In May of this year, I’ll be heading to the lovely town of Lucca in Tuscany, Italy to celebrate getting married to my lovely partner in crime Christian. As a full time crafter, I’m kind of expected to make lots of pretty things for the wedding, but I must admit that up until Christmas, I wasn’t feeling particularly inspired. Yes, even professionals get creative block sometimes. Thankfully, inspiration hit and I’ve been happily rag rugging along ever since. Below is a little look at my work-in-progress handmade wedding table plan…
THE INSPIRATION:
I don’t know about you, but I’m always on the lookout for trash that I can upcycle into something beautiful. So, when I received the below piece of cut out plywood as packaging with a piece of furniture, I snaffled it away to be used for something at a later date. I had no idea what that “something” would be when I hid it away.
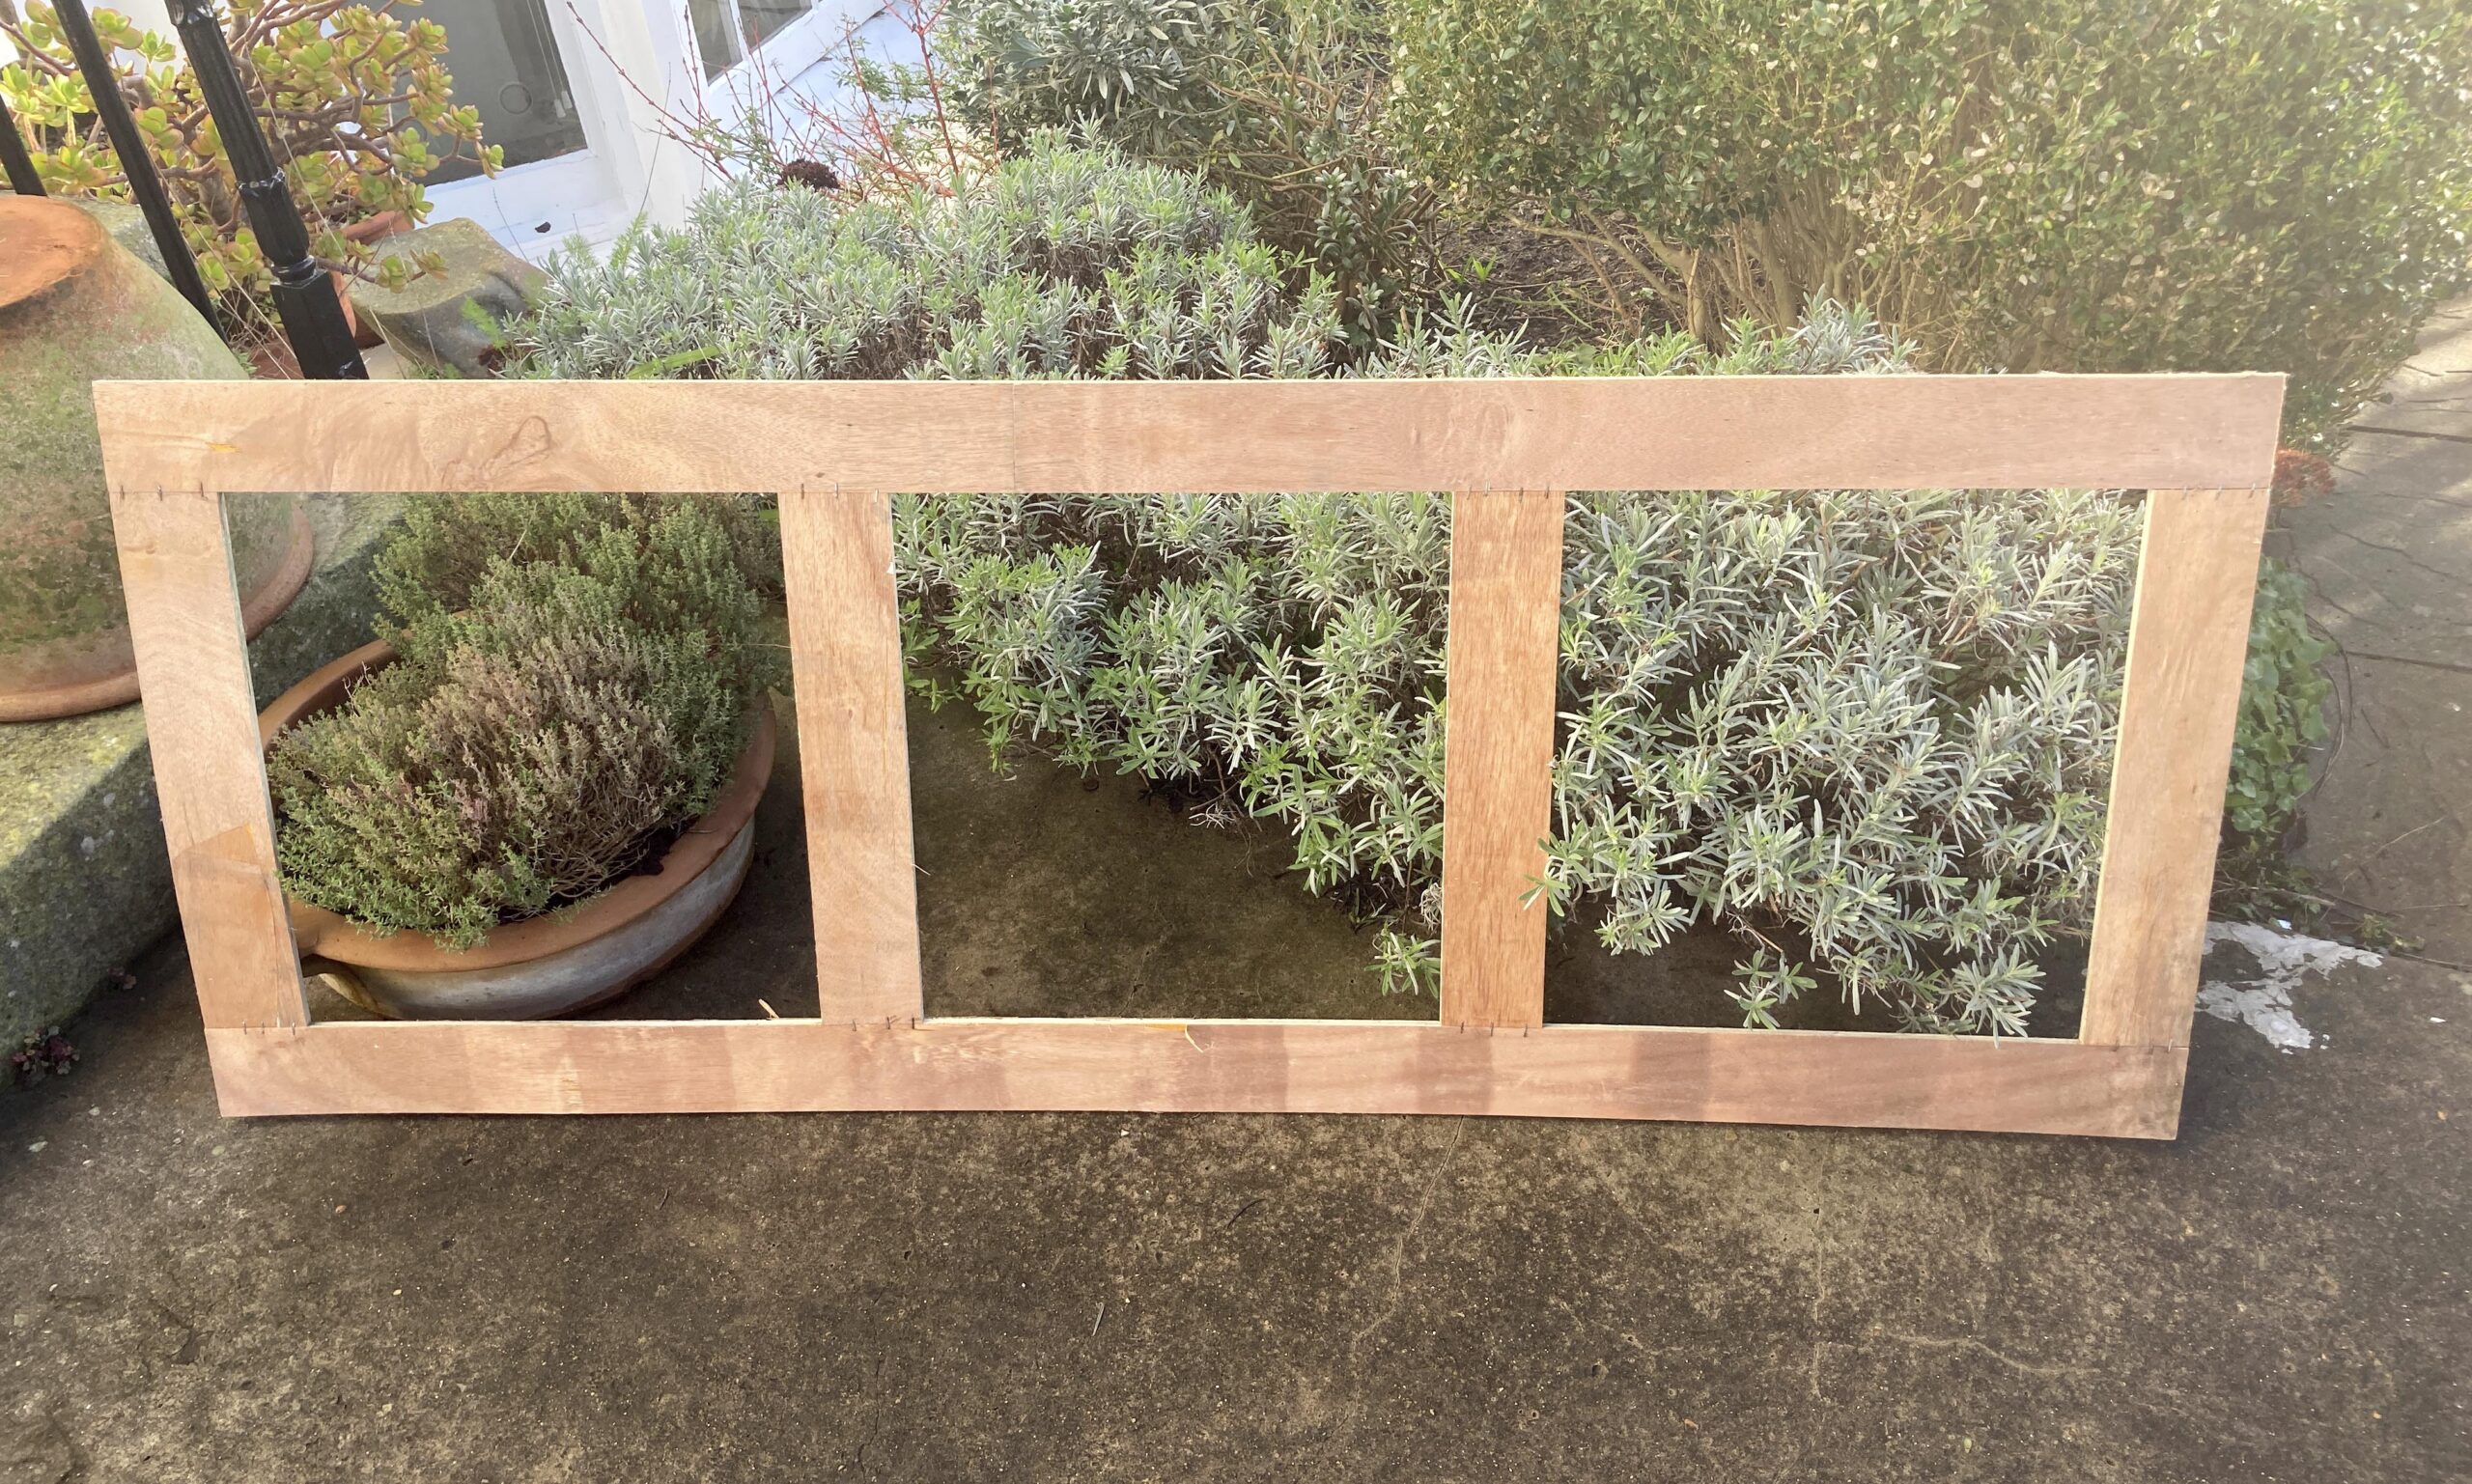
Fast forward twelve months (yes, that’s how long I’ve hoarded it for) and it suddenly struck me that I’d be having three long tables at the wedding and this odd piece of plywood conveniently had three gaps. Perhaps I could create a handmade wedding table plan with each cut out section showing the seating arrangement for one table. And, so the very simple plan began…
Step 1: Create a rag rug border for the plywood.
Step 2: Design and make the table plans to sit within each of the gaps.
Step 3: Tidy things up (especially the back) and decide how to display it on the day.
That doesn’t seem particularly difficult, so here’s how I began…
RAG RUGGING THE BORDER:
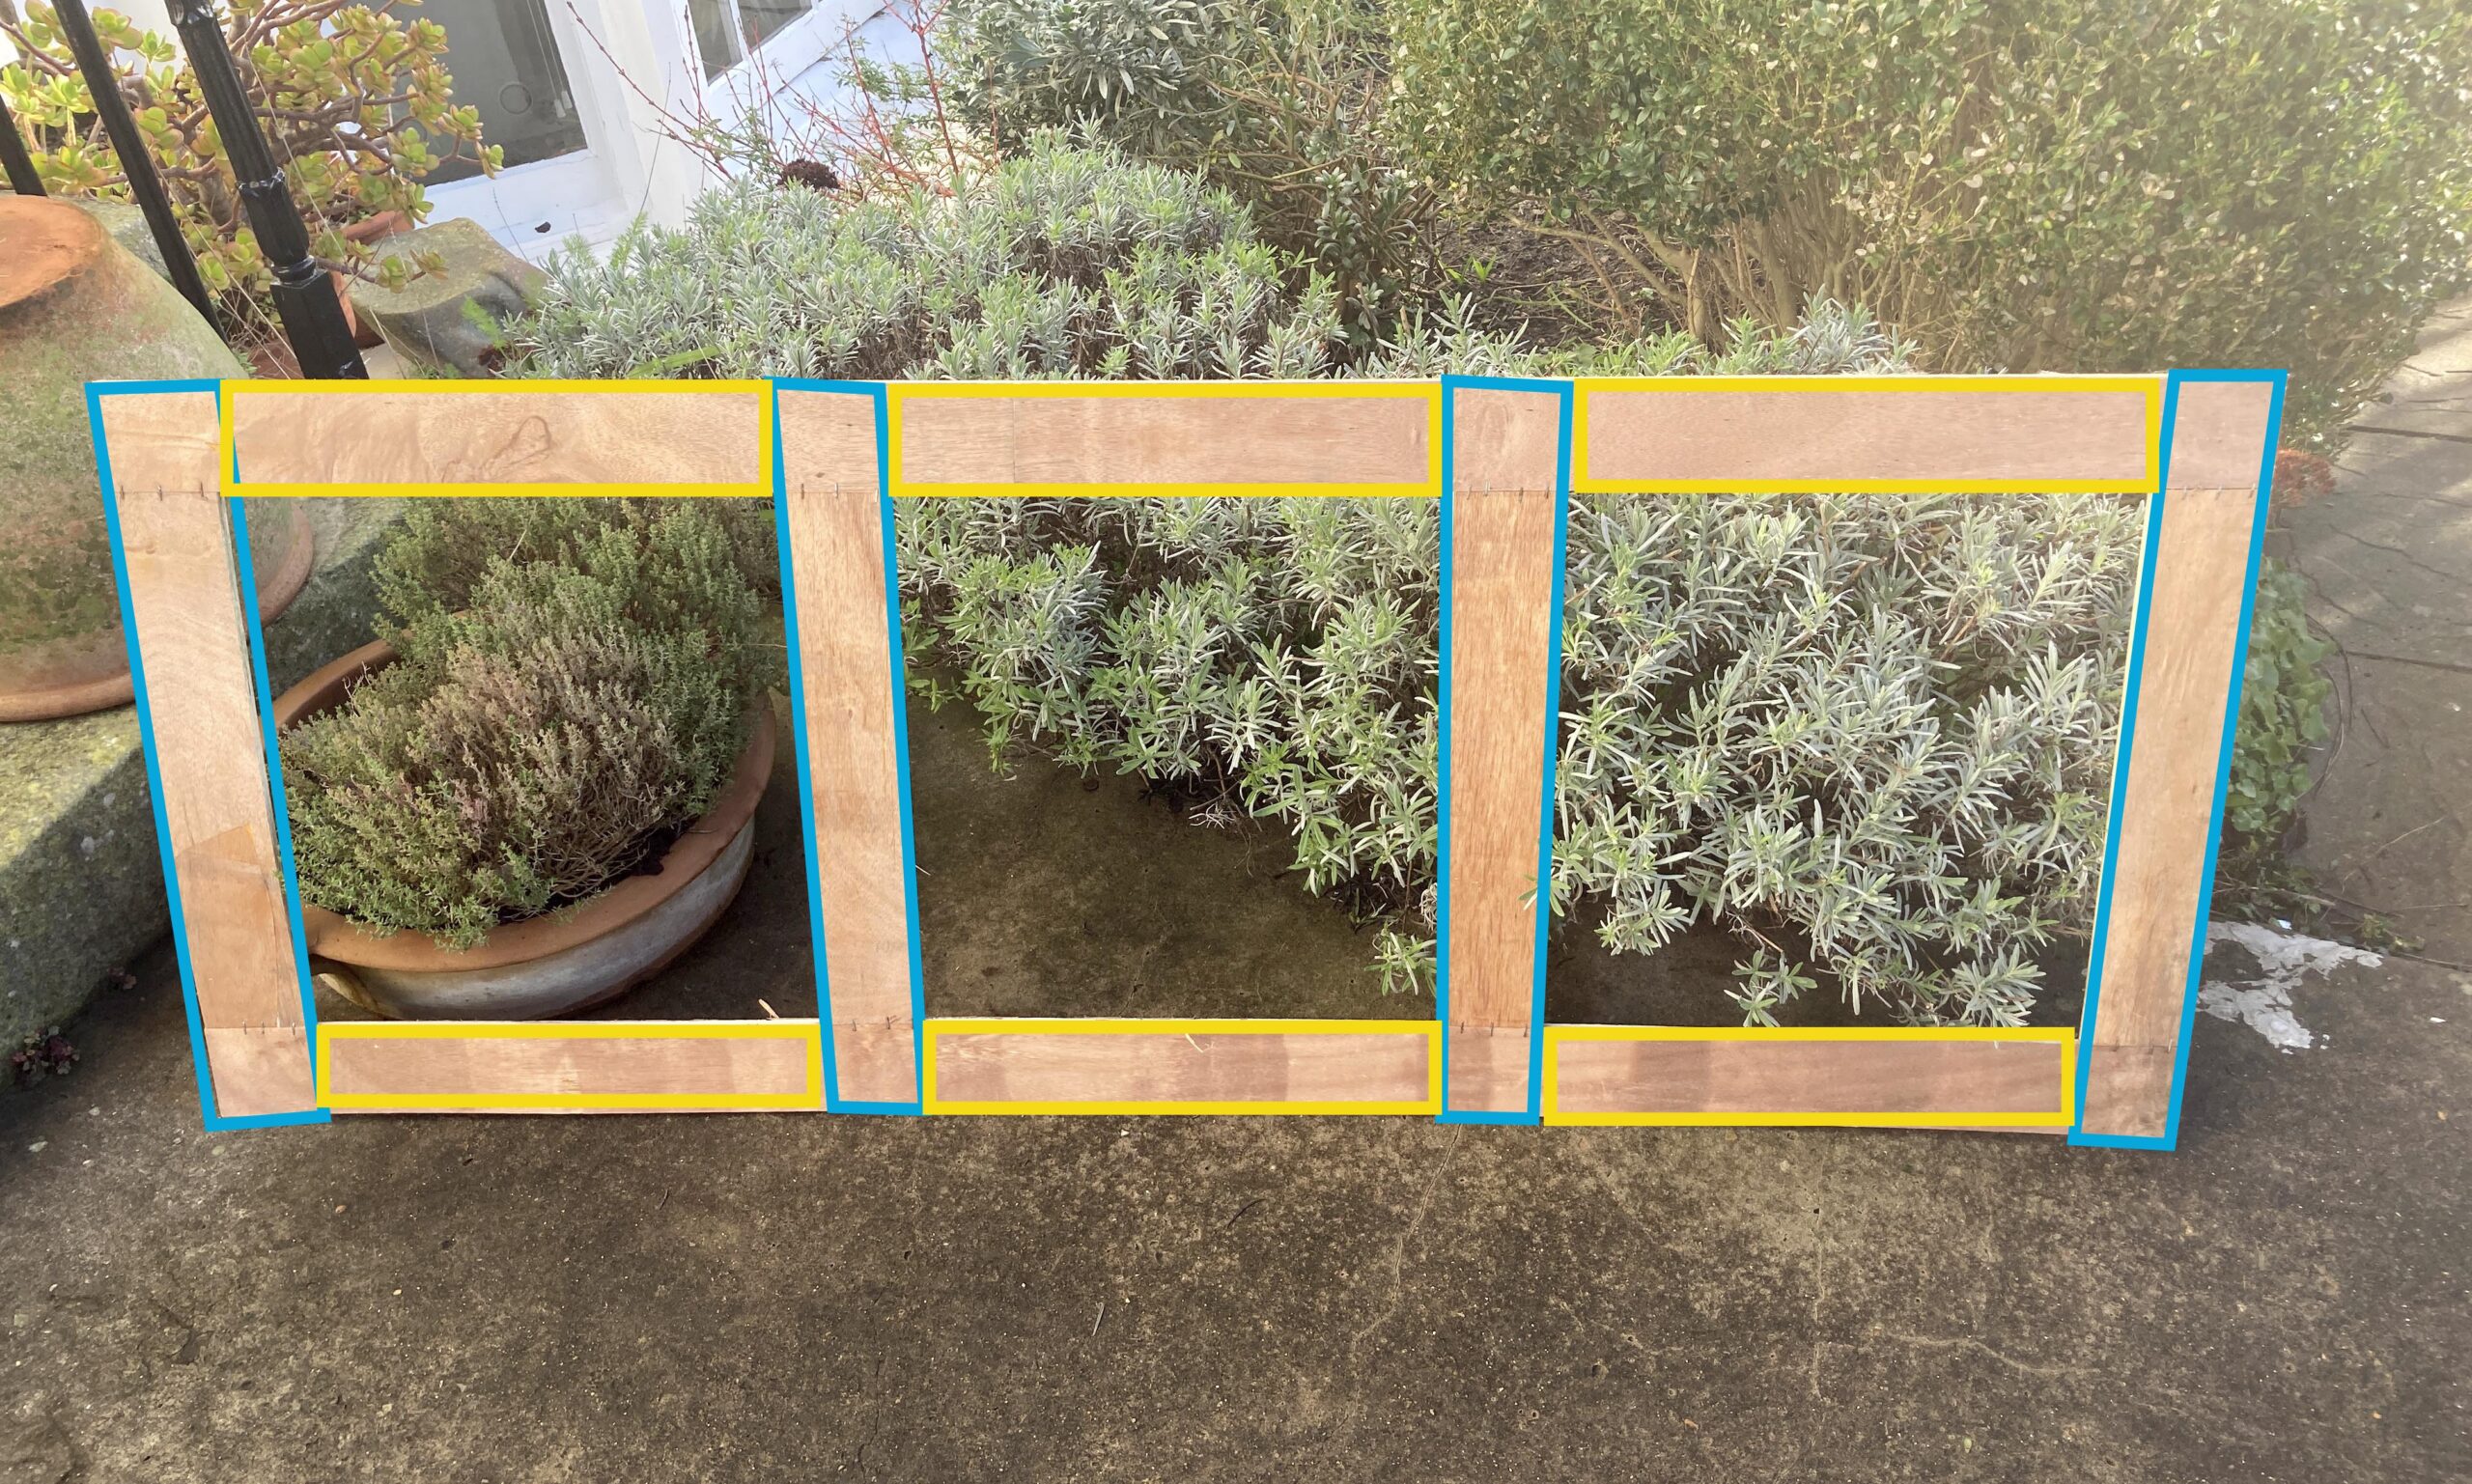
To begin with, I worked out that I would need at least six panels of rag rugging to cover all the plywood. Two panels for the long edges at the top and bottom of the plywood and four panels for the short pieces of wood joining the long edges. However, I’m all about creating as little wastage as possible, so I actually ended up measuring out and creating ten smaller panels of hessian as it allowed me to use up some smaller offcuts of hessian that I had lying around. Waste not, want not! I
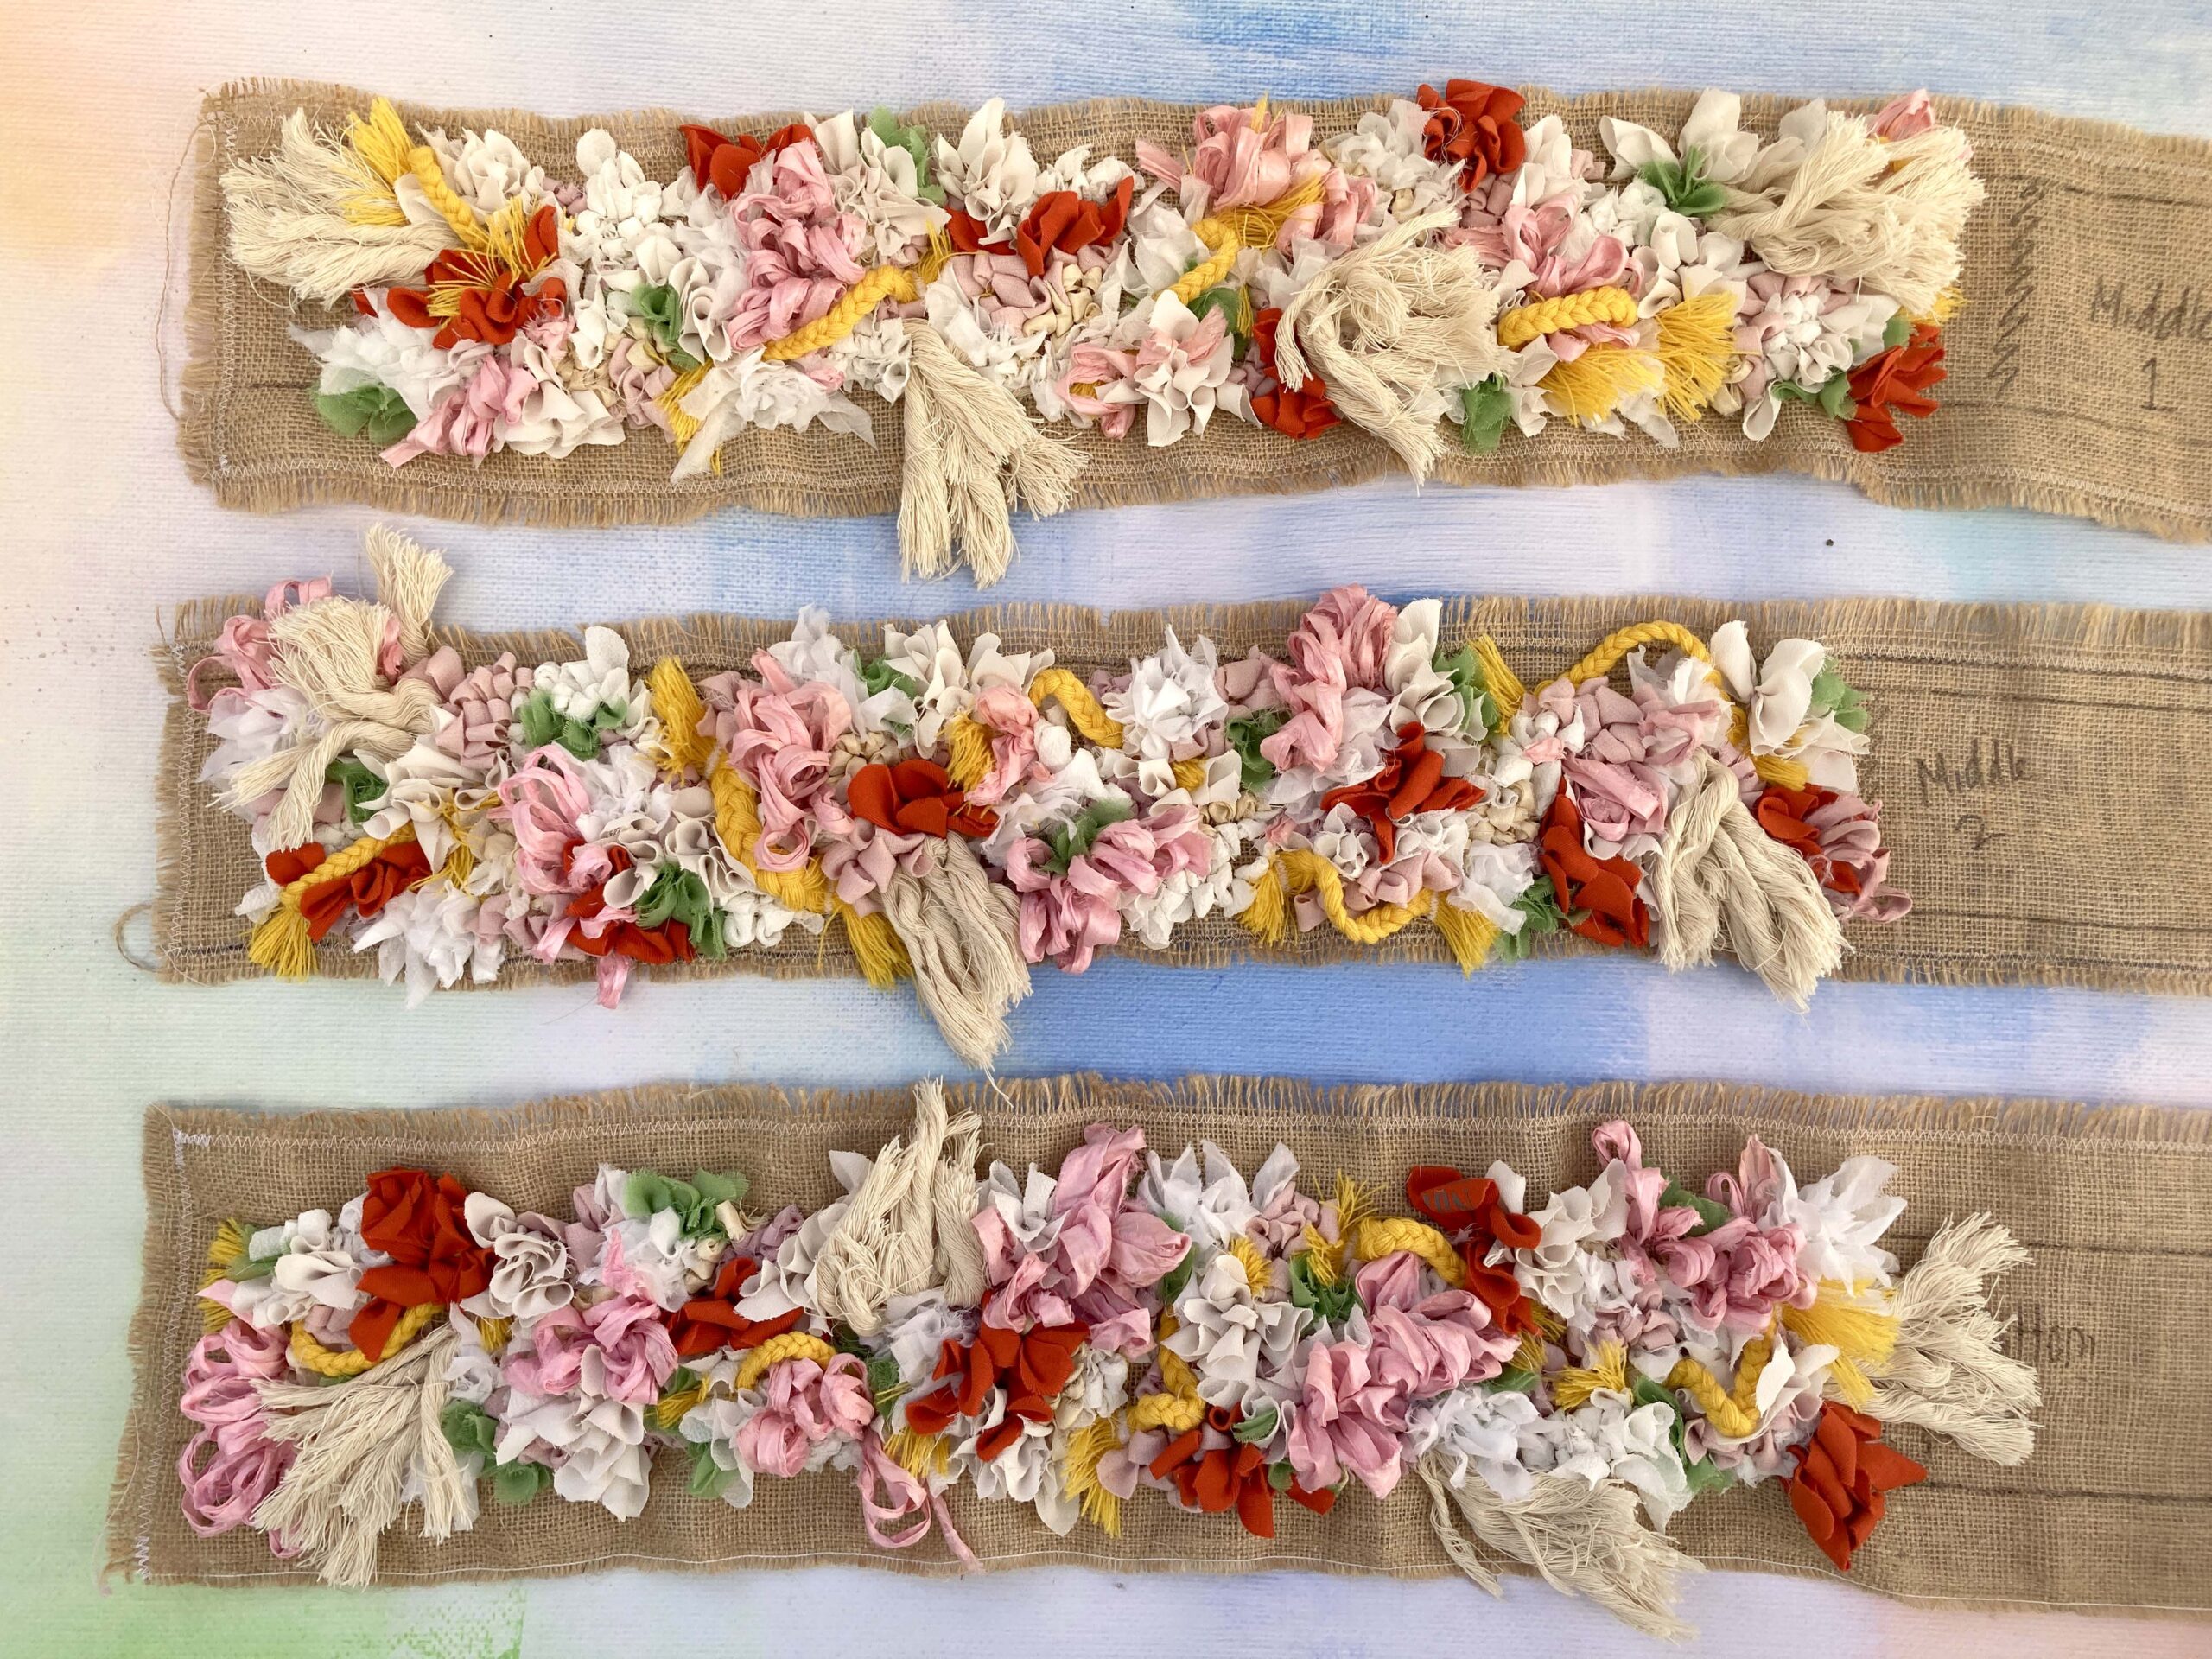
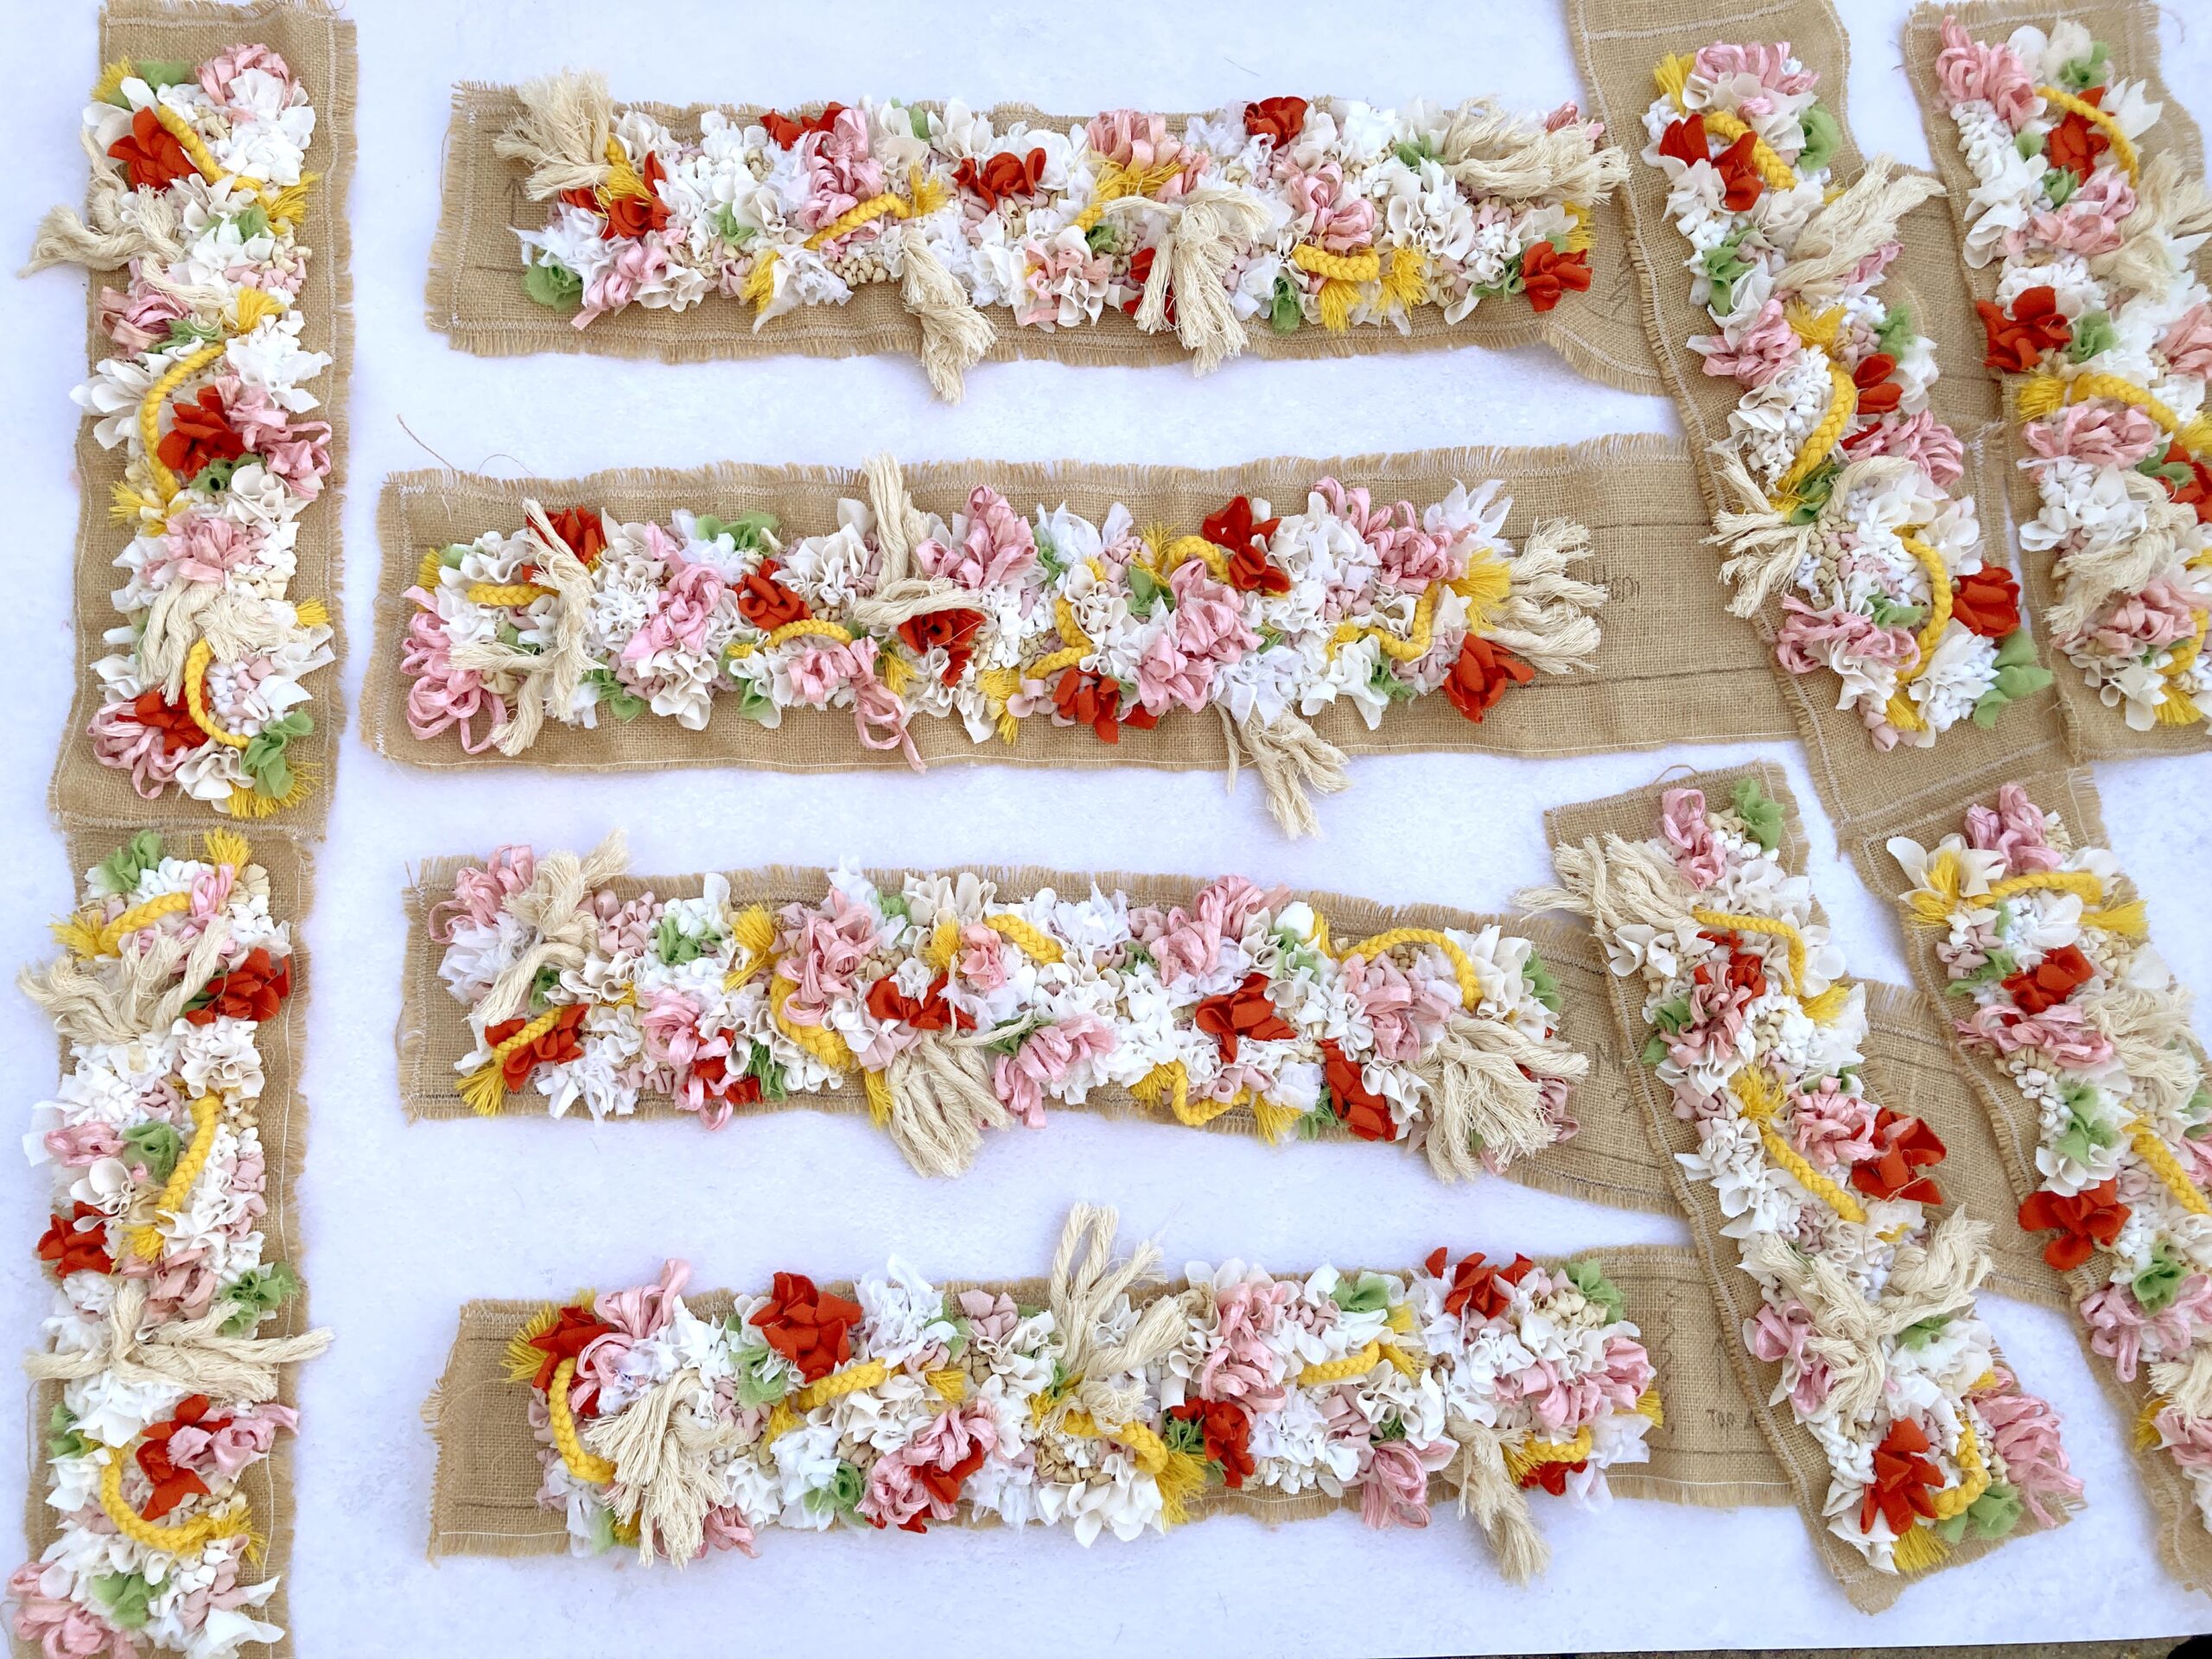
I had four suitable strips of hessian leftover from hemming a rug, so I decided to start with the four sections below…

I measured the dimensions of these panels and sketched rectangles onto my four hessian offcuts using a marker pen. I then zig zag stitched around the drawn rectangle, 2cm outside of the lines. This hemming would stop the hessian from falling apart too much as I worked and create tabs for me to attach the panels to the wooden frame later.
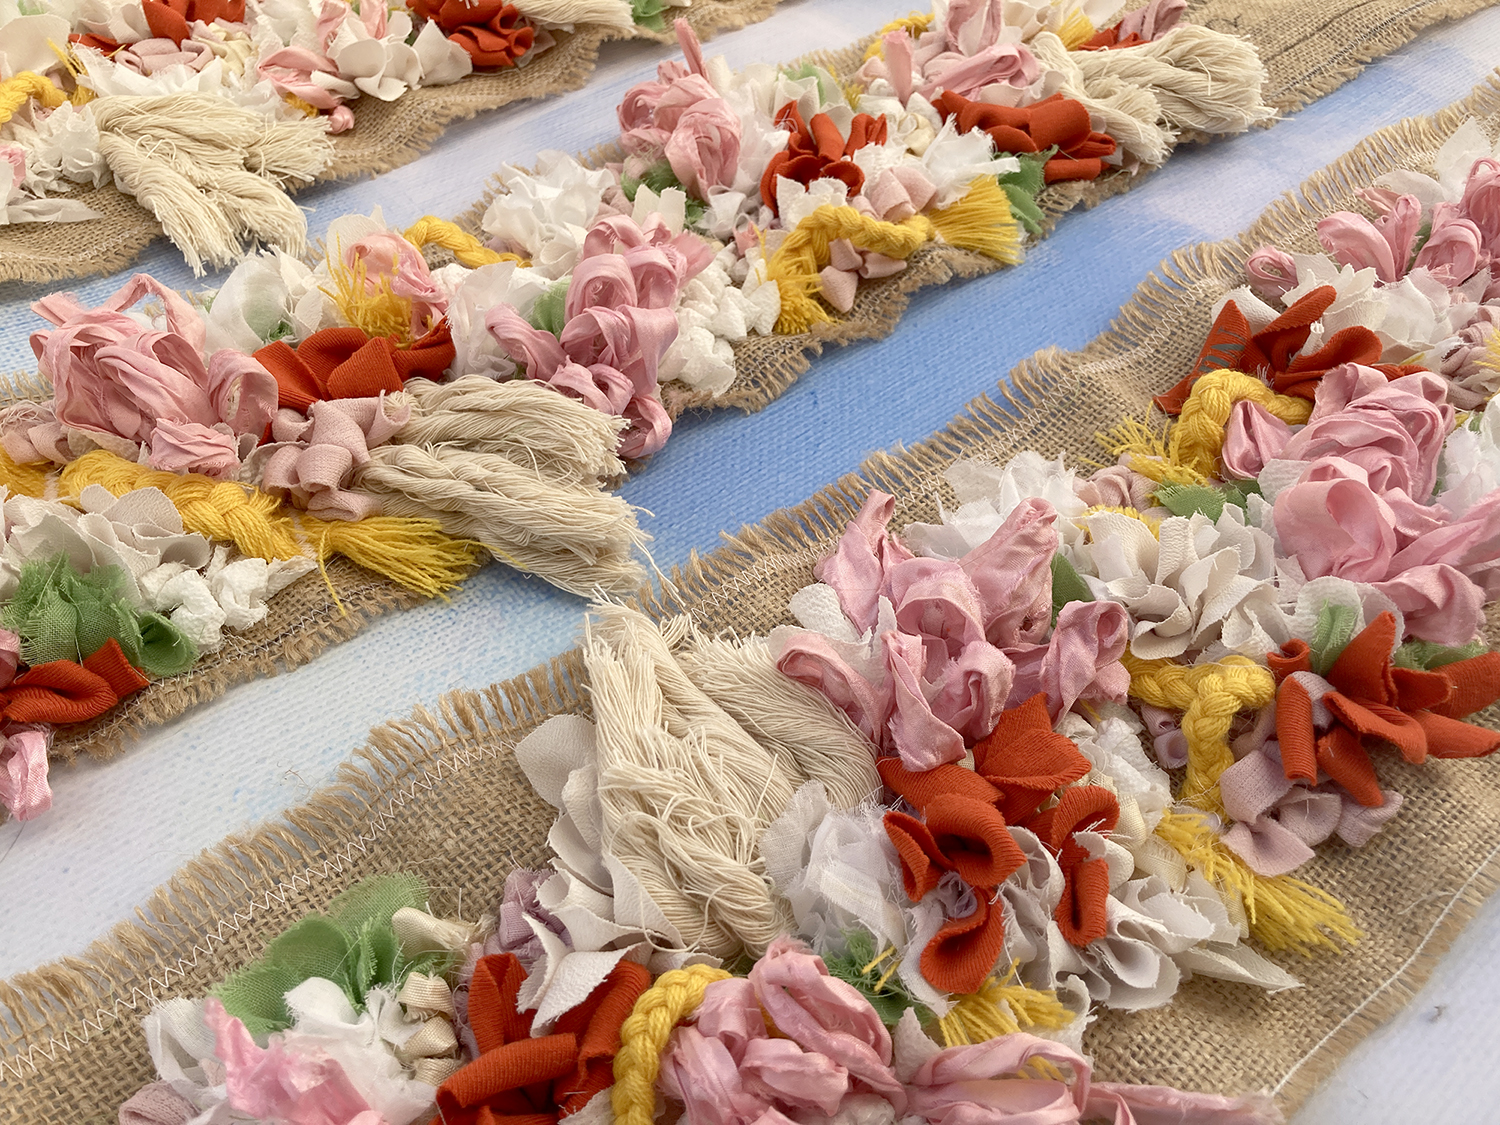
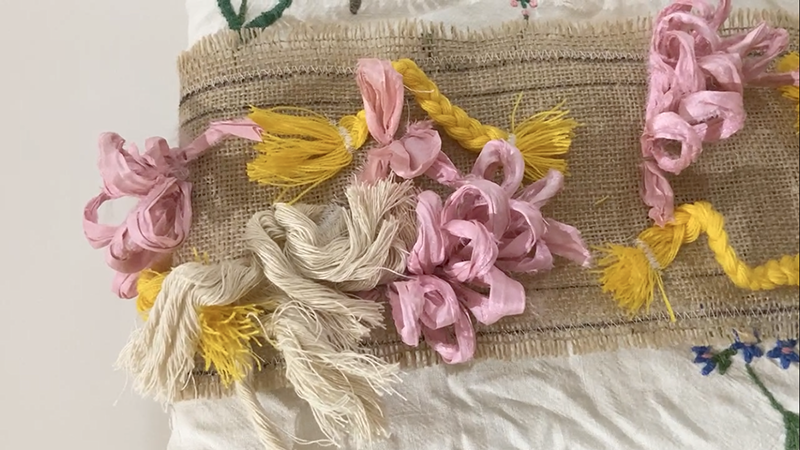
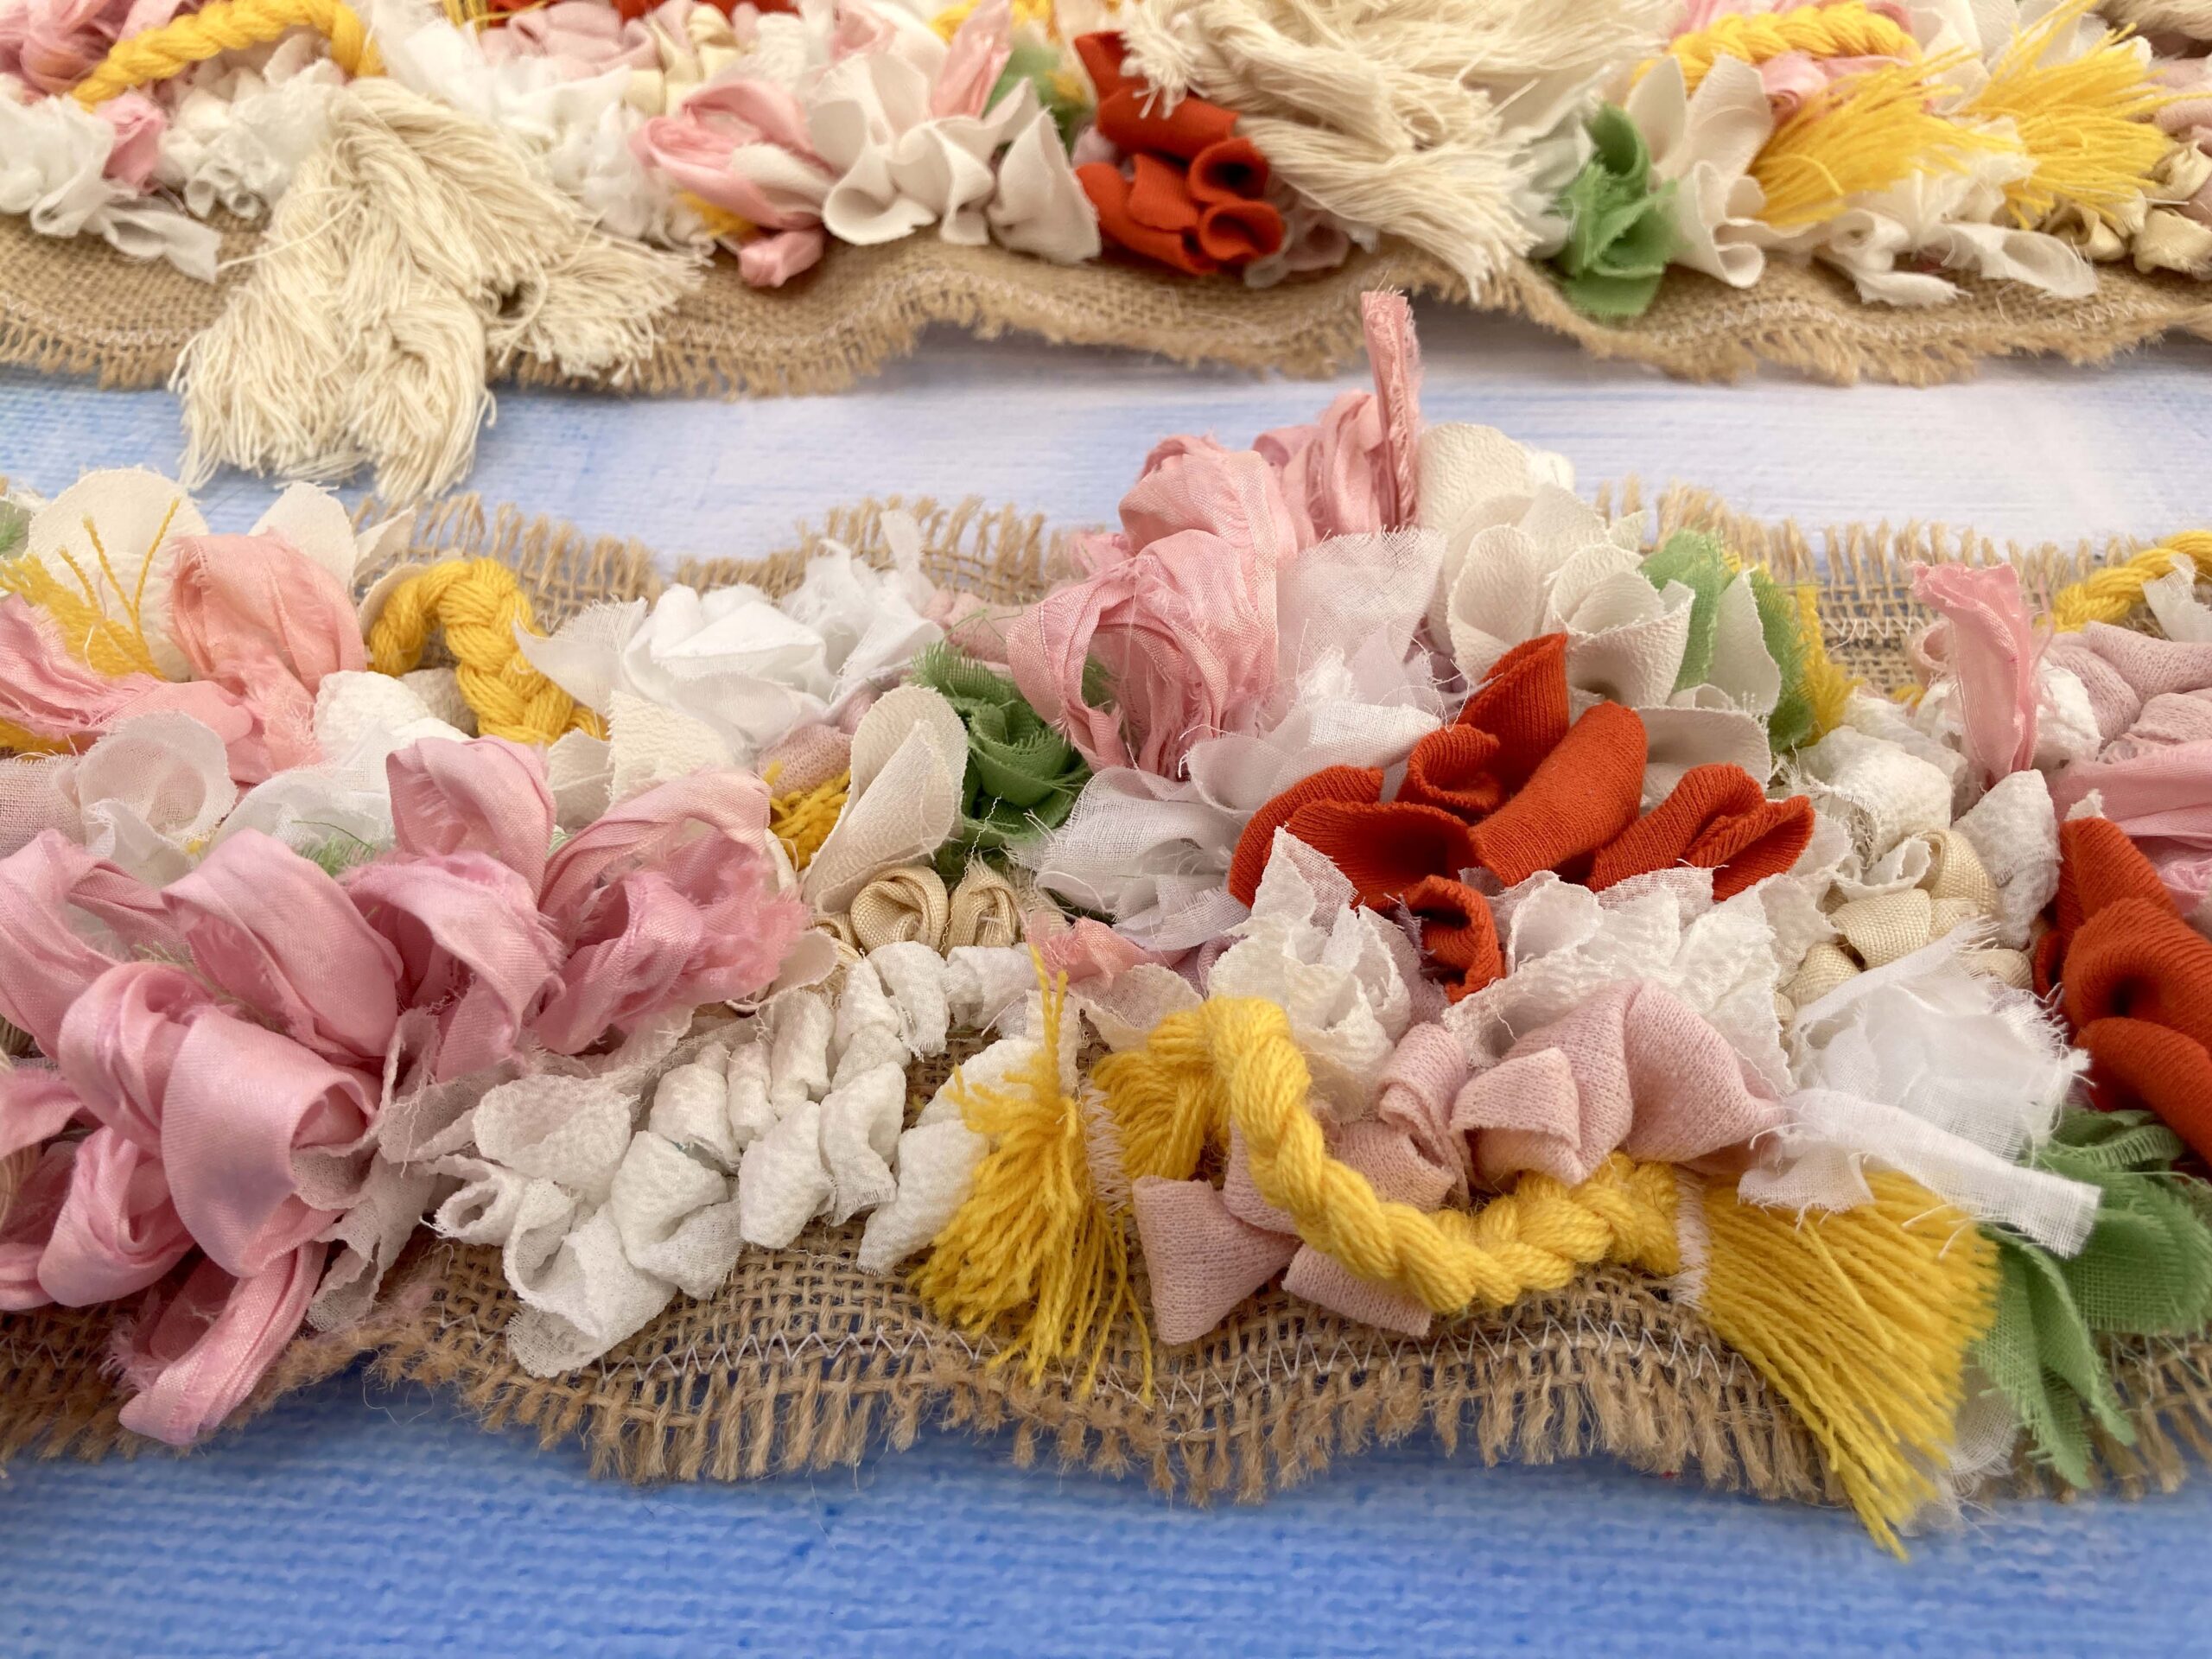
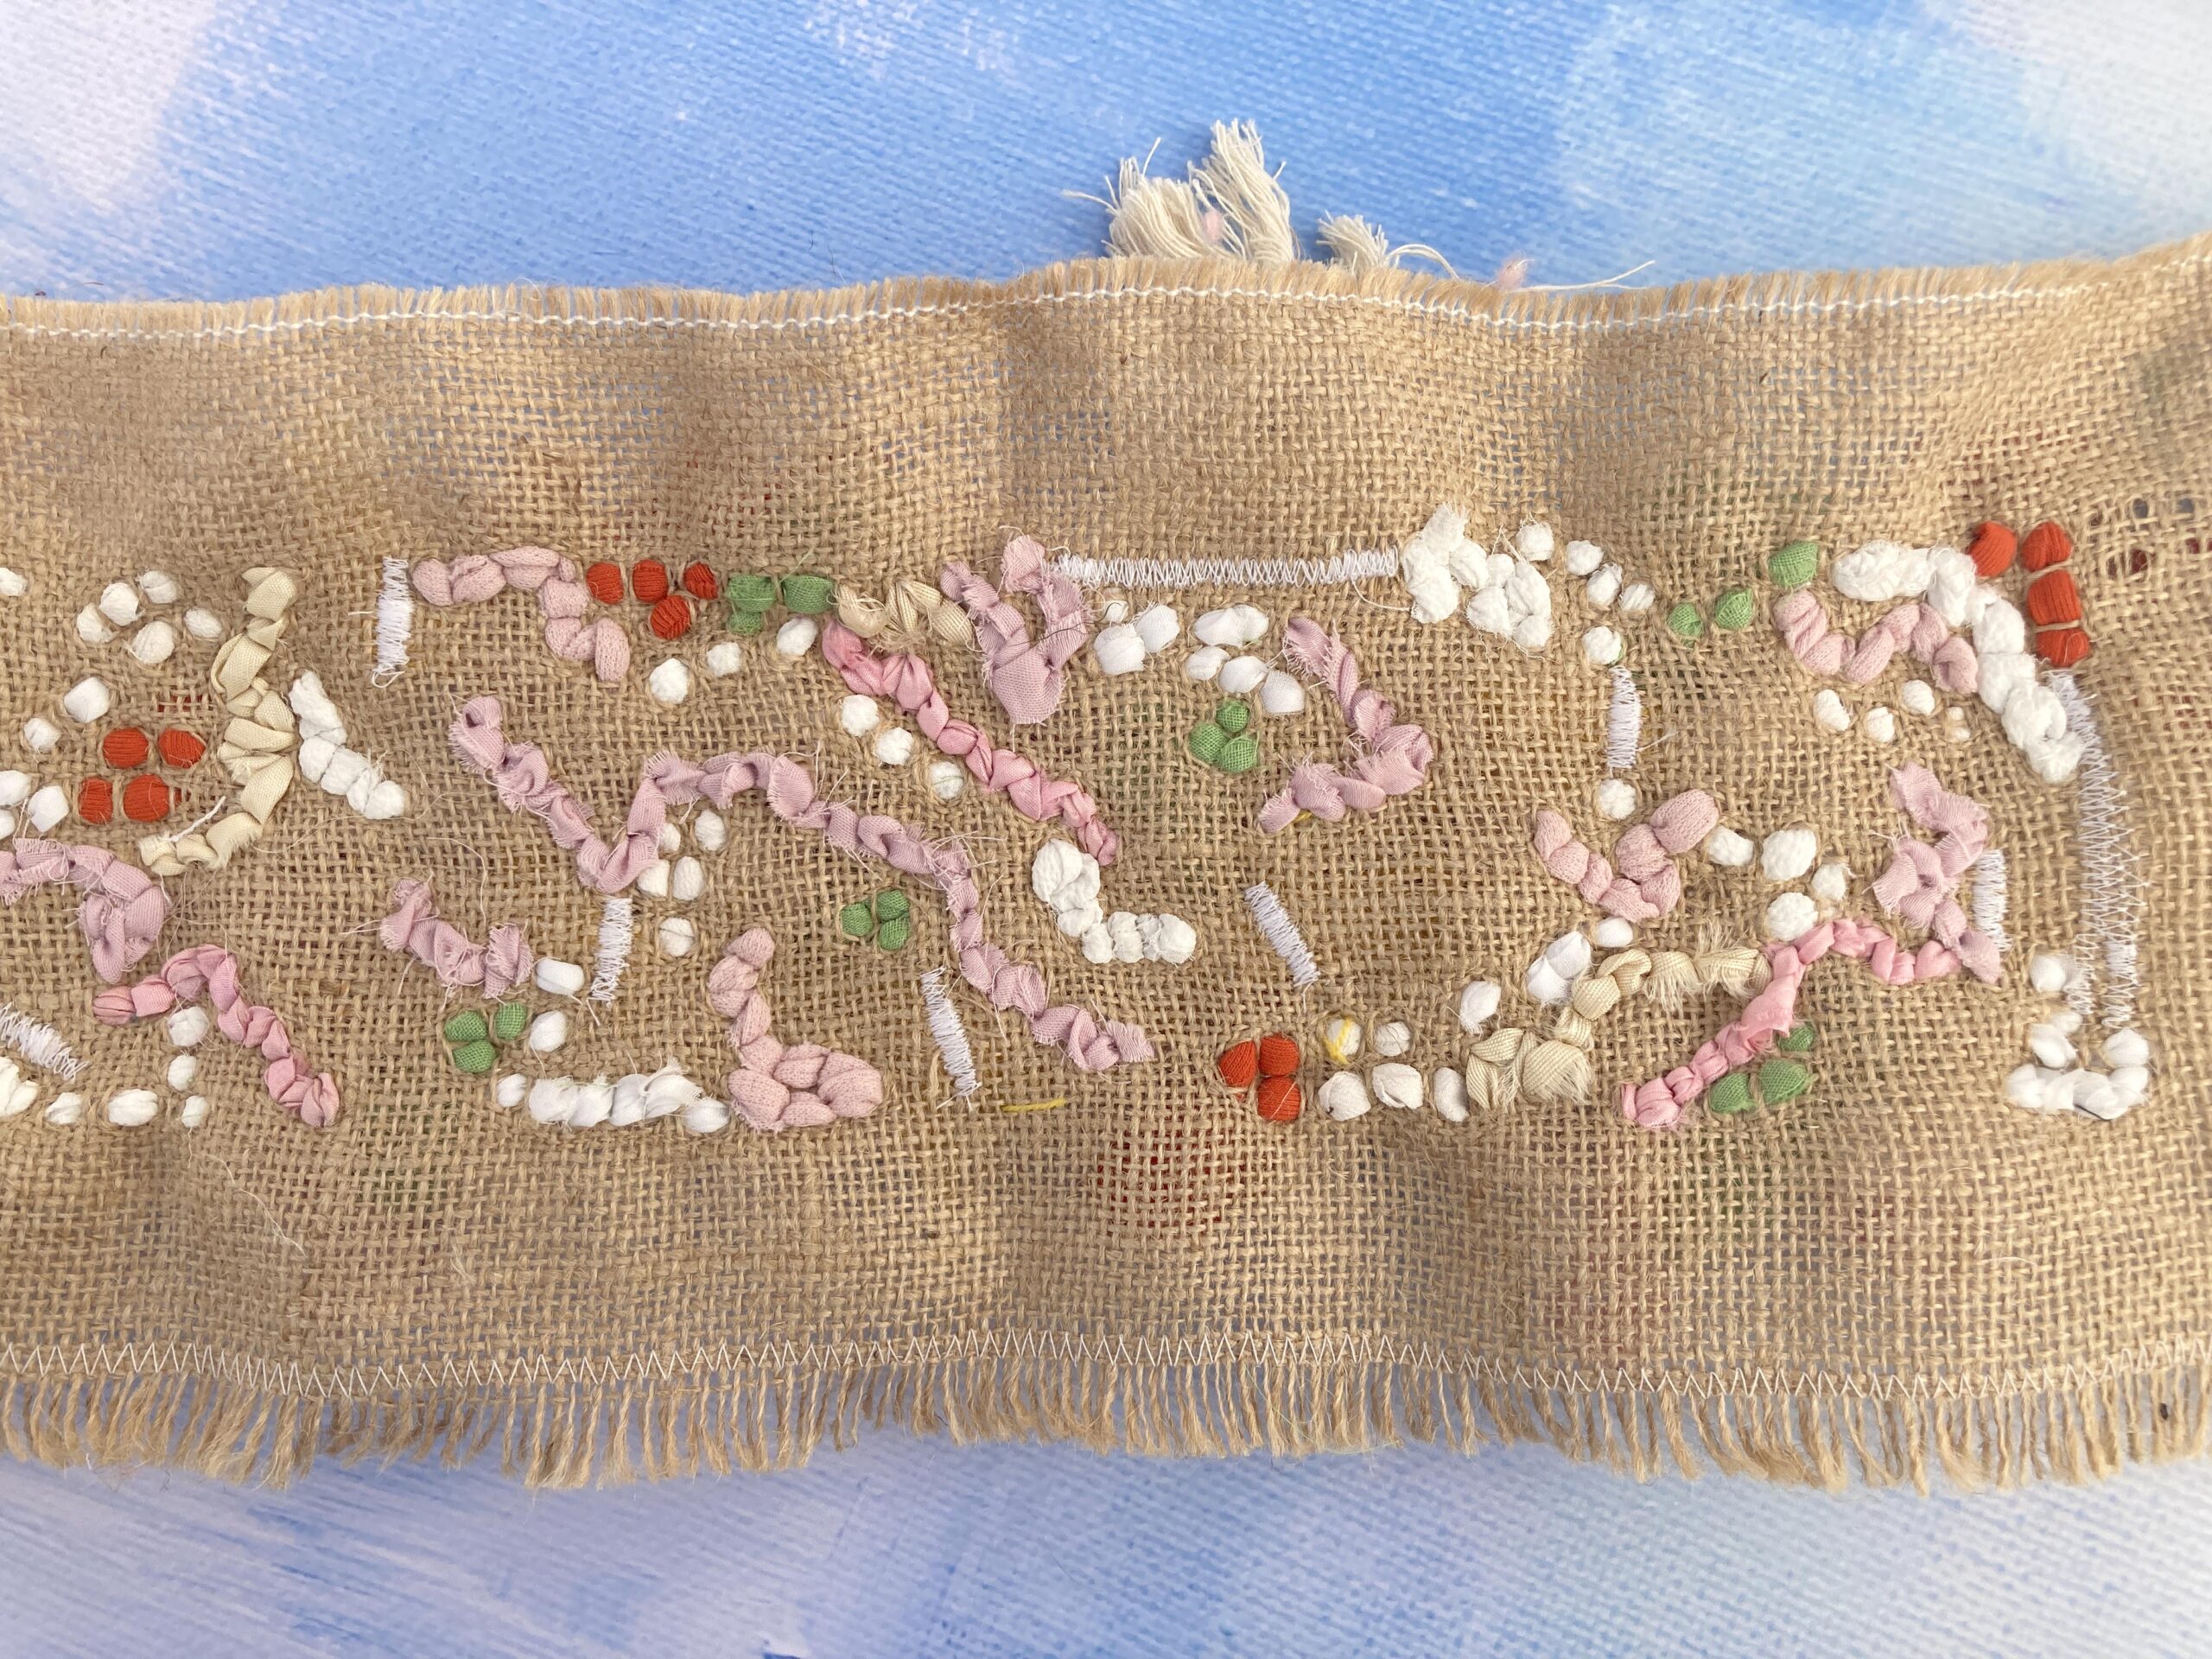
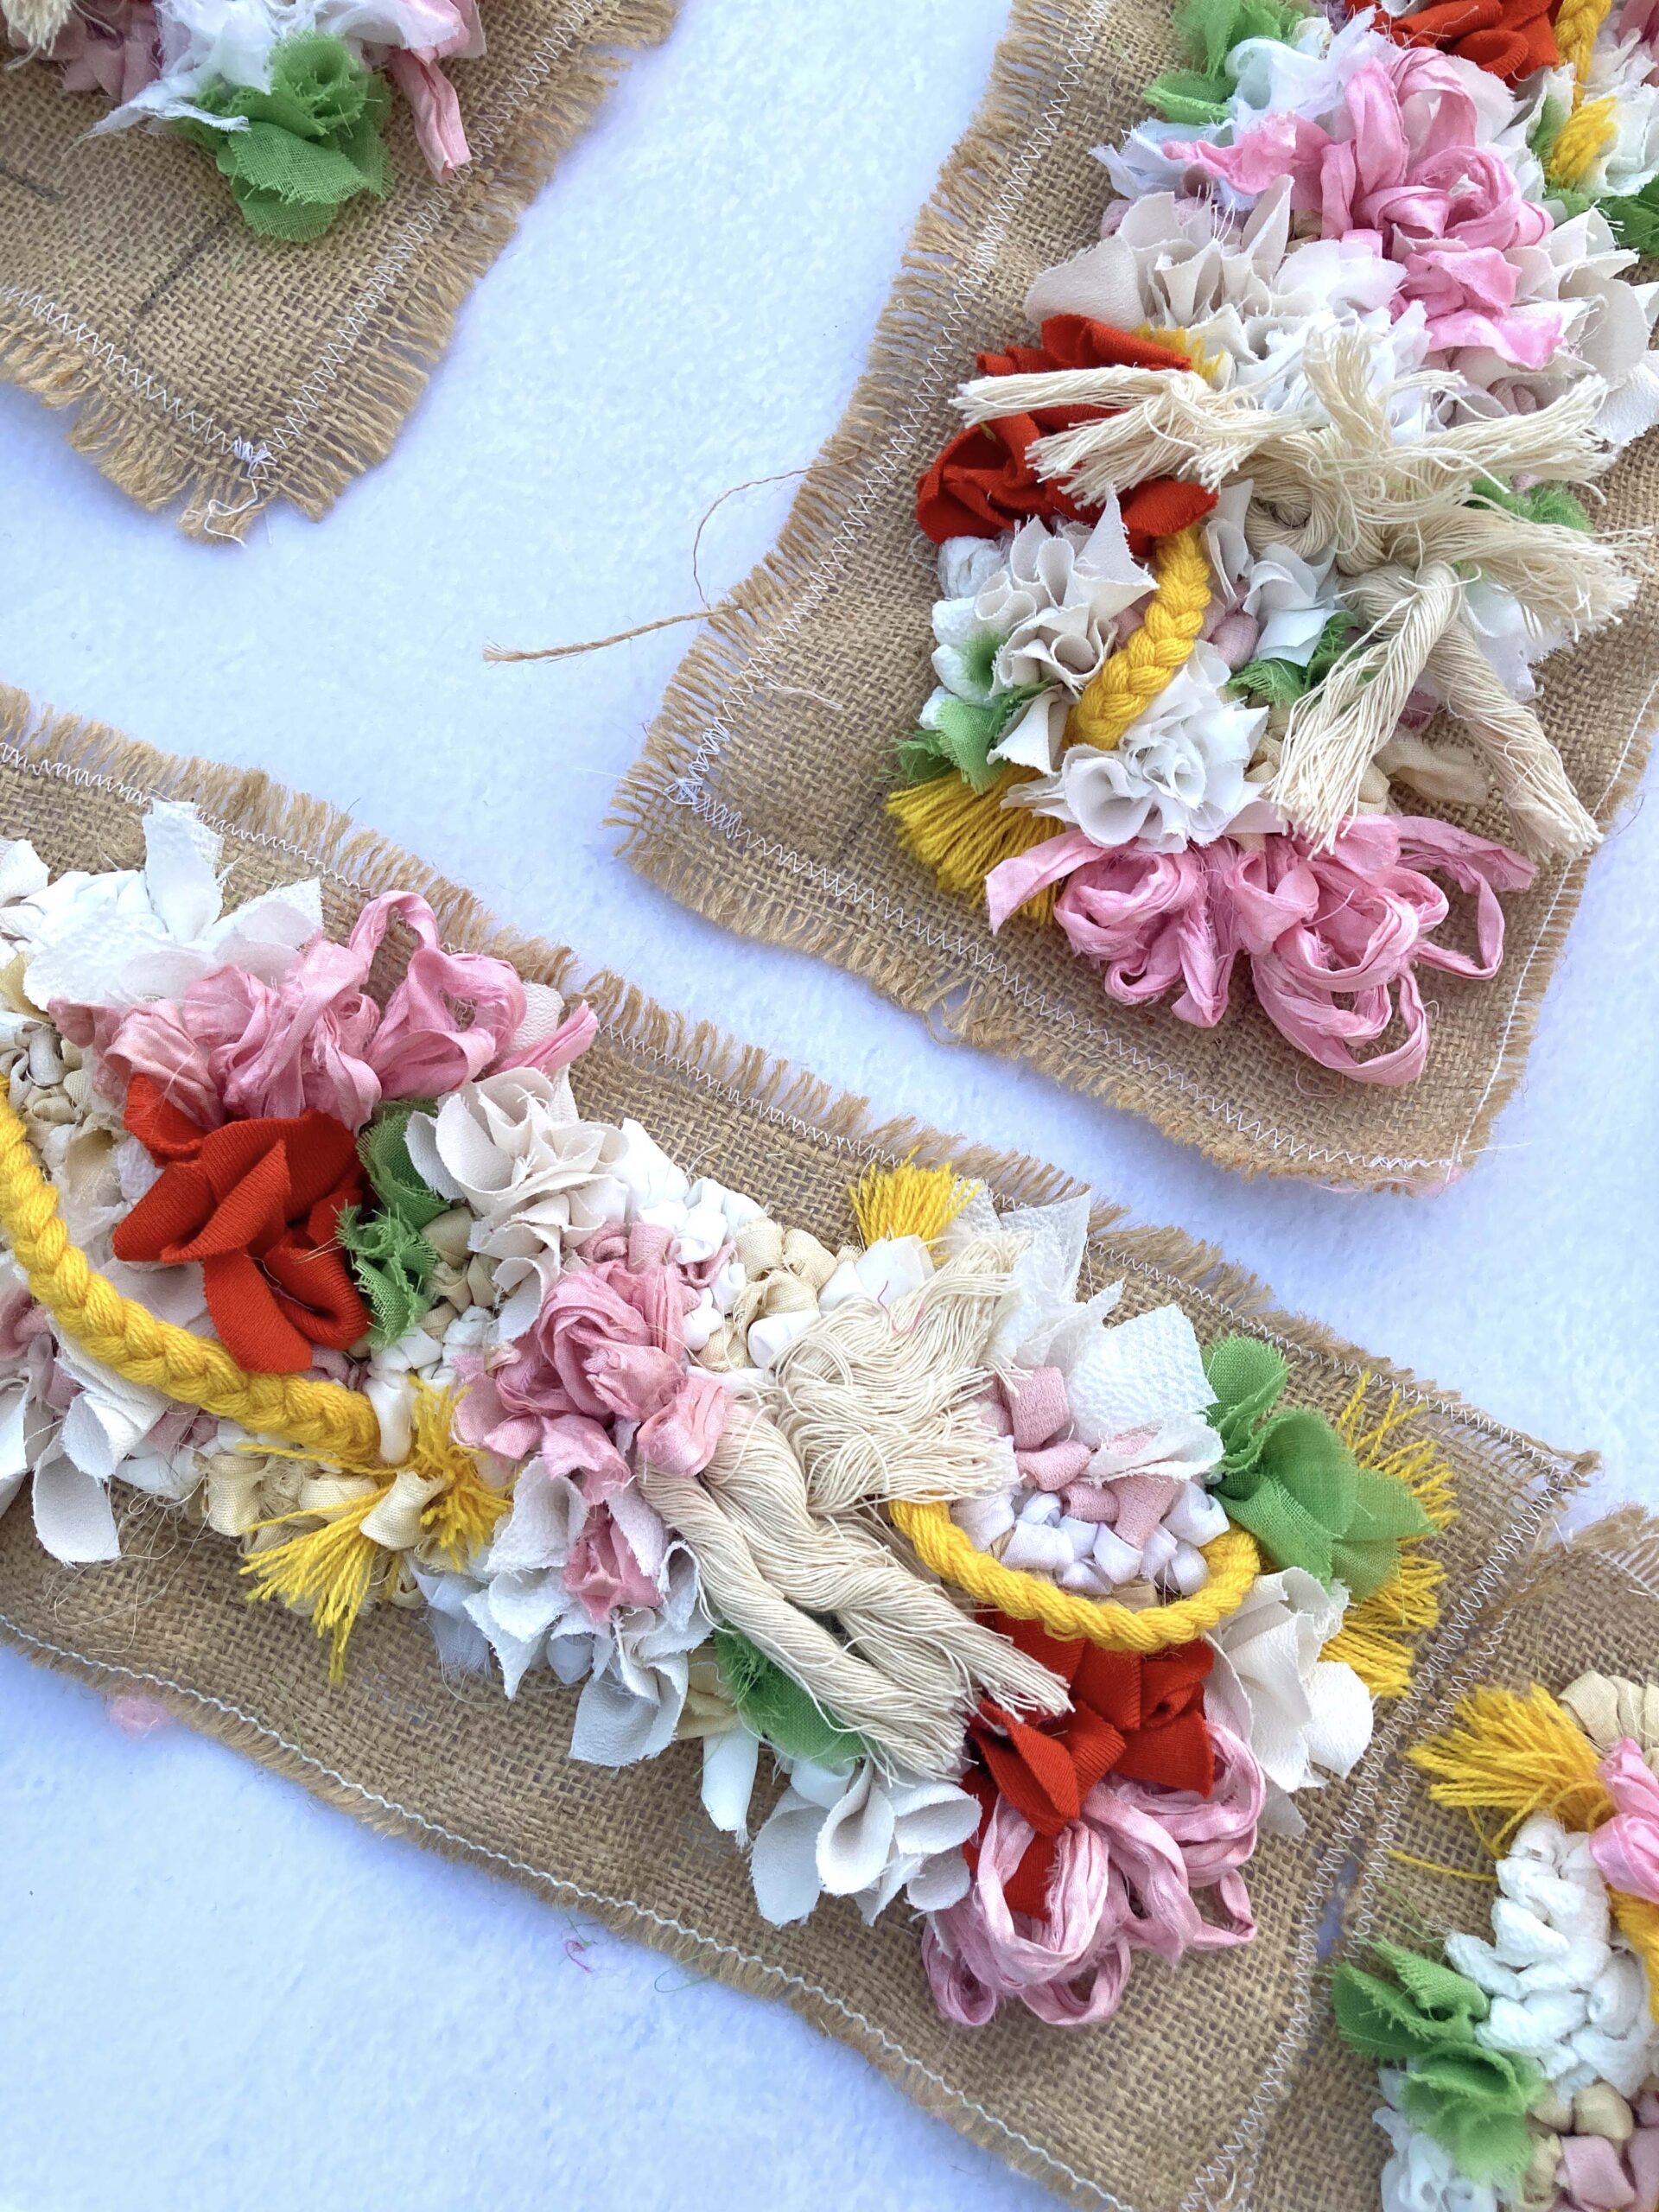
Getting started is always the hardest part of beginning to rag rug. Luckily, I had a fairly clear idea of the colours I wanted to use as they’re the colours in my wedding invite – orange, pink, yellow, green and off white. I wanted the orange, yellow and green to be accents to a mainly neutral background but I particularly wanted the texture to be varied and interesting. It’s this that made me think outside the box with my design and rather than only rag rugging the whole of each panel, I decided to stitch some interesting elements to the hessian panels too. This was an idea I took from the Stitched Rag Rug chapter of my book “Rag Rug Techniques for Beginners” where I stitched unwound rope and other interesting textiles onto a backing to make this Boho Cushion.

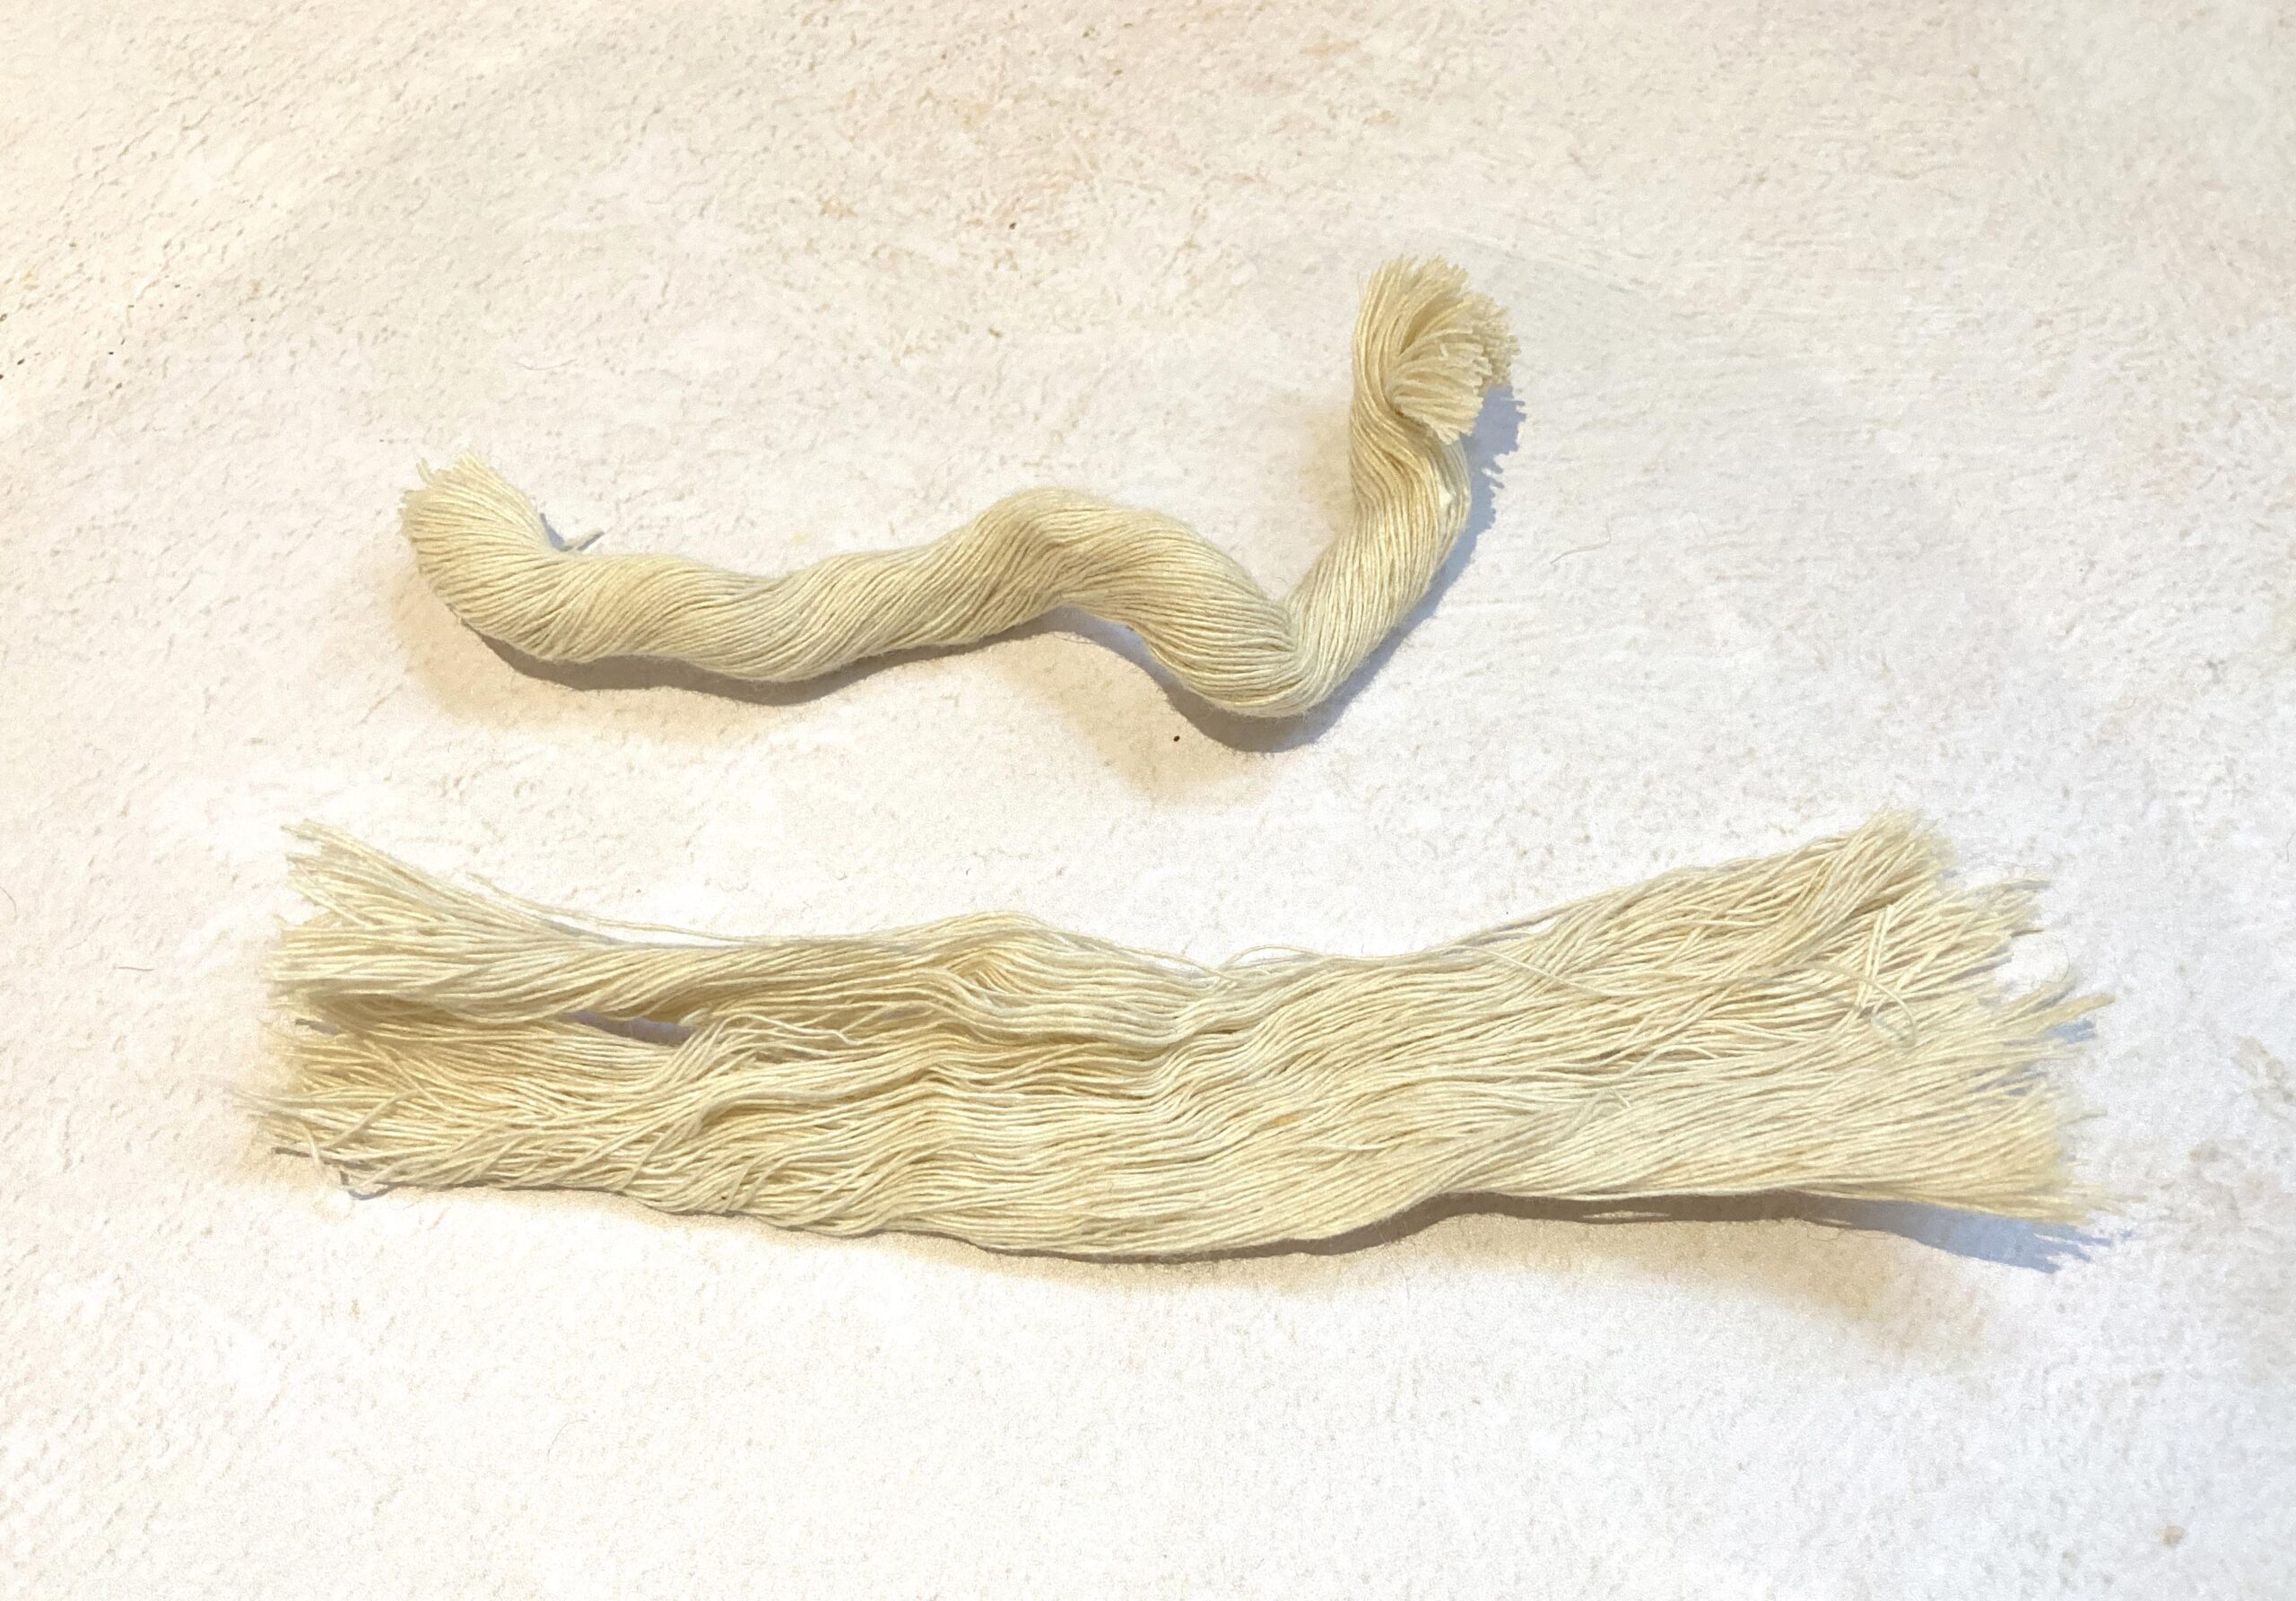
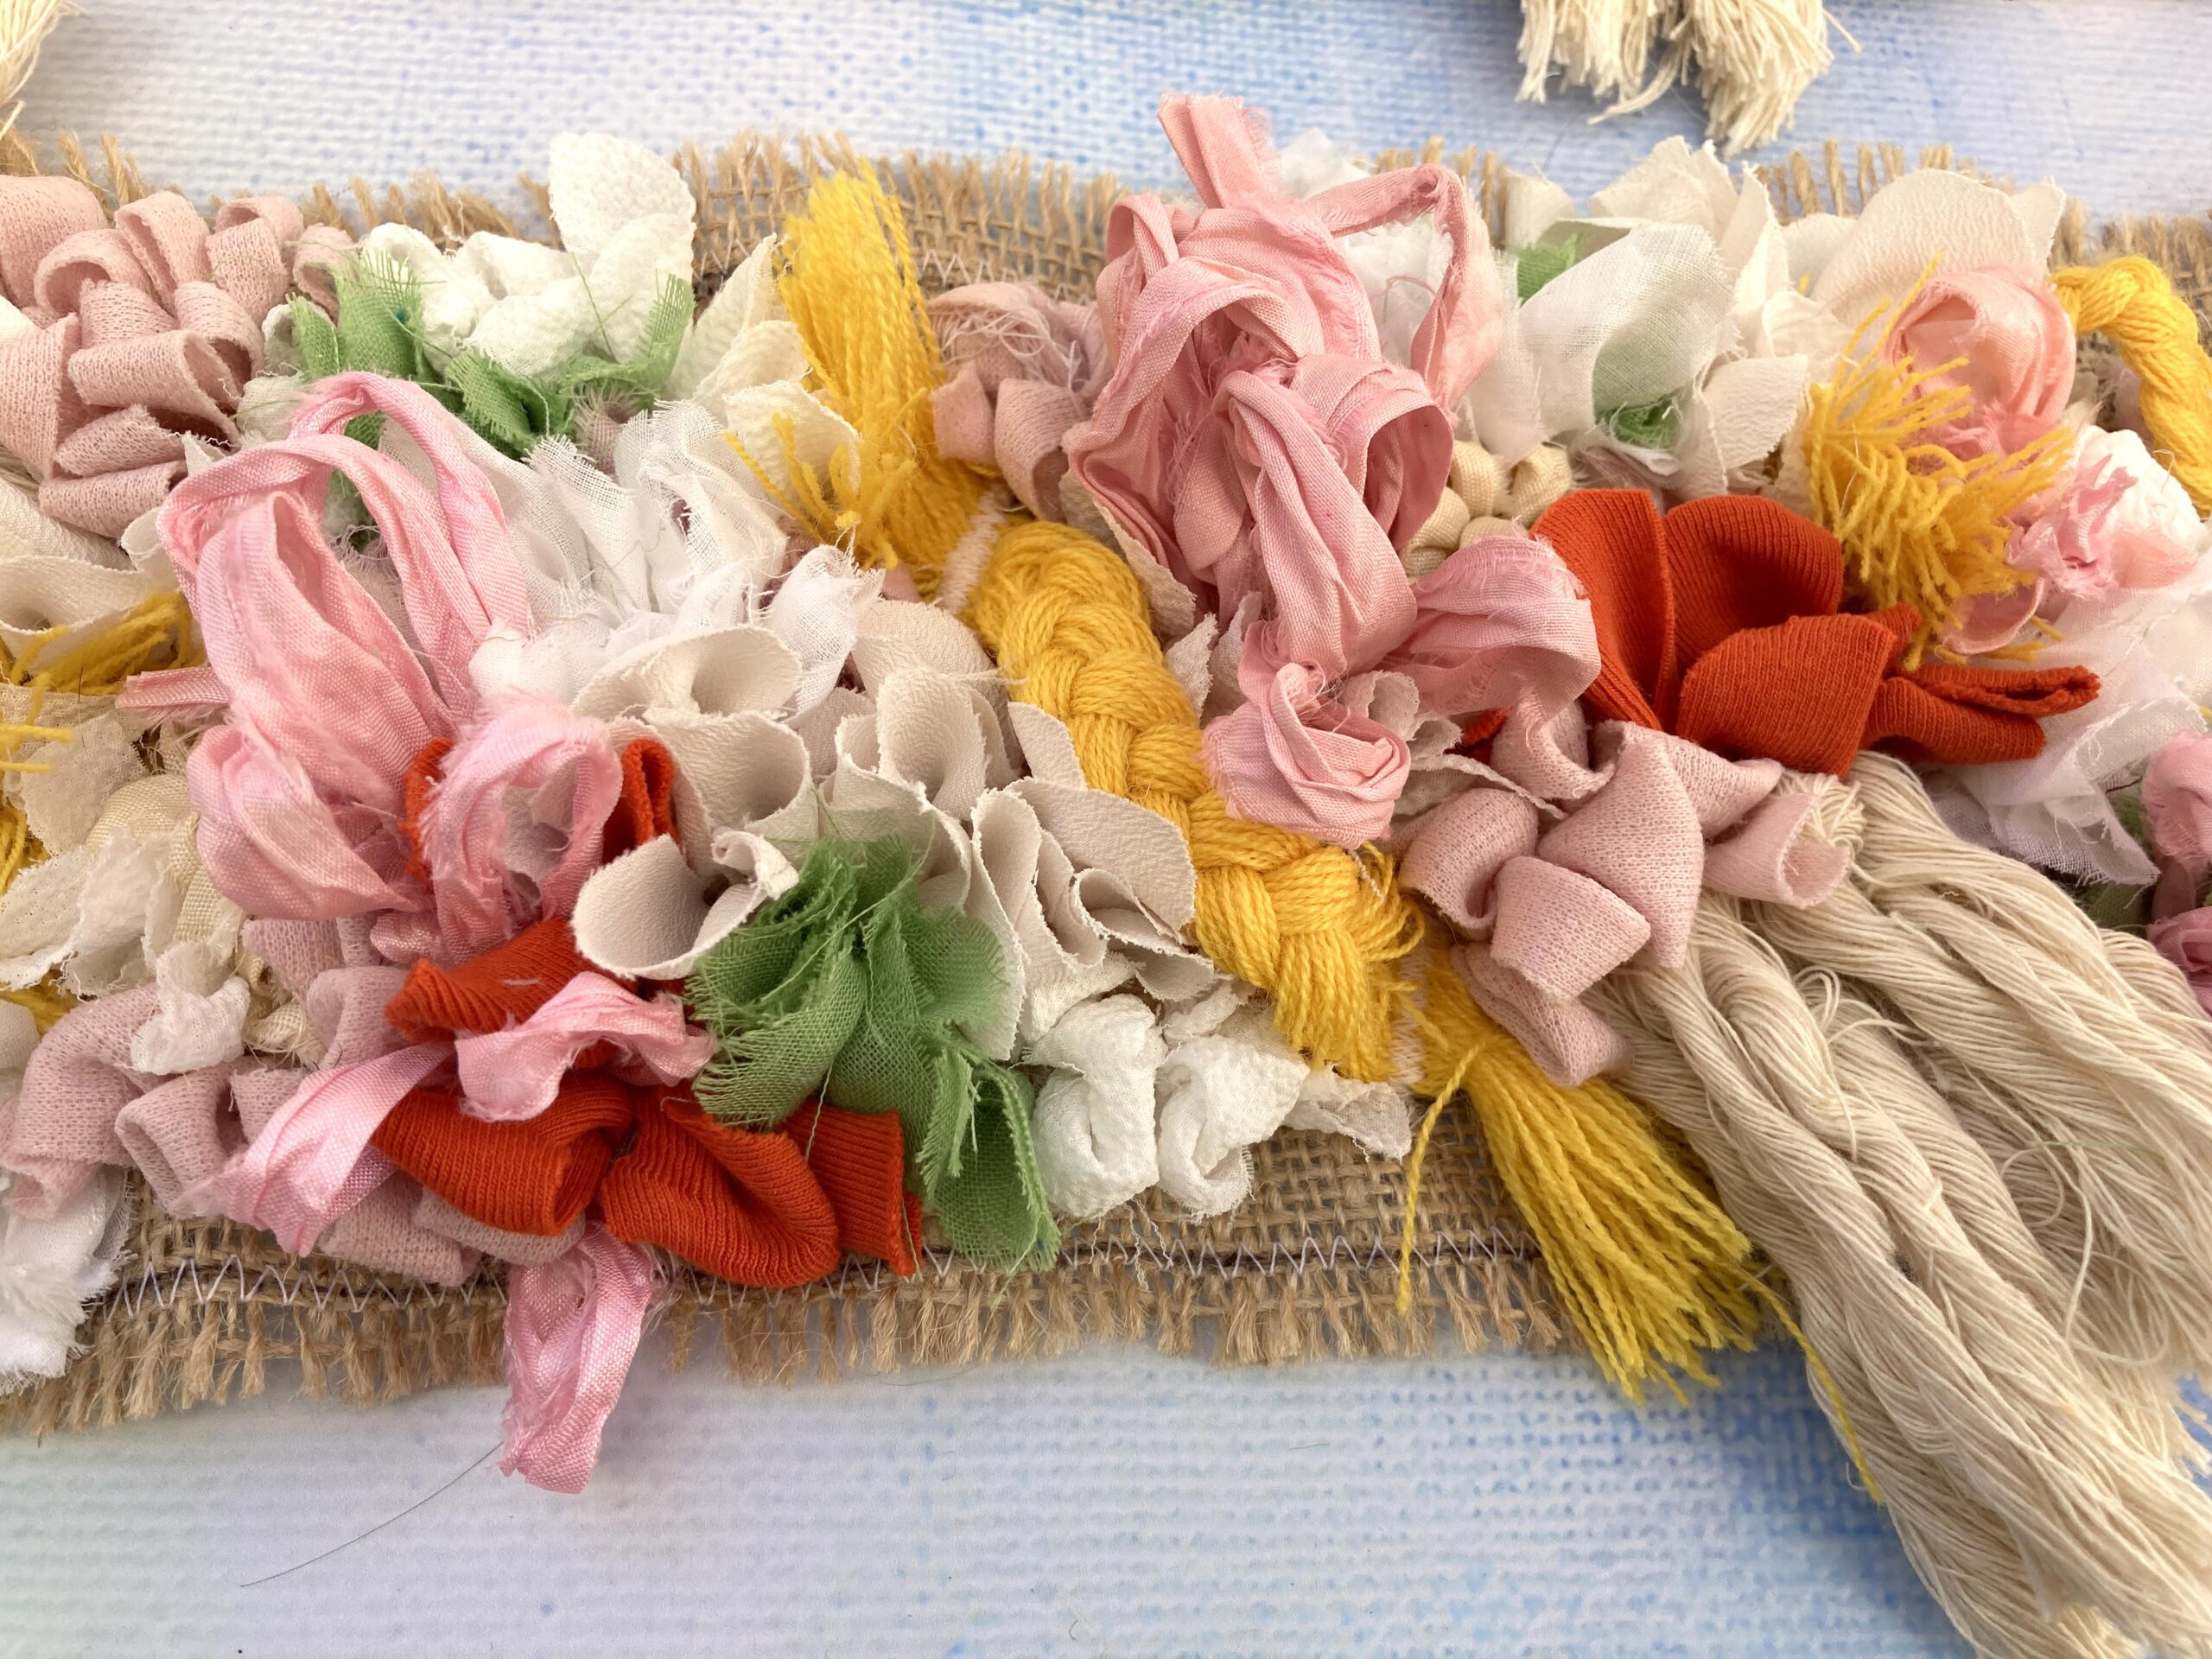
With stitched elements, you’re generally best doing them first, so that things don’t get in the way of the sewing machine foot. Luckily for me, I had some rope lying about and was able to use it up on the handmade wedding table plan panels. As I knew I had a further six panels to make, I made sure to divide the rope equally in ten before getting started. I cut lengths of rope, unwound them, combed the fibres until they were flat then stitched them across the middle a few times with a zig zag stitch to secure them in position. It’s strangely therapeutic brushing the rope to make it lie flat.
Once I’d attached my rope (approx three sections per panel), I moved onto some classic loopy rag rugging with a rug hook. I used some leftover pink sari silk ribbon to pull long loops through the hessian to create a blousy texture. I used about six sections of the pink per panel.
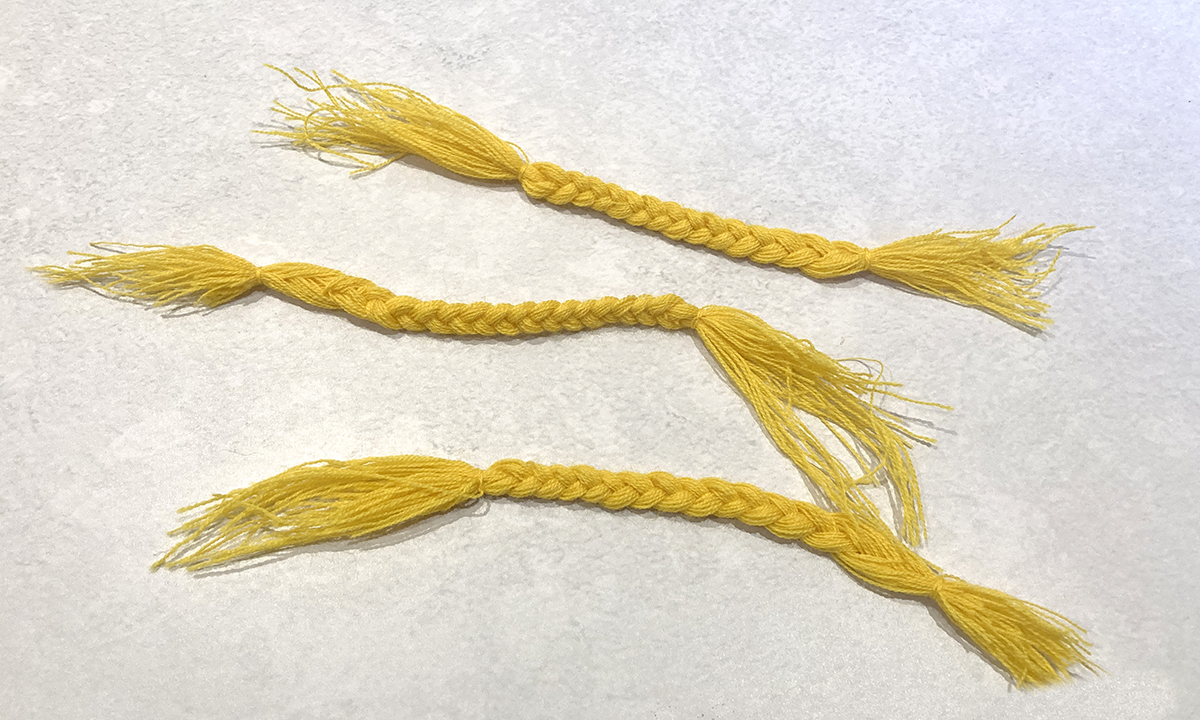
Next, I had a little rummage to see what else was in my odds and ends trunk. I knew this would be a good opportunity to use up some of the stranger materials I don’t often use, so I was looking out for colours that fit my scheme rather than a particular fabric. I came across a cut off bundle of threads I picked up in the mills in Yorkshire (I liked the colour but wasn’t sure what I’d do with it at the time). As I’d already used the rope in the panels, I decided to create a different texture by plaiting the yellow into little braids. This was really quite painstaking, but well worth it. I tore off a bunch of threads, tied one thread around the end of the bunch, divided it roughly into three sections and created a plait. I then knotted the second end with a thread too.
Once I’d made all the plaits, I stitched the tied section of each plait to the hessian, leaving a little fringe which I later trimmed and making sure that the plaits arched up so they wouldn’t be swamped by later rag rugging. I was super pleased by how it looked…
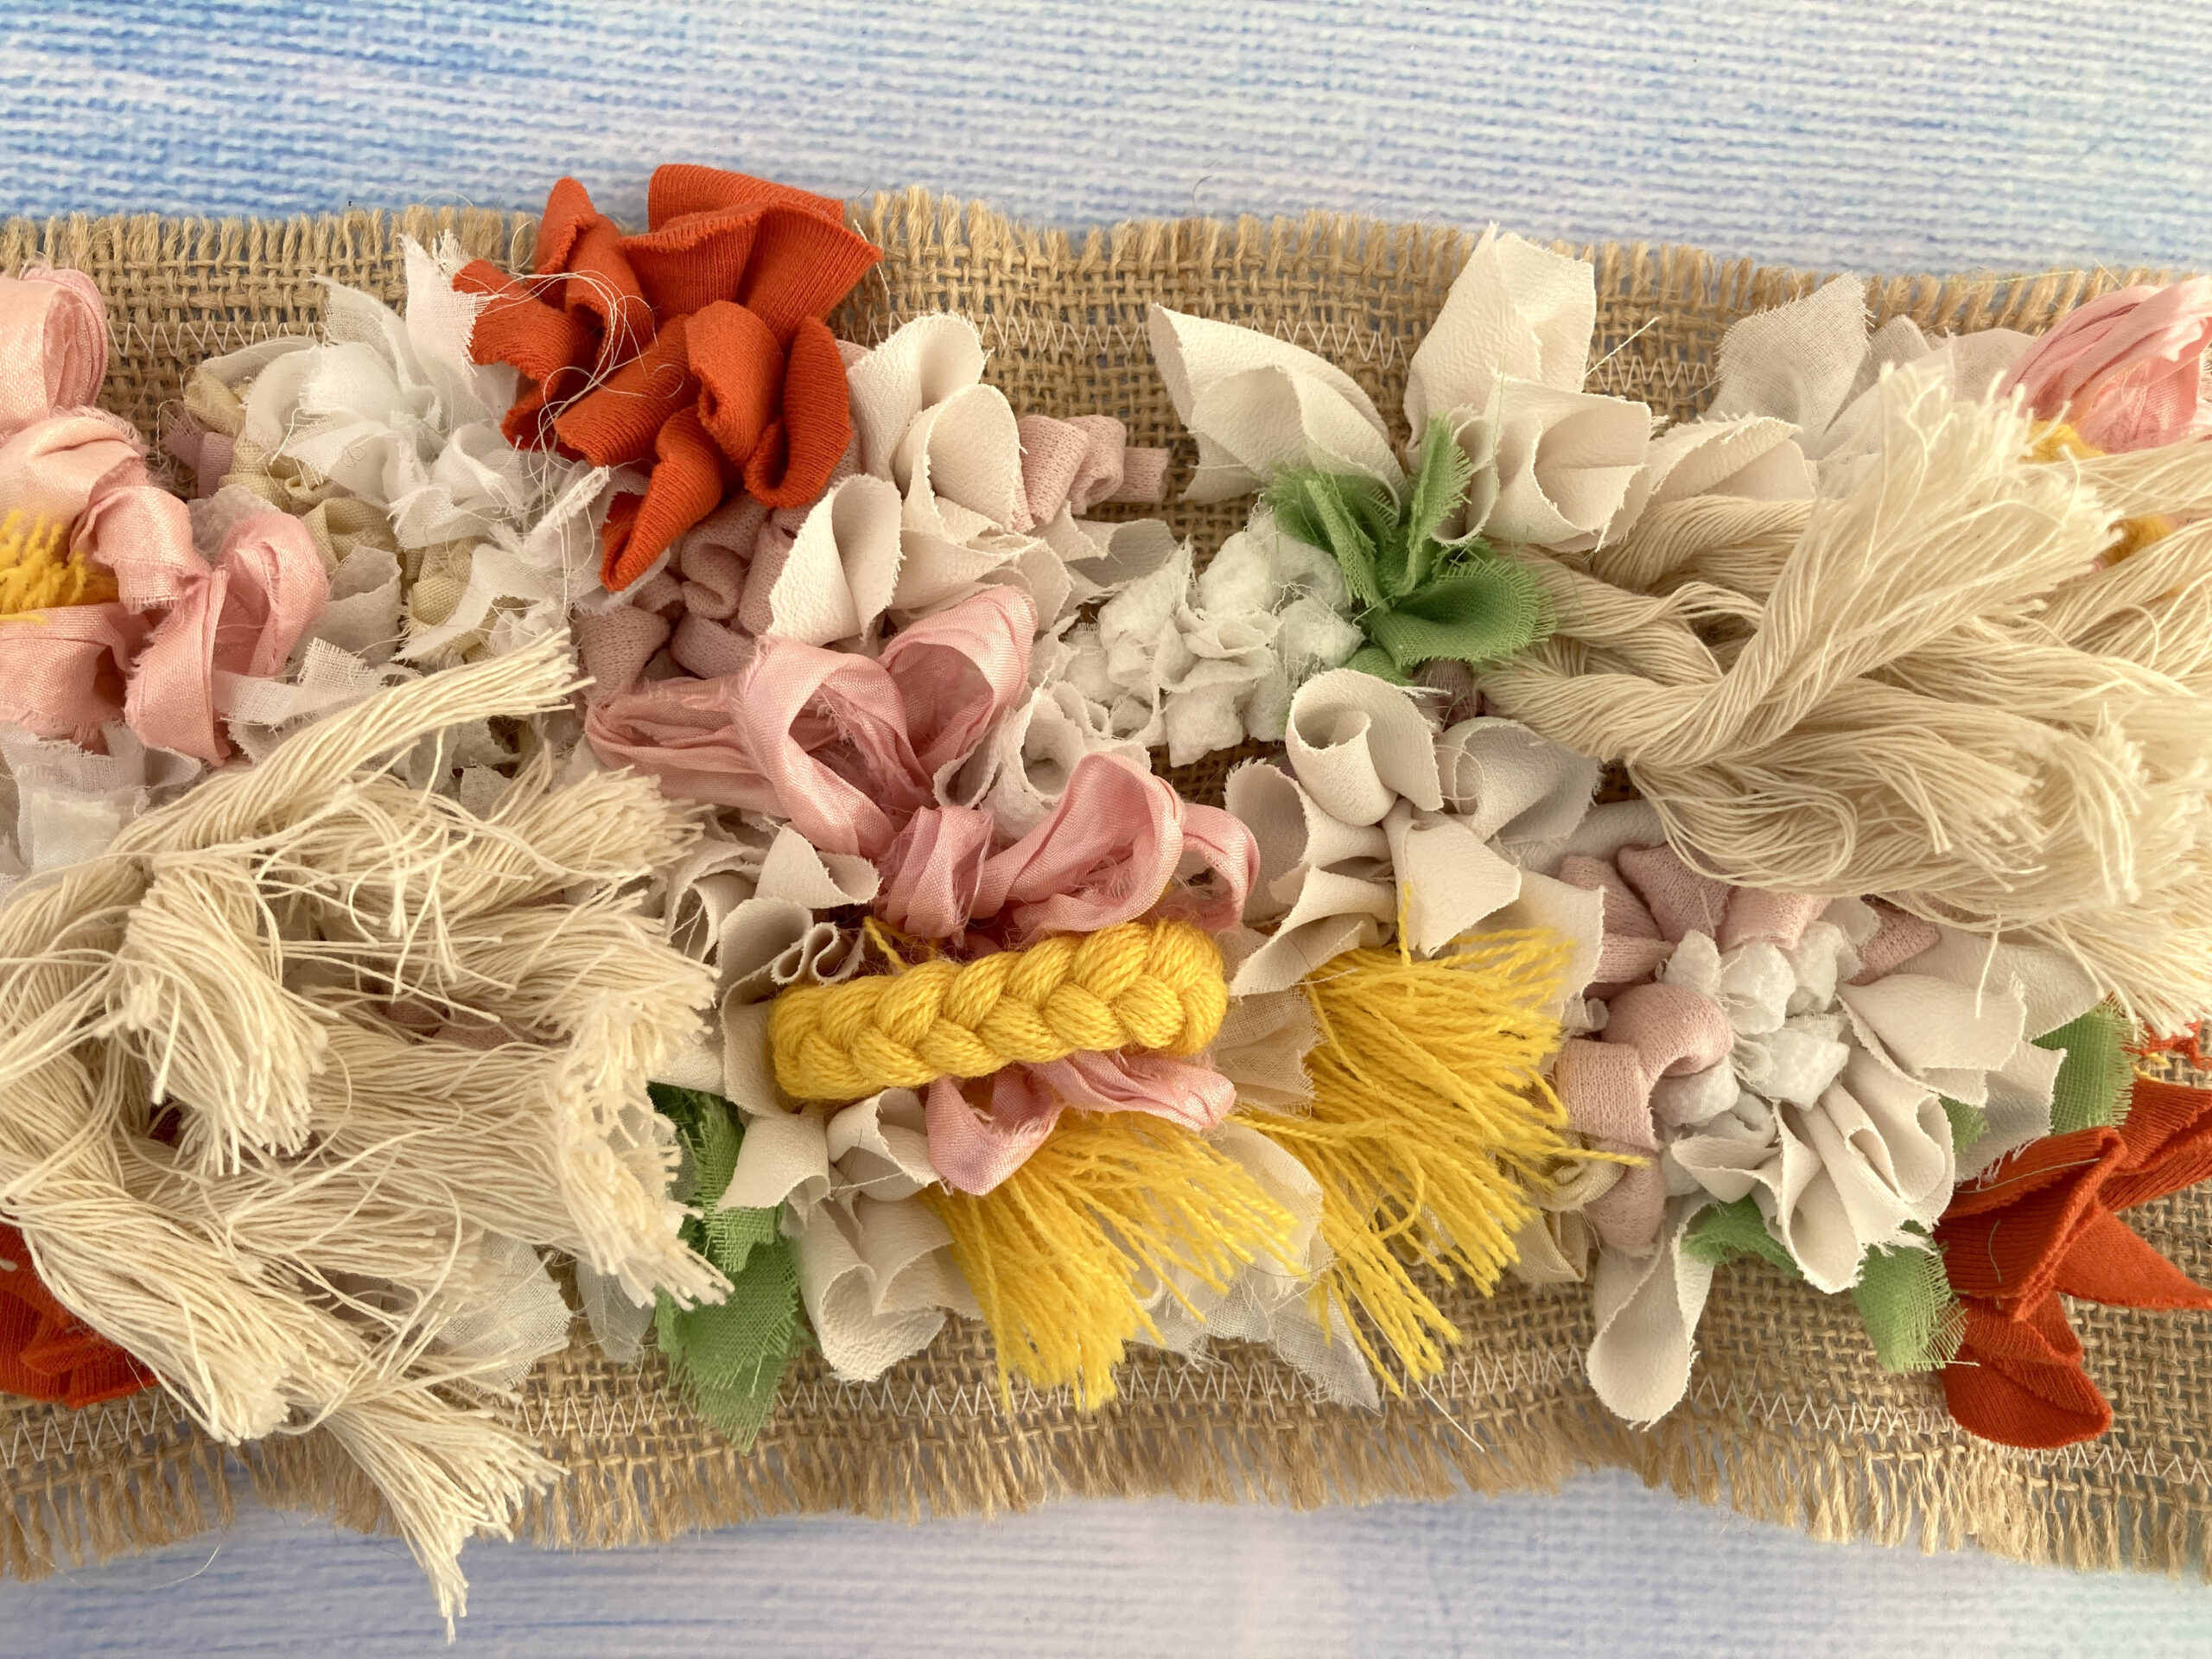
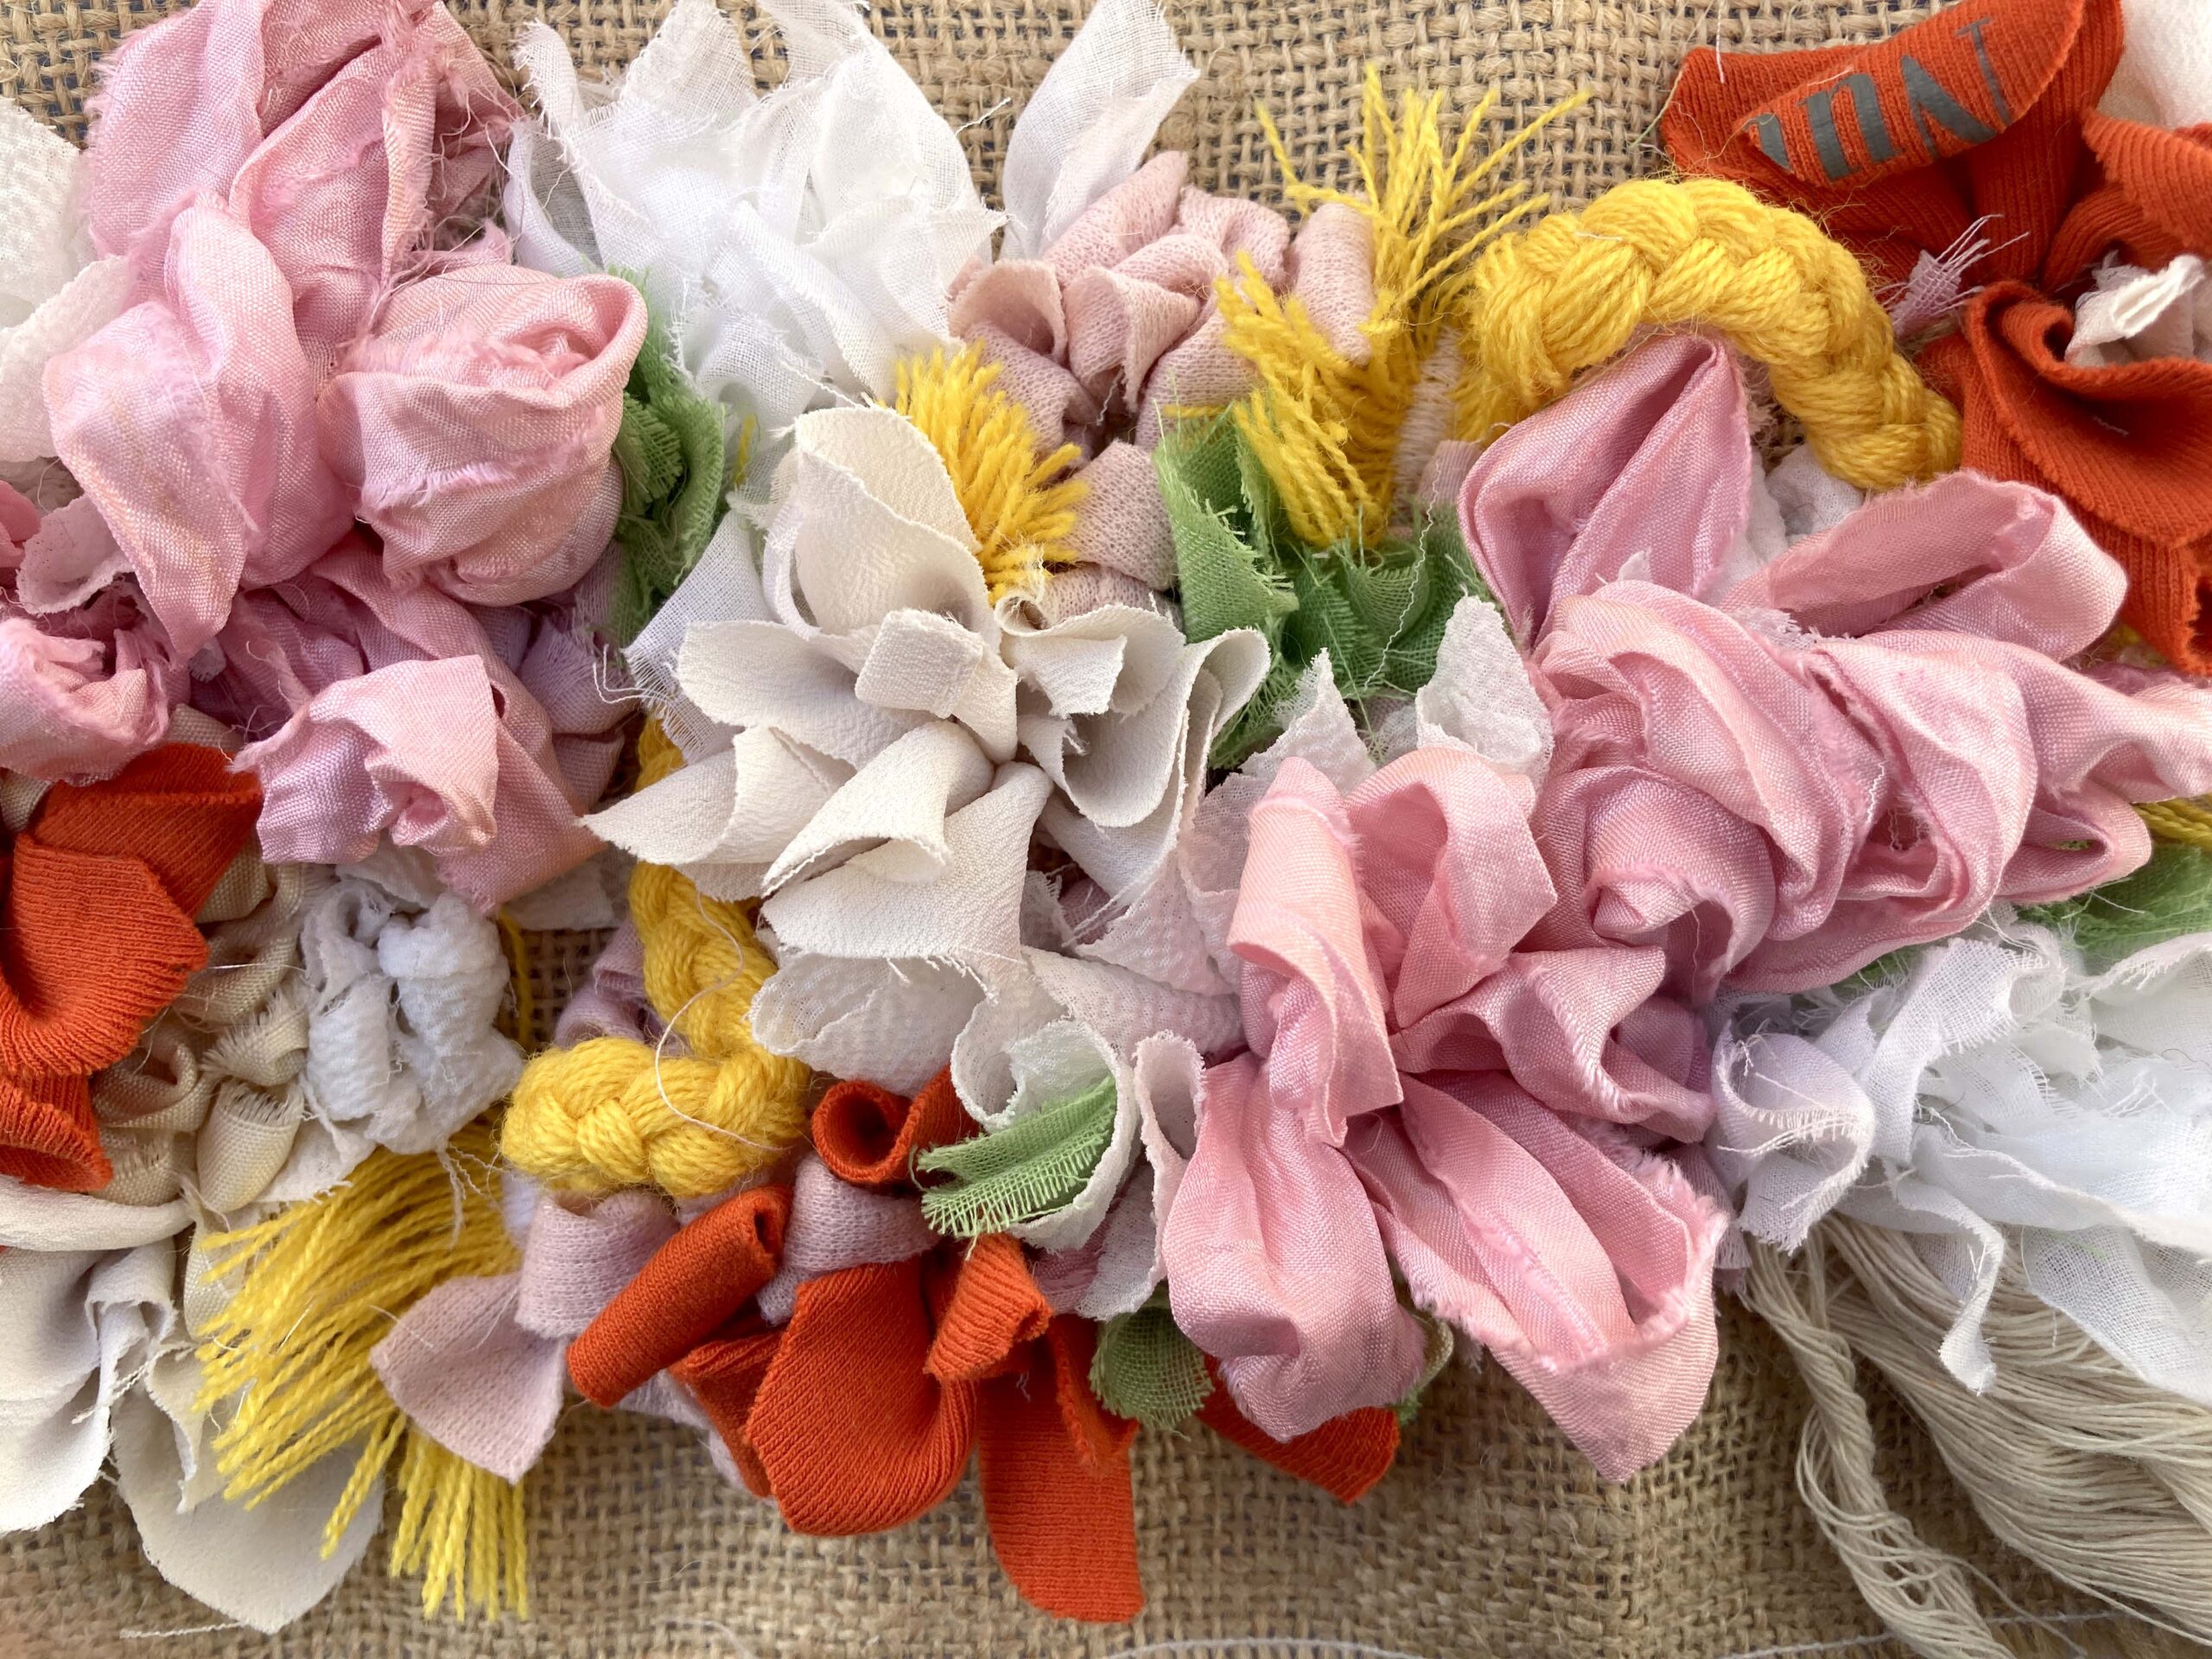
By this stage, I was getting a little tired of the sewing machine, so I moved onto some more typical British rag rugging. I added in some short loops of white polyester from an old dress in my stash, as well as some green (the lining of a curtain) and orange shaggy rag rugging (a jersey t-shirt). I wanted to create different heights and textures with the green and orange fabrics so cut the fabric pieces into 5cm and 7cm long petal shapes. The orange fabric was from a t-shirt with quite a lot of elastic in, so curls over nicely. Here’s how it looked with these elements added in…
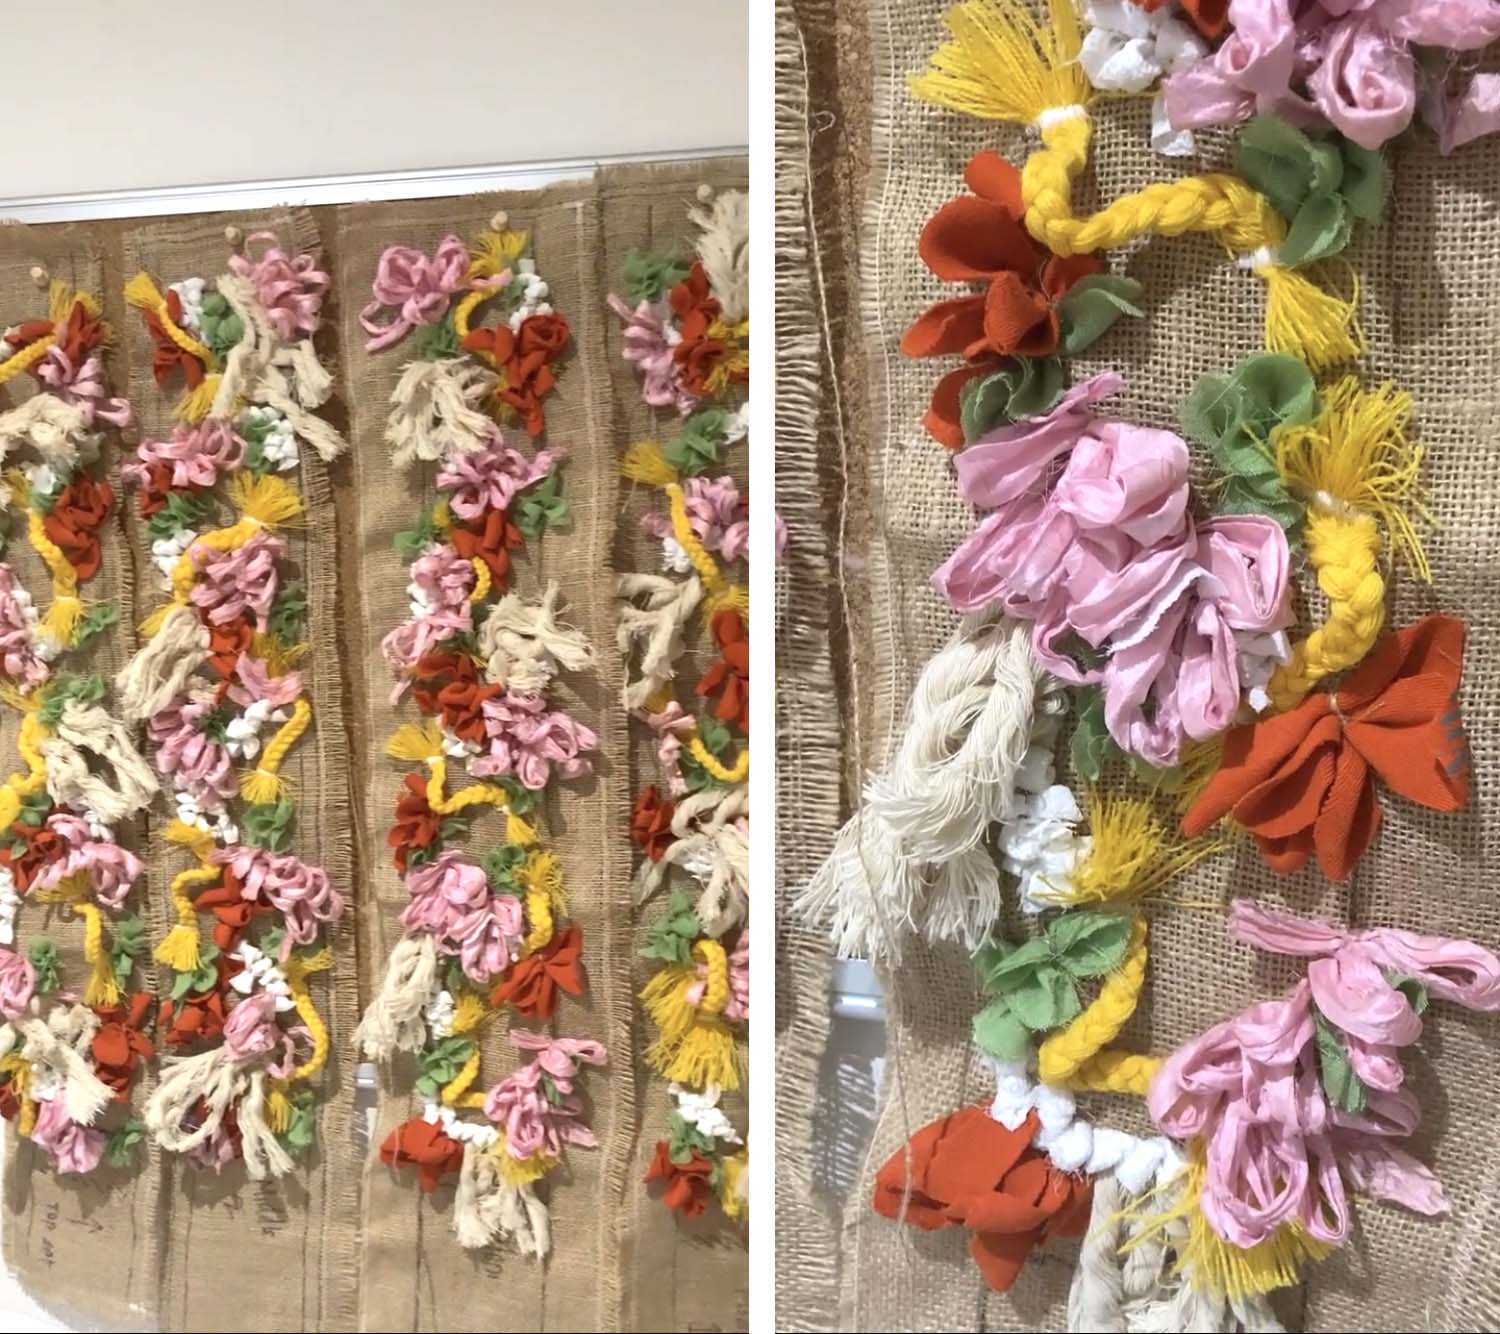
With these sorts of designs, I tend to build them up as I go, as opposed to pre-planning where every different colour will be placed. All I was aiming for was a good distribution of each colour across each panel (e.g. not all clumped in one area) and a variety of different heights and textures across each section.
It was then just a matter of continuing to fill in the gaps until the design looked right. Yes, nice and specific! I added a bit of my grandma’s pink dressing gown (short loops), cream sari silk ribbon (short loops), off-white chiffon (short shaggy rag rugging) and that’s it. As I wasn’t making a rug, I didn’t need to worry too much about the spacing of the rag rug pieces. All I cared about was how it looked from the front.

From the back, you can see how many gaps I left…
Once I’d finished the initial four longer panels, I moved onto the six smaller panels marked out in yellow below…
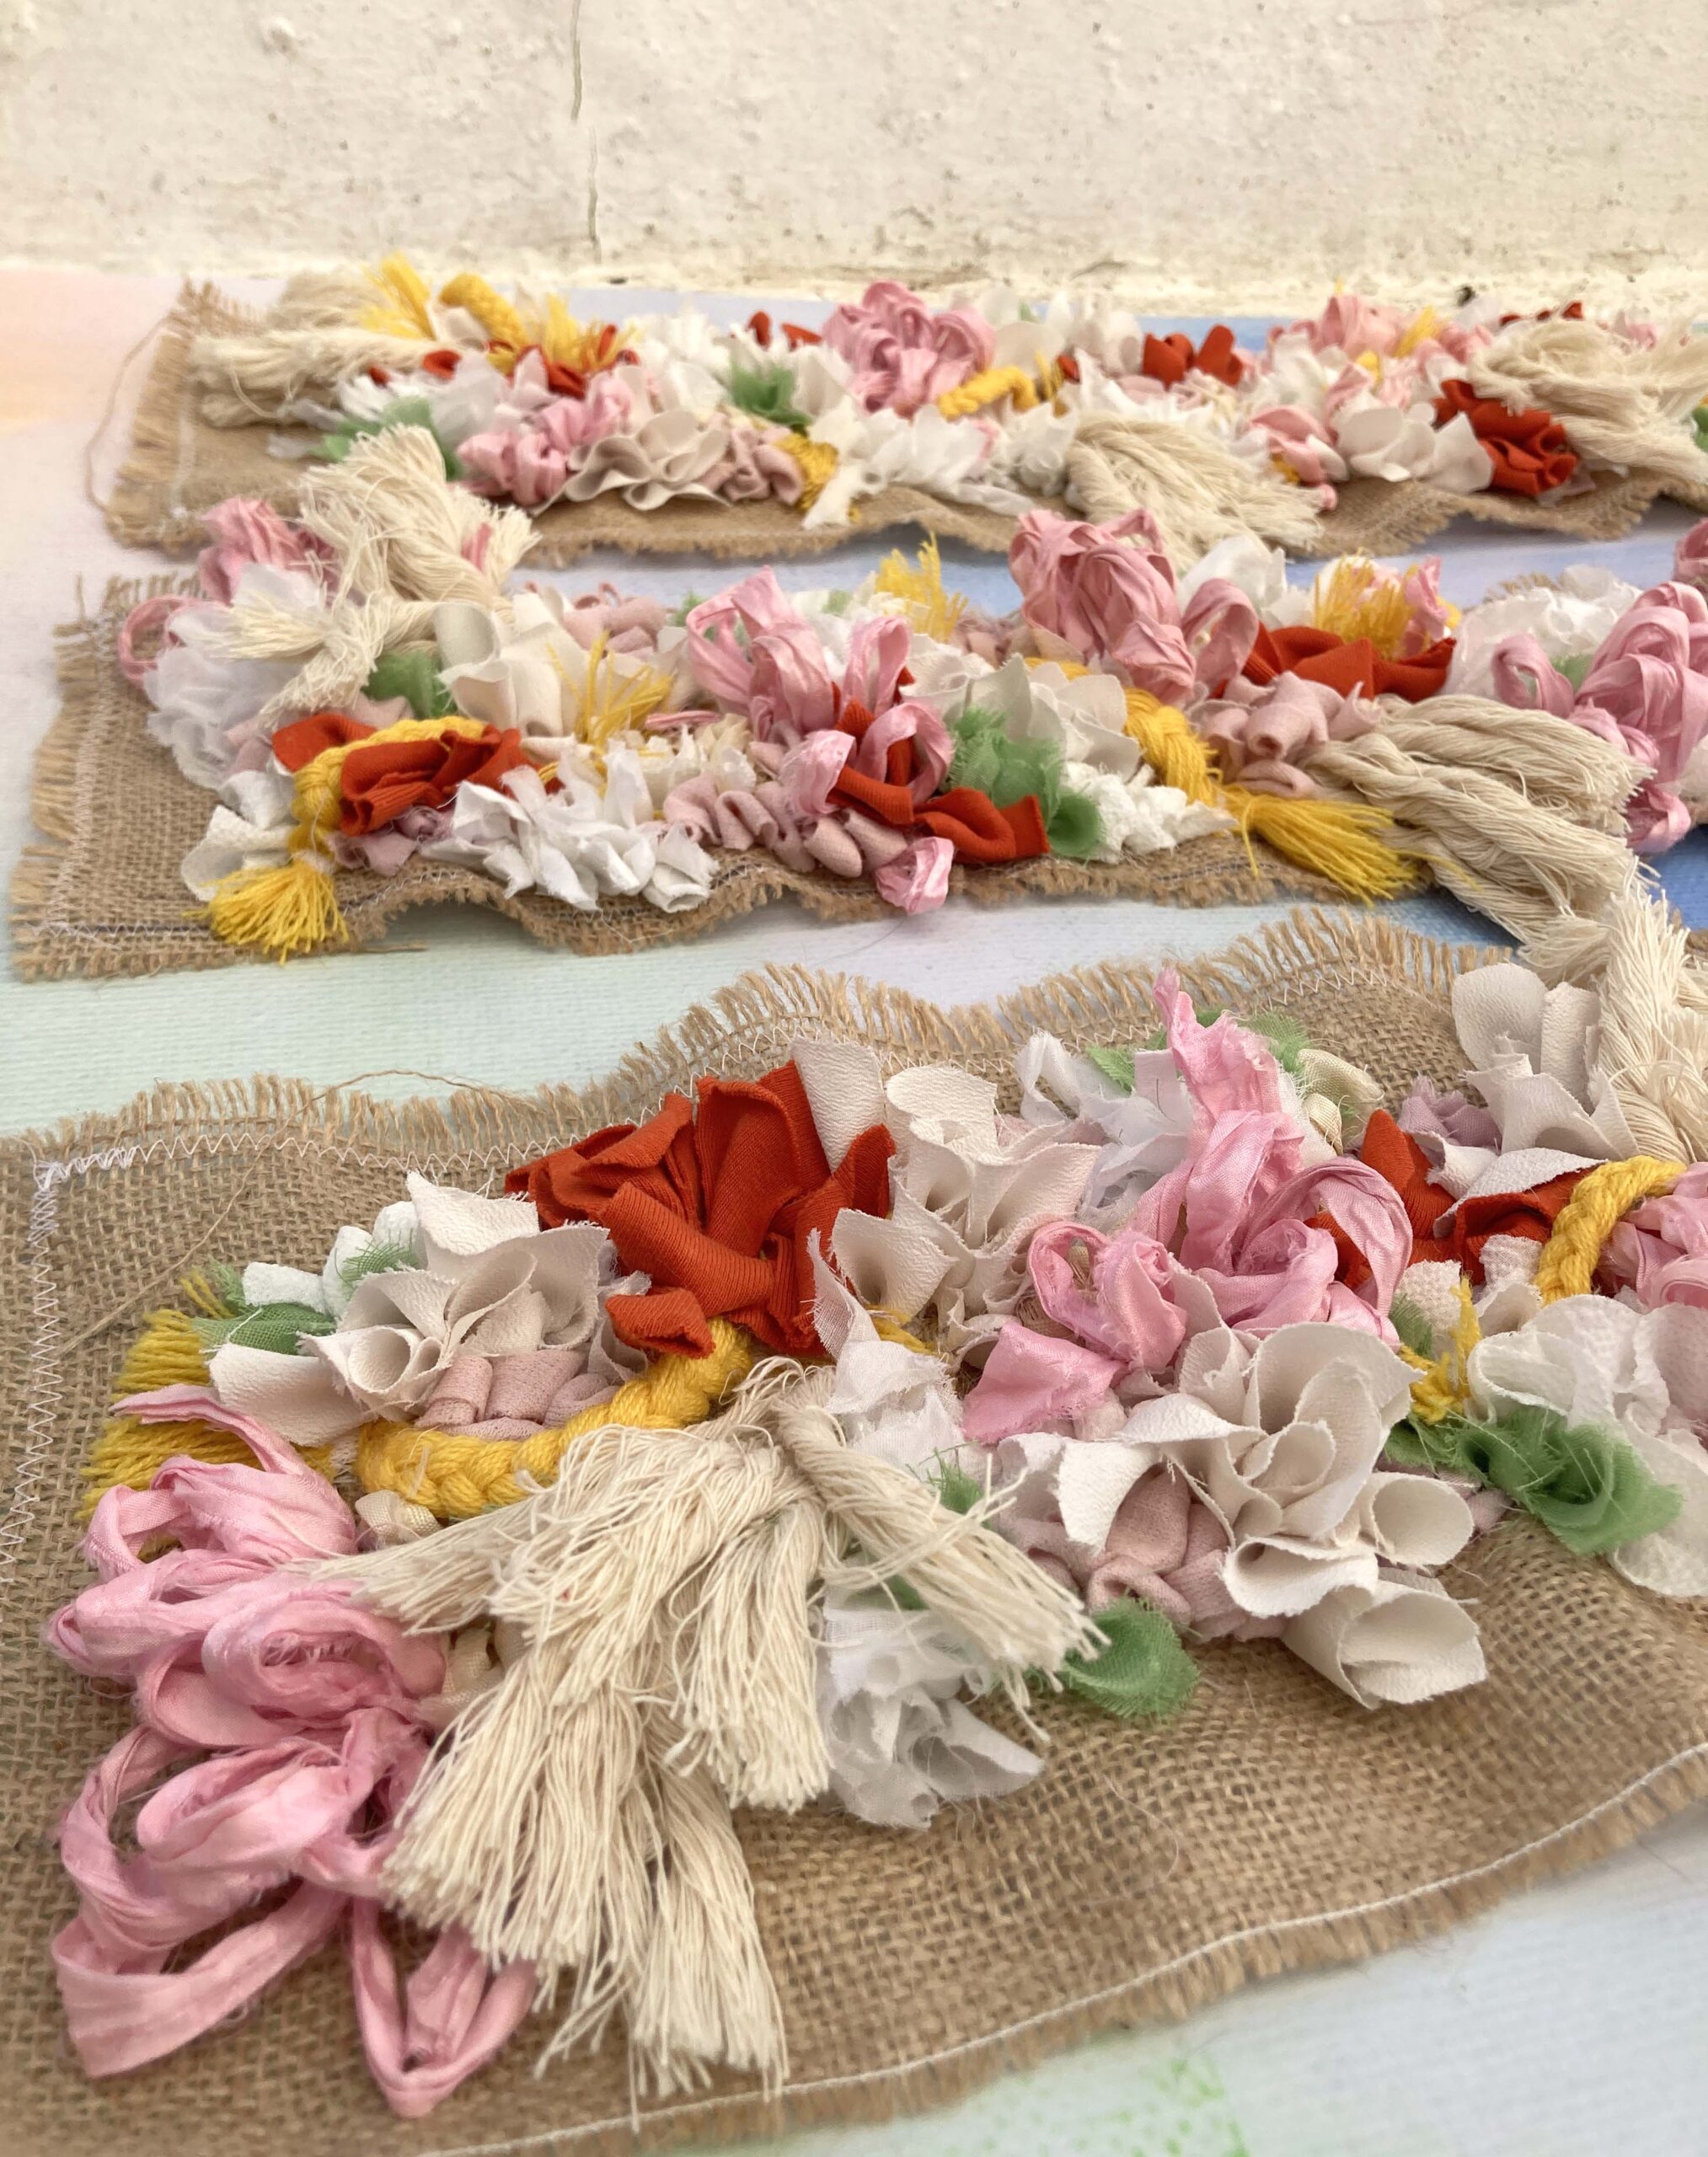
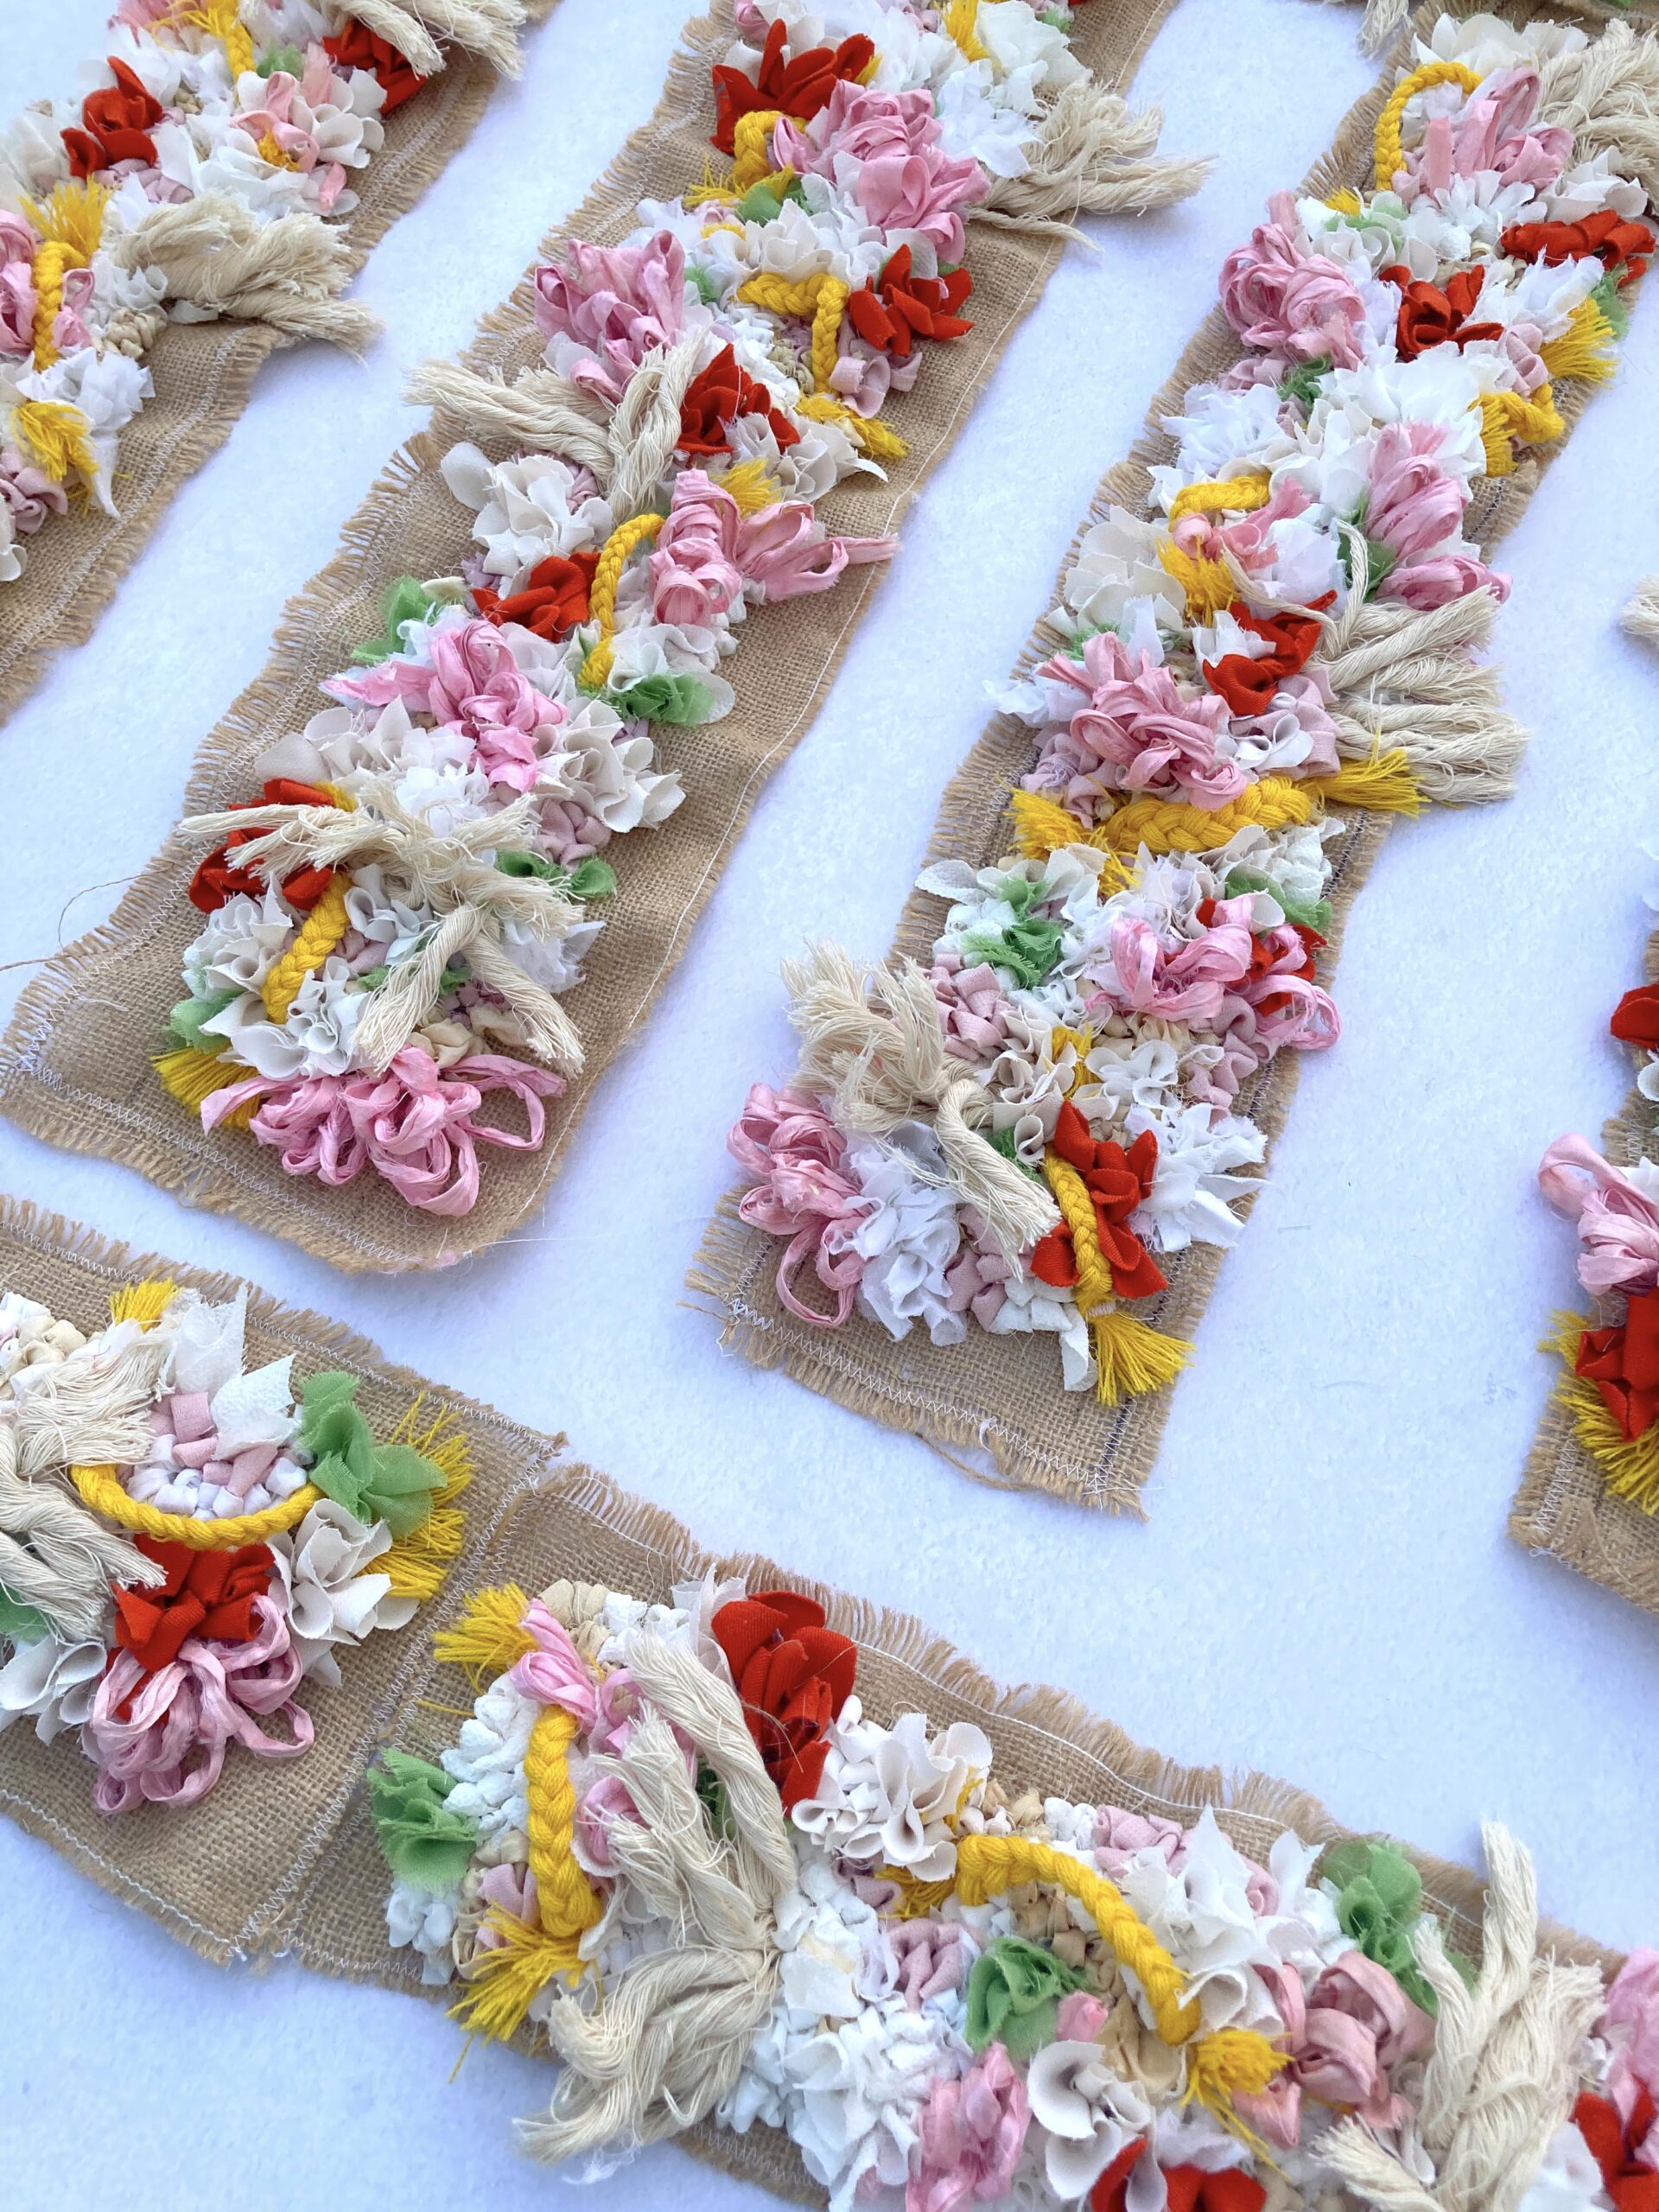
As predicted, these sections took a lot less time to complete as I already had my design finalised from the first four sections I’d made. I’d been careful to keep back about half of each fabric I had, so I’d be able to use the exact same fabrics. Here’s a photo of all ten panels together…
Now, onto the first part of the assembly…
ASSEMBLING THE TABLE PLAN FRAME:
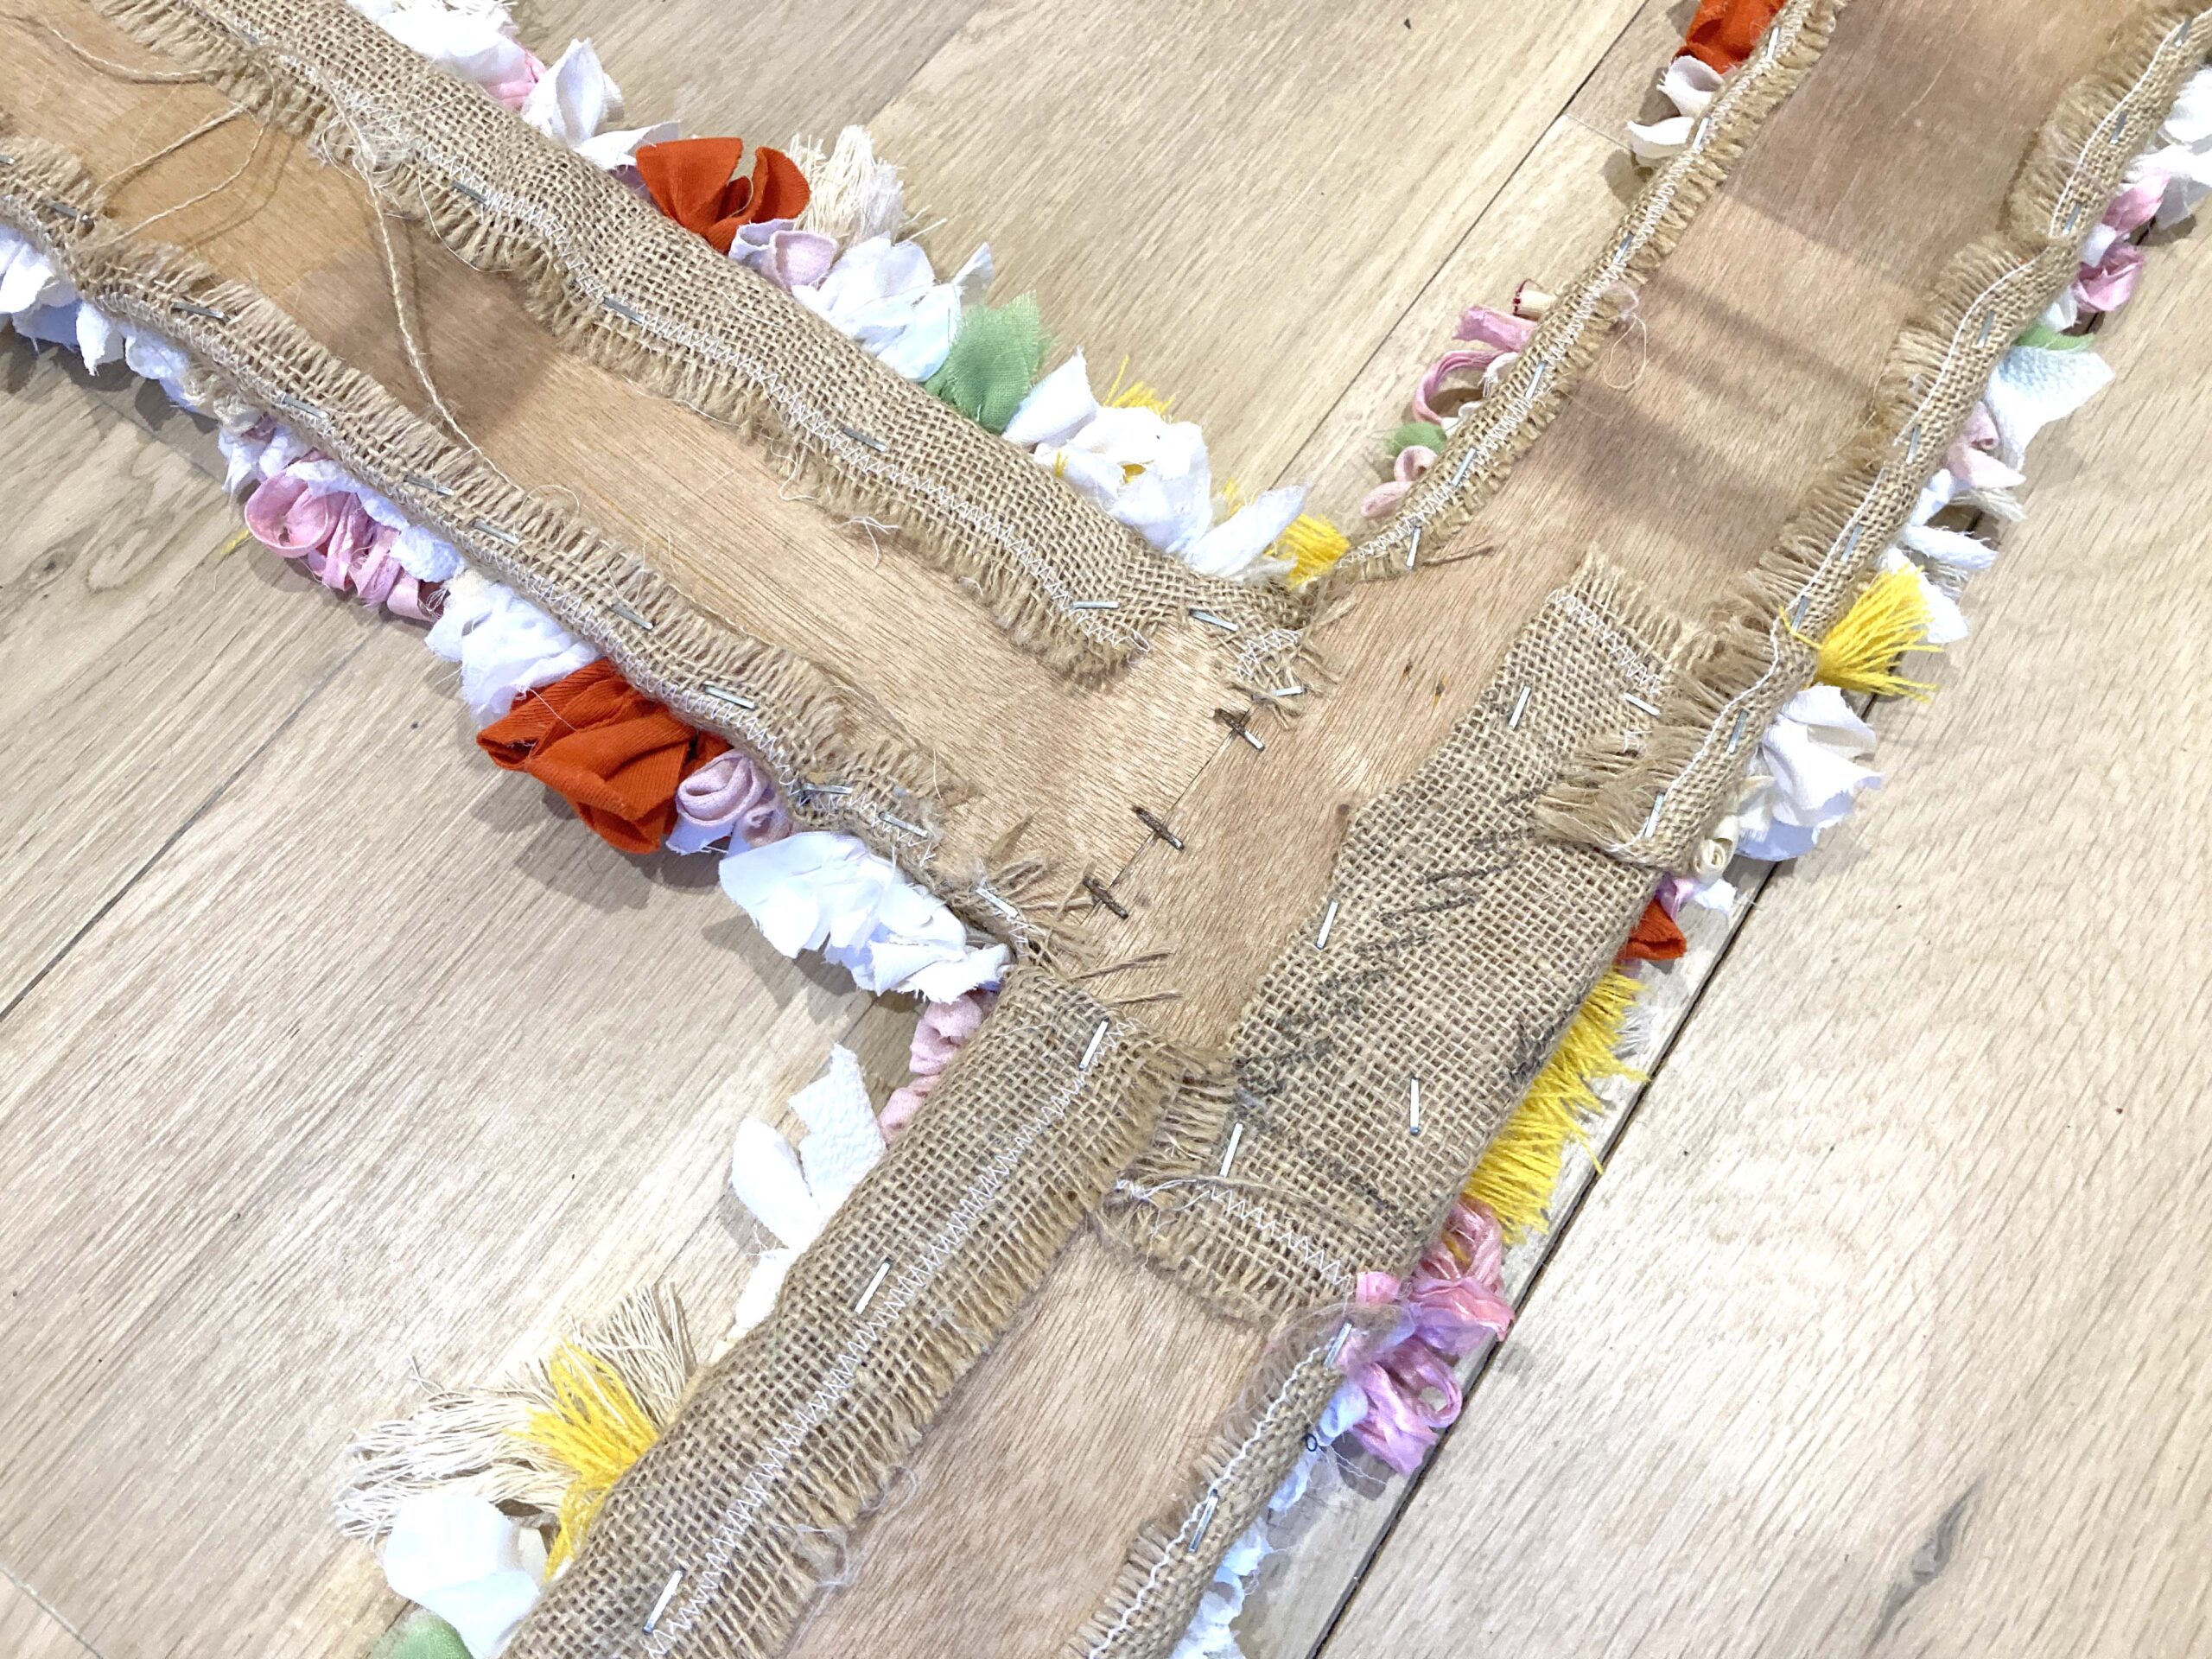
This was the part of the process that I was most excited about as I’d be able to finally see what all my hard work had come to. Firstly, I staple gunned the four longer sections to the plywood frame. I made sure that the hessian was pulled taut and that the hessian was neatly folded and secured to the back. It took quite a bit of force! NB: I managed to stupidly staple gun my finger at one point, so be careful if you do something similar.

I then moved onto staple gunning the six smaller panels to the frame and prayed that I’d done the measurements correctly. Where the panels met other rag rug panels, I had to the fold the hessian under before stapling between the gaps in the hessian on the front then securing it around the back. Here’s what it looked like with all the panels attached…
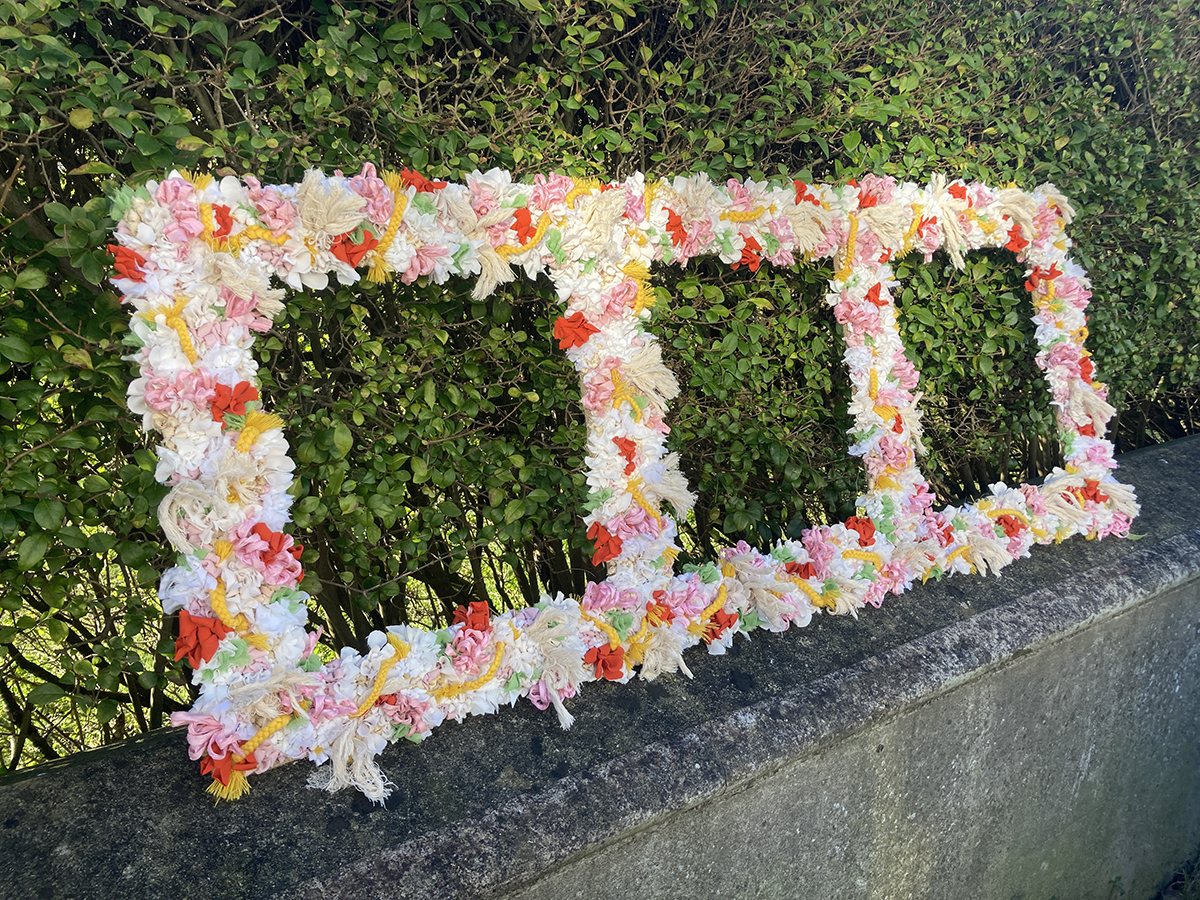
And a few other photos…

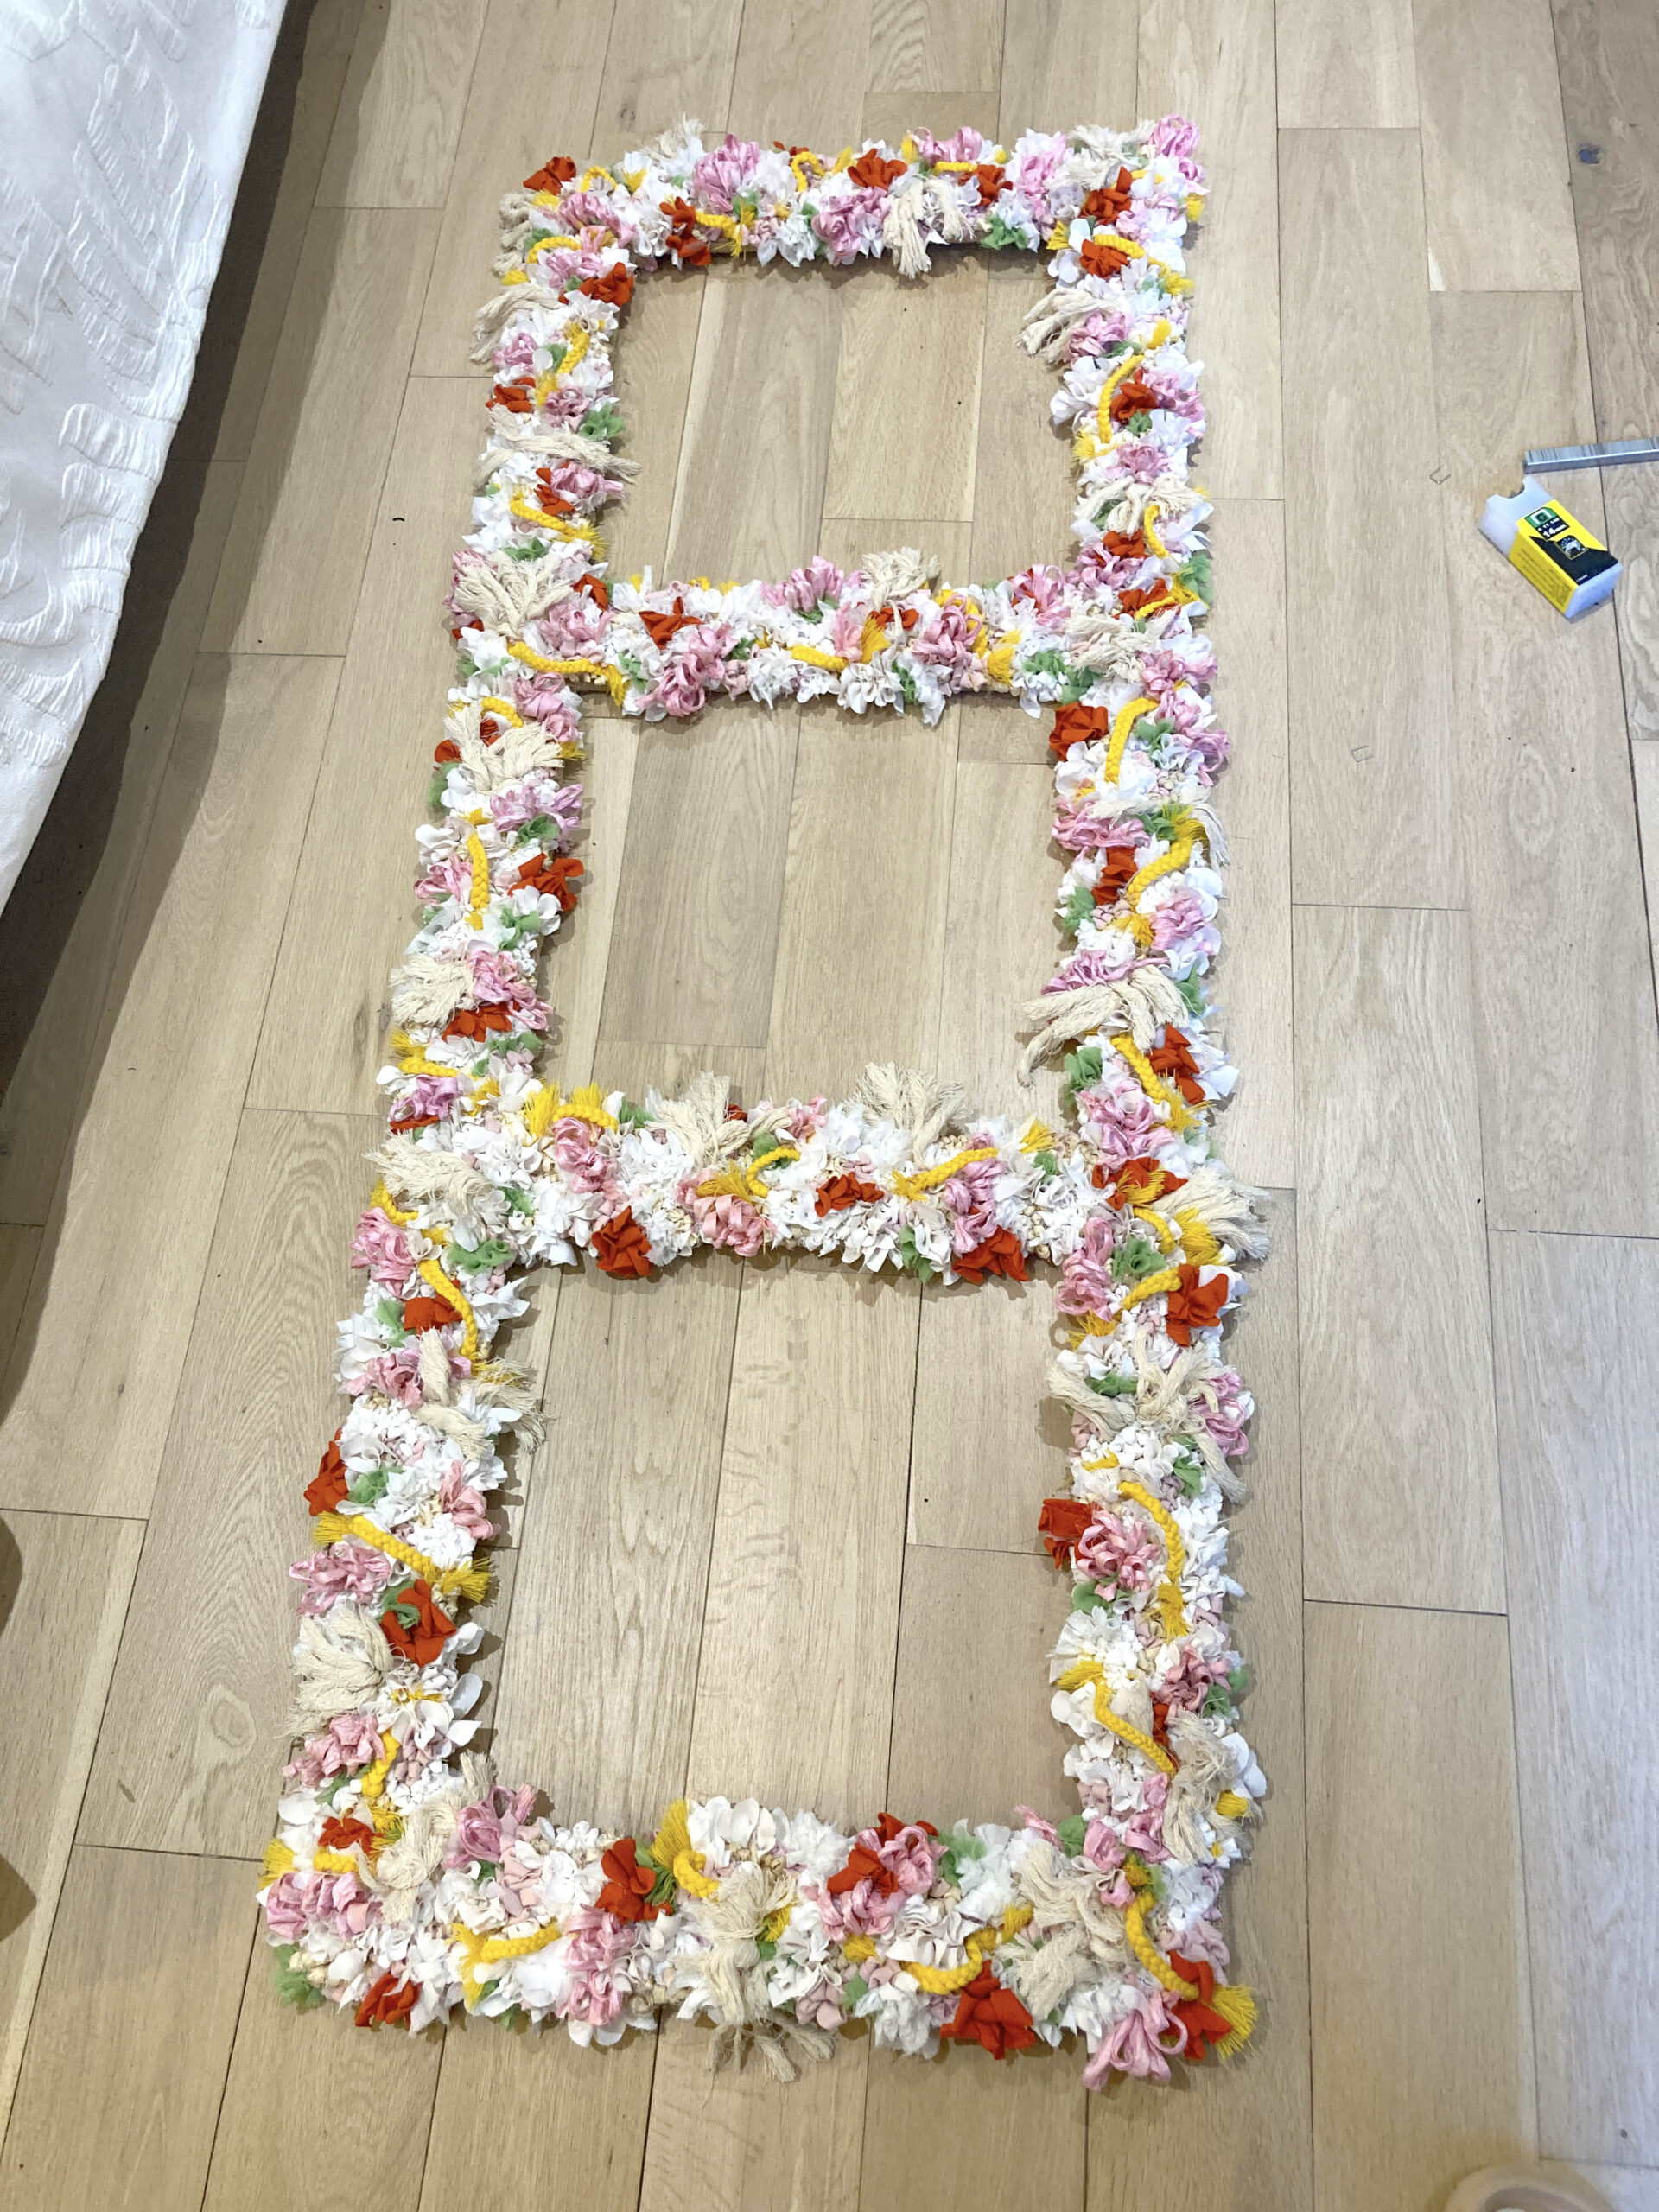
At this stage, I was pretty chuffed with how it looked, but the back was a mess where the hessian had been folded and secured. I won’t tidy up the back until the table plans themselves have been positioned into the gaps, as I don’t know how that’ll work yet. Watch this space!
To be the first to hear any updates on this project and others, subscribe to our fortnightly Ragged Life Inspiration Newsletter or follow us on Facebook.
Happy rag rugging!
Elspeth
I saw your article in the Woman’s Weekly magazine and thought I’d browse your website. For a complete novice I was a bit disappointed to find there are no pict showing the differences between each style. I decided against ordering a small kit because I basically didn’t know what I was ordering. I appreciate this was most probably an oversight and other people will also benefit from added pictures. Kindest regards, Marie
Love the colours, the textures are spot on and it yells Spring Wedding. Well done.
Thanks so much Angela 🙂 It was a labour of love, but a fun bit of upcycling!
Just terrific! There is a lovely lush look to this. You have inspired me. A wedding in Lucca – wonderful it is such a gorgeous place, sending you every good wish for a blissful occasion.
Thanks so much Anne 🙂