One of the things that sometimes puts people off trying rag rugging for the first time is the thought of having to commit to finishing an entire rug. Well we’re here to tell you that rag rugging doesn’t have to be a labour of love and even the smallest of pieces can look very effective. Now there’s no excuse not to pick up a latch hook and get ragging!
A great first project for a rag rug beginner, for example, is a piece of framed rag rug art like below: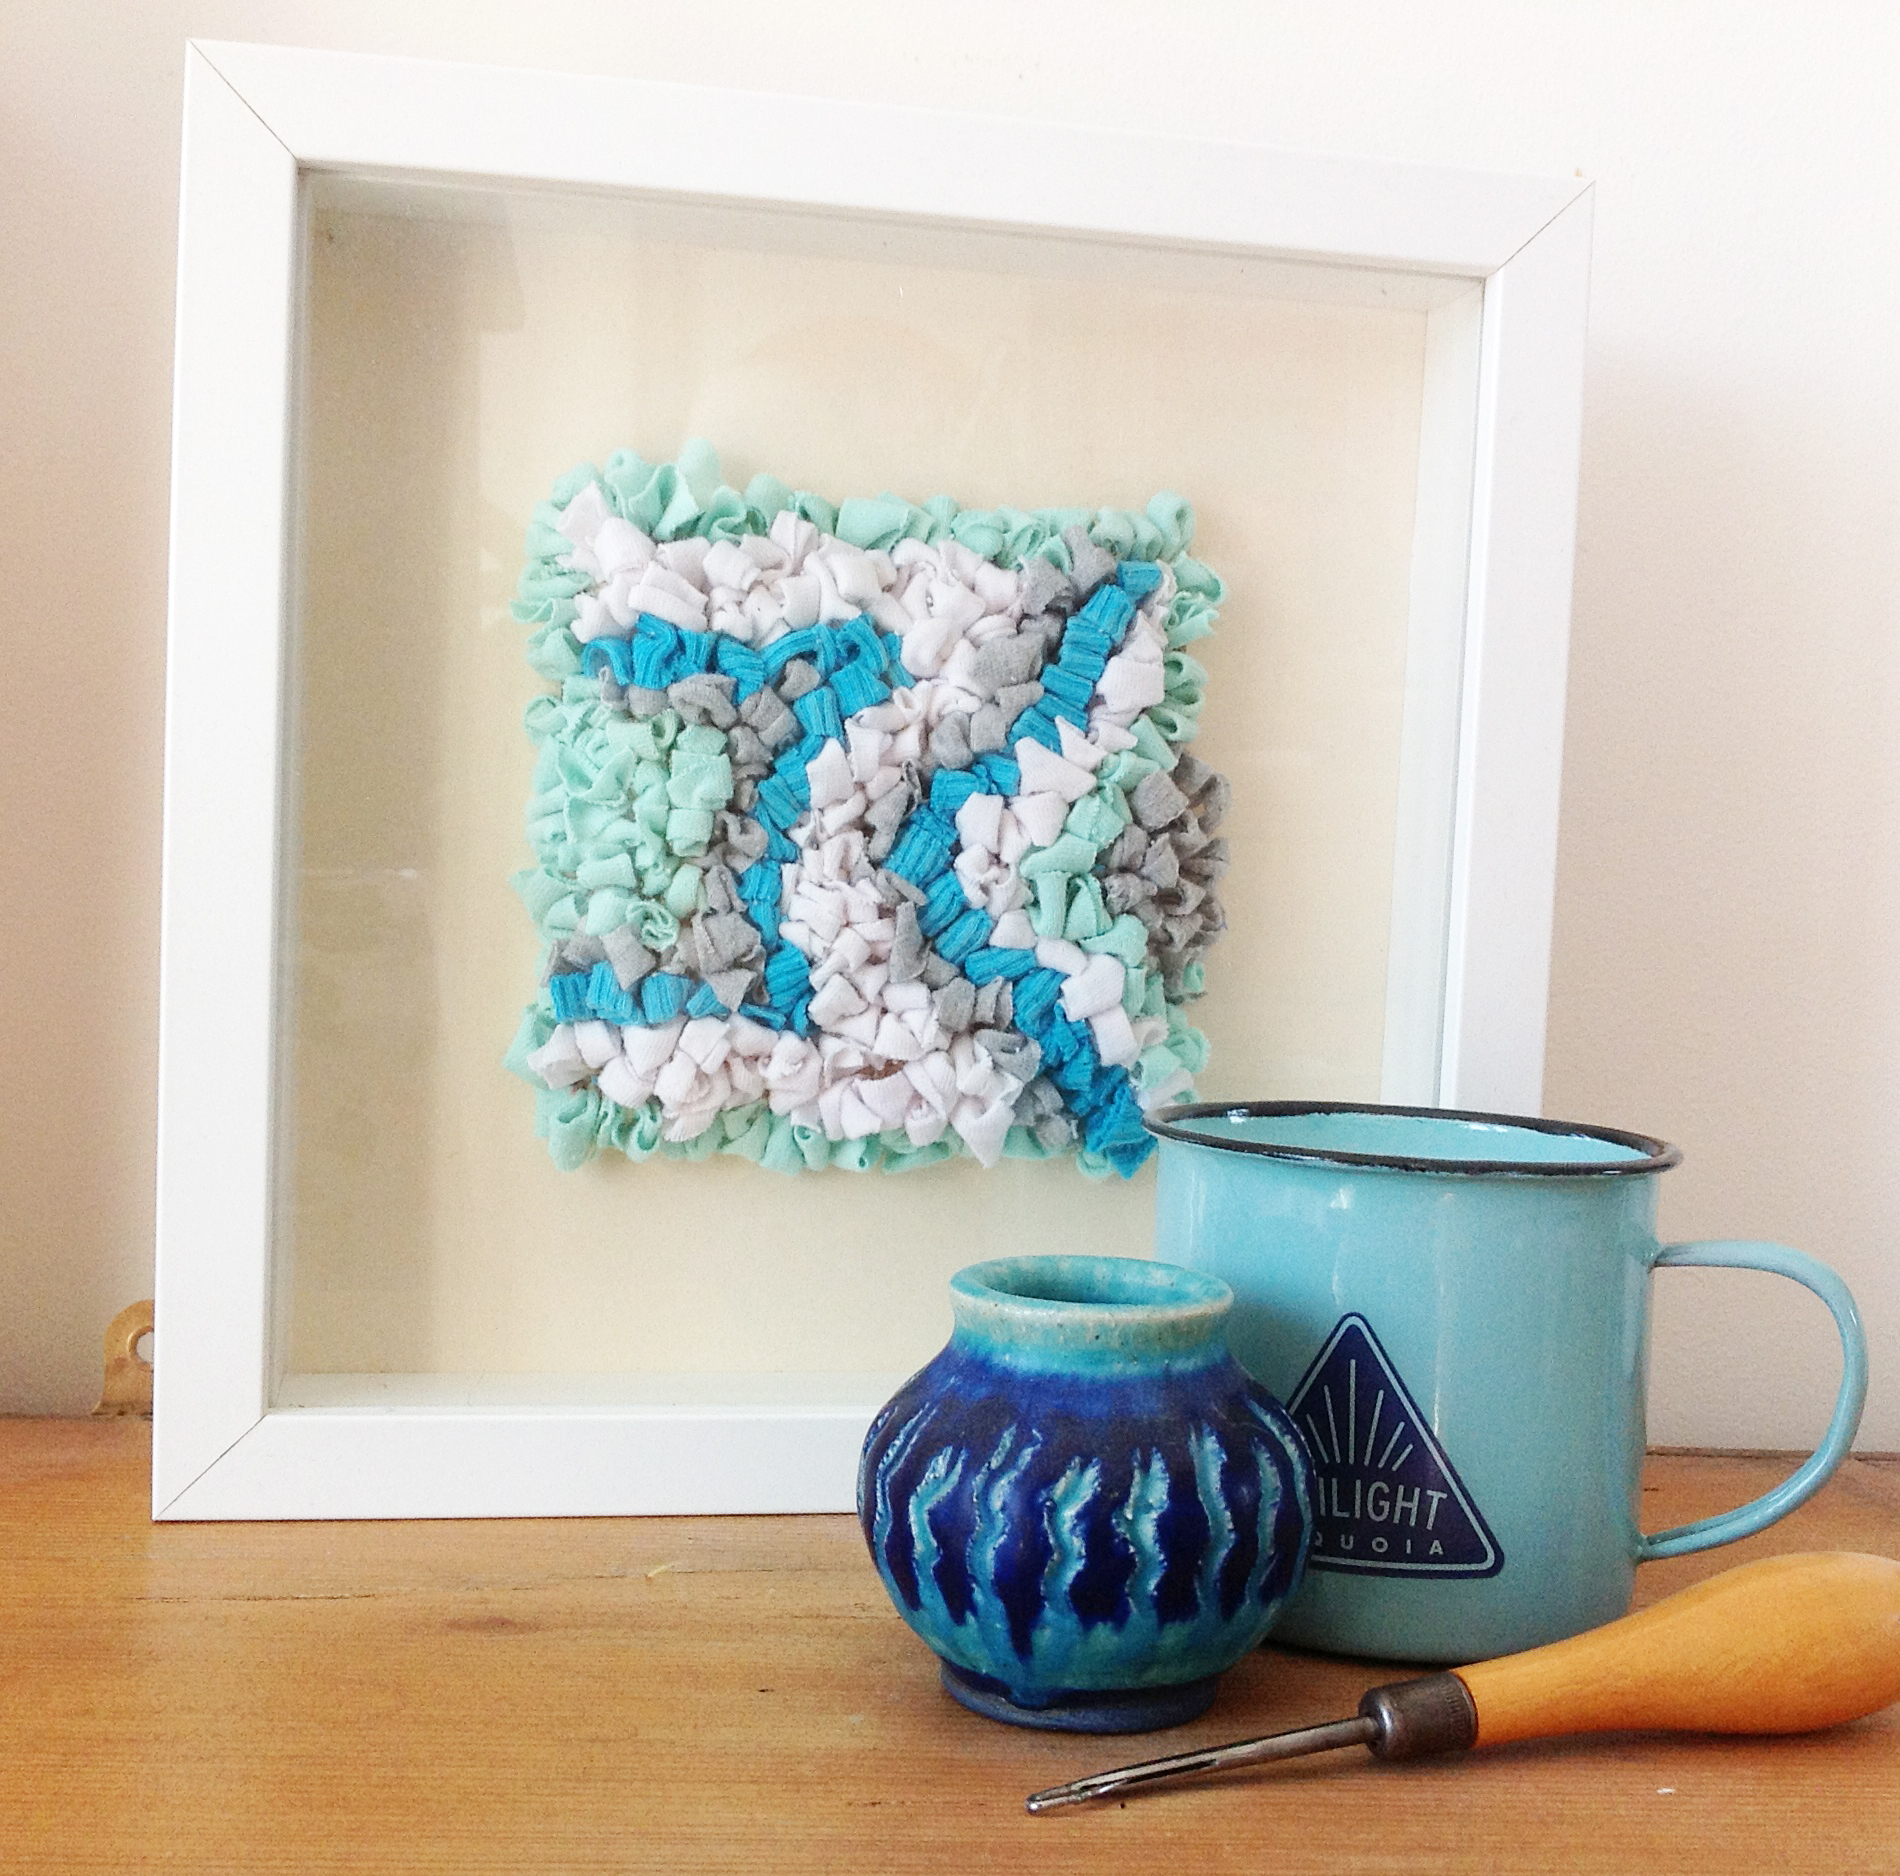
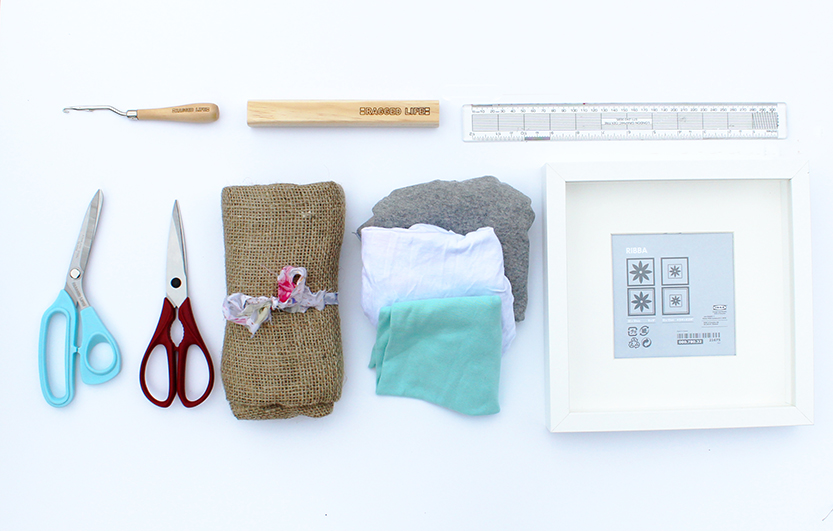
We’re going to talk you through how to make one of these little beauties in a jiffy. First of all your need to gather together the below equipment. A Ragged Life Rag Rug Starter Kit contains all the basic rag rug tools you will need (https://www.etsy.com/uk/shop/RaggedLife):
- Latch hook
- Hessian (at least twice the size of the frame you are looking to fill)
- Sharp Fabric Scissors
- Everyday scissors
- T-Shirts / Any Fabric
- A deep frame with mount. This Ikea Ribba Frame is the frame we used (http://www.ikea.com/gb/en/catalog/products/00078051/)
- A Thick Pen
- Sewing Machine
Step 1: Place Mount on Hessian
Carefully take the mount out of the frame and place it front down onto the hessian, leaving at least 10cm of excess hessian on each side of the inner square.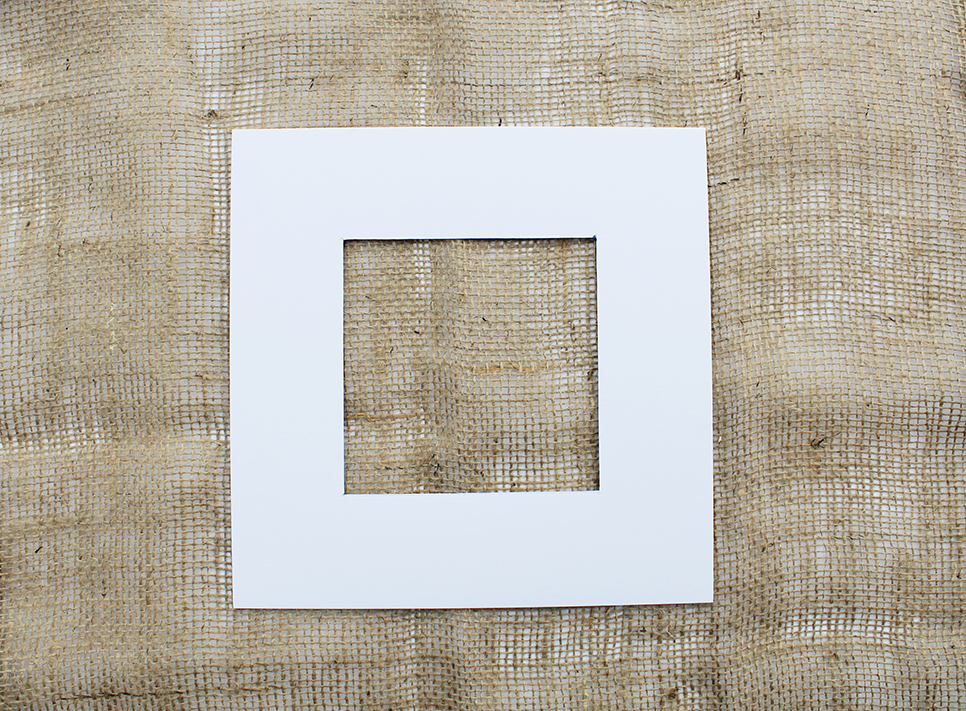
Step 2: Draw Around the Mount
- Draw directly onto the hessian, marking out the inner frame of the mount. Be careful not to mark the mount and if you’re worried about the surface below the hessian then place paper underneath. We don’t want you to ruin any lovely tablecloths!
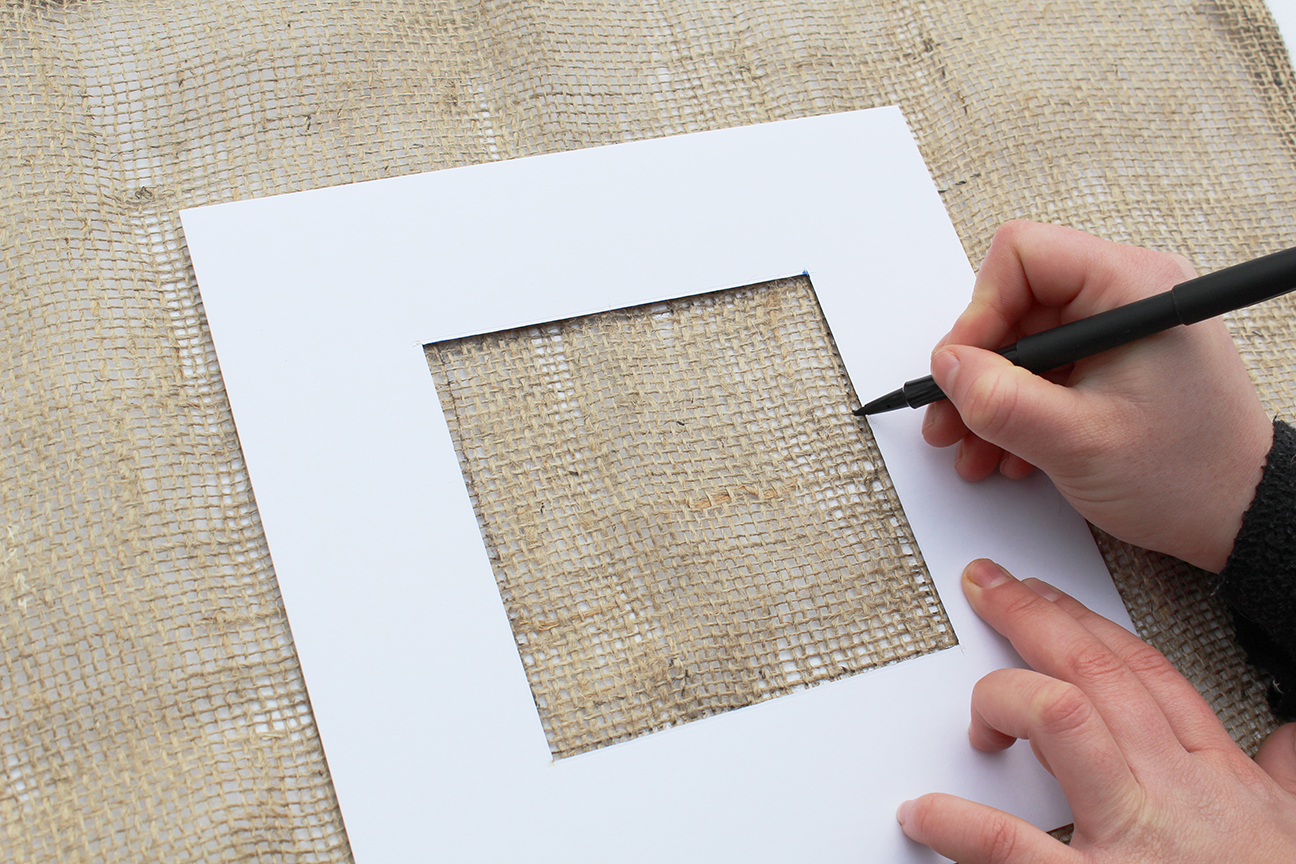
Step 2: Draw Around Mount
Step 3: Draw a Second Square
- You will now have a small square drawn onto your hessian. This is the space that you will be rag rugging. The next step is to draw a second square onto the hessian, 5cm away from each side of your initial square.
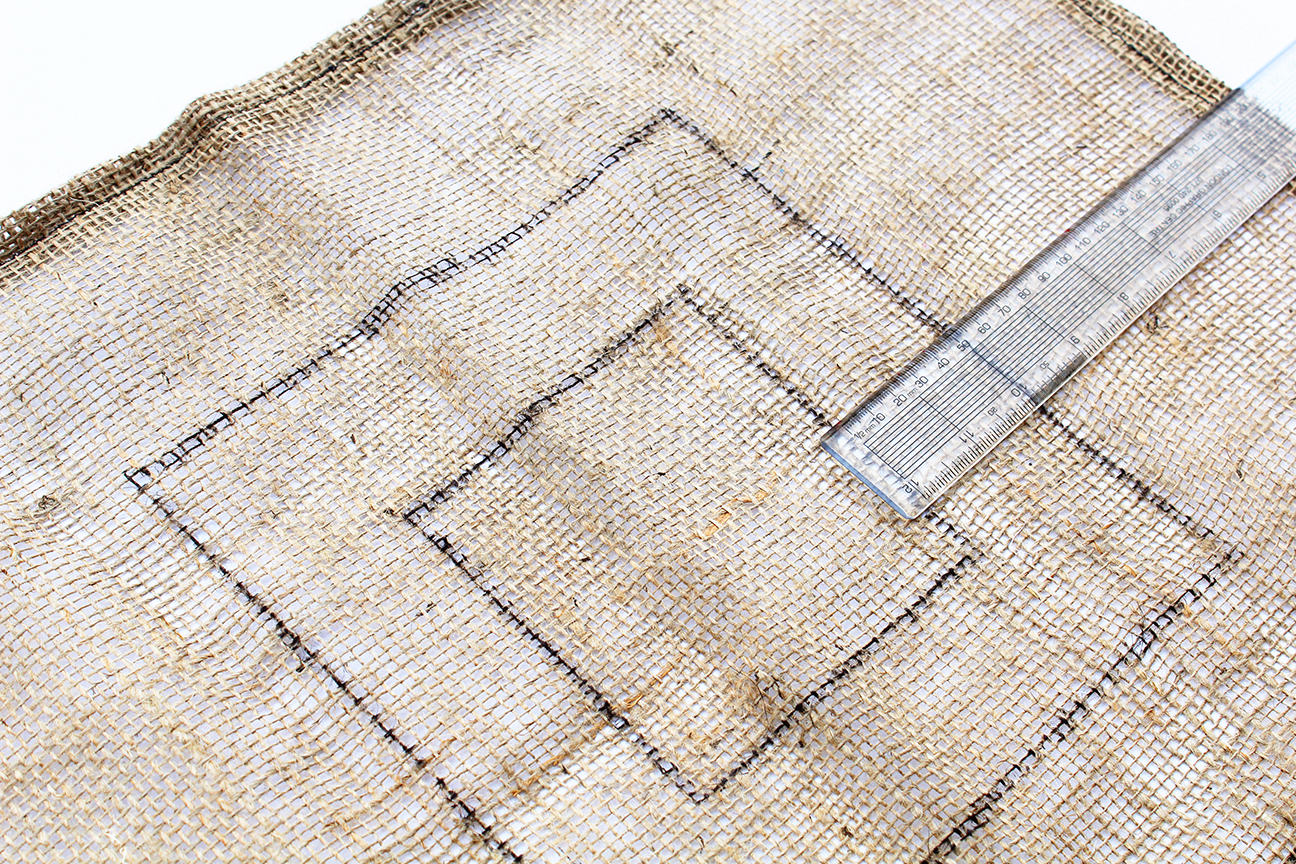
Step 3: Draw second square
Step 4: Sew Along the Squares
- Now sew along both squares using a stitch that will hold both the horizontal and vertical strands of the hessian in place. This will help your work to stay intact later and creates less mess.
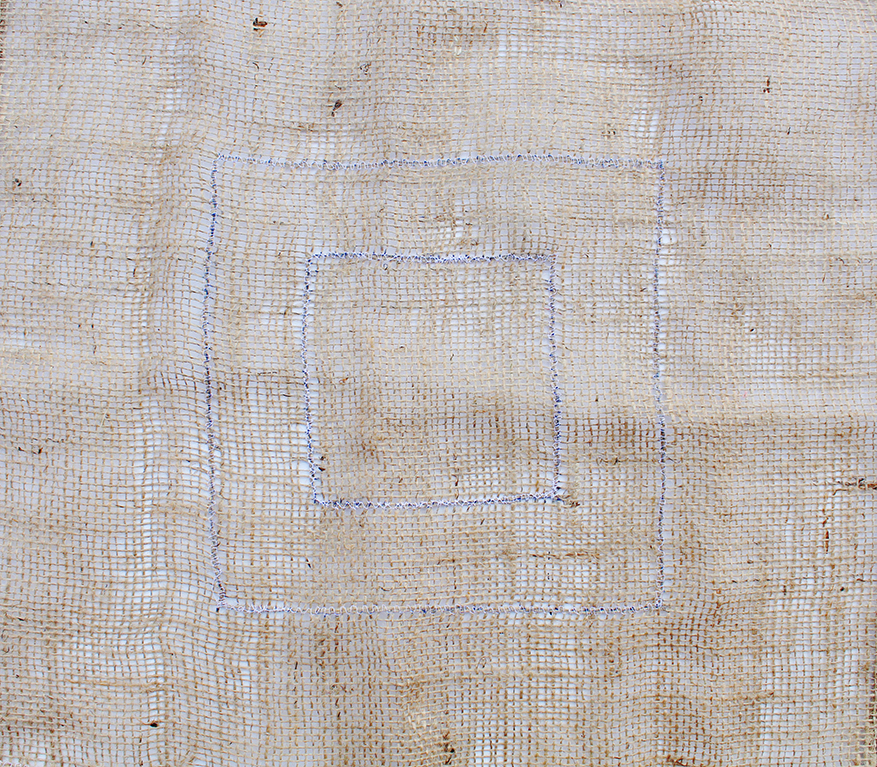
Step 4: Sew Along the Squares
Step 5: Draw your pattern
- If you have a specific pattern in mind, it’s best at this stage to sketch is directly onto the hessian. Make sure you stay within the stitched smaller square.
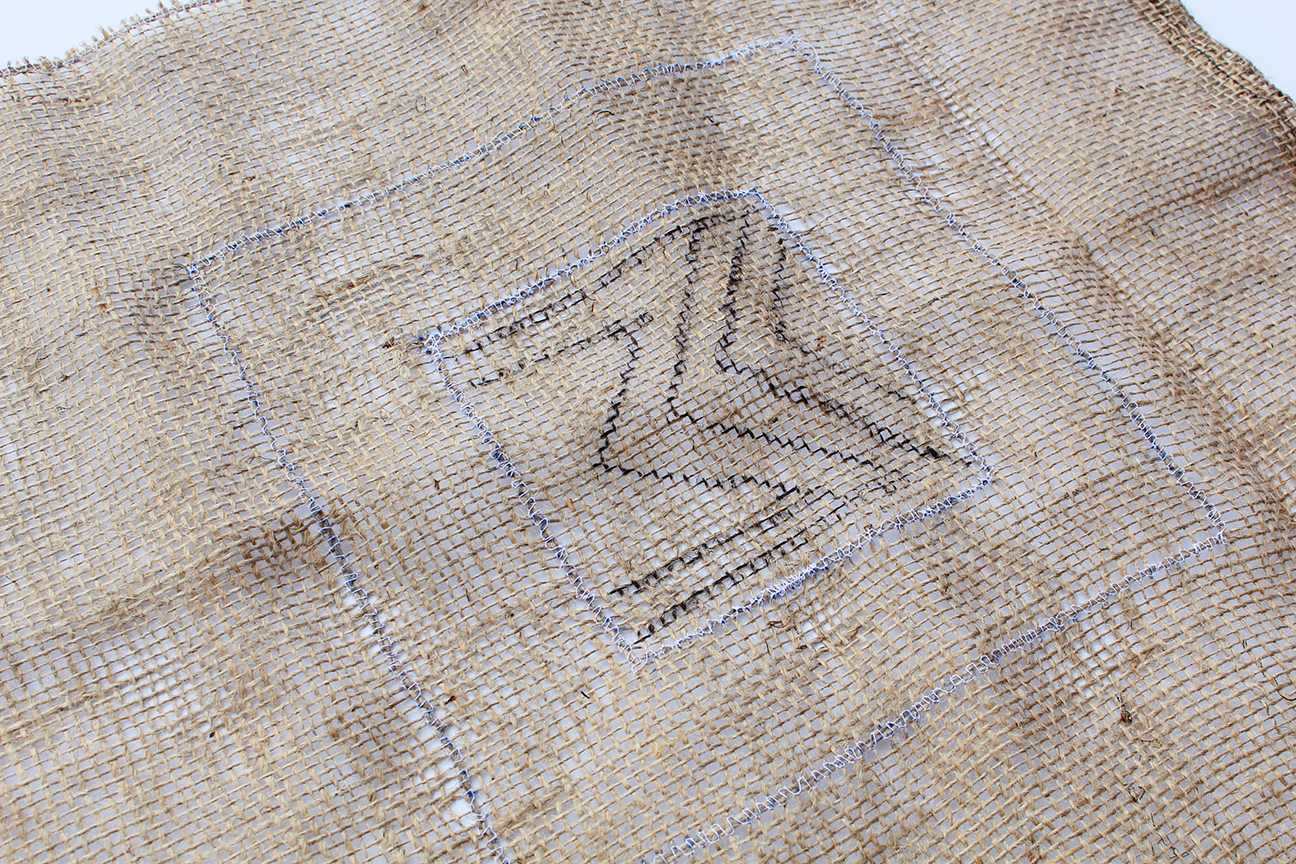
Step 5: Draw your Design onto the Hessian
Step 6: Cut your fabric into strips
- Gather together your fabric and choose the piece you would like to start with. You will be able to start this colour anywhere within the smaller square. Cut the fabric into long strips approximately 2-3cm in width. The longer the strips, the better but don’t worry if they’re a little wonky. A handy tutorial on how to cut up strips faster can be found here: http://ragged-life.com/cut-material-into-strips/
- As the area we are looking to fill isn’t that large, you won’t need to cut up a whole t-shirt, only what you need.
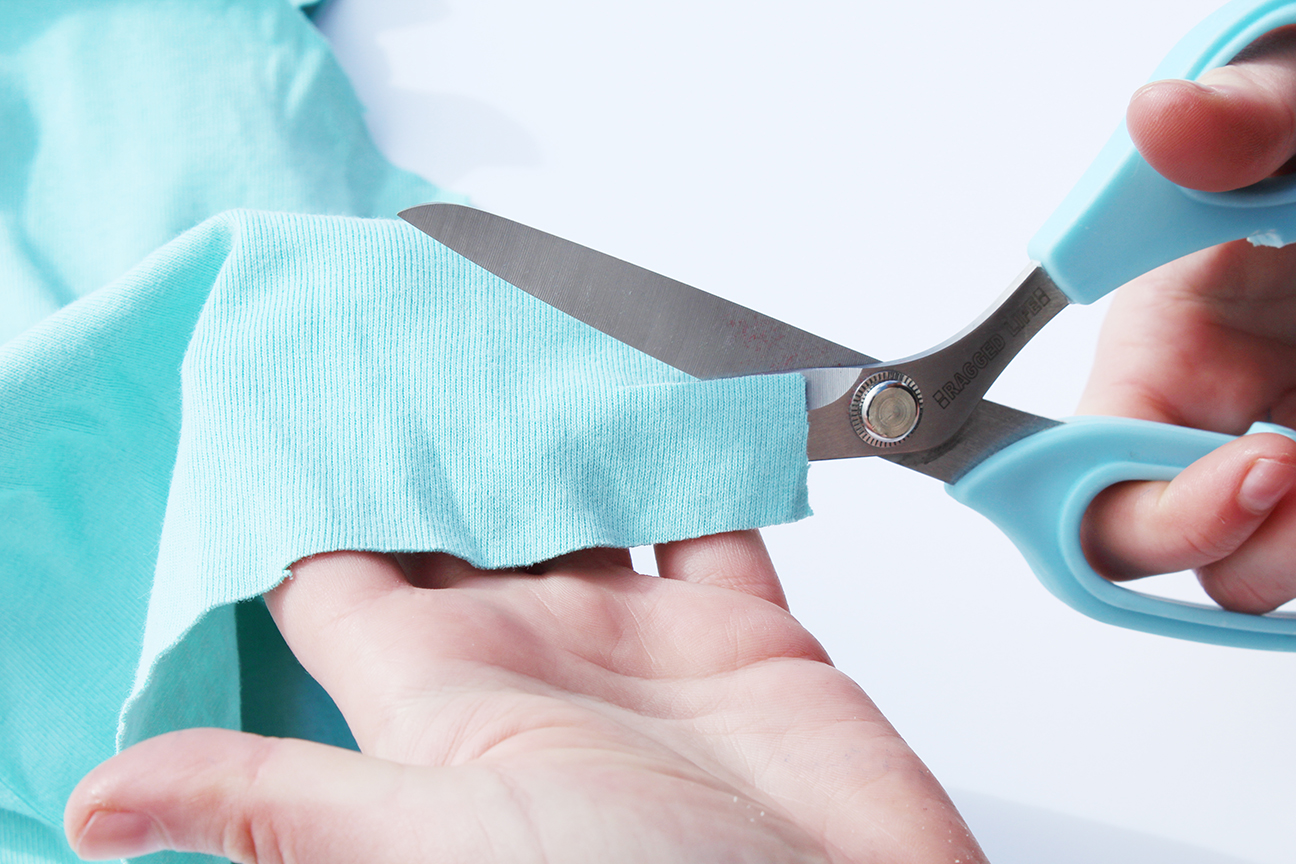
Step 6: Cut Fabric into Strips
Tips:
- You can even use the seams of t-shirts in your rag rug. If you plan to do this just make sure that you cut any strip including a seam slightly narrower than normal (we recommend 1.5-2cm) to compensate for the thickness of the seam.
- If your chosen material looks likely to fray then cutting it on the bias (at an angle) will lessen the risk of fraying.
Step 7: Hold the hook and strip of fabric
- Now you’re ready to get rag rugging! Pick up your latch hook with your main hand and hold one of the strips of fabric in your other hand.
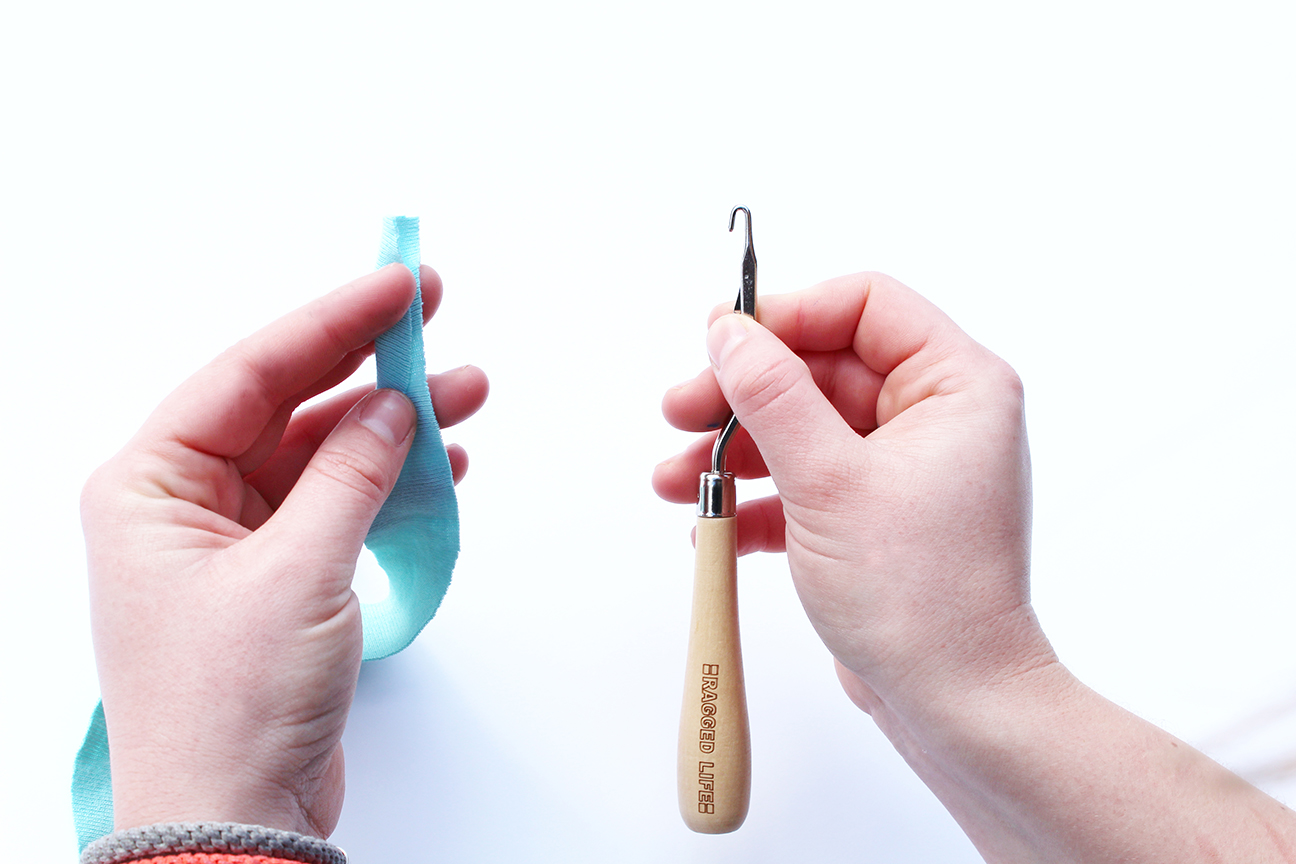
Step 7: Hold hook and strip
Step 8: Pull one end up through the hessian
- Hold the strip of fabric under the hessian where you would like to start and use the hook (inserting front to back) to pull one end of the strip up through the hessian. You should have approximately 1.5cm of the strip poking upwards.
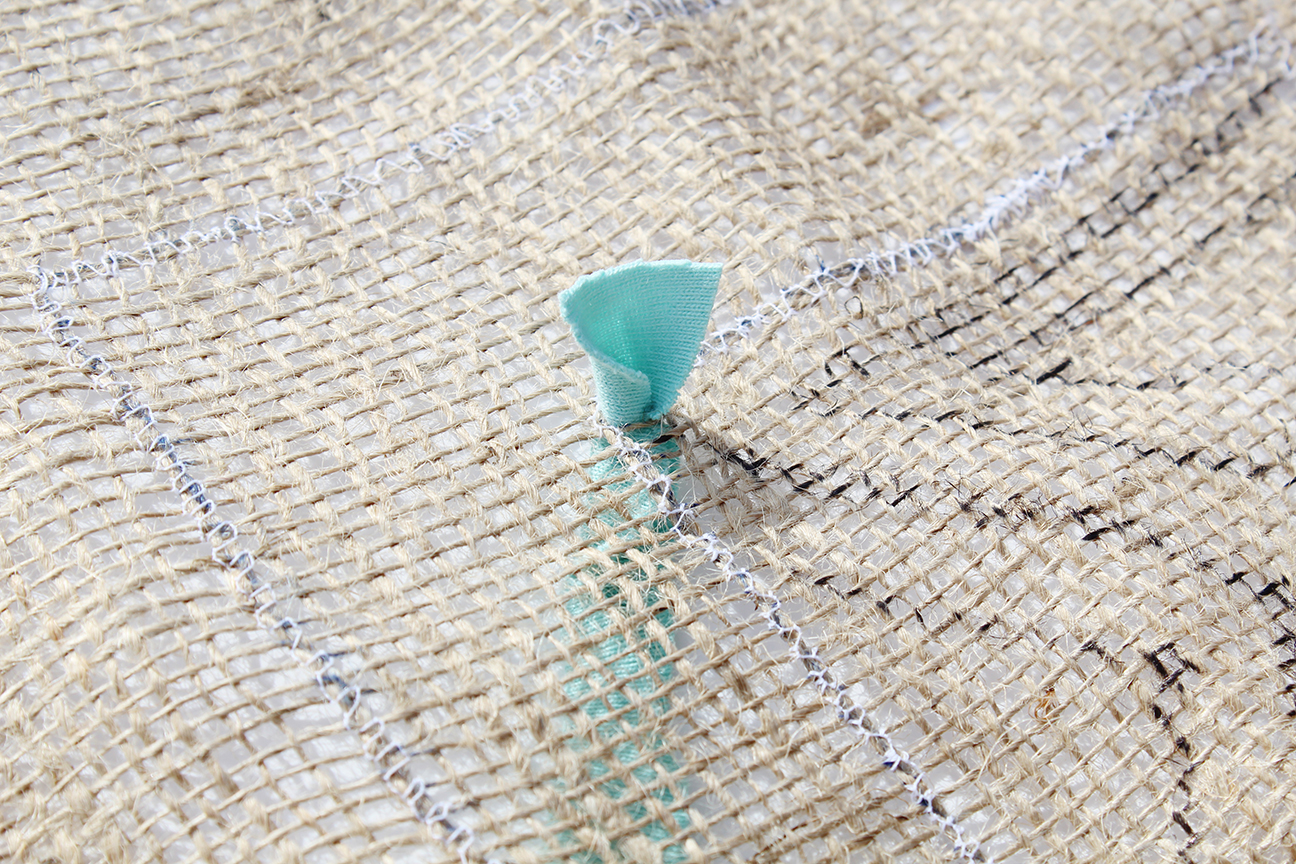
Step 8: Pull one end of the strip up through the hessian
Step 9: Pull loop up through next hole
- Insert your hook (from front to back) into the next hole and pull a loop up through the hessian. Make sure that the end of the strip does not get pulled through when you do this. The new loop should be the same height as the initial end (so roughly 1.5cm high).
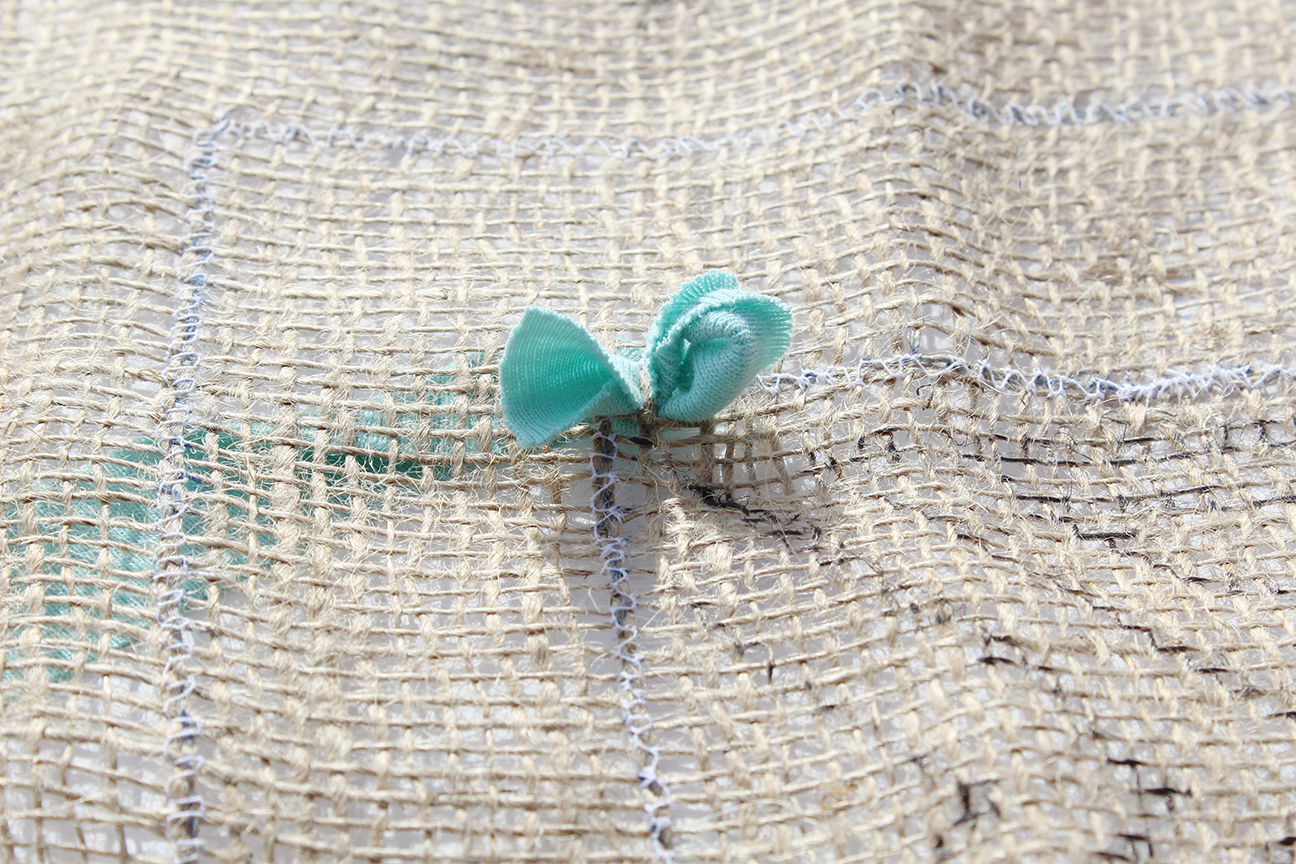
Step 9: Pull loop up through next hole
Step 10: Create a row of loops
- Missing out a hole in the hessian, insert your hook into the next hole and repeat step 9 until you have a row of loops in the direction you would like to go.

Step 10: Create a row of loops
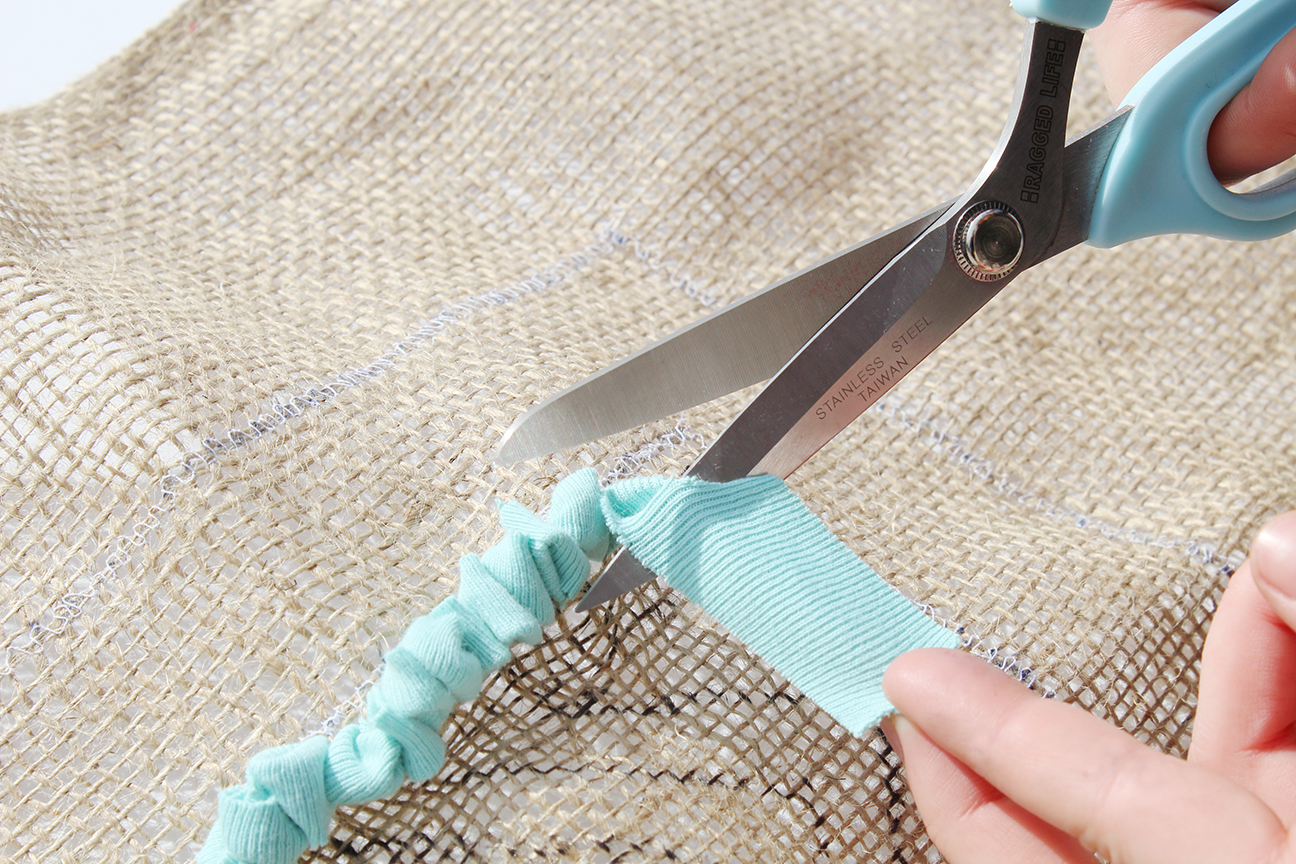
Step 11: Pull end of strip up & cut level
- When you’re reaching the end of a strip or would like to start another piece of fabric, pull the end of the strip up through the hessian and cut to 1.5cm. All the ends of the strips of fabric should be pointing upwards in the end as this secures the fabric in place.
Step 10: Create a row of loops
Step 12: Rag rug the entire square
- You can then begin a new strip wherever you would like and should continue rag rugging until your small square is full. It should look something like below. If you would like to see a video on how to do loopy rag rugging please see our handy tutorial here: http://ragged-life.com/how-to-make-a-loopy-rag-rug/
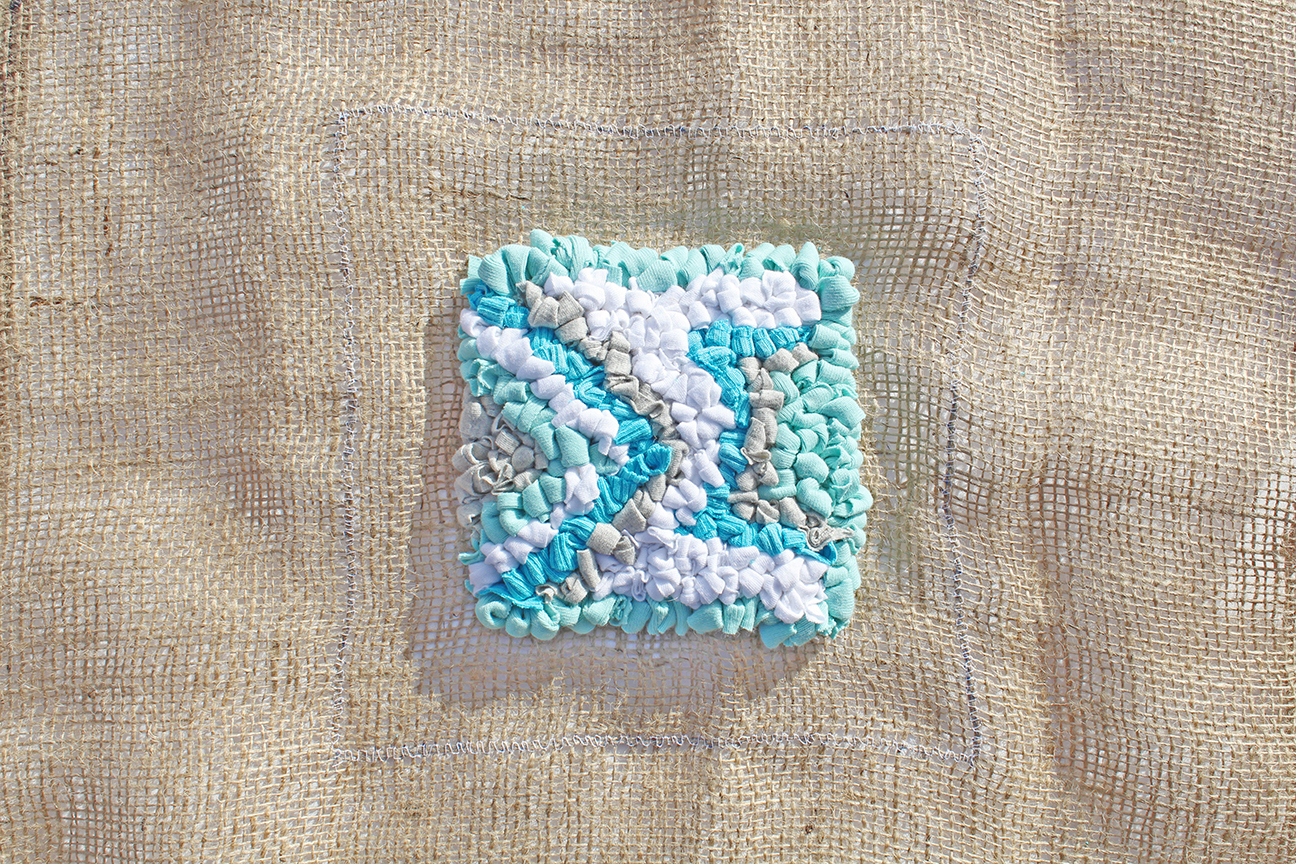
Step 12: Rag rug the entire square
Step 13: Cut off the excess hessian
- You’re now ready to put your art into its frame. Cut carefully around the edge of the larger square with your everyday scissors (hessian blunts fabric scissors) until there is no excess hessian.
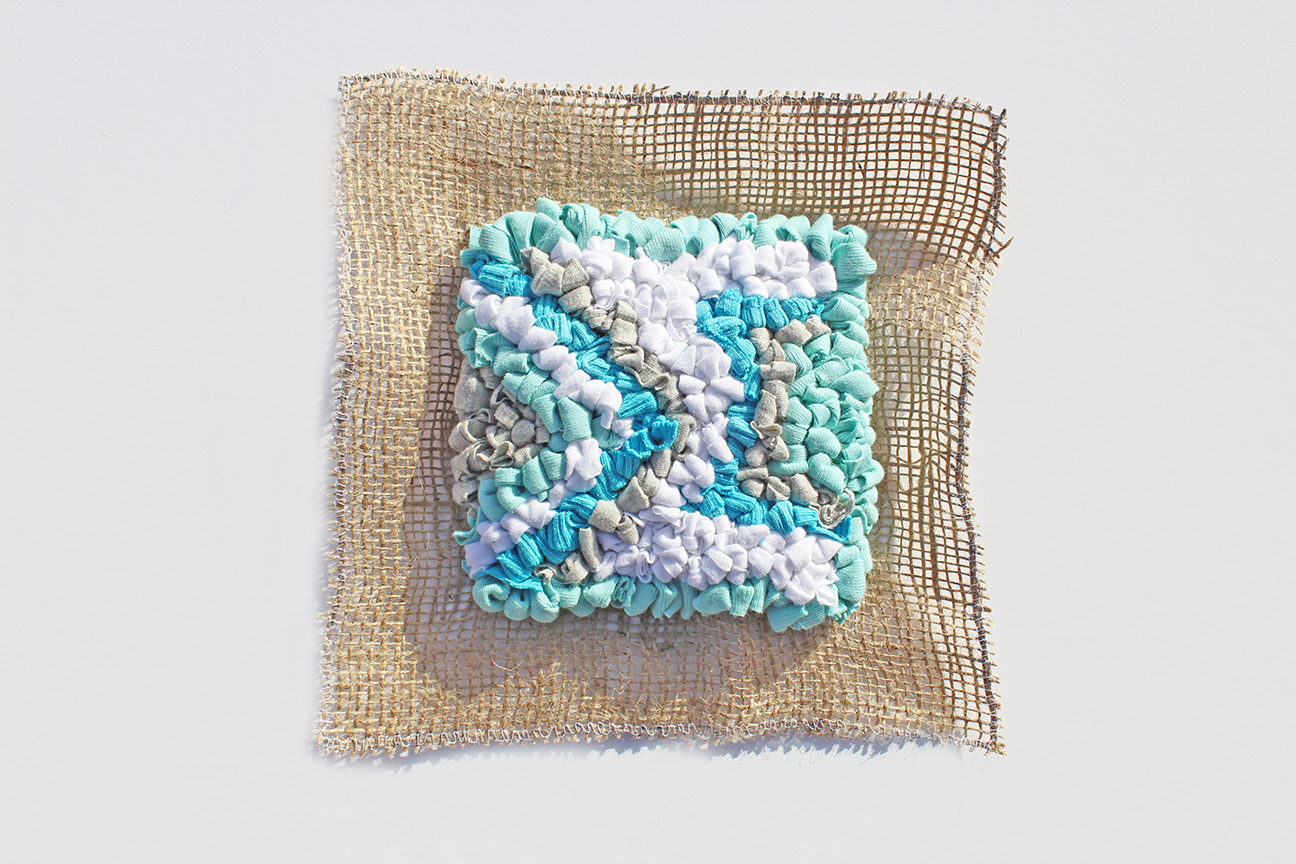
Step 13: Cut off the excess hessian
Step 14: Place art in frame
- Place the rag rug art into the frame, pressing it through the mount.
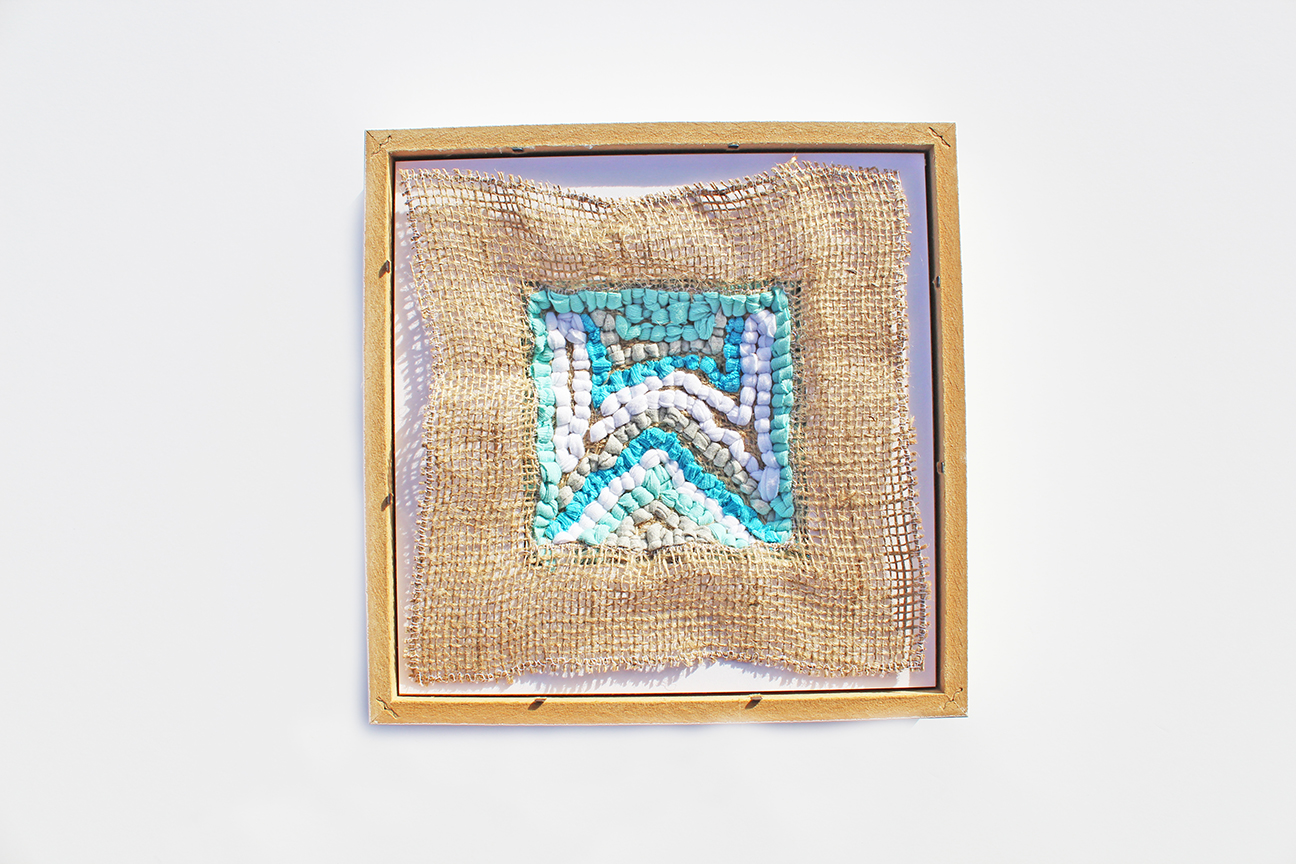
Step 14: Place art in frame
And voila – one piece of Framed Rag Rug Art!

Framed Rag Rug Art
We hope you enjoyed this tutorial and for more inspiration, tips and rag rug projects, check out our other how to articles.