Sunday, 11th November, 2018 marks the centenary of the end of World War I. Every year, I make myself a poppy or buy one if I haven’t had the time. This small gesture is a simple reminder of what people like my great-grandparents went through and I feel pretty passionately that it’s something we should never forget. Well, this year, I thought that it would be nice to mark the occasion with a series of rag rug poppies. Below is the rag rug brooch that I’ll be wearing on Remembrance Sunday and I’ve also included some photos of a rag rug poppy wreath we made. If you would like to make a rag rug poppy for yourself then simply follow the step by step instructions below. Do send me over a photo if you decide to make one 🙂 Good luck!
How to Make a Rag Rug Poppy Brooch:
Rag rug flowers are a fun project for any rag rug beginner, as they’re one of the quickest rag rug projects to make. It takes just thirty minutes to make one small rag rug poppy, which means they can get pretty addictive to make. The basic techniques used in this project can be adapted to make any rag rug flower… daisies, sunflowers, hydrangeas… pretty much anything… all you need to do is vary the size and petal shape. Let’s get started.
What you will need:
- Latch Hook
- Rag Rug Spring Tool (optional)
- Hessian (at least 8 x 8cm in size with 10 holes per inch weave).
- Rag Rug Scissors or Fabric Scissors
- Red Fabric (stiffer fabrics such as chiffon and lining fabric work best)
- Black Fabric (any fabric will work for this, but I use soft, thin materials)
- Accent Fabric (optional, but I used black with gold)
- Marker Pen
- Sewing Machine
- Small Piece of Felt or Thick Backing Fabric (the colour of this doesn’t matter as it won’t be on show)
- Glue Gun
- Circular Brooch Back (I generally use these)
Rag Rug Poppy Design Tips:
Before getting started on your rag rug poppy, here are a few of our design tips:
- To help the poppy petals to keep their shape, use a relatively stiff fabric for the red material (e.g. lining fabric, silk and cotton), rather than floppy fabrics (e.g. jersey, fleece and lace).
- Even though the hemmed circle looks pretty tiny when you first look at it, don’t be tempted to make it any bigger. The poppy will turn out much larger than it may appear.
- If the black centre of your poppy doesn’t show up as much as you would like, glue gun or sew a few petals back to expose the centre more.
How to make a Rag Rug Poppy:
Step 1: Making sure to leave at least 2cm of excess hessian around the circumference, use a marker pen to draw a small circle onto the hessian. I generally draw around a two pence coin or large button. Draw a slightly larger circle onto the felt or thick backing fabric and cut it out. Do not cut out the hessian circle.

The cut piece of felt or backing fabric doesn’t need to exactly circular as it won’t be on show and you can always trim it later.
Step 2: Hem along the drawn circle on the hessian using placeholder hemming stitch (a wide zig zag stitch). This will stop the hessian from falling apart when you cut the poppy out later on.
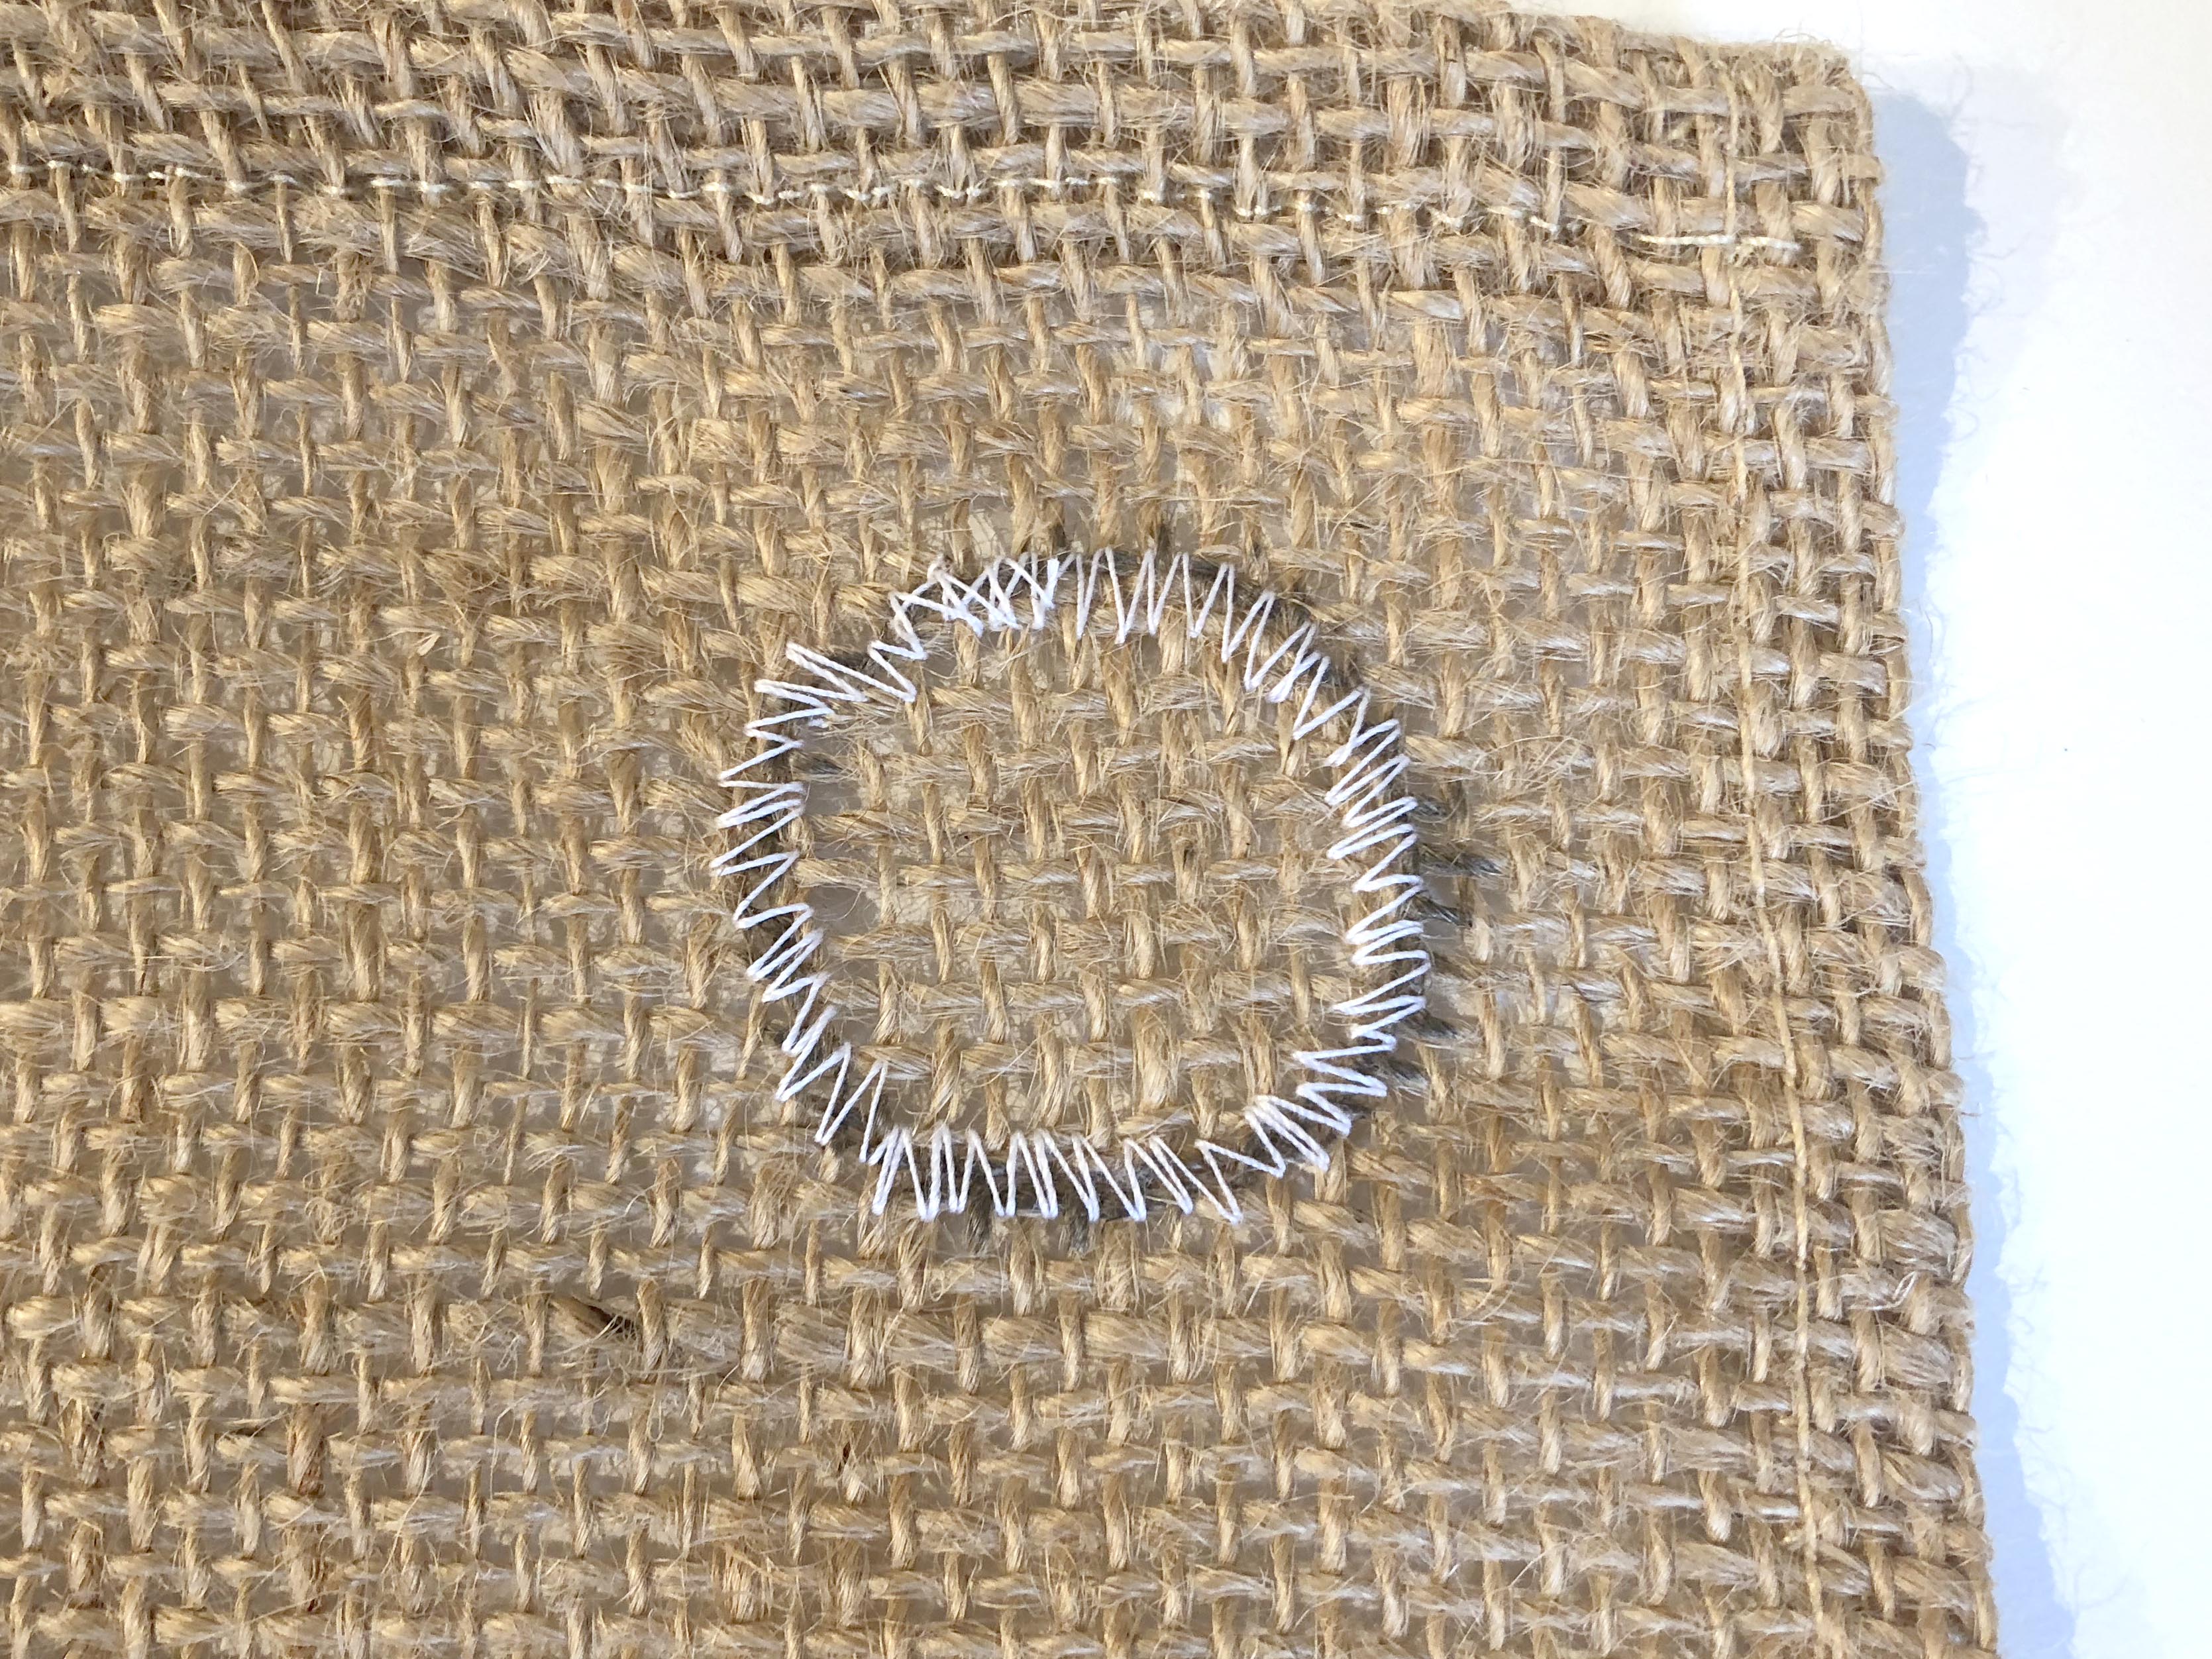
Placeholder hemming stitch
Step 3: Prepare your fabric by cutting out approximately 15 red “petals” using a figure-of-8 shape. Mine were approximately 7cm long by 4cm wide. I find that it works best to fold the fabric to cut multiple petals at once. Cut one long strip of black fabric for the centre of the poppy.
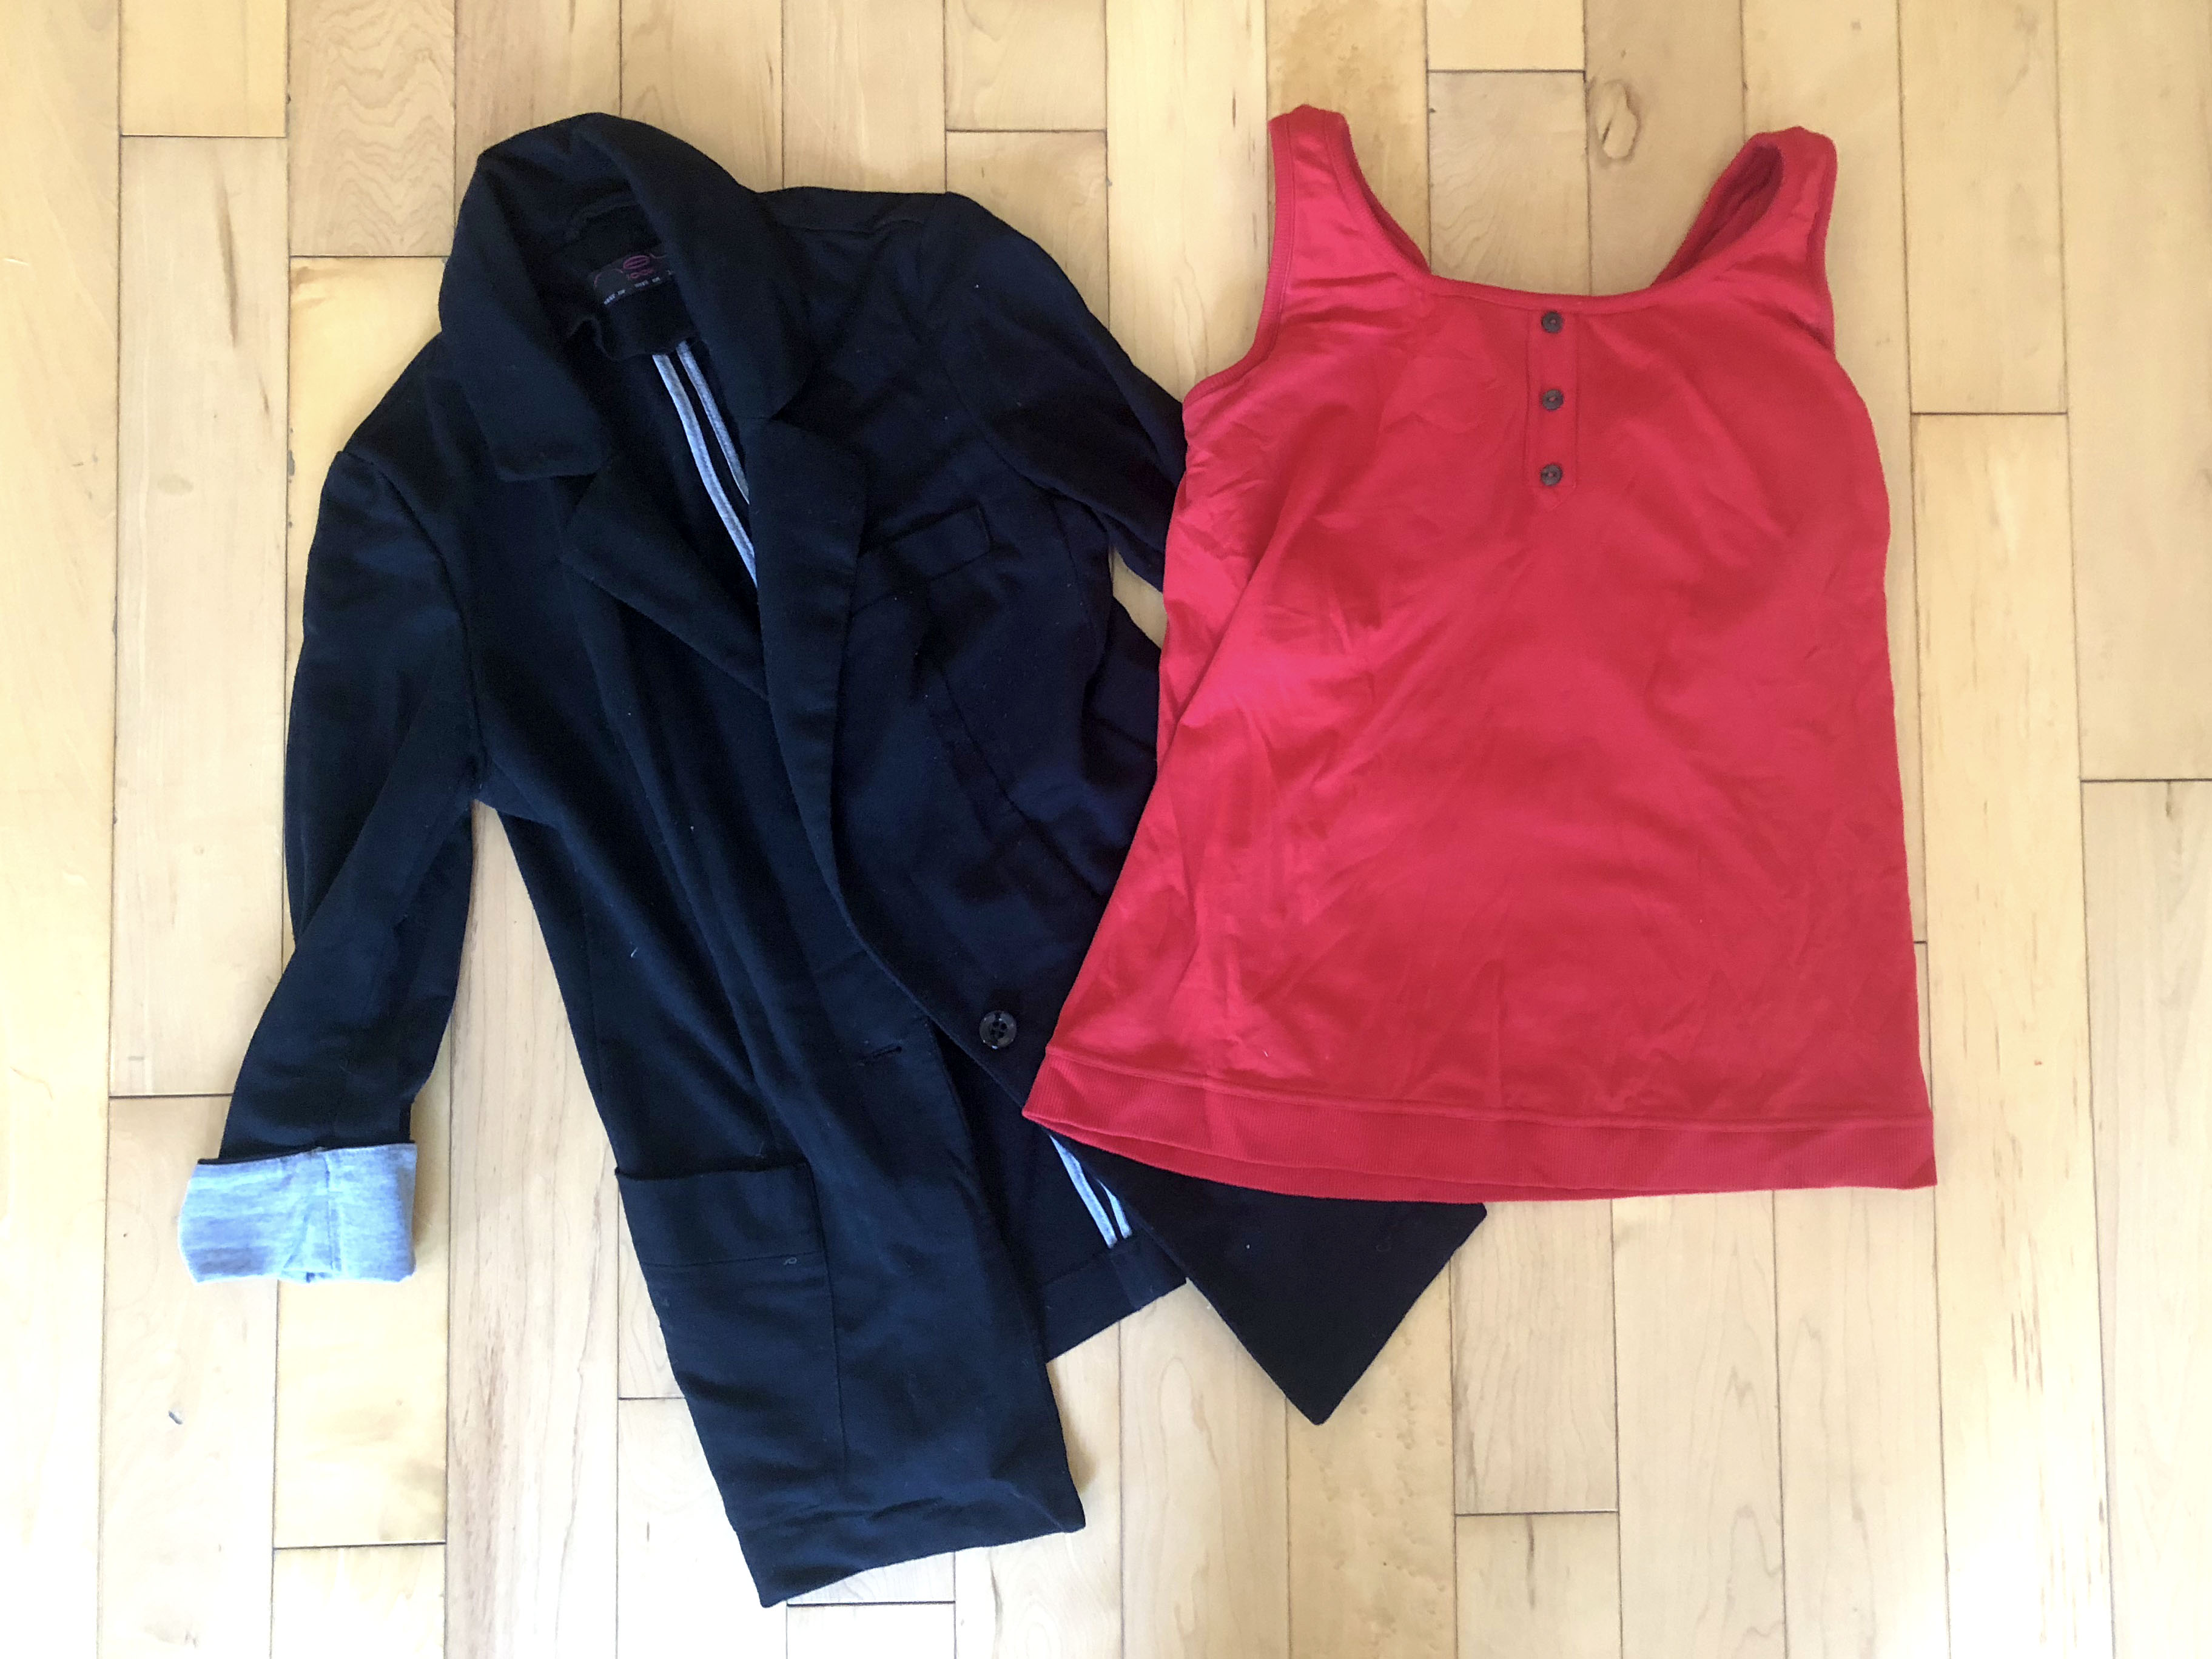
I used these items of clothing from my wardrobe to make my rag rug poppy. These items of clothing could easily make a few rag rug poppies.

Fortunately, you don’t need to do much fabric prep for this rag rug project.
Step 4: Shaggy rag rug the red “petals” inside the stitched circle of hessian using either a latch hook (see how to shaggy rag rug with a latch hook here) or a spring tool (see how to shaggy rag rug with a spring tool here). Work from the stitched hemming inwards. Keep filling the circle until there is only a very small gap left in the centre of the poppy. Rag rug very close together for the best effect.
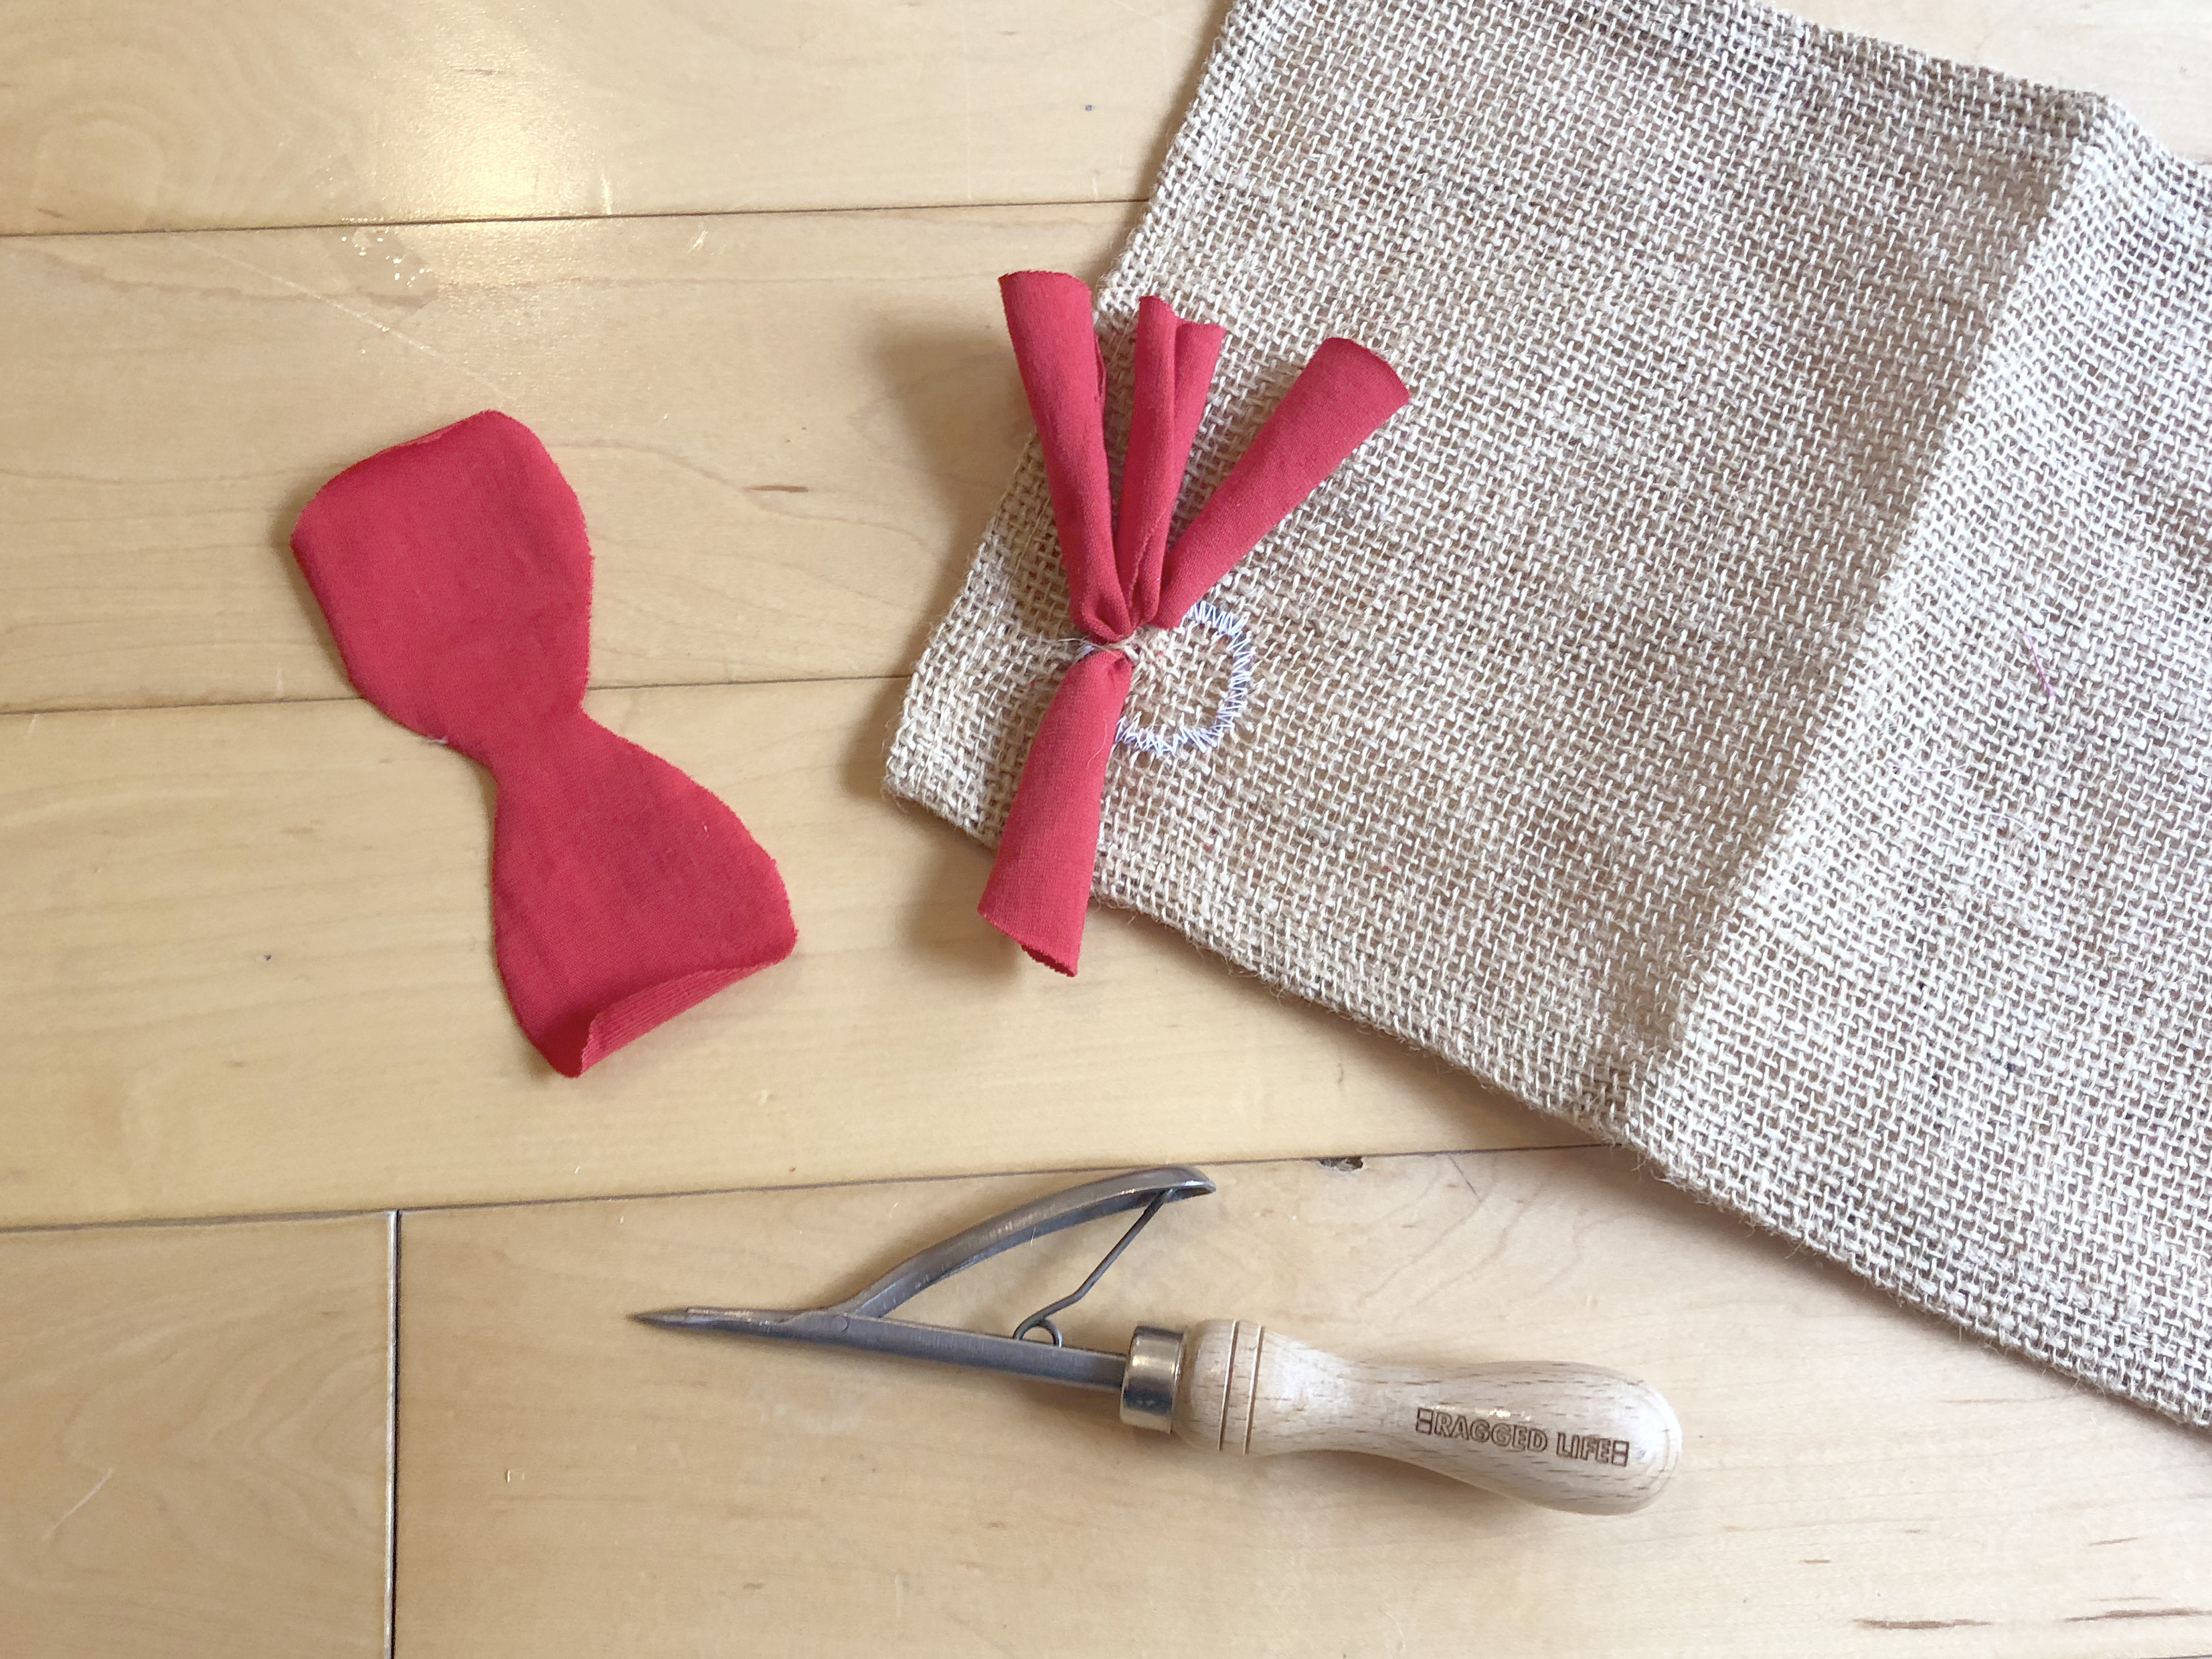
This red fabric had lots of elastic in so it tubed up when rag rugged. Stiffer fabrics would keep their shape better.
This is what the poppy looked like after two rows of shaggy rag rugging.

This is what the back of the hessian looked like at this stage. You can see how small a gap has been left in the centre.
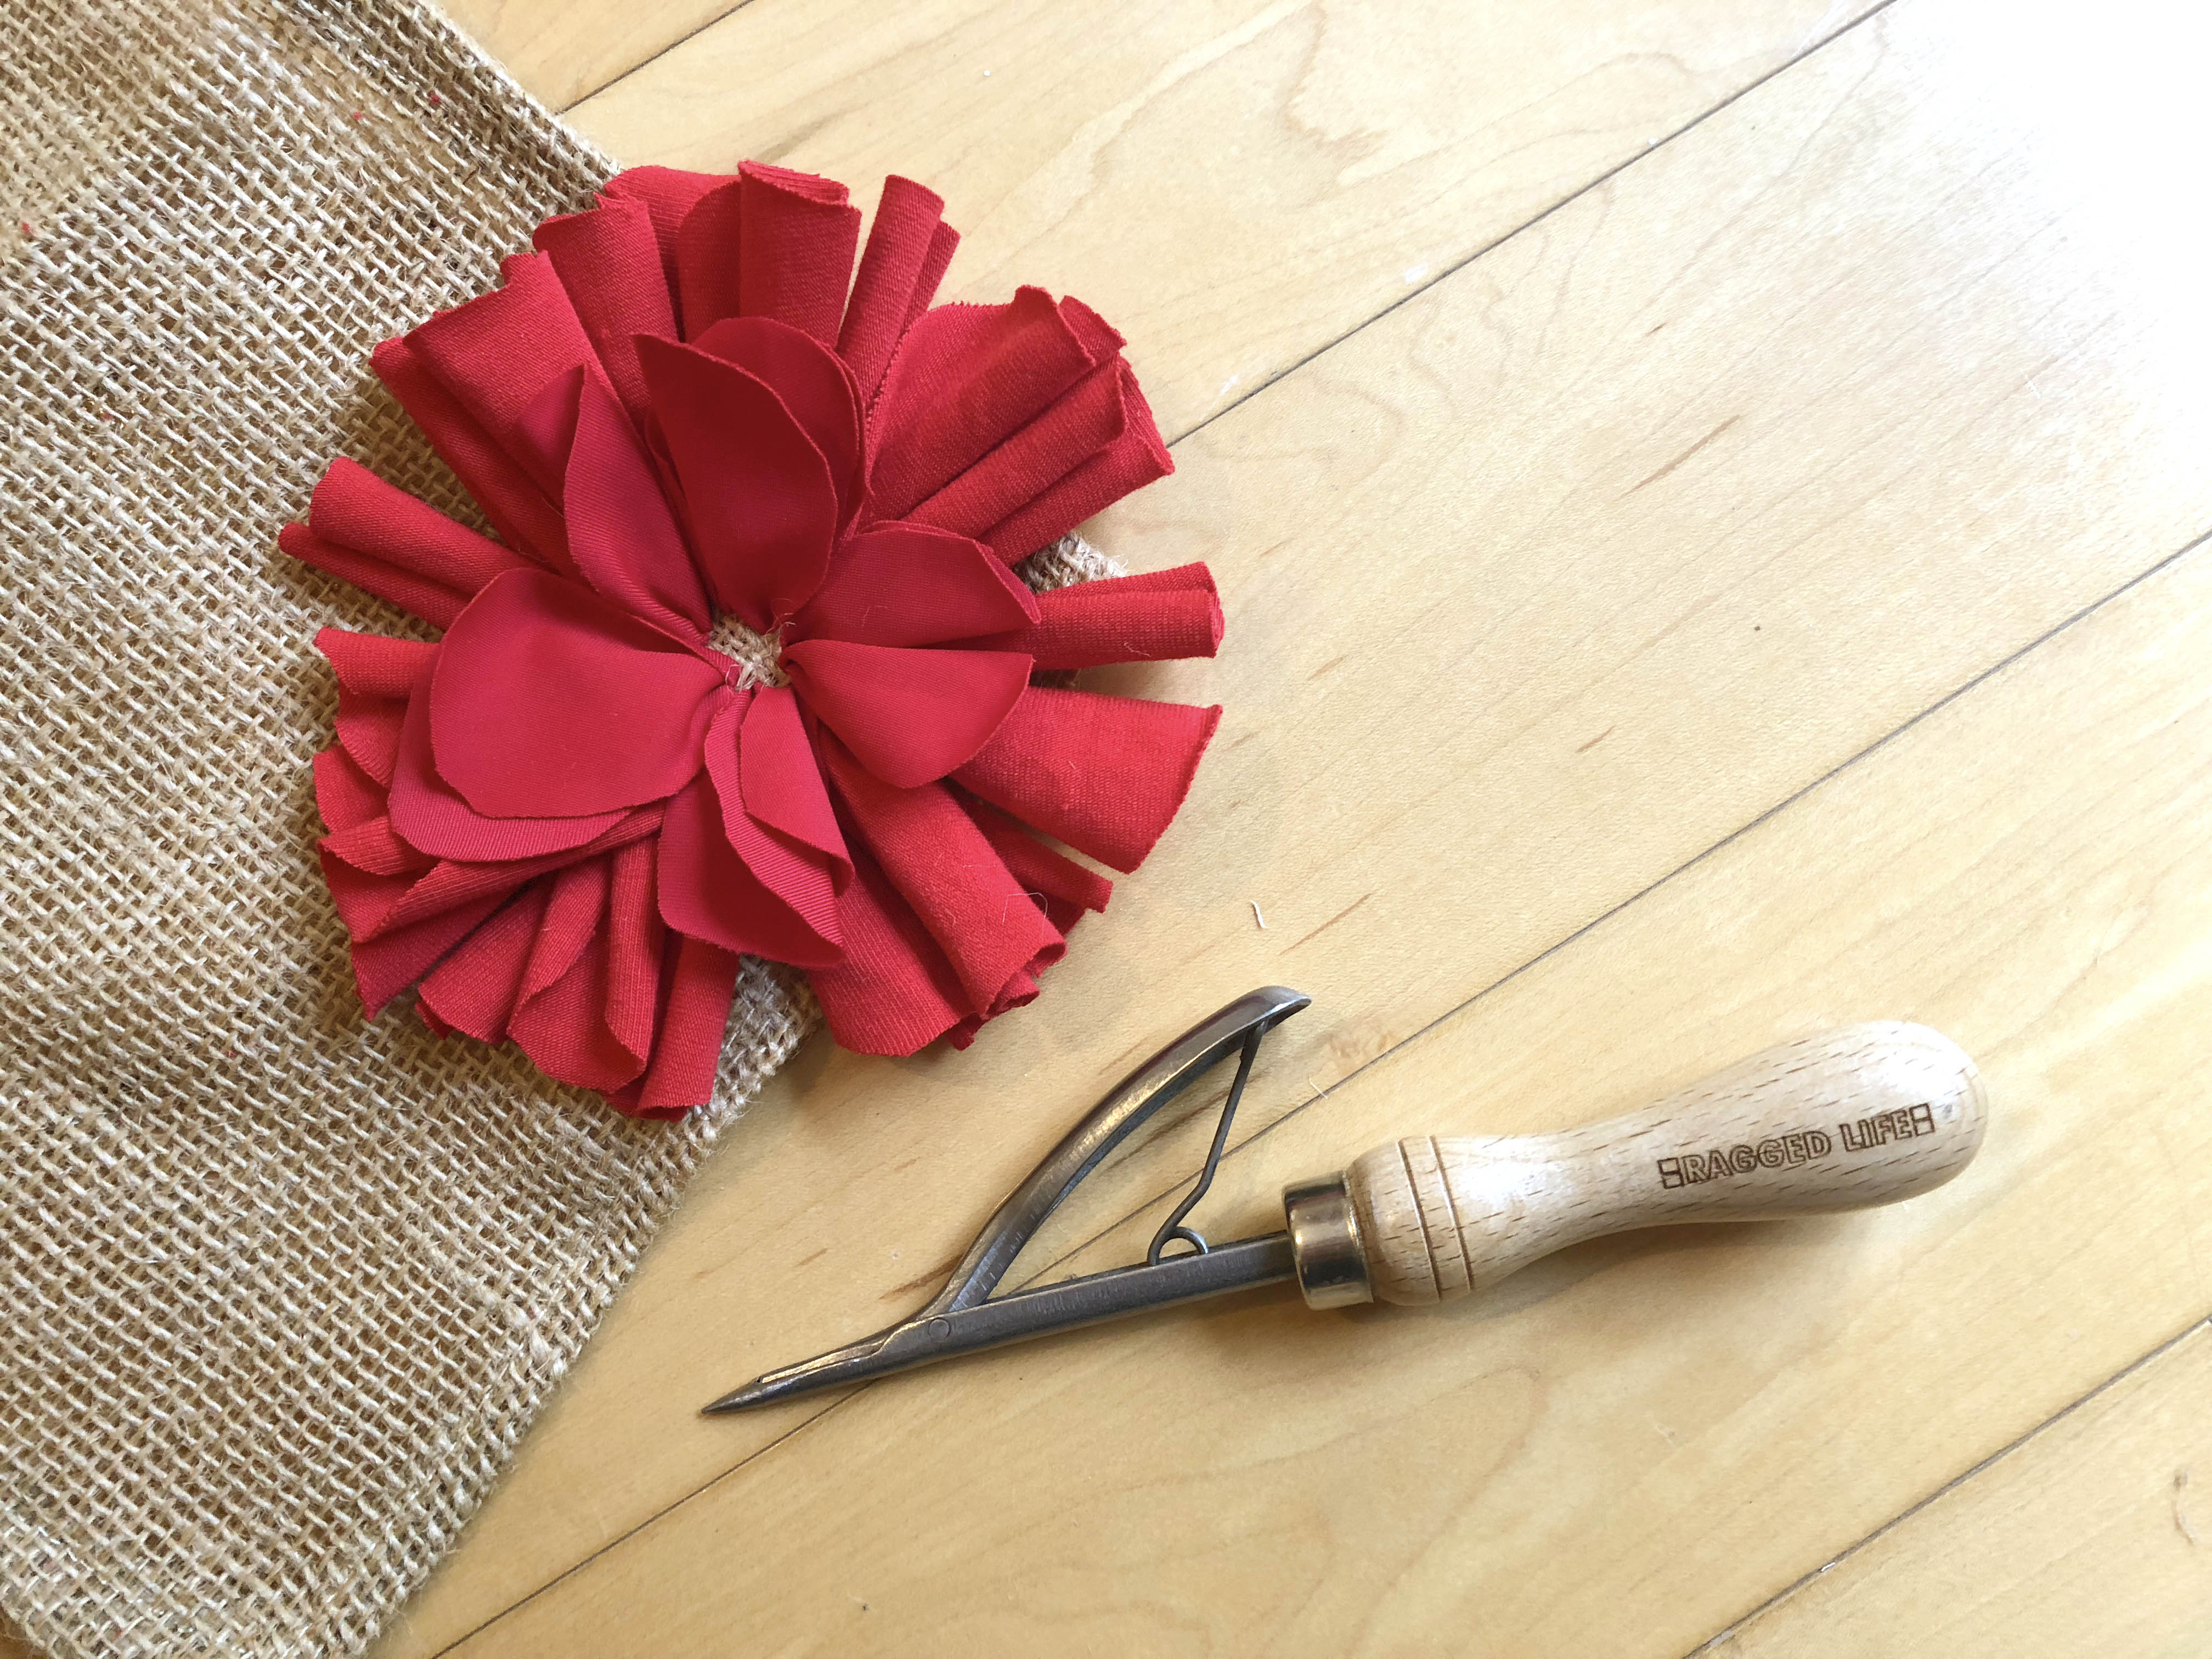
Step 5: Use your black strip to fill the centre of the circle with loopy rag rugging. Your loops should be relatively short (less than 1cm in height) and you should pack them in tightly so that they force the red petals to fall outwards.
Loopy rag rugging always begins with a single end being brought to the front of the rag rugging.
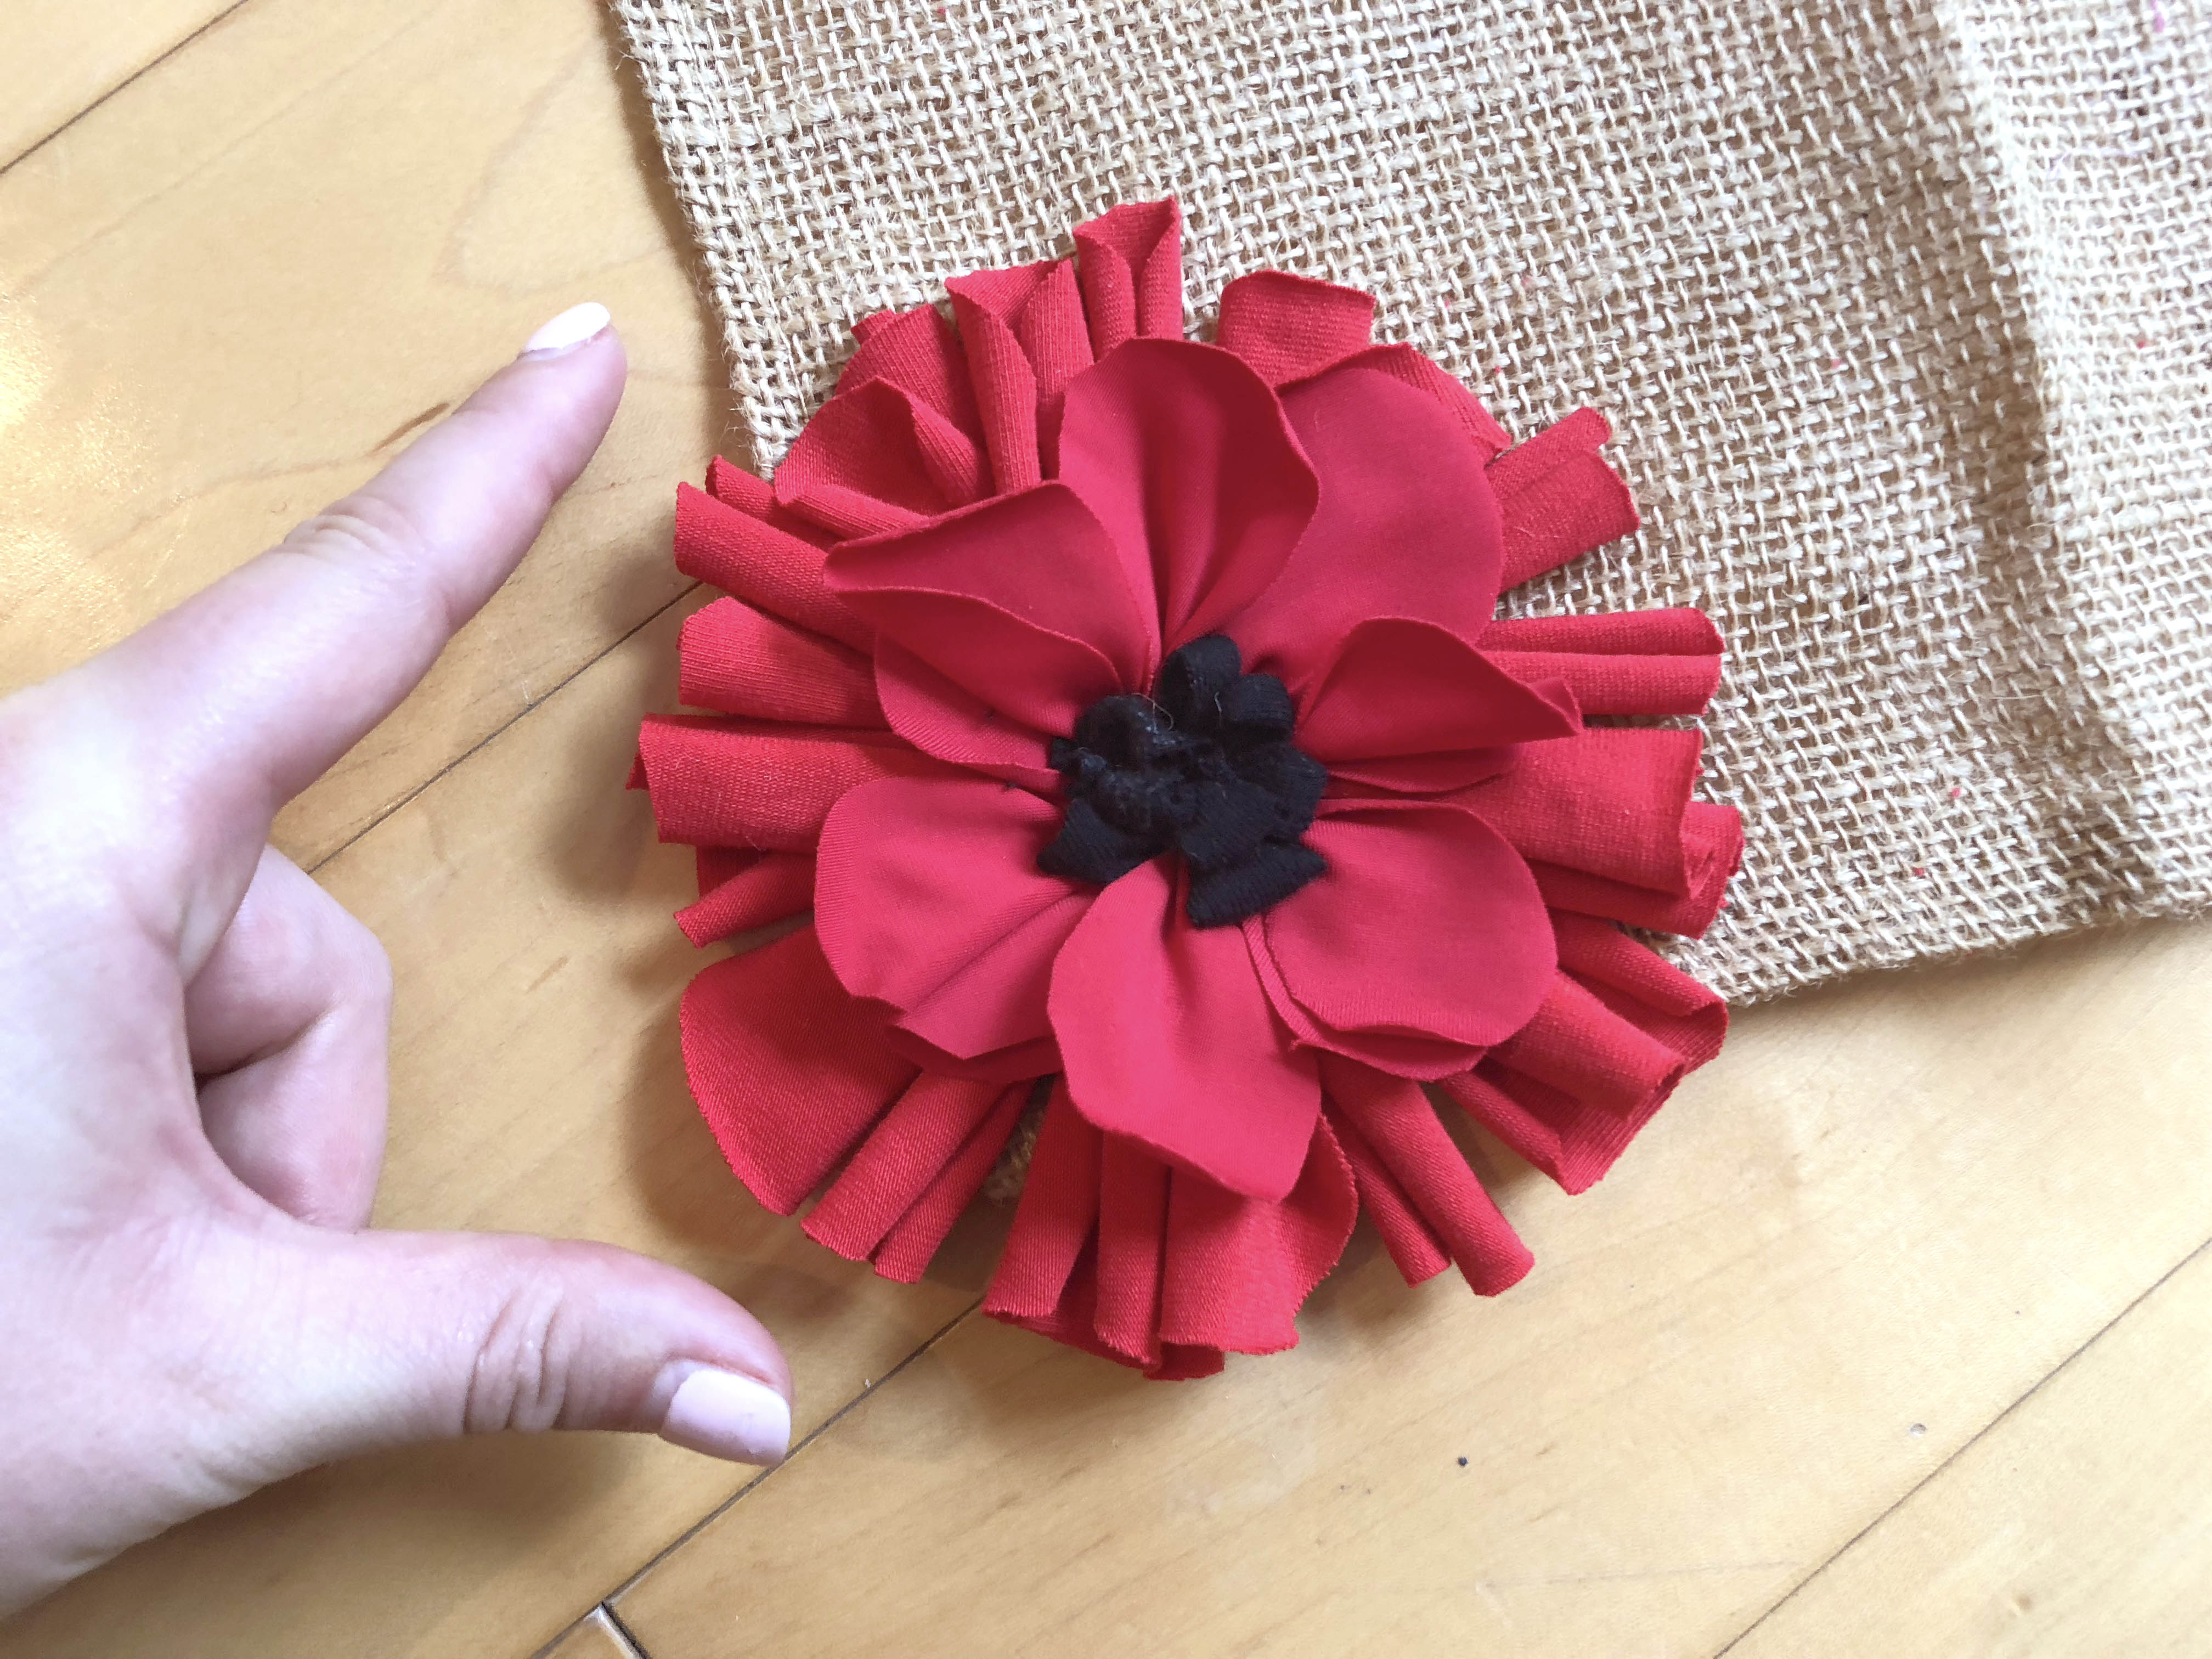
This is what the poppy should look like once the centre is filled with black loopy rag rugging. Here you can get an idea of the scale.
Here you can see how tight the rag rugging is.
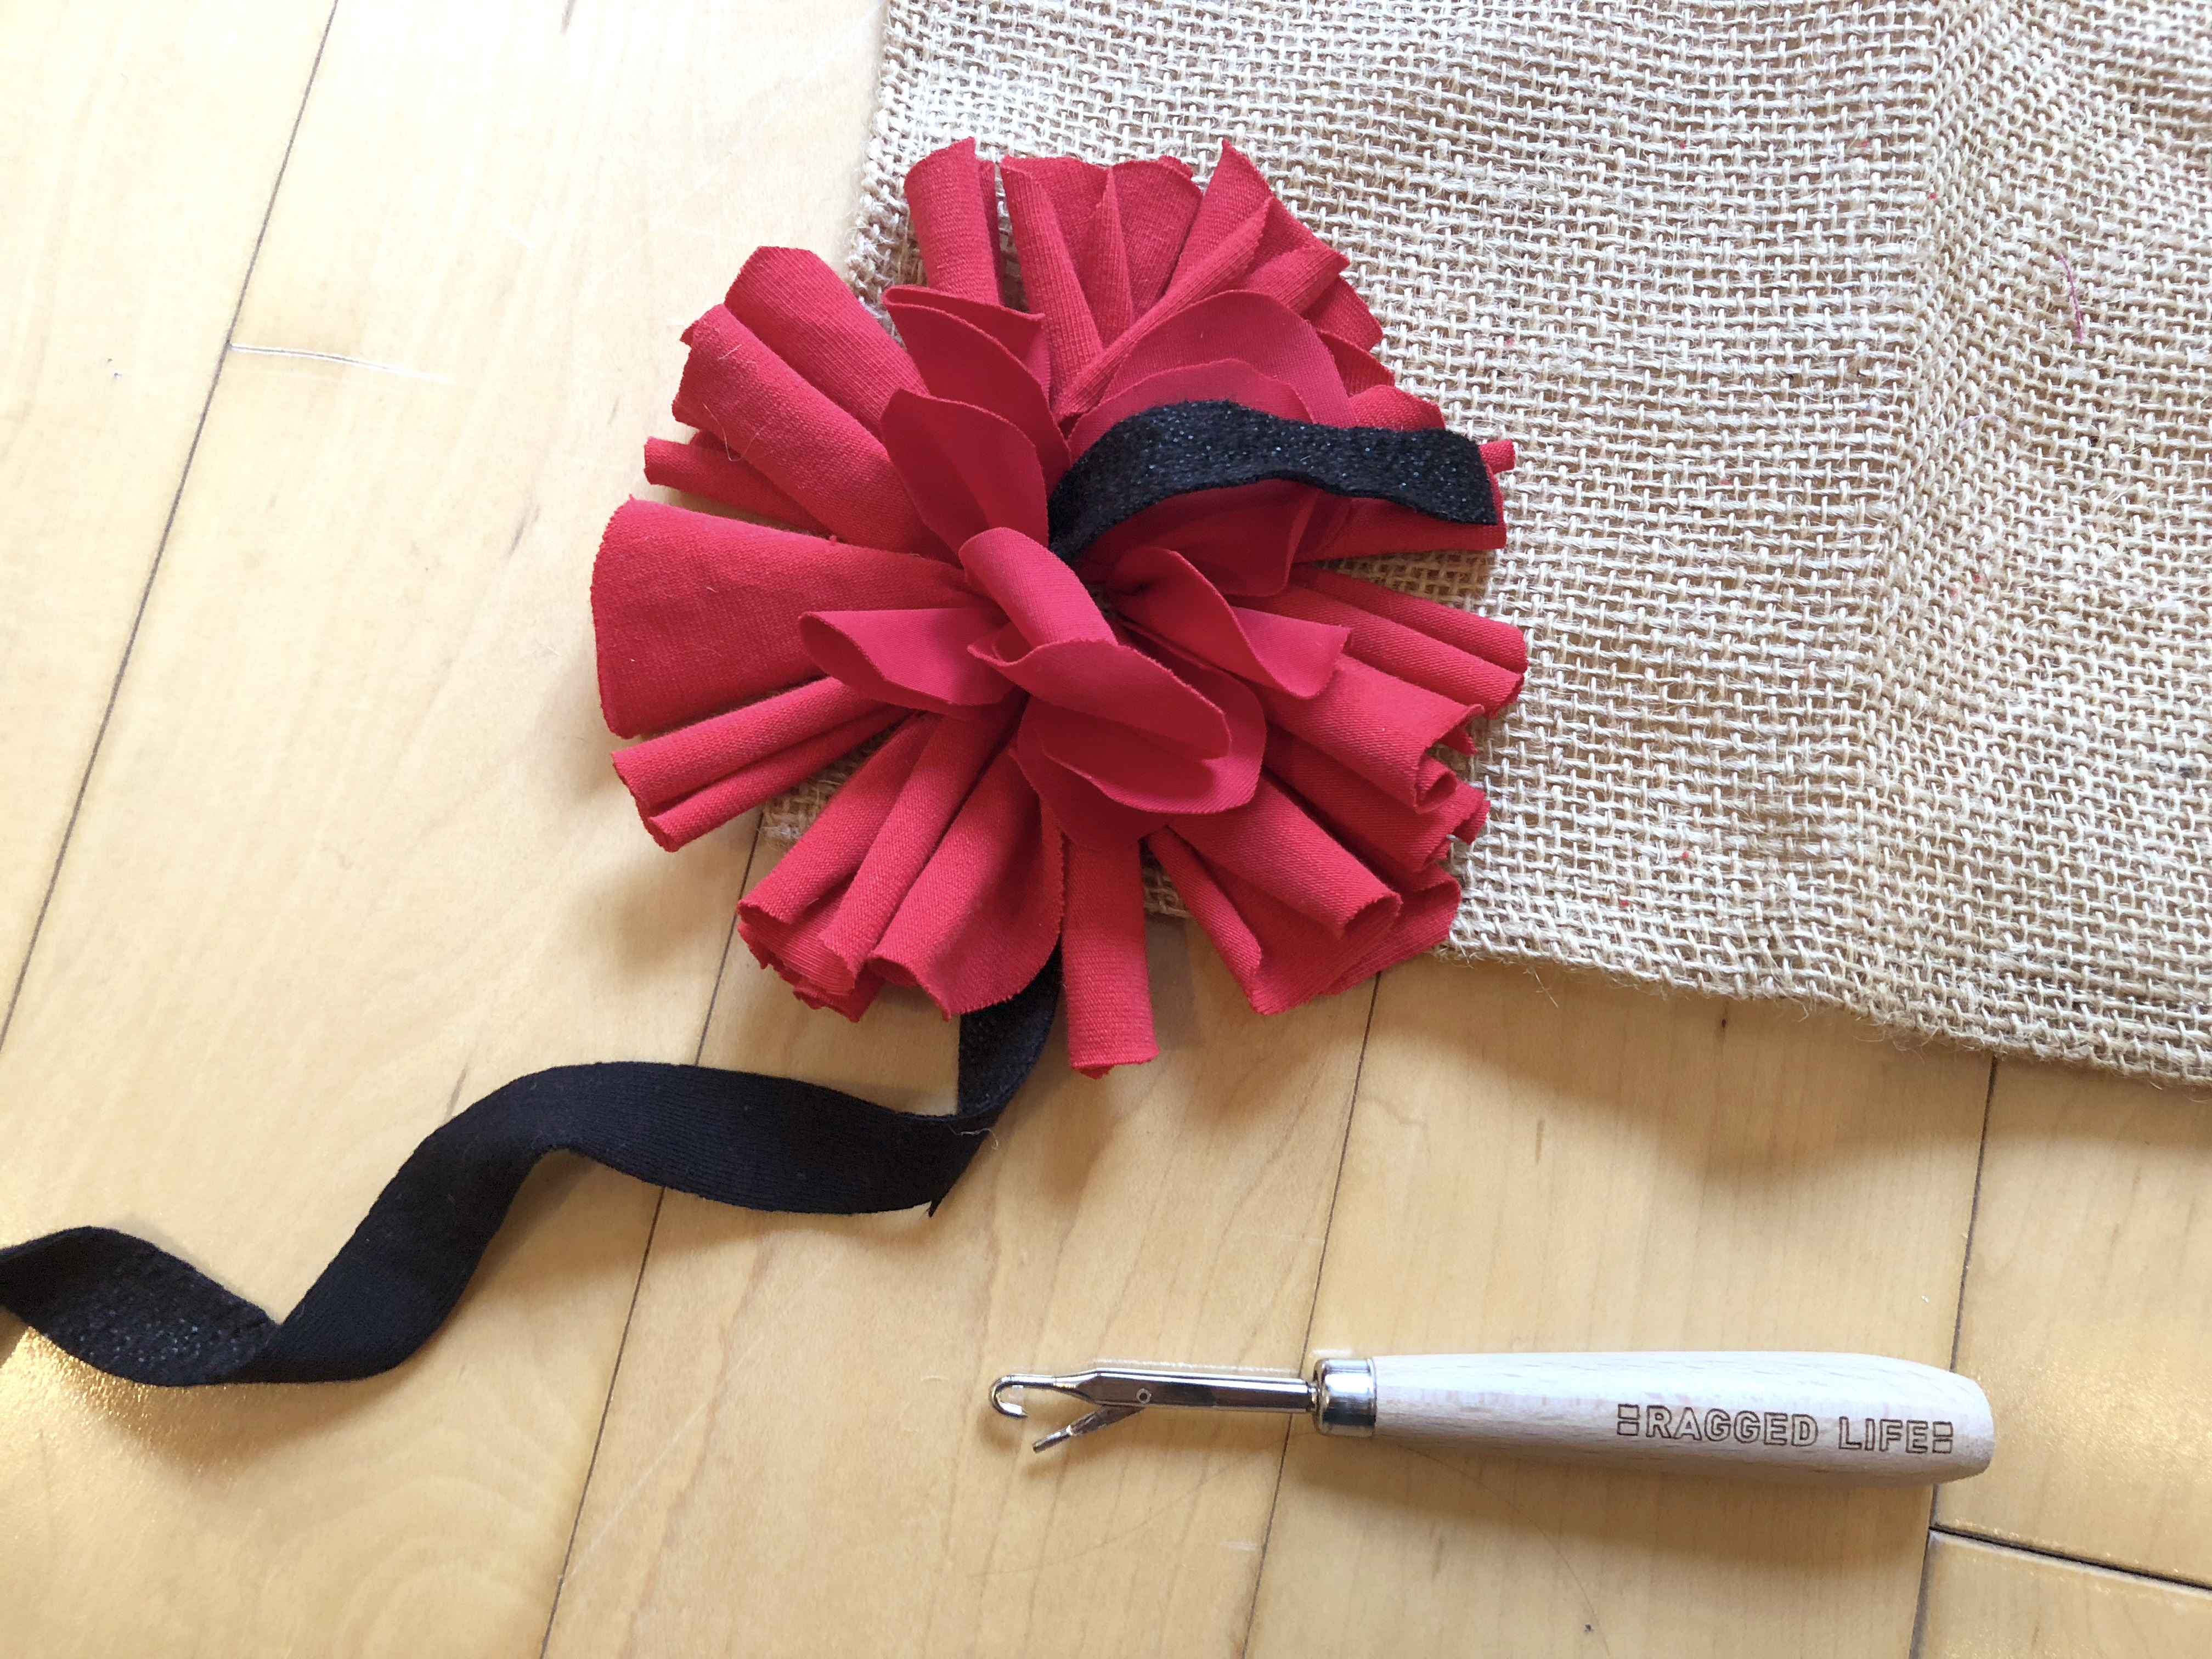
Step 6: Put any finished touches to your rag rug poppy. I generally like to loopy rag rug an accent colour into the black centre of the poppy. Don’t worry about where you prod it into the centre as you can double up into holes.
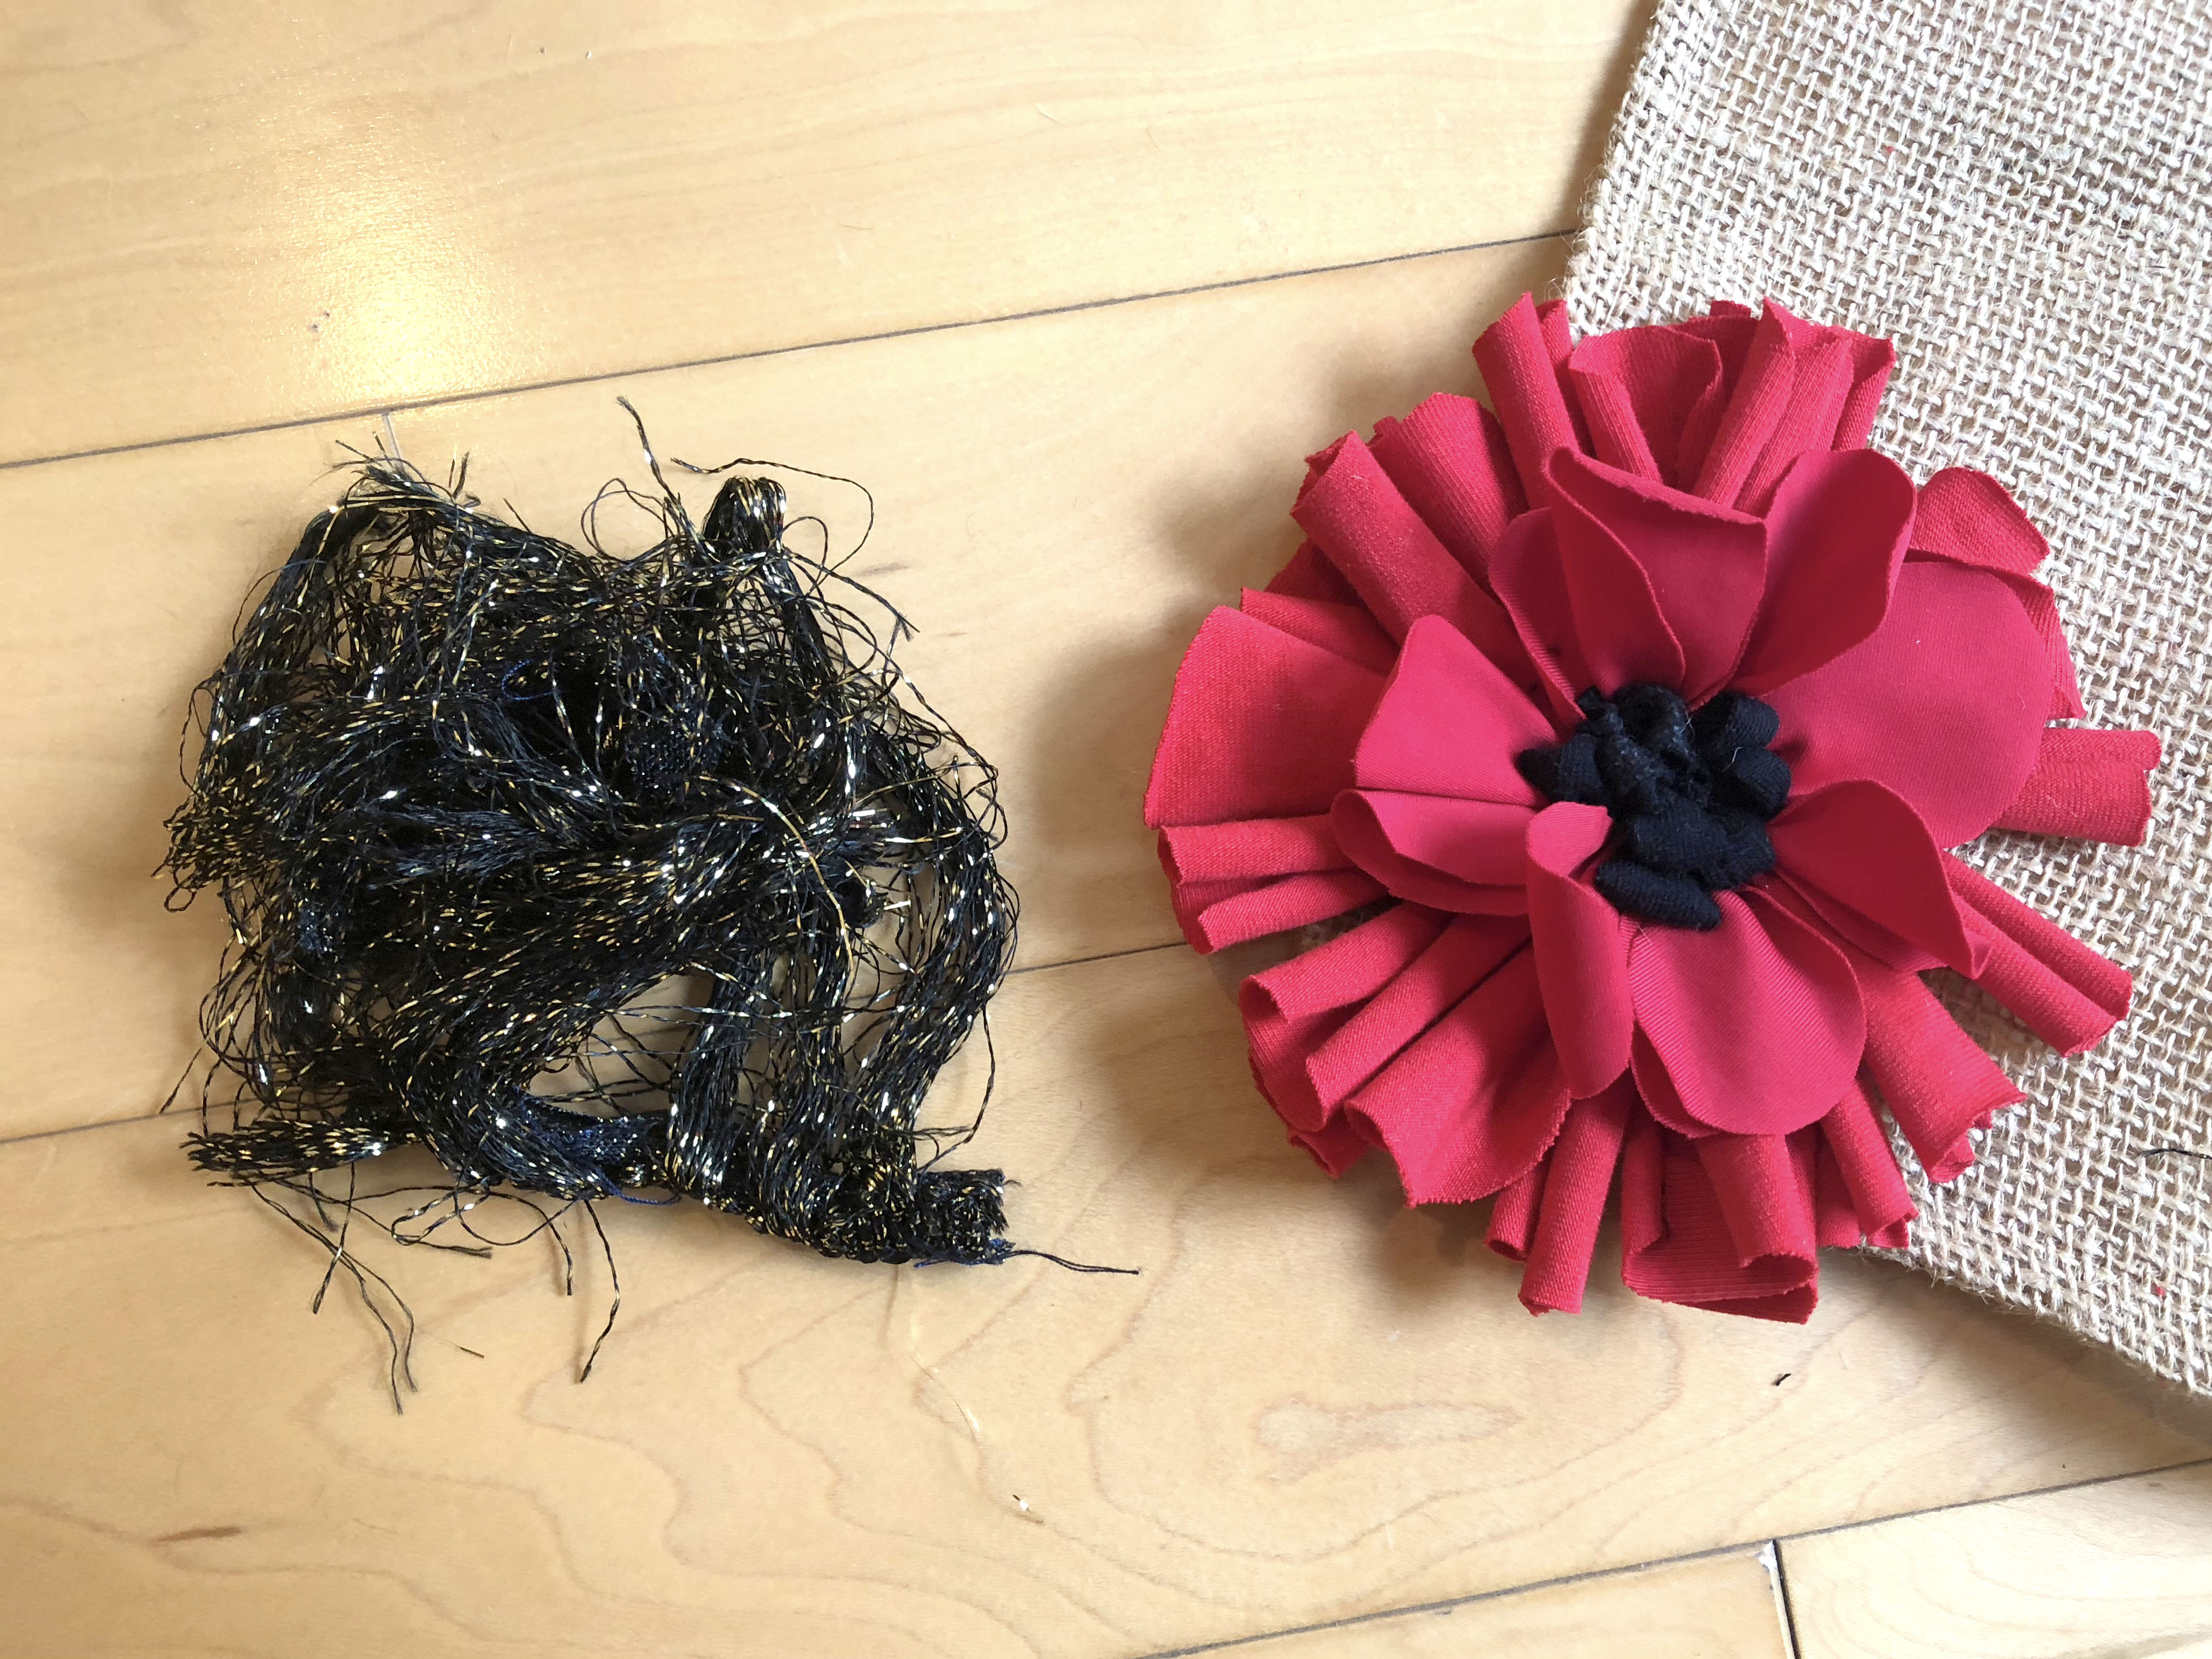
I like to use a contrast fabric to make the black centre a little less one dimensional.
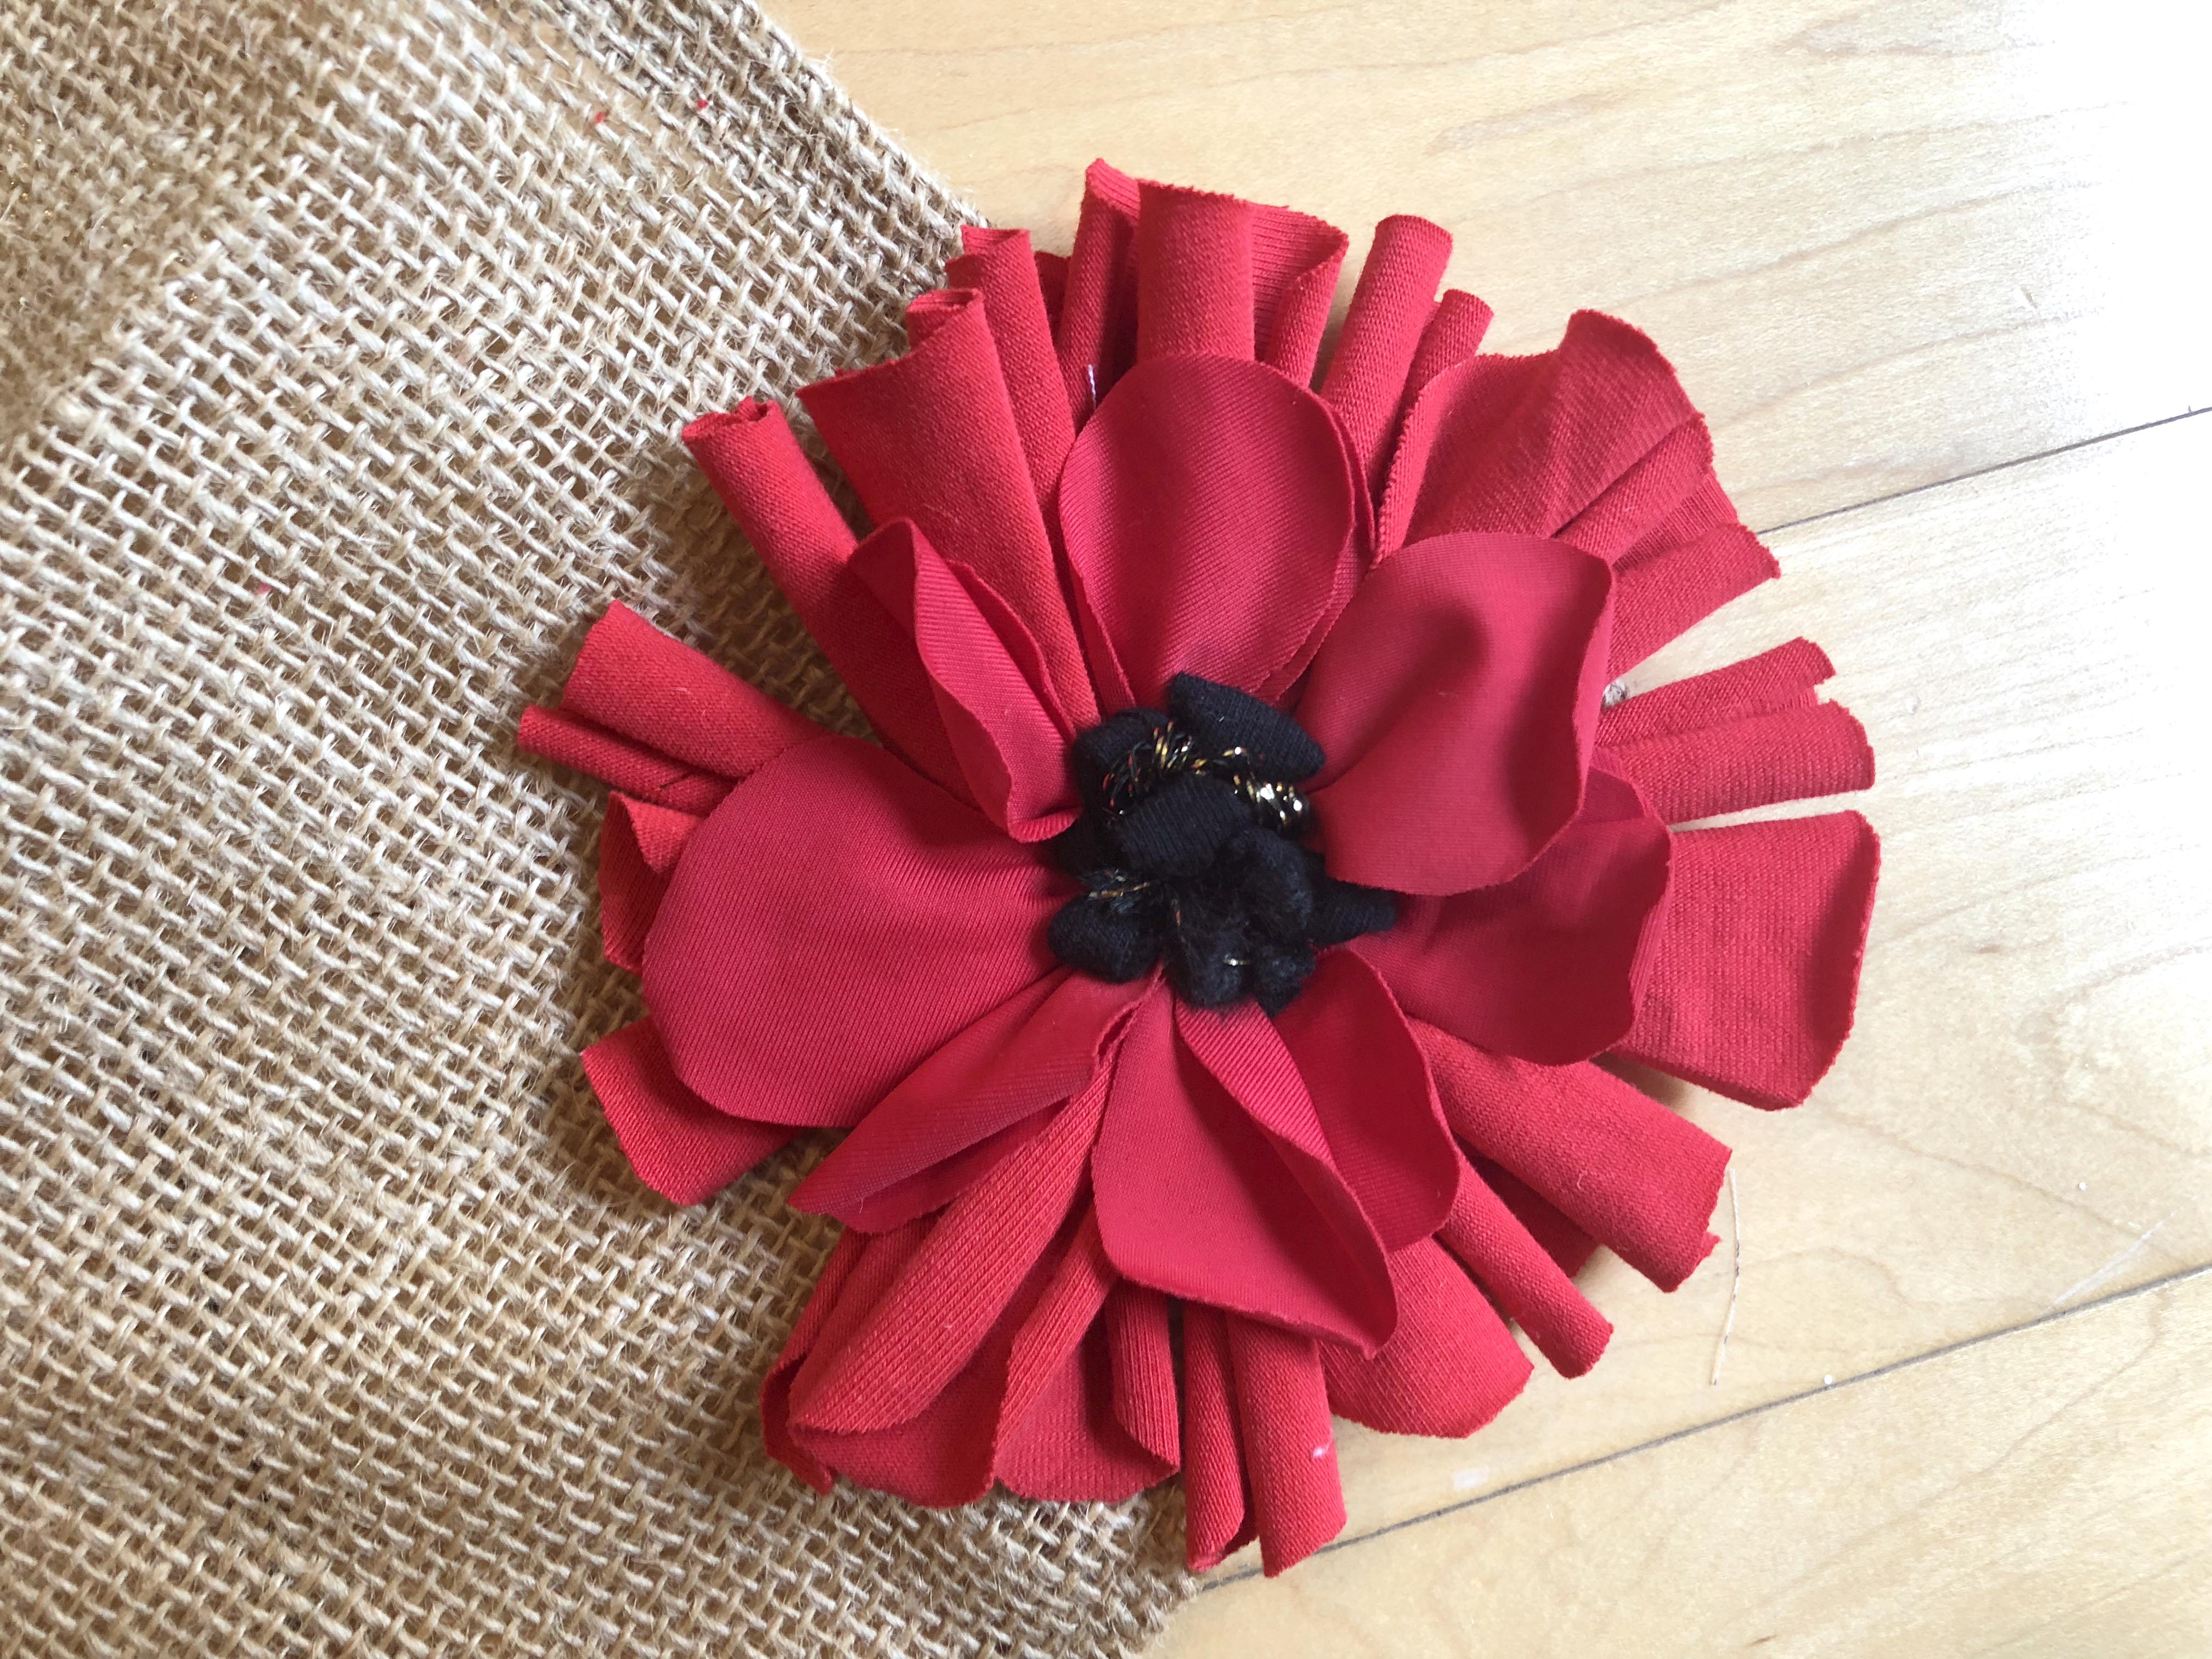
The gold fabric helps to lift the black centre of the poppy a little.
Step 7: Pre-heat your glue gun whilst you cut around the stitching (be careful not to cut your poppy’s petals as you do this).
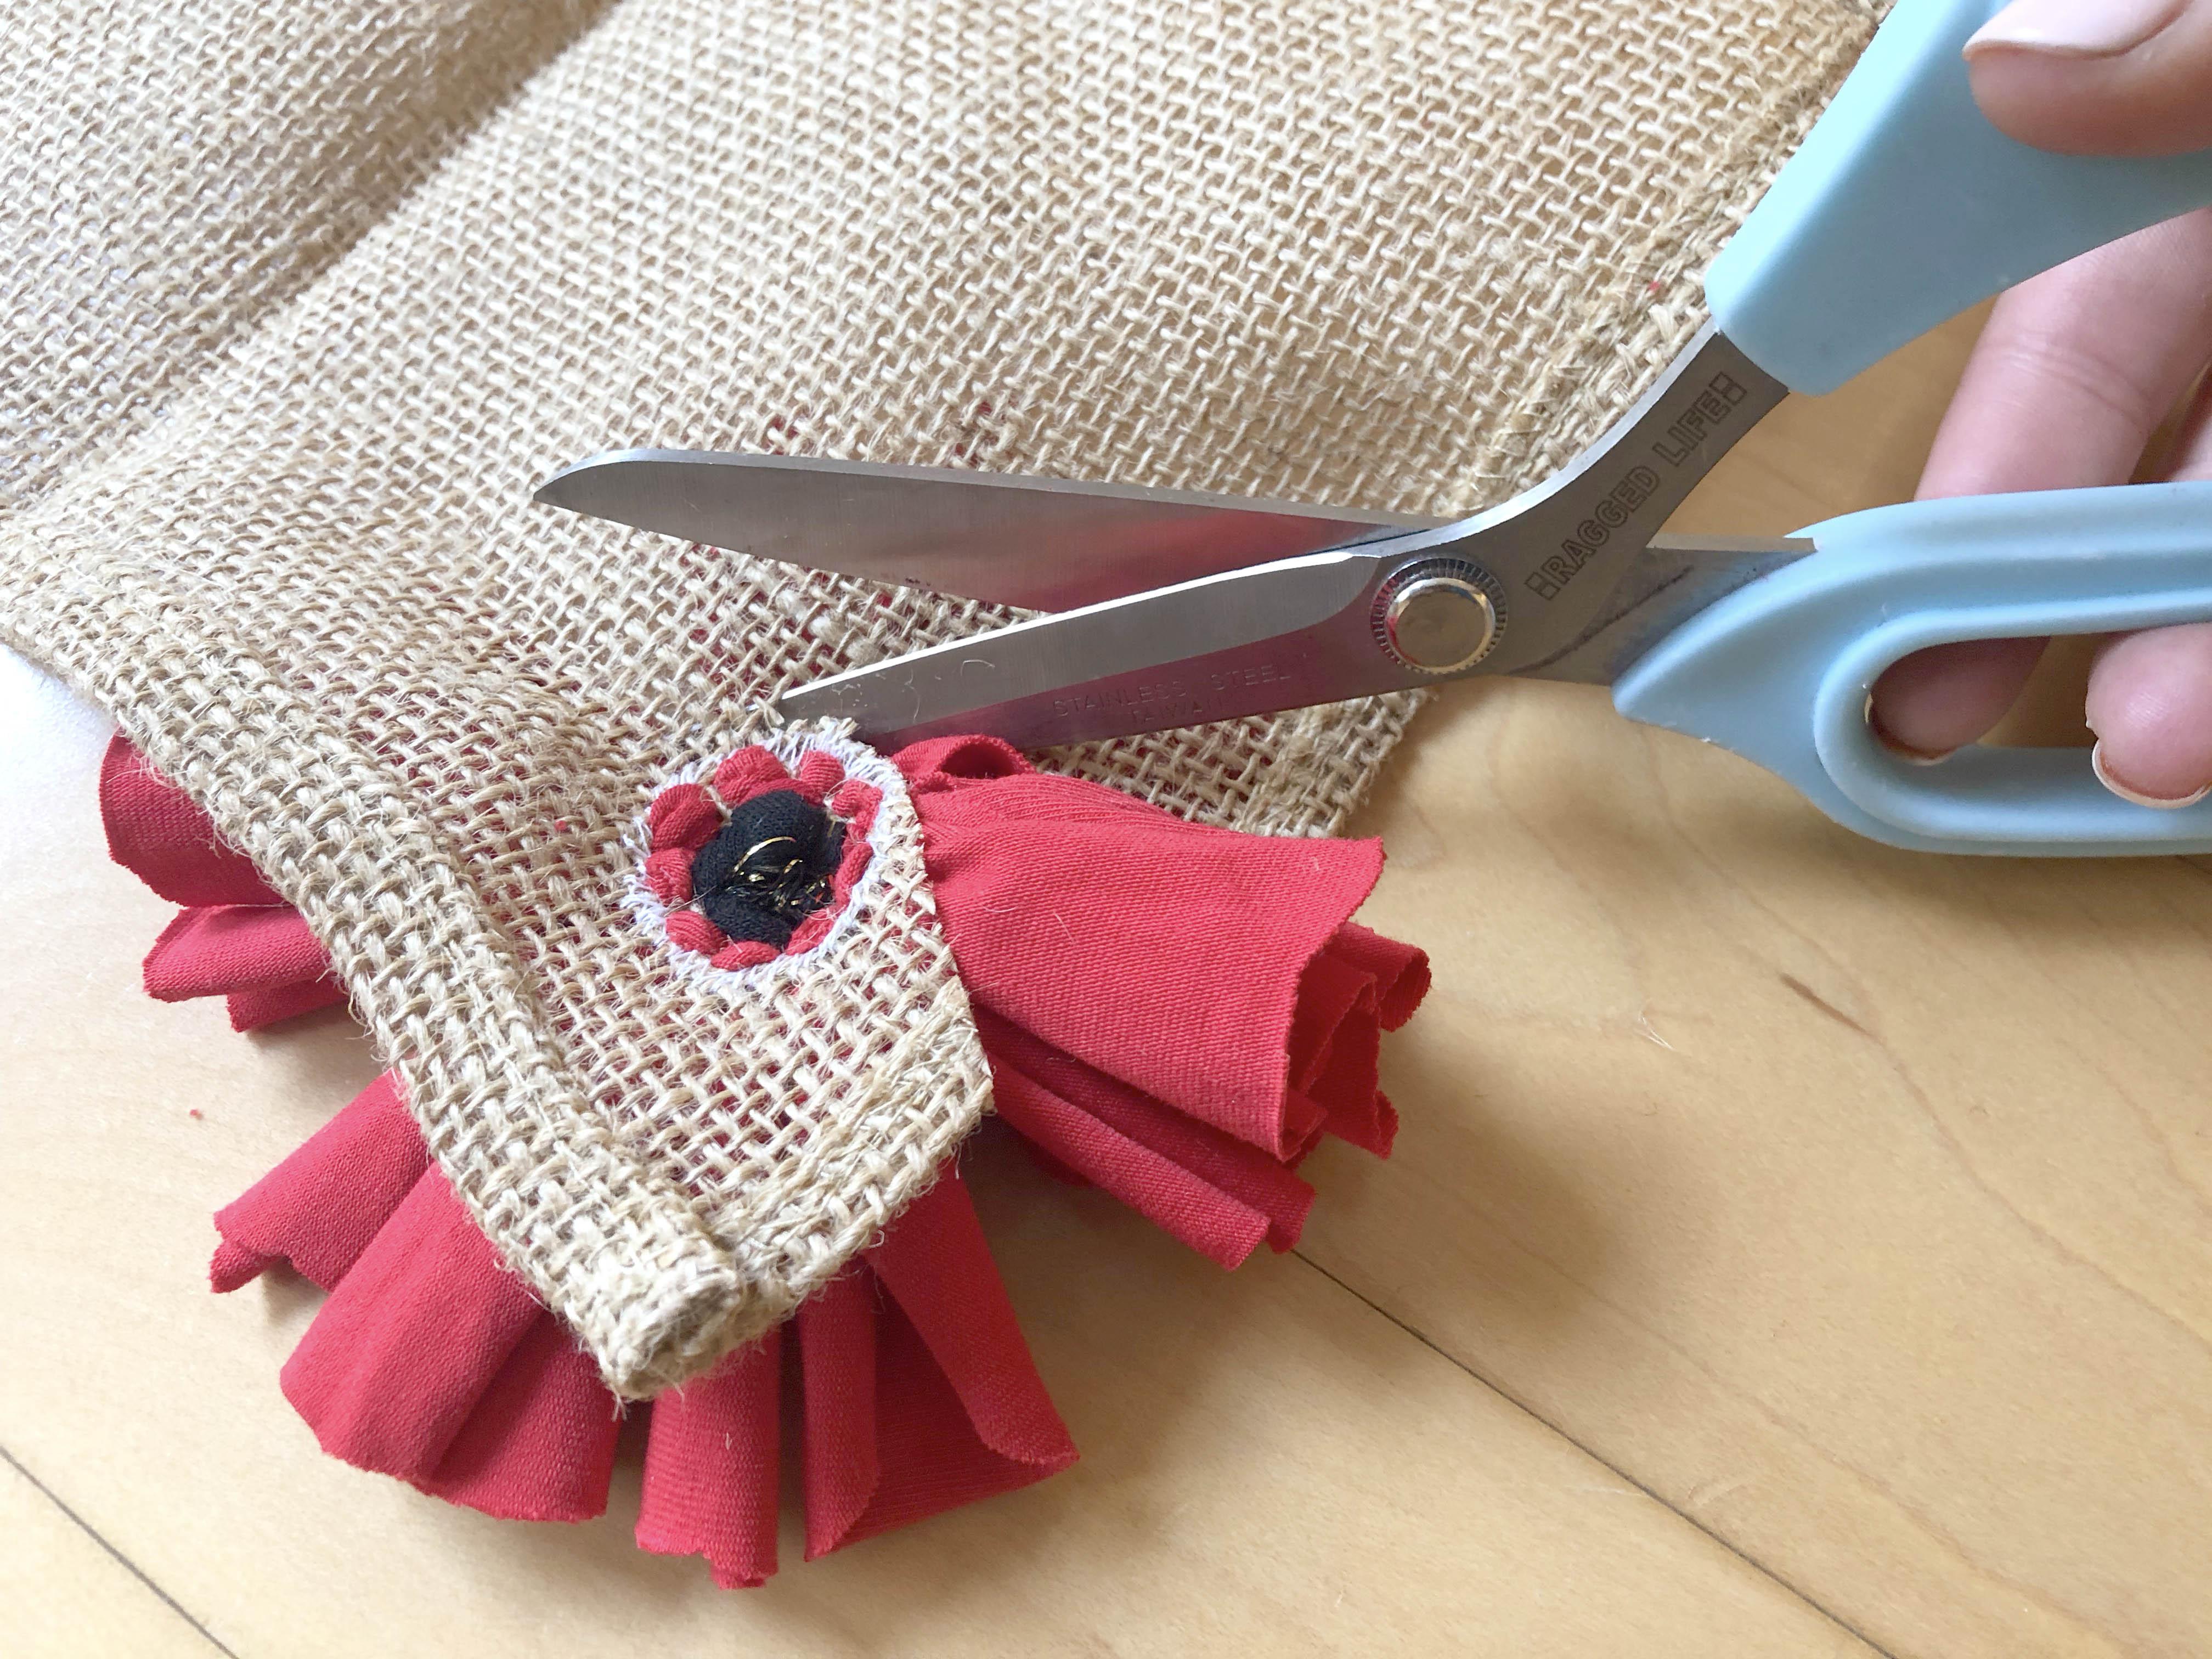
Be careful not to cut any of the “petals” when you cut around the stitching.
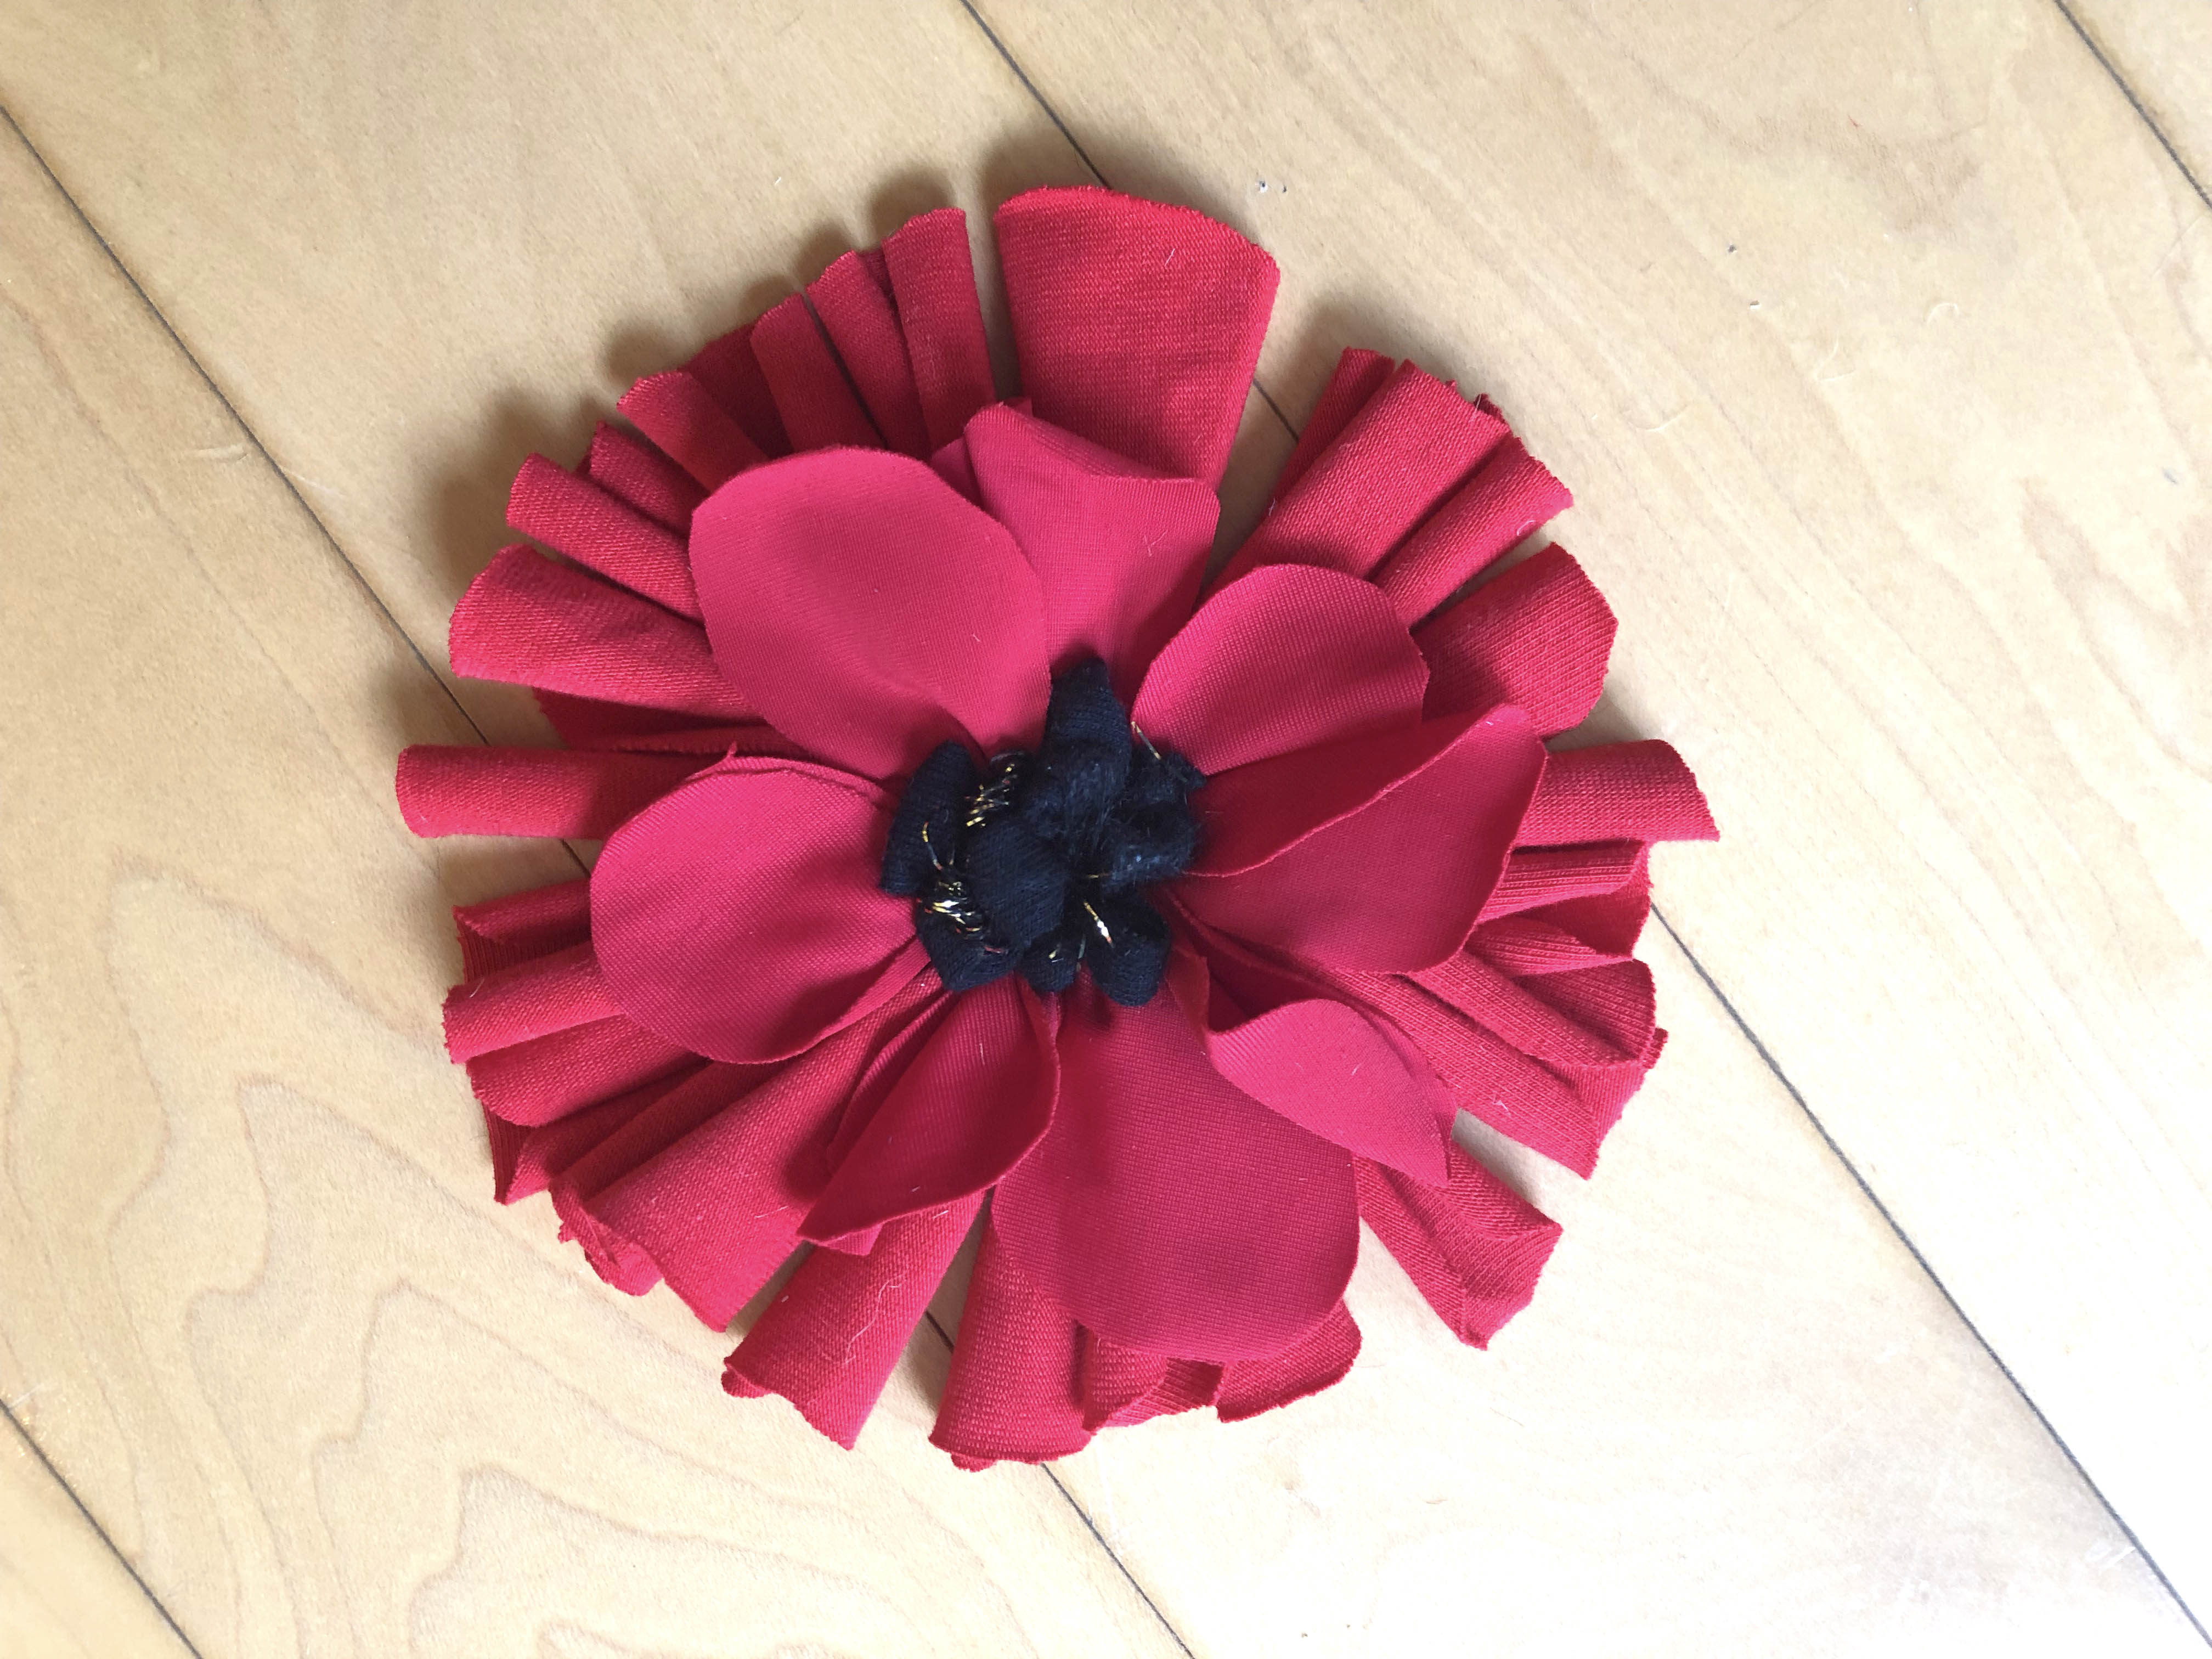
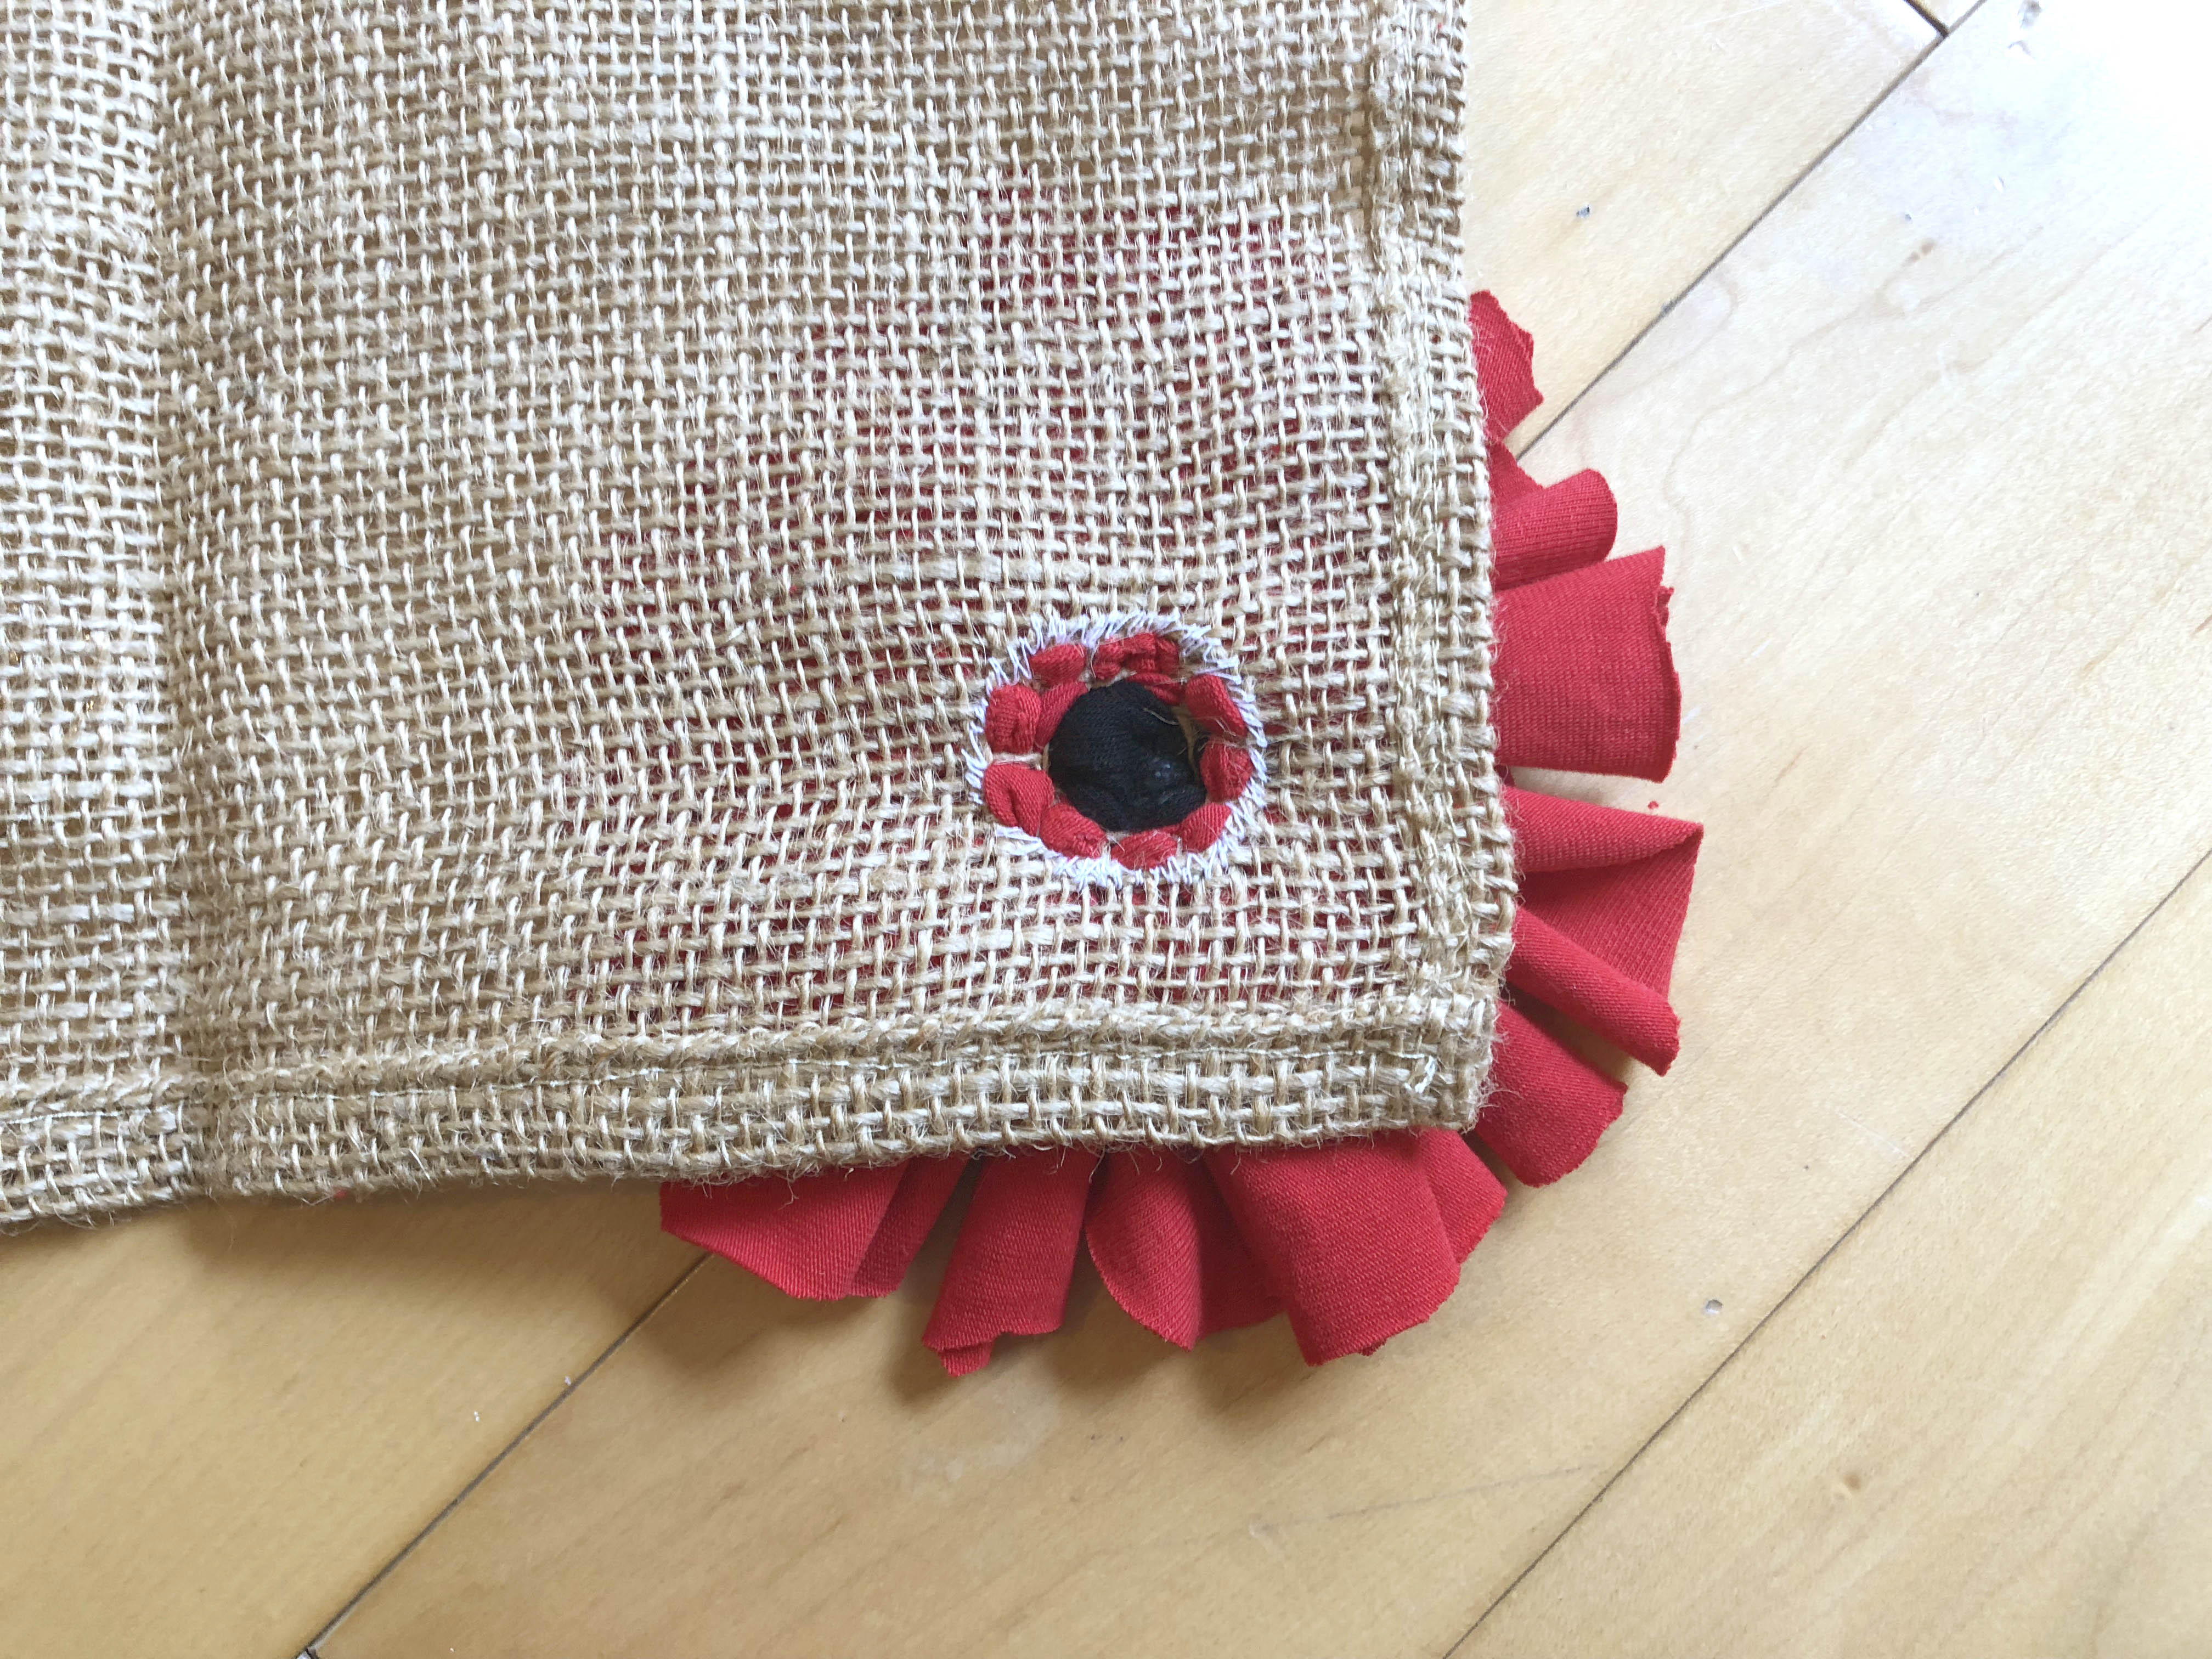
This is what the poppy should look like once it’s cut out.
Step 8: Carefully glue gun the felt or thick fabric circle to the back of the hessian circle.
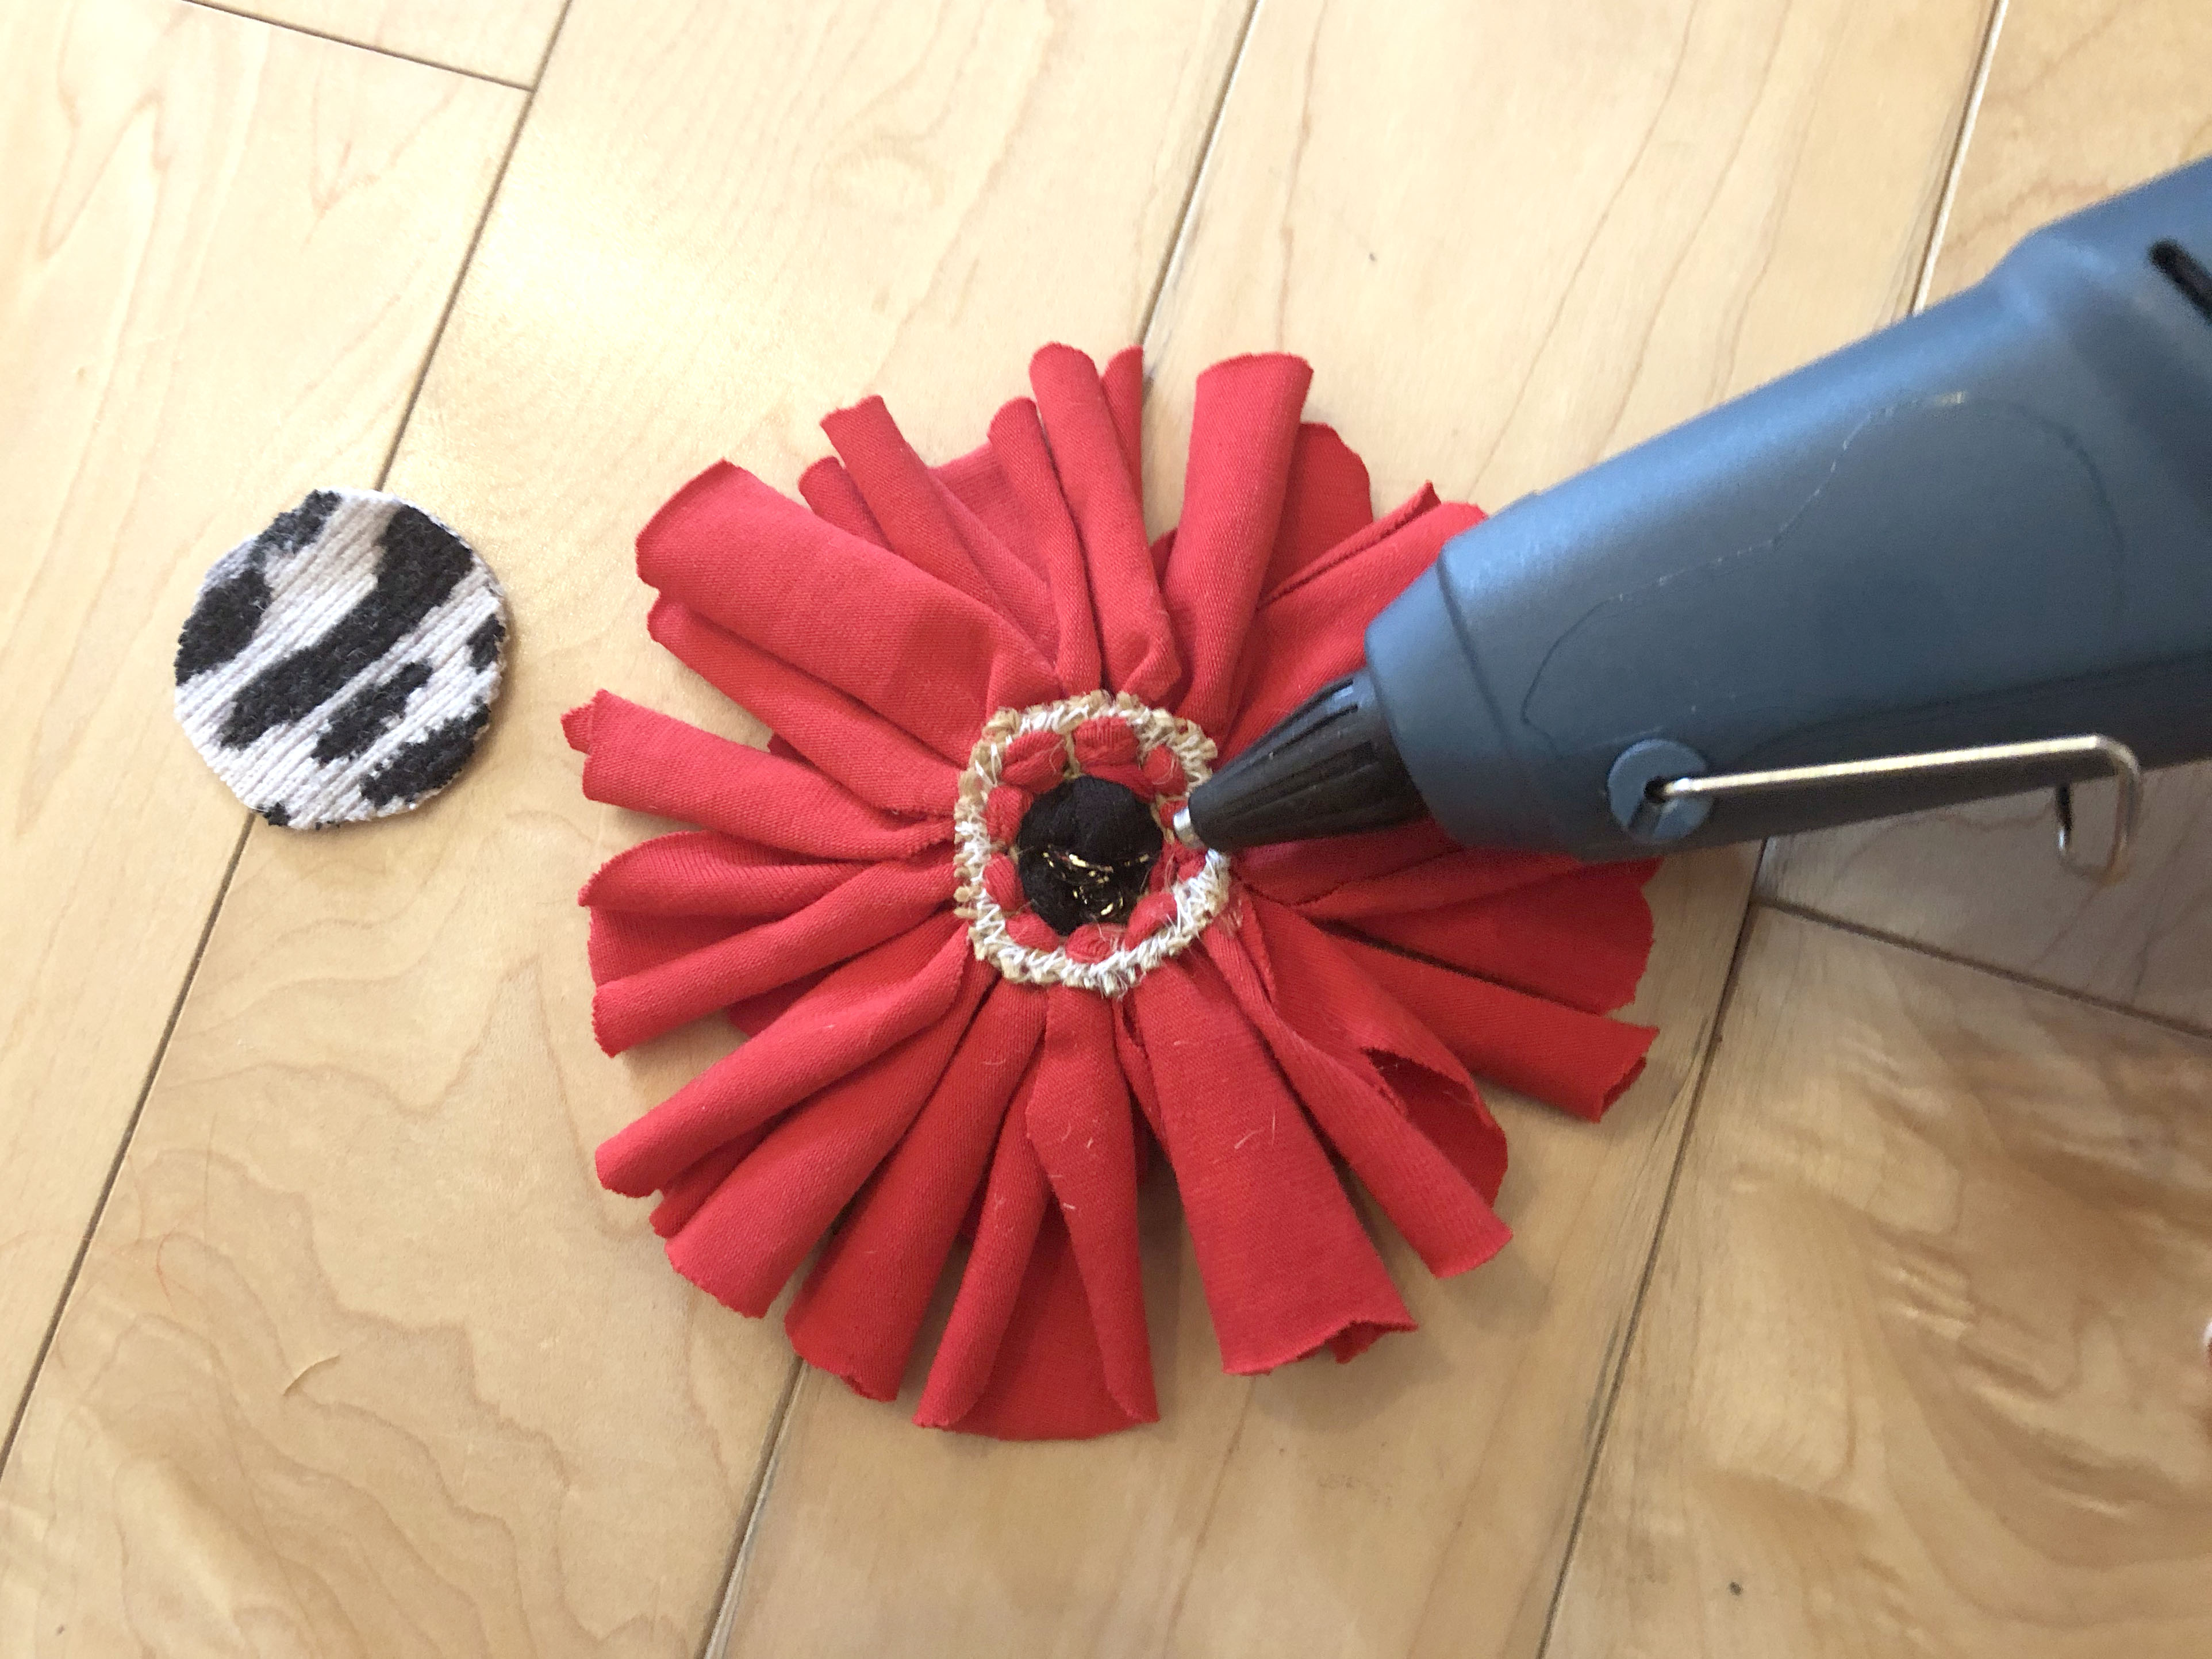
Carefully glue the backing to the hessian
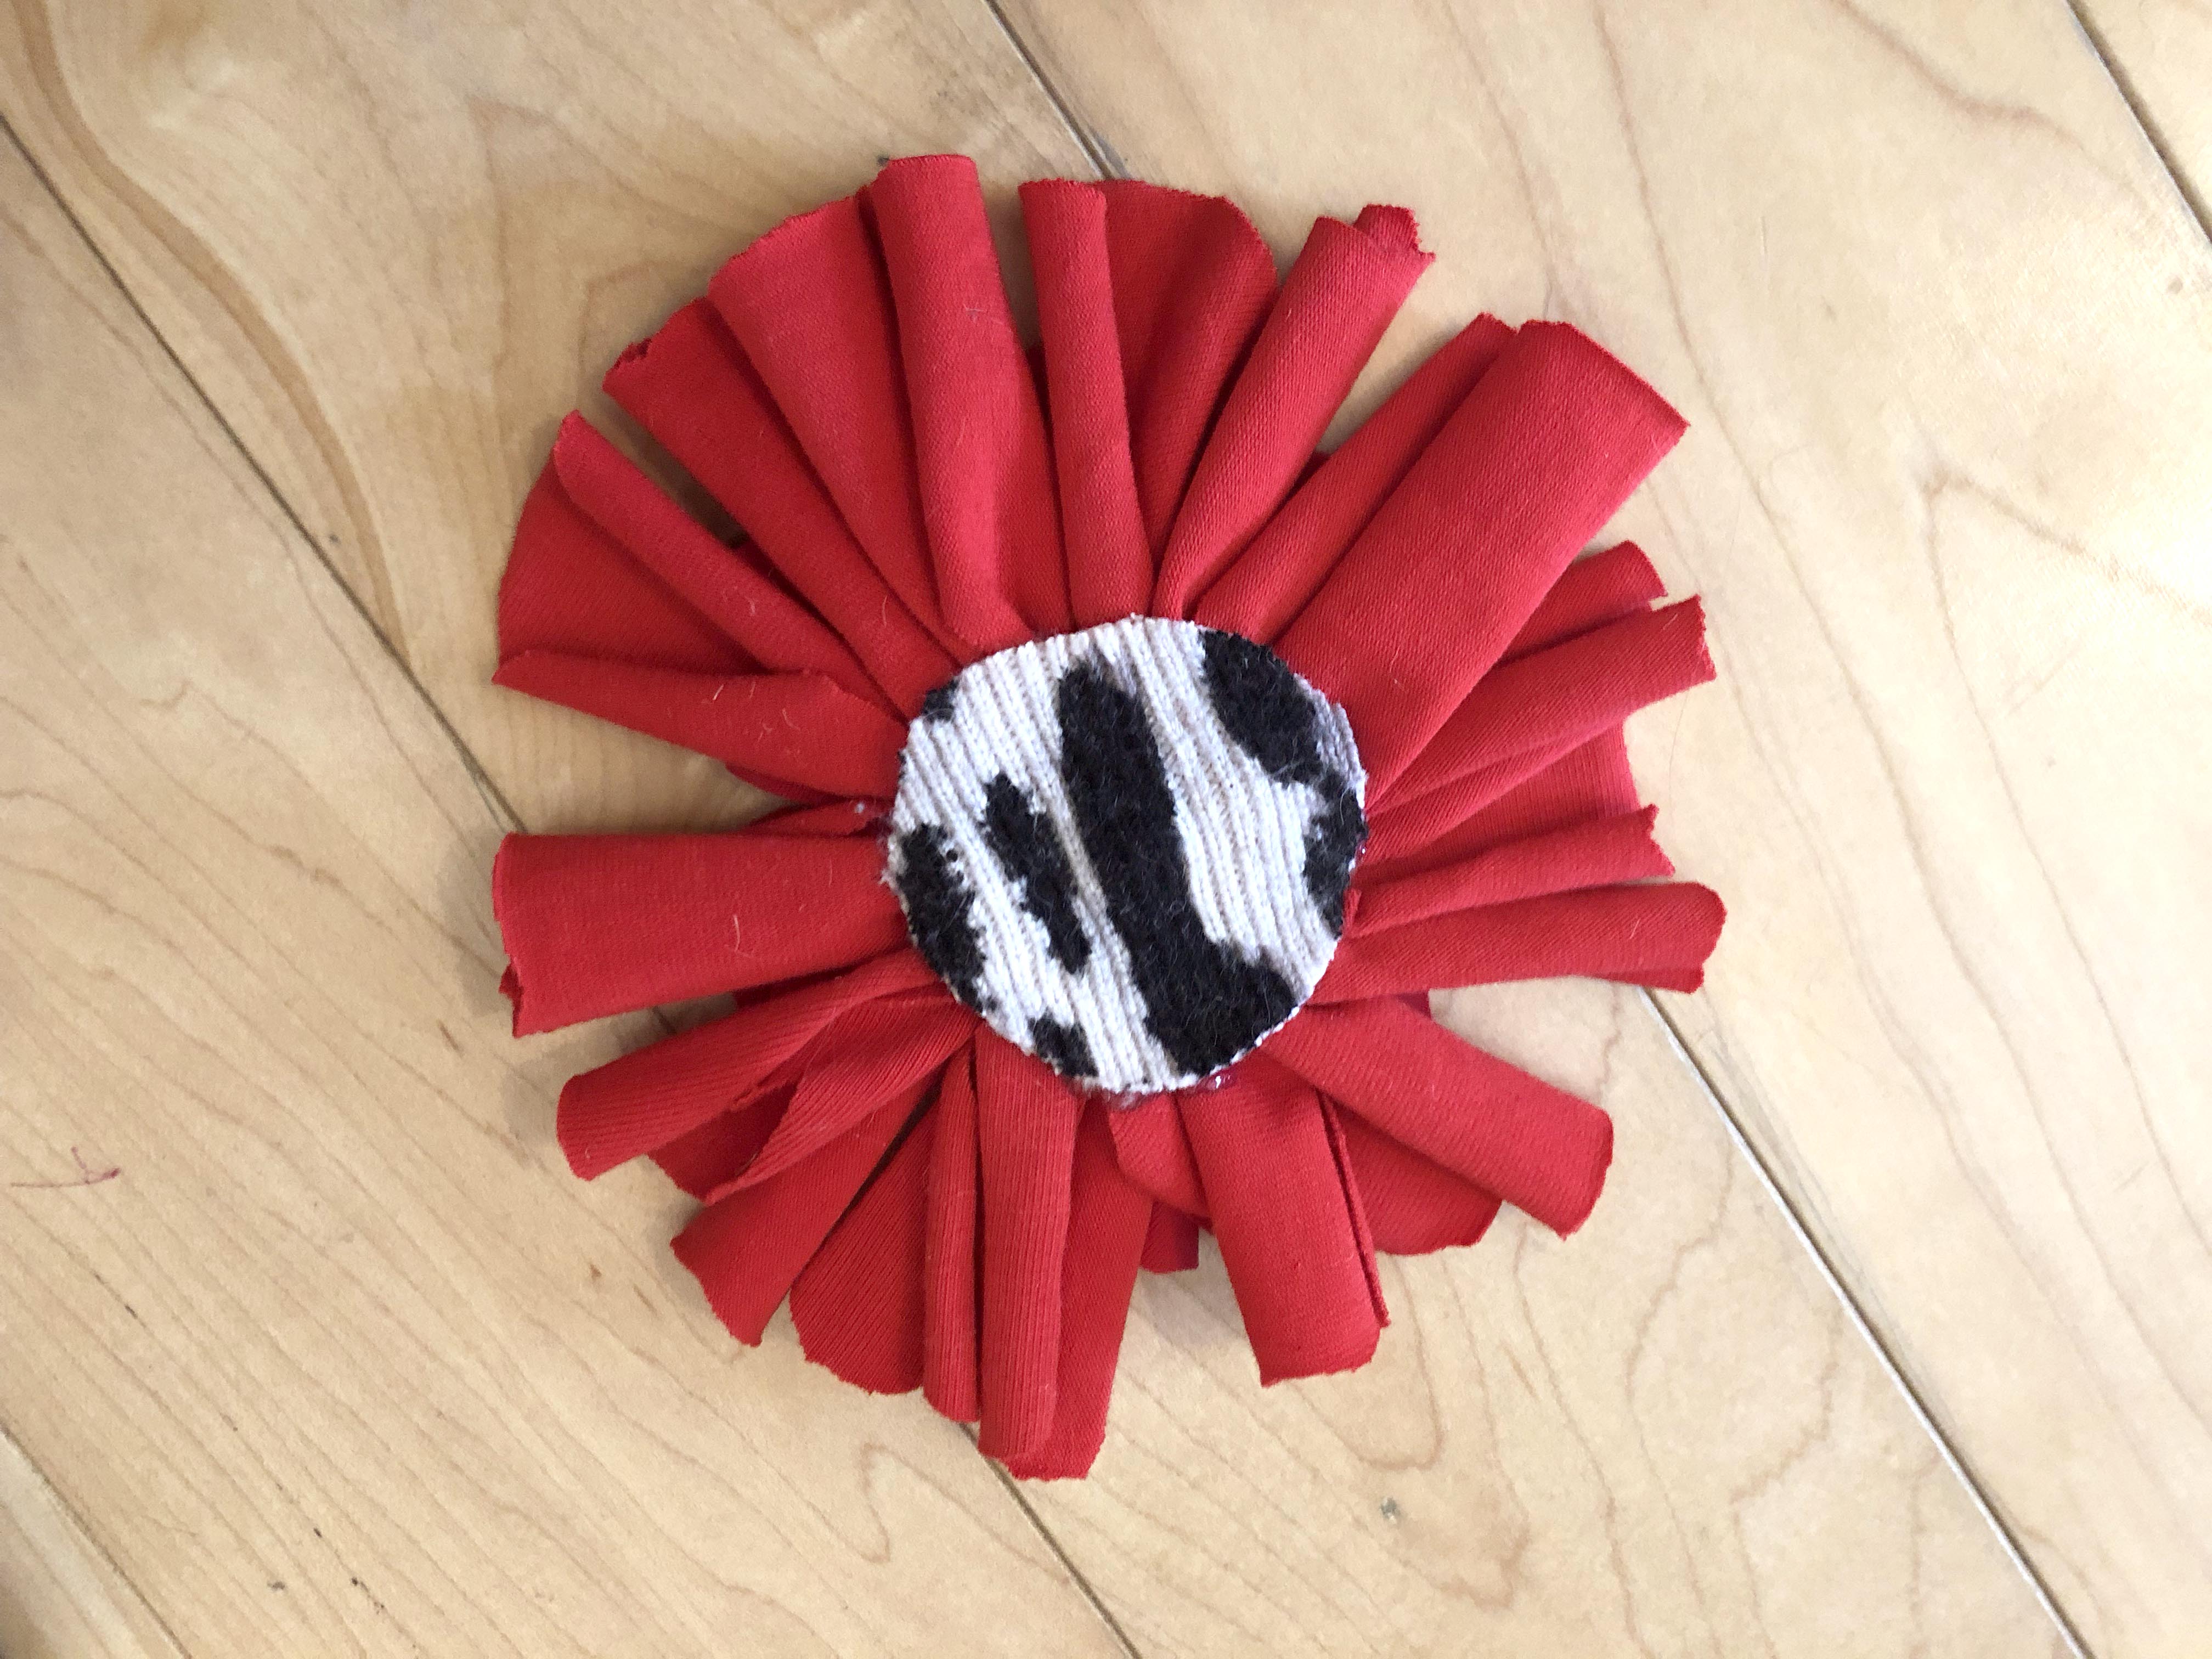
The zebra print fabric won’t be on show.
Step 9: Glue gun the brooch back to the back of the felt circle.
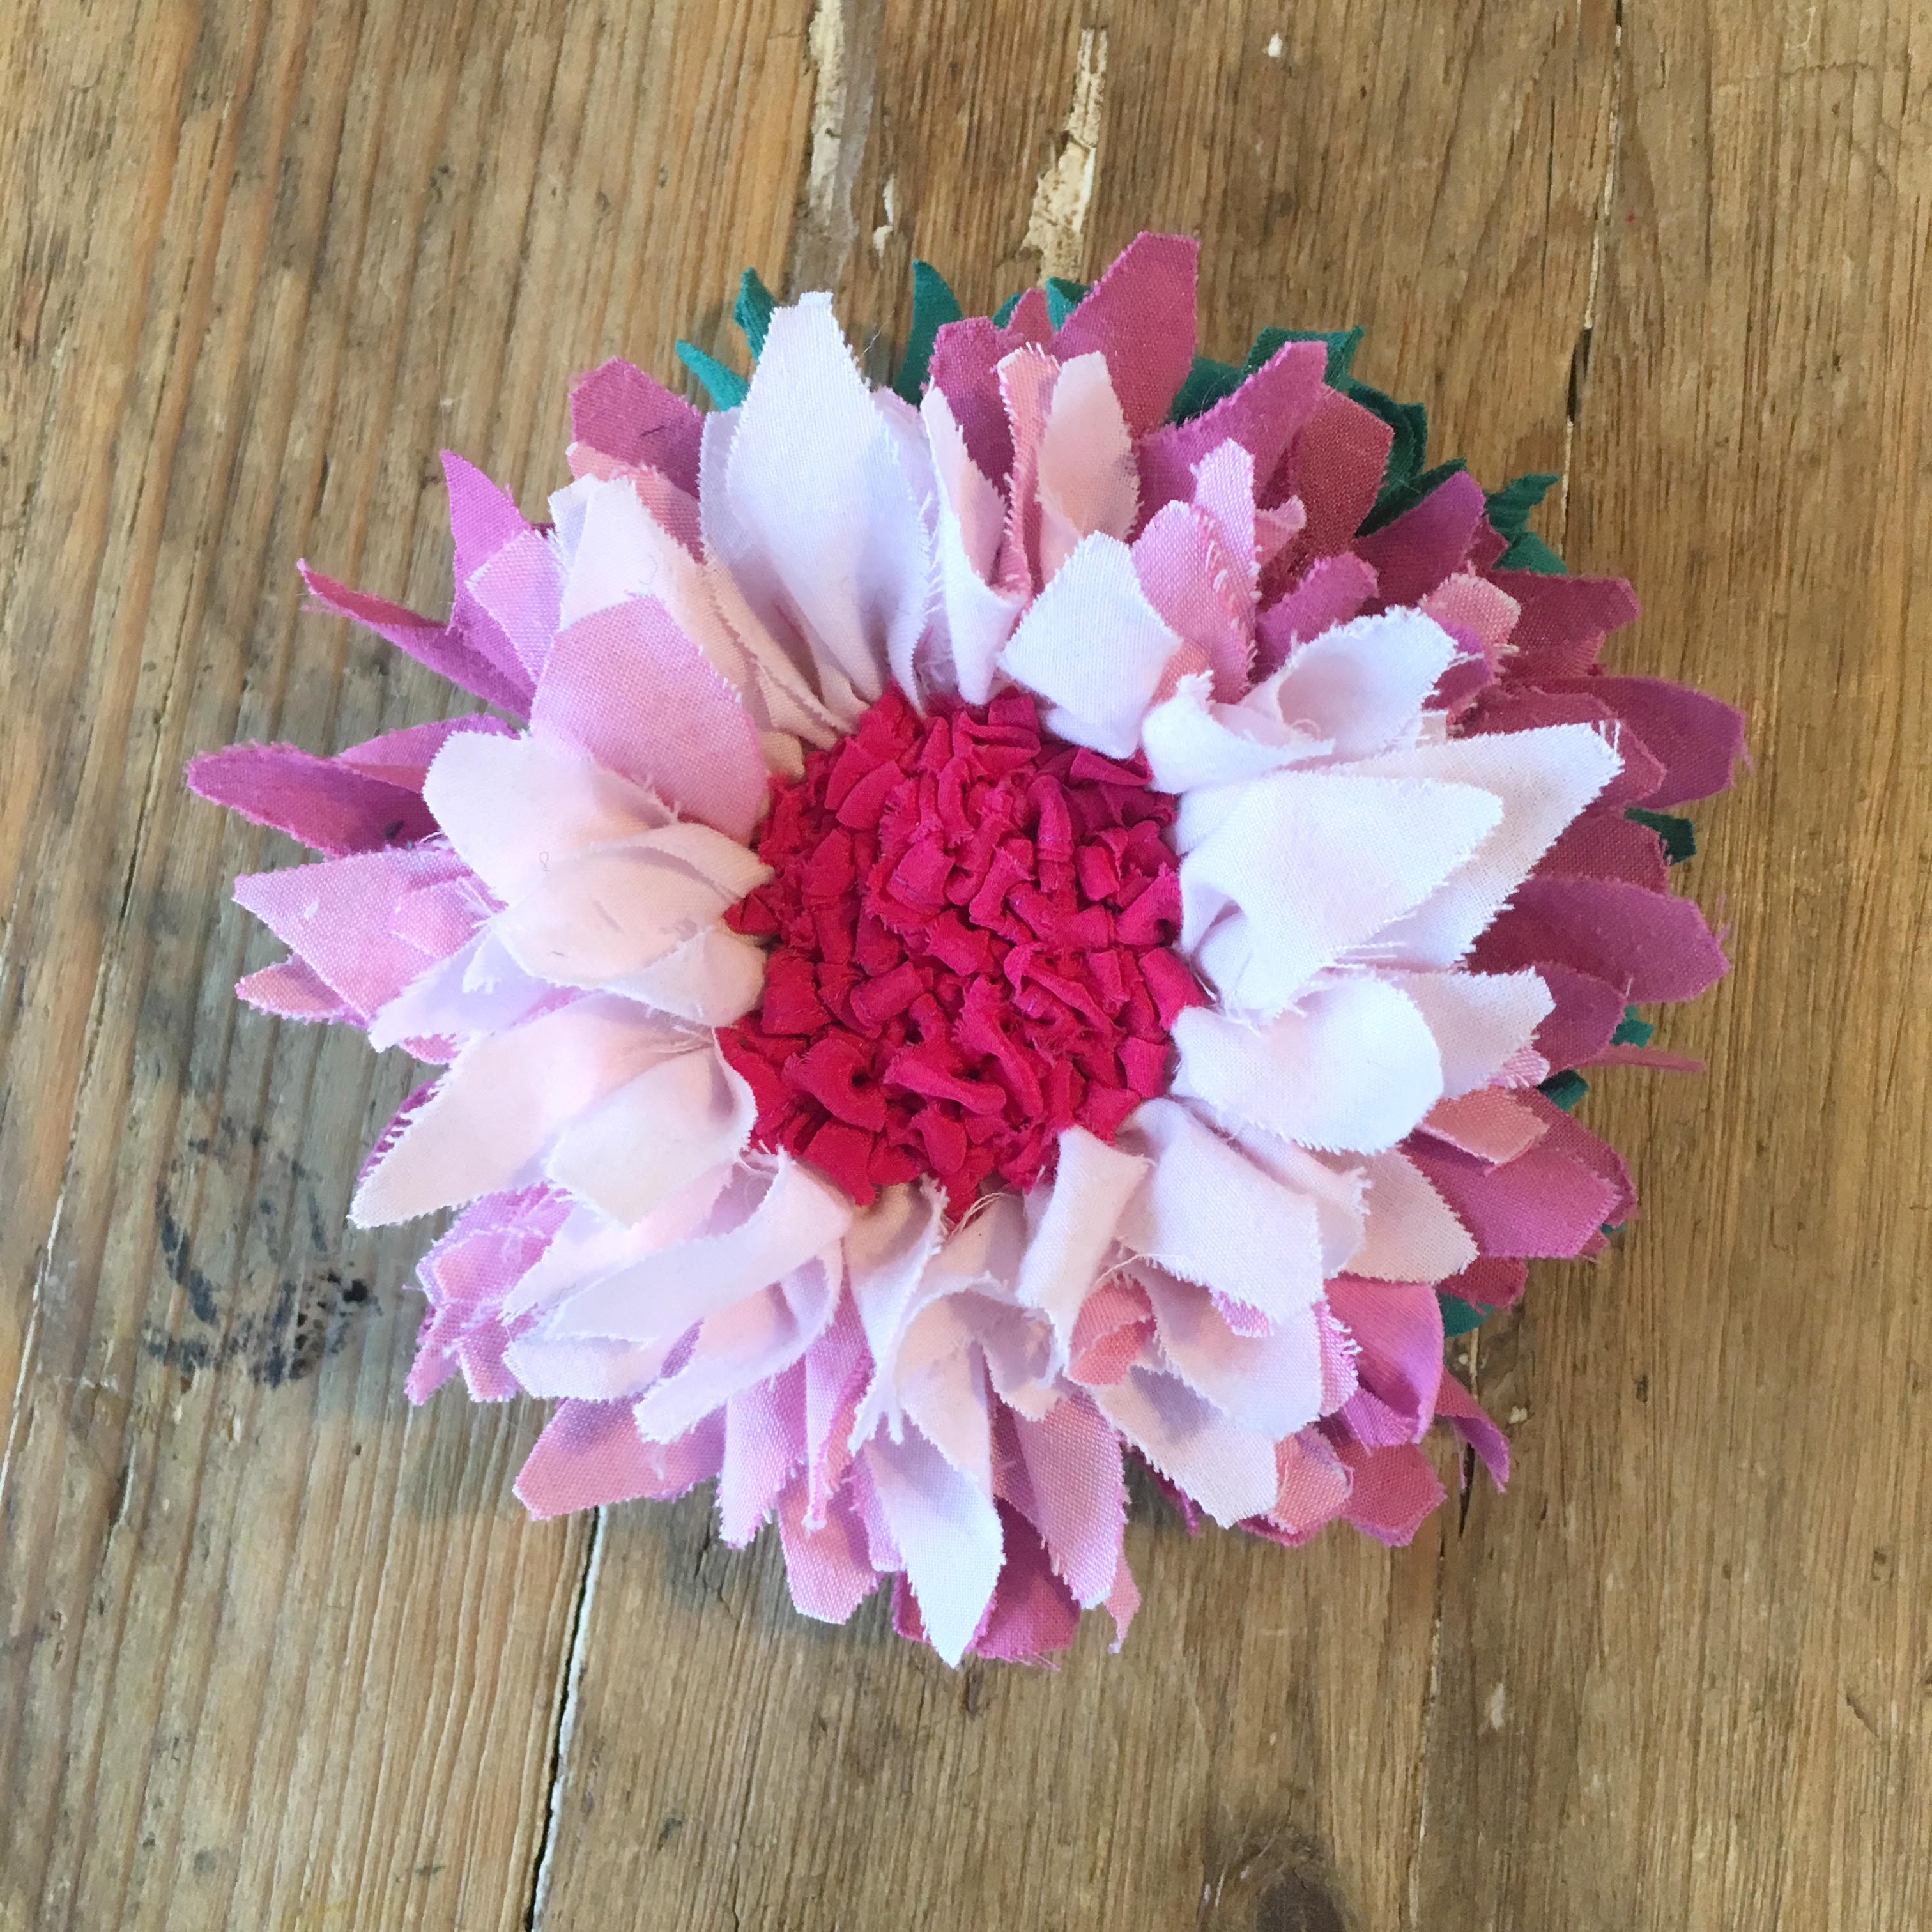
Poppies not your thing? Well, you can use the instructions above to make plenty of different flowers. Below are just a few of the experiments we’ve done…
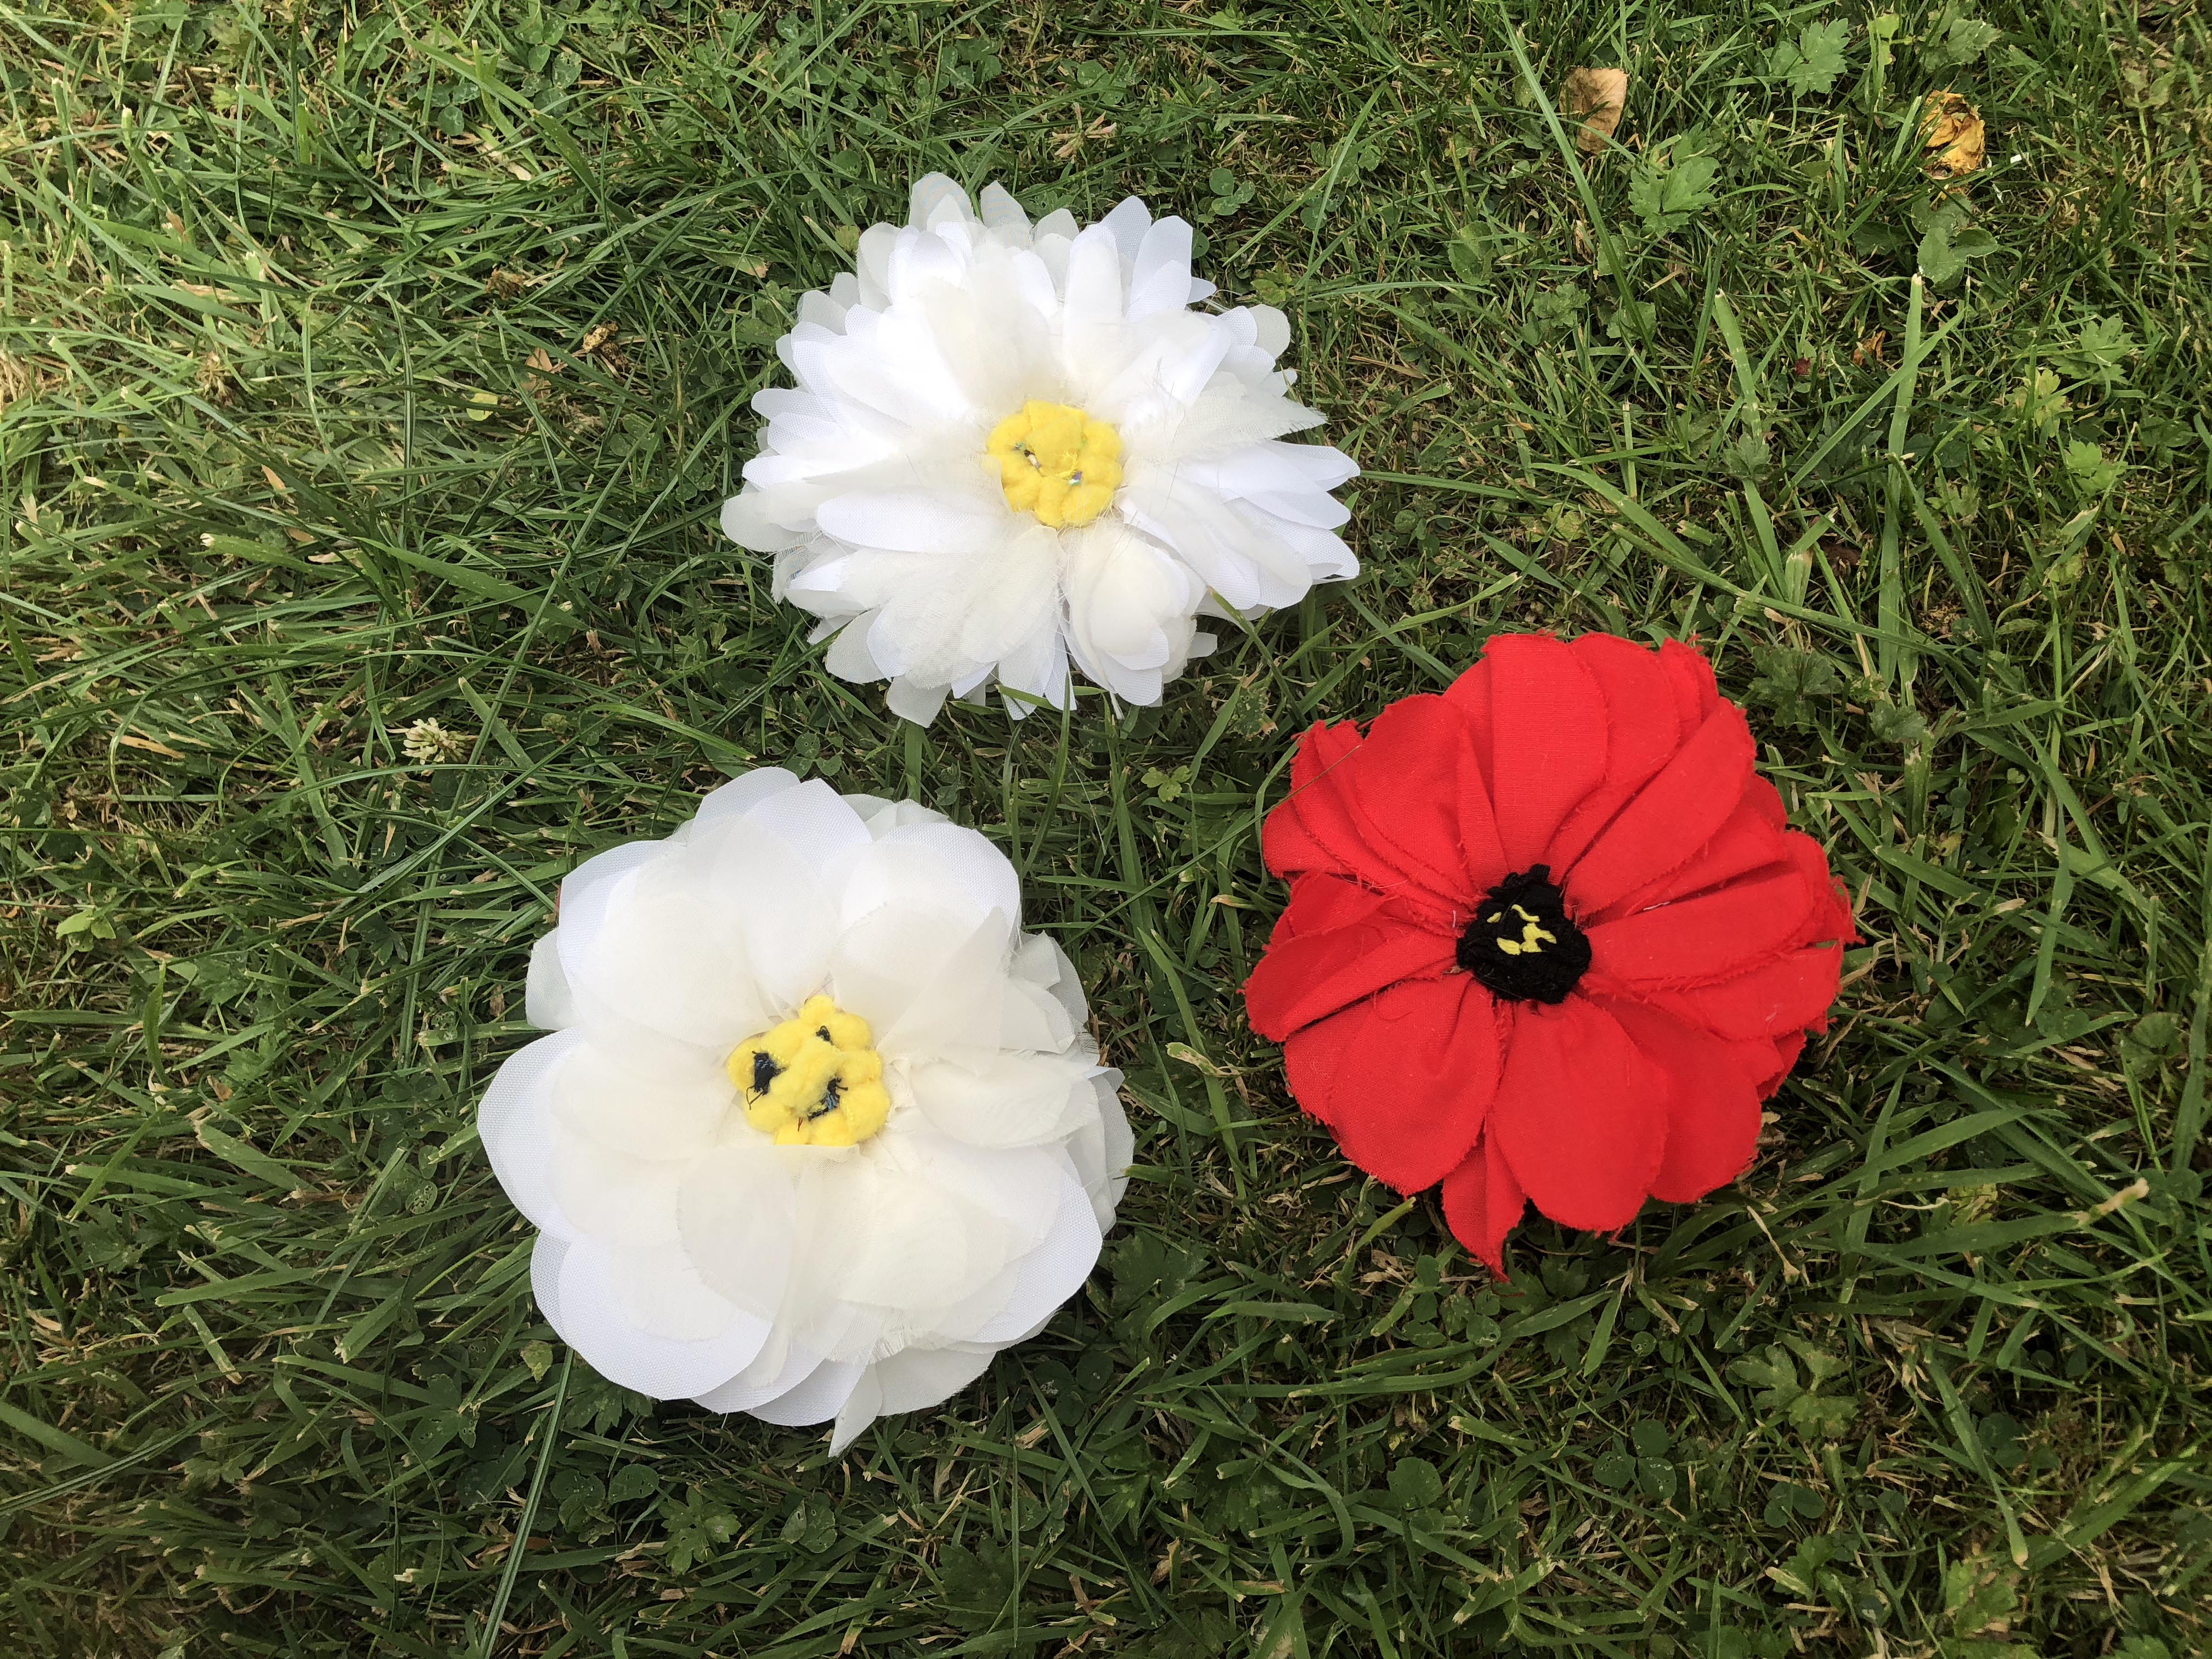
Here I had a play around with different shapes of petals.
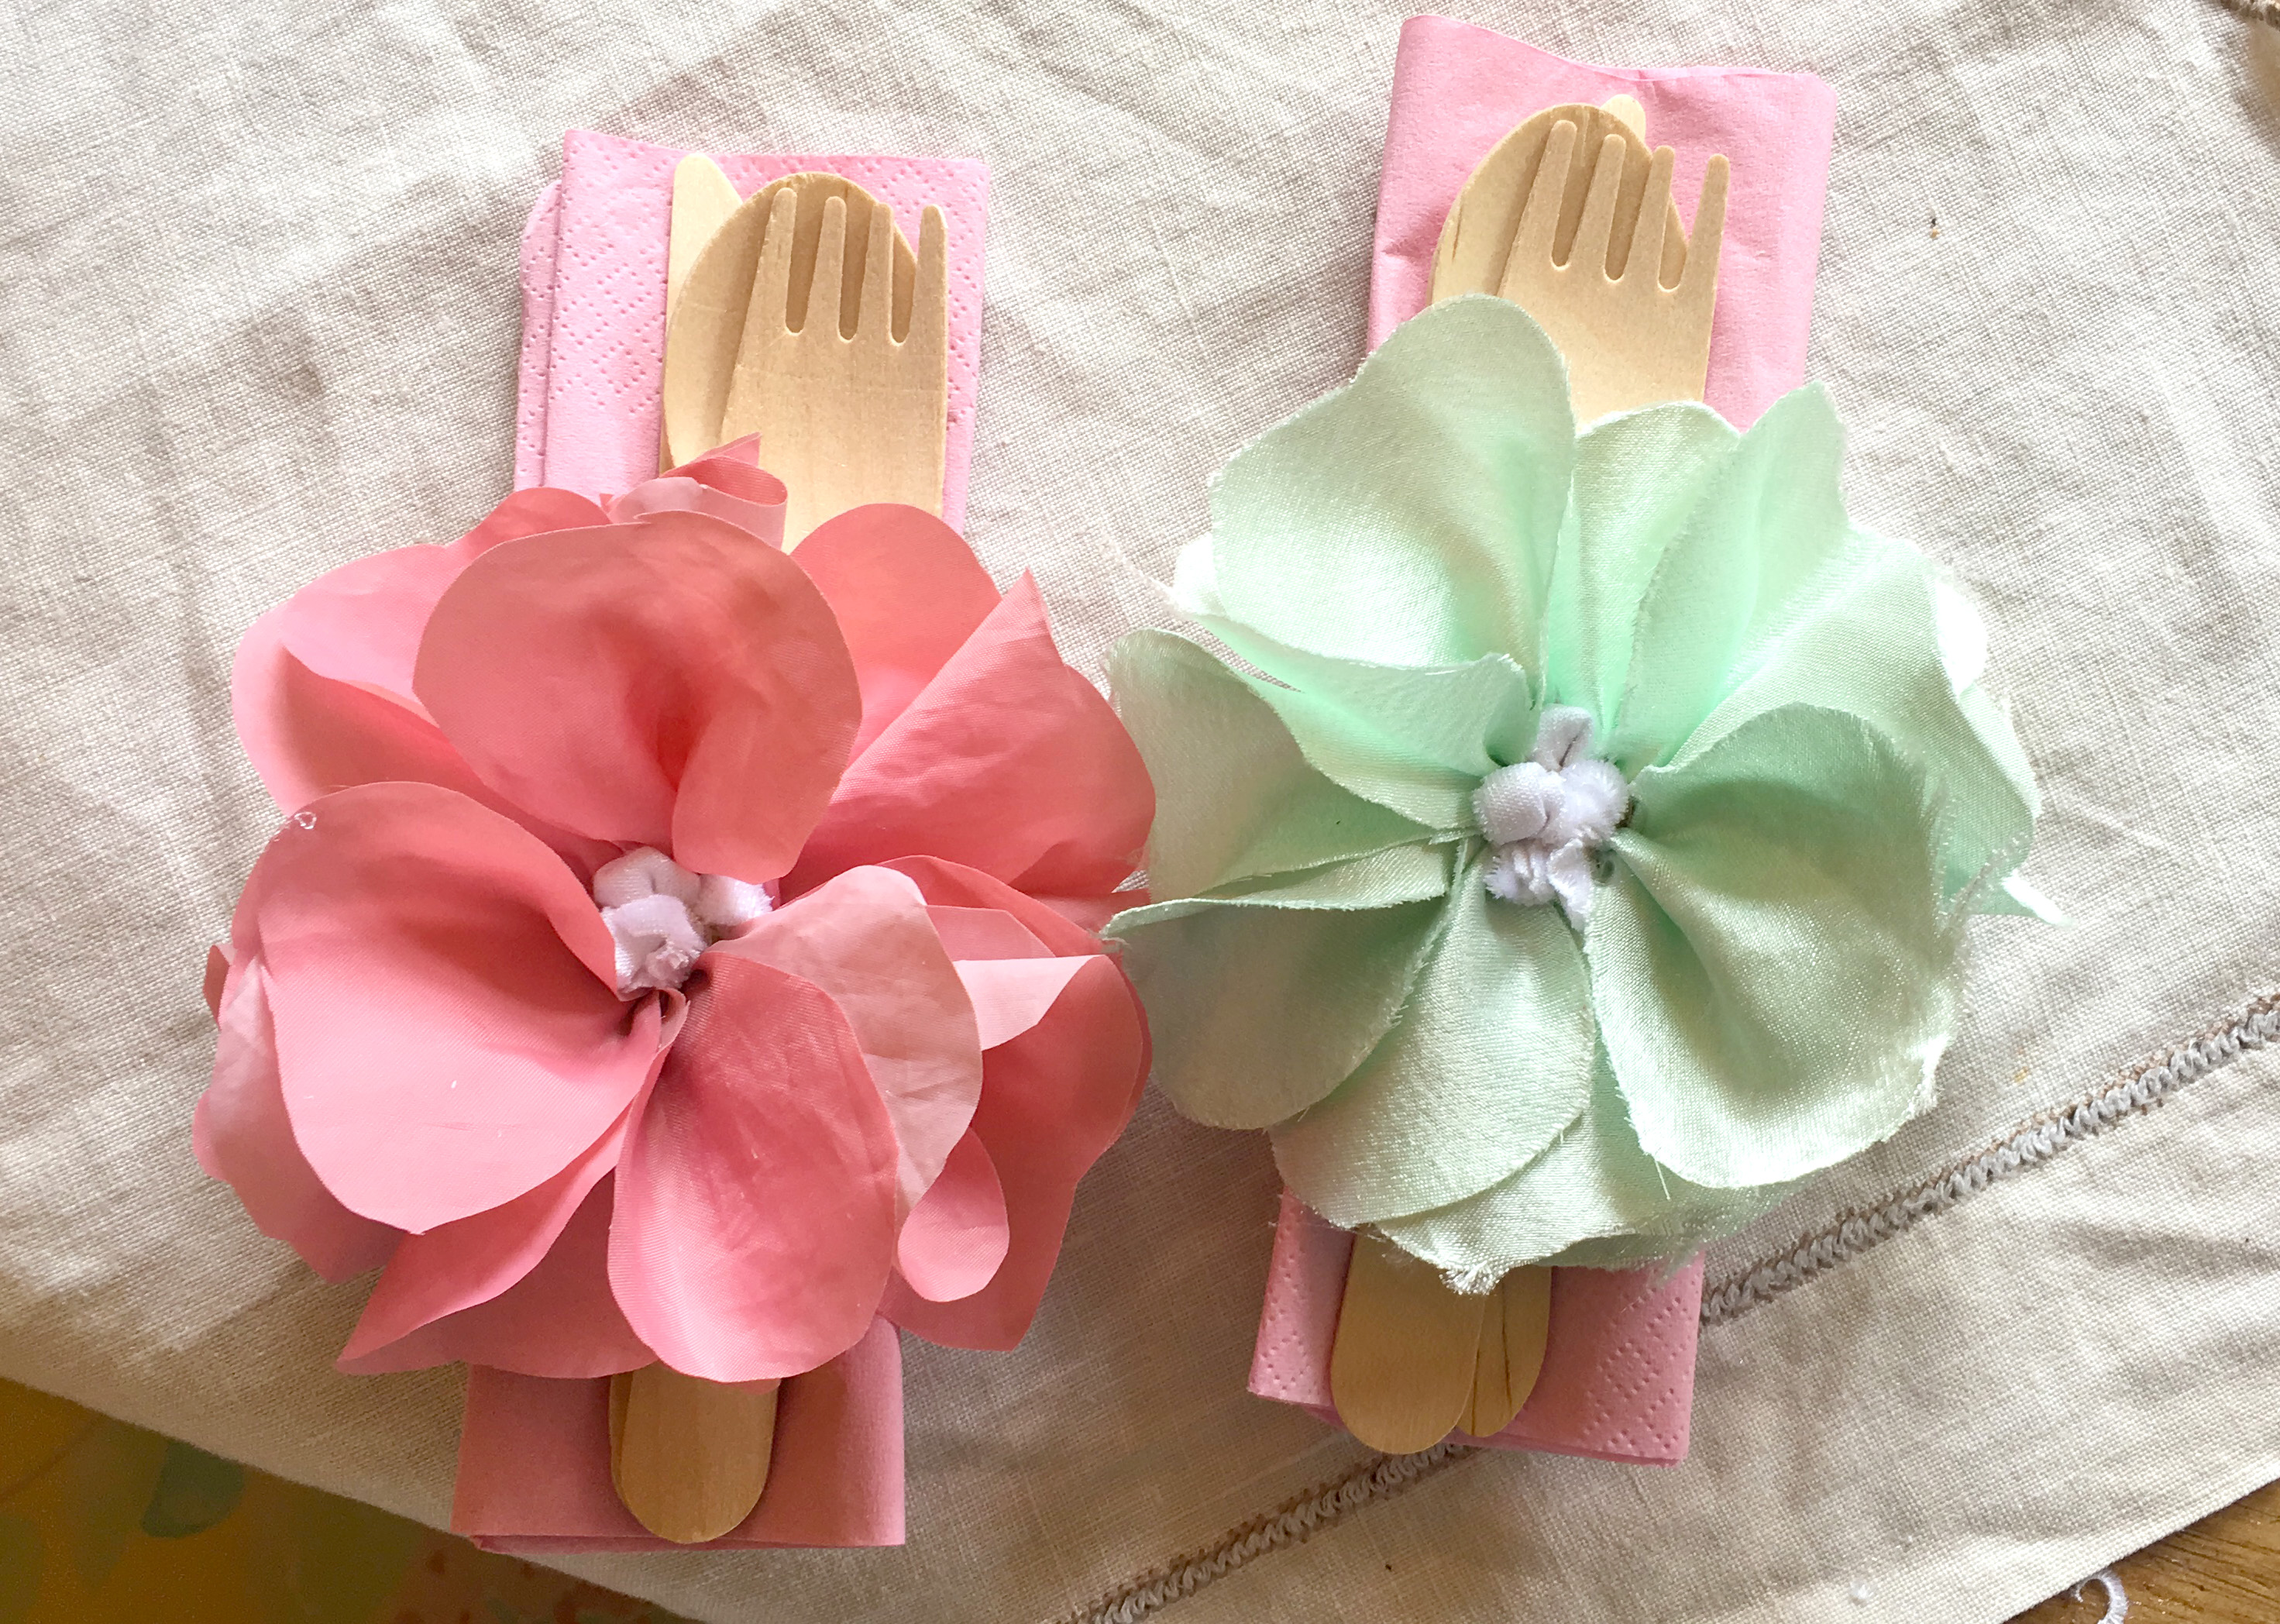
I made lots of rag rug flowers to make napkin rings for my friend’s handmade hen do, which you can read about here.
This flower reminds me a bit of a waterlily.
Fancy making some flowers? Buy a set of 5 pre-hemmed flower circles over on the Ragged Life Shop here.
Rag Rug Poppy Wreath:
So, now that you’ve learned how to make a rag rug poppy brooch, you can apply what you’ve learned to also make a Rag Rug Poppy Wreath like the one below:
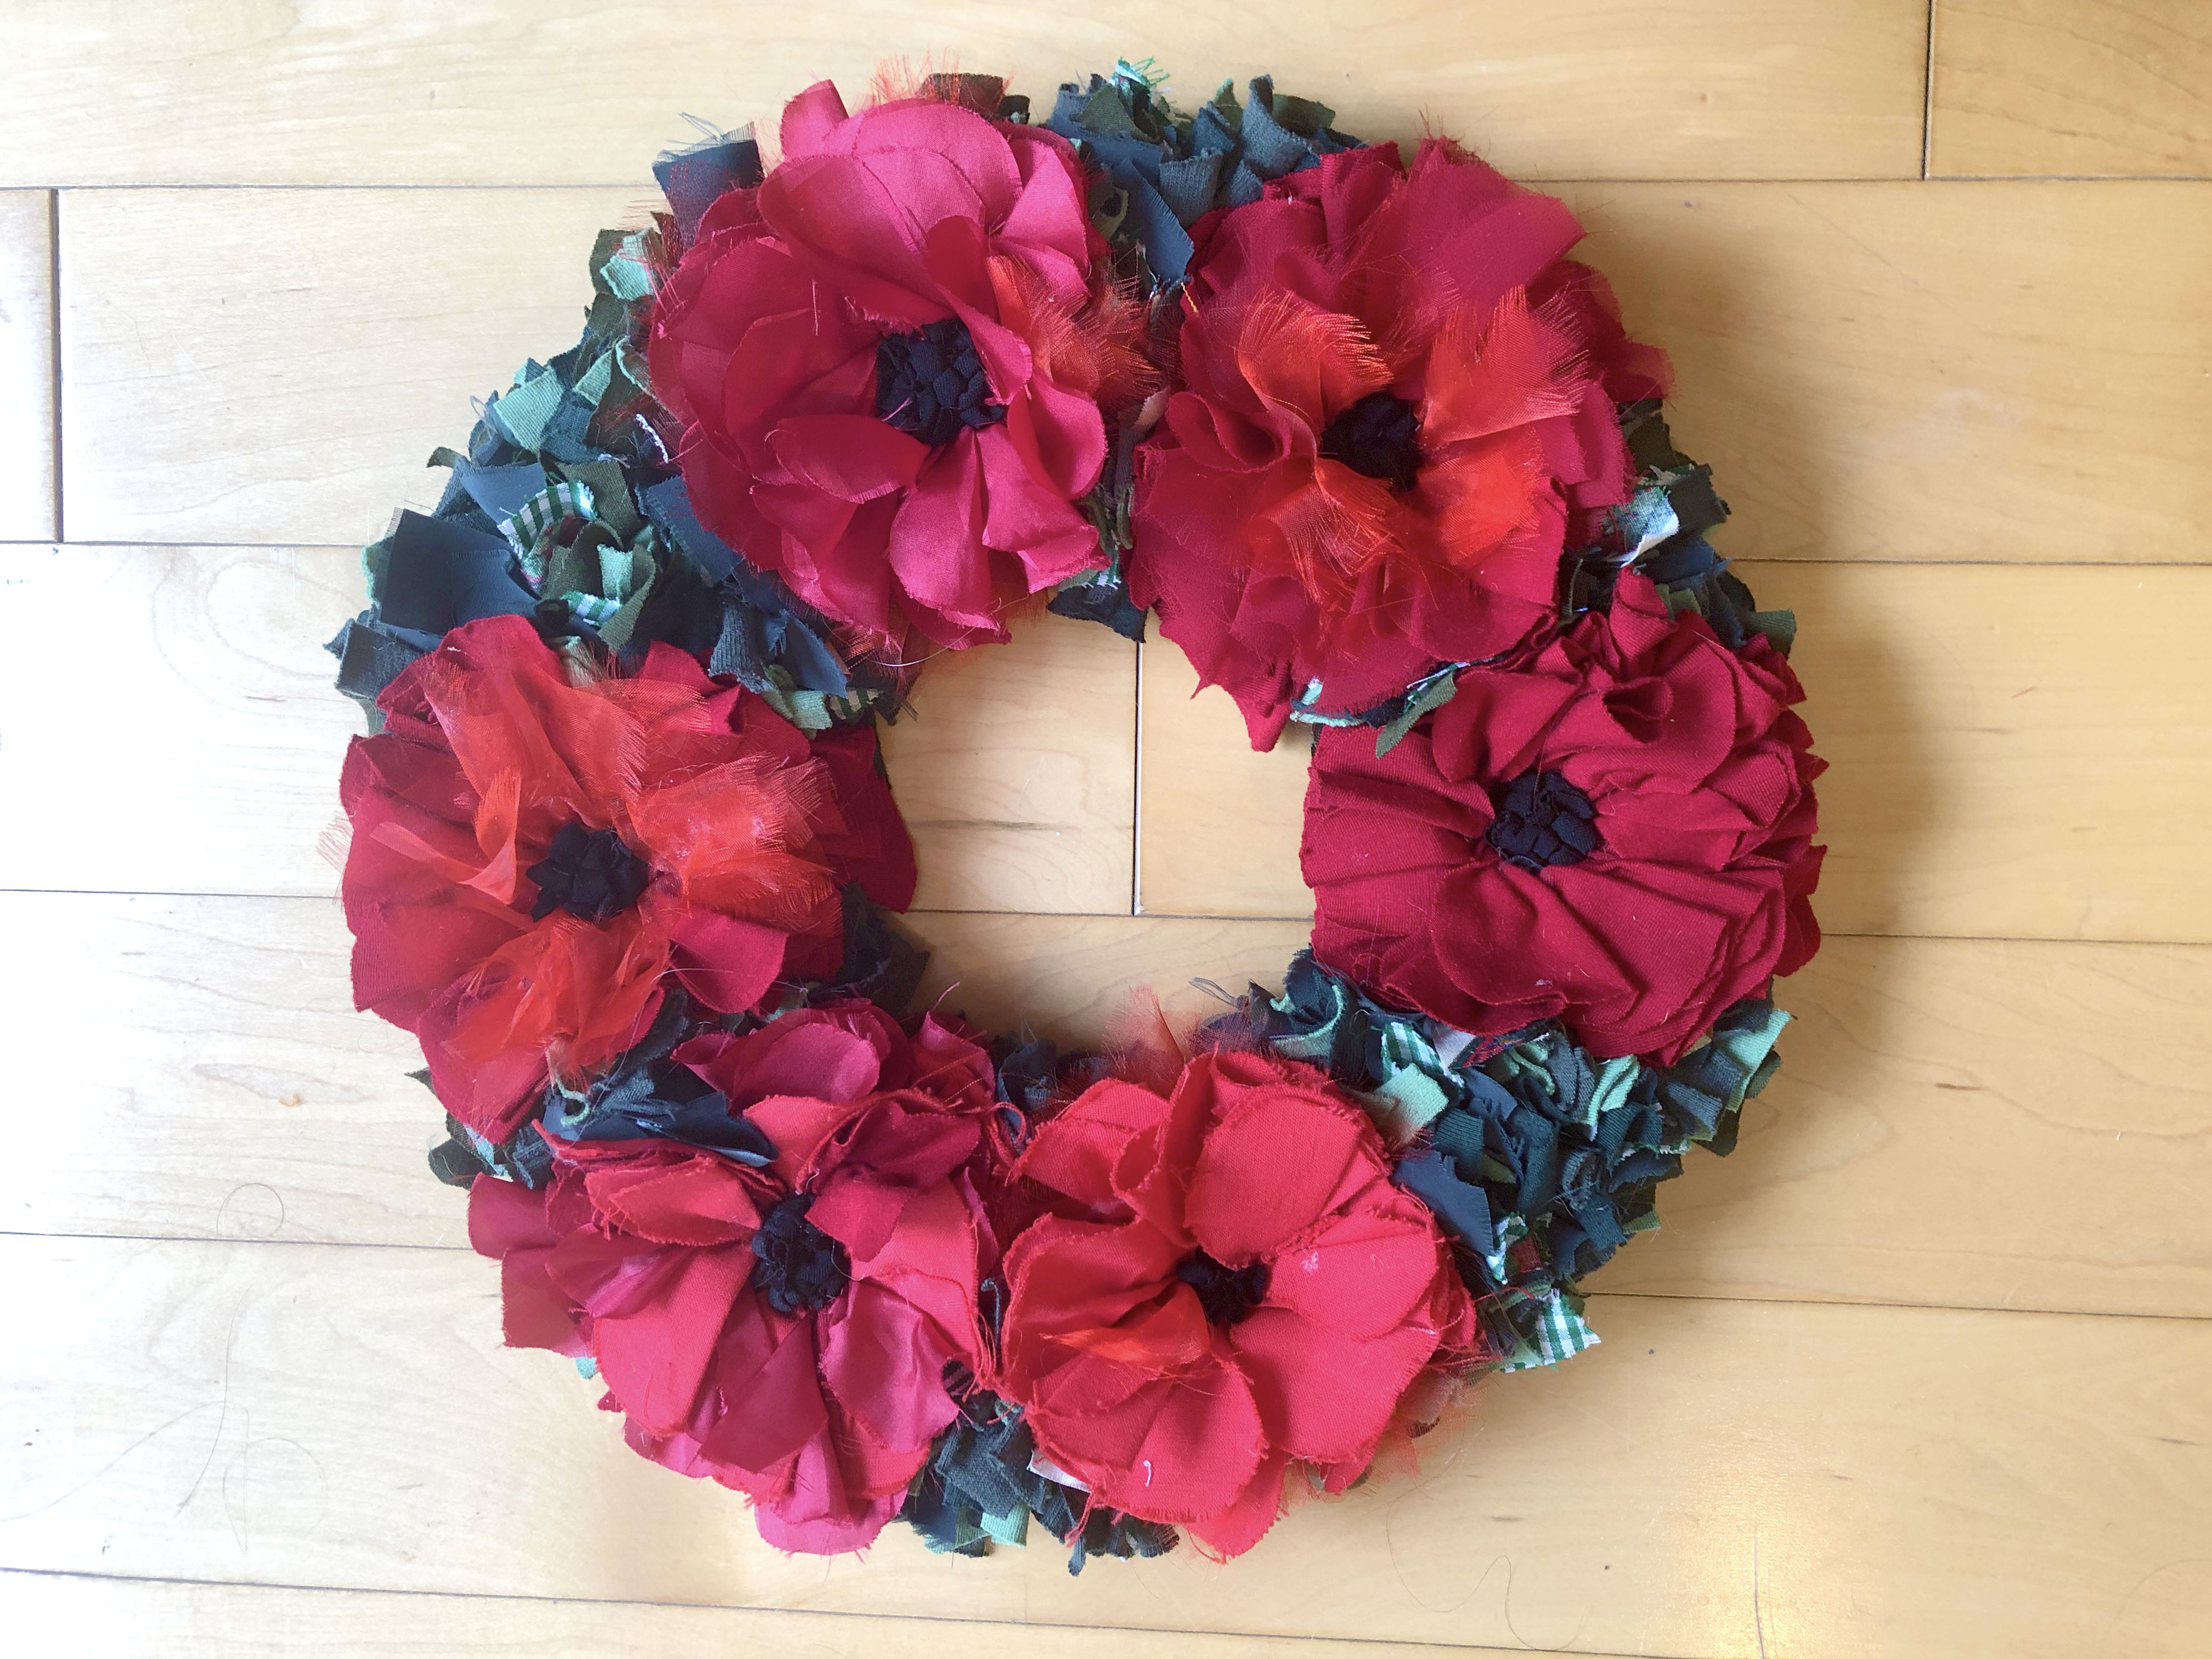
My first rag rug poppy wreath…
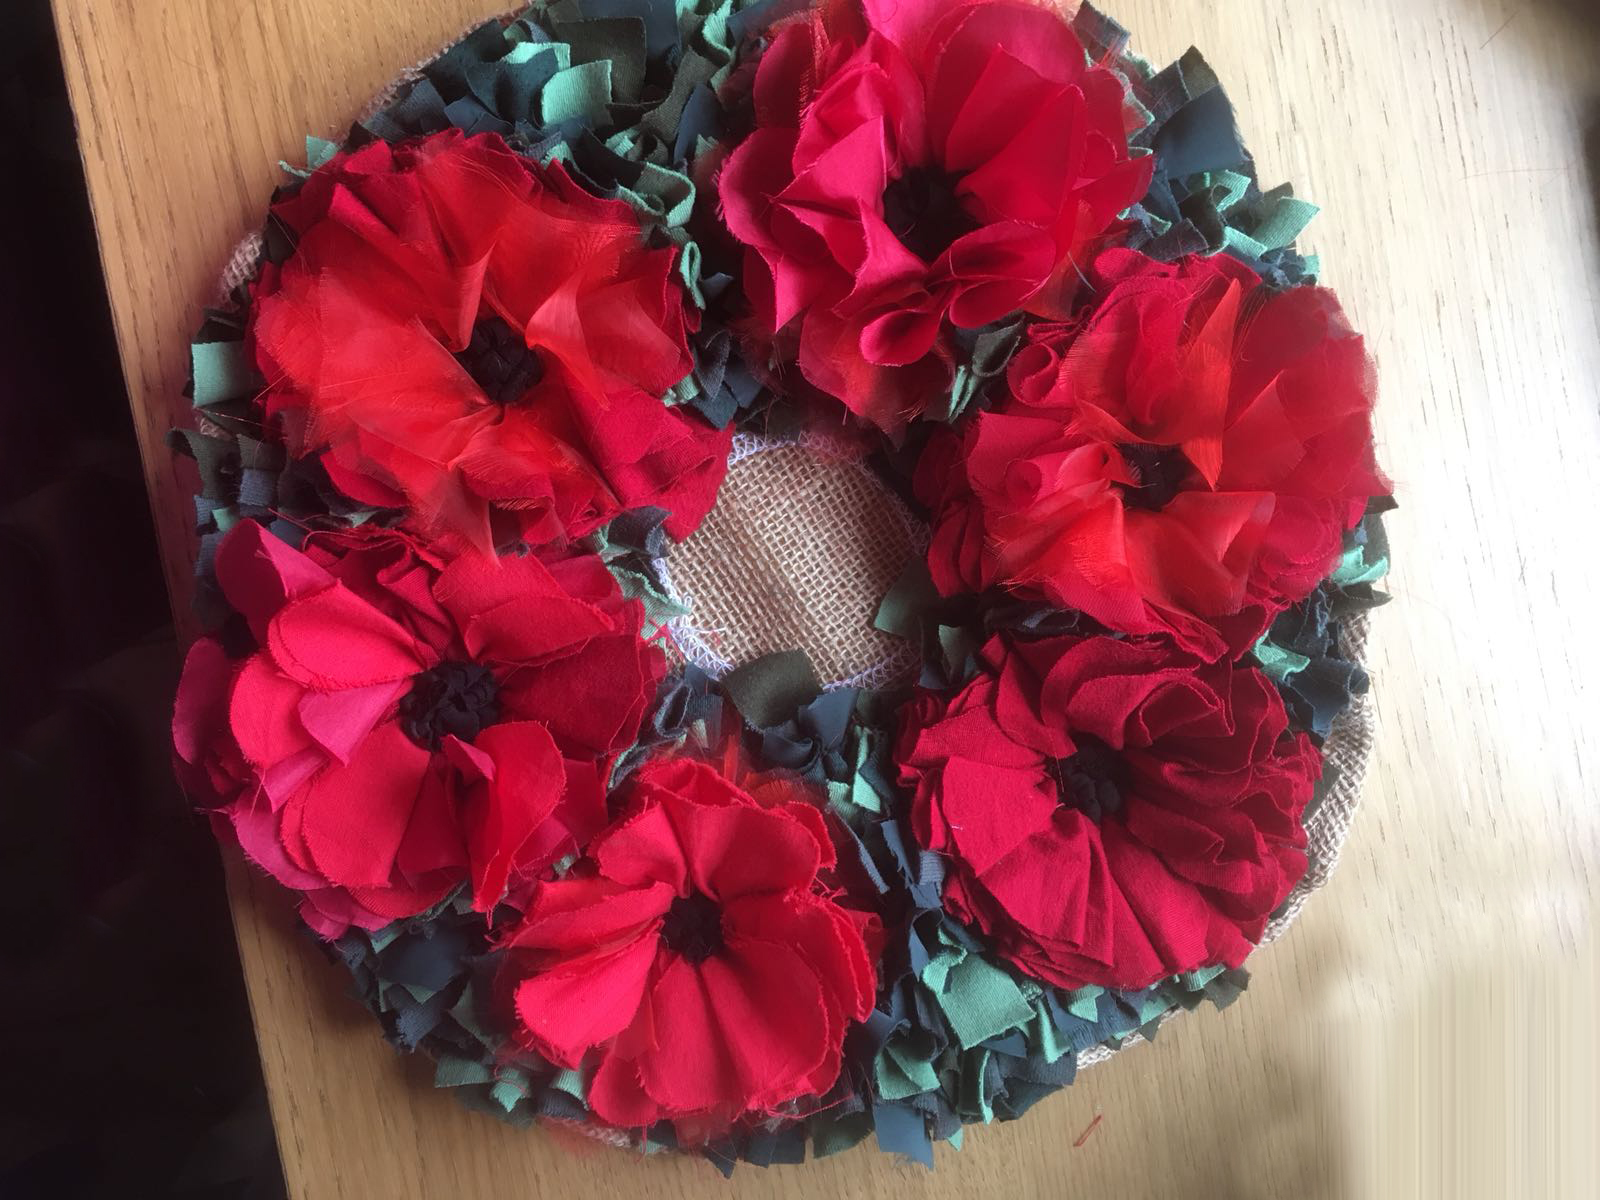
This is what it looked like before it was assembled…
Our first poppy wreath looked a bit too much like a Rag Rug Christmas Wreath, so we decided to add more flowers to our next design to make it a bit more traditional. We’re still working out the kinks, but here is how it’s looking so far…
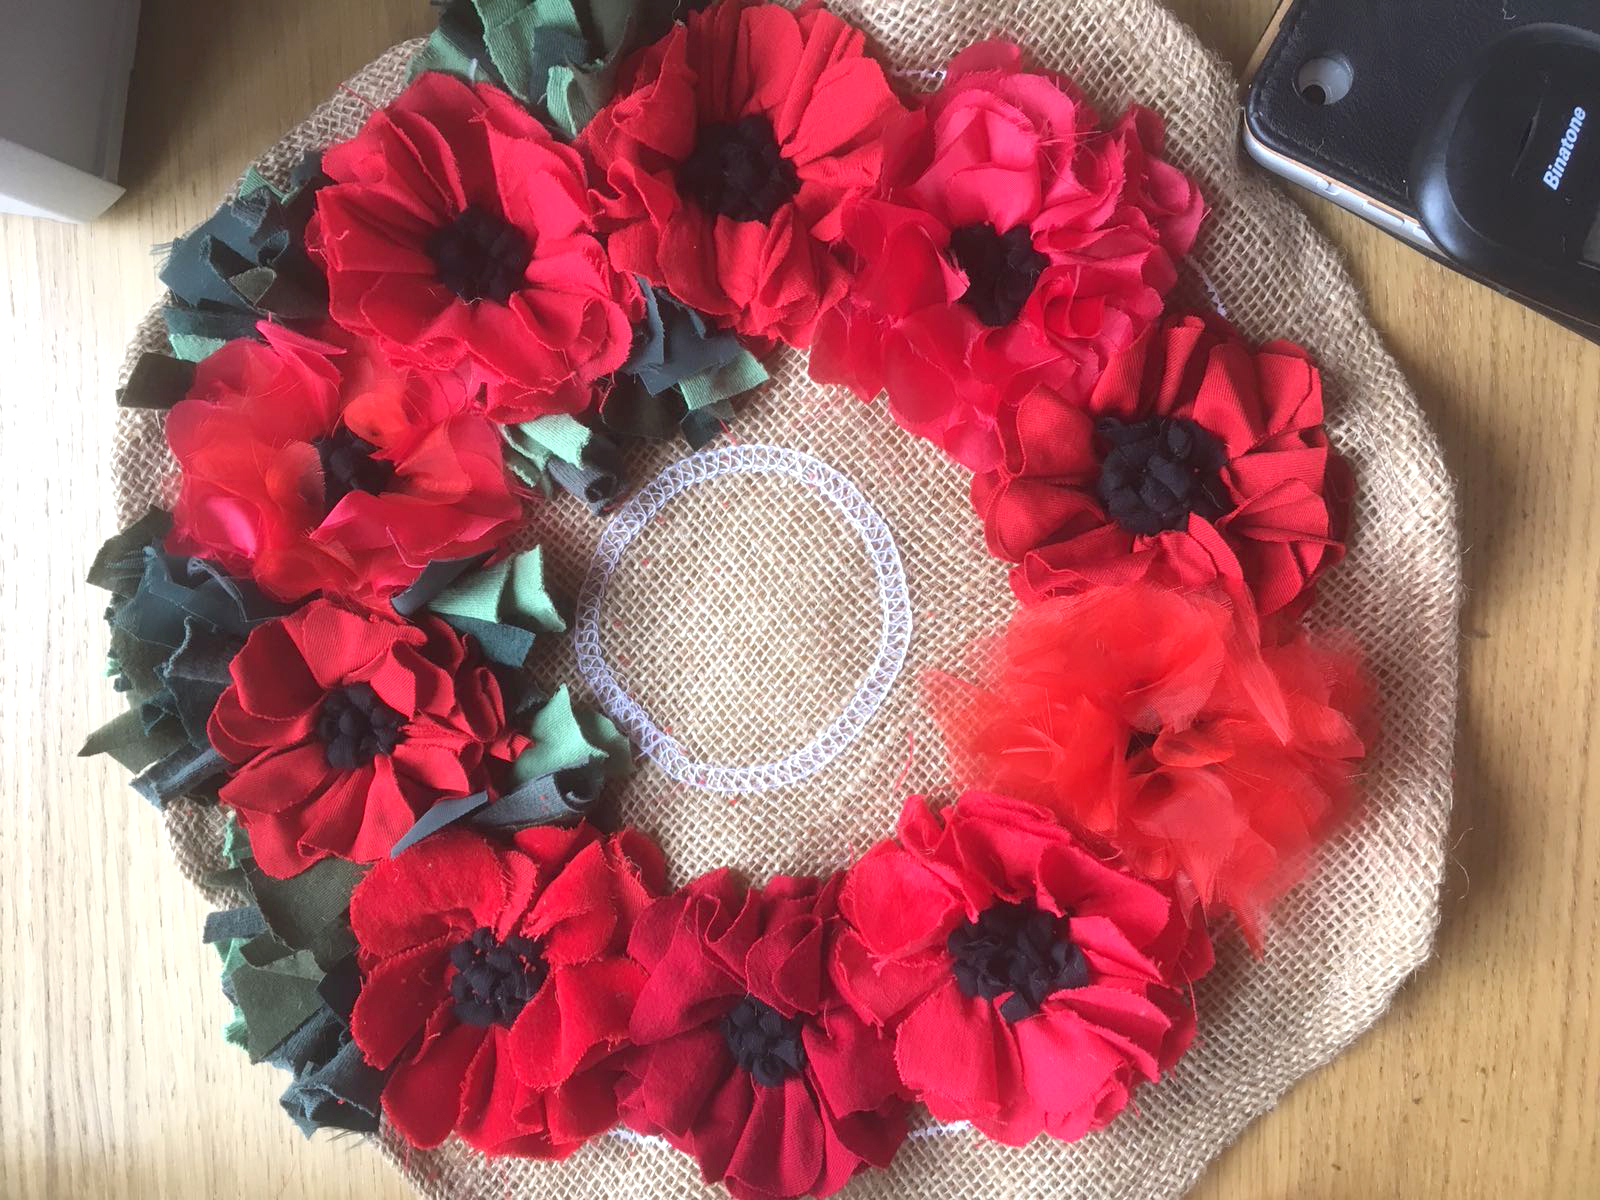
This is a work in progress poppy wreath with more flowers.
As you can see, we’re still playing around with the different fabrics a lot.
To make a rag rug wreath, you can follow our step by step instructions here or you can buy a Rag Rug Wreath Kit or set of Hemmed Hessian and Instructions over on the Ragged Life Shop. Below are our design tips if you do decide to specifically make a Rag Rug Poppy Wreath…
Rag Rug Poppy Wreath Design Tips:
- Use a variety of different greens (at least three) to fill in between the poppies – this will make your design look more vibrant.
- Include a patterned fabric amongst your green to add interest.
- When filling in your green fabric, leave a bit of blank hessian around each of your poppies. This will leave space for the flowers to open out. Otherwise your black loopy rag rugging may get swamped.
CONNECT WITH US:
Right, that’s it for my foray into the world of rag rug poppies. I hope some of you decide to give the project a go and if you do, definitely send me a photo at hello@raggedlife.com. If you’d like to be the first to see other rag rug projects, why not join our Rag Rug Community on Facebook https://www.facebook.com/groups/RagRugCommunity/or join our fortnightly newsletter here.
OR CONNECT WITH US ON SOCIAL MEDIA AT:
Instagram: https://www.instagram.com/raggedlife/
Facebook: https://www.facebook.com/raggedliferagrugs/
Pinterest: https://www.pinterest.co.uk/raggedlife/
Twitter: https://twitter.com/raggedlife
As always, happy rag rugging!
Elspeth x