The Settlement Rag Rug Wall Hanging:
I’ve been working with The Settlement in Letchworth Garden City, Hertfordshire for a while now. They’re an excellent adult education centre running courses in every skill and craft under the sun. Seriously… languages, fitness, arts & crafts… they do it all. Their headquarters is this characterful Art & Crafts building, which somehow manages to be central but still slightly off the beaten track.

The Settlement is a beautiful Arts & Crafts period building which was formerly an old Inn (the Skittles Inn).
The Challenge:
Every year, the Settlement team take advantage of the quieter summer months to change a few things about the place. This year that involved completely revamping the communal sitting area. They changed all the chairs and tables (the old ones were comfy but a bit dated) and took down the heavy curtains to make the space feel brighter and airier. The new space looked great, but left the room with a slight echo and in need of a little injection of cosiness. I wonder what would make things feel cosier? A rag rug perhaps! That was Sonia at The Settlement’s thought process at least, so she called me up and I came over to see the room and see if I could be of any help.
We took a look at the room together and after a bit of moving of chairs and tables and viewing things from different angles, had a few thoughts. My initial thought was that the room had to be practical as well as beautiful. I almost immediately ruled out a rug because of a couple of reasons:
- In the Settlement sitting room, people move the chairs and tables around a lot before and after classes. A rug would reduce the floor space, forcing people to manoeuvre around it – not ideal.
- A rug should only be used in a place that makes sense. That’s pretty hard to explain but generally there has to be a focal point which the rug is centred around e.g. running down a hallway, next to a bed, under a kitchen table. You can’t plonk a rug down just anywhere. The location that made the most sense in the sitting room was in front of the fireplace, but putting a rug there would mean that there wasn’t enough floor space for the tables and chairs. It would also draw all the focus to one side of the room. It didn’t really work for me.
So, after a bit of discussion between Sonia and myself, we decided that the west wall was the one that needed a bit of colour and comfort. It was a process of elimination really – the east wall had a gorgeous fireplace which provided interest and warmth, the south wall had book cases for interest and the north wall was covered in windows so didn’t leave much room for creativity.
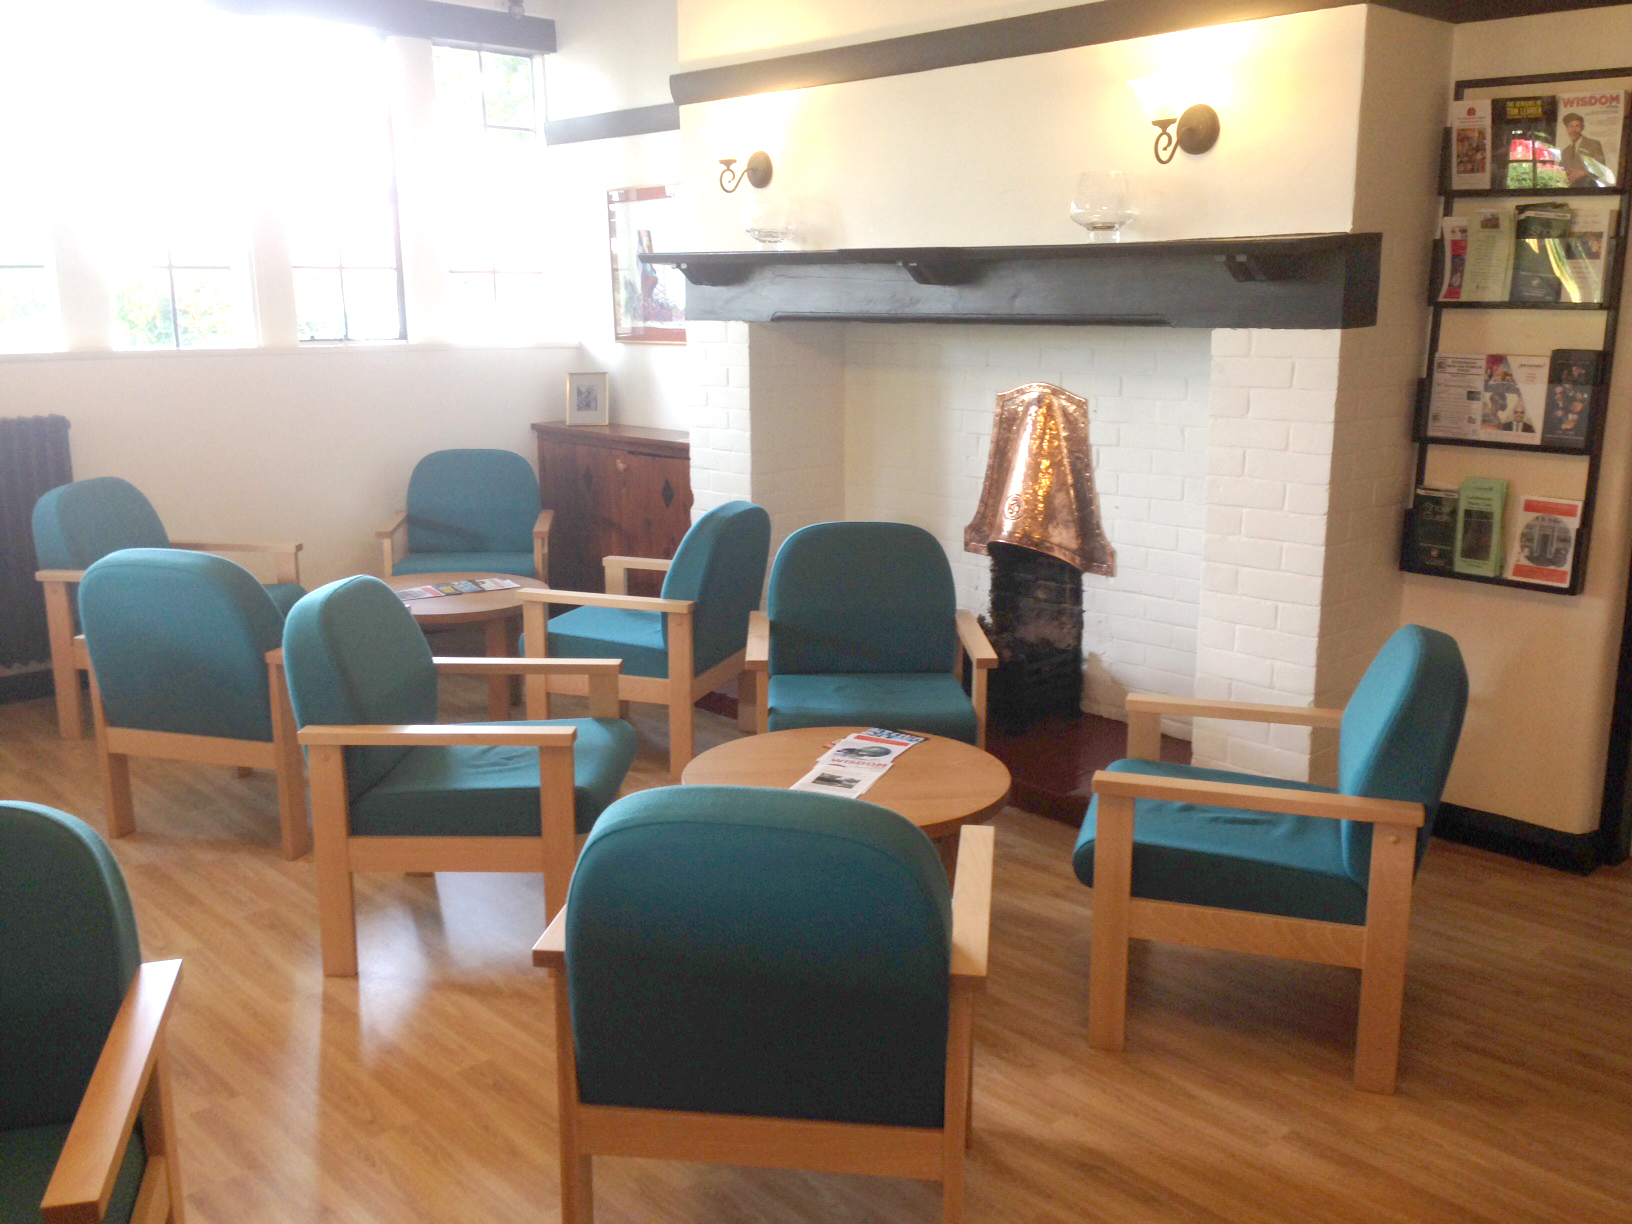
The common room has a nice, large fireplace on one wall.
The west wall had a lovely bit of white space directly opposite the fireplace. Both Sonia and I thought that a rag rug wall hanging would look lovely there so I measured it up. Right, so have our space, what about design?

The common room is beautiful and light. The space under the window on the left is where the wall hanging will sit.
The Rag Rug Design:
Sometimes when I’m completing a rag rug commission, the client doesn’t have a concrete idea of what they’d like to create. Maybe they have some colours in mind, but not necessarily a design. Sonia did have a pretty good idea of what she’d like. The Settlement has a beautiful mosaic on the outside of the building and Sonia thought that it would be lovely to have a fabric version inside.

The mosaic is in pride of place on one of the outside walls of the Settlement.
So Sonia sent me over the below image to base the rag rug wall hanging on:

I immediately loved the design when it came through. It would lend itself perfectly to loopy rag rugging.
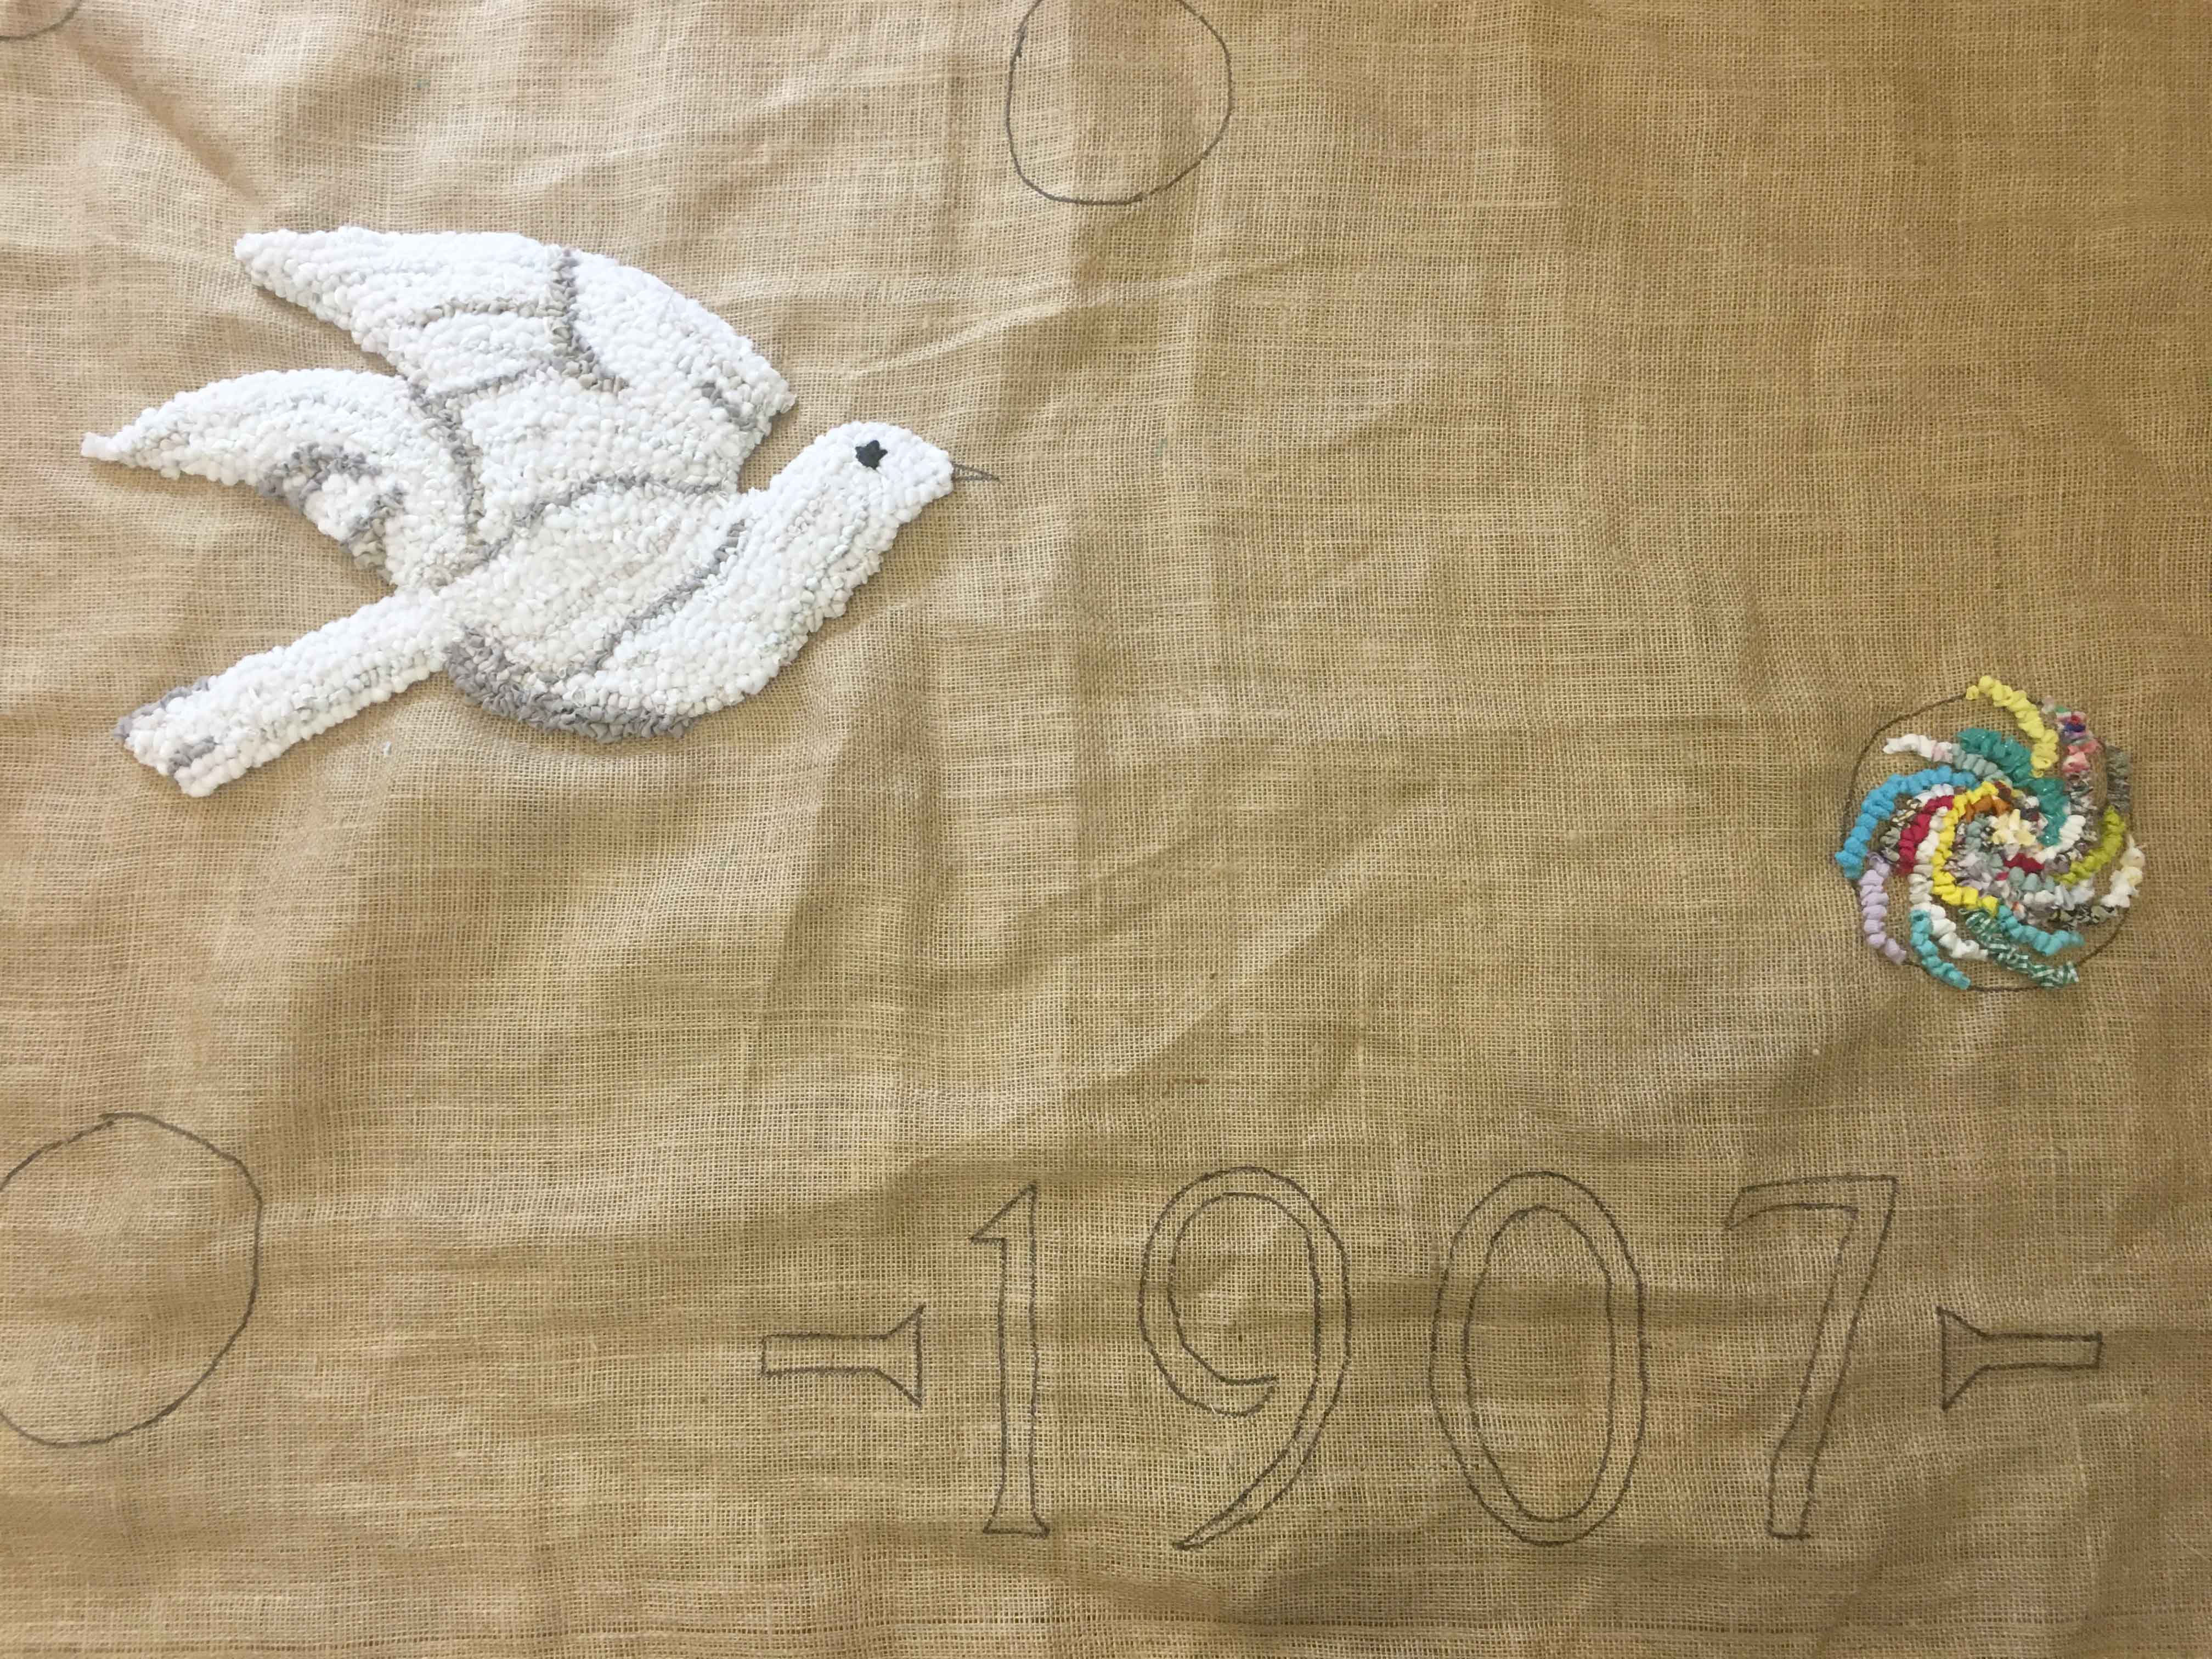
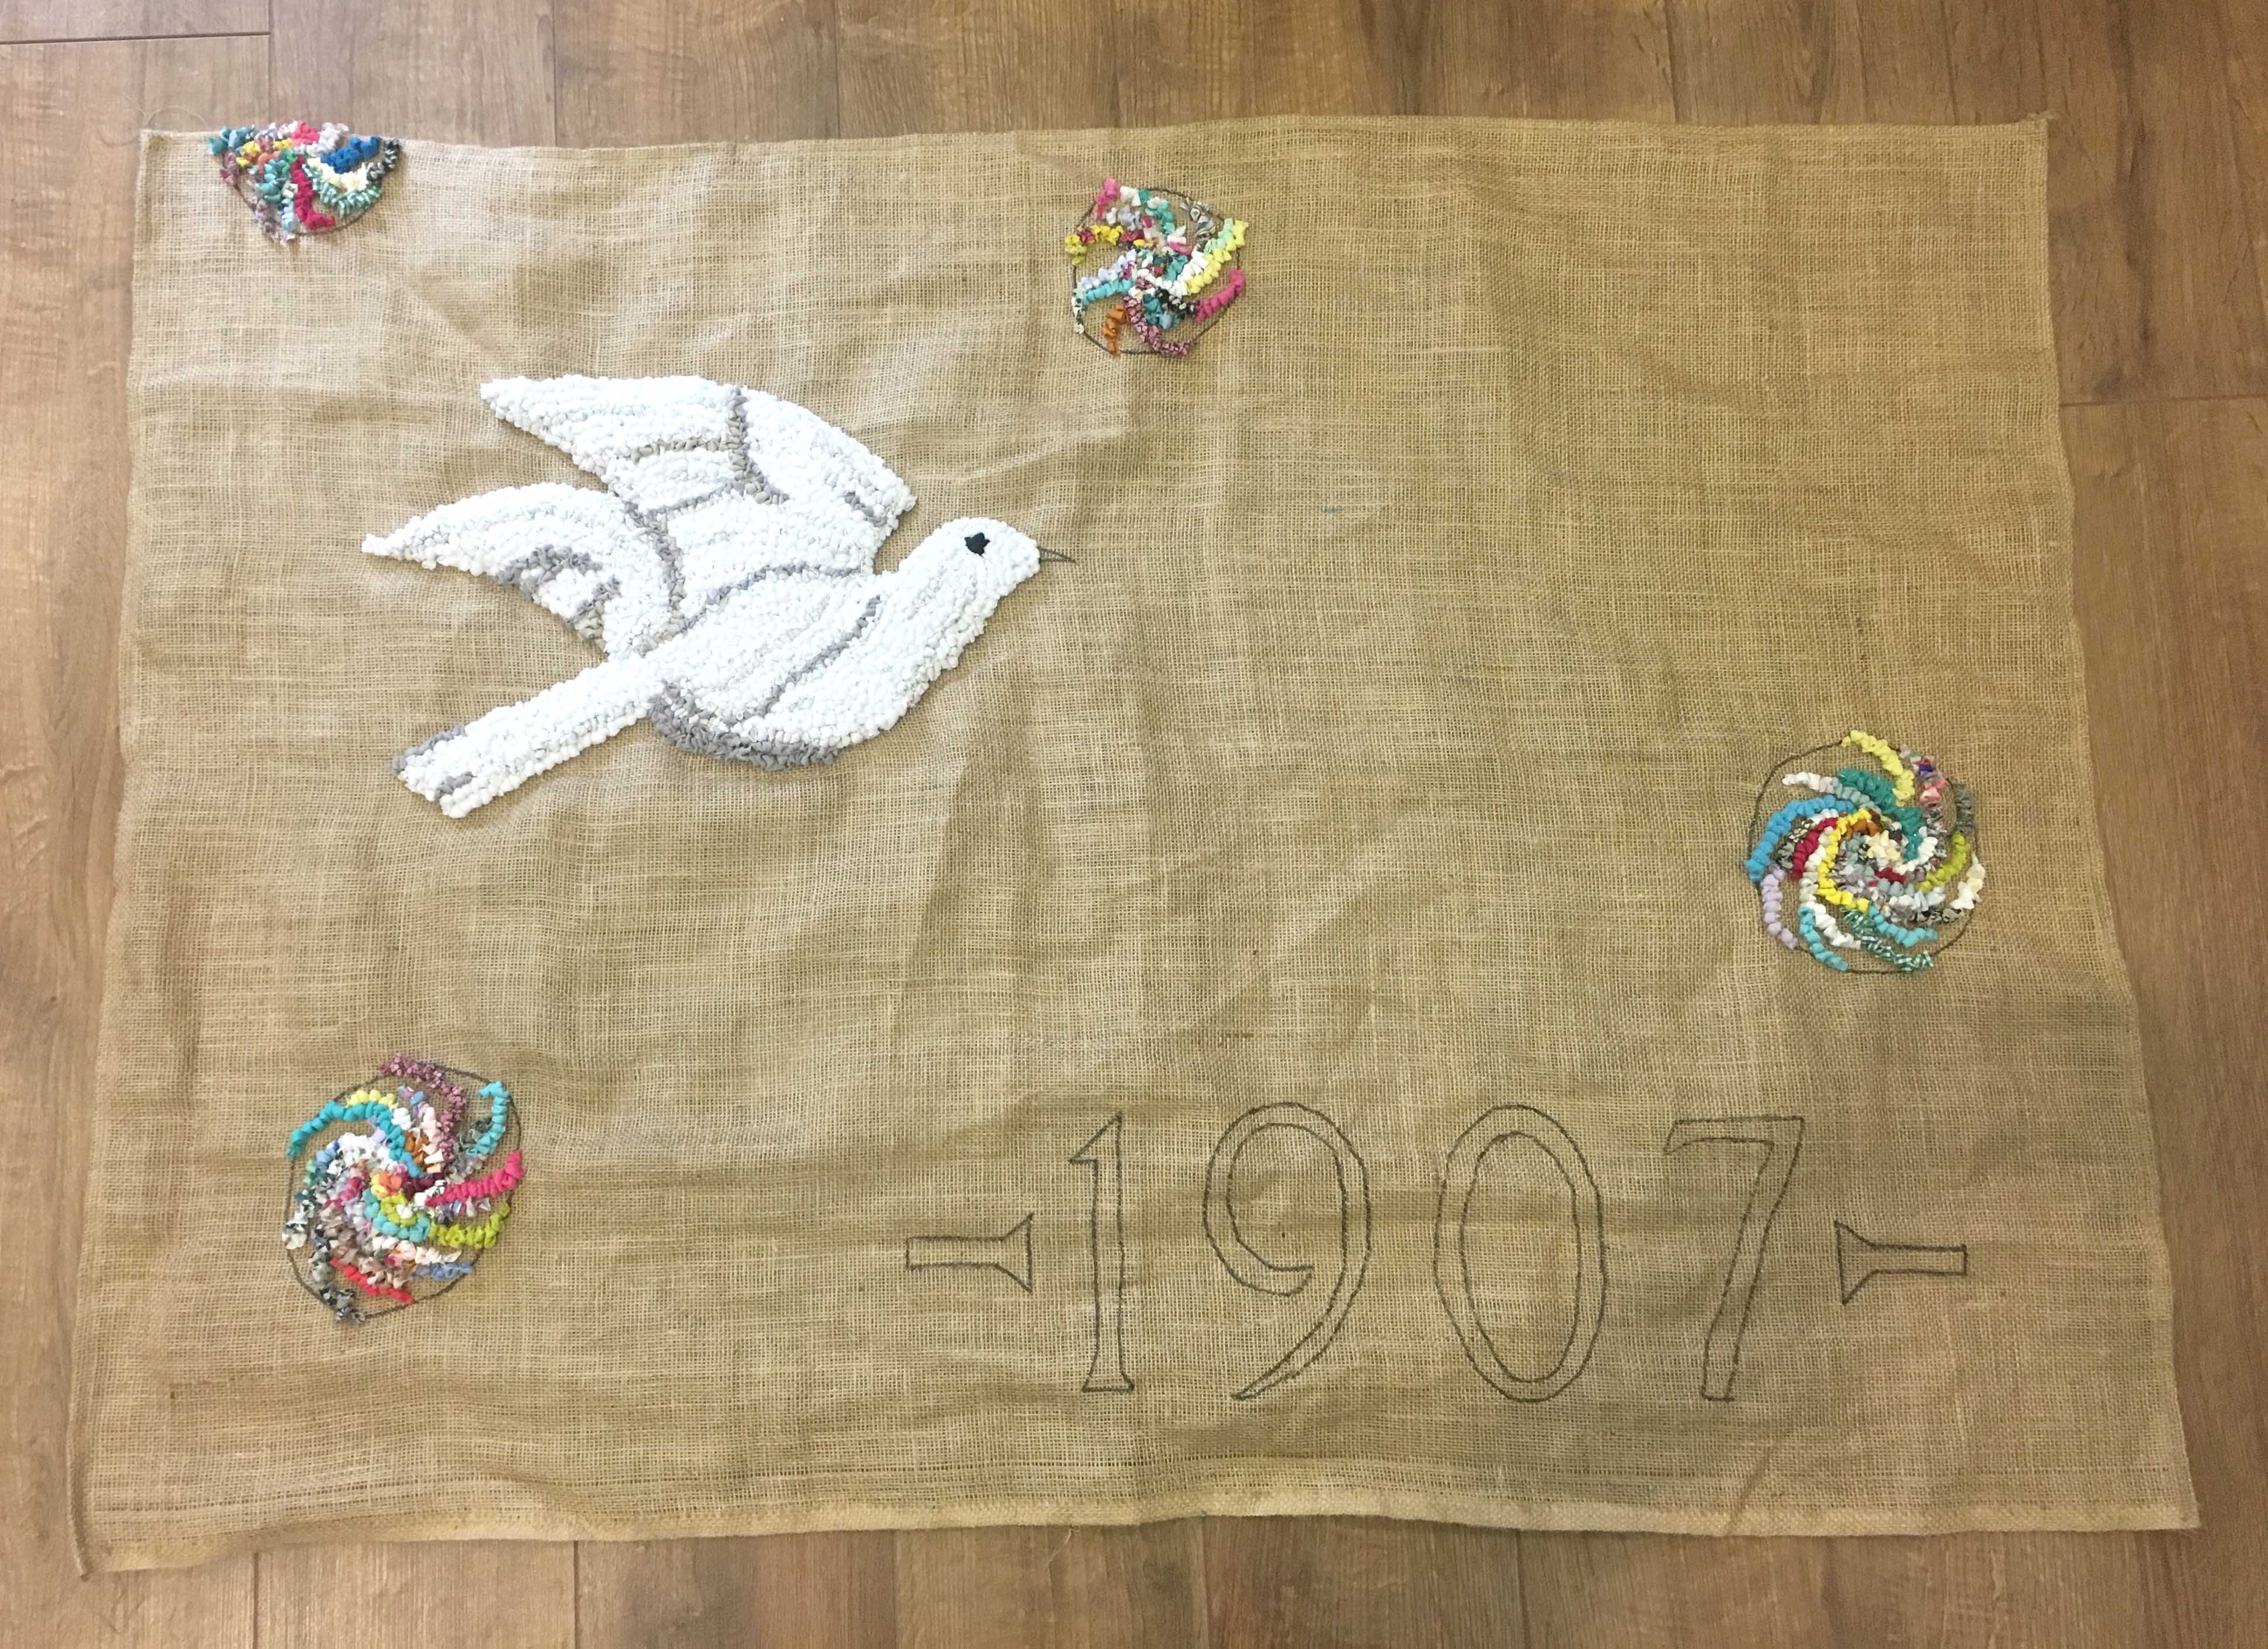
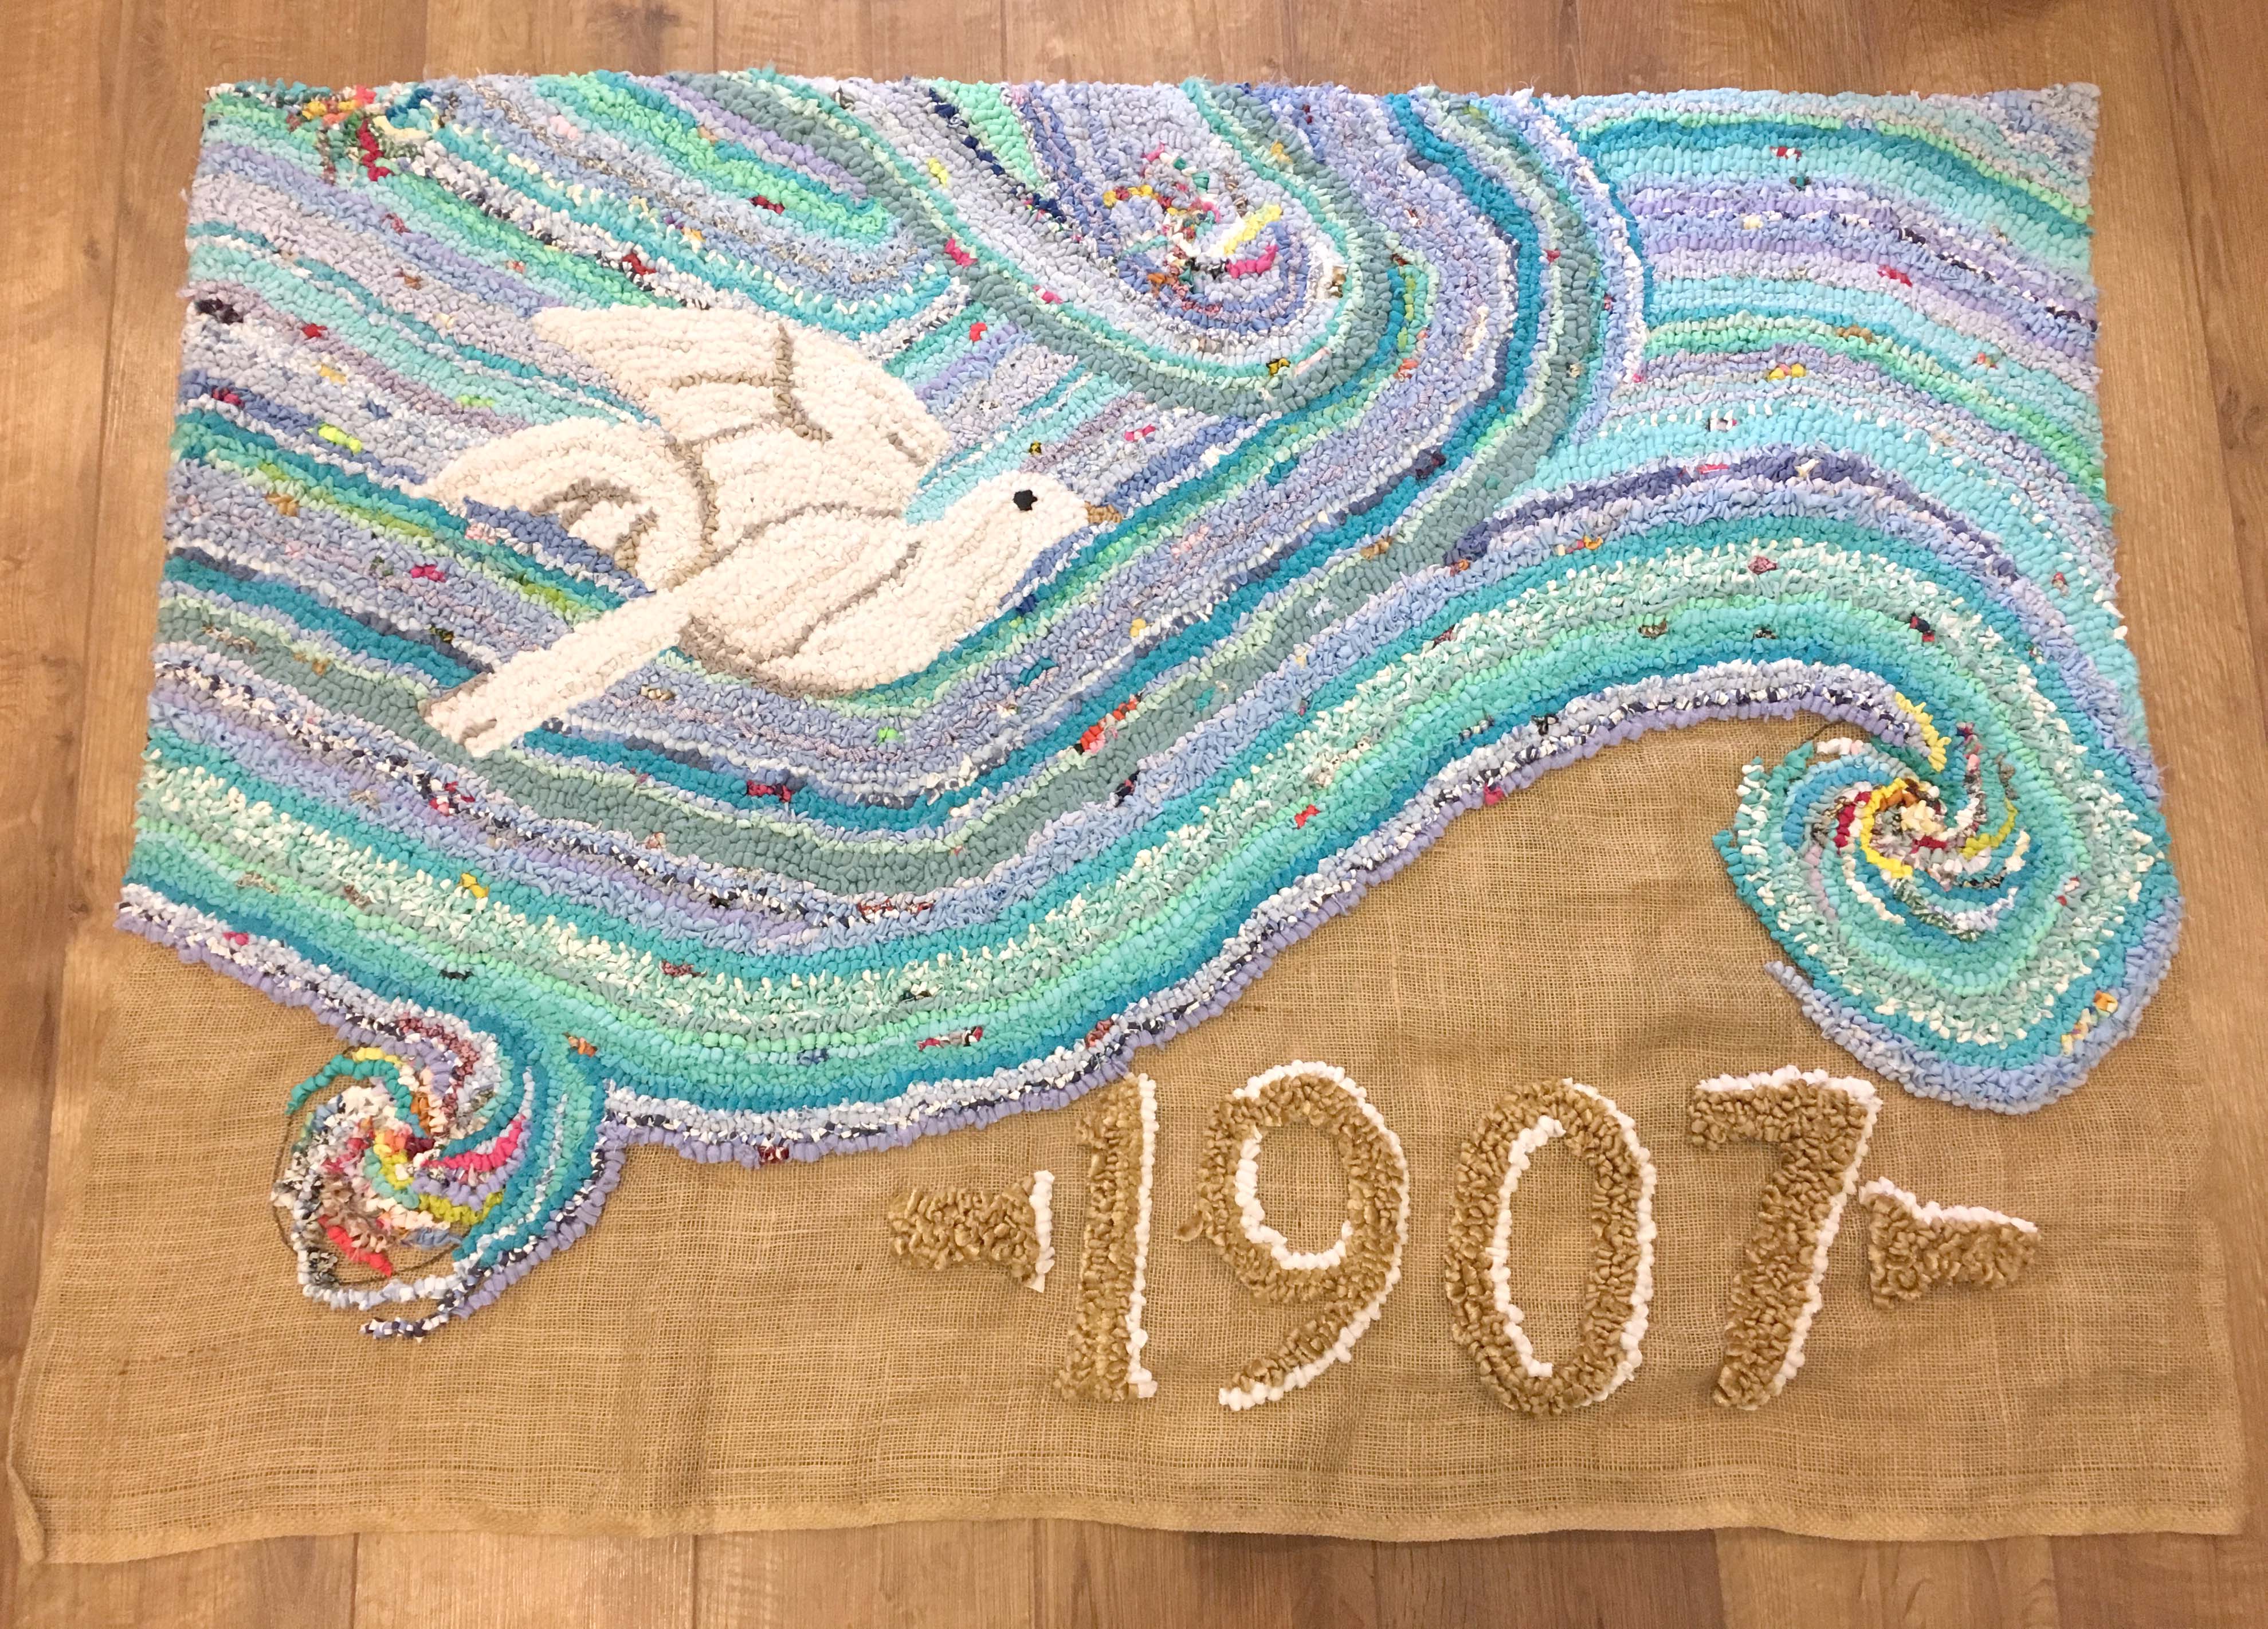
With a design this defined and detailed, the only real option was to create a wall hanging in the loopy rag rugging technique. Shaggy rag rugging would have distorted the image and all the detail would have been lost. From a practical perspective, loopy rag rugging doesn’t weigh as much so is generally easier to hang as well. With the dimensions I was working with, it would be impossible to use the entire design, so I decided to focus on the left side of the mosaic with the dove and founding date of The Settlement. This is the section that I took:
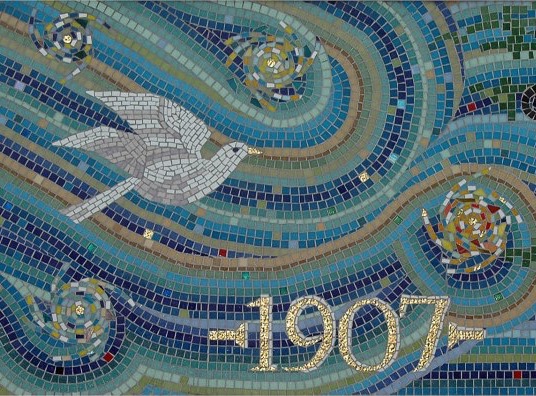
I knew that the dove would become the focus of the wall hanging.
Making the Rag Rug Wall Hanging:
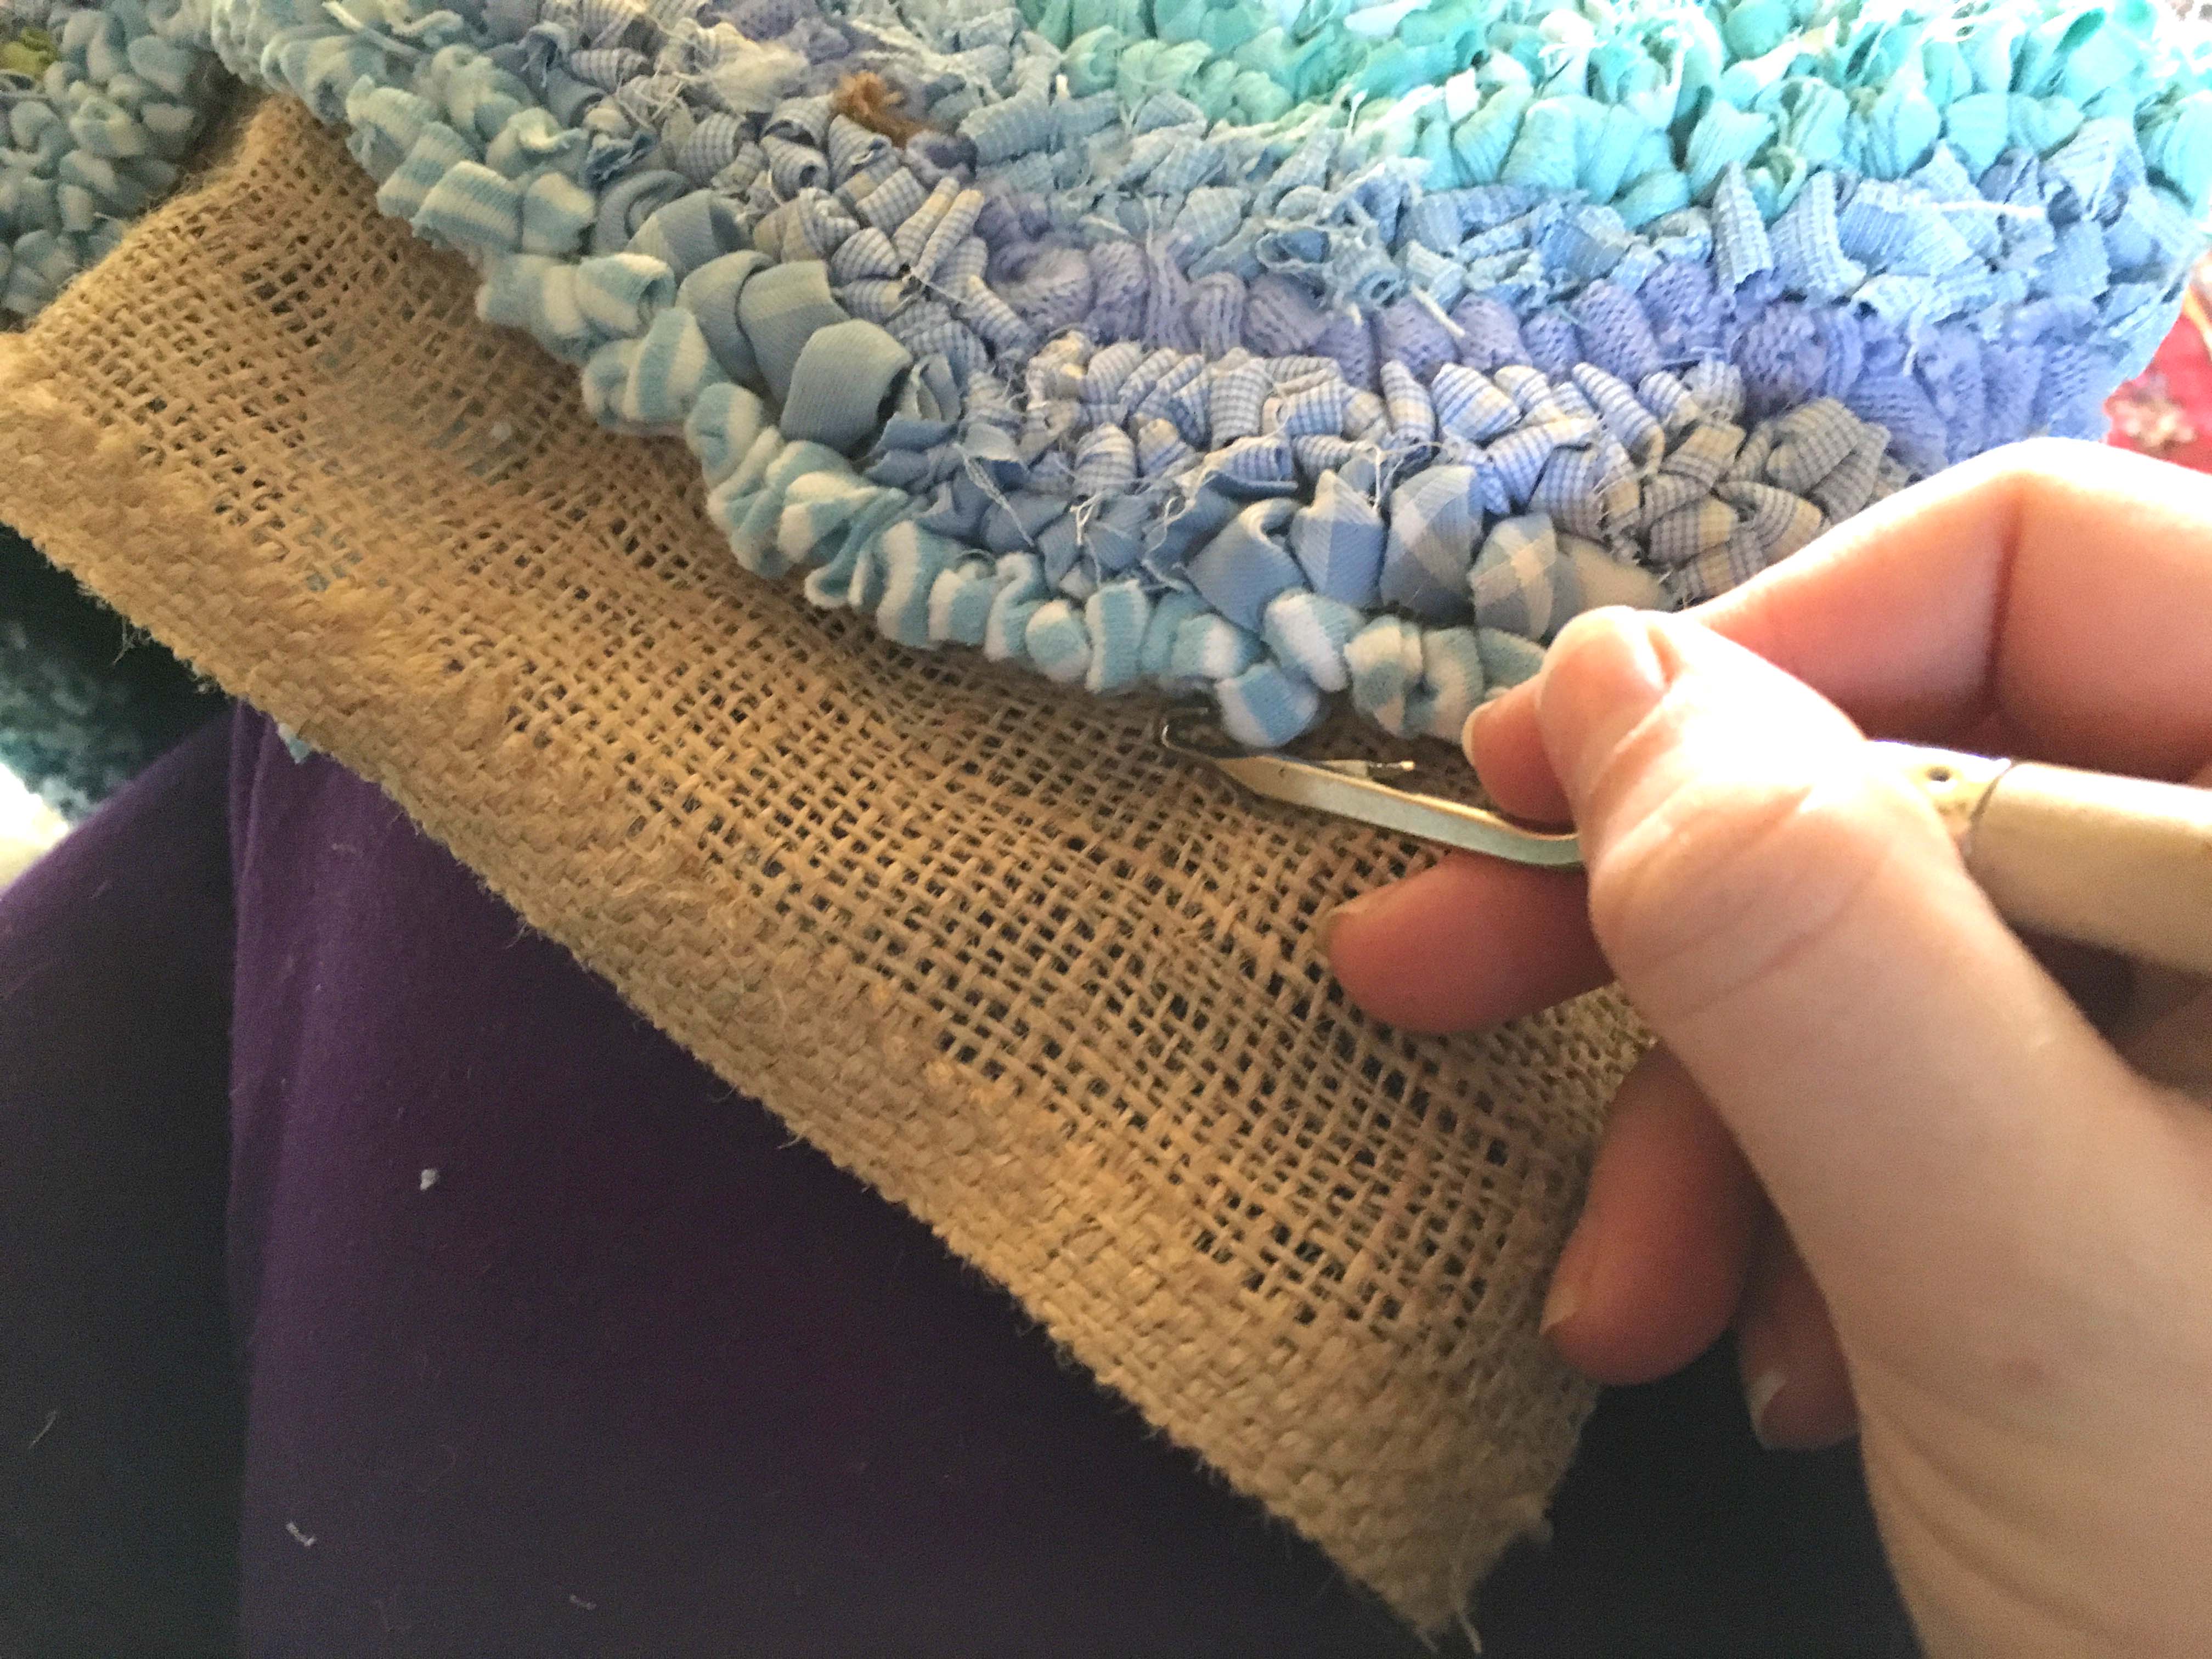
Before I could get started with the making, I hemmed the hessian to the agreed upon size. For this particular rag rug wall hanging, the dimensions were 98 x 130cm to fit the wall we’d chosen perfectly. This is my least favourite part of the rag rug process but is a necessary evil.
Next, I sketched out the main shapes onto the rag rug hessian. For this particular design, that was the dove, letters and swirling maelstroms. Although I was quite careful to sketch out the dove and letters accurately (albeit freehand), I just sketched circles for the swirls as I knew that I would just make them up as I went along.
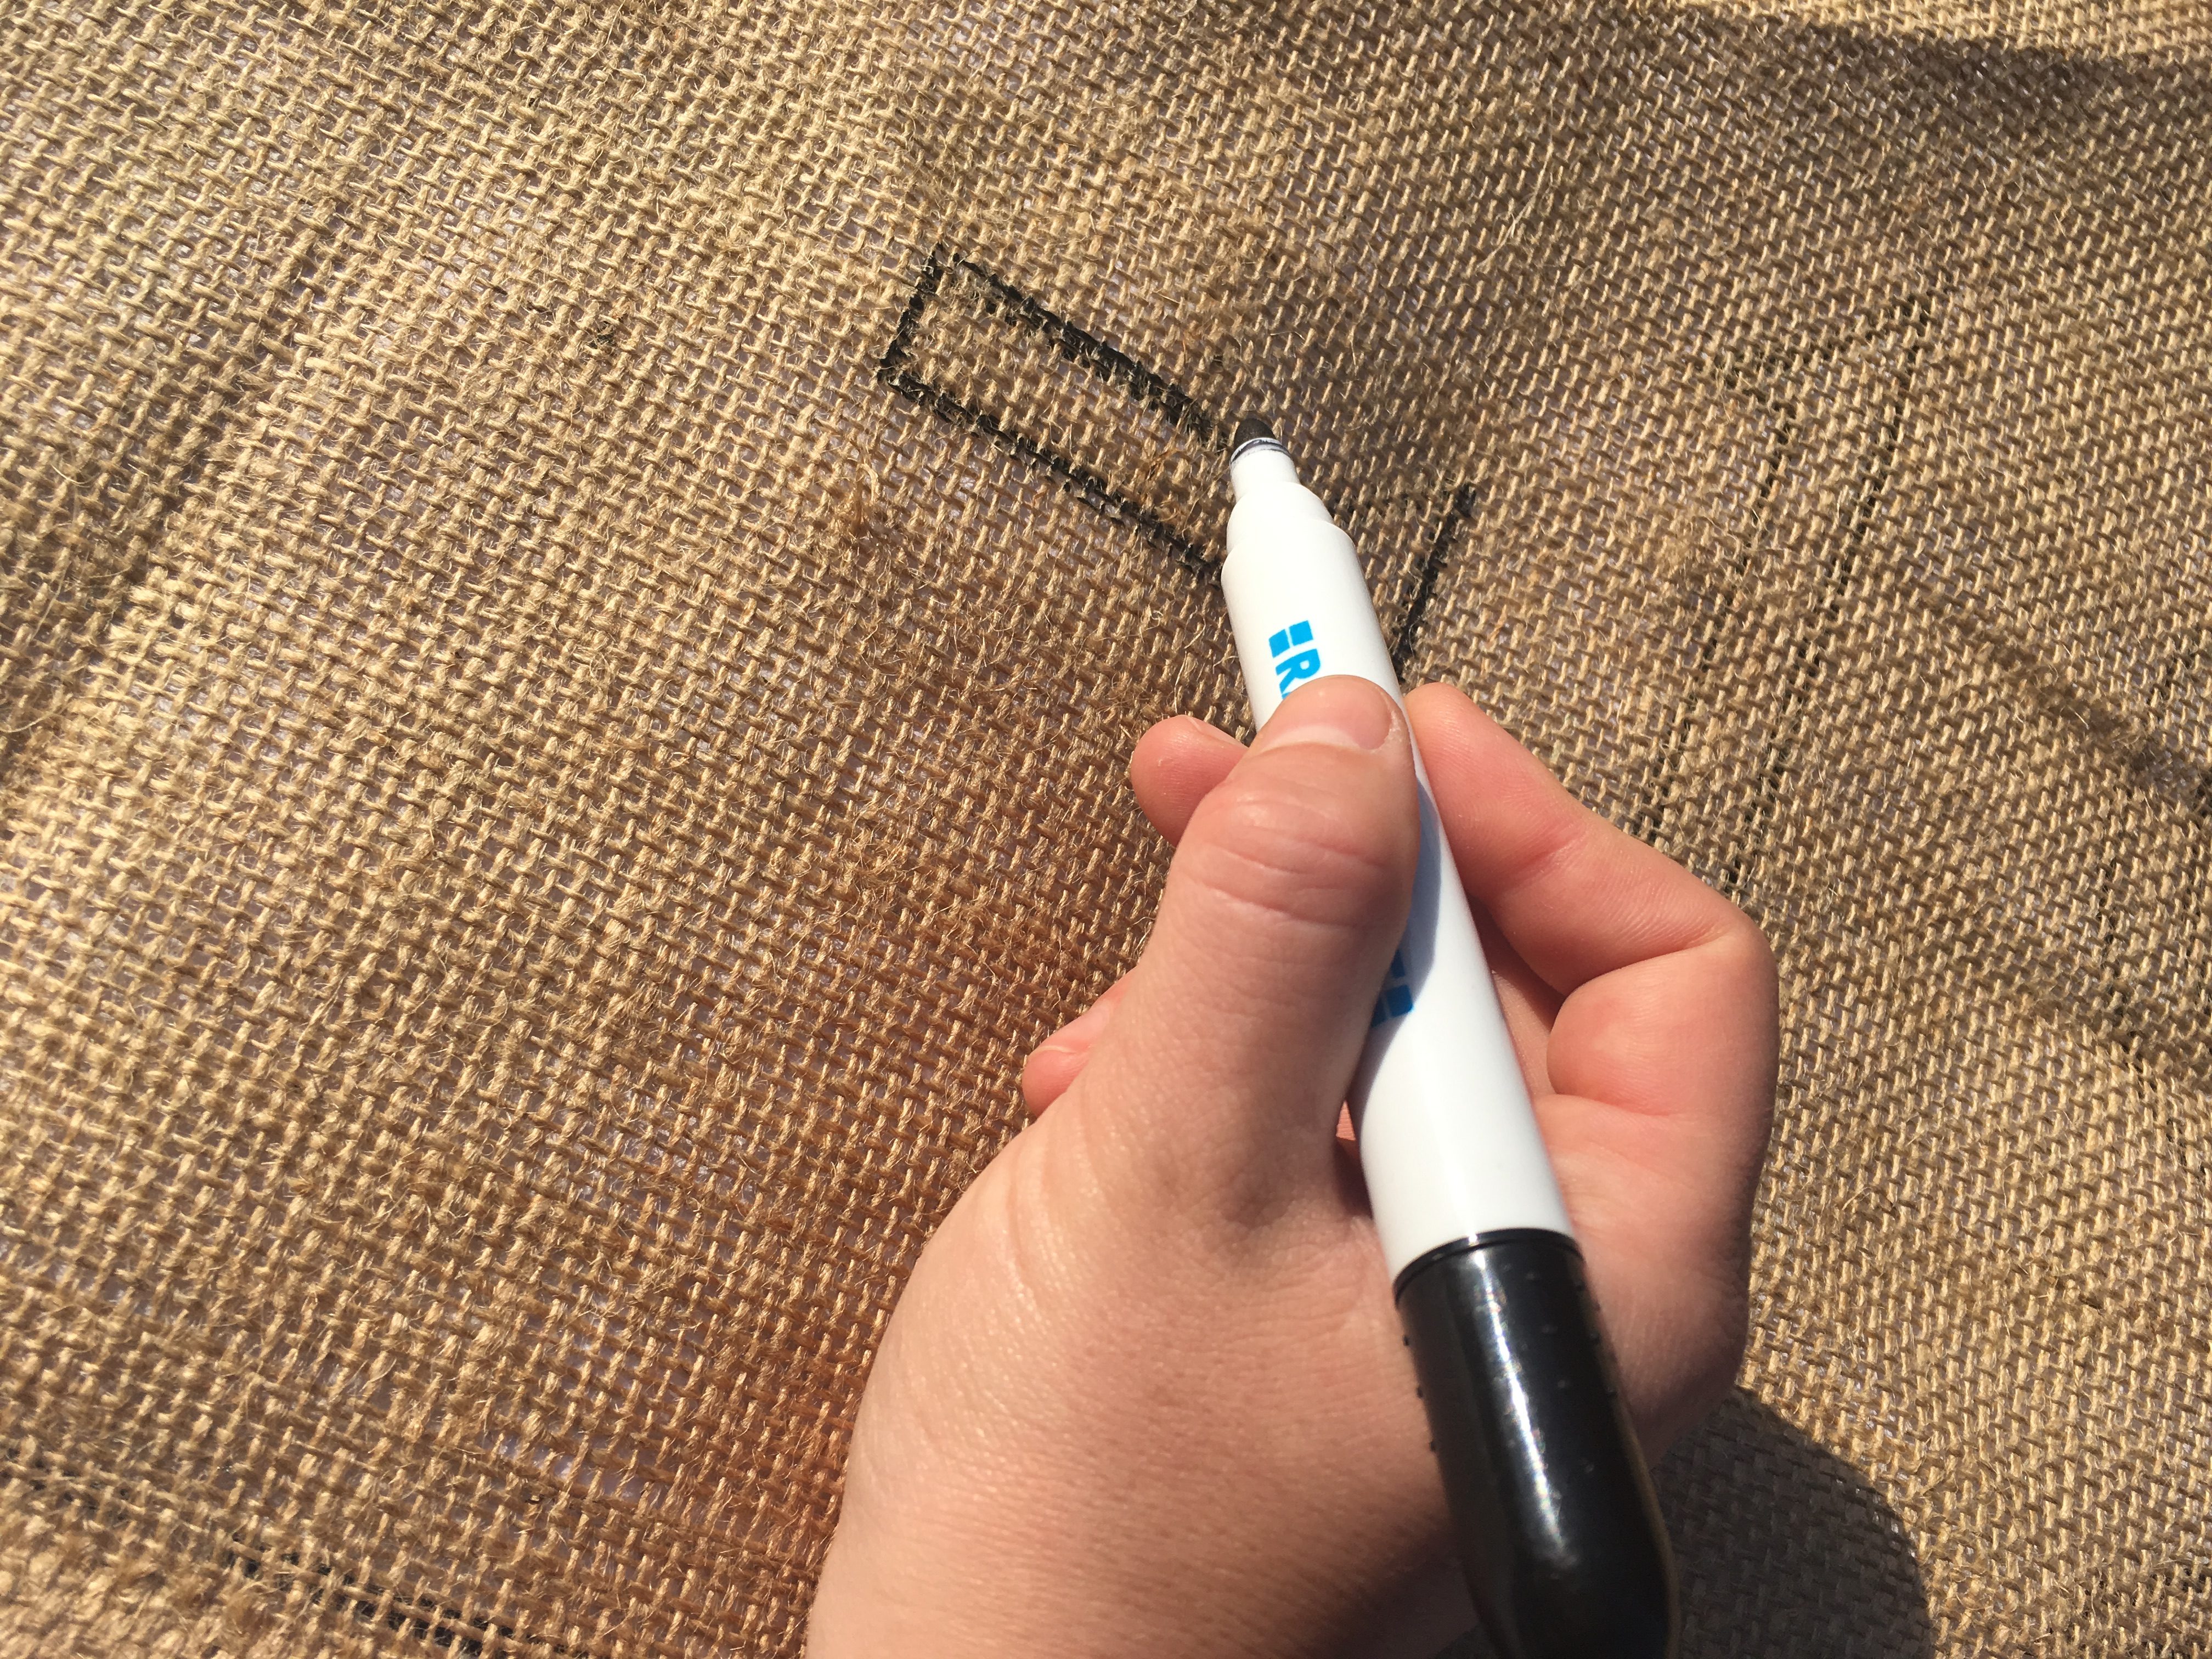
I sketched out my design onto the hessian before starting the rag rugging.
With any complex rag rug project, I prefer to start with the hardest part first. For the rag rug wall hanging, this was the dove. So, I chose a few greys and whites to cut up to begin with. I used a white shimmery velour, white cotton, two grey jersey tops and a darker grey cotton. Using a variety of different fabrics creates interest and texture without you having to do a lot of work. Once I’d cut my dove colours into long strips, I dived in and started the loopy rag rugging… eek!
It can sometimes be a bit daunting to start a new rag rug piece but once you’ve made those first loops, it flows from then on.
I began with the darkest of the grey materials and created the shaded area at the bottom of the dove first. My plan was to rag rug all the darker contour lines of the dove first before filling in with subtler shades. This is always the most nerve-wracking part as the rag rugging tends to look very strange and you begin to doubt yourself.
It’s hard to have faith and confidence that this is going to turn out looking like a rag rug dove.
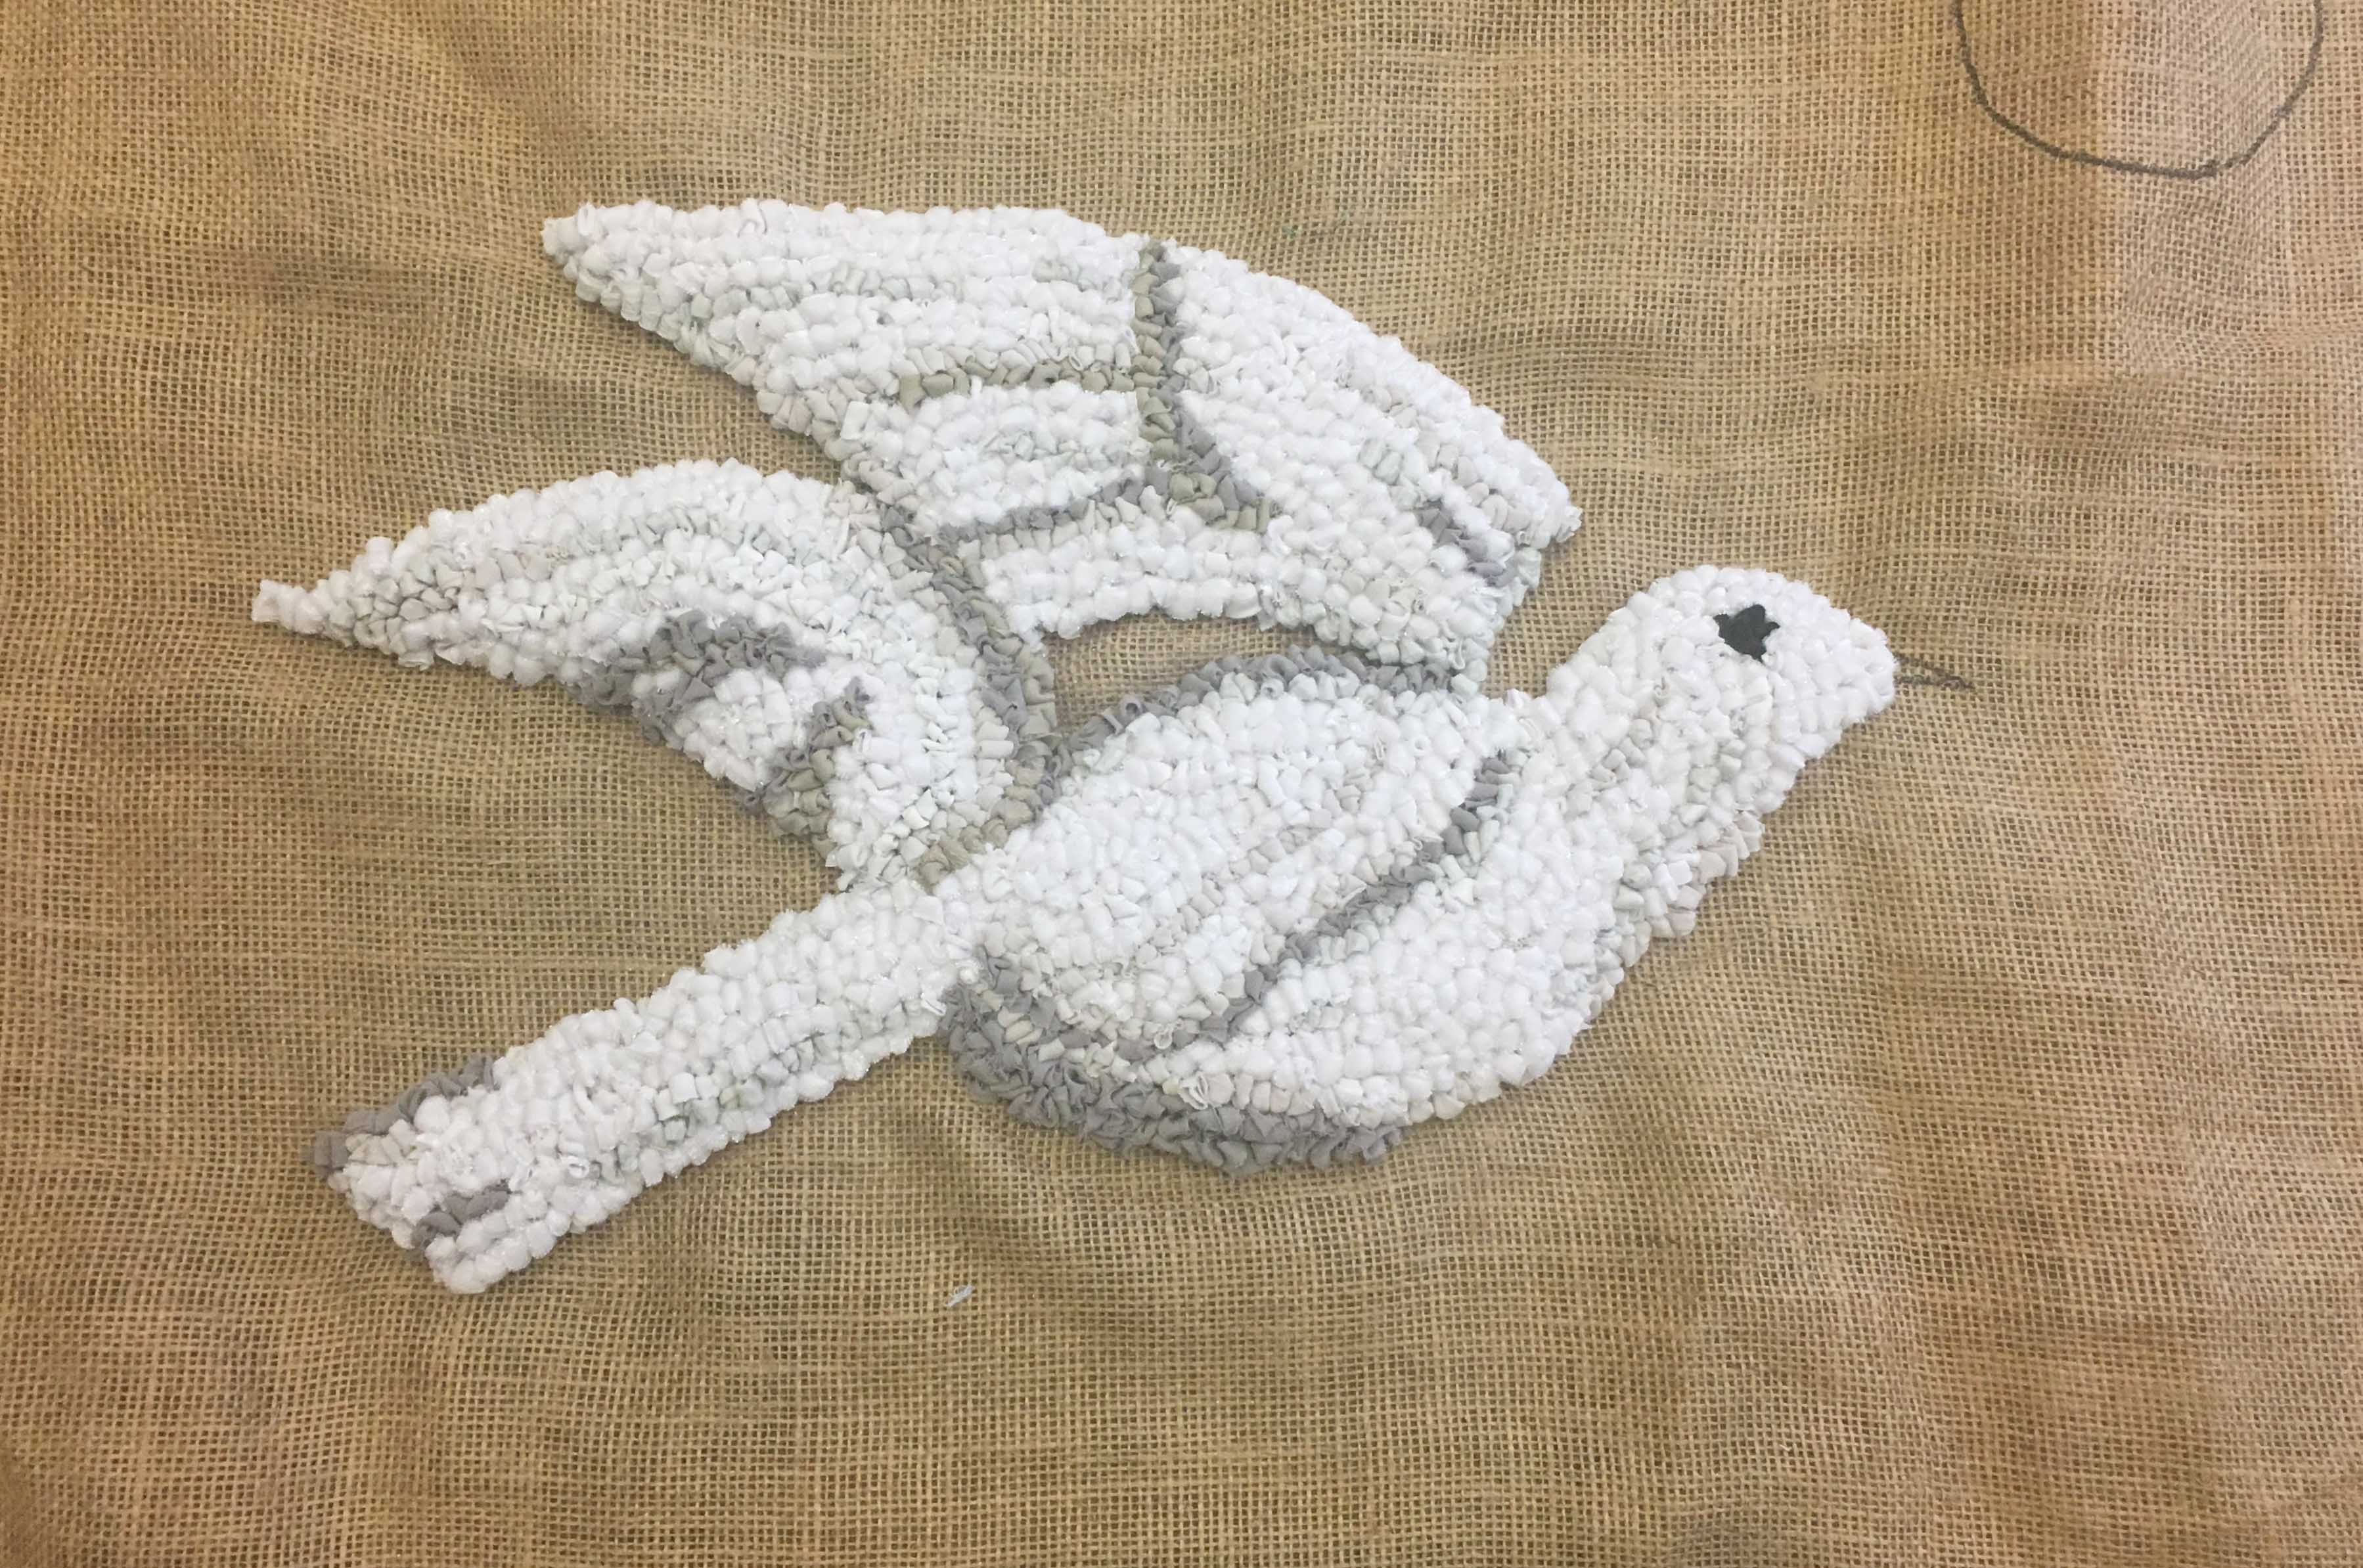
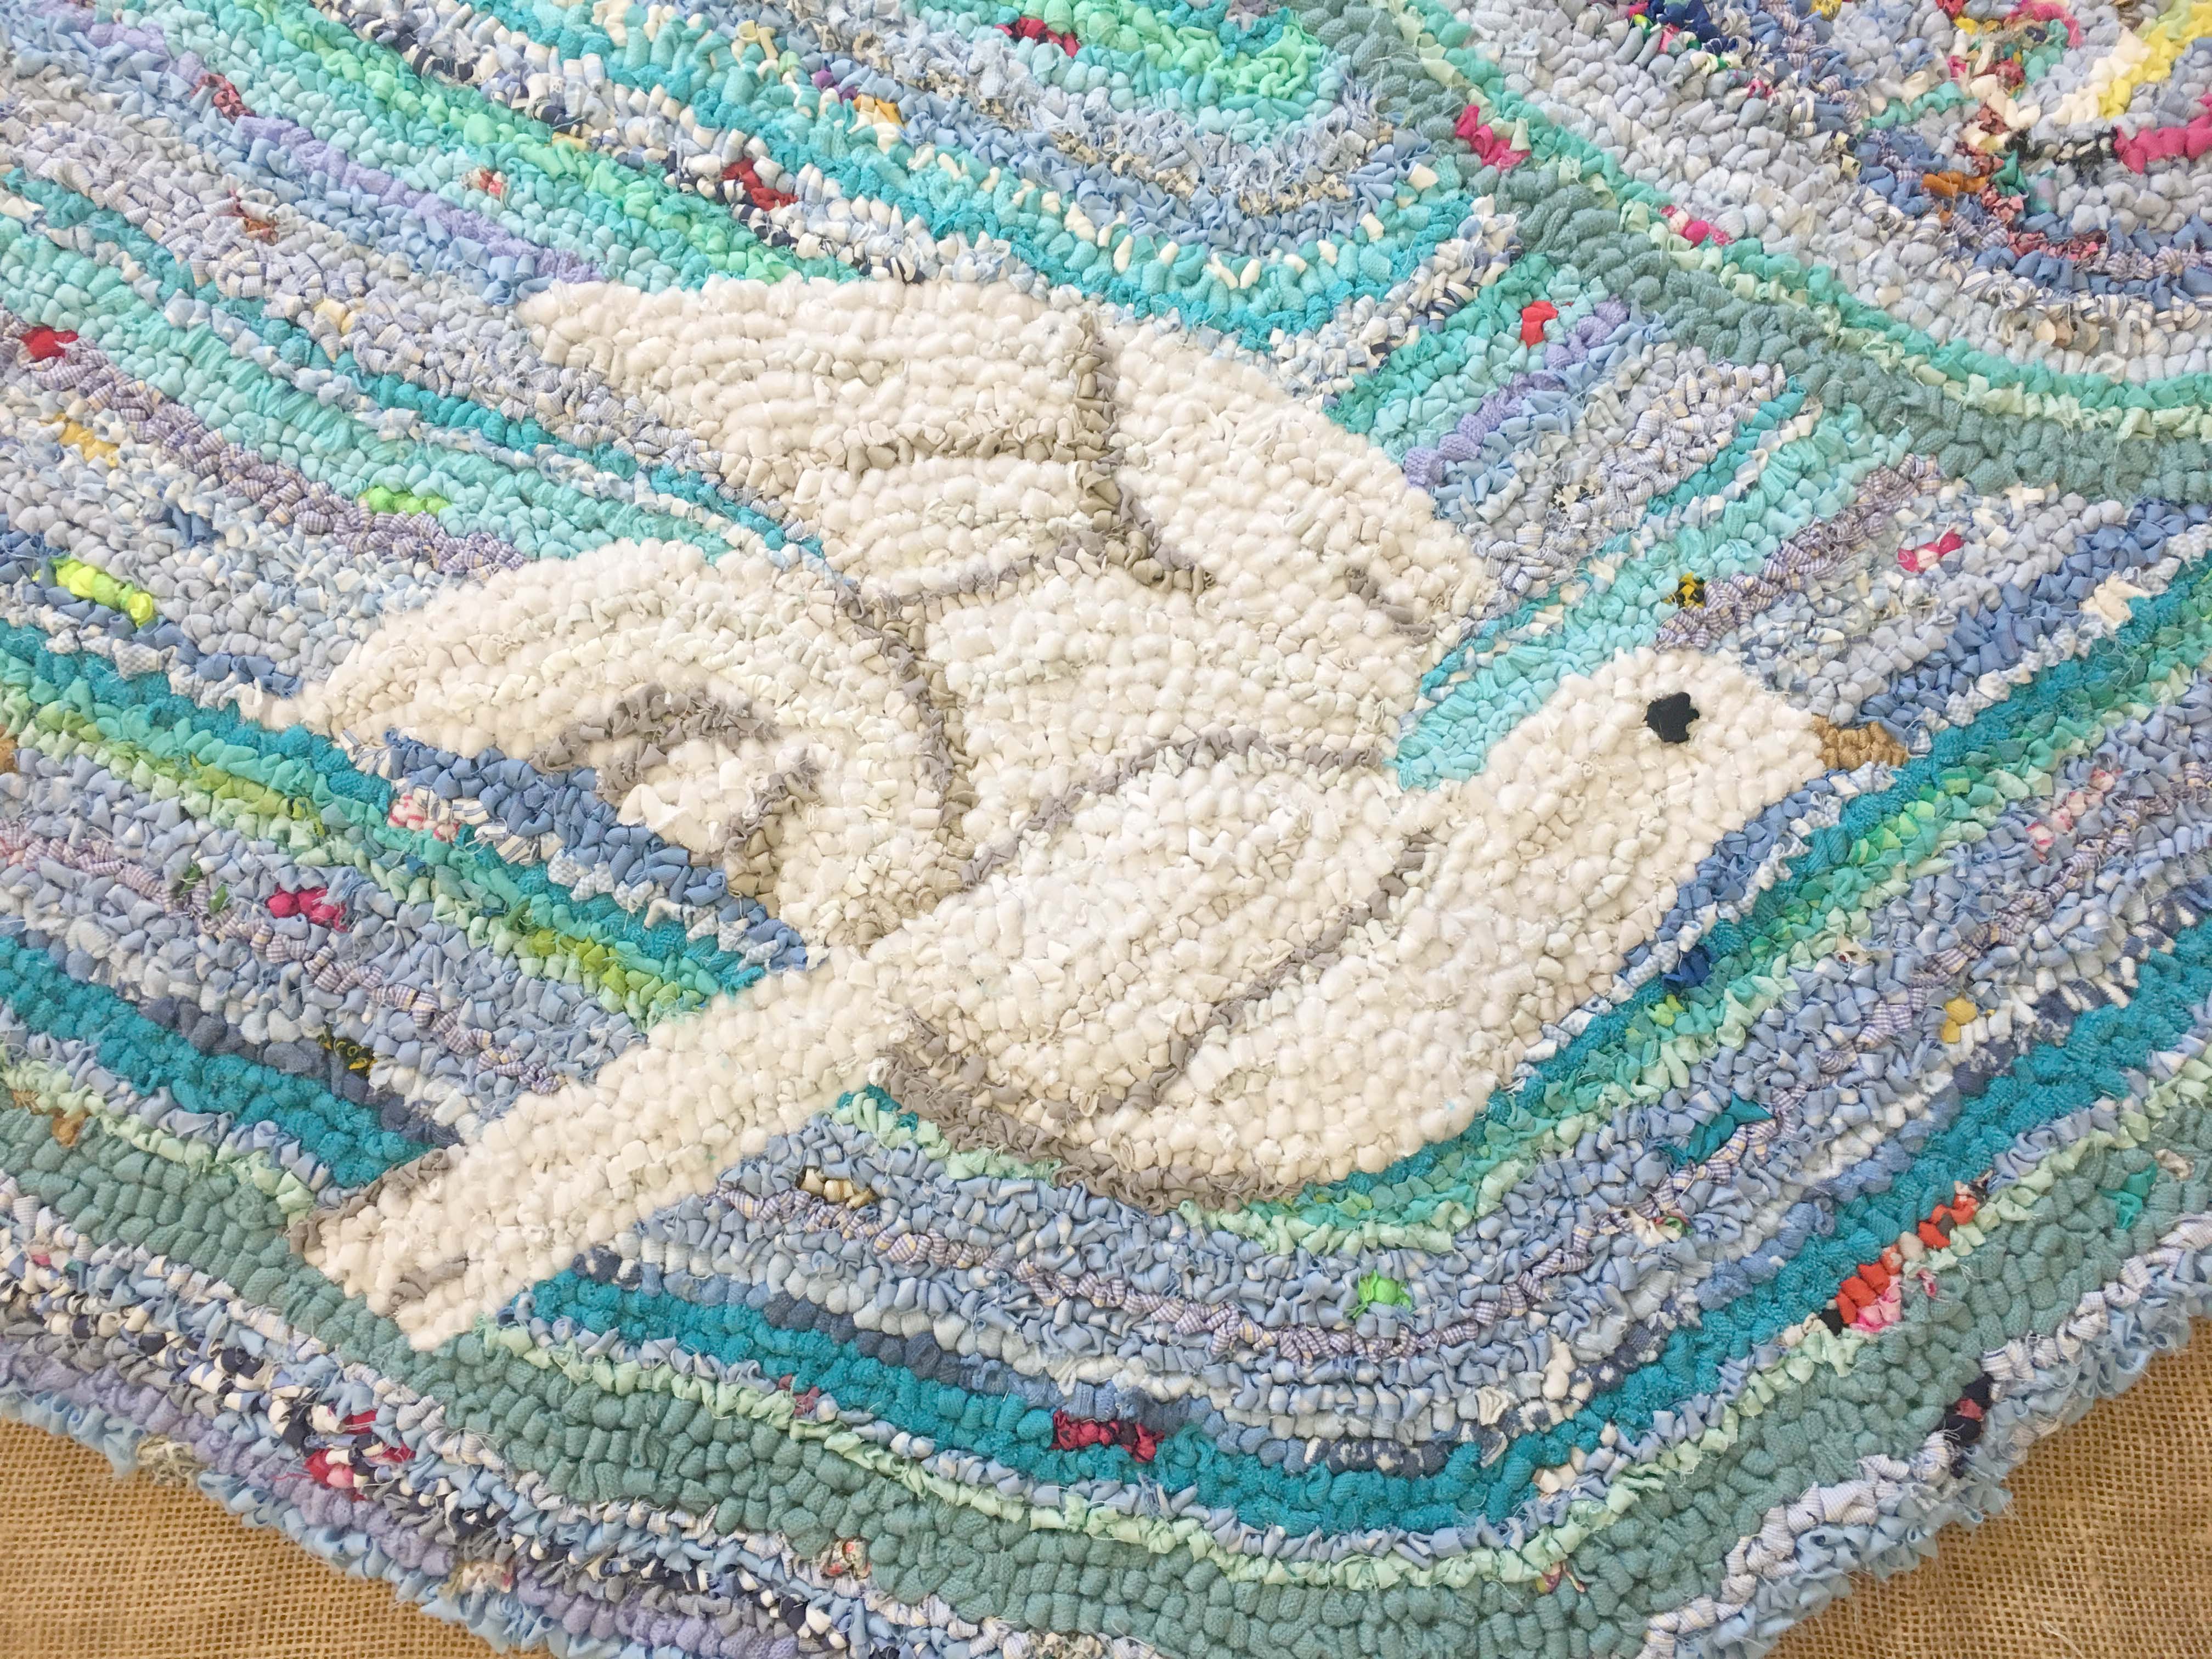
Nevertheless, I kept on rag rugging in my five shades of grey until the dove began to take shape… phew. Note how the black eye that looks really large in the above photo looks a lot smaller once it is surrounded by rag rugging. This is a key example of how rag rugging can look deceptively big when it is on its own.
I tried to add in lots of different shades of grey to make the dove less blocky and create elements of interest simulating feathers.
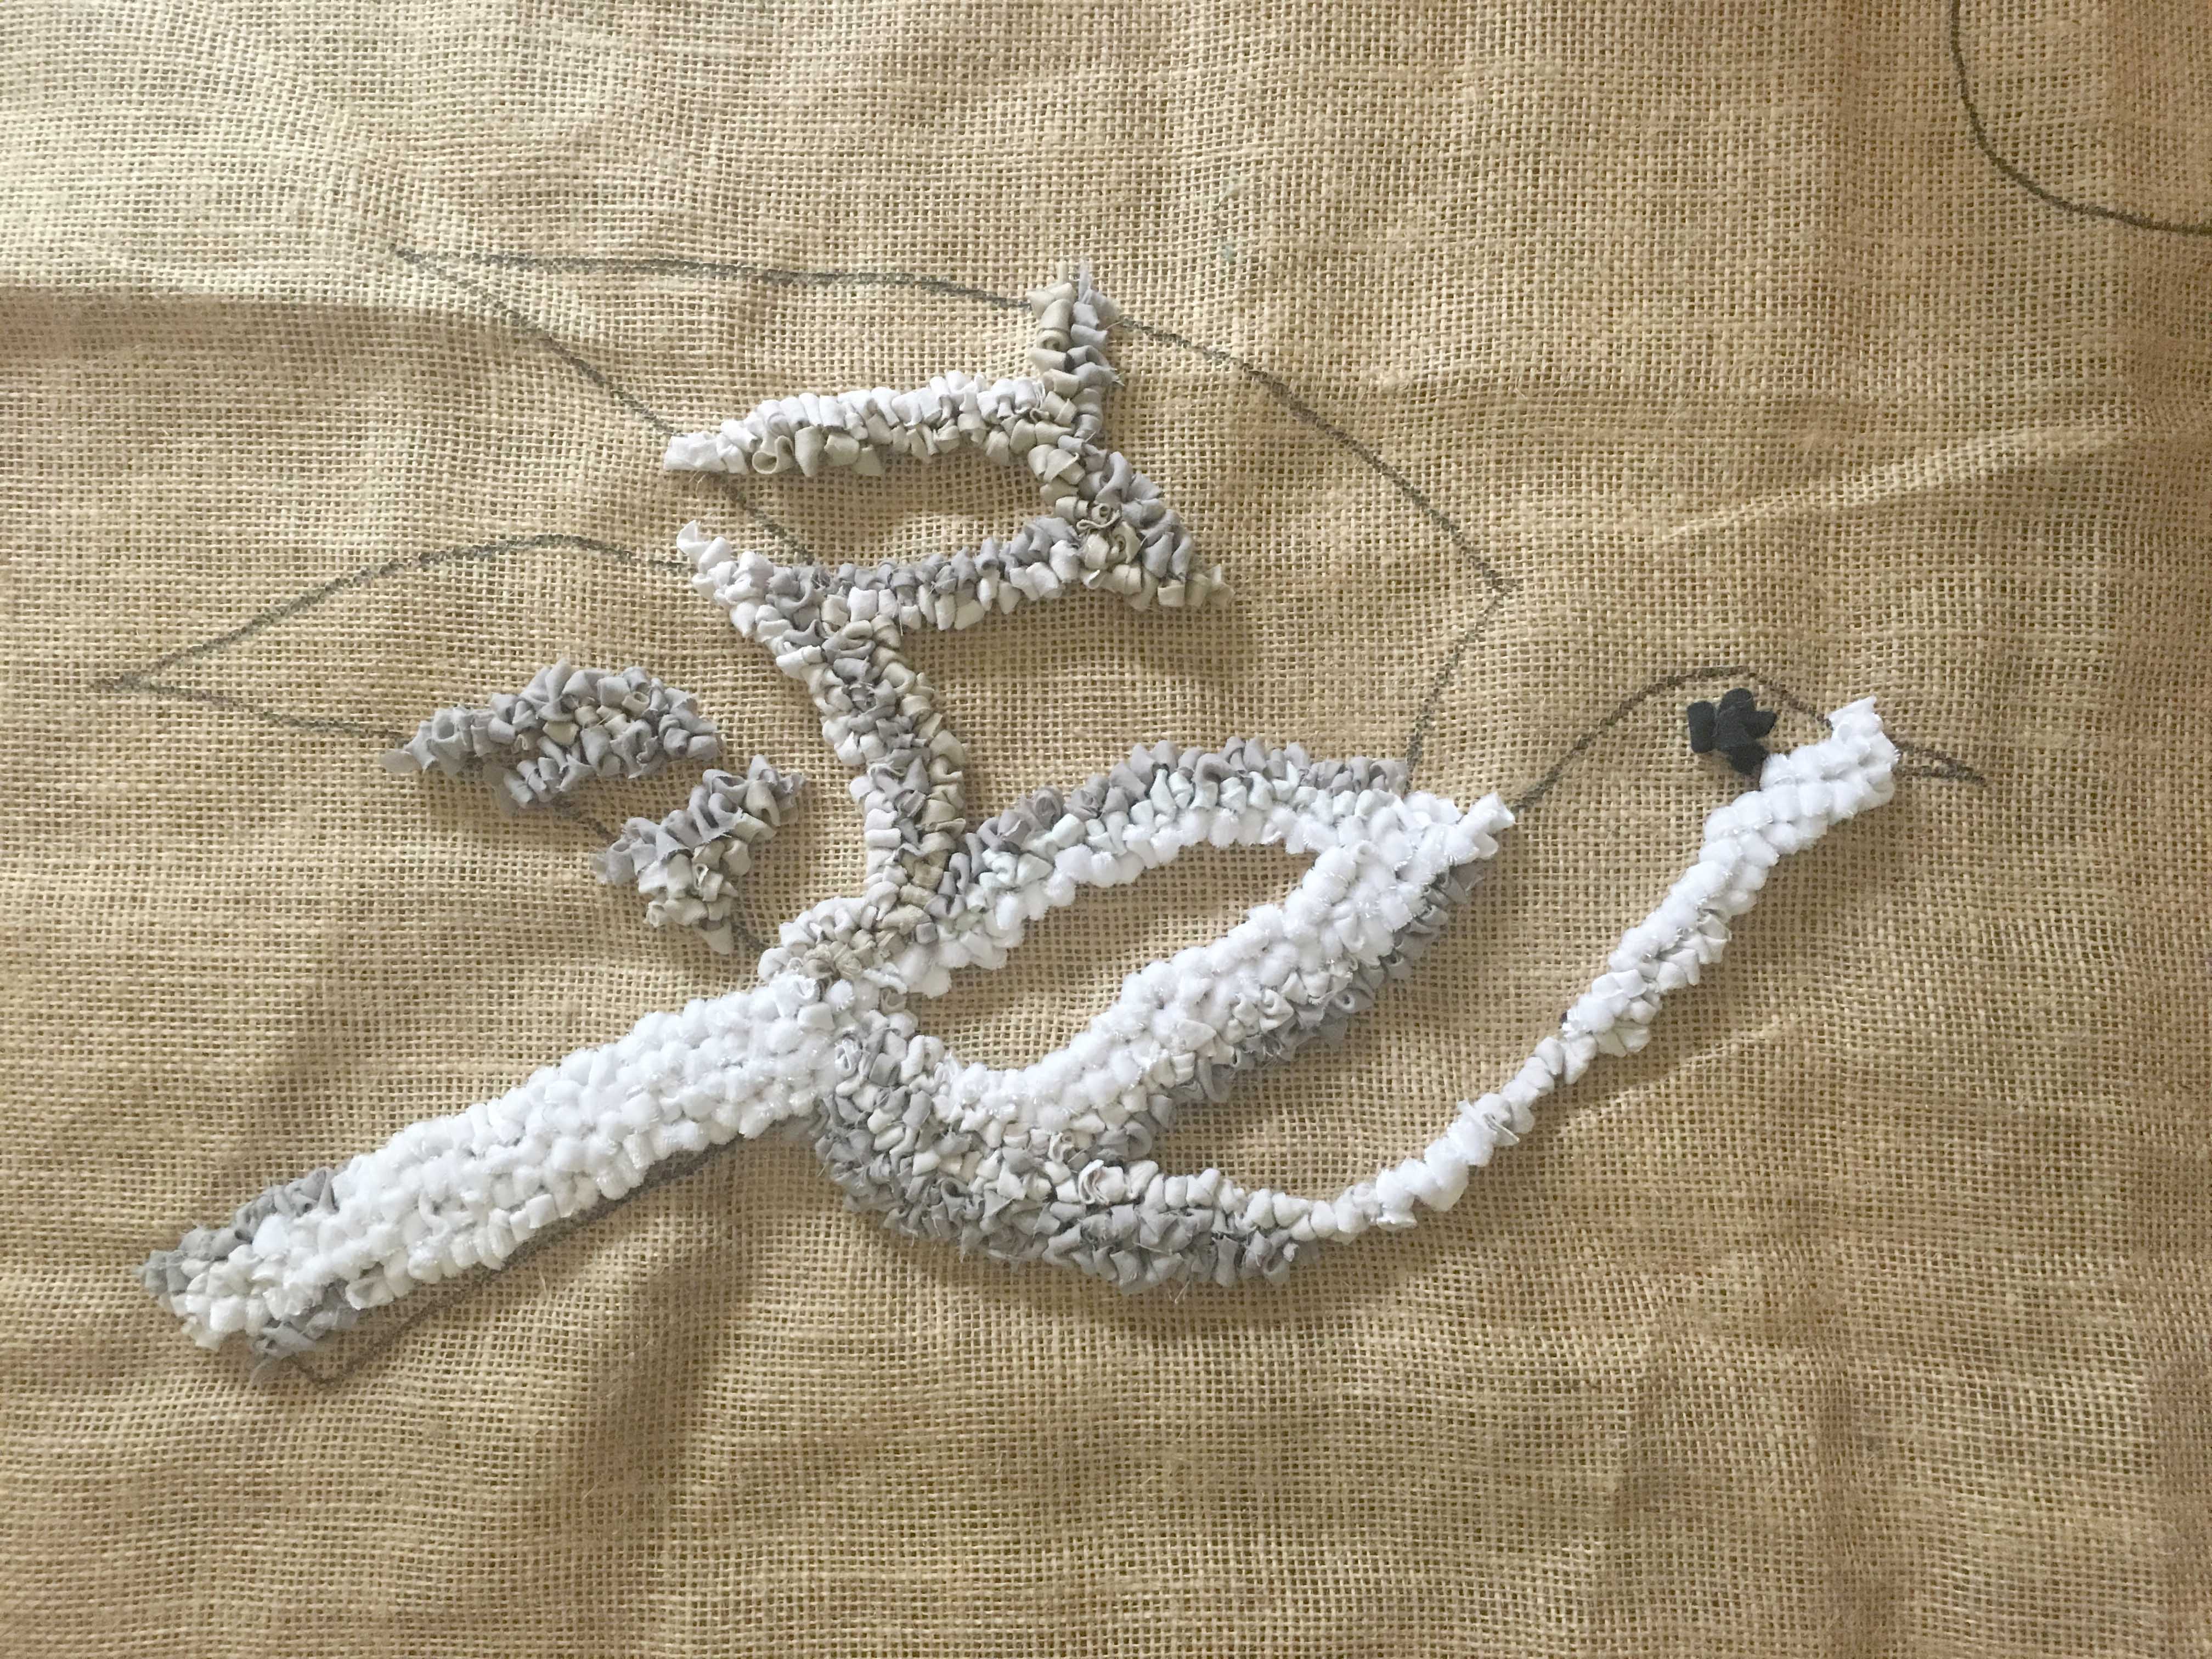
Once the body and first wing of the dove were completed, it began to take shape a bit better.
This photo gives you a better idea of the size of the rag rug commission. The dove is probably only 12% of the overall wall hanging. I’ve got a long way to go at this stage!
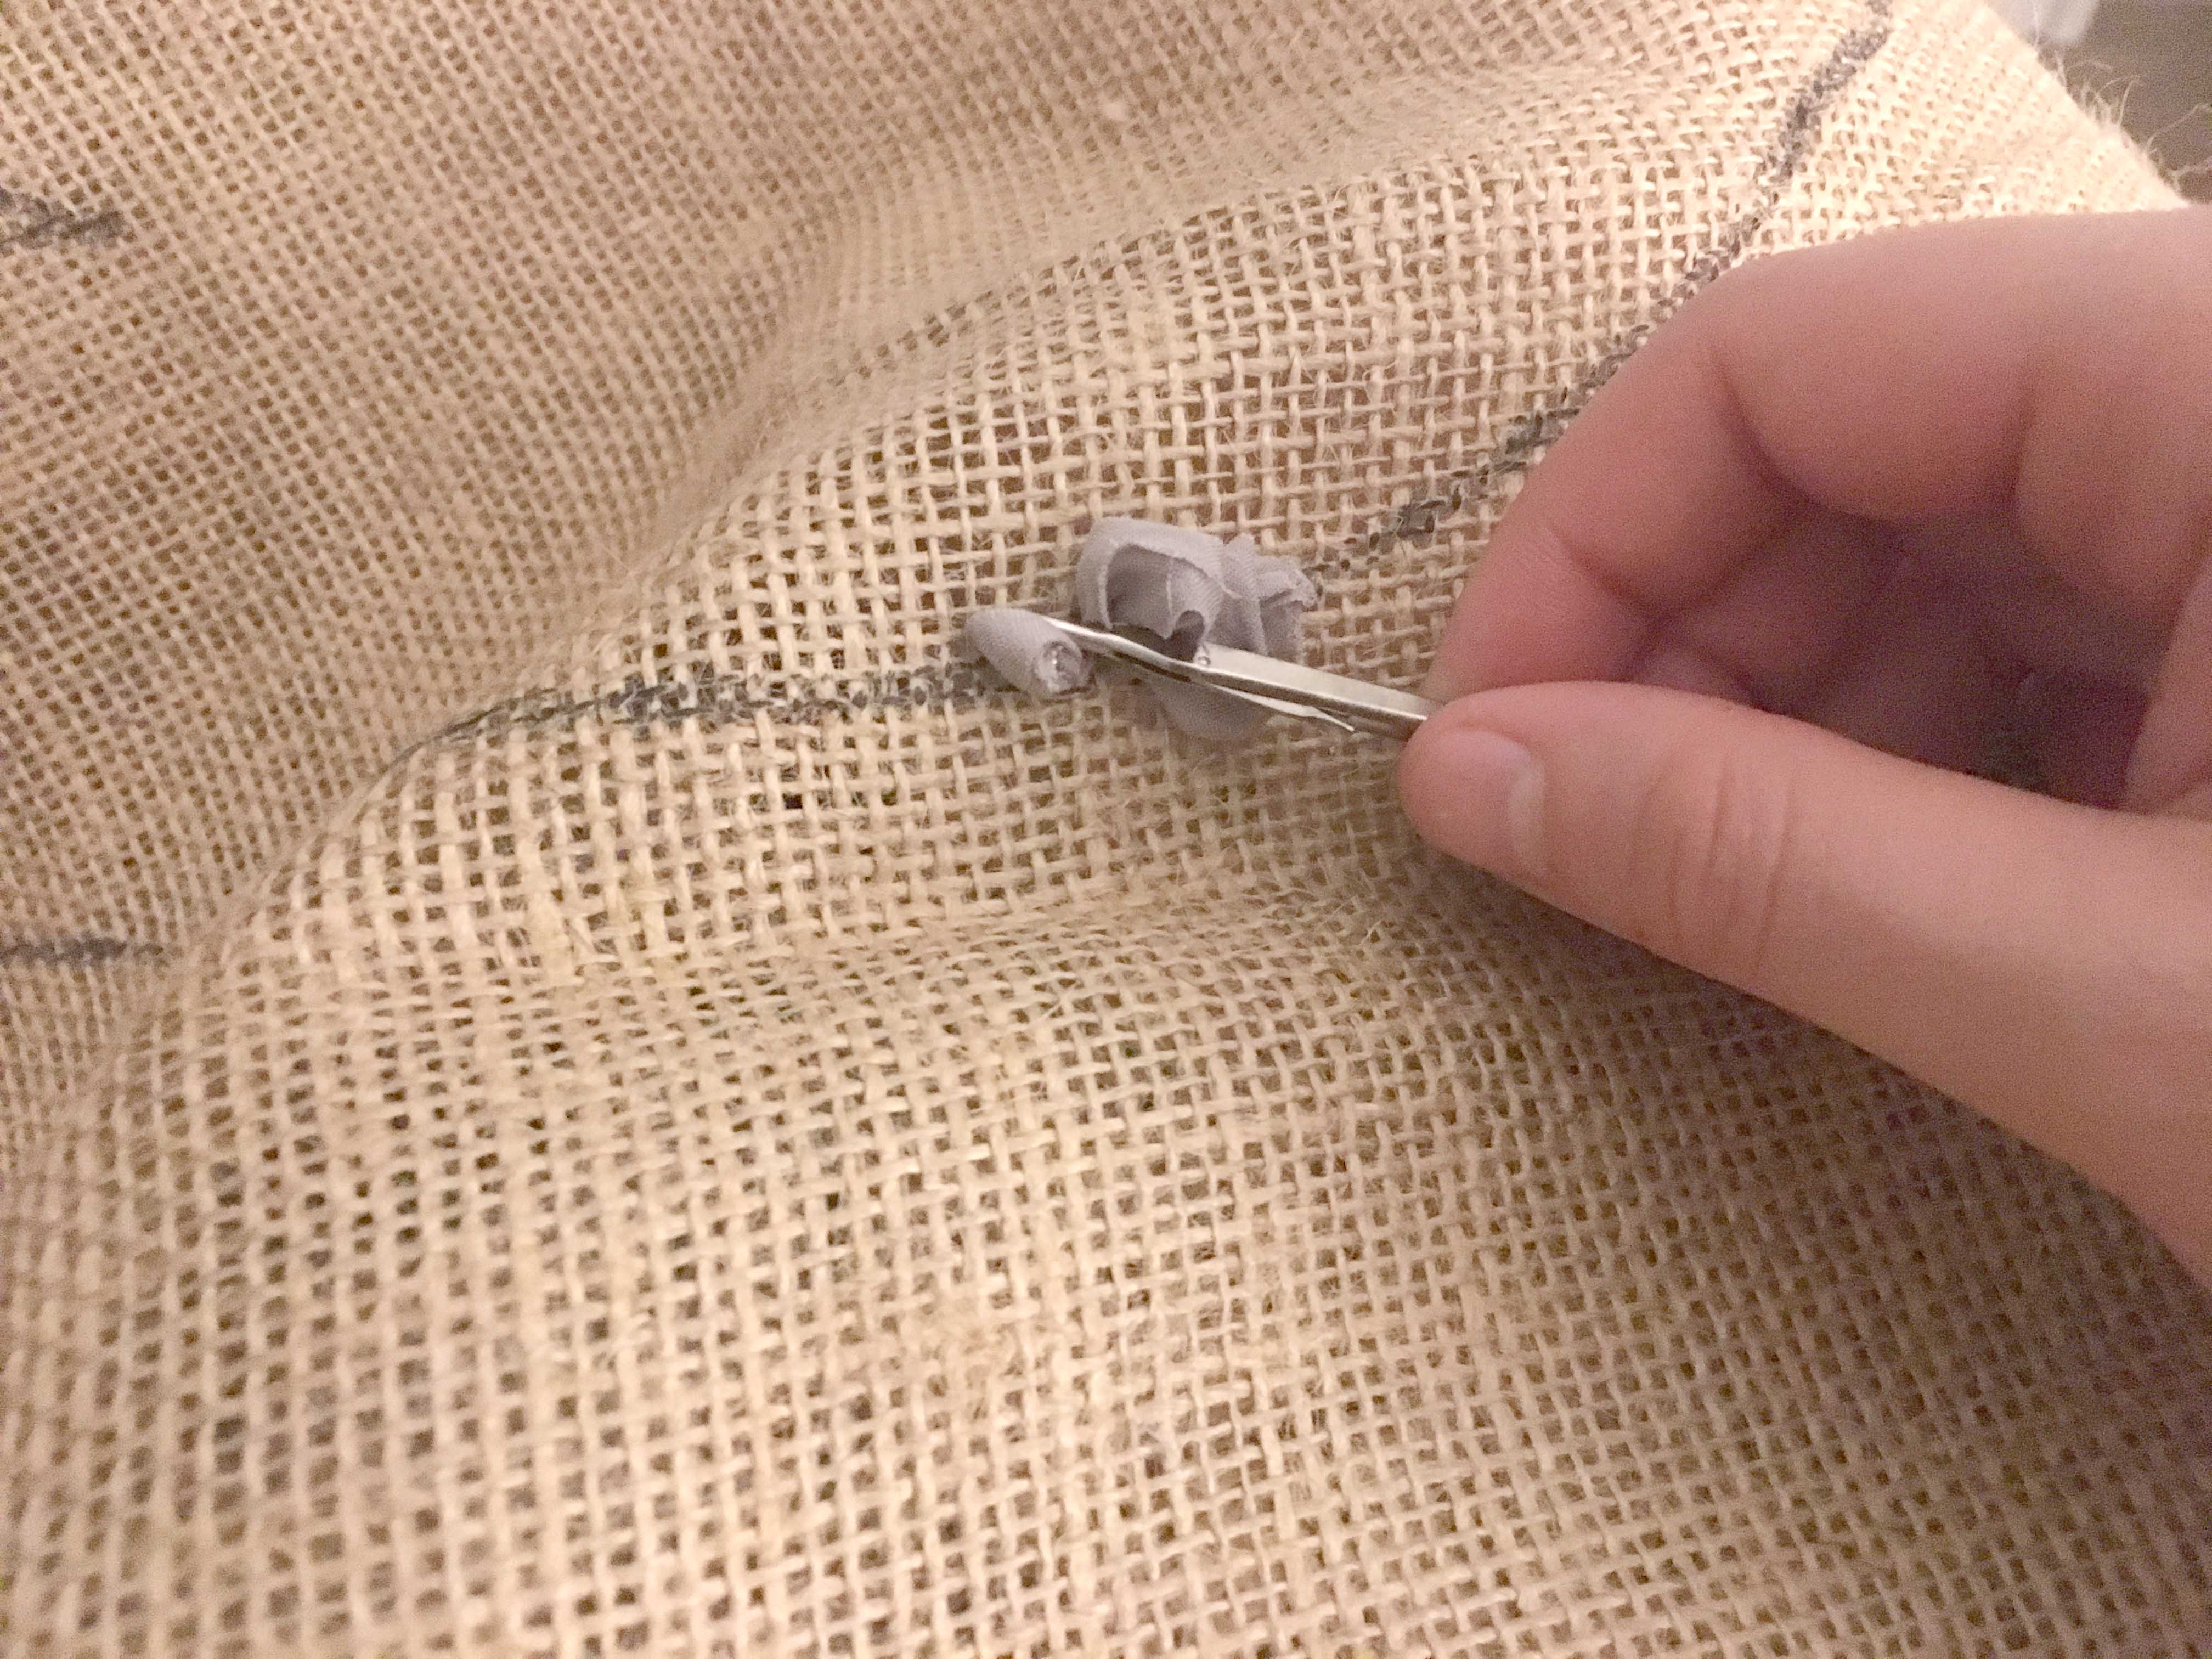
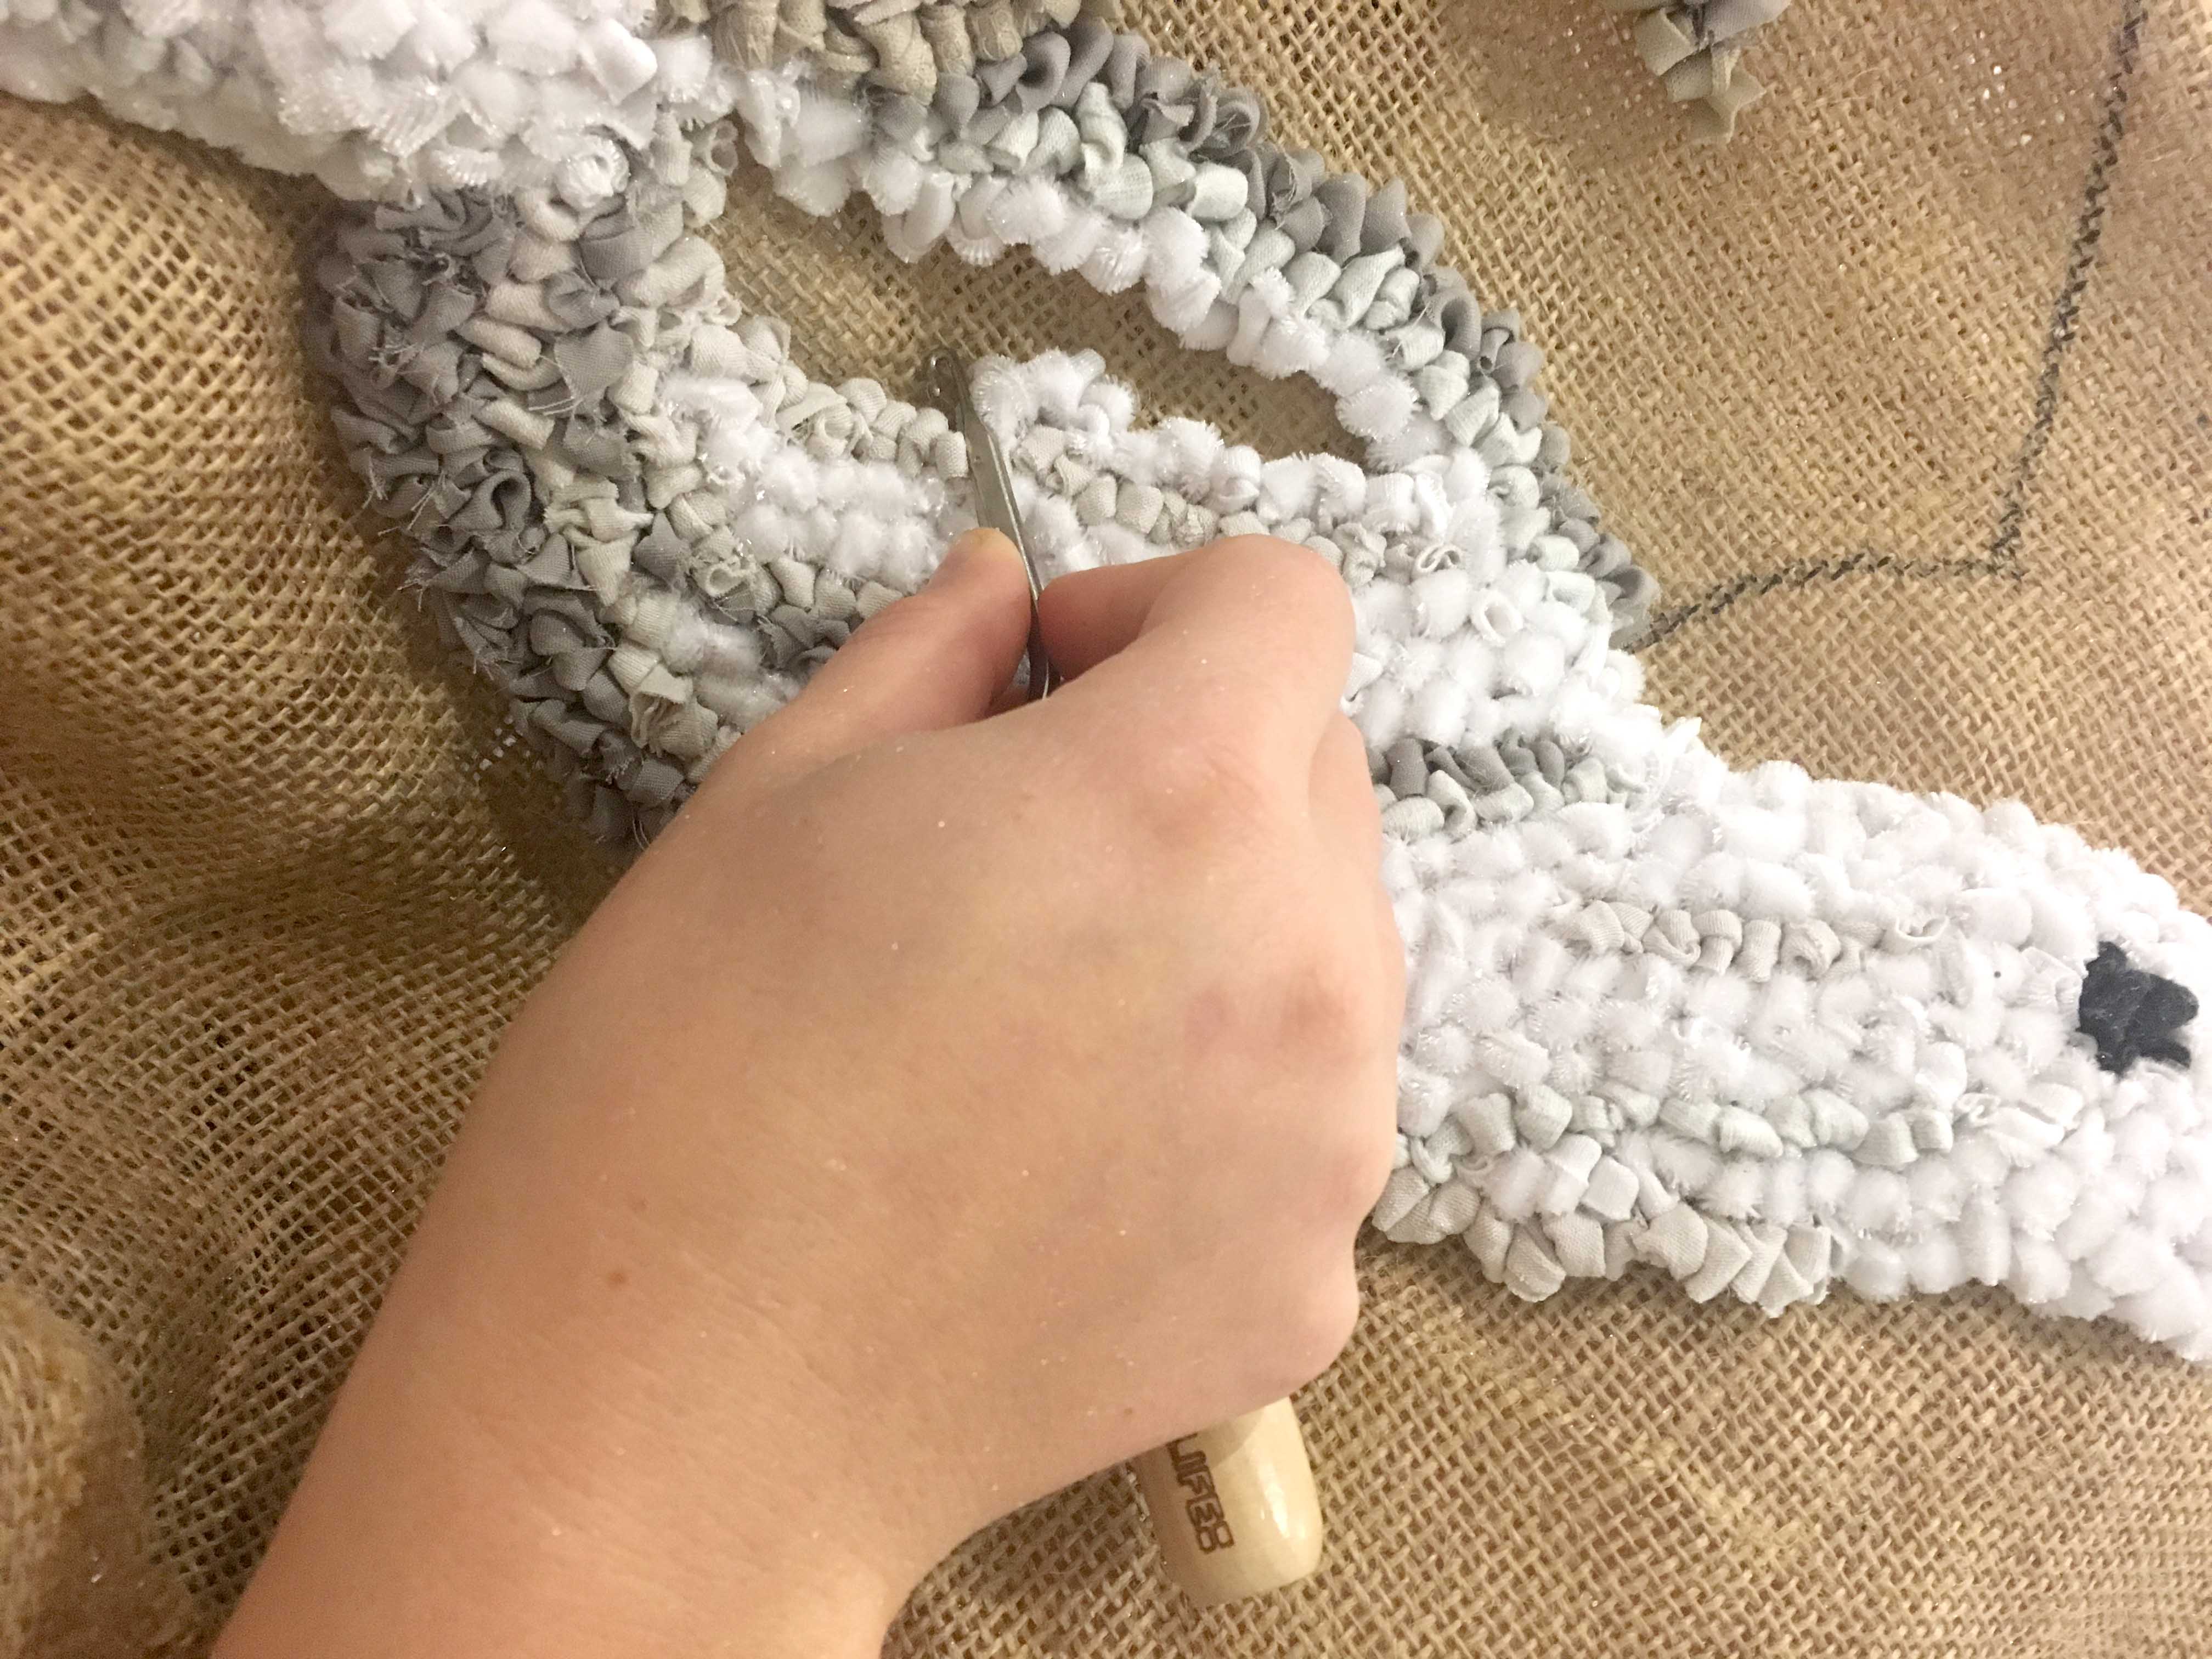
I took a break for a couple of days then finished off the rag rug dove except for the beak. I was planning to rag rug the beak in gold to match the letters as per the original mosaic and had to order some in (it’s the only fabric in the wall hanging that wasn’t sourced from charity shops).
I only had the beak and a very small part of the dove to rag rug at this stage.
Once I’d completed the rag rug dove, I moved onto the colourful swirling parts of the sky. In the original mosaic, these were quite tonal, but I decided to go a bit wild and bring in a whole range of different colours to lift the piece. I used a mixture of small rags that I keep in a large “lucky dip” jar on my desk so I ended up using over a hundred different fabrics in the end (wow!)
I started off my first swirl with a yellow centre…
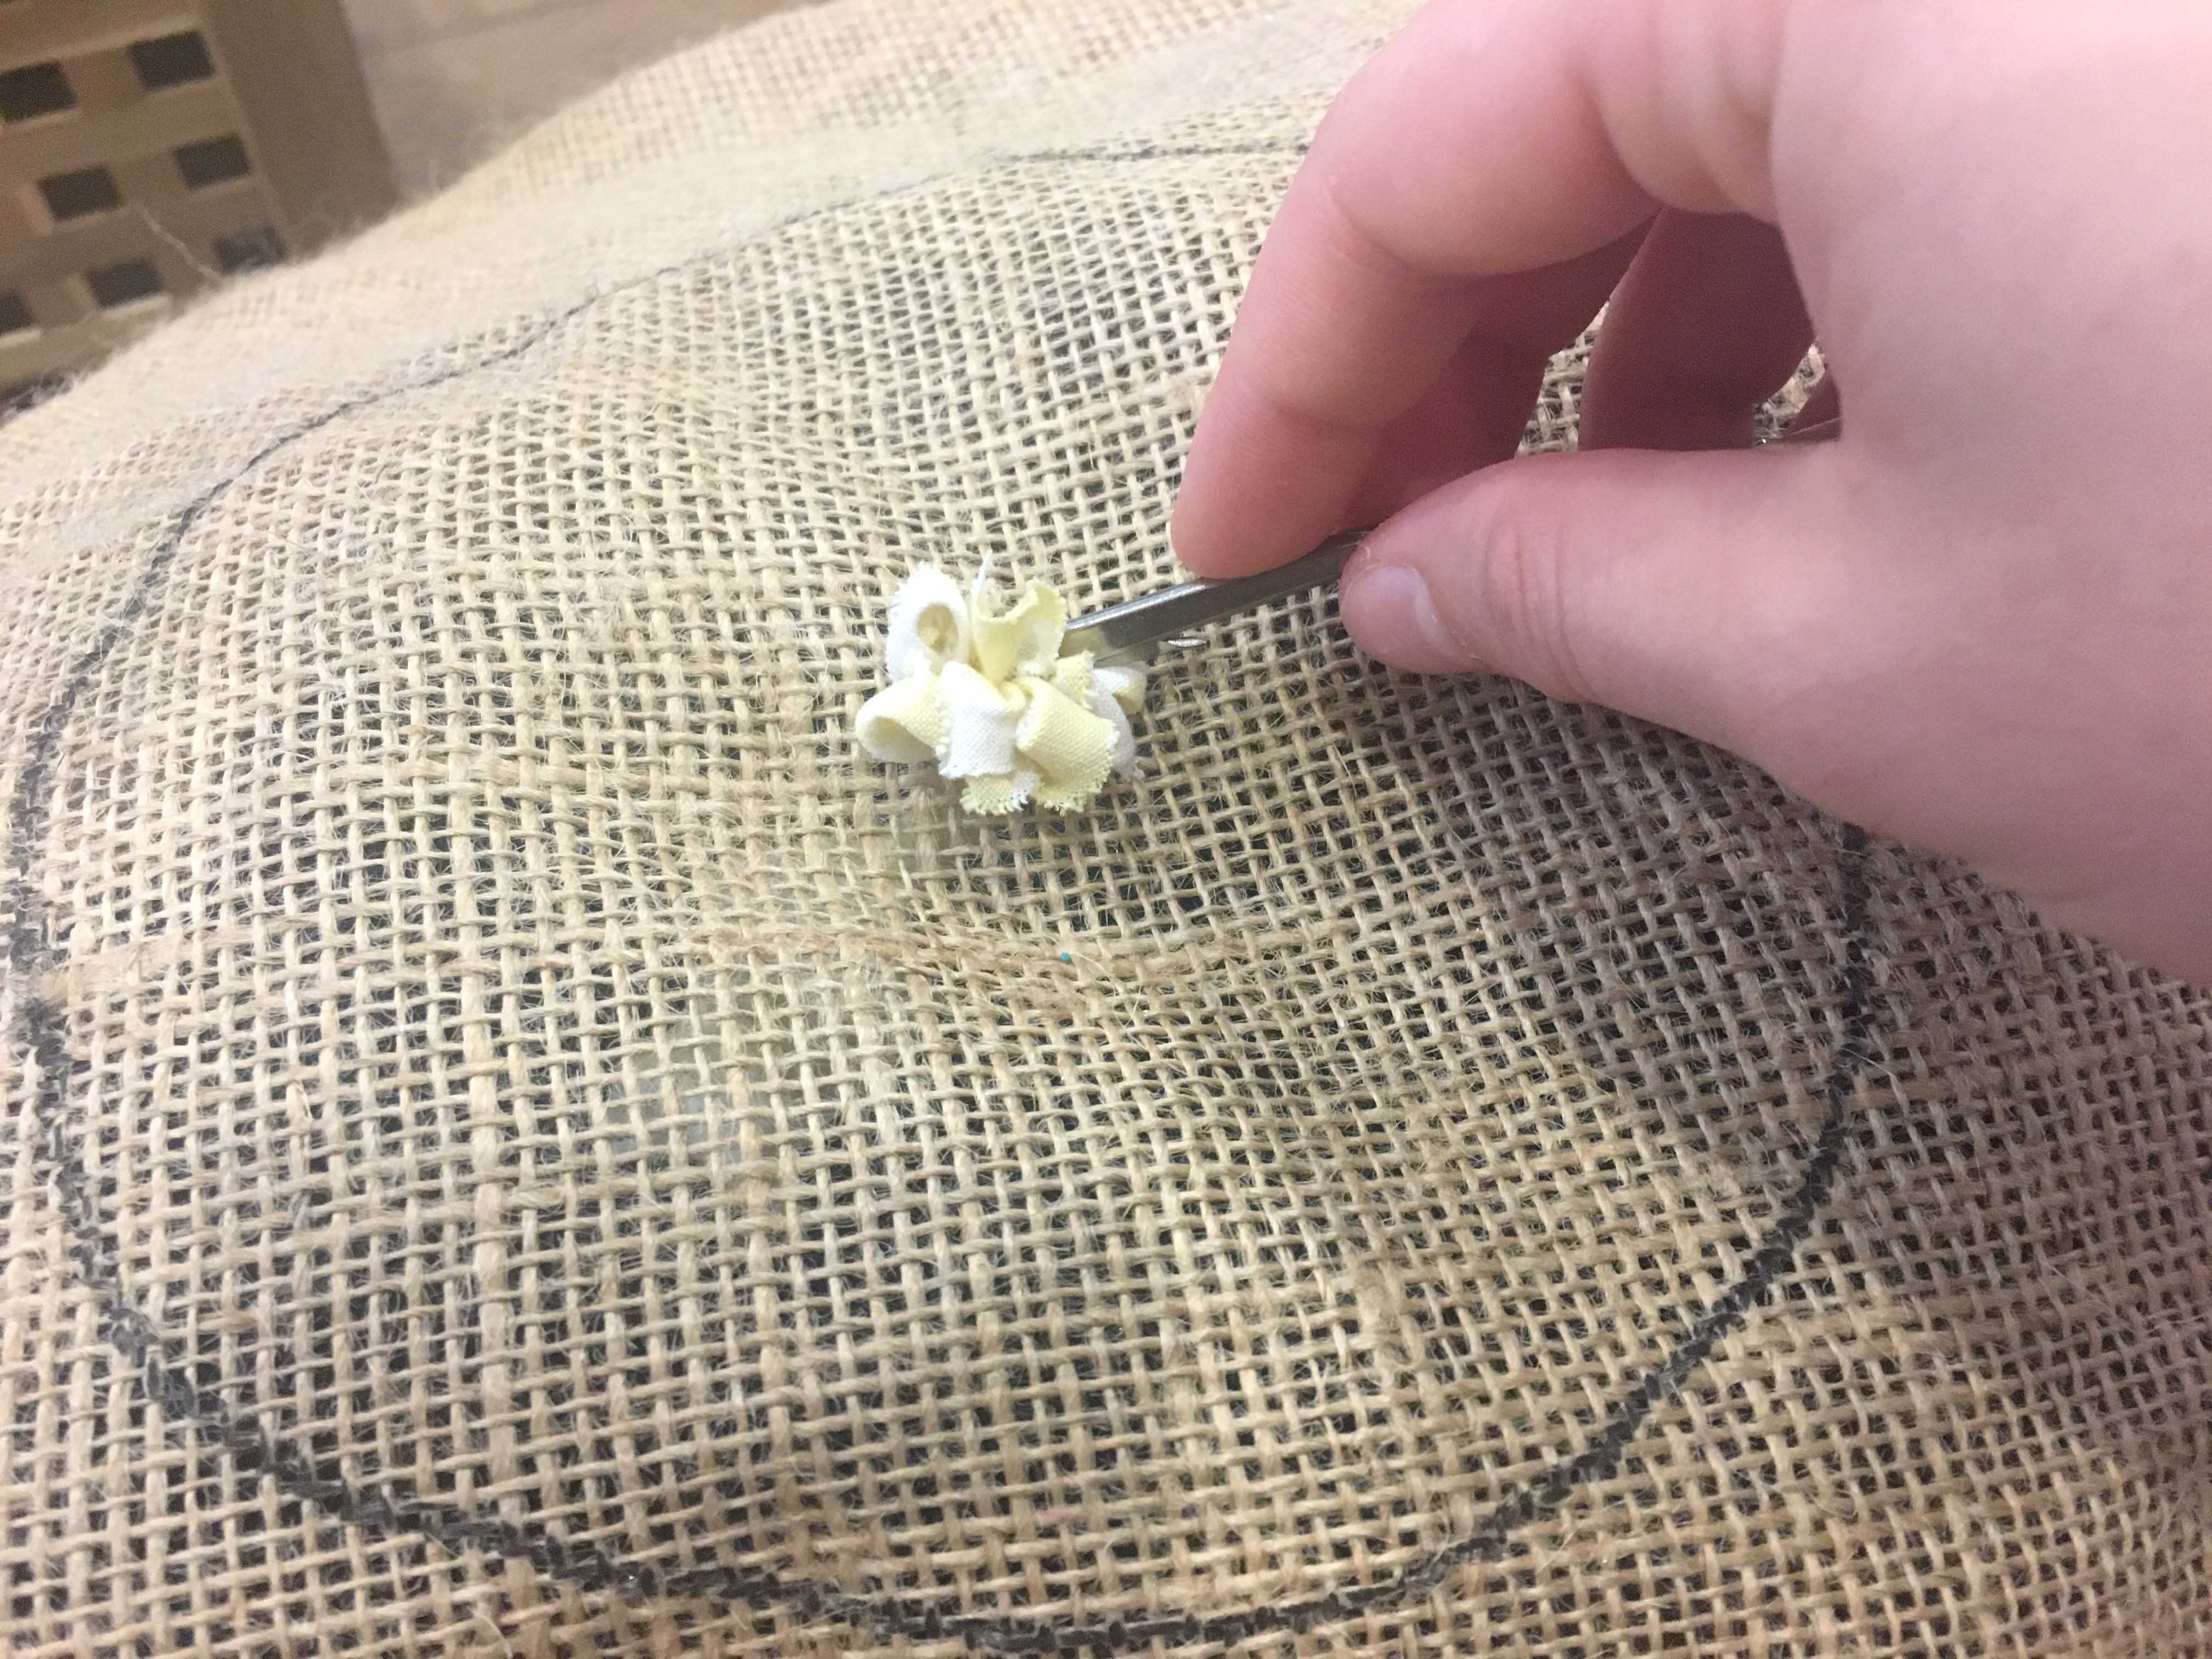
For my first swirl, I began with a light yellow rag rugged centre.
I then rag rugged the swirl using a variety of different colours and fabrics until I vaguely reached the outside of the circle. I made sure that some of the strands didn’t completely reach the edge of the circle to make sure things weren’t too regular. Asymmetry generally makes things look more interesting.
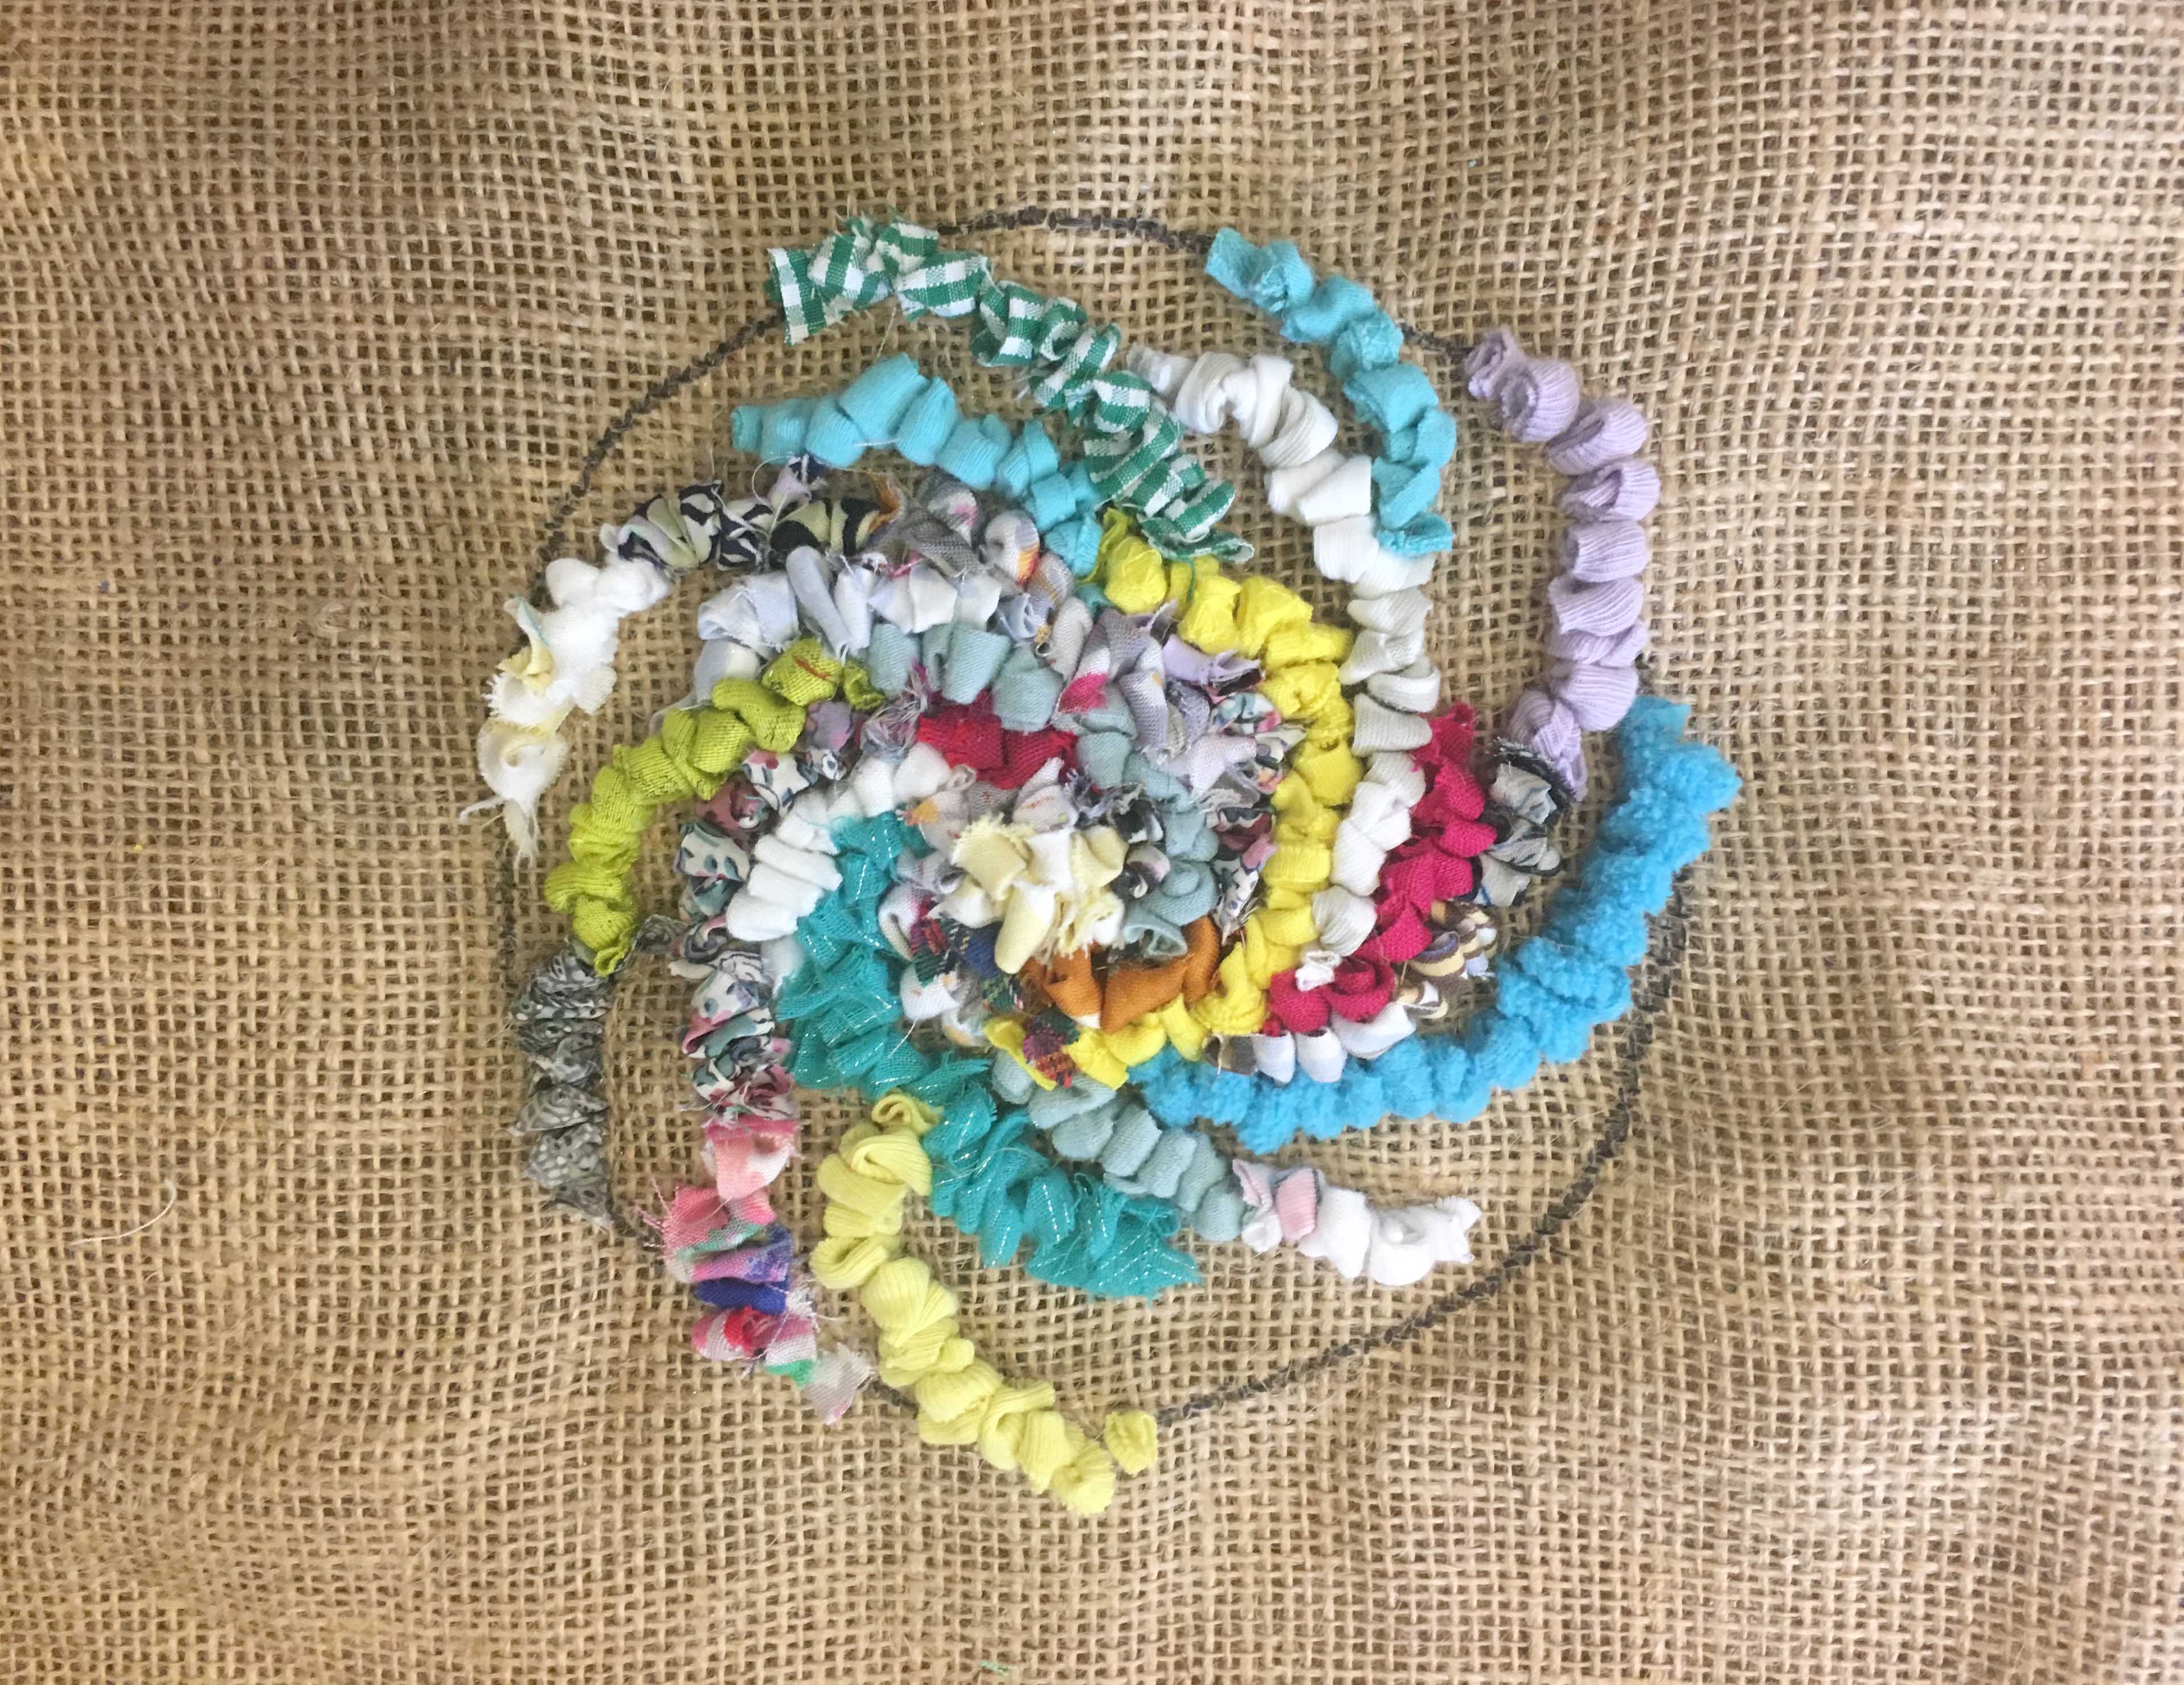
I chose a mixture of plain and patterned fabrics in every colour under the sun.
My first swirl, doing its thing on the right of the hessian.
I then completed all the swirls (which I like to think of as vortexes for some strange reason) because why not?
Here’s how the rag rug wall hanging looked after the “swirls” were all complete.
It was at this stage that I was in a little conundrum. I’d planned to rag rug the numbers next before moving onto the background but unfortunately the gold material I’d ordered hadn’t arrived yet… doh! So, I did what any rag rug addict would do next… I cracked on with the background…
I let the pattern guide which part of the background I began with.
If you look carefully, you can see that the blue row isn’t just one fabric. I’ve tried to break it up with different patterns every now and then to add to the complexity of the design. This becomes a bit more visible after I’d added in a few more rows…
You can see the little patches of different colours that I brought into the blue background to make it more complex. These were rags that I had once again fished out of my lucky dip jar.
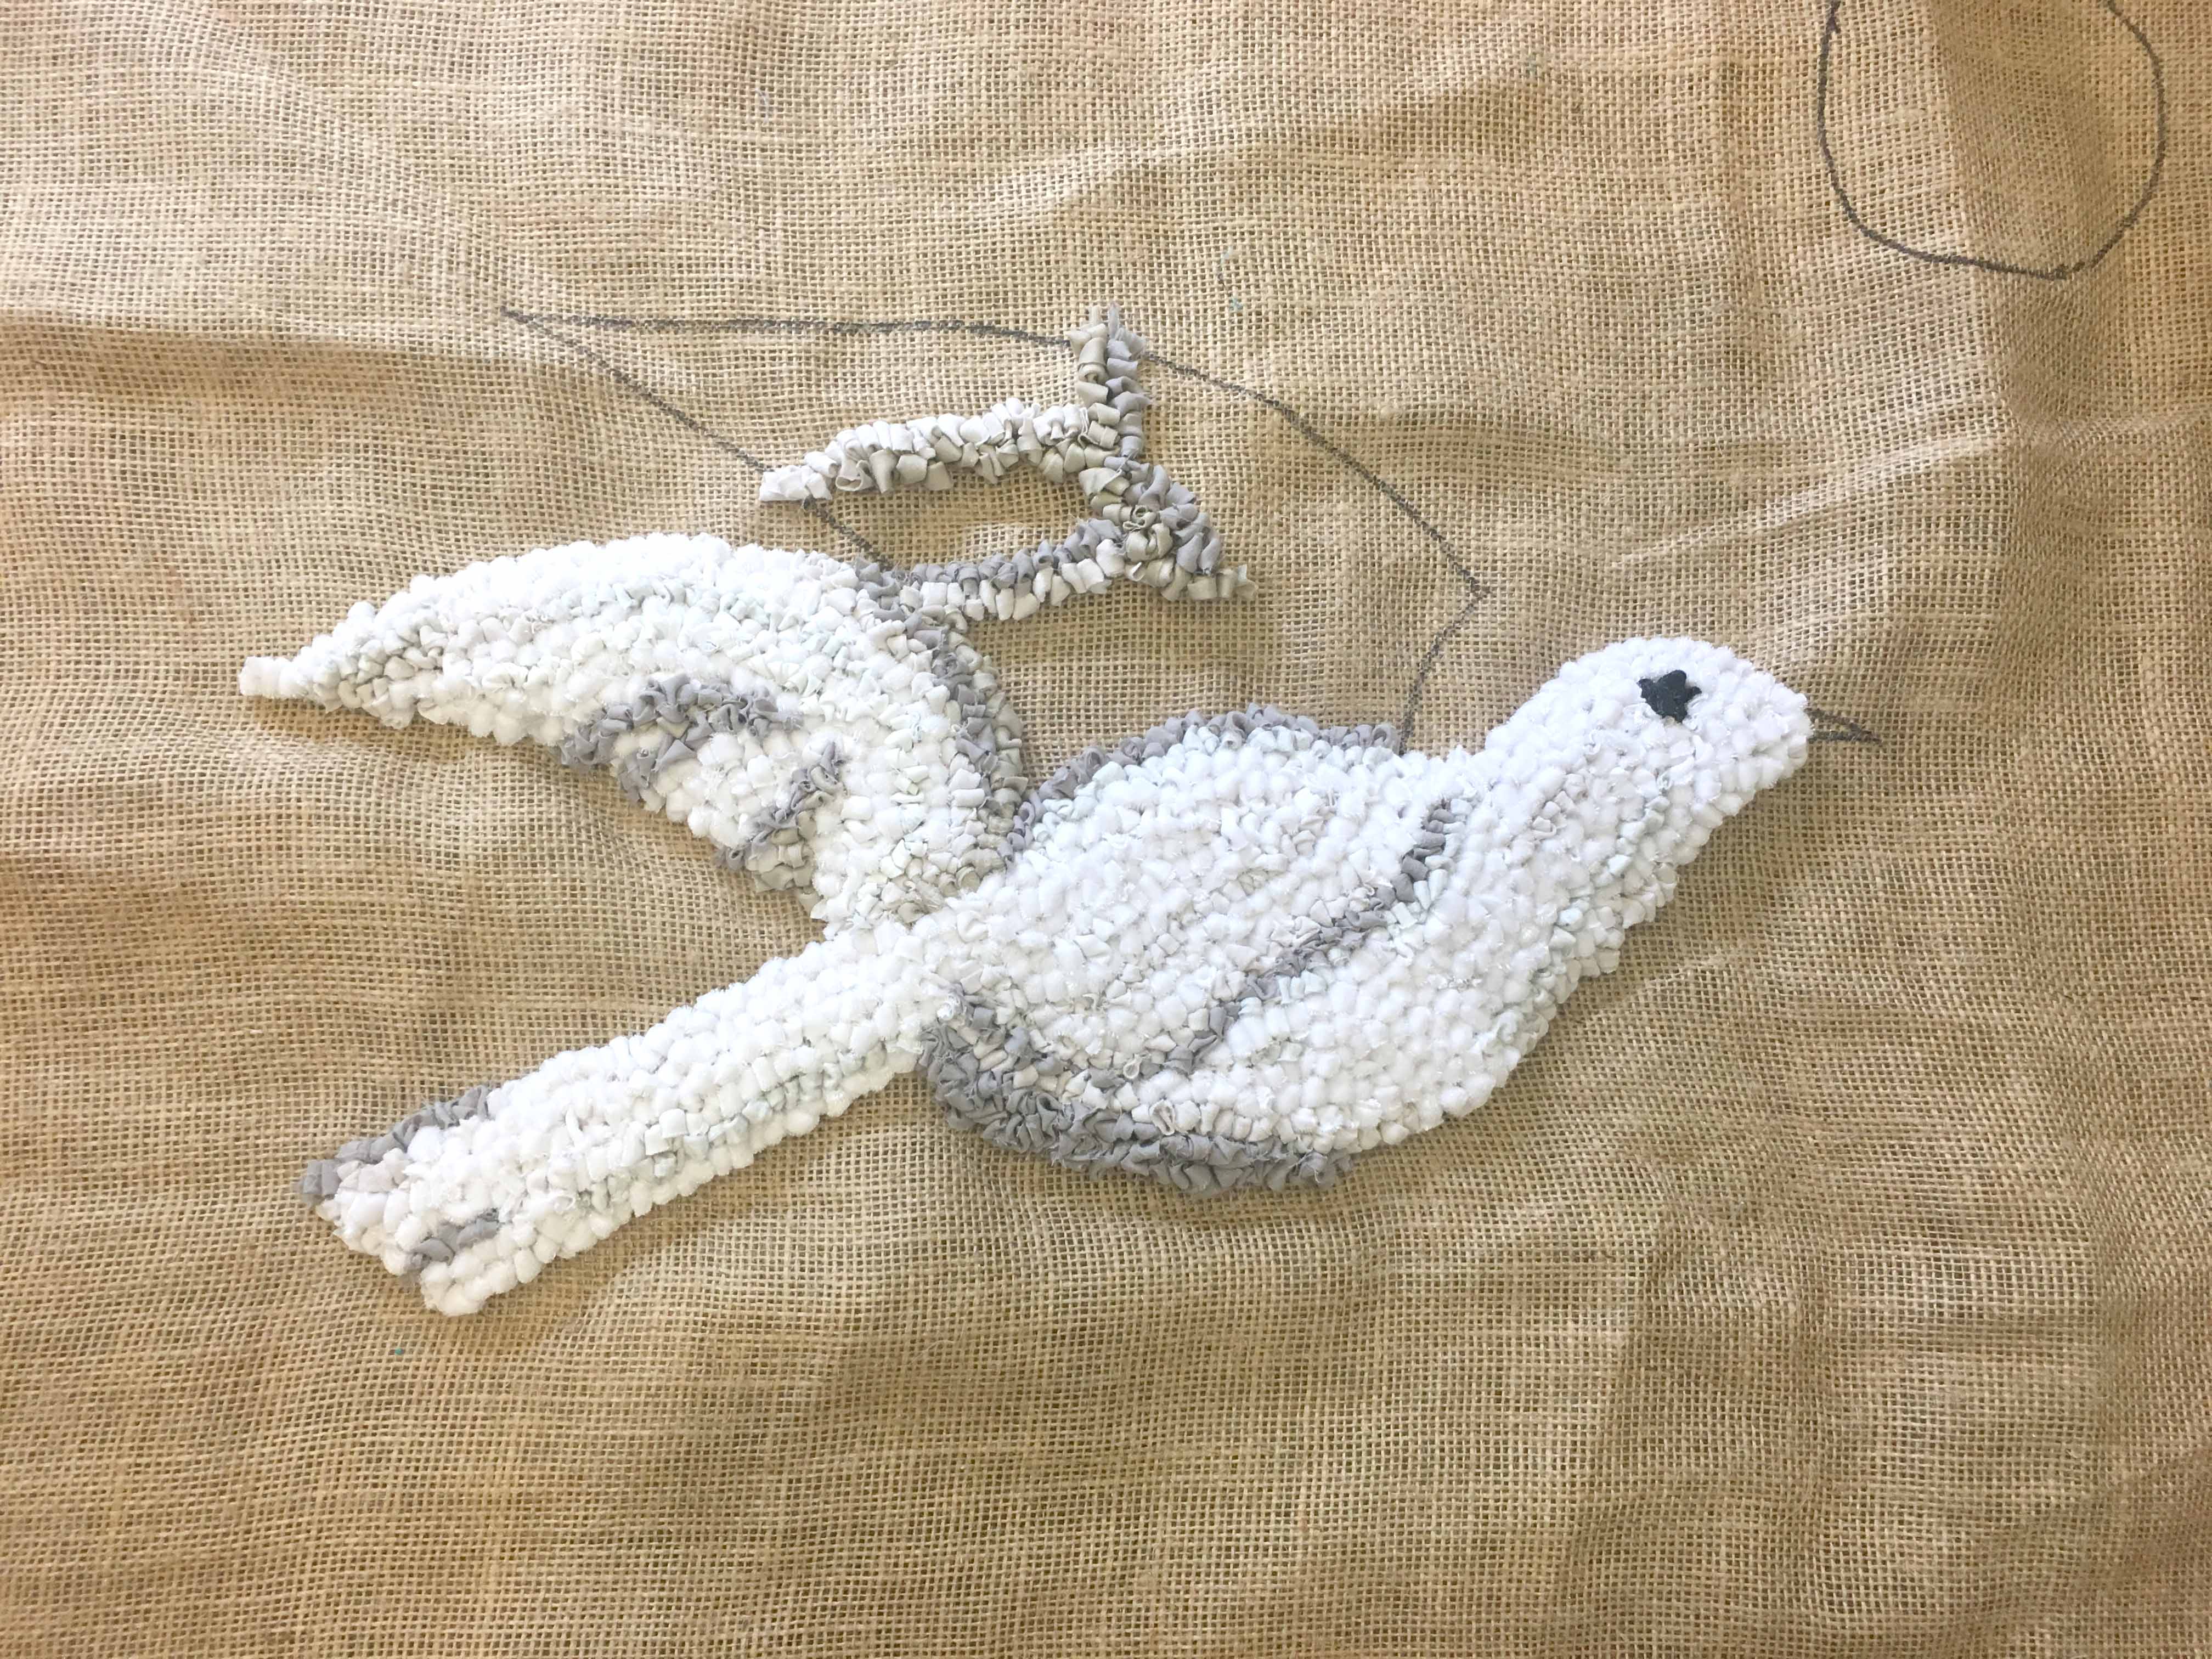
At this stage, the lack of beak is starting to annoy me slightly but I’m still waiting on the gold 🙂
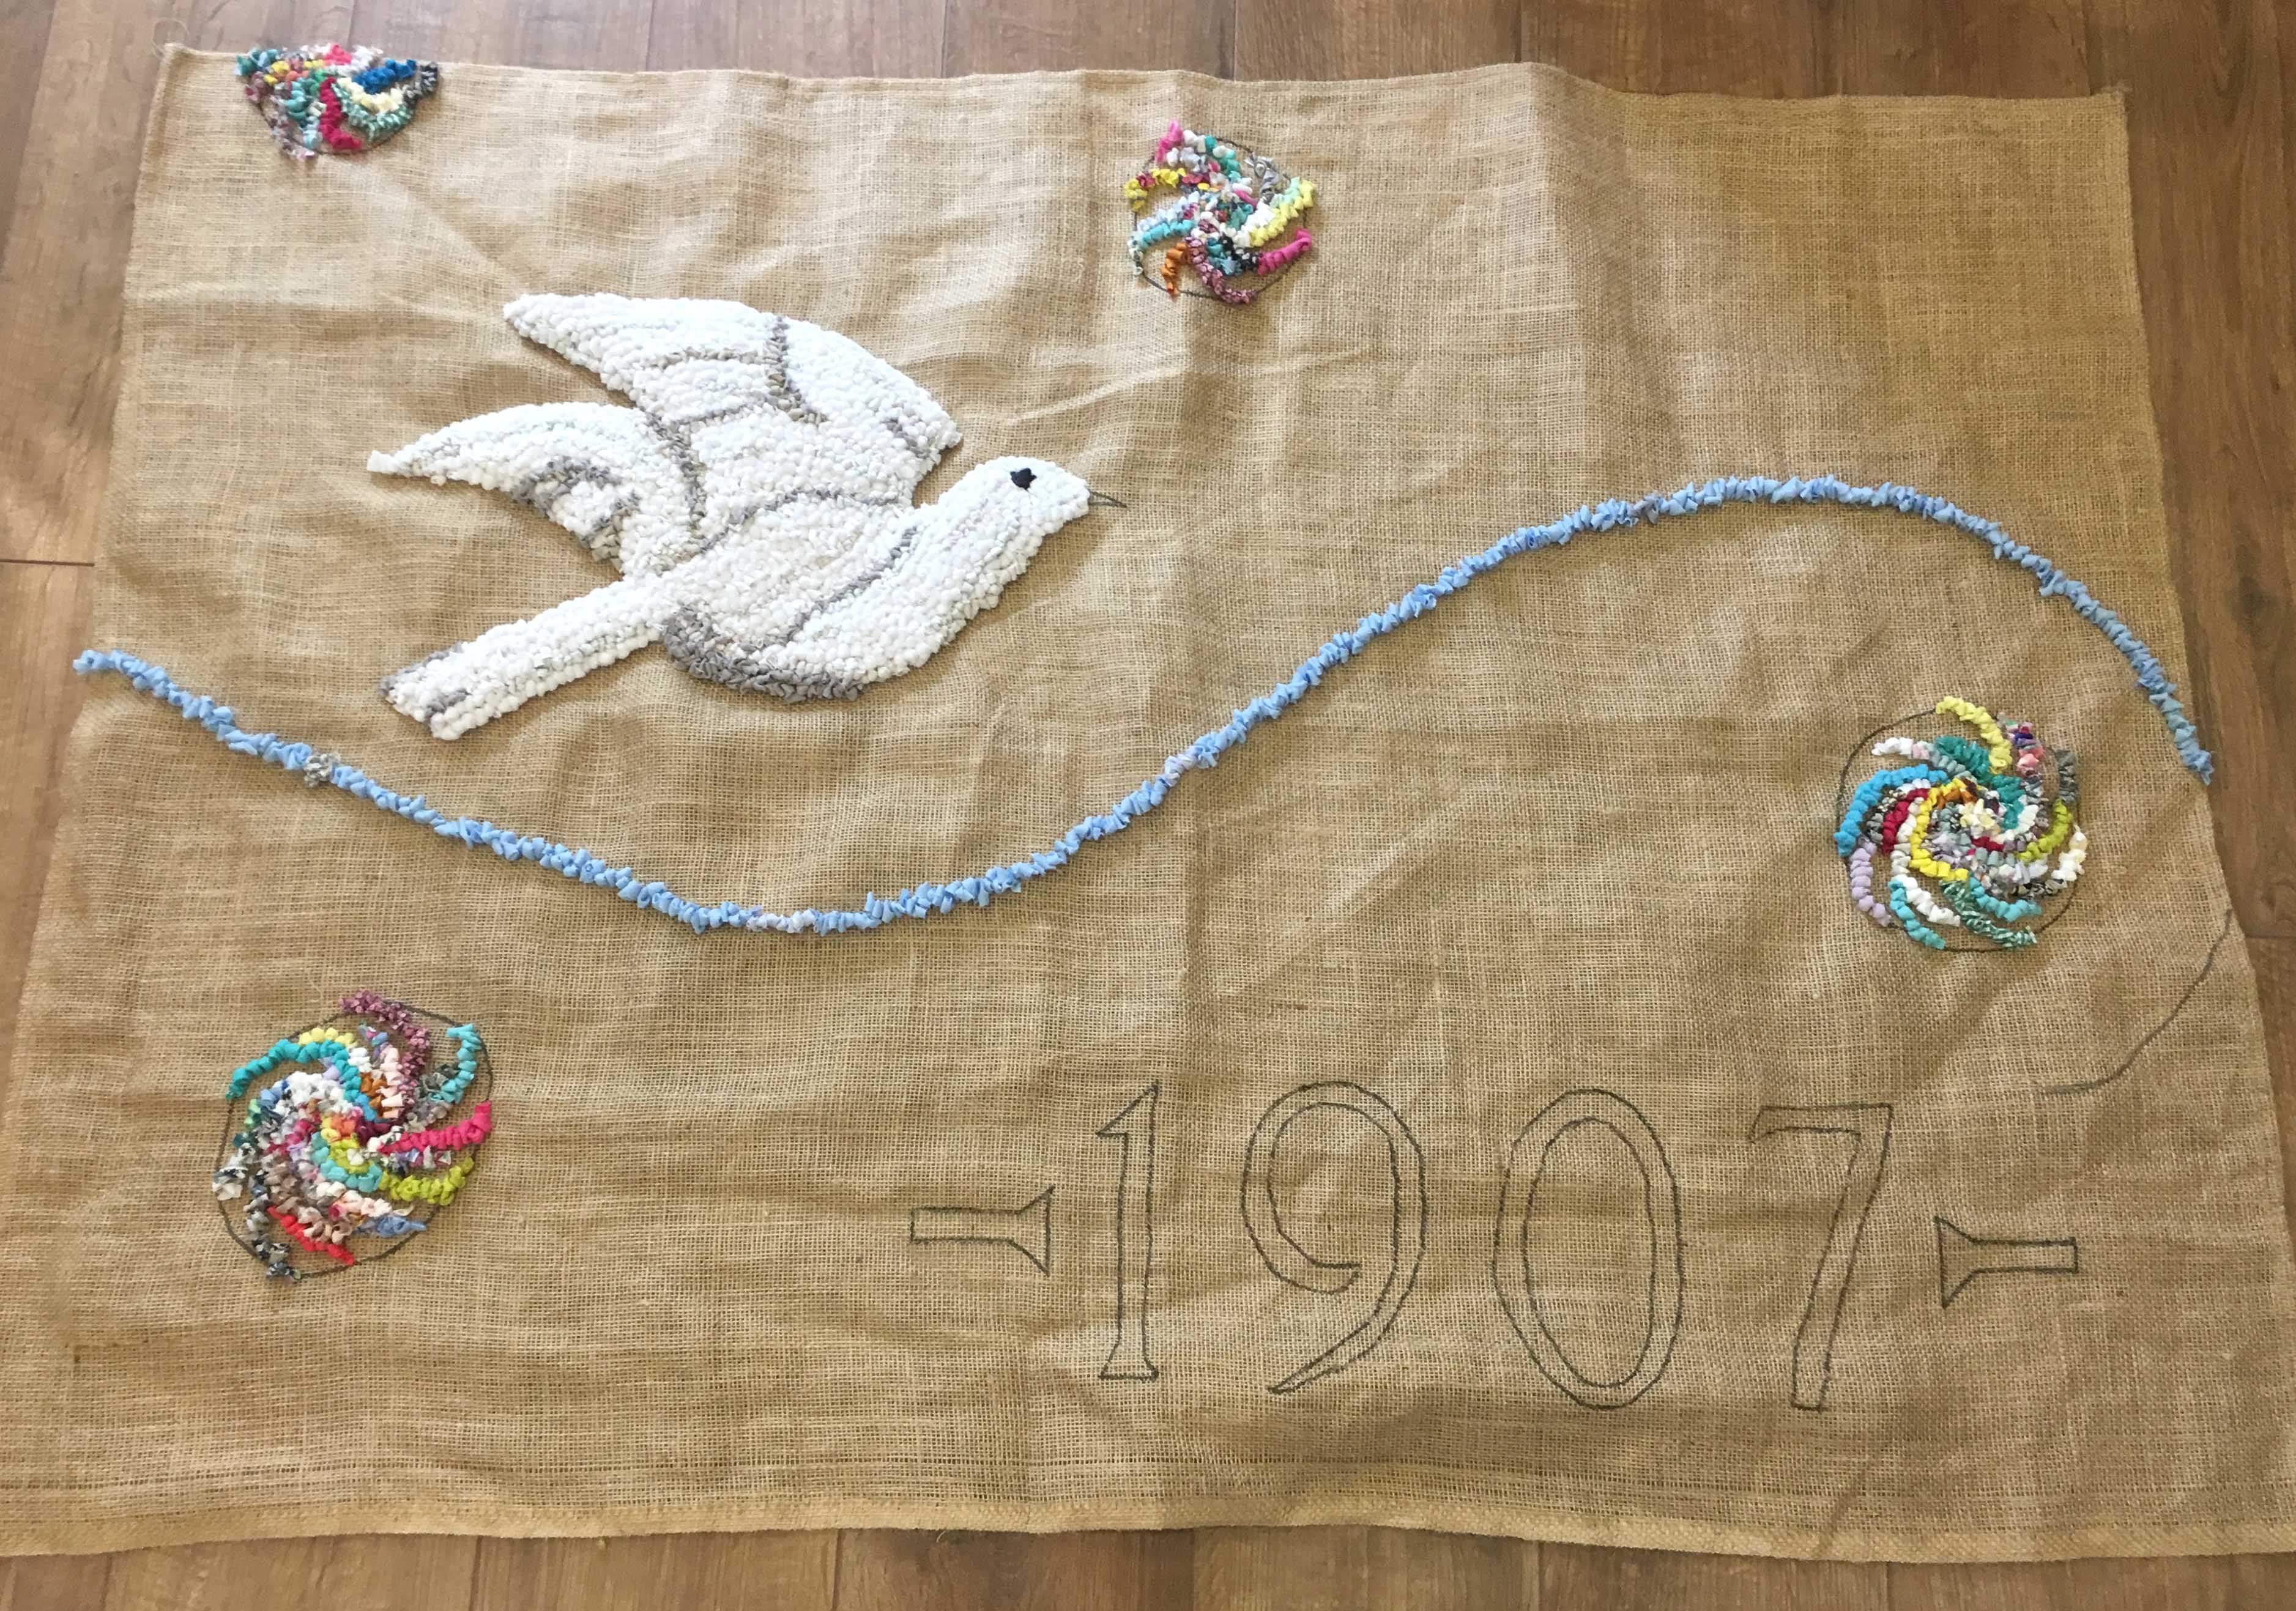
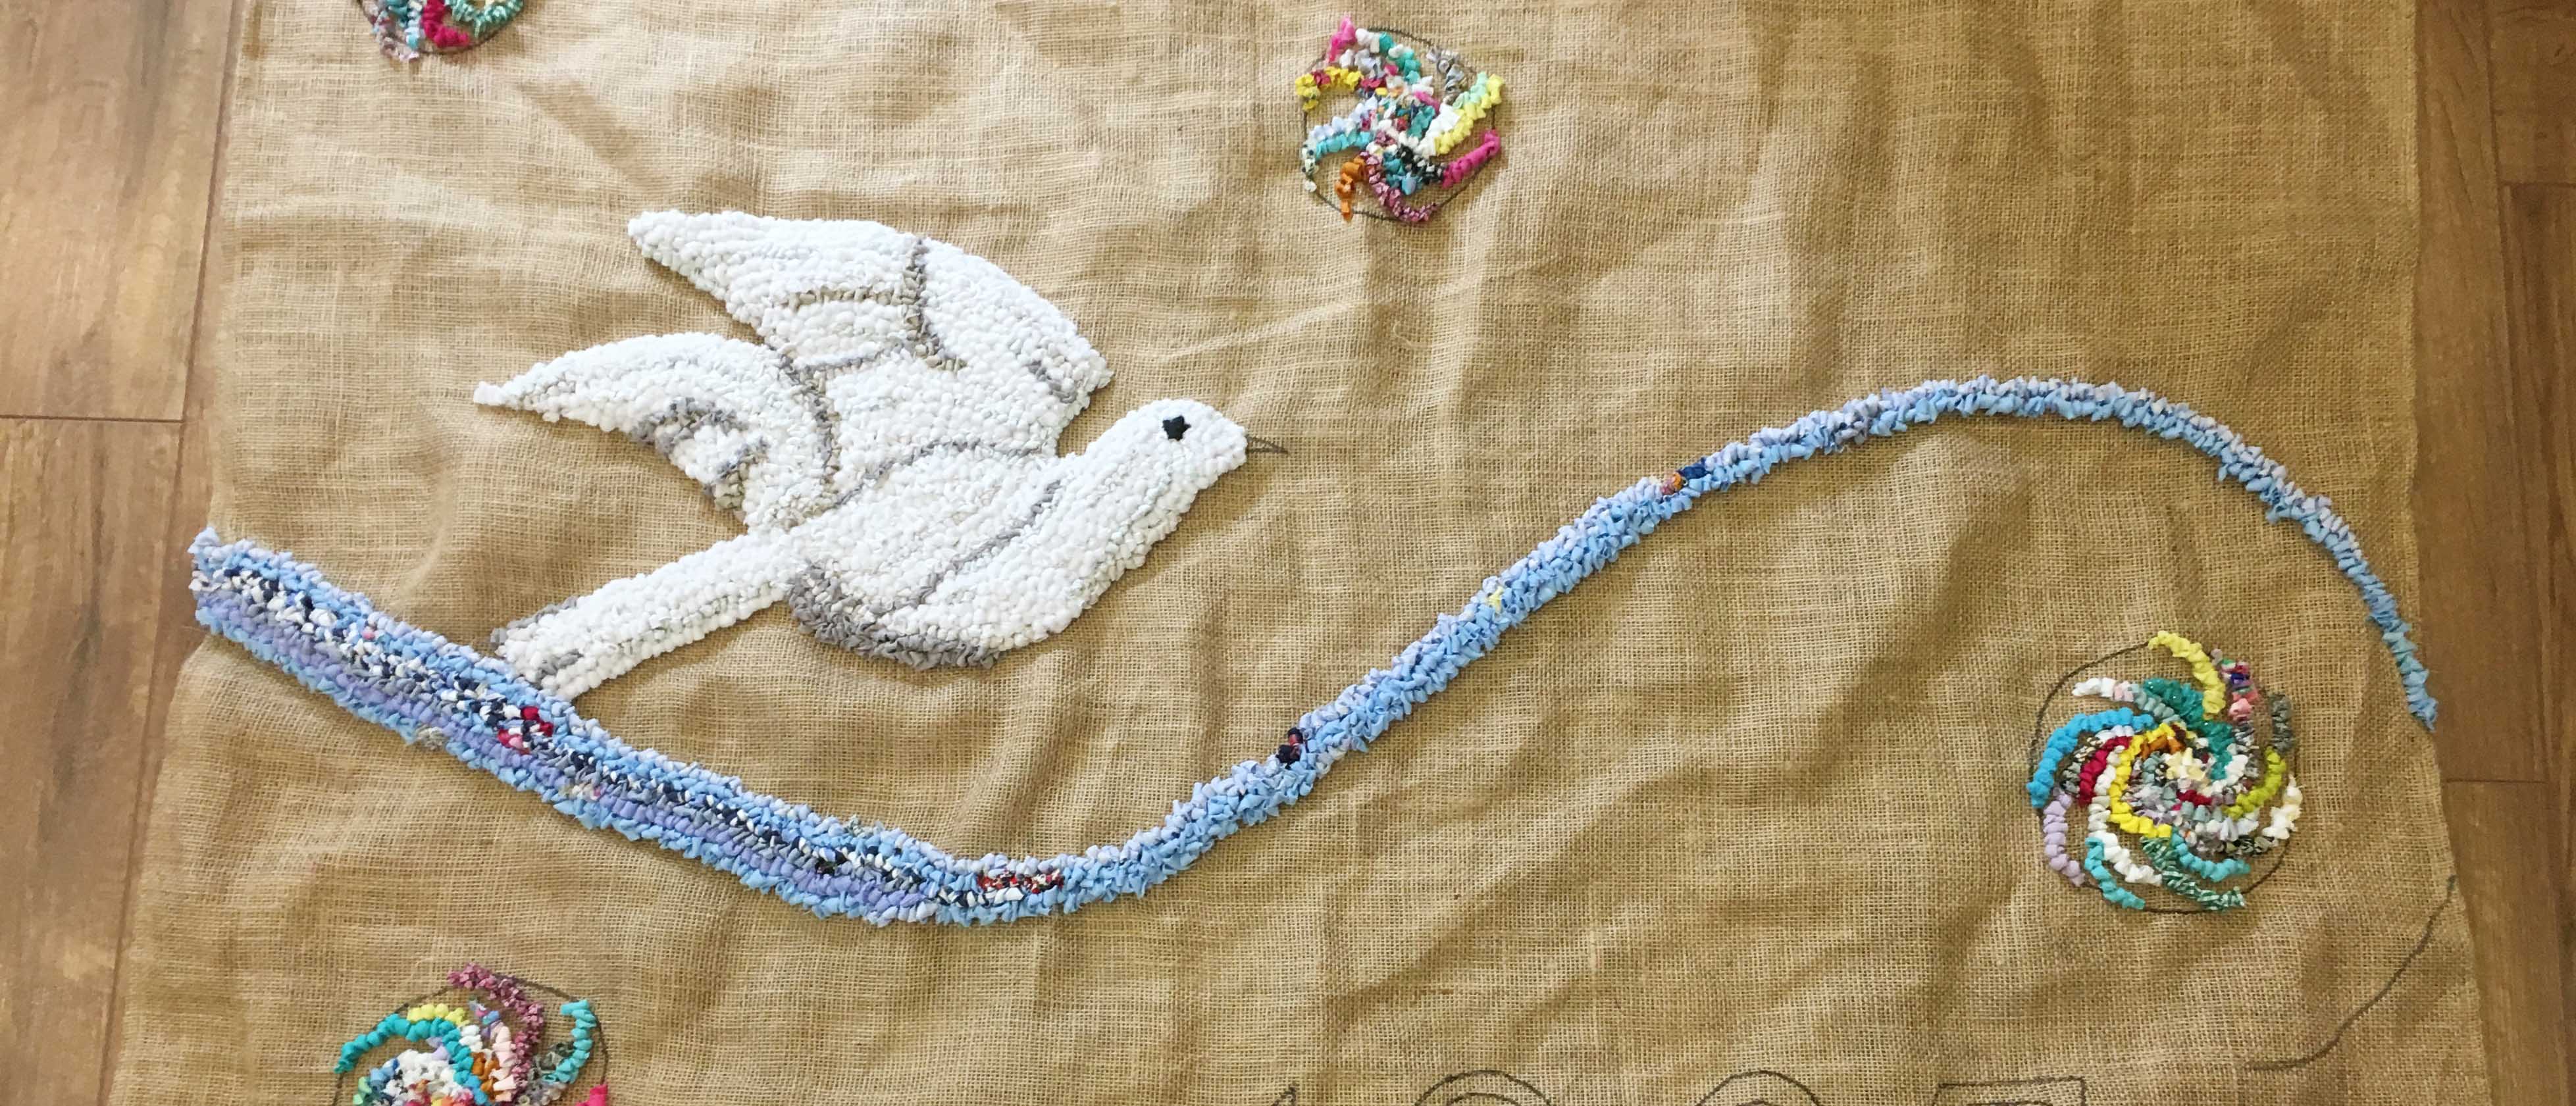
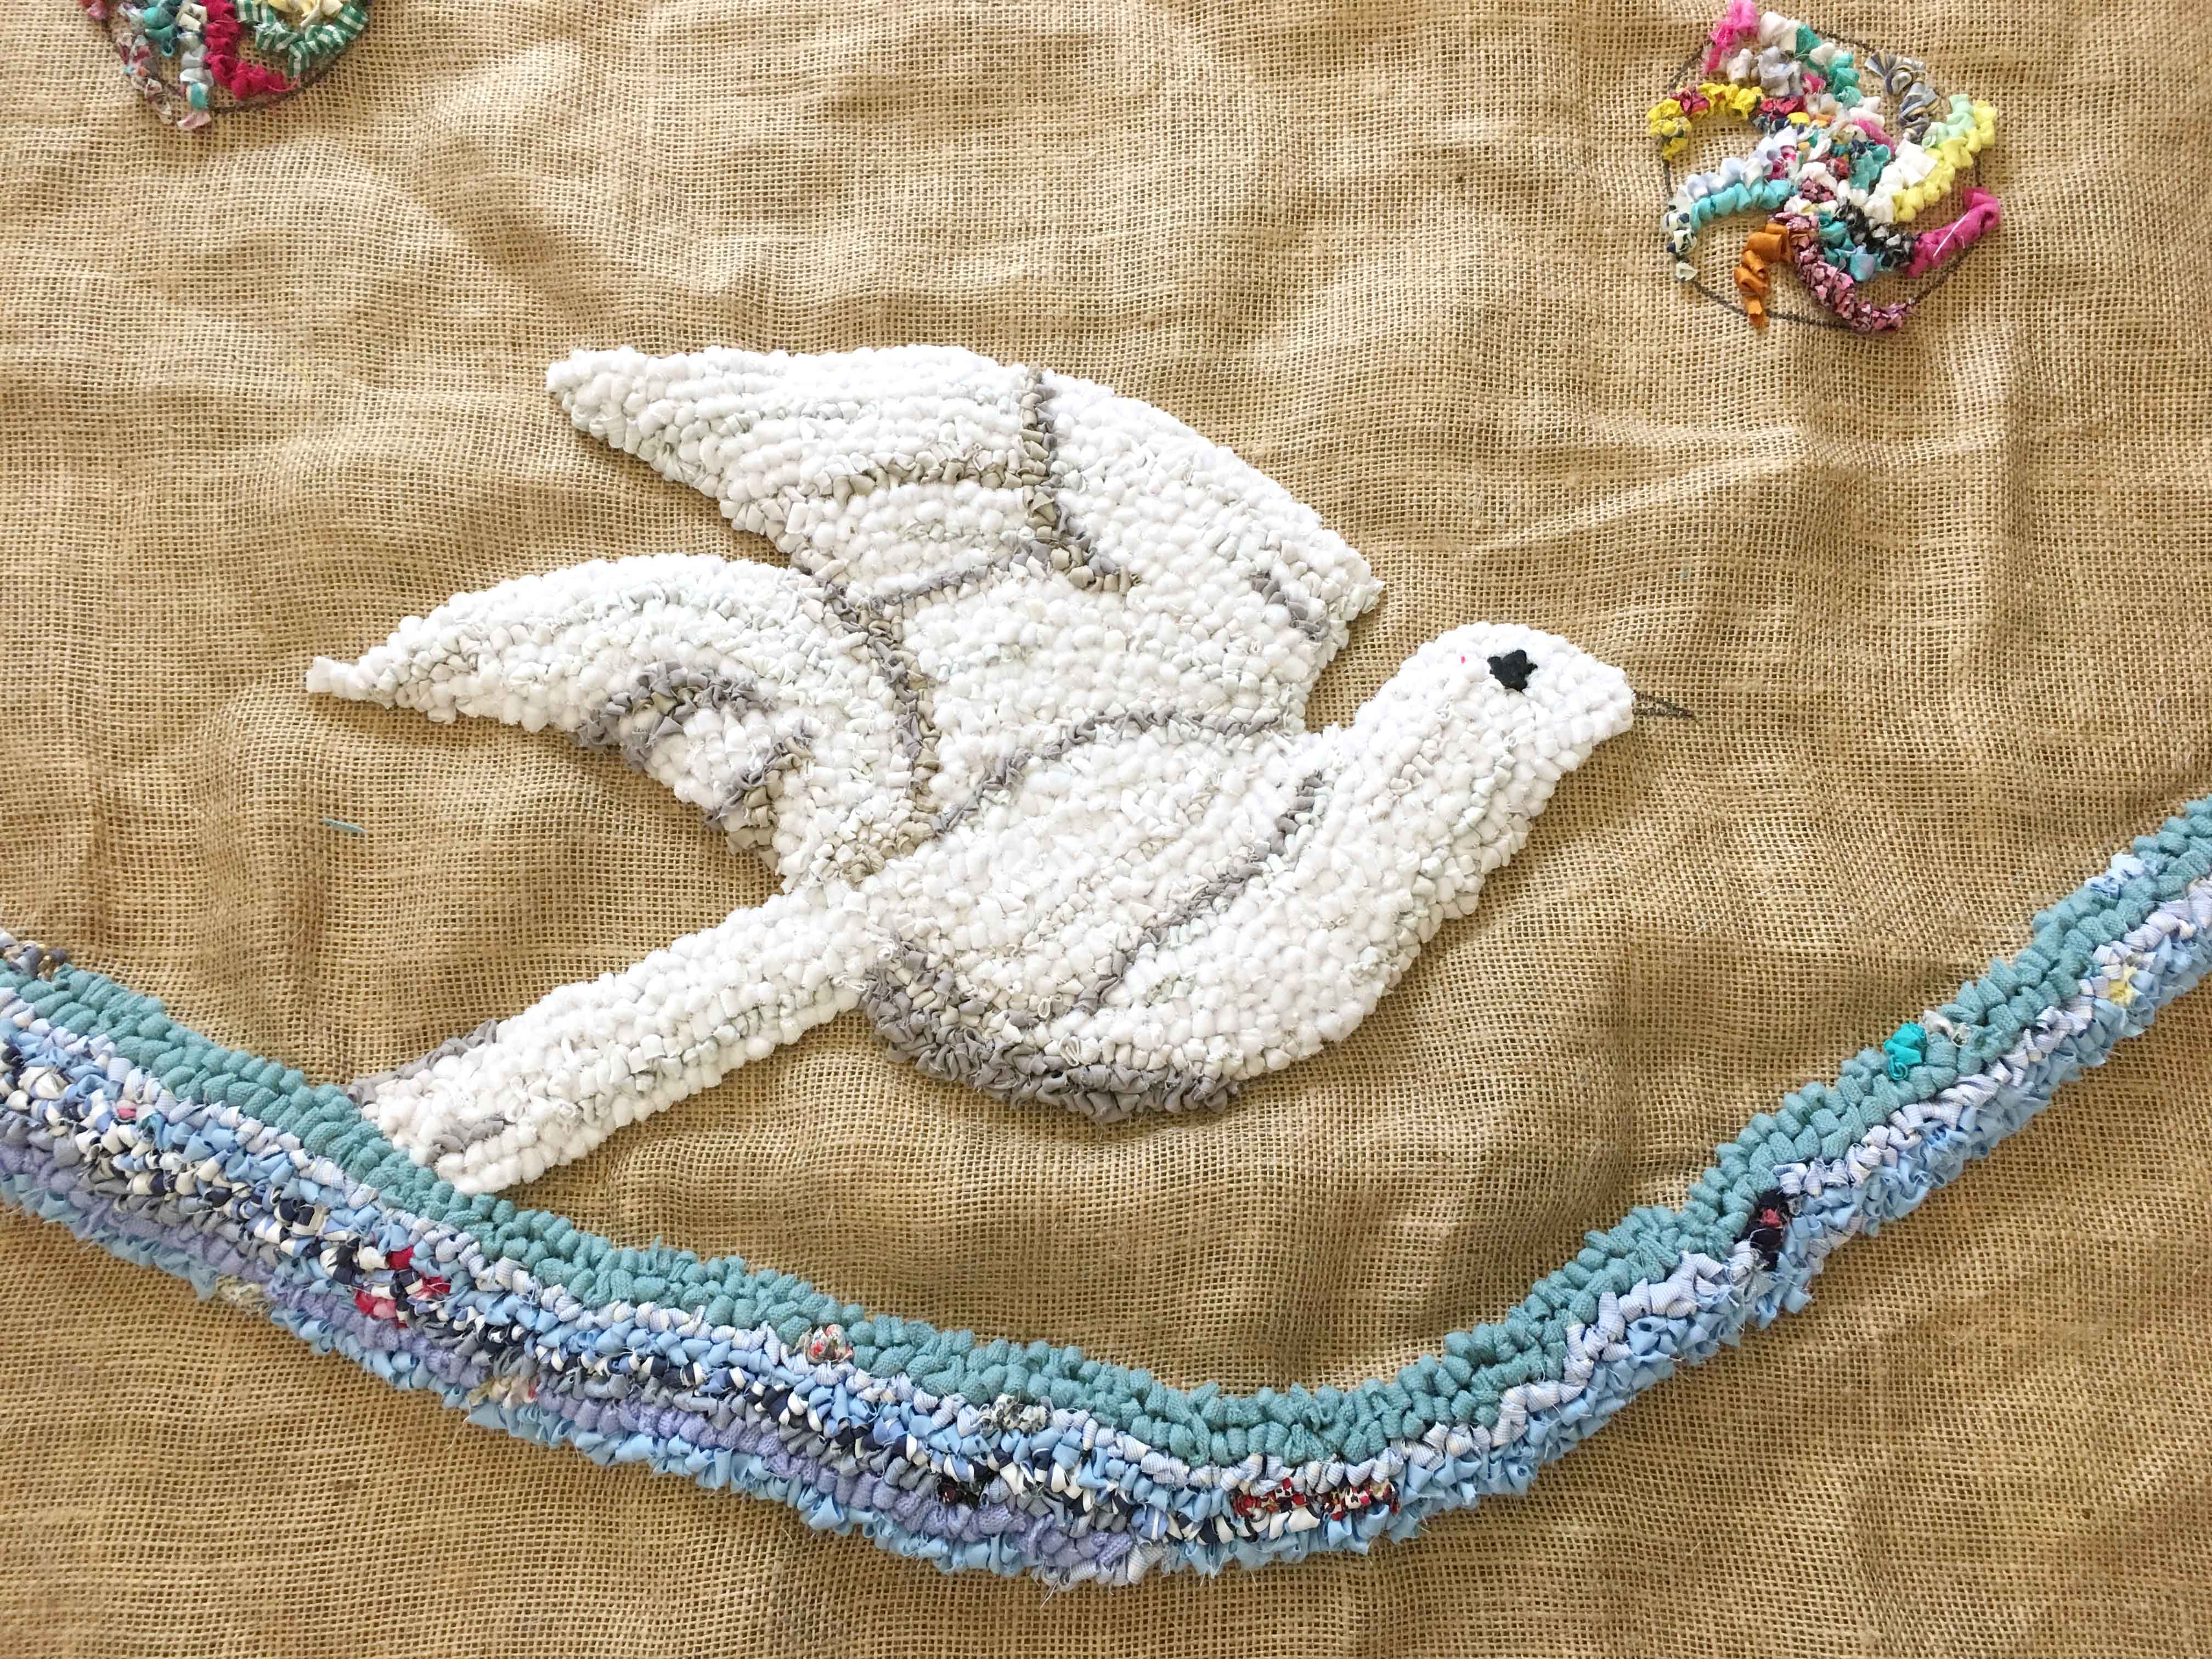
The design then led me to deviate a bit and curl upwards – wheeeeee!
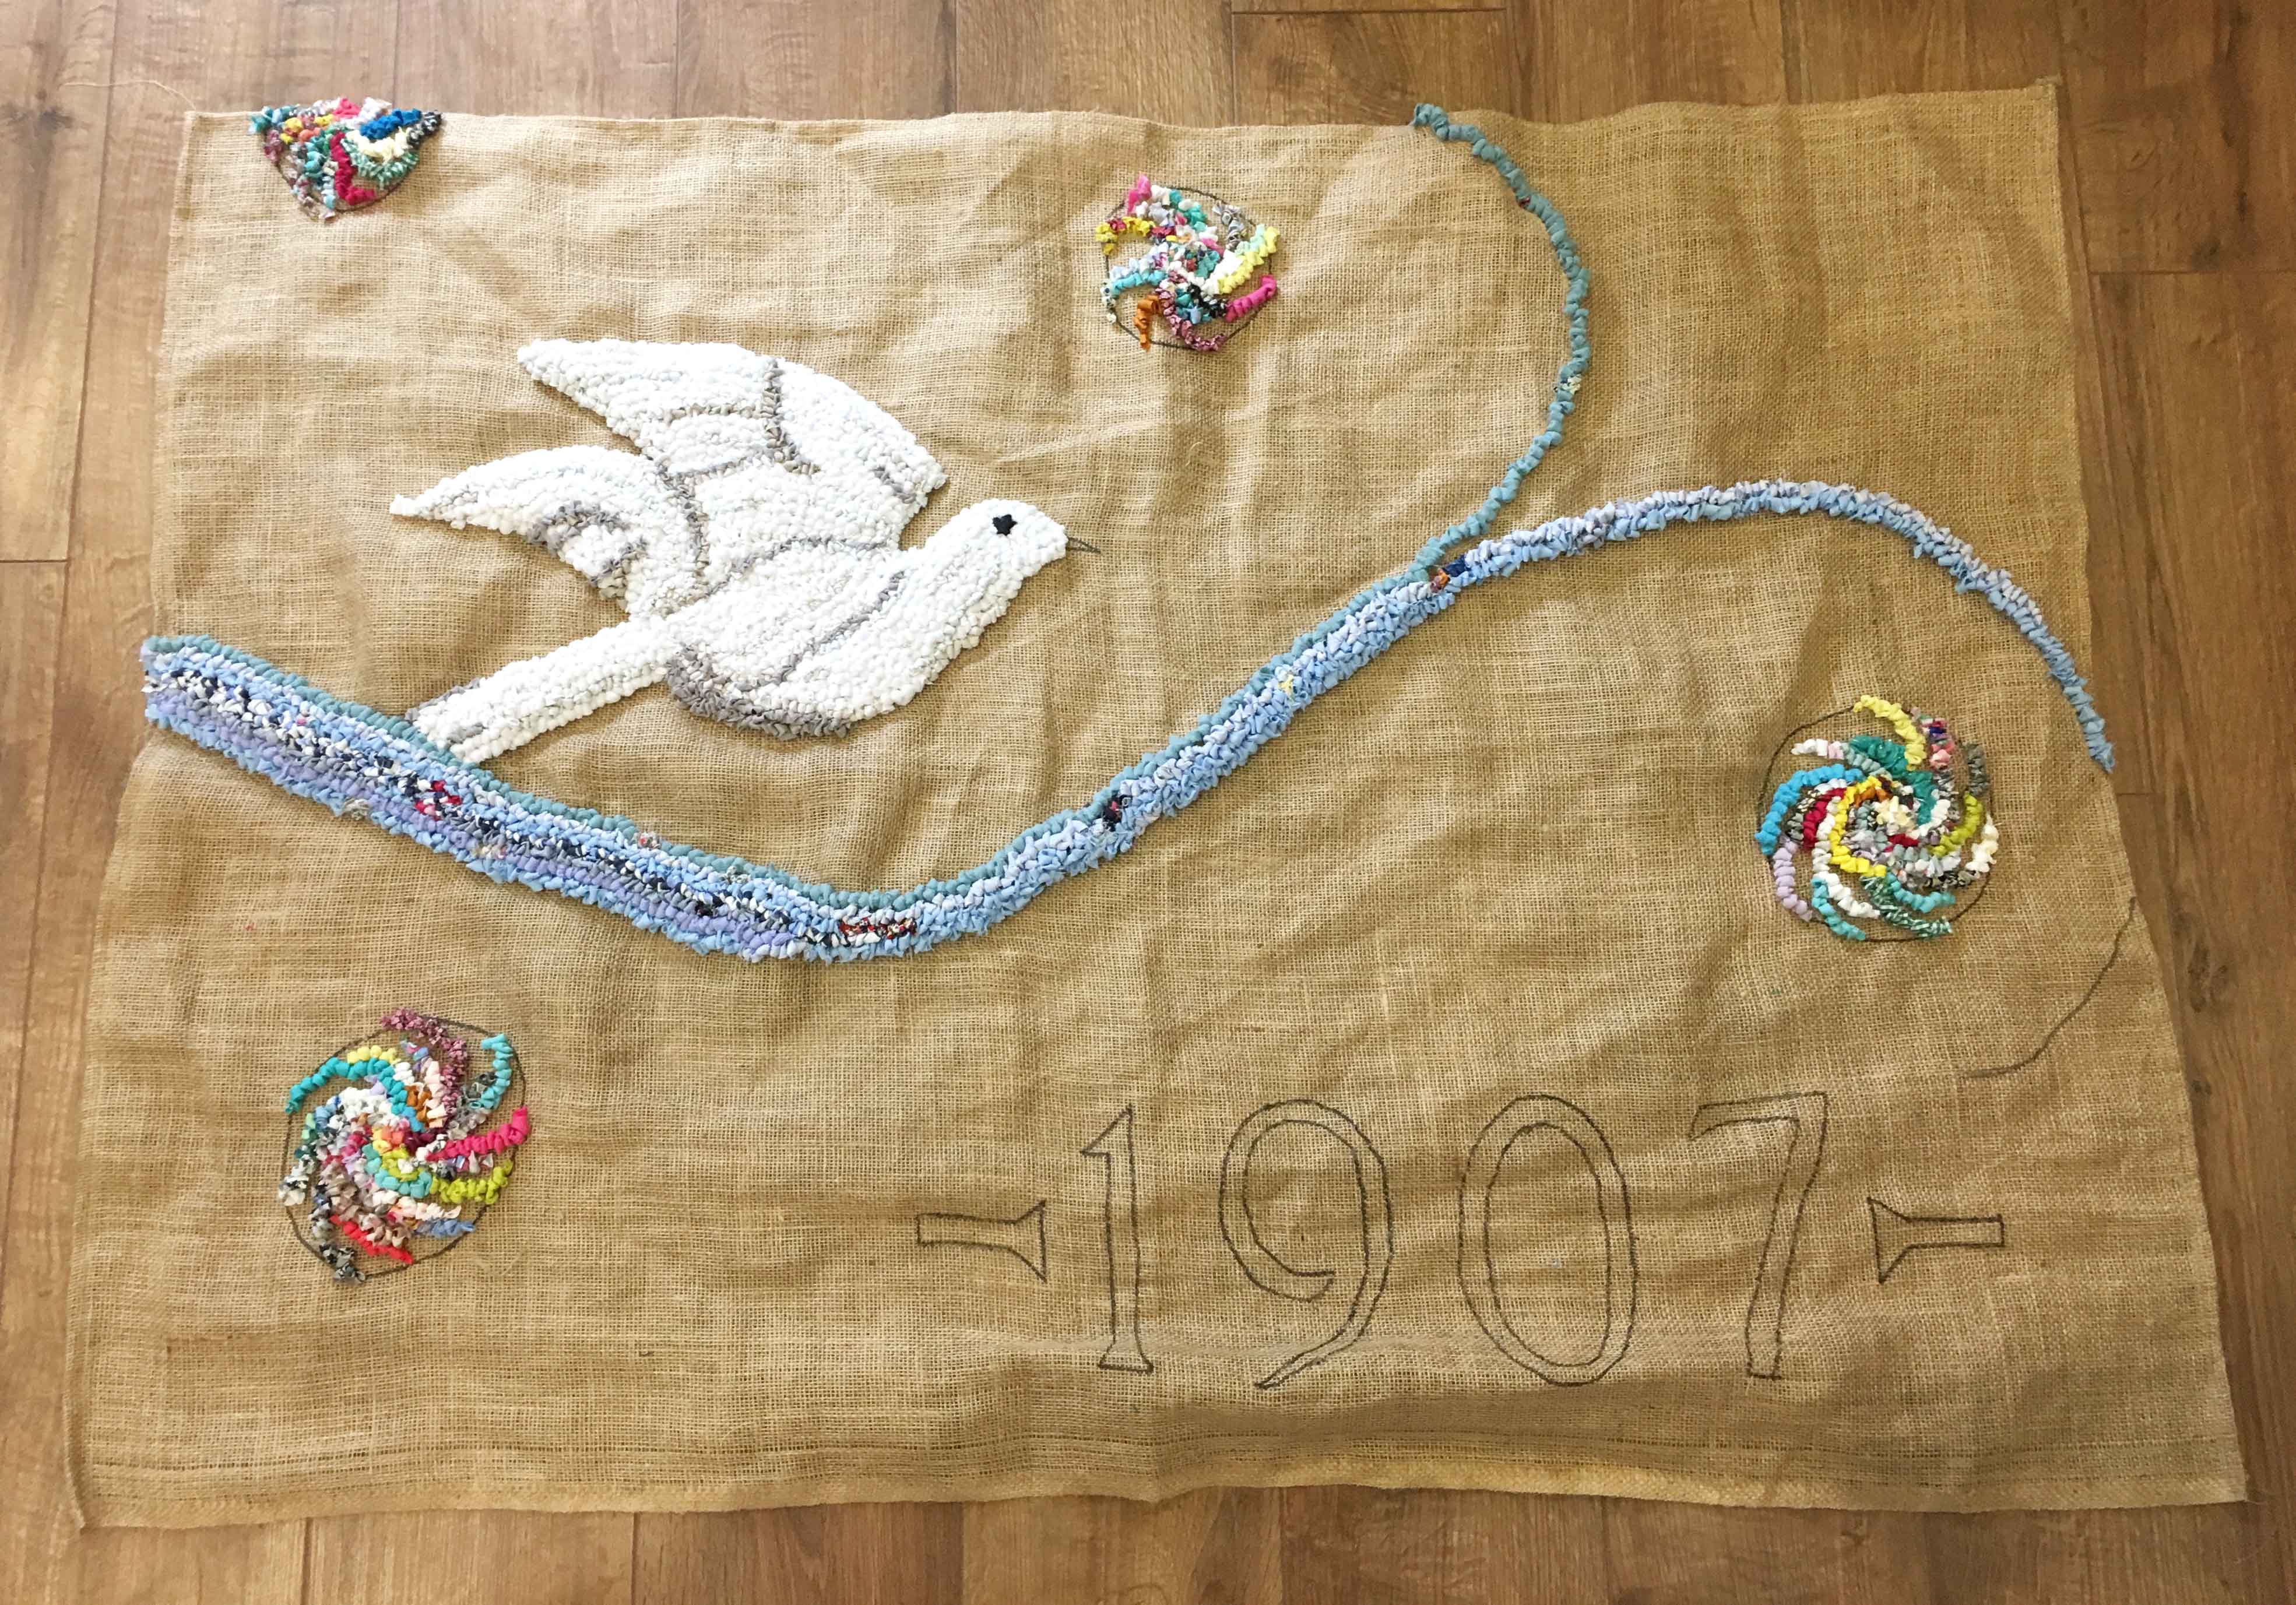
Following a more complicated design is actually more fun because you always have a new part of the piece to look forward to.
And then the postman arrived with my gold fabric… hooray! I then went back to Plan A and loopy rag rugged the letters. It was important to keep the shading on the edges of the letters to prevent them becoming too blocky and one-dimensional. The gold rag rugging doesn’t show up very well against the hessian but will pop nicely against the blue background once it is completed.
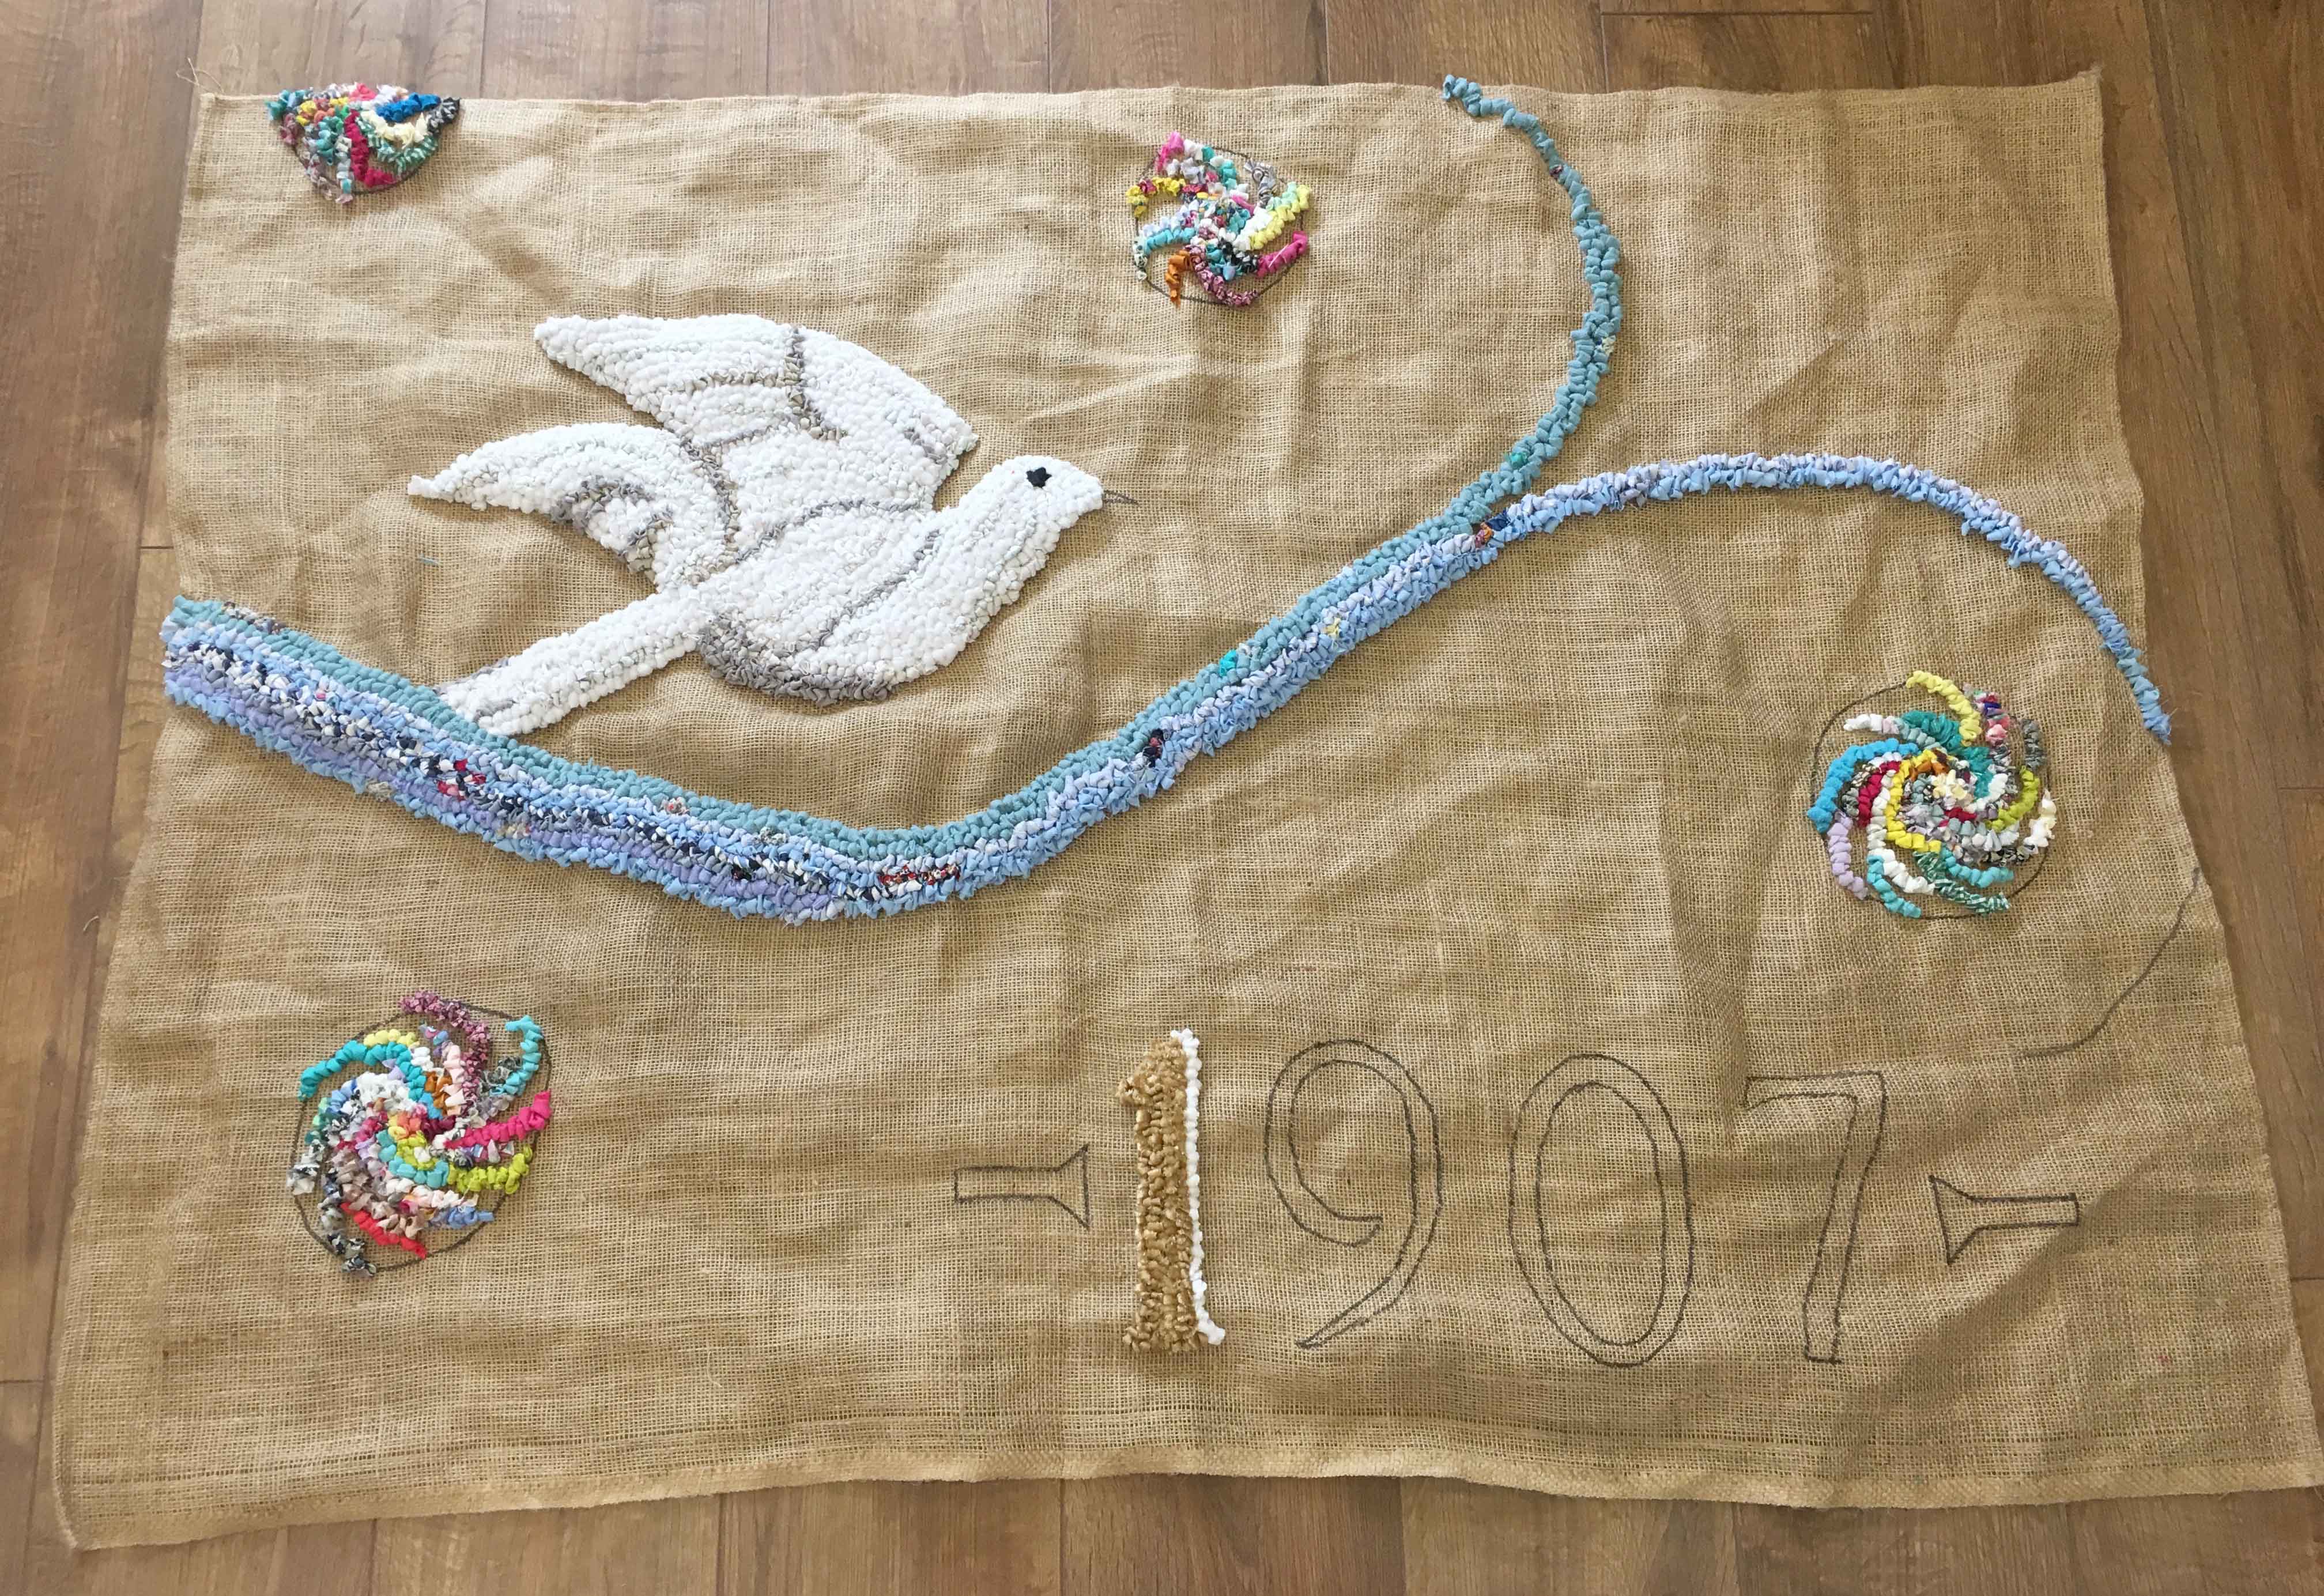
I was so excited to get started on the rag rug numbers after waiting for the gold for so long.
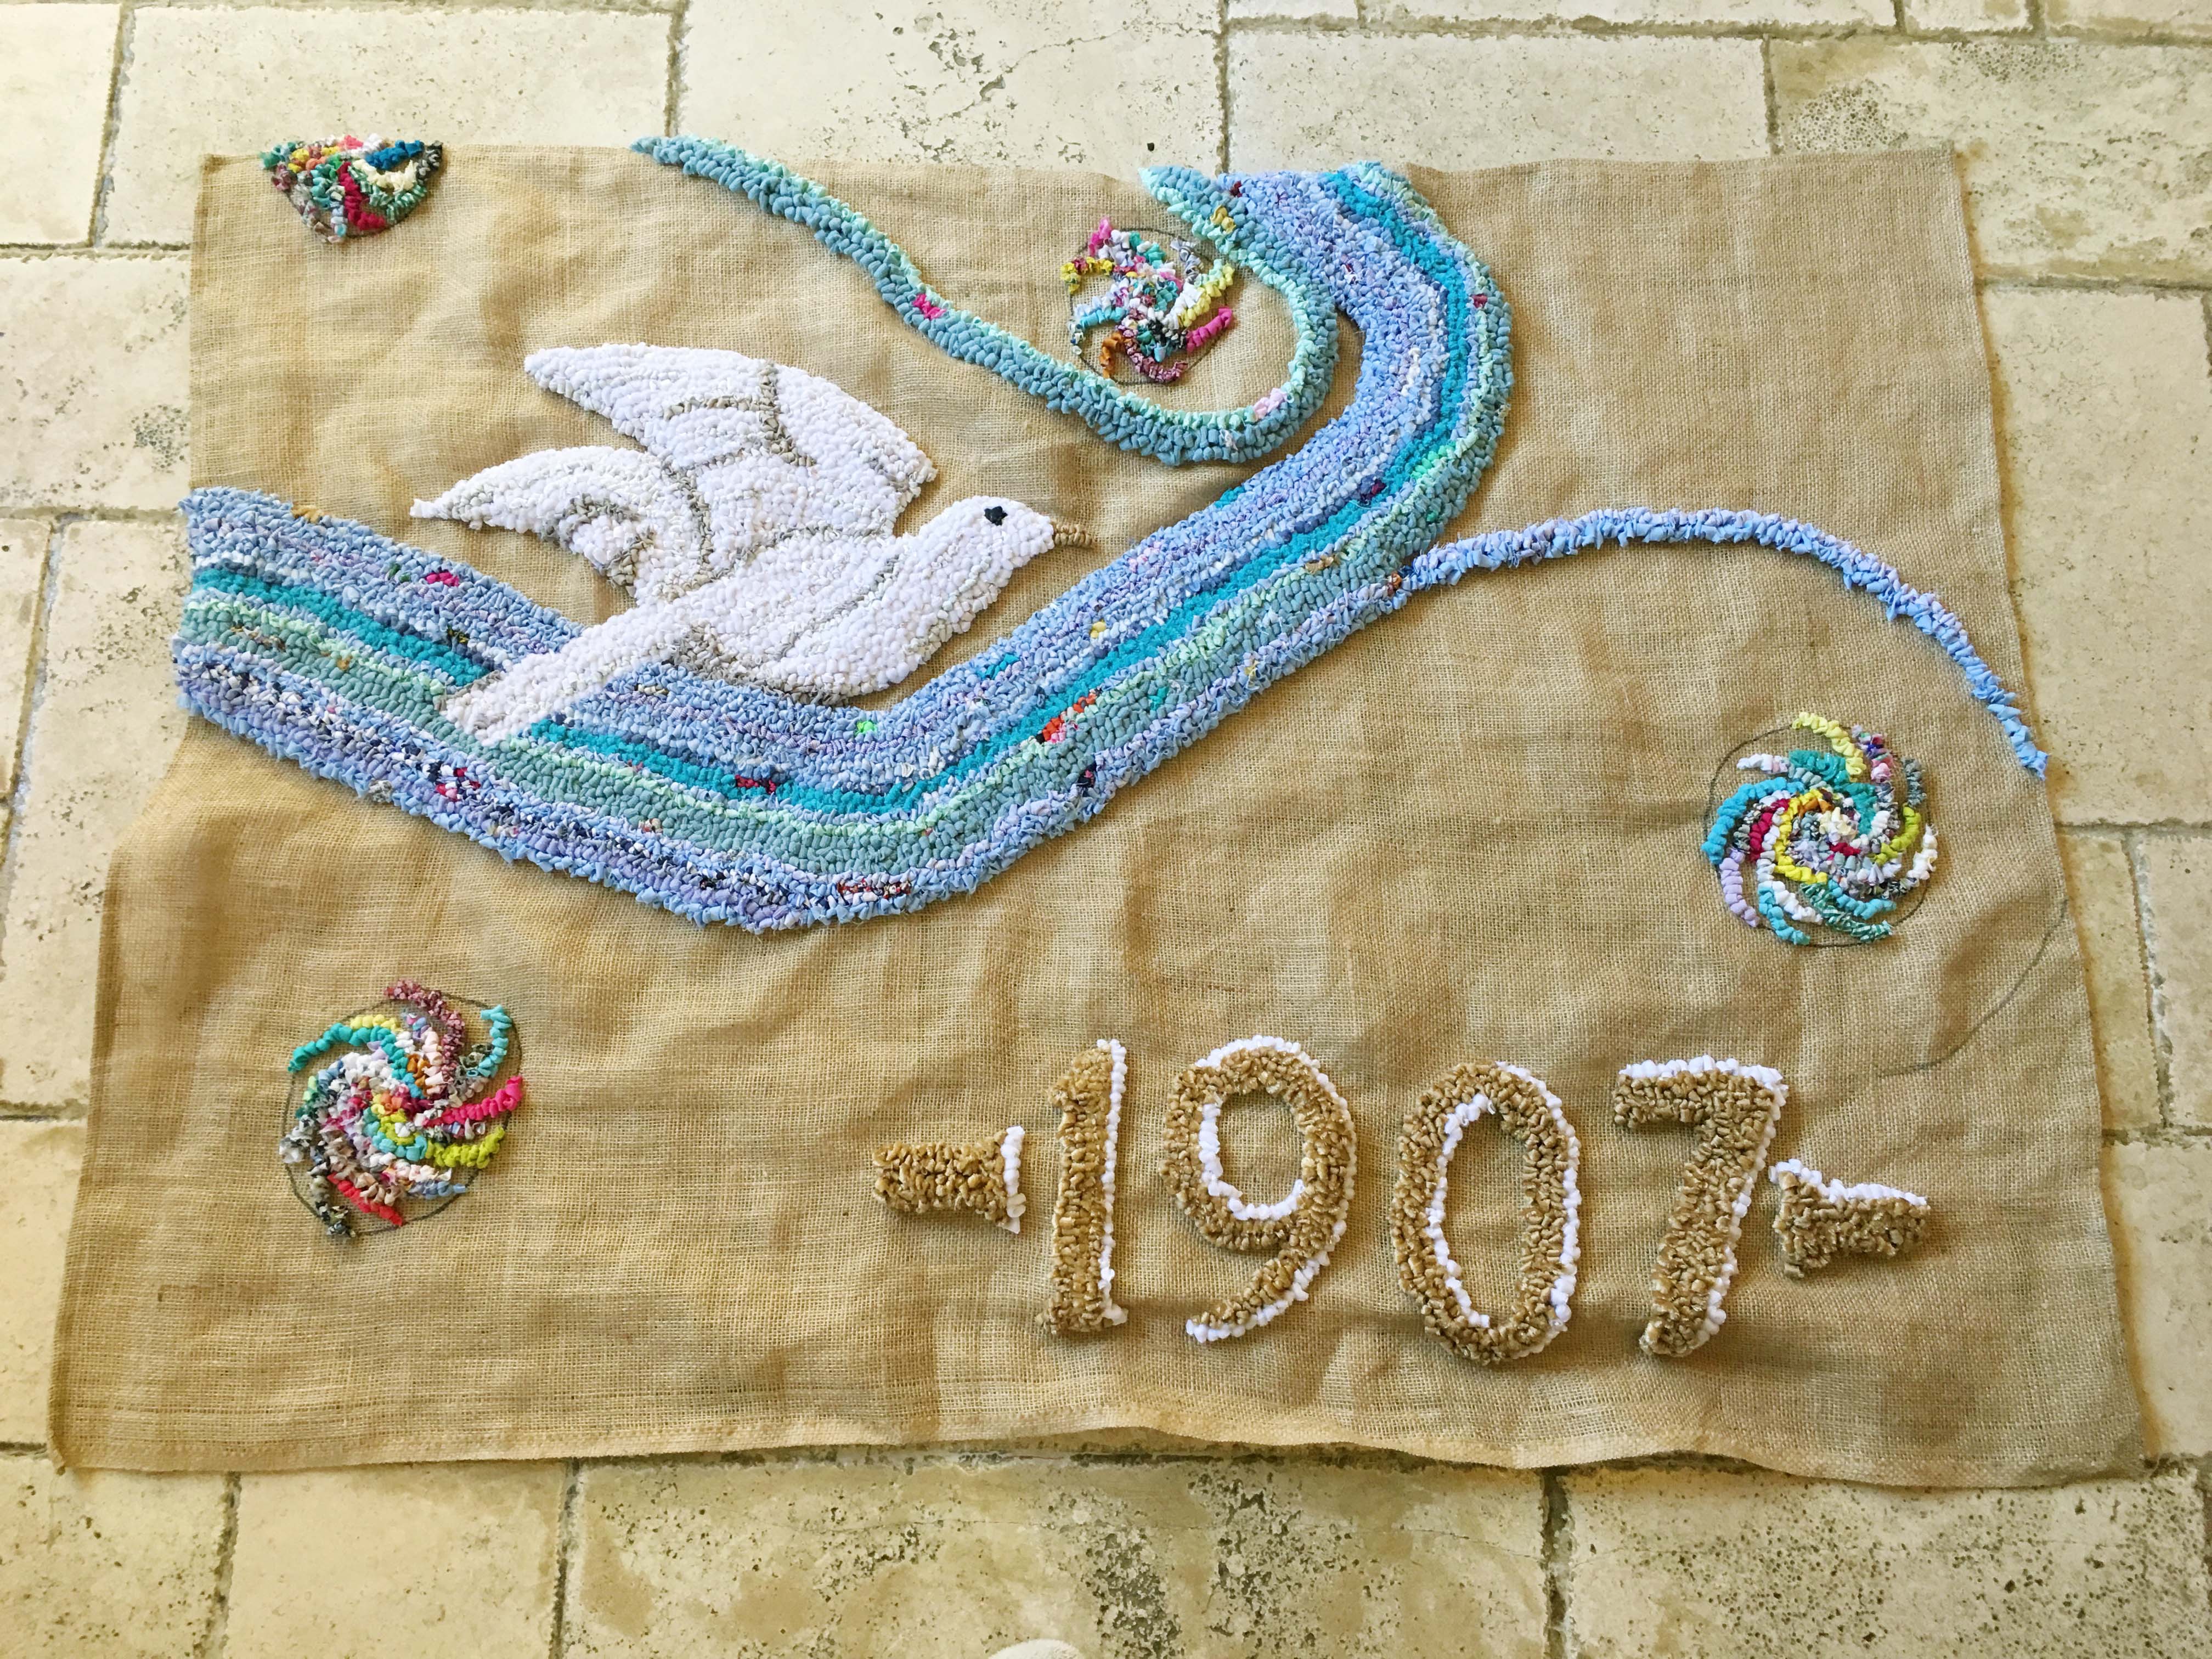
And here’s how it looked after I had rag rugged all the numbers 🙂
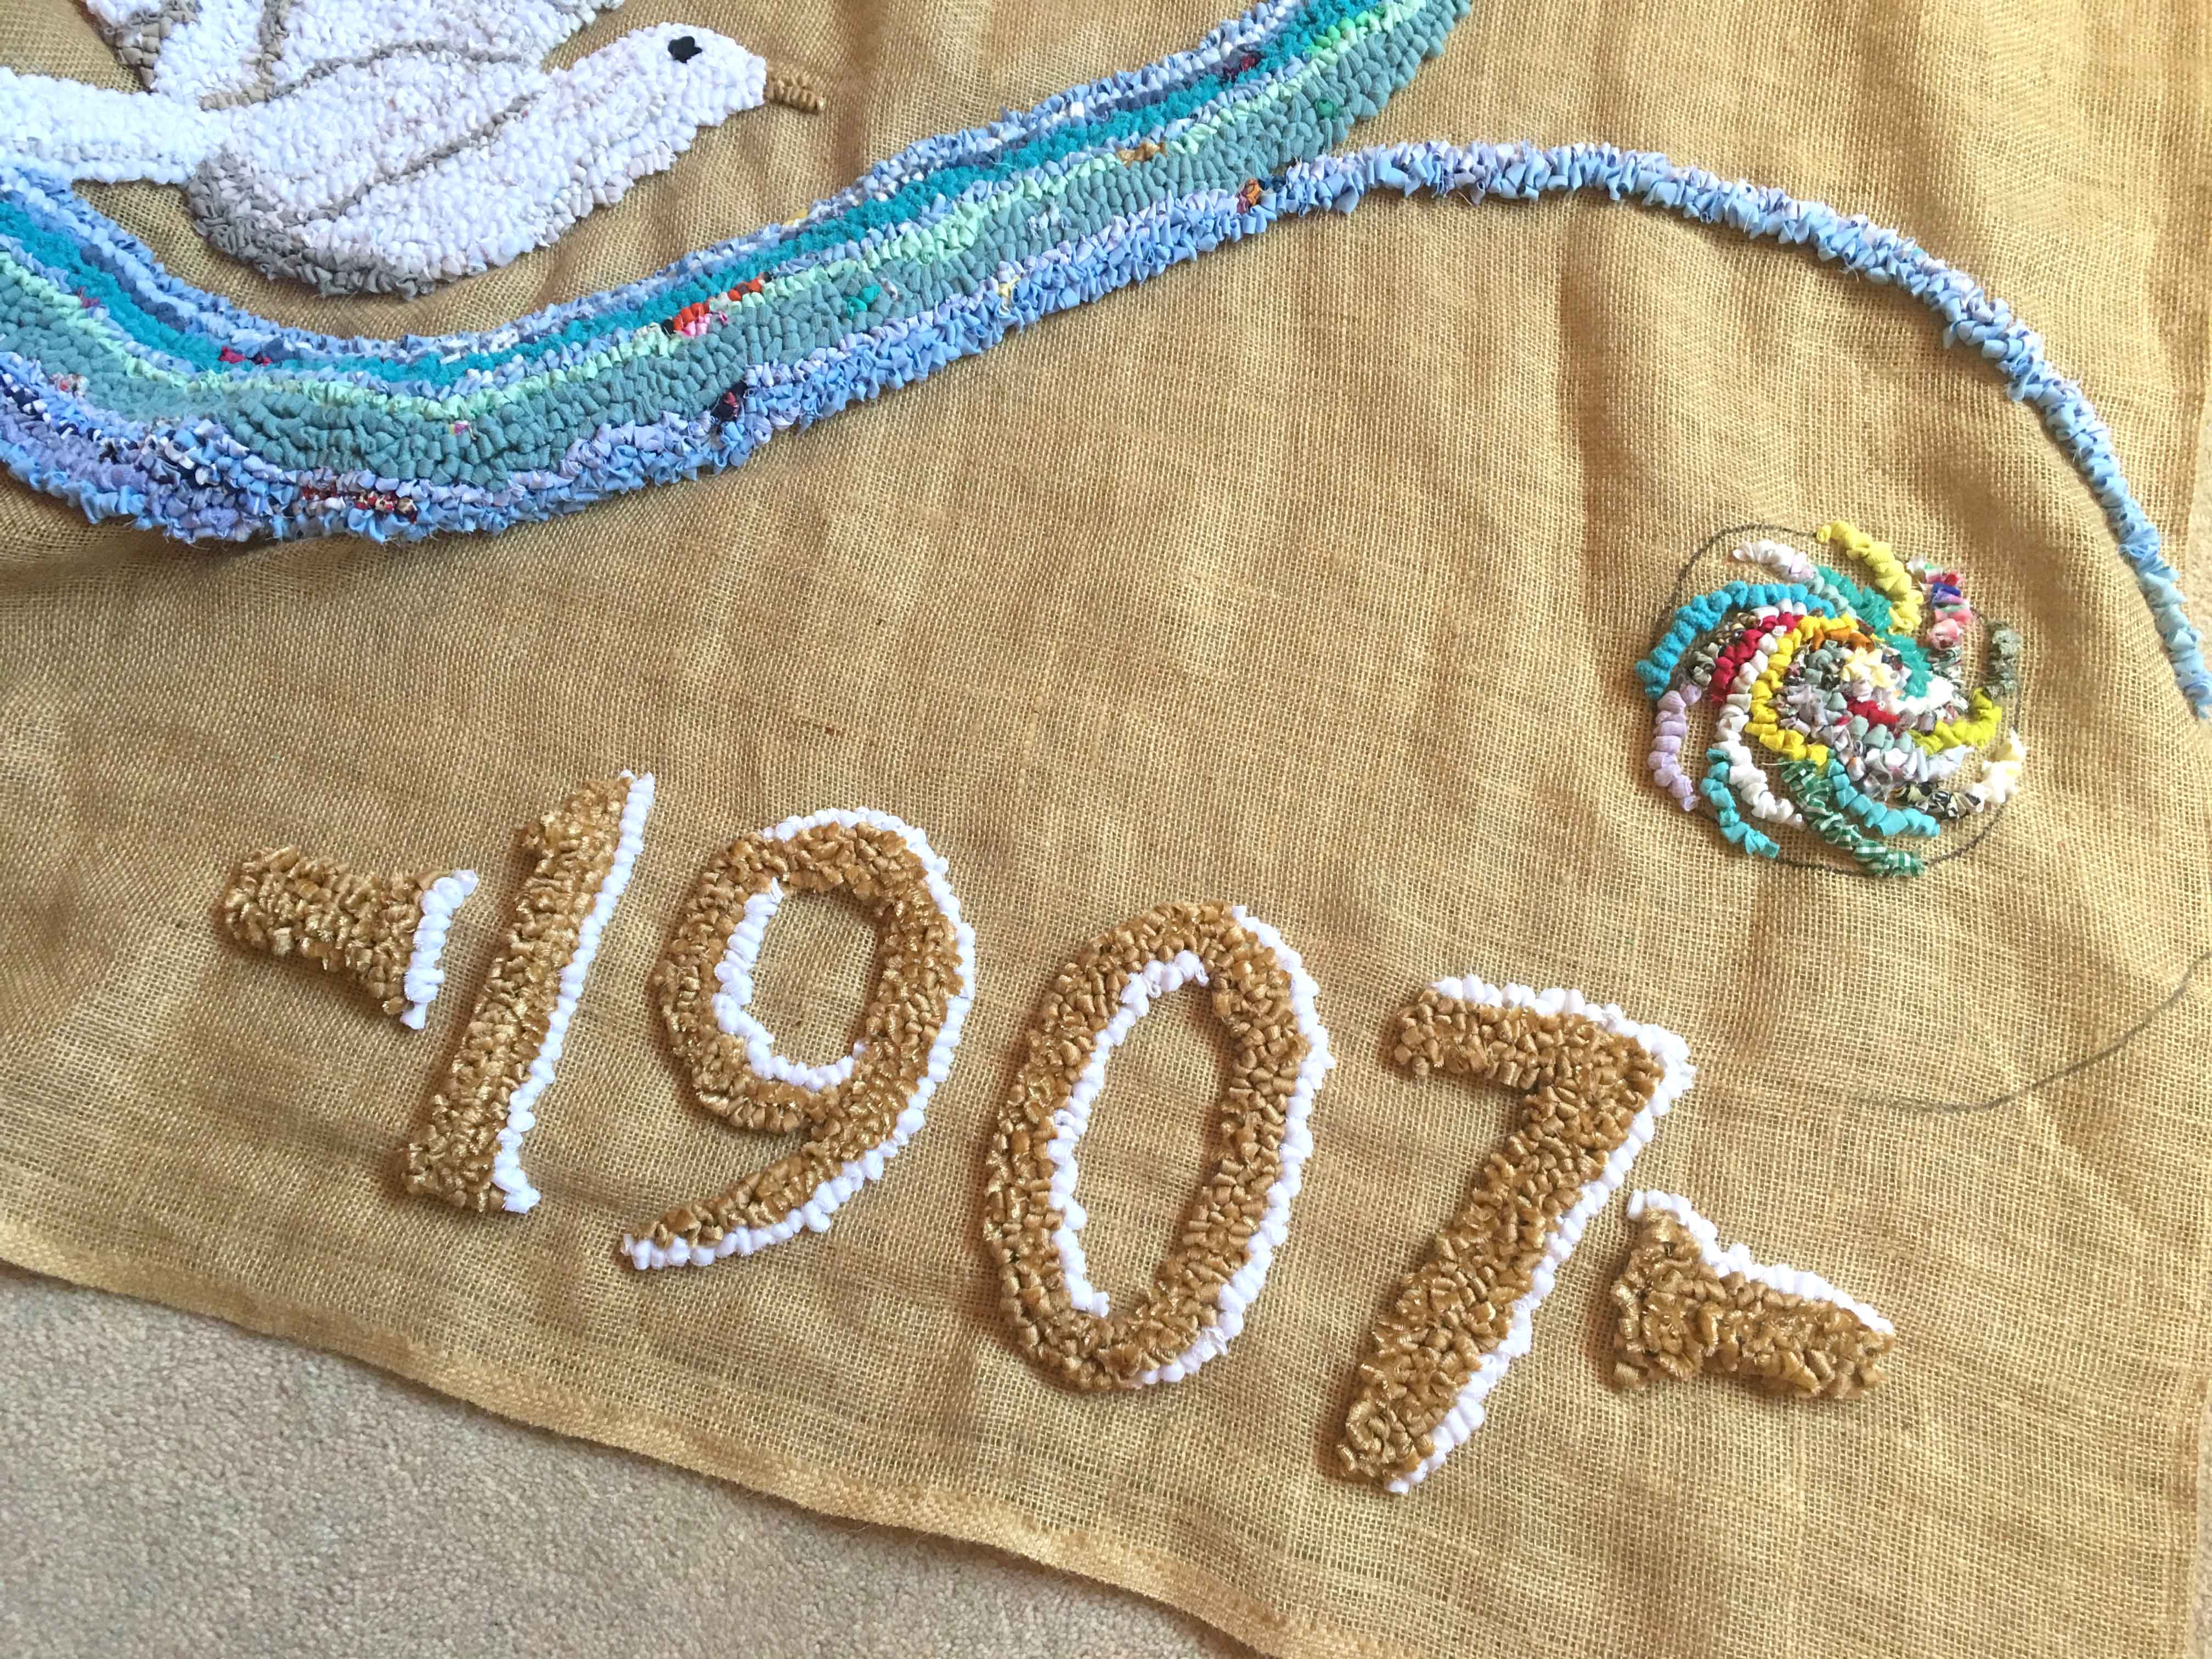
It was pretty satisfying finishing the numbers and adding in the dove’s beak!
I then changed the direction in which I was rag rugging the sky to keep the design flowing.
I was looking forward to rag rugging around the first swirl as I really wanted to see how it would stand out agains the blue background.
So, I’ve just realised that I’ve got this stage in the blog post and haven’t actually shown you the back of the wall hanging! here’s what it looked like at this point of the process…
The hessian curls a little when you don’t rag rug it from one point of the hessian. The curling will rectify itself once the bits of blank hessian in between have been filled.
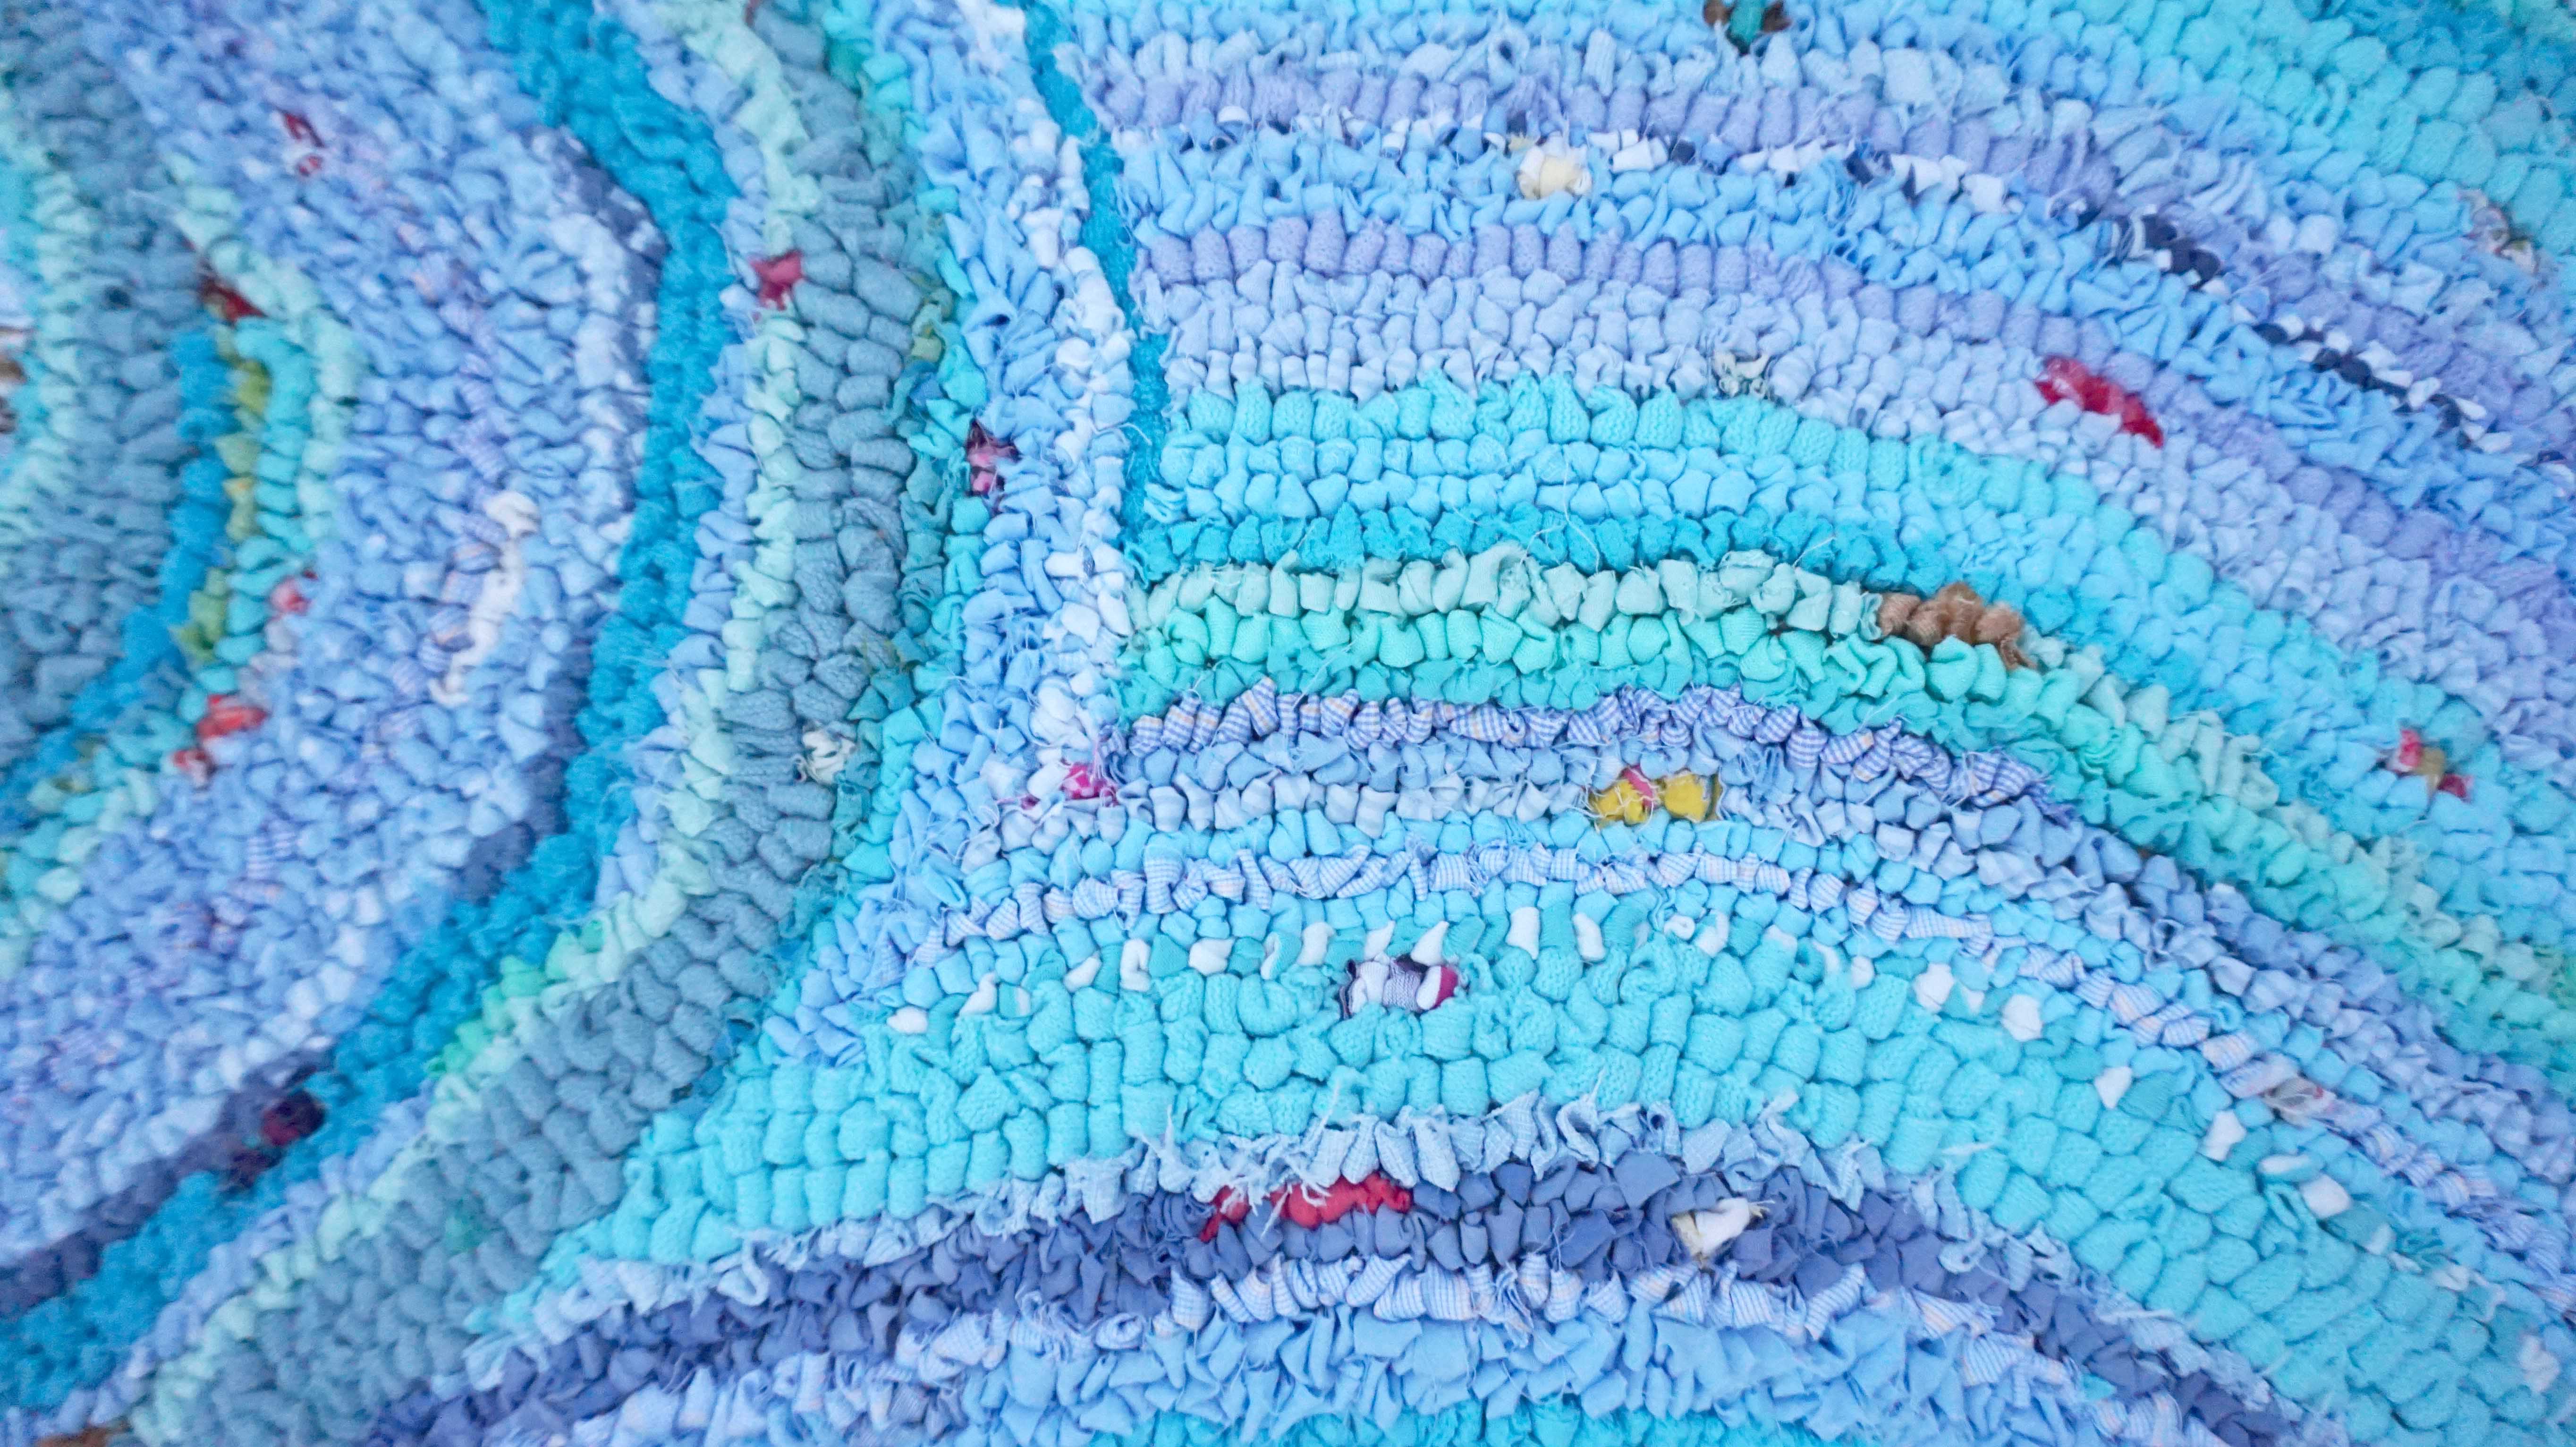
It’s only when you see close up photos like this that you begin to see some of the details of the wall hanging that aren’t so obvious from further away.
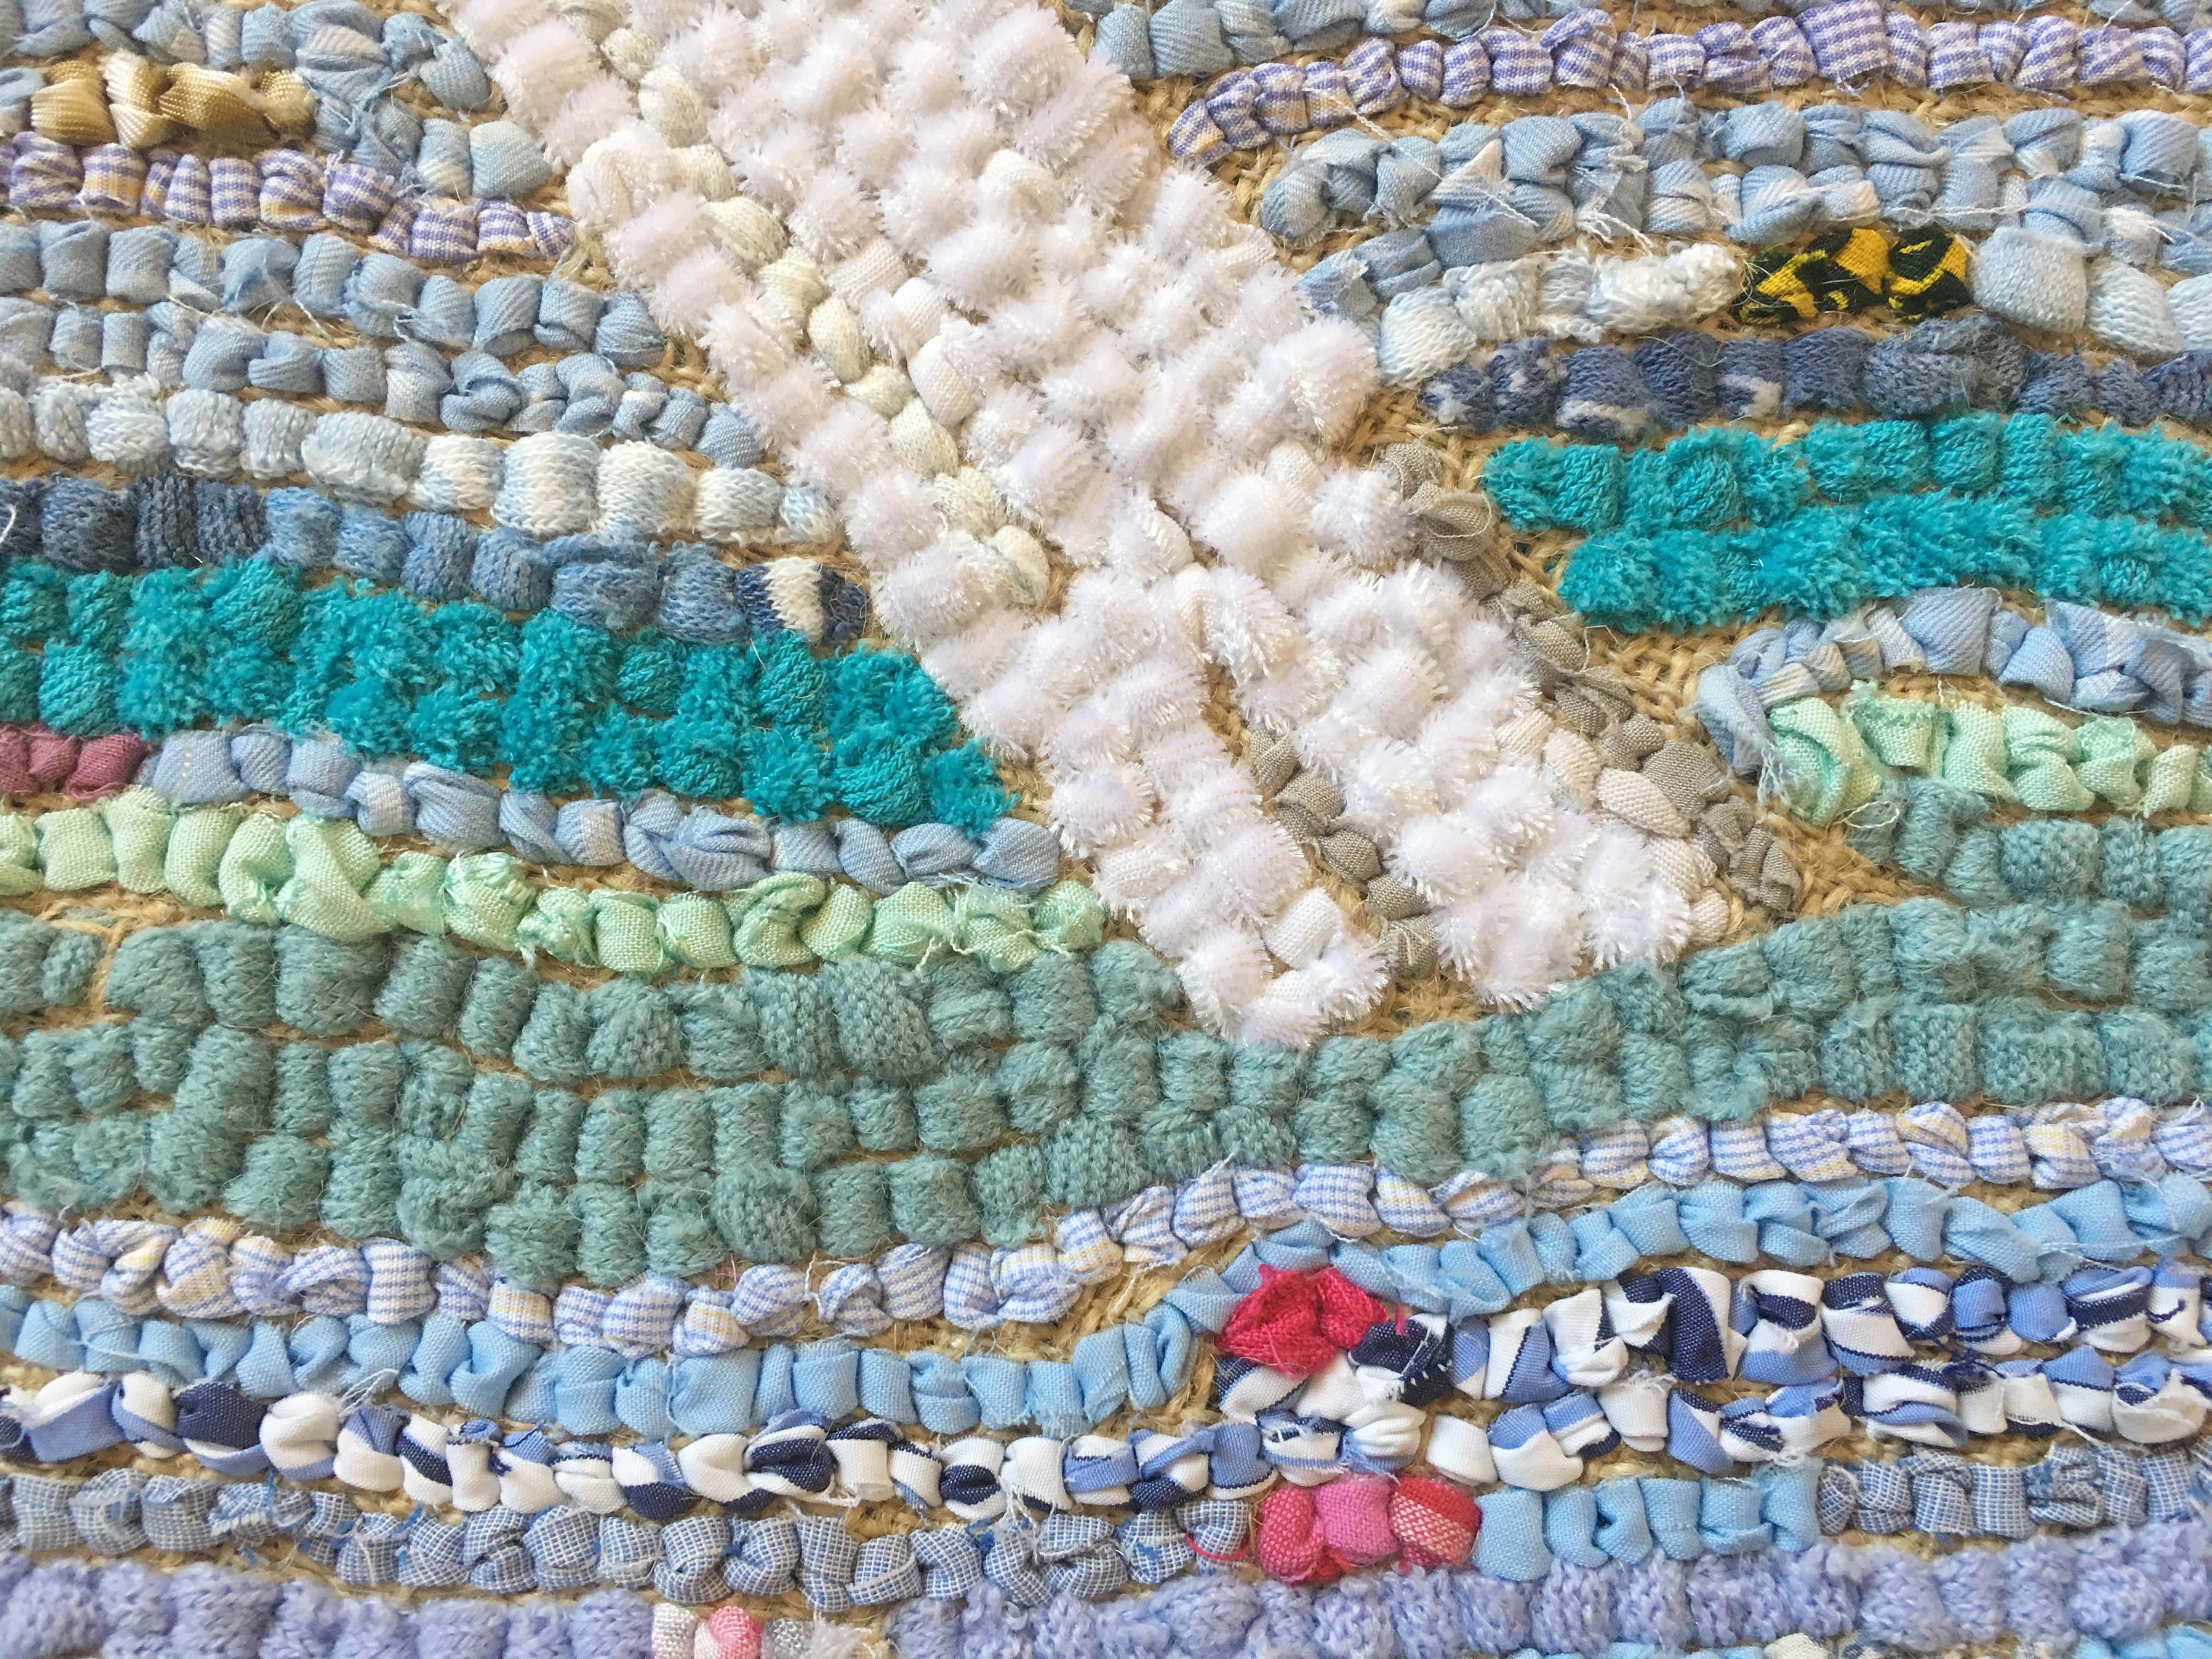
Here you can see the sheer amount of different fabrics that go into my pieces. There’s knitted fabrics, jersey, velour, cotton, fleece and towelling fabric just in this section alone 🙂
I have to admit that at this stage in the wall hanging I was beginning to wonder whether I’d made a horrendous mistake by changing the lines of the sky to form a different pattern inside…
Fortunately it ended up looking nice and added a bit more interest to the piece. I can’t even believe to tell you how happy I was when I finally finished the top left hand corner.
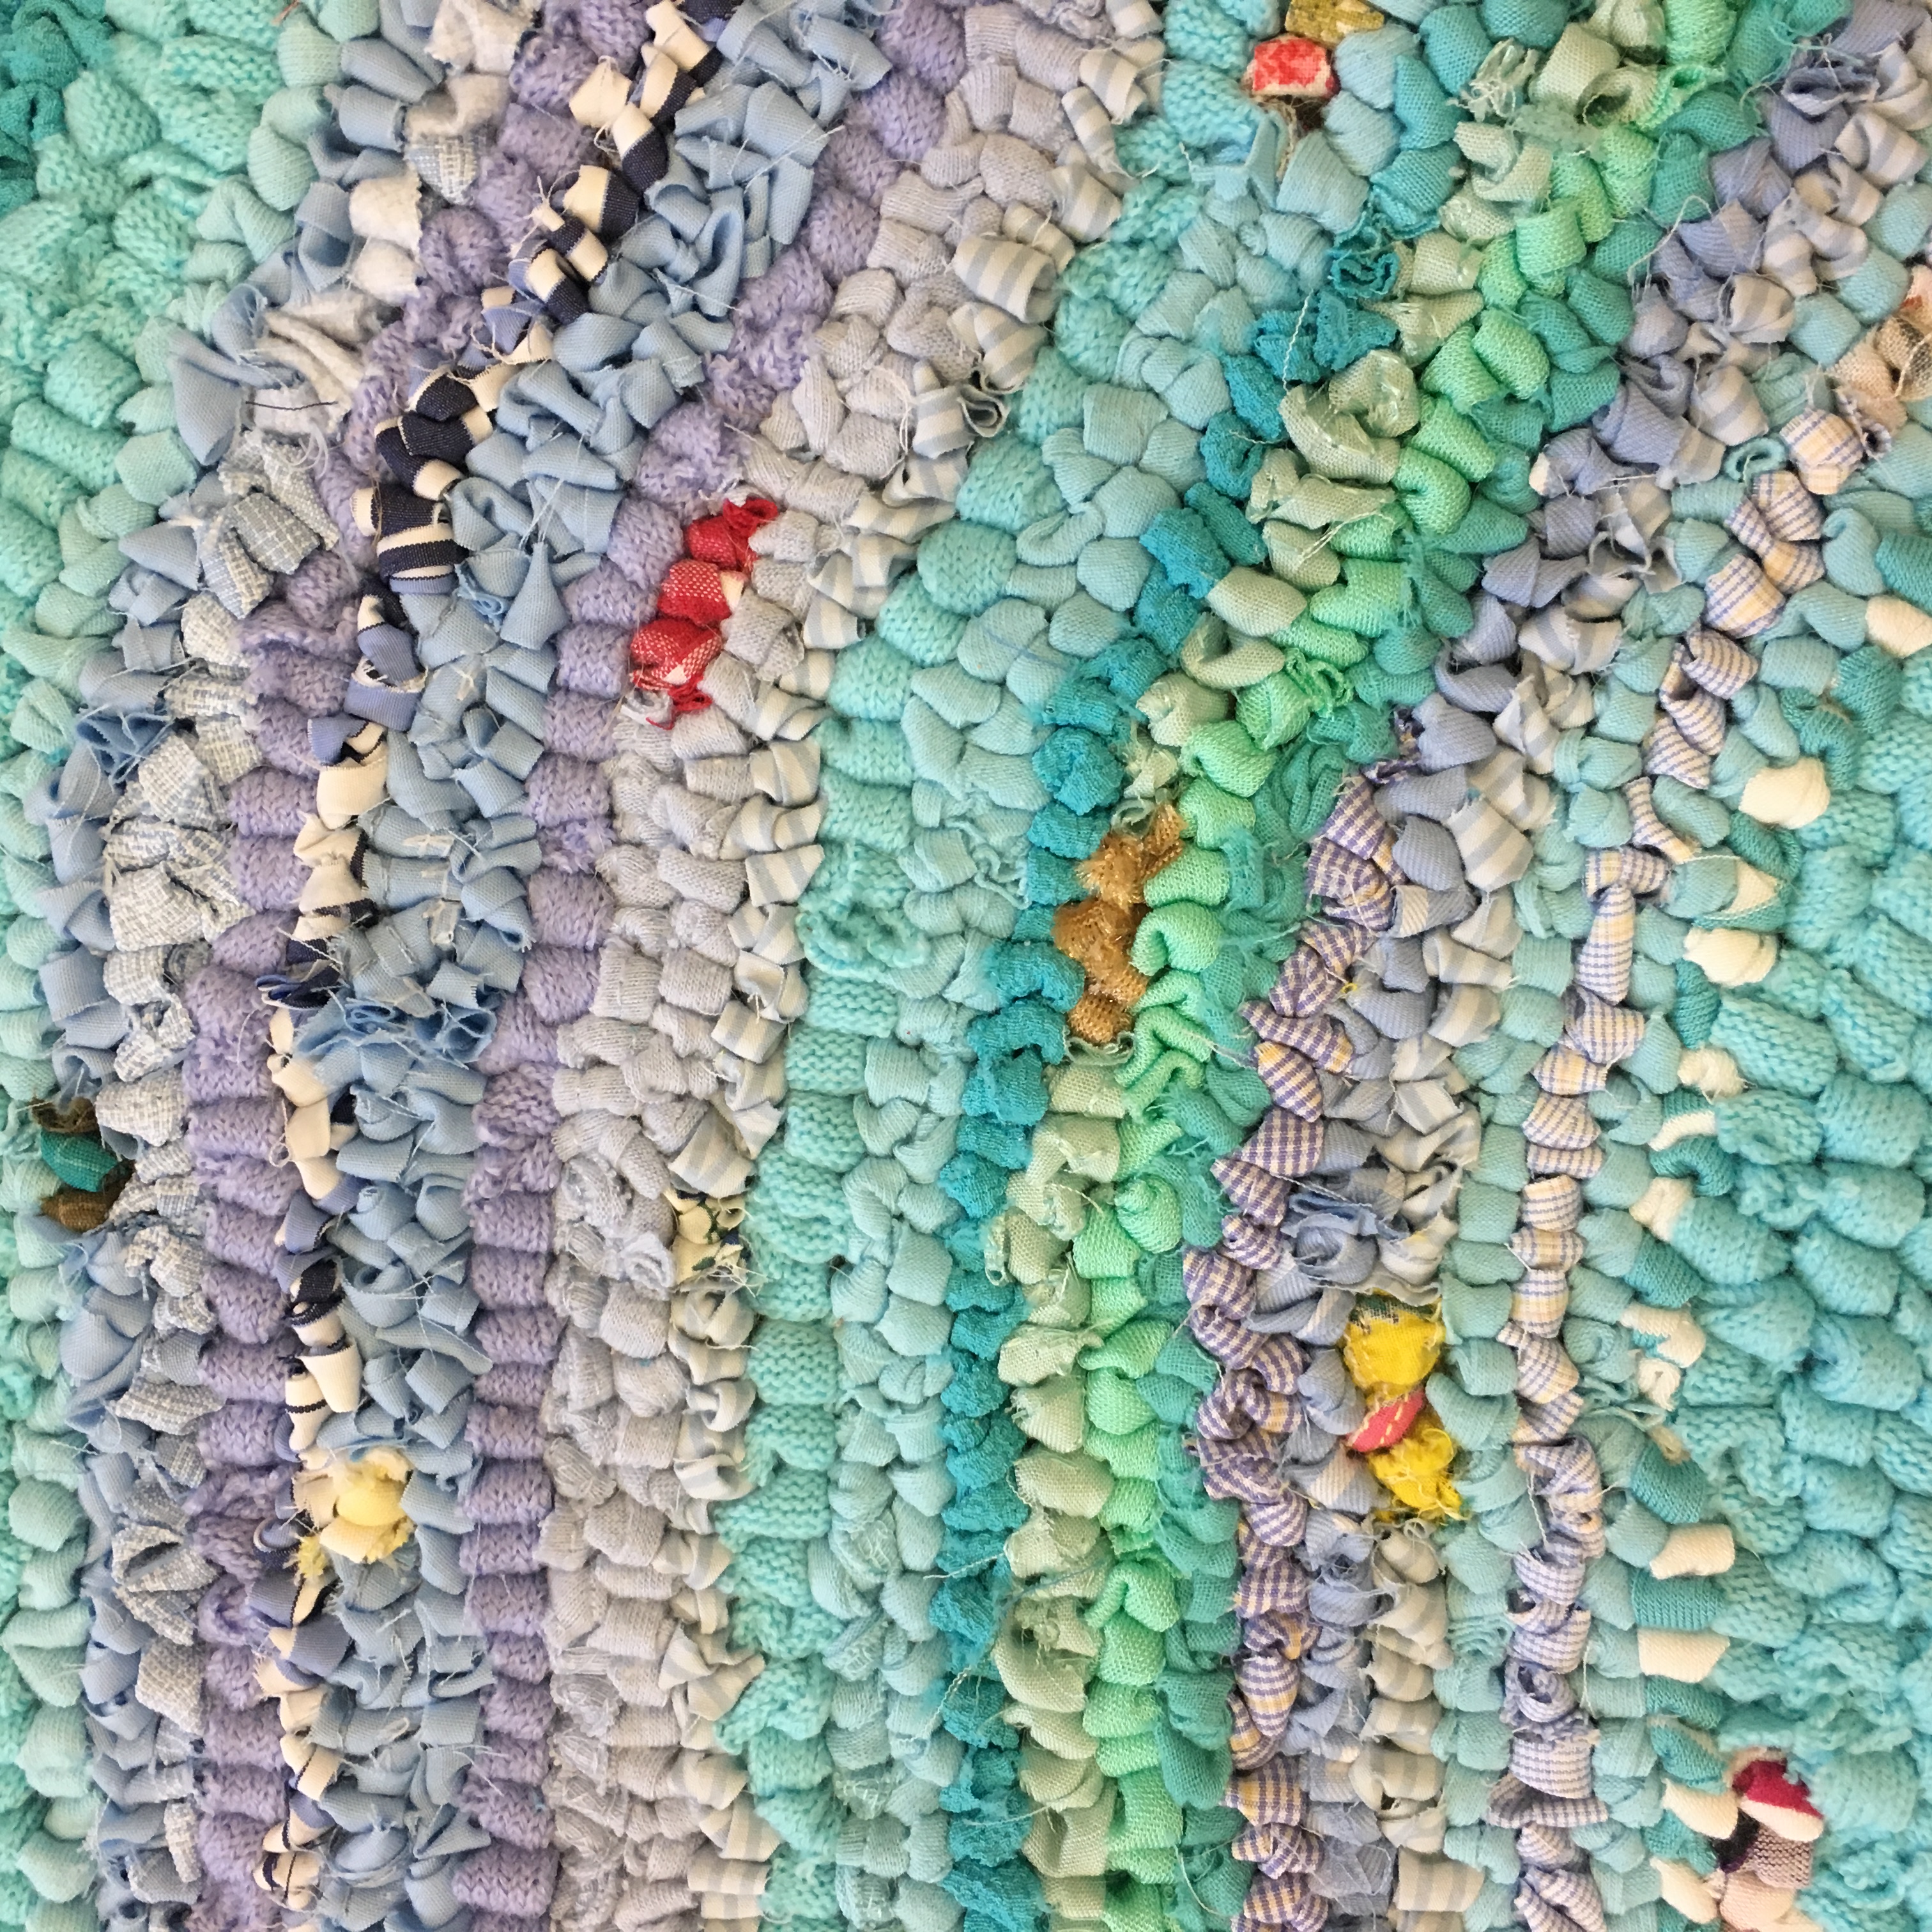
Here you can see up close what the stripes of the sky looked like.
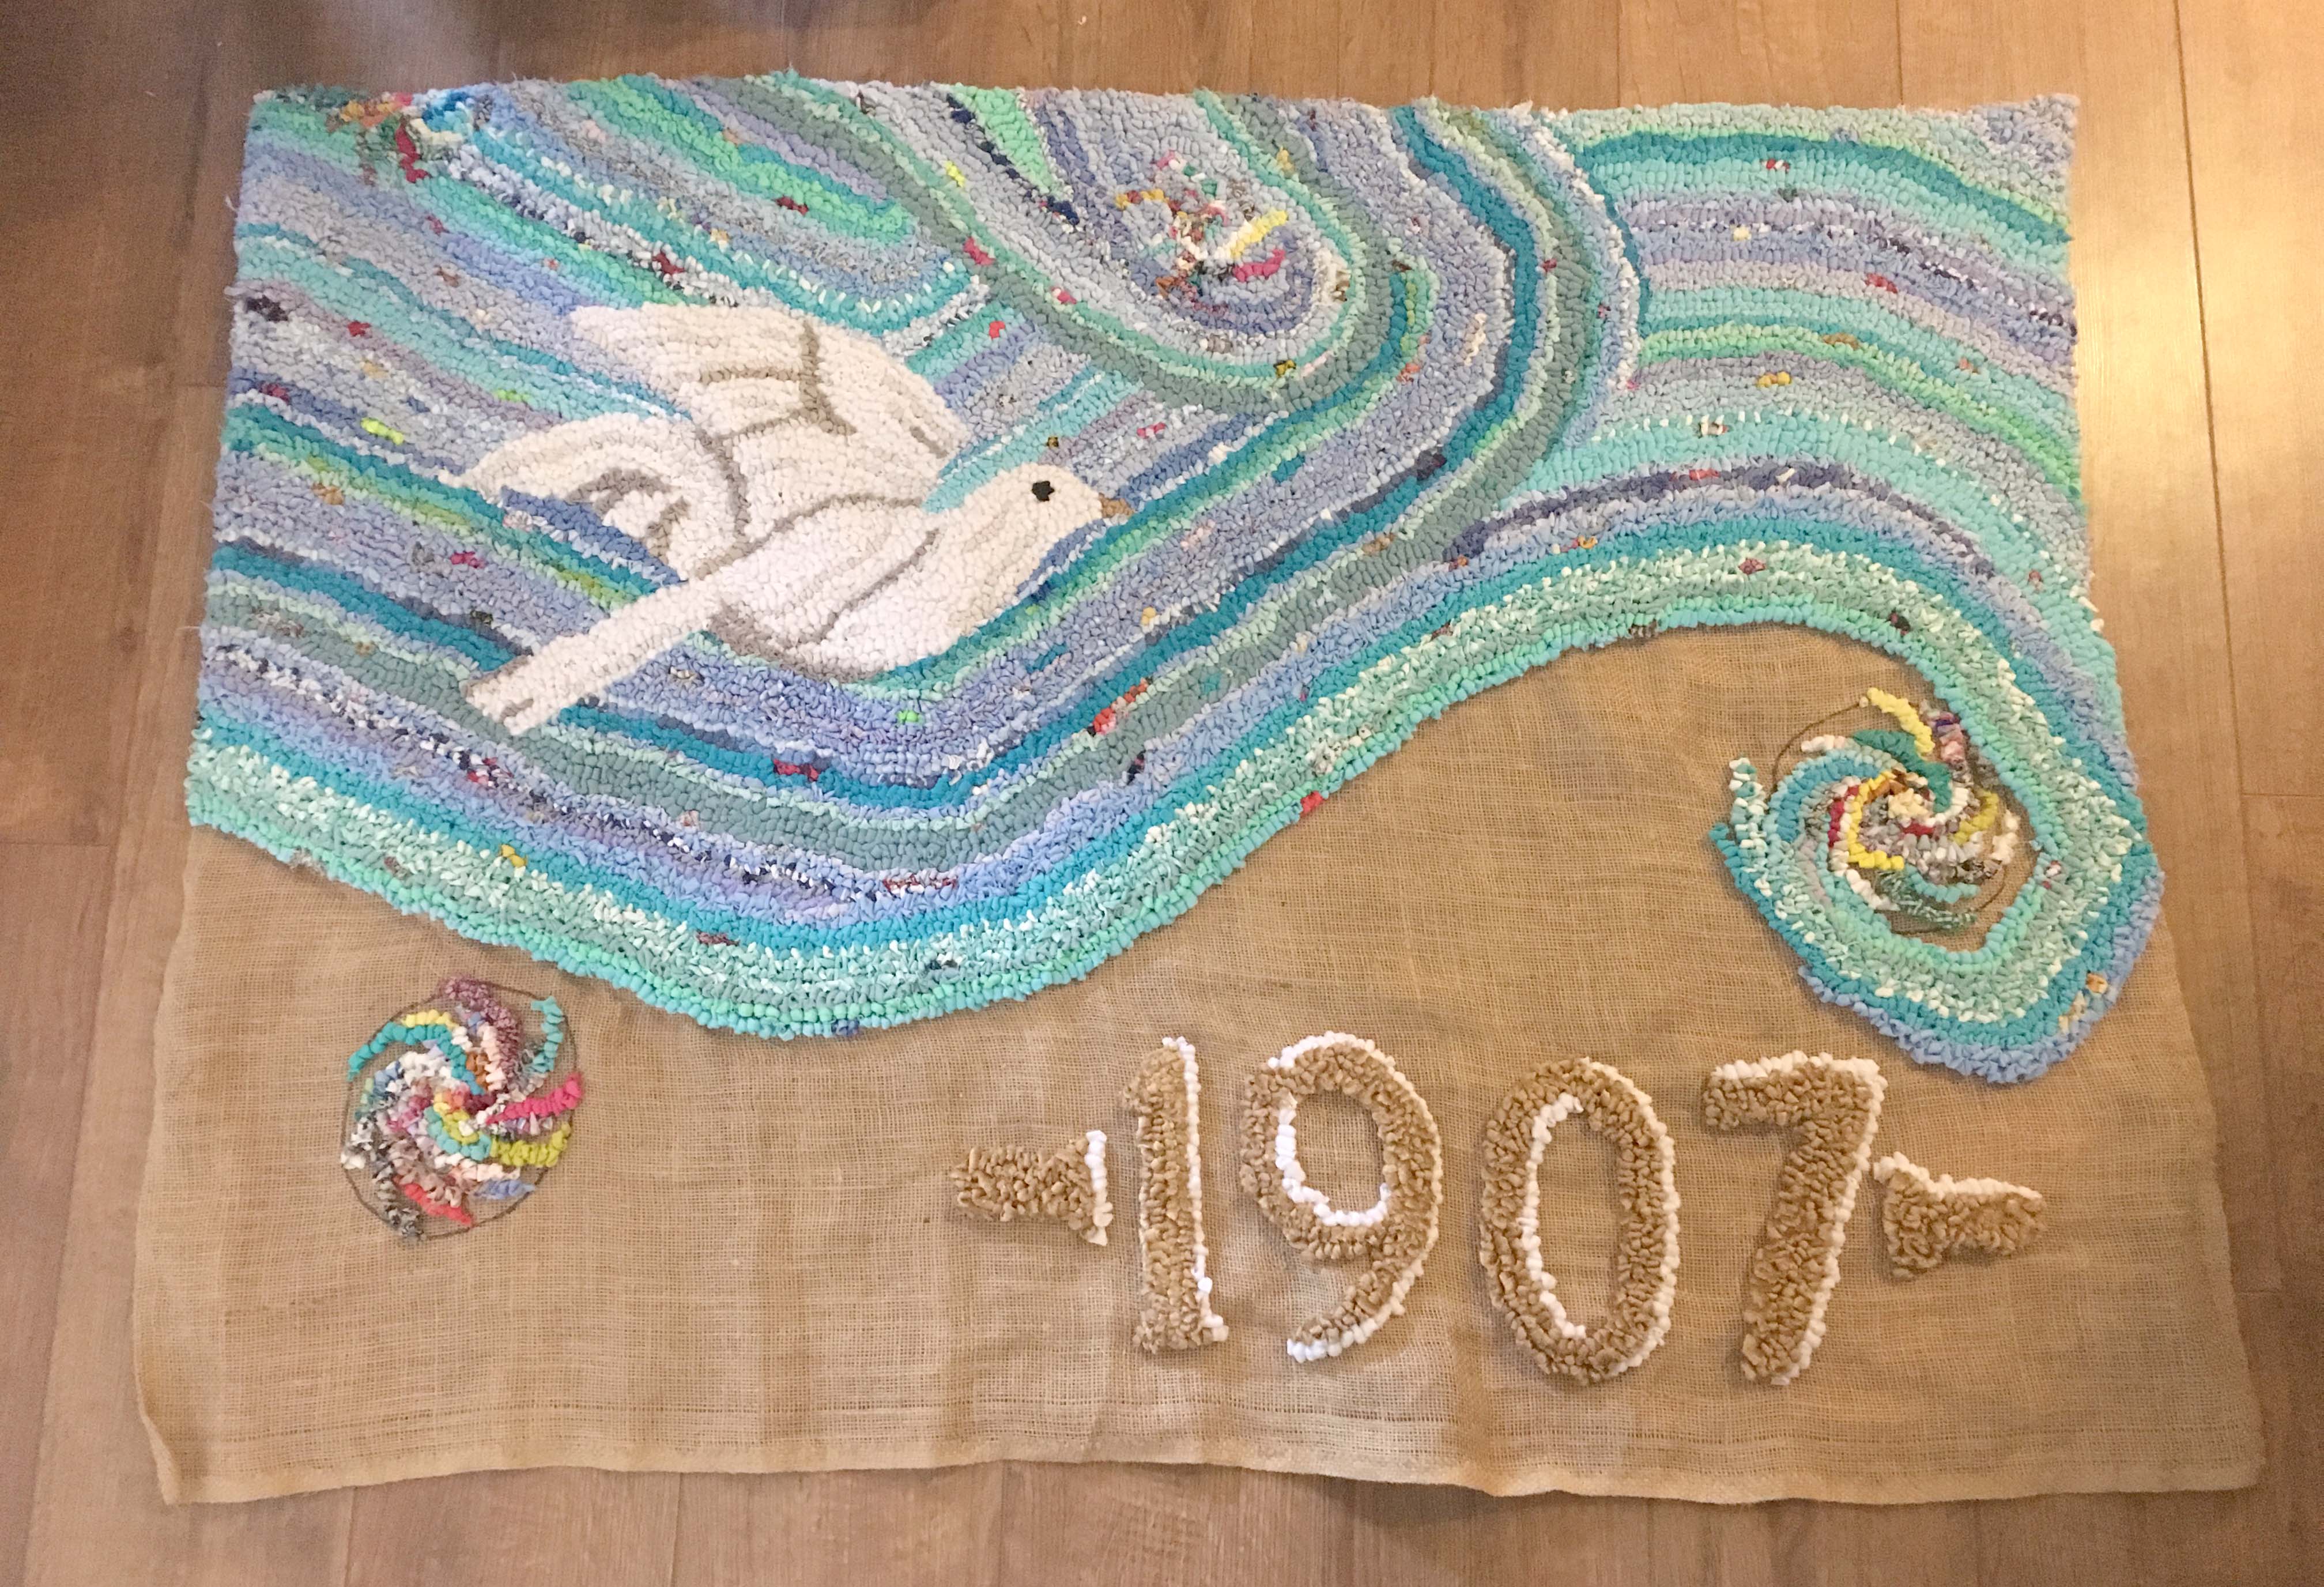
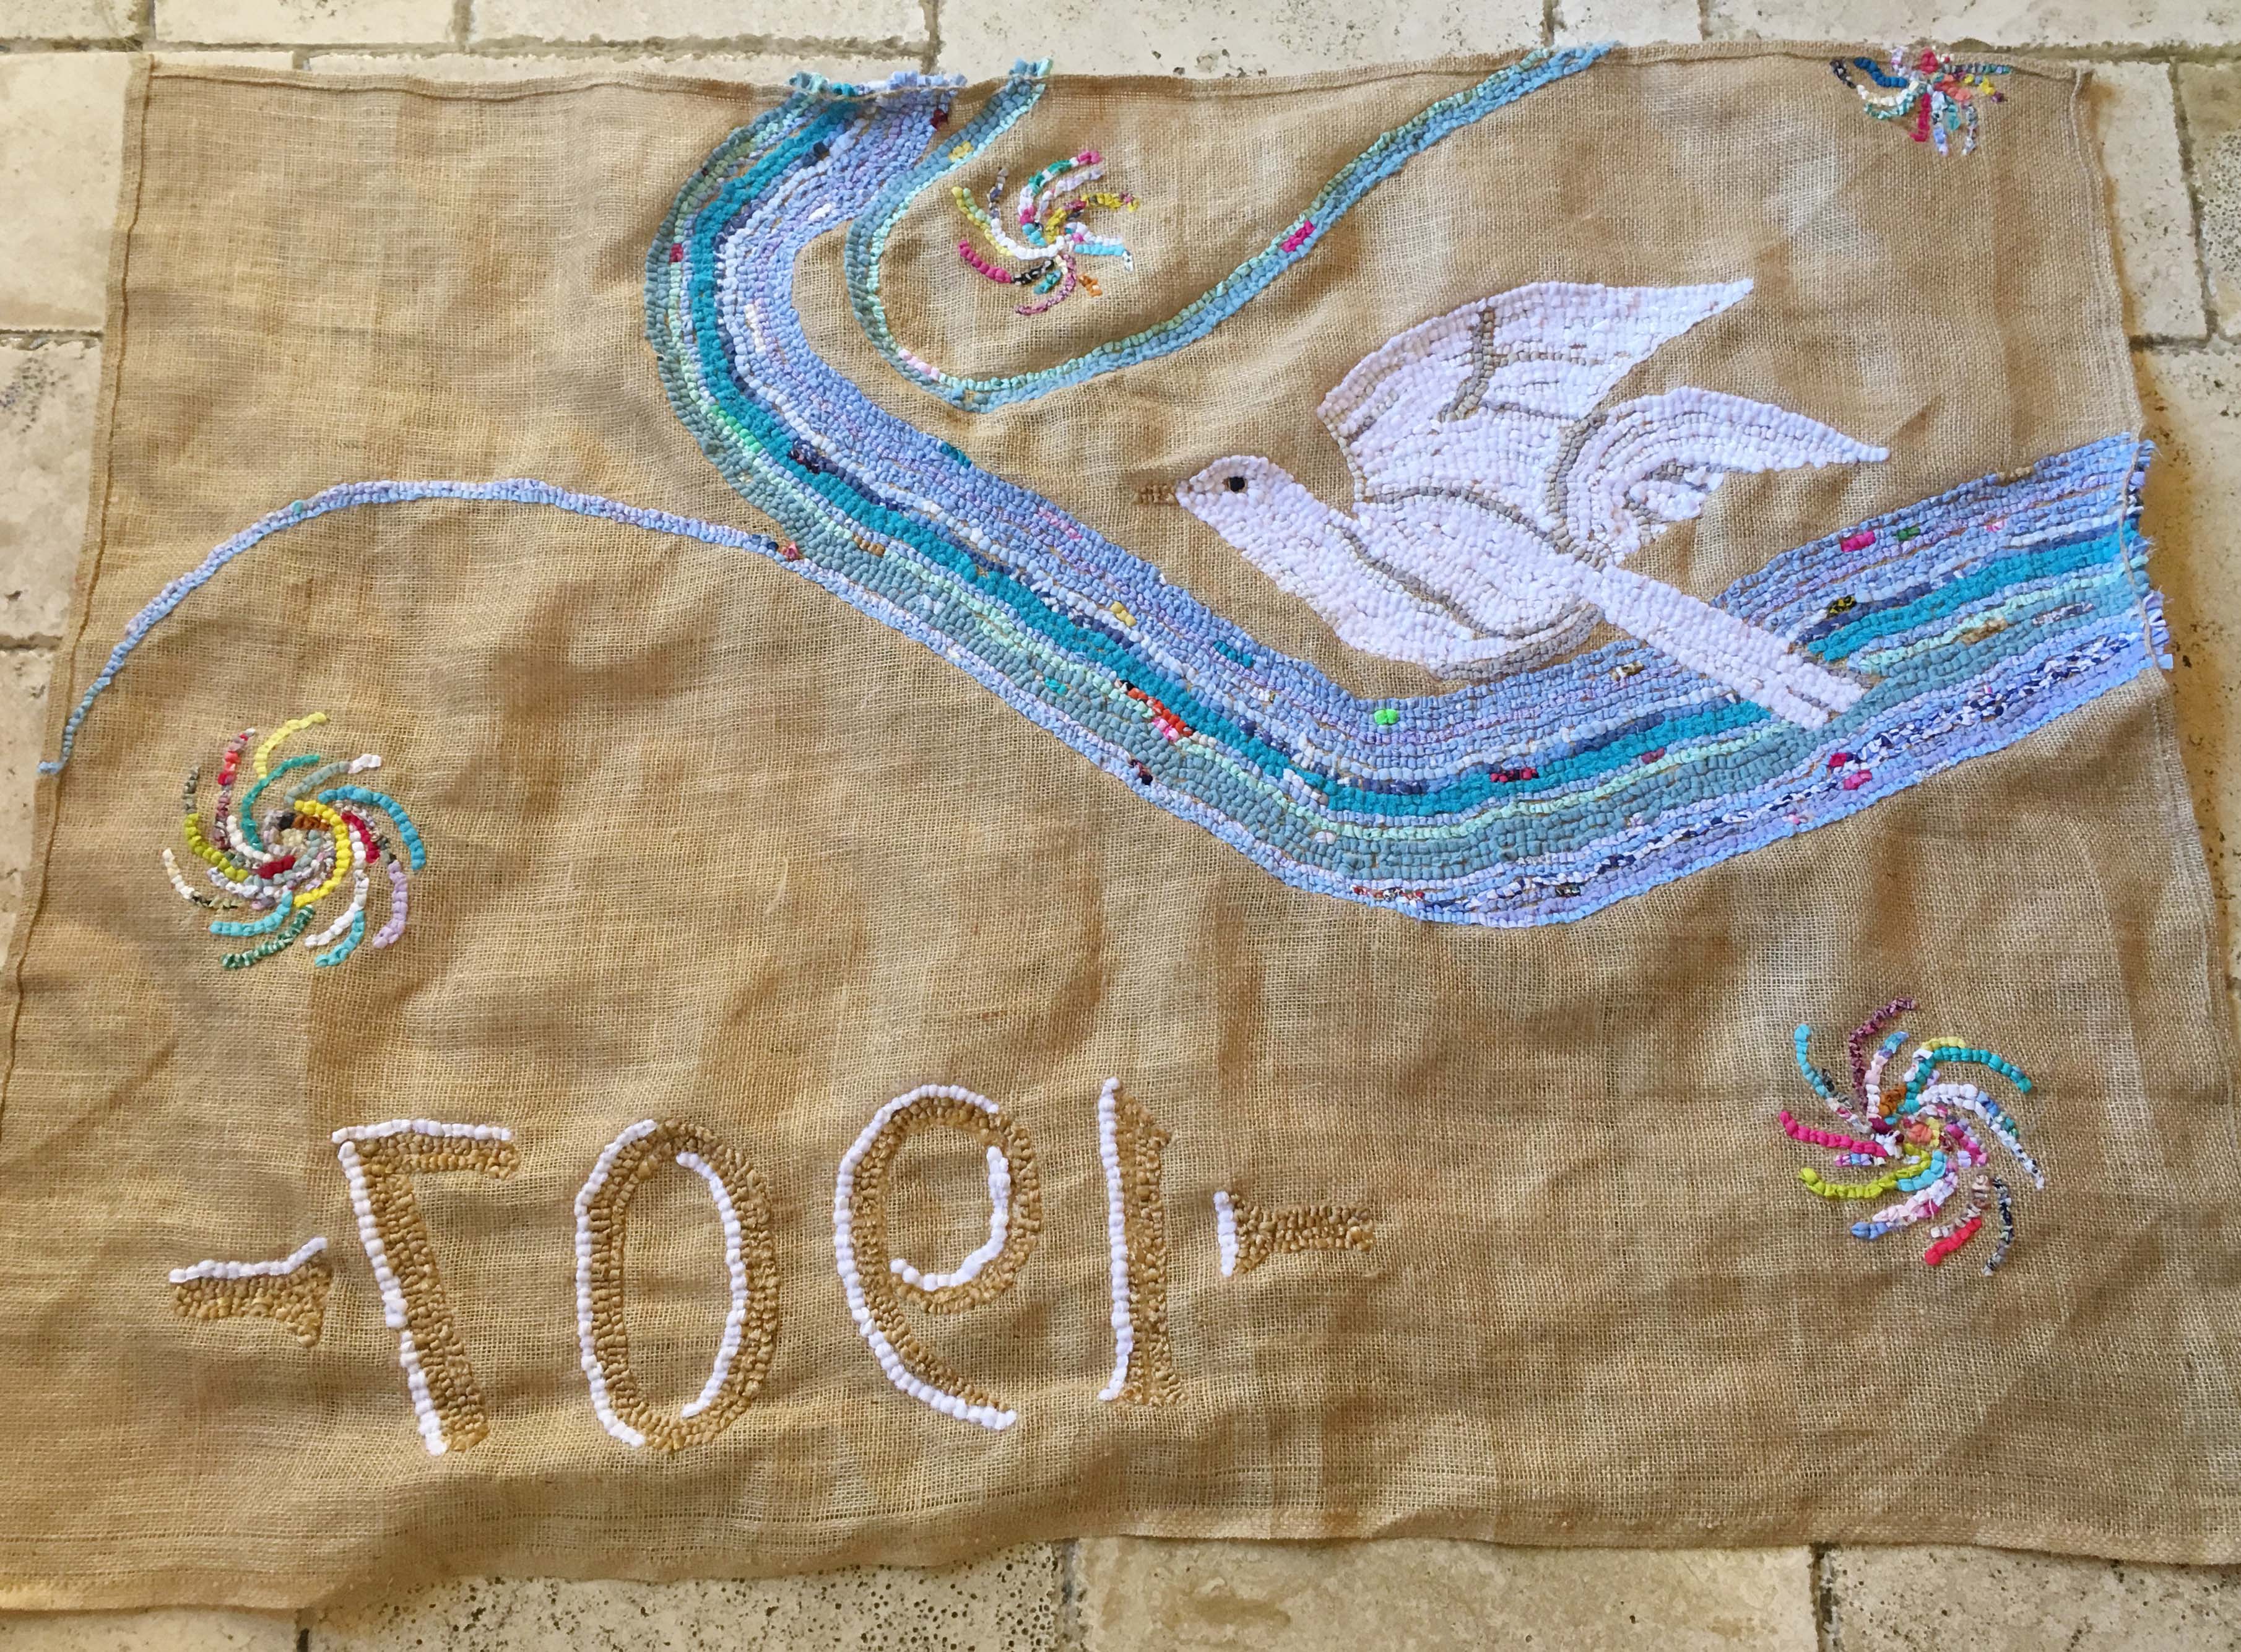
It really felt like I’d made some solid progress once I’d finished the top right hand corner of the piece. Only about half to go now!
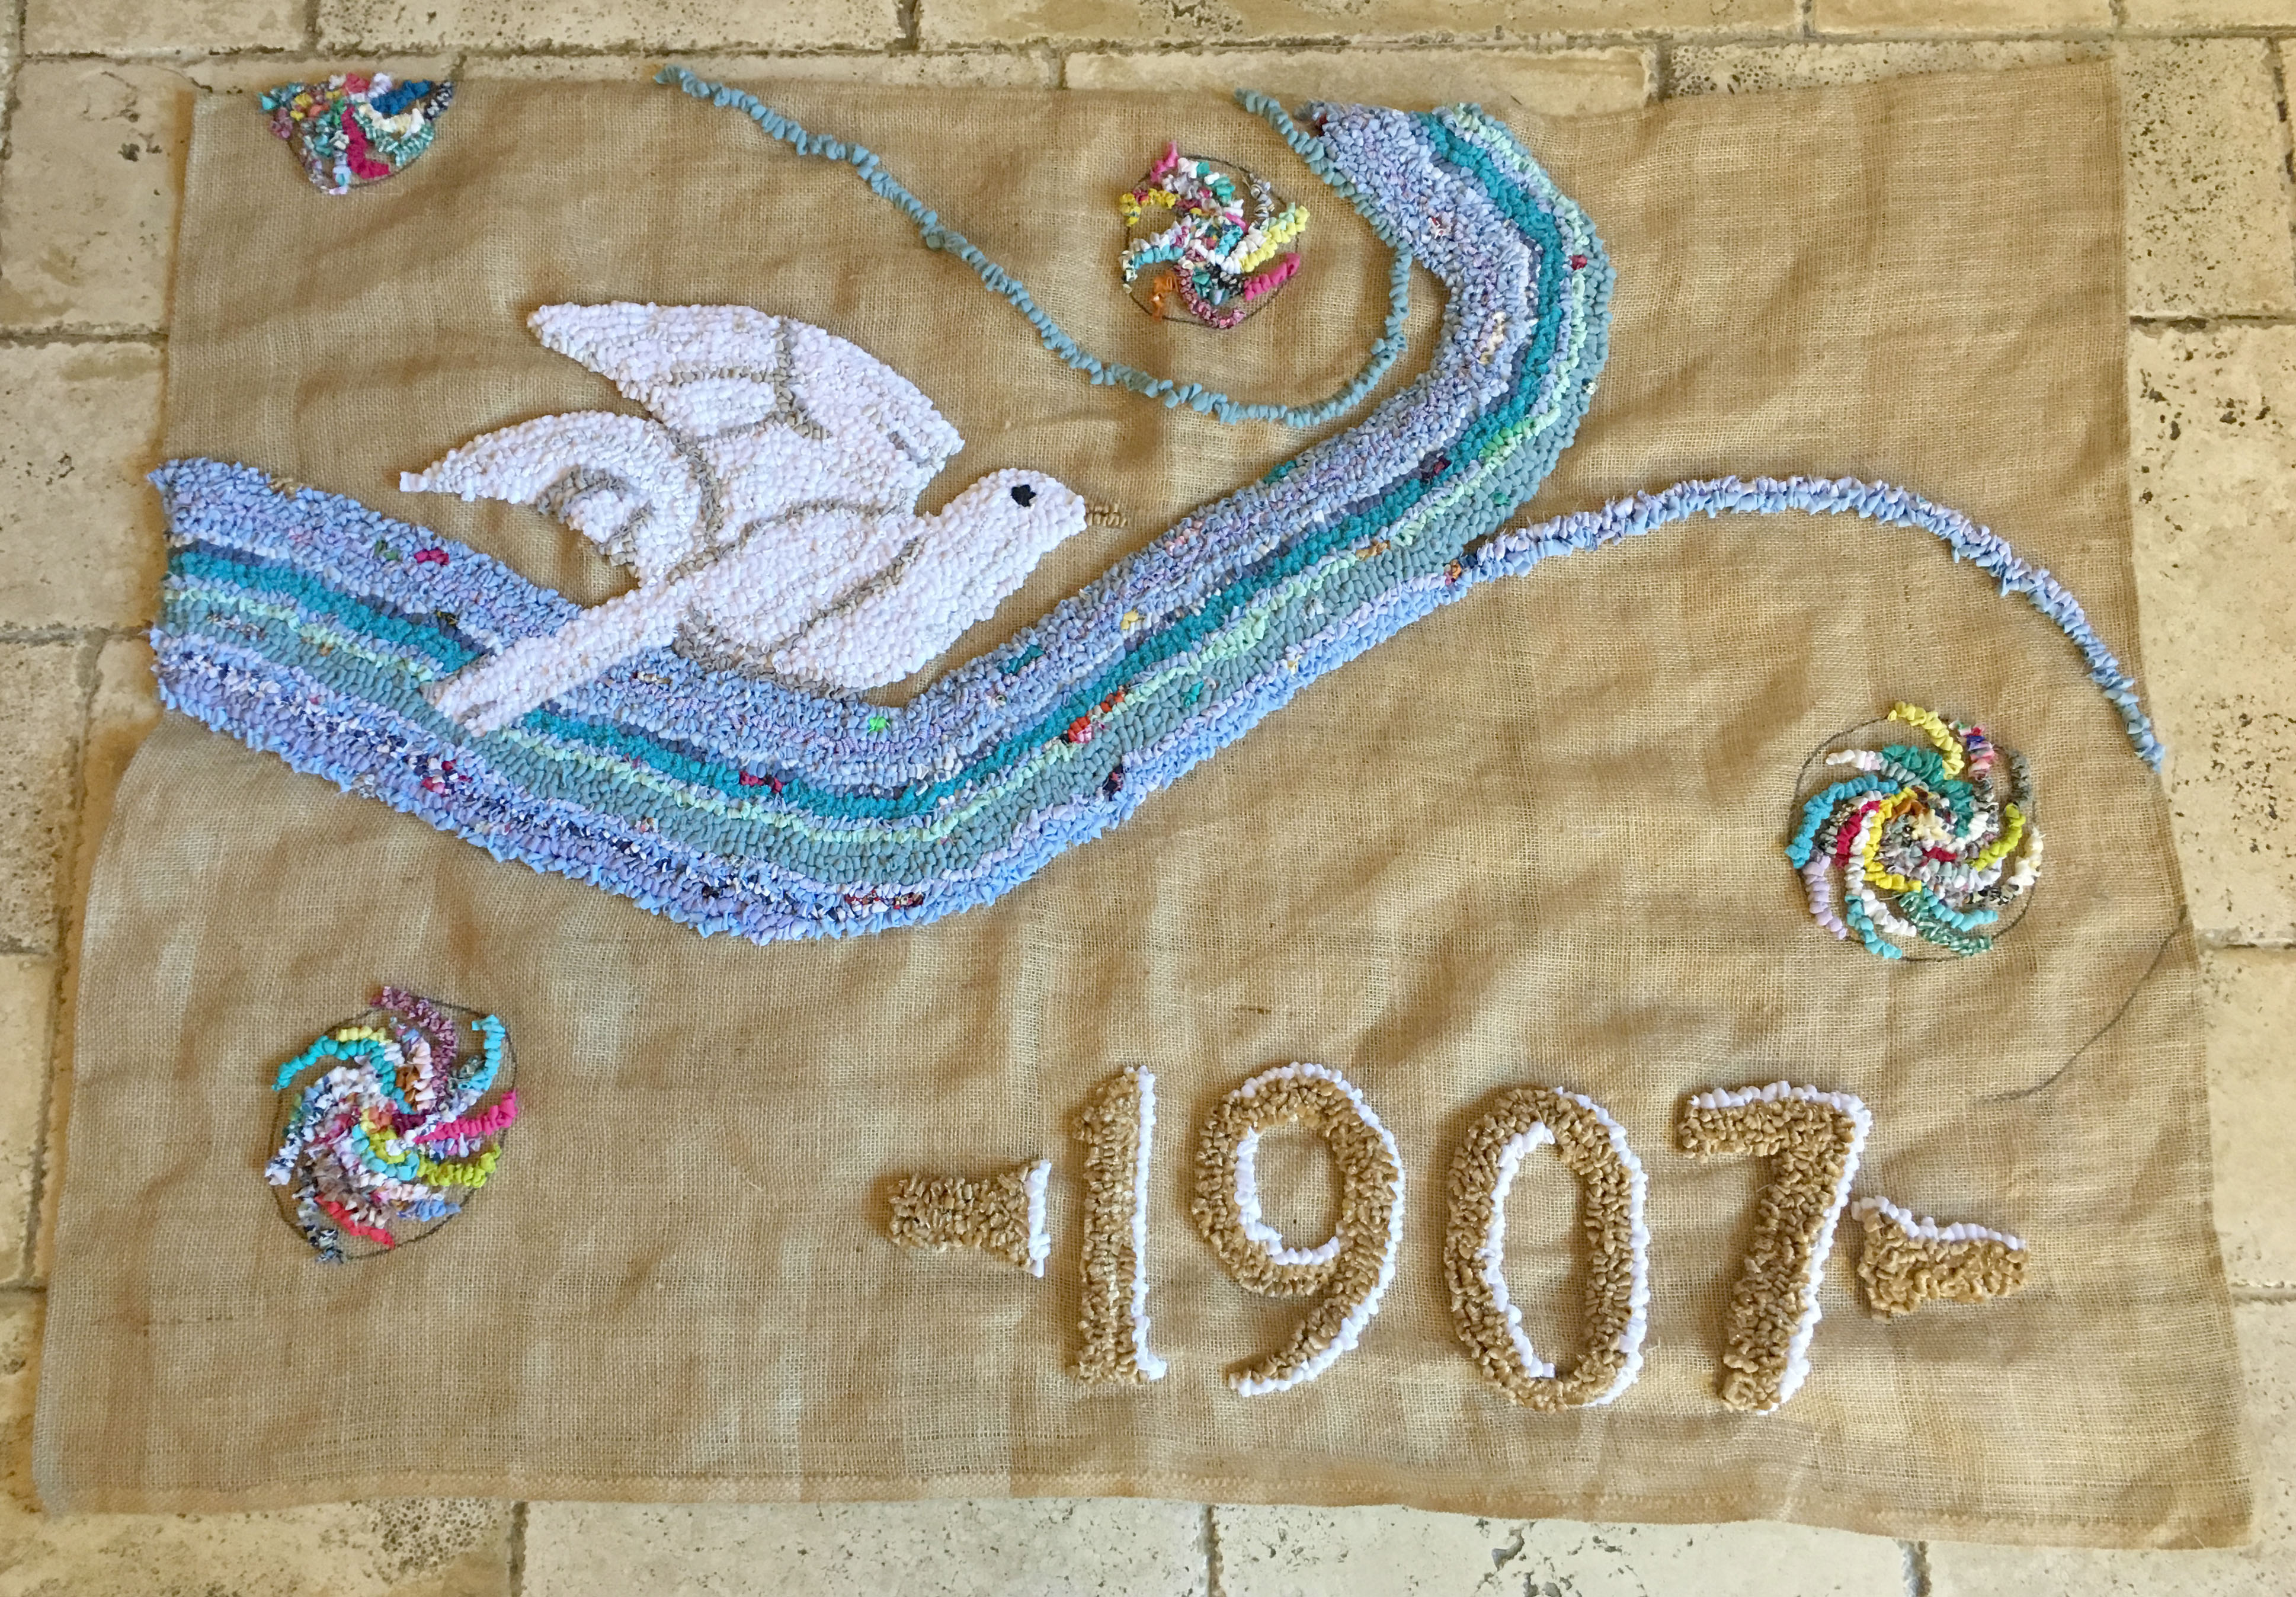
Once I had finished filling in above the dove, I moved onto filling in one row at a time below the dove, stretching from one side of the wall hanging to the other.
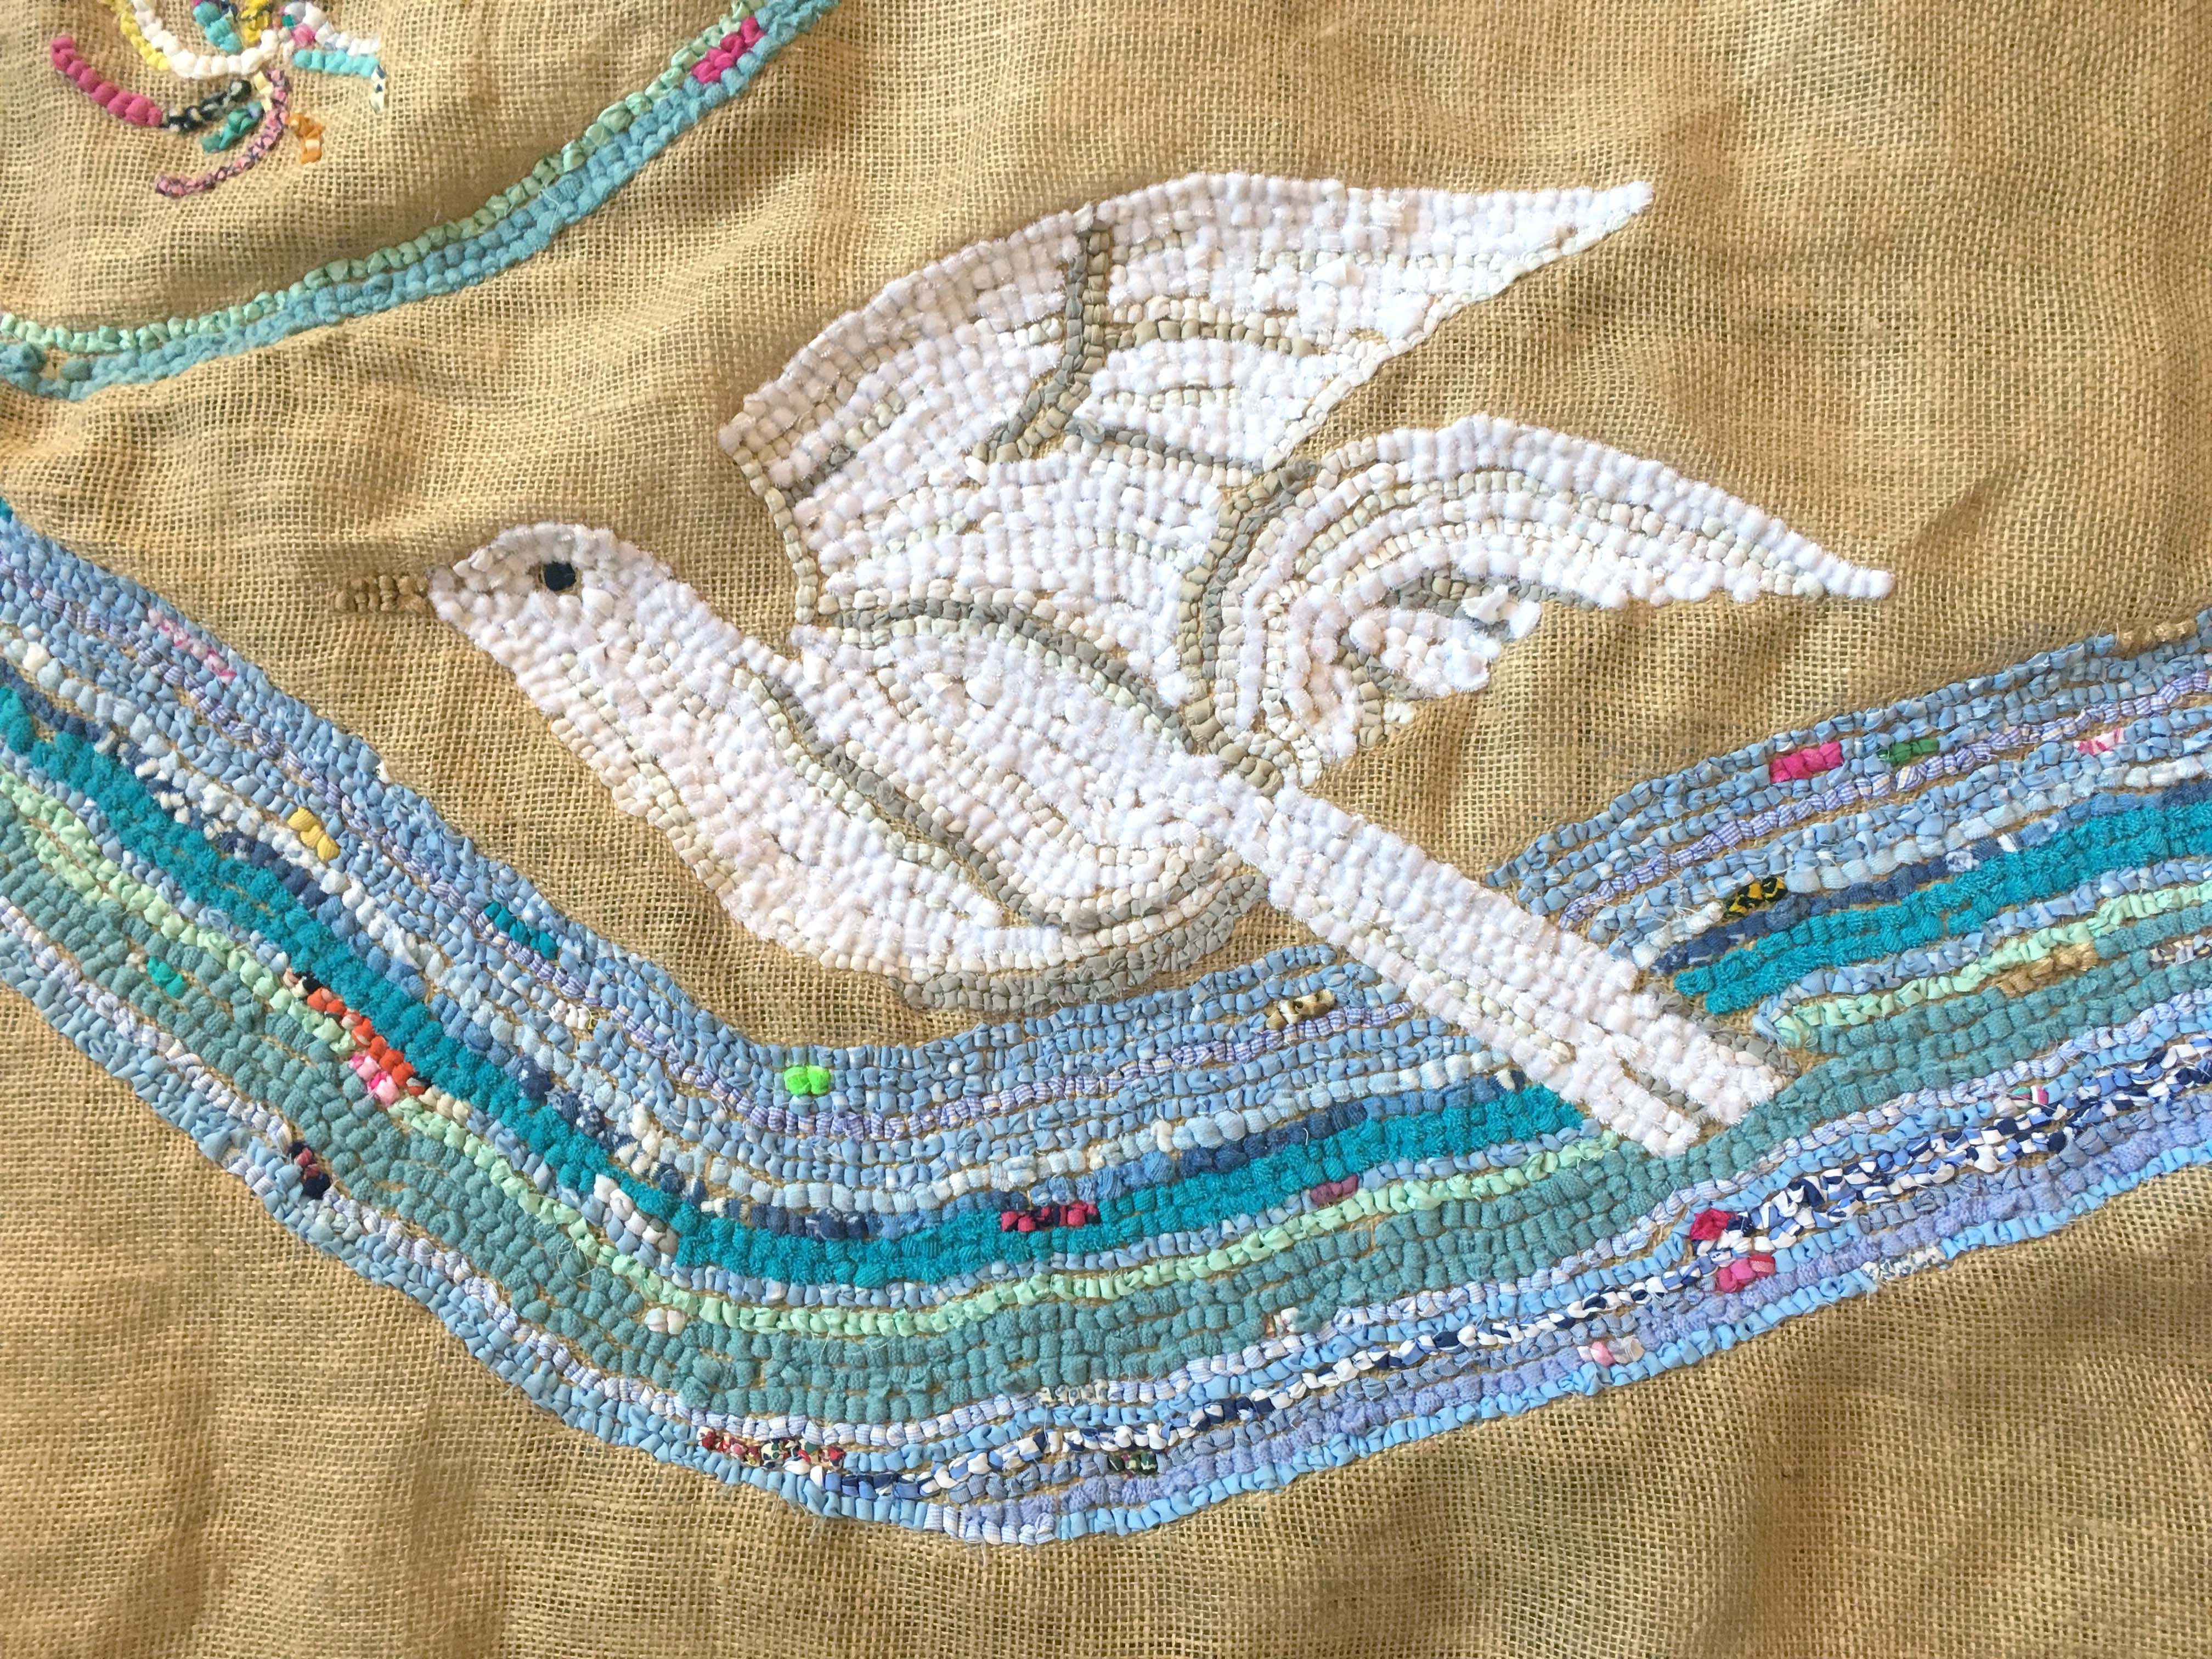
I was pretty pleased with how the dove turned out once it was surrounded by blue rag rugging.
When I met with the colourful spirals, I made sure to follow the line of them round to make things look more natural like air currents.
It was pretty satisfying when I finally reached the numbers at the bottom of the wall hanging.
So nearly there…
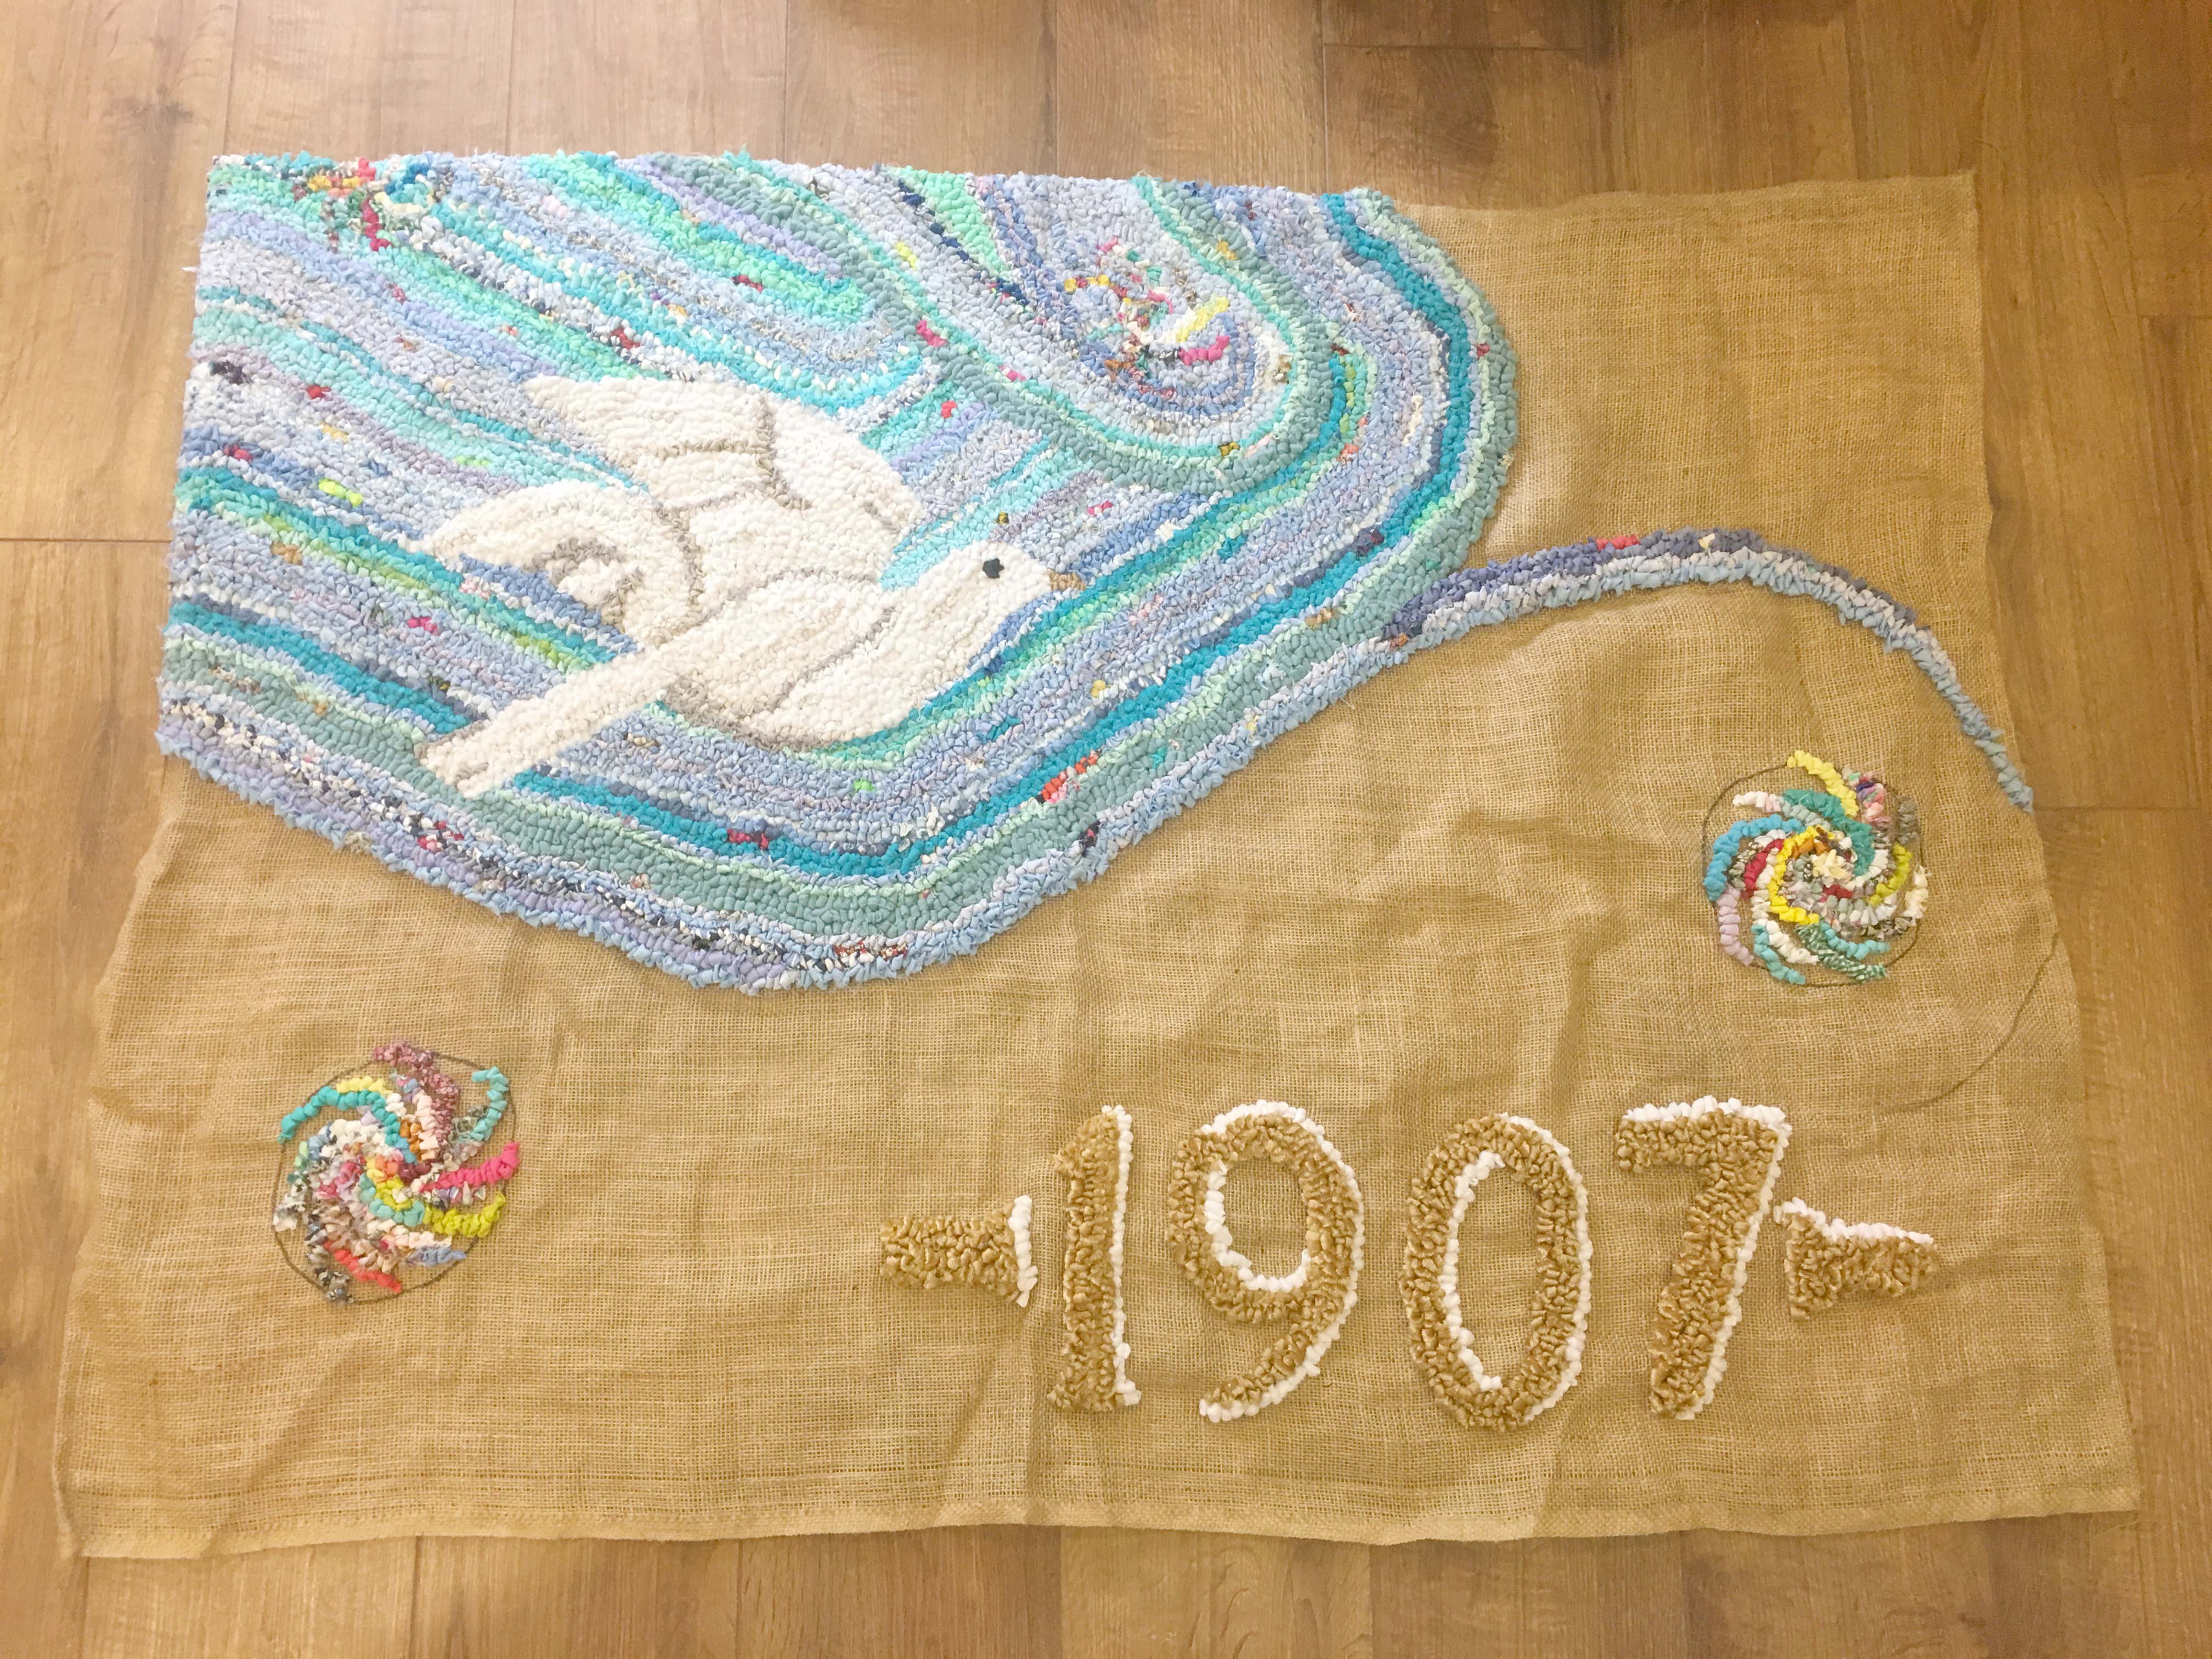
Hooray!!! This is the very final corner of the rag rug wall hanging. I’m right at the finish line.
And here’s another section up close.
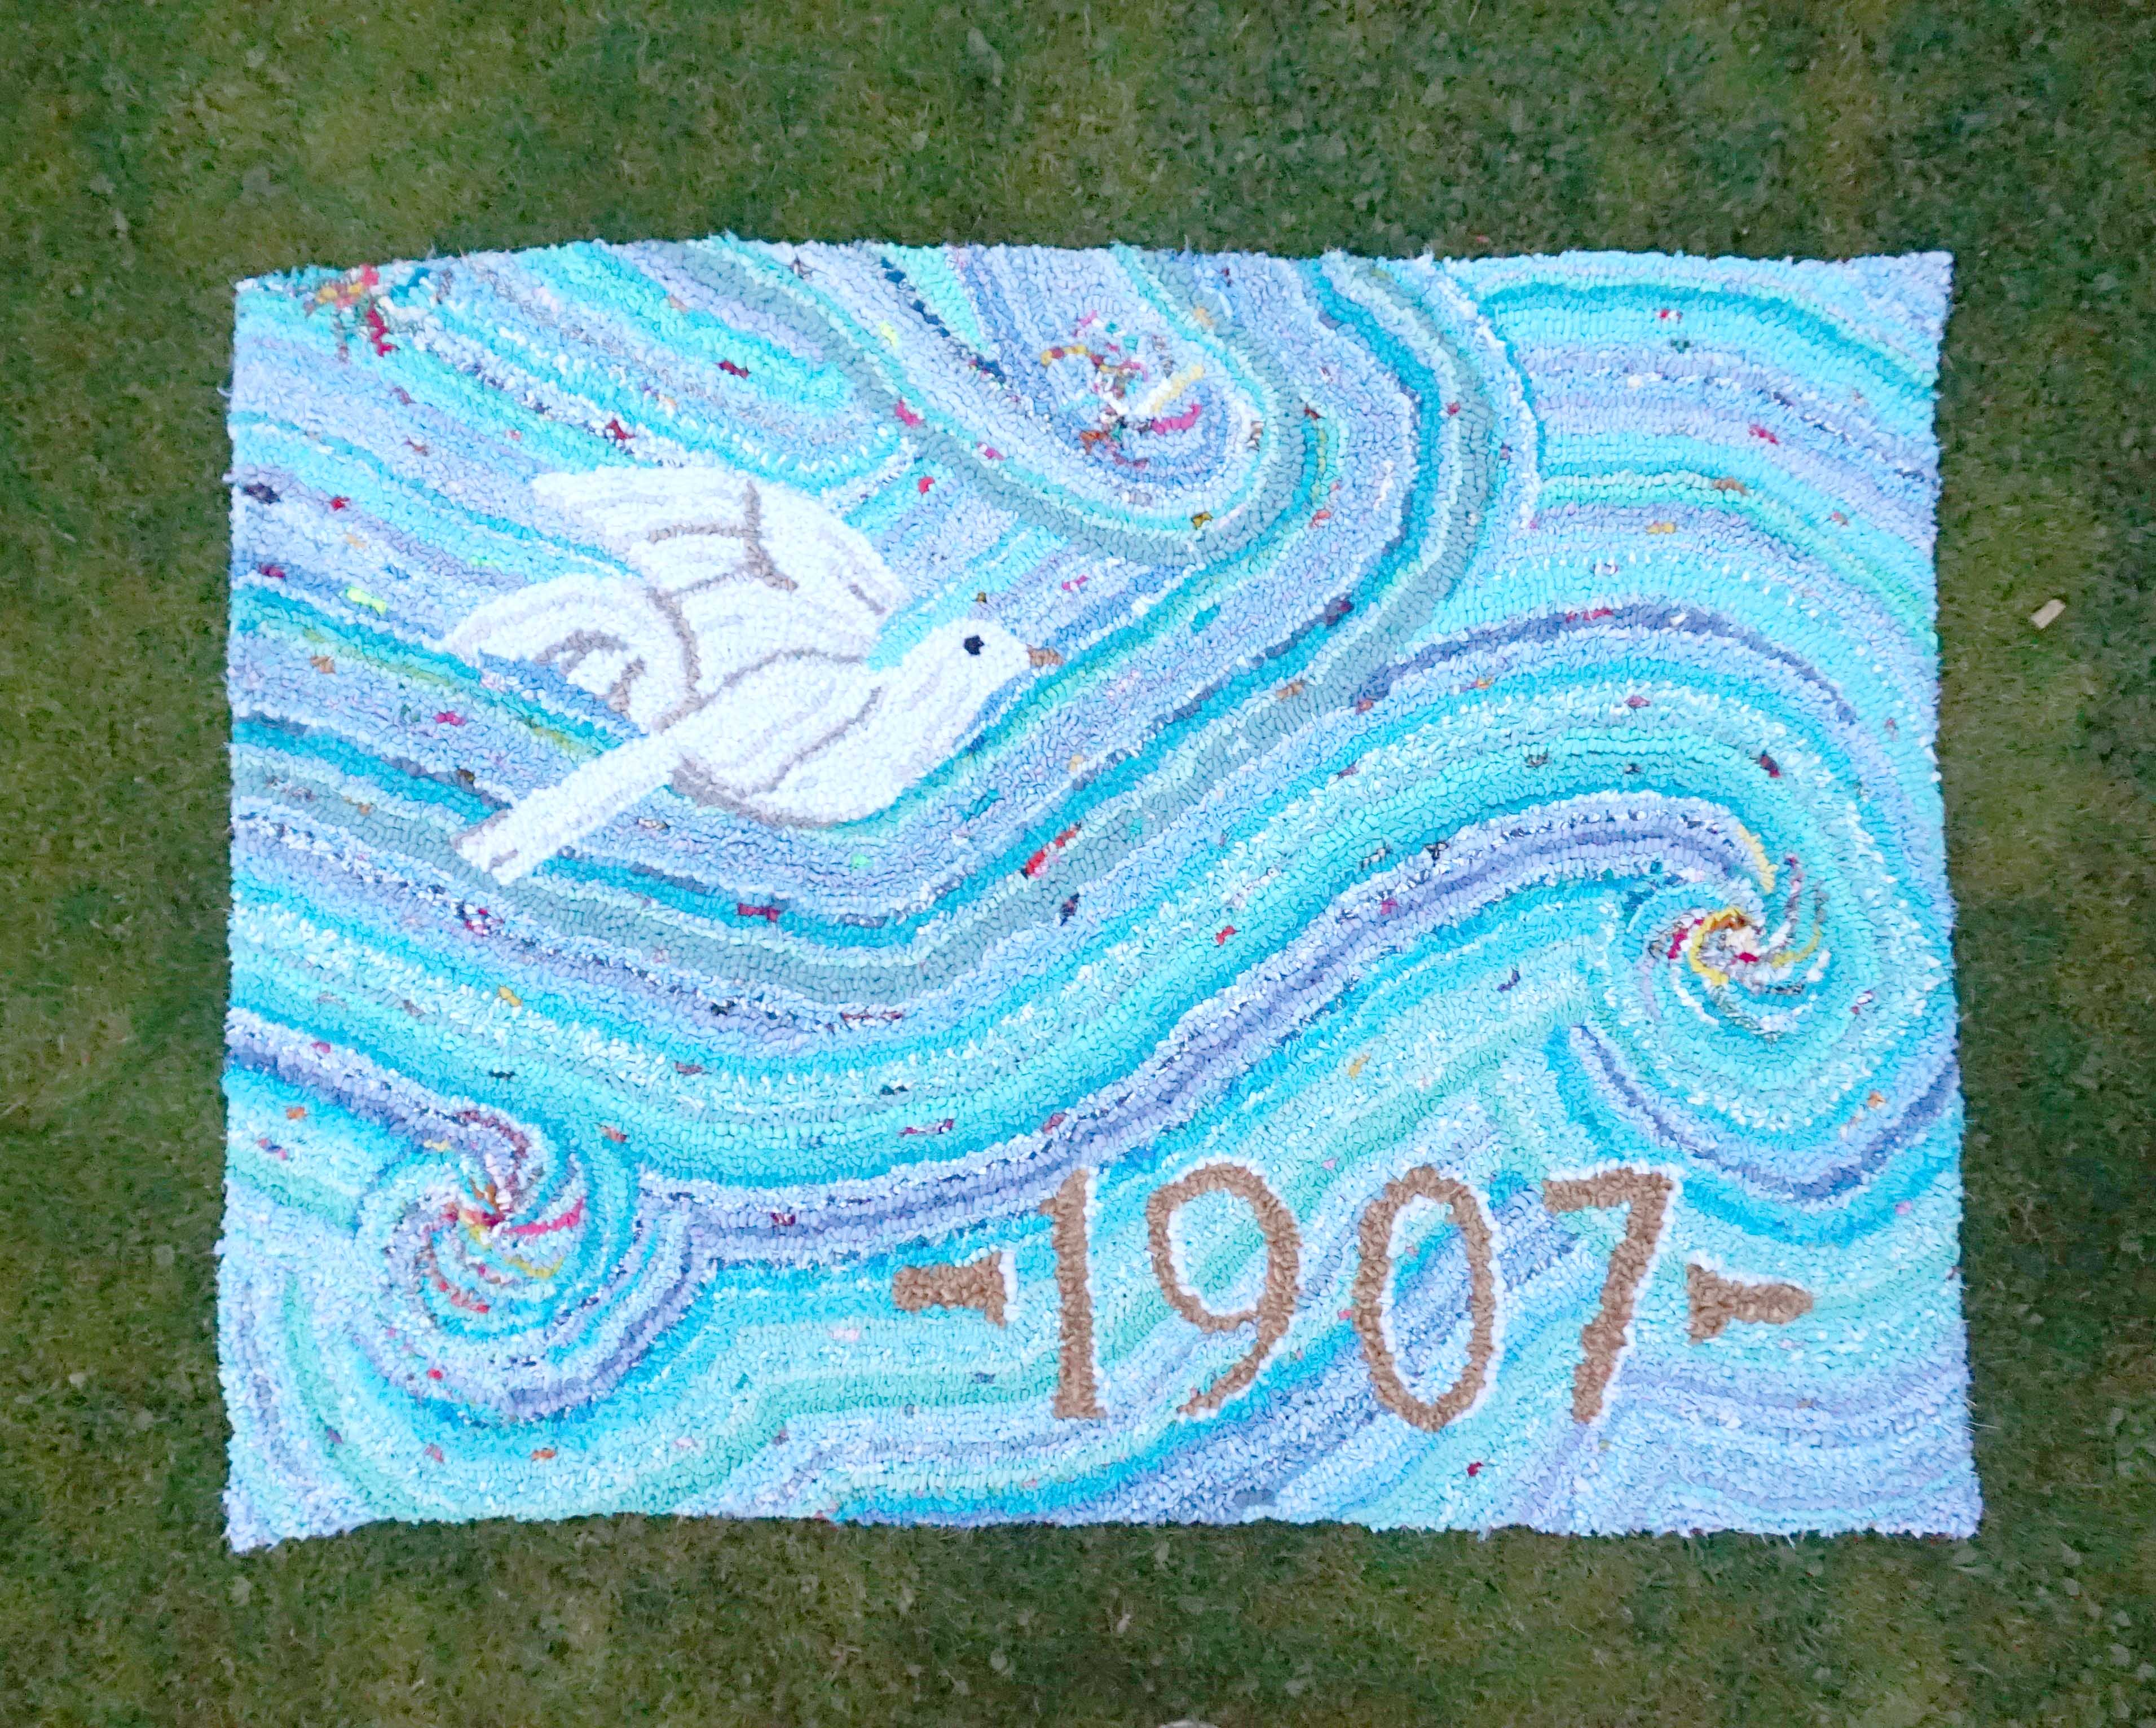
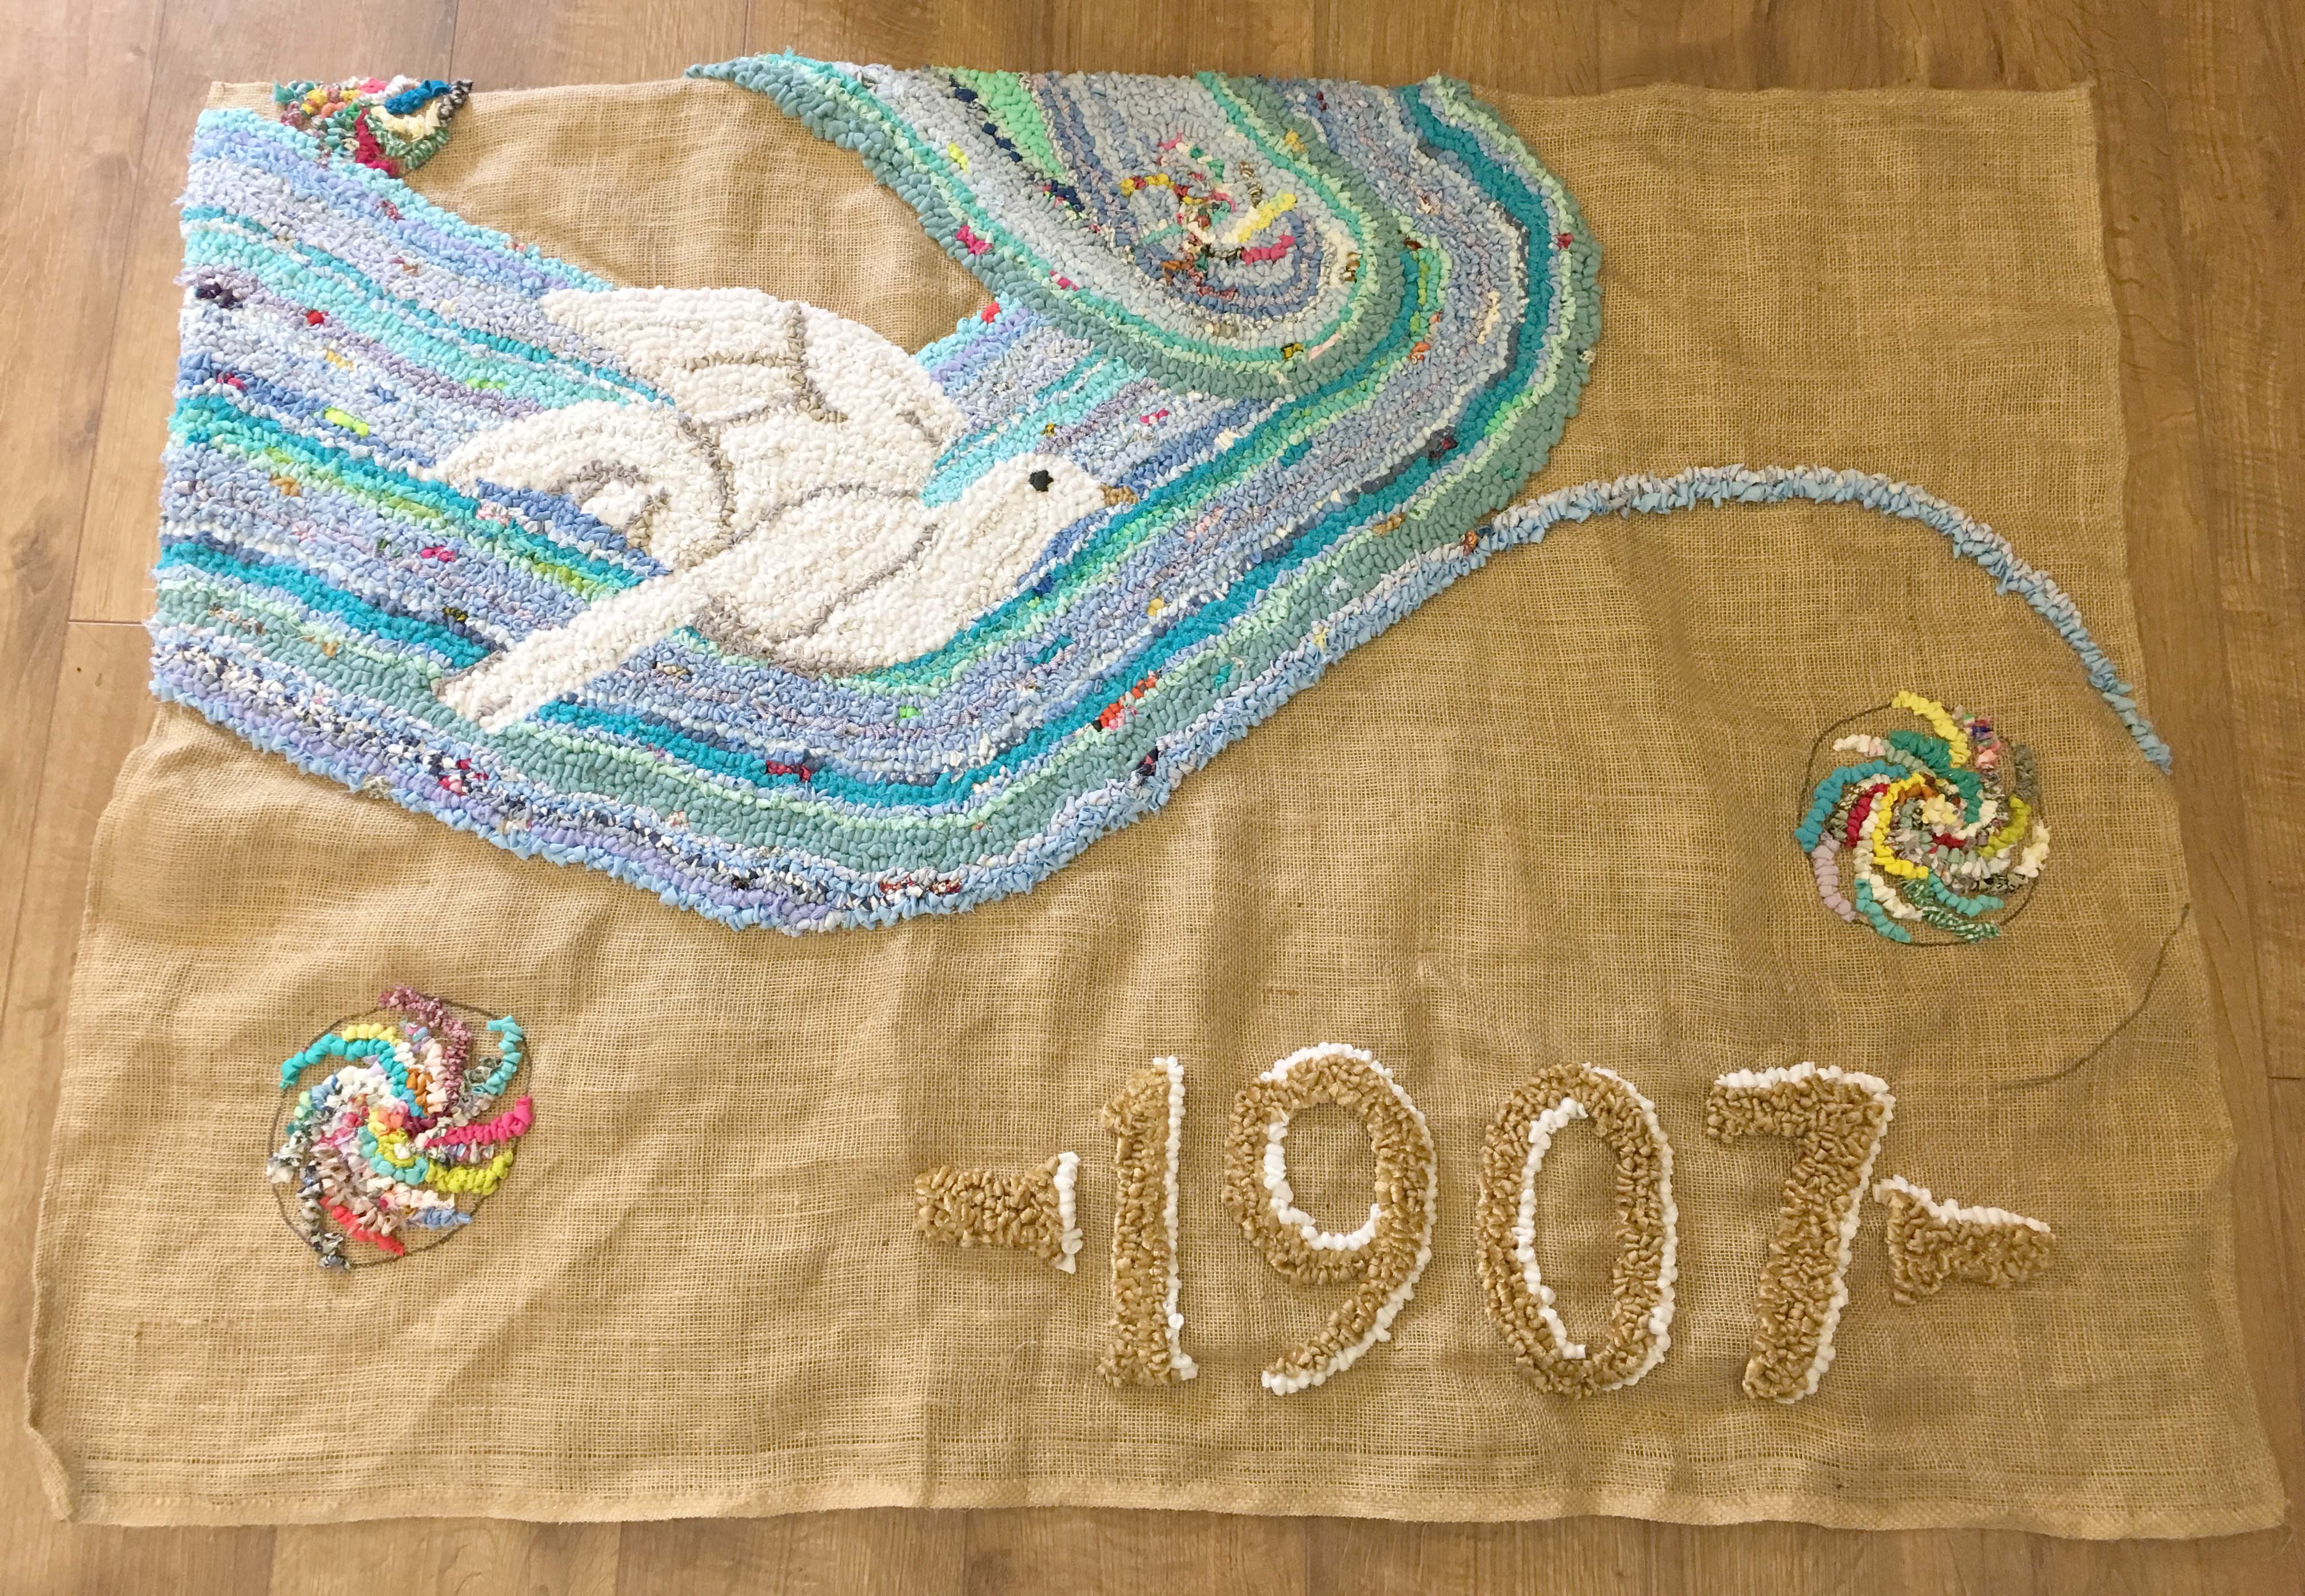
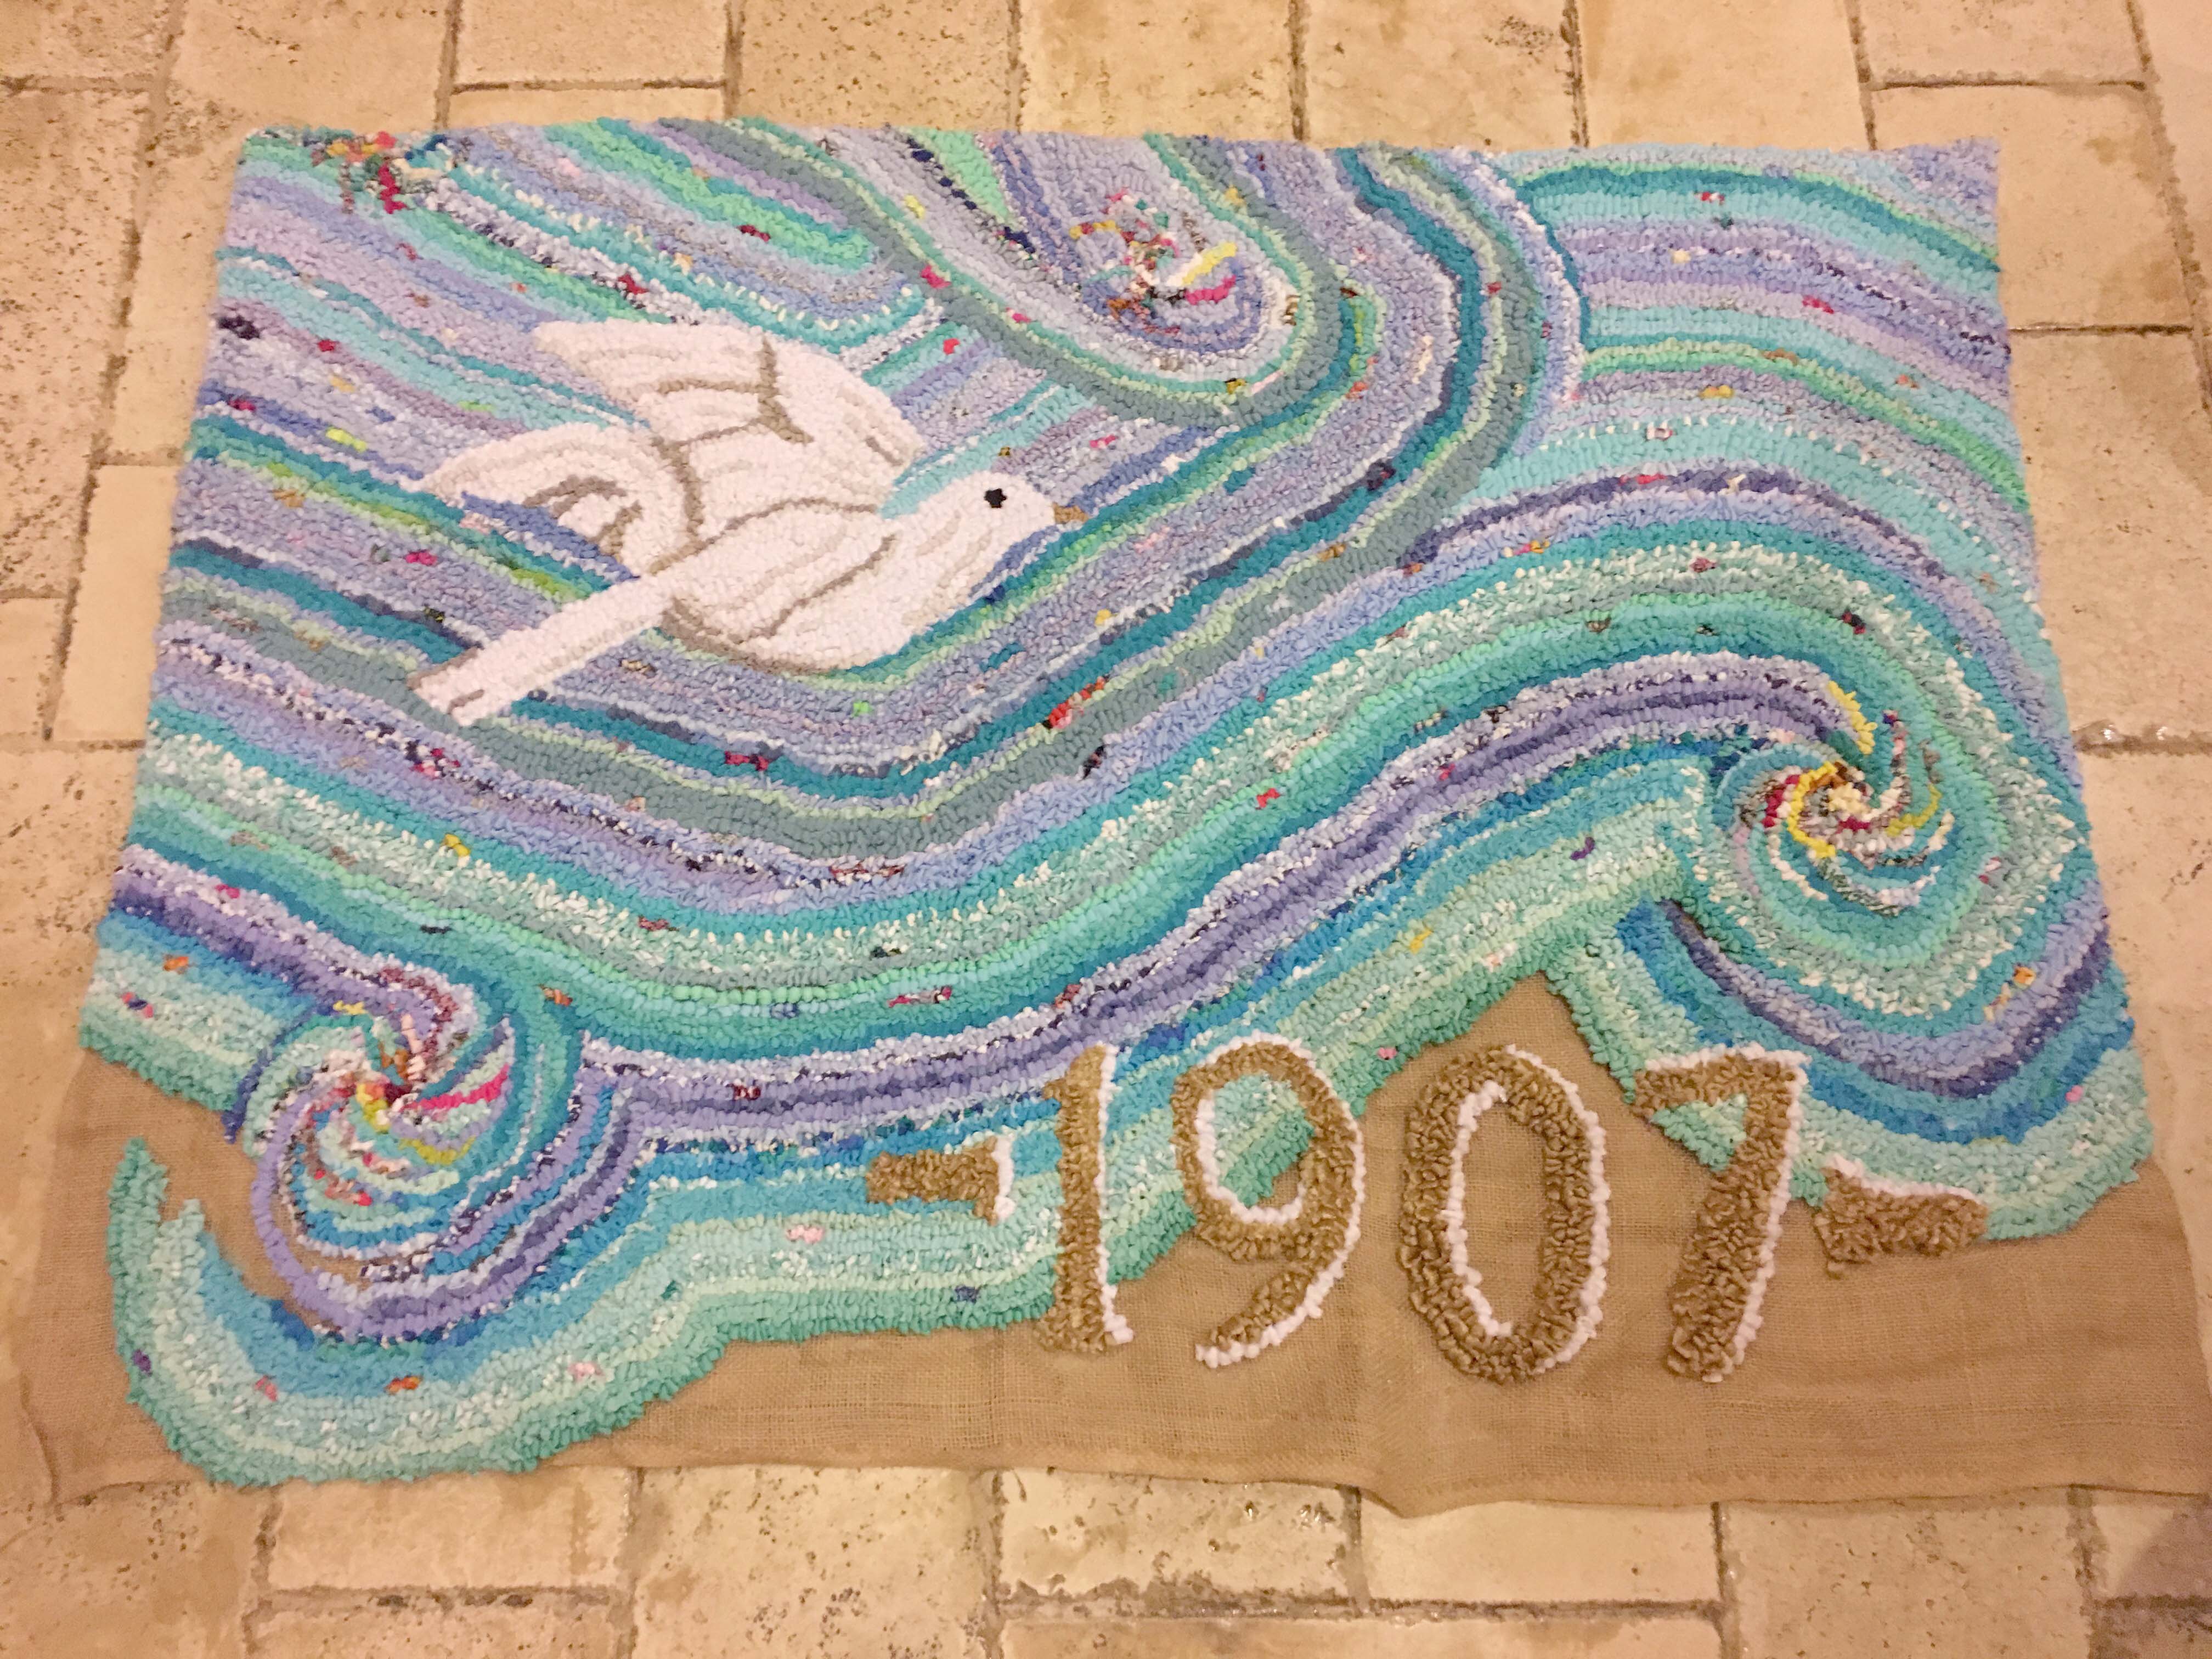
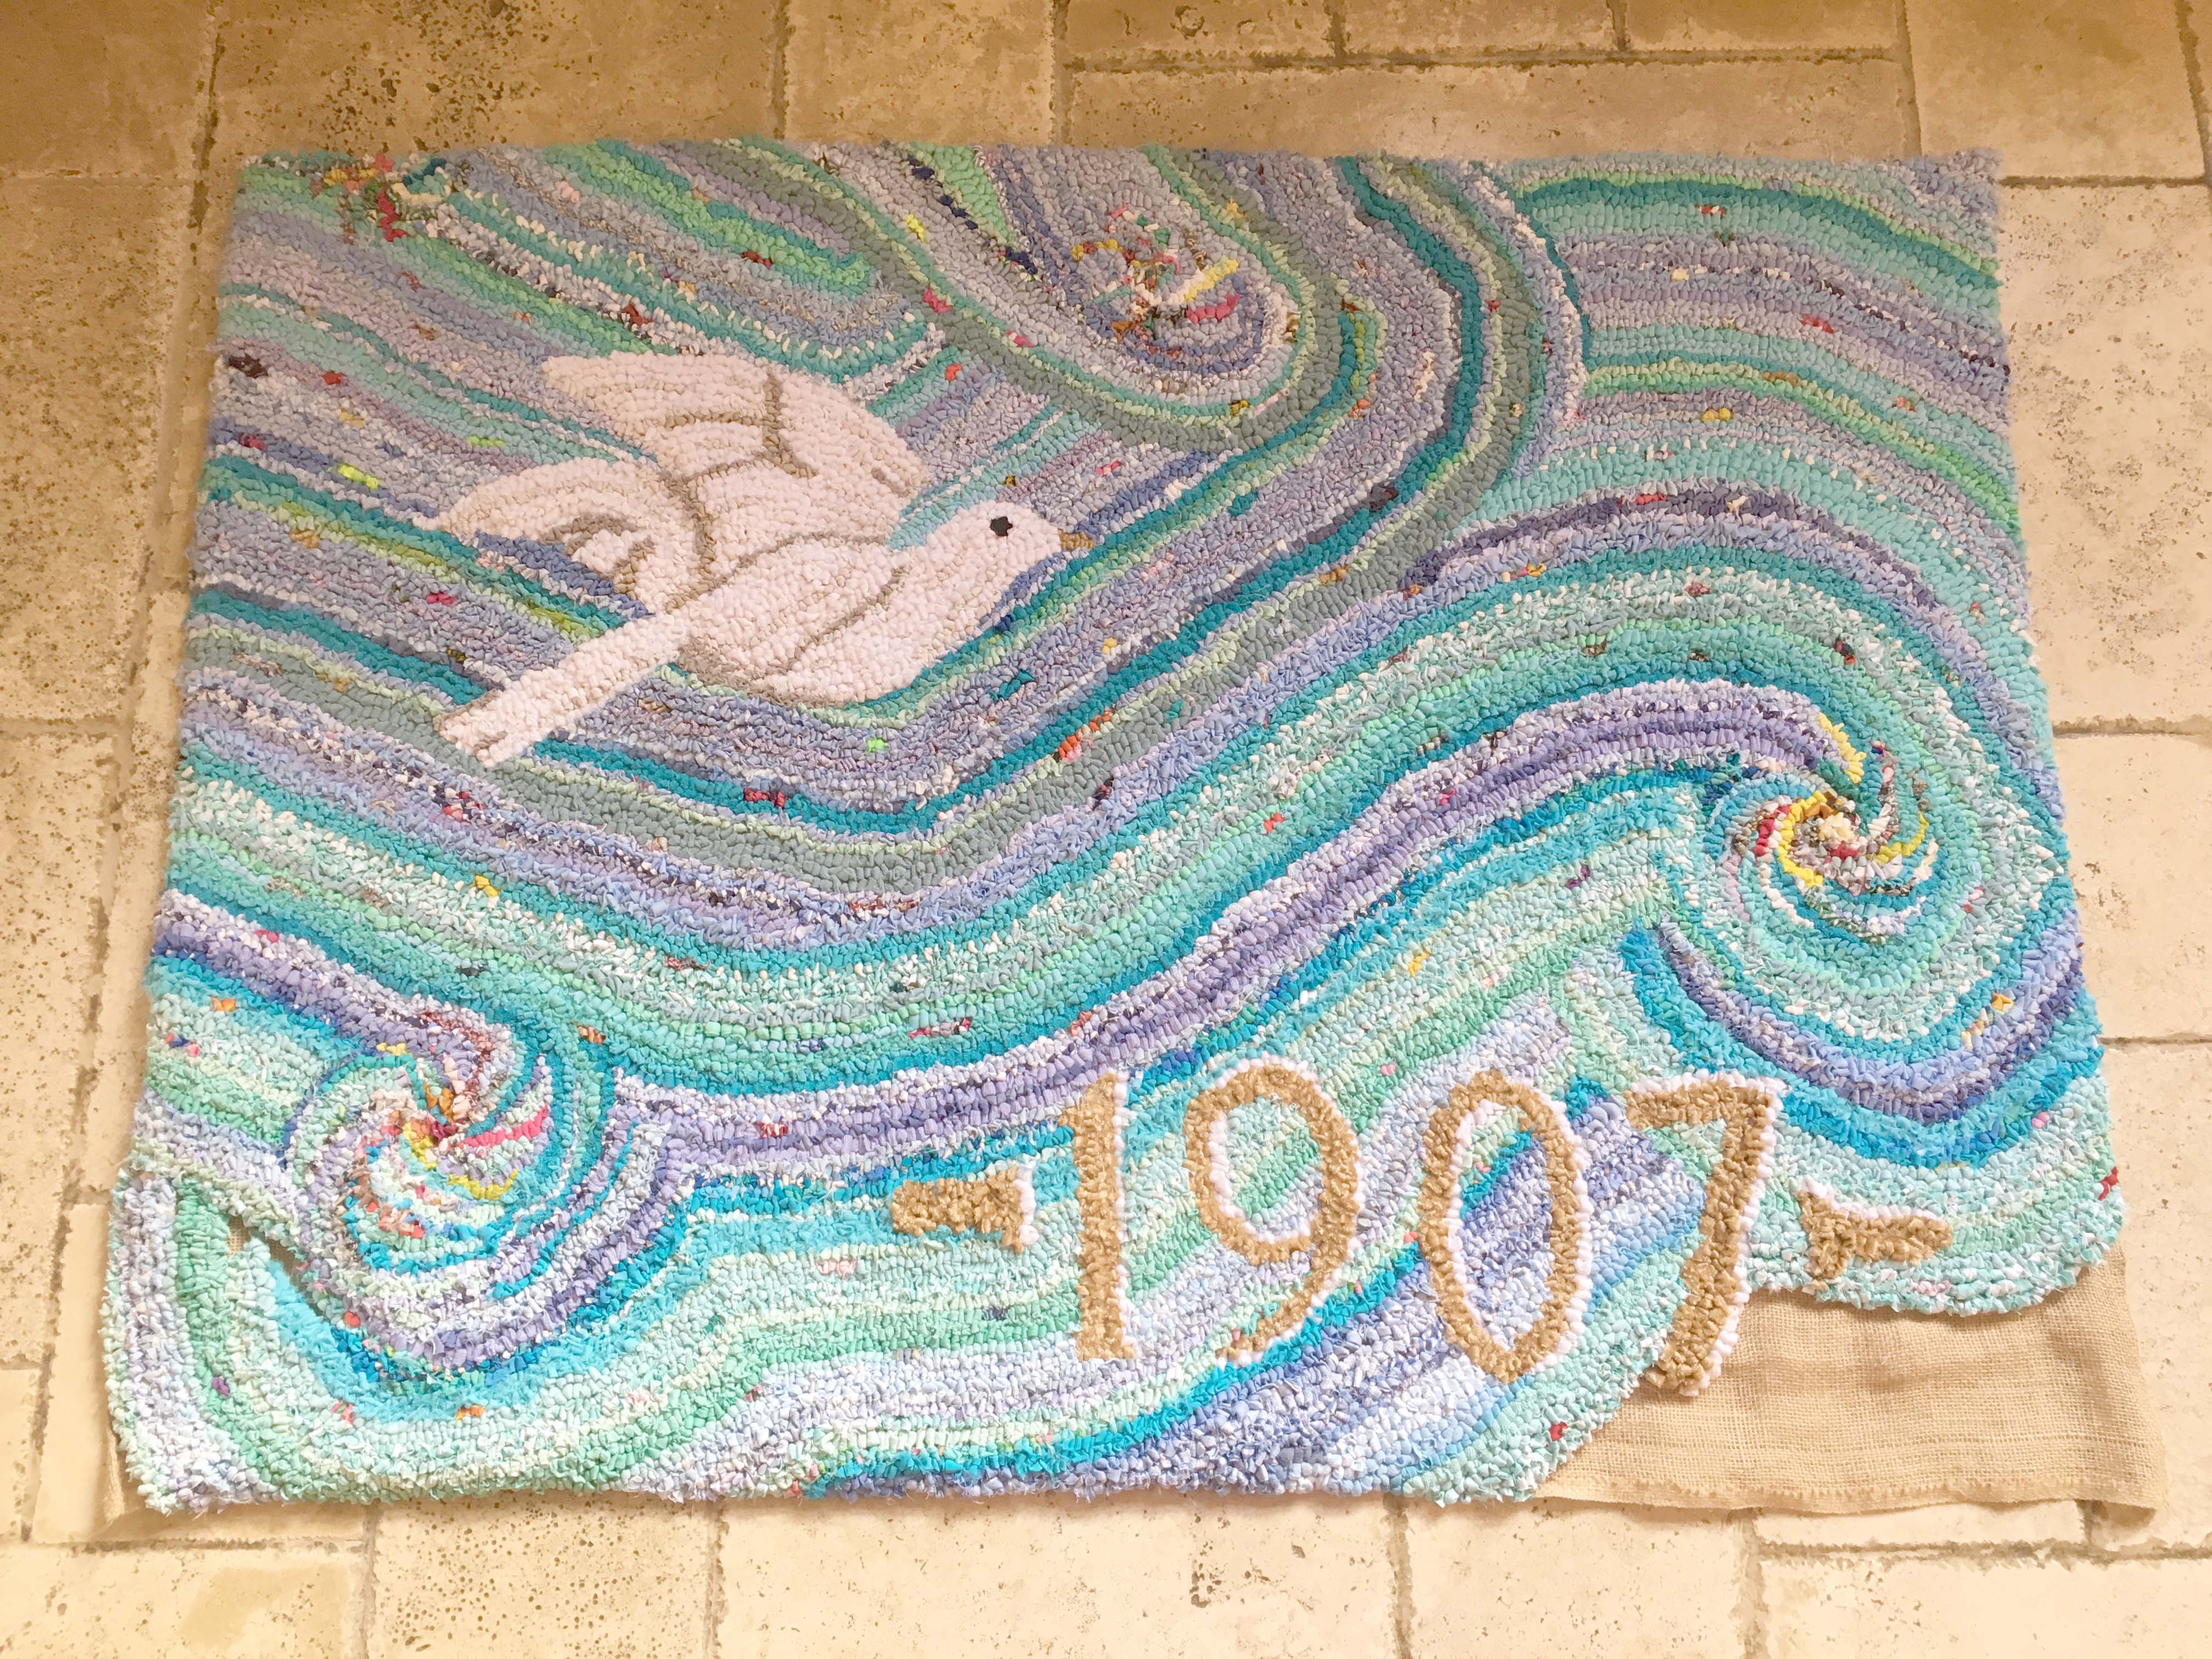
Here’s what the wall hanging looked like when it was finally finished.
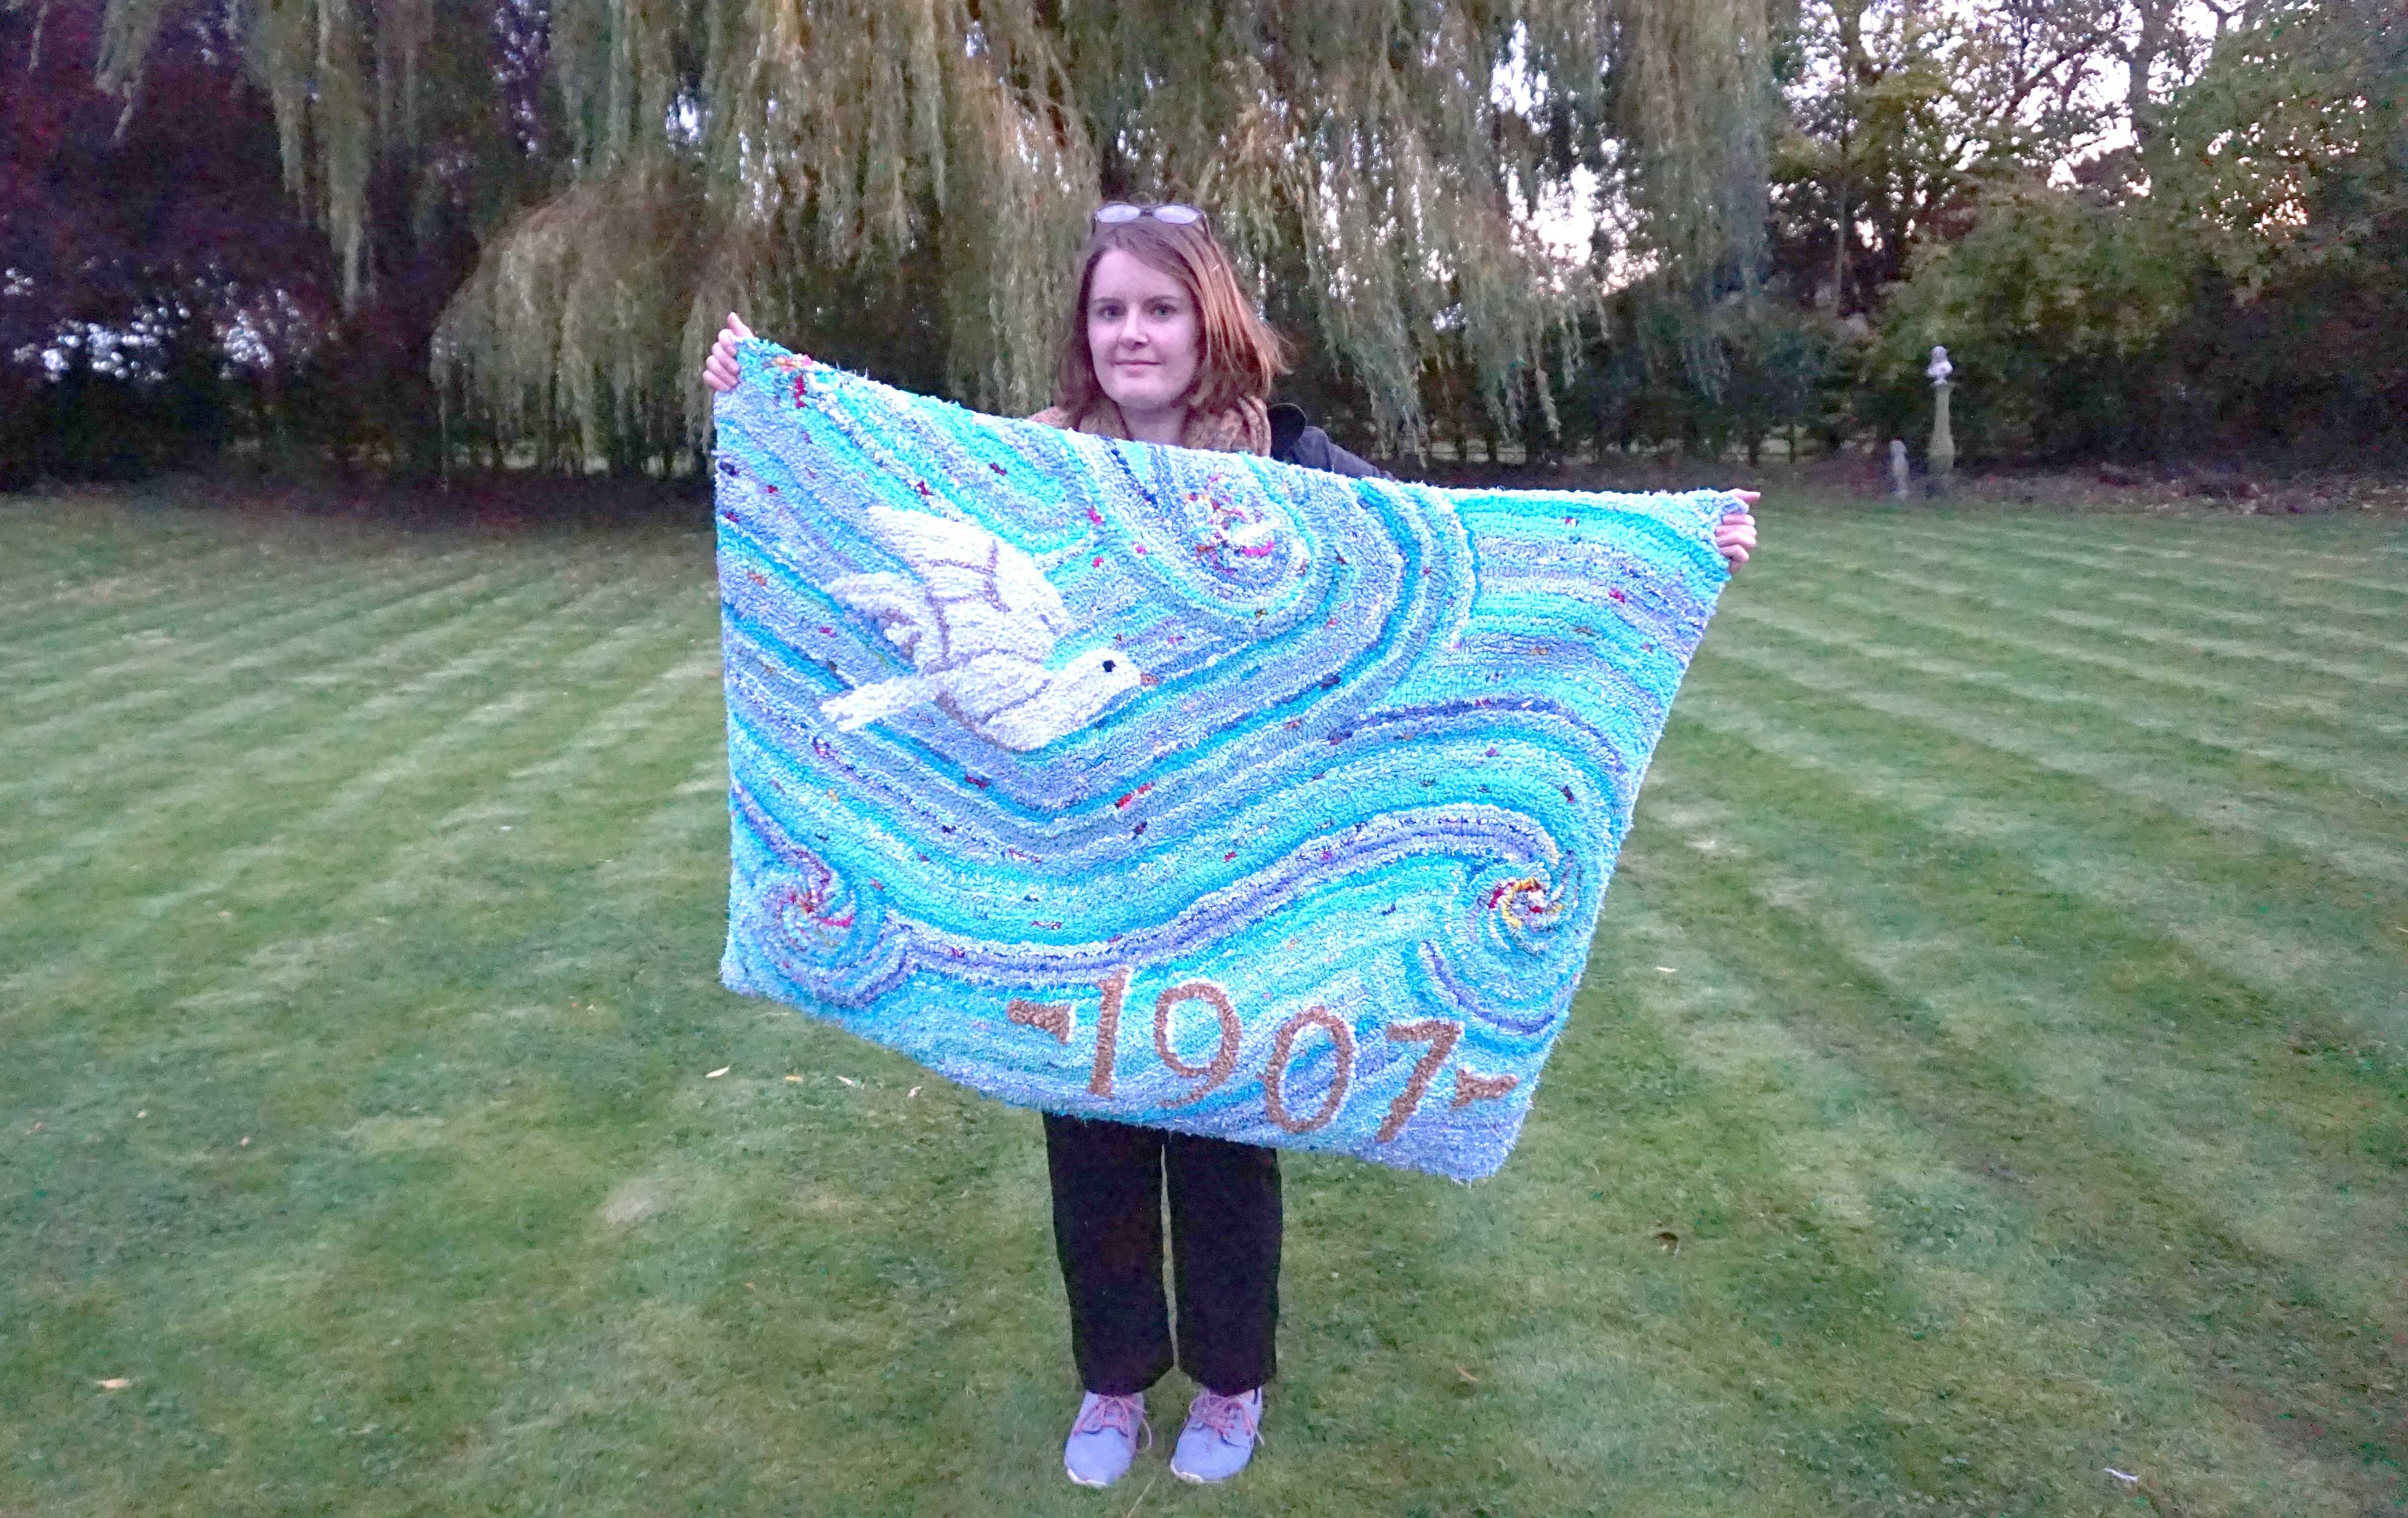
I very rarely model with my creations but what the heck, here I am holding up the finished wall hanging with pride. You get a much better idea of the scale here too!
So that’s how to painstakingly make a rag rug wall hanging. I really hope you like how it turned out and please please do comment on the post to let me know your thoughts – it’s always nice to hear from you 🙂
Have questions or just fancy saying “hi”, you can get in touch with me on hello@raggedlife.com
LOOKING FOR MORE RAG RUG INSPIRATION? WHY NOT CONNECT WITH US ON SOCIAL MEDIA AT:
Instagram: https://www.instagram.com/raggedlife/
Facebook: https://www.facebook.com/raggedliferagrugs/
Pinterest: https://www.pinterest.co.uk/raggedlife/
Twitter: https://twitter.com/raggedlife
Elspeth x
Beautiful work! Complicated design. Only a beginner!
Thanks so much Elizabeth – you’ll be making gorgeous pieces before you know it 🙂
[…] loved the dove wall hanging– so so much detail! The design meant that although of course the base colour for the […]
Impressed with your rug, Elspeth. Lovely interpretation helped by the design quality of that fantastic mosaic! I thought the diagonal lines might be a bit tricky, not for you…. but for me! I can’t wait to see the finished article. I have a project ongoing but have had to leave it for a while…. once it’s finished I’ll send a pic. If I was a bit nearer I might get to see you a bit more often… it’s just distance that keeps me away from your round table! Great blog and uplifting in the somewhat gloomy and damp middle Oxfordshire!… Read more »
Thanks so much Rosey! Definitely do share with me any photos of what you’re working on – you know I always love to see what you are making 🙂 xx
Loving the wall hanging and the interesting journey of the making Elspeth which I think is as important as the finished piece of work.
Kind regards
Stephanie x
Thanks Stephanie! Are you working on anything at the moment? I’d love to see what amazing things you’re up to 🙂