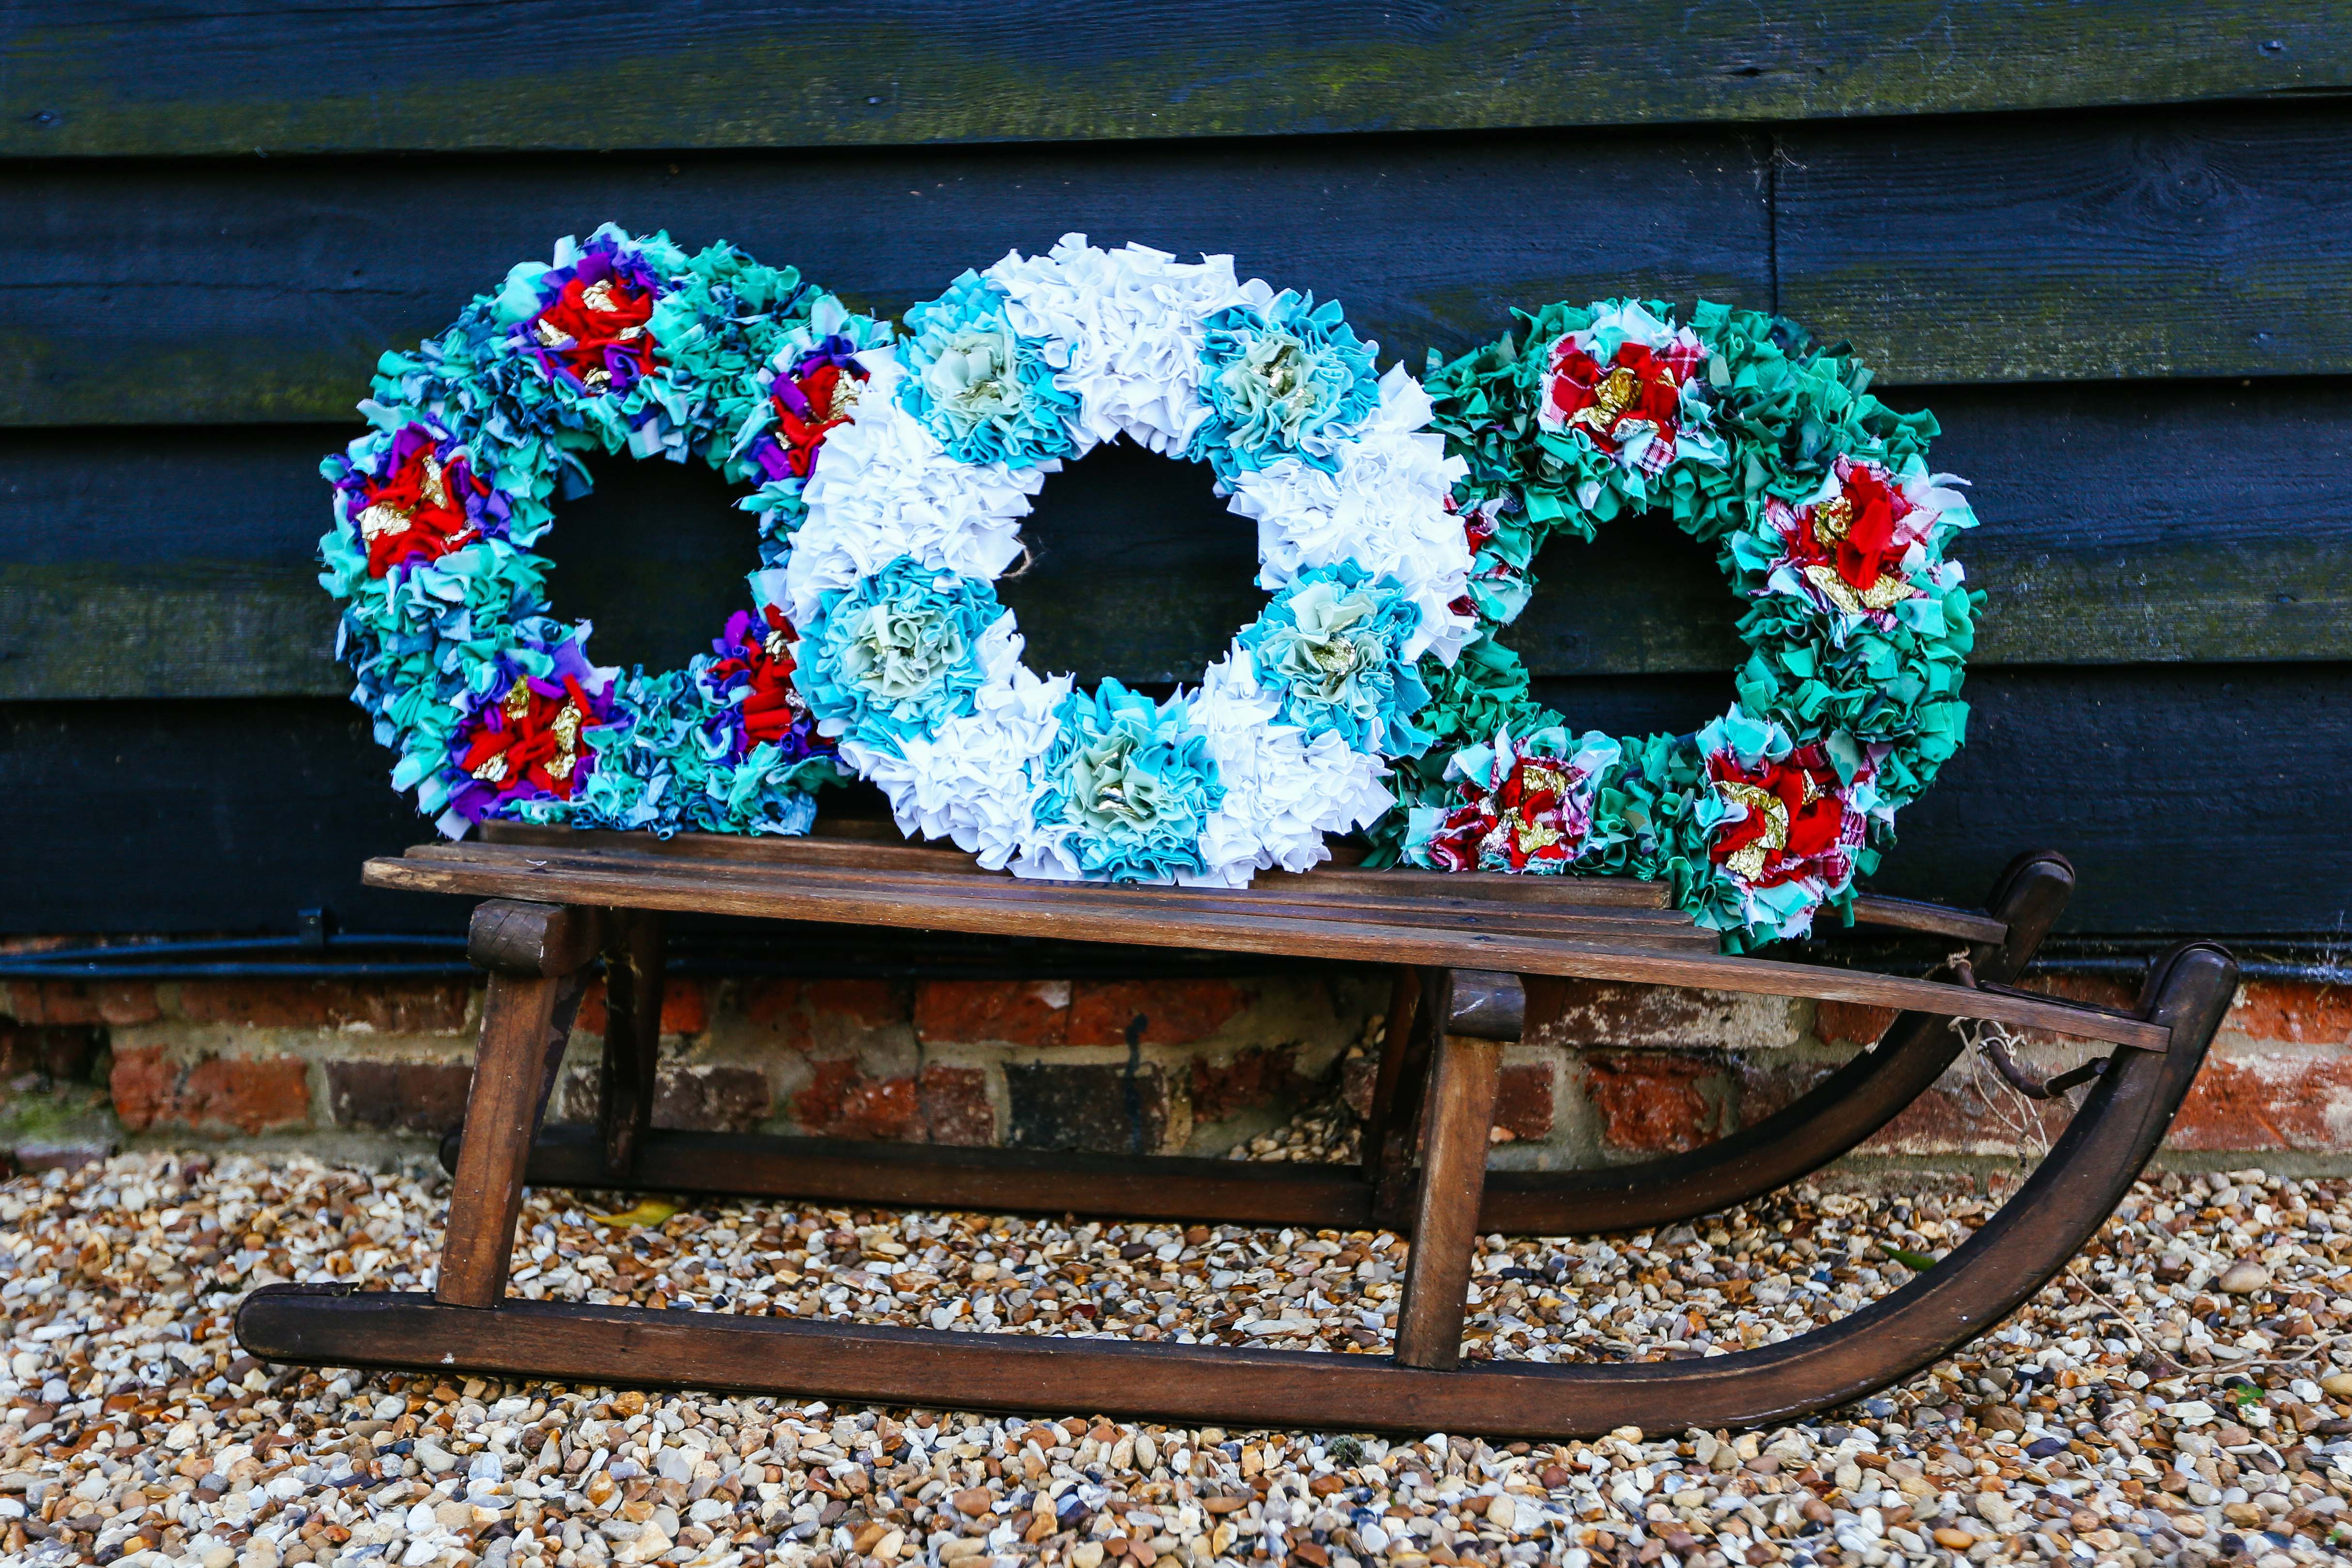
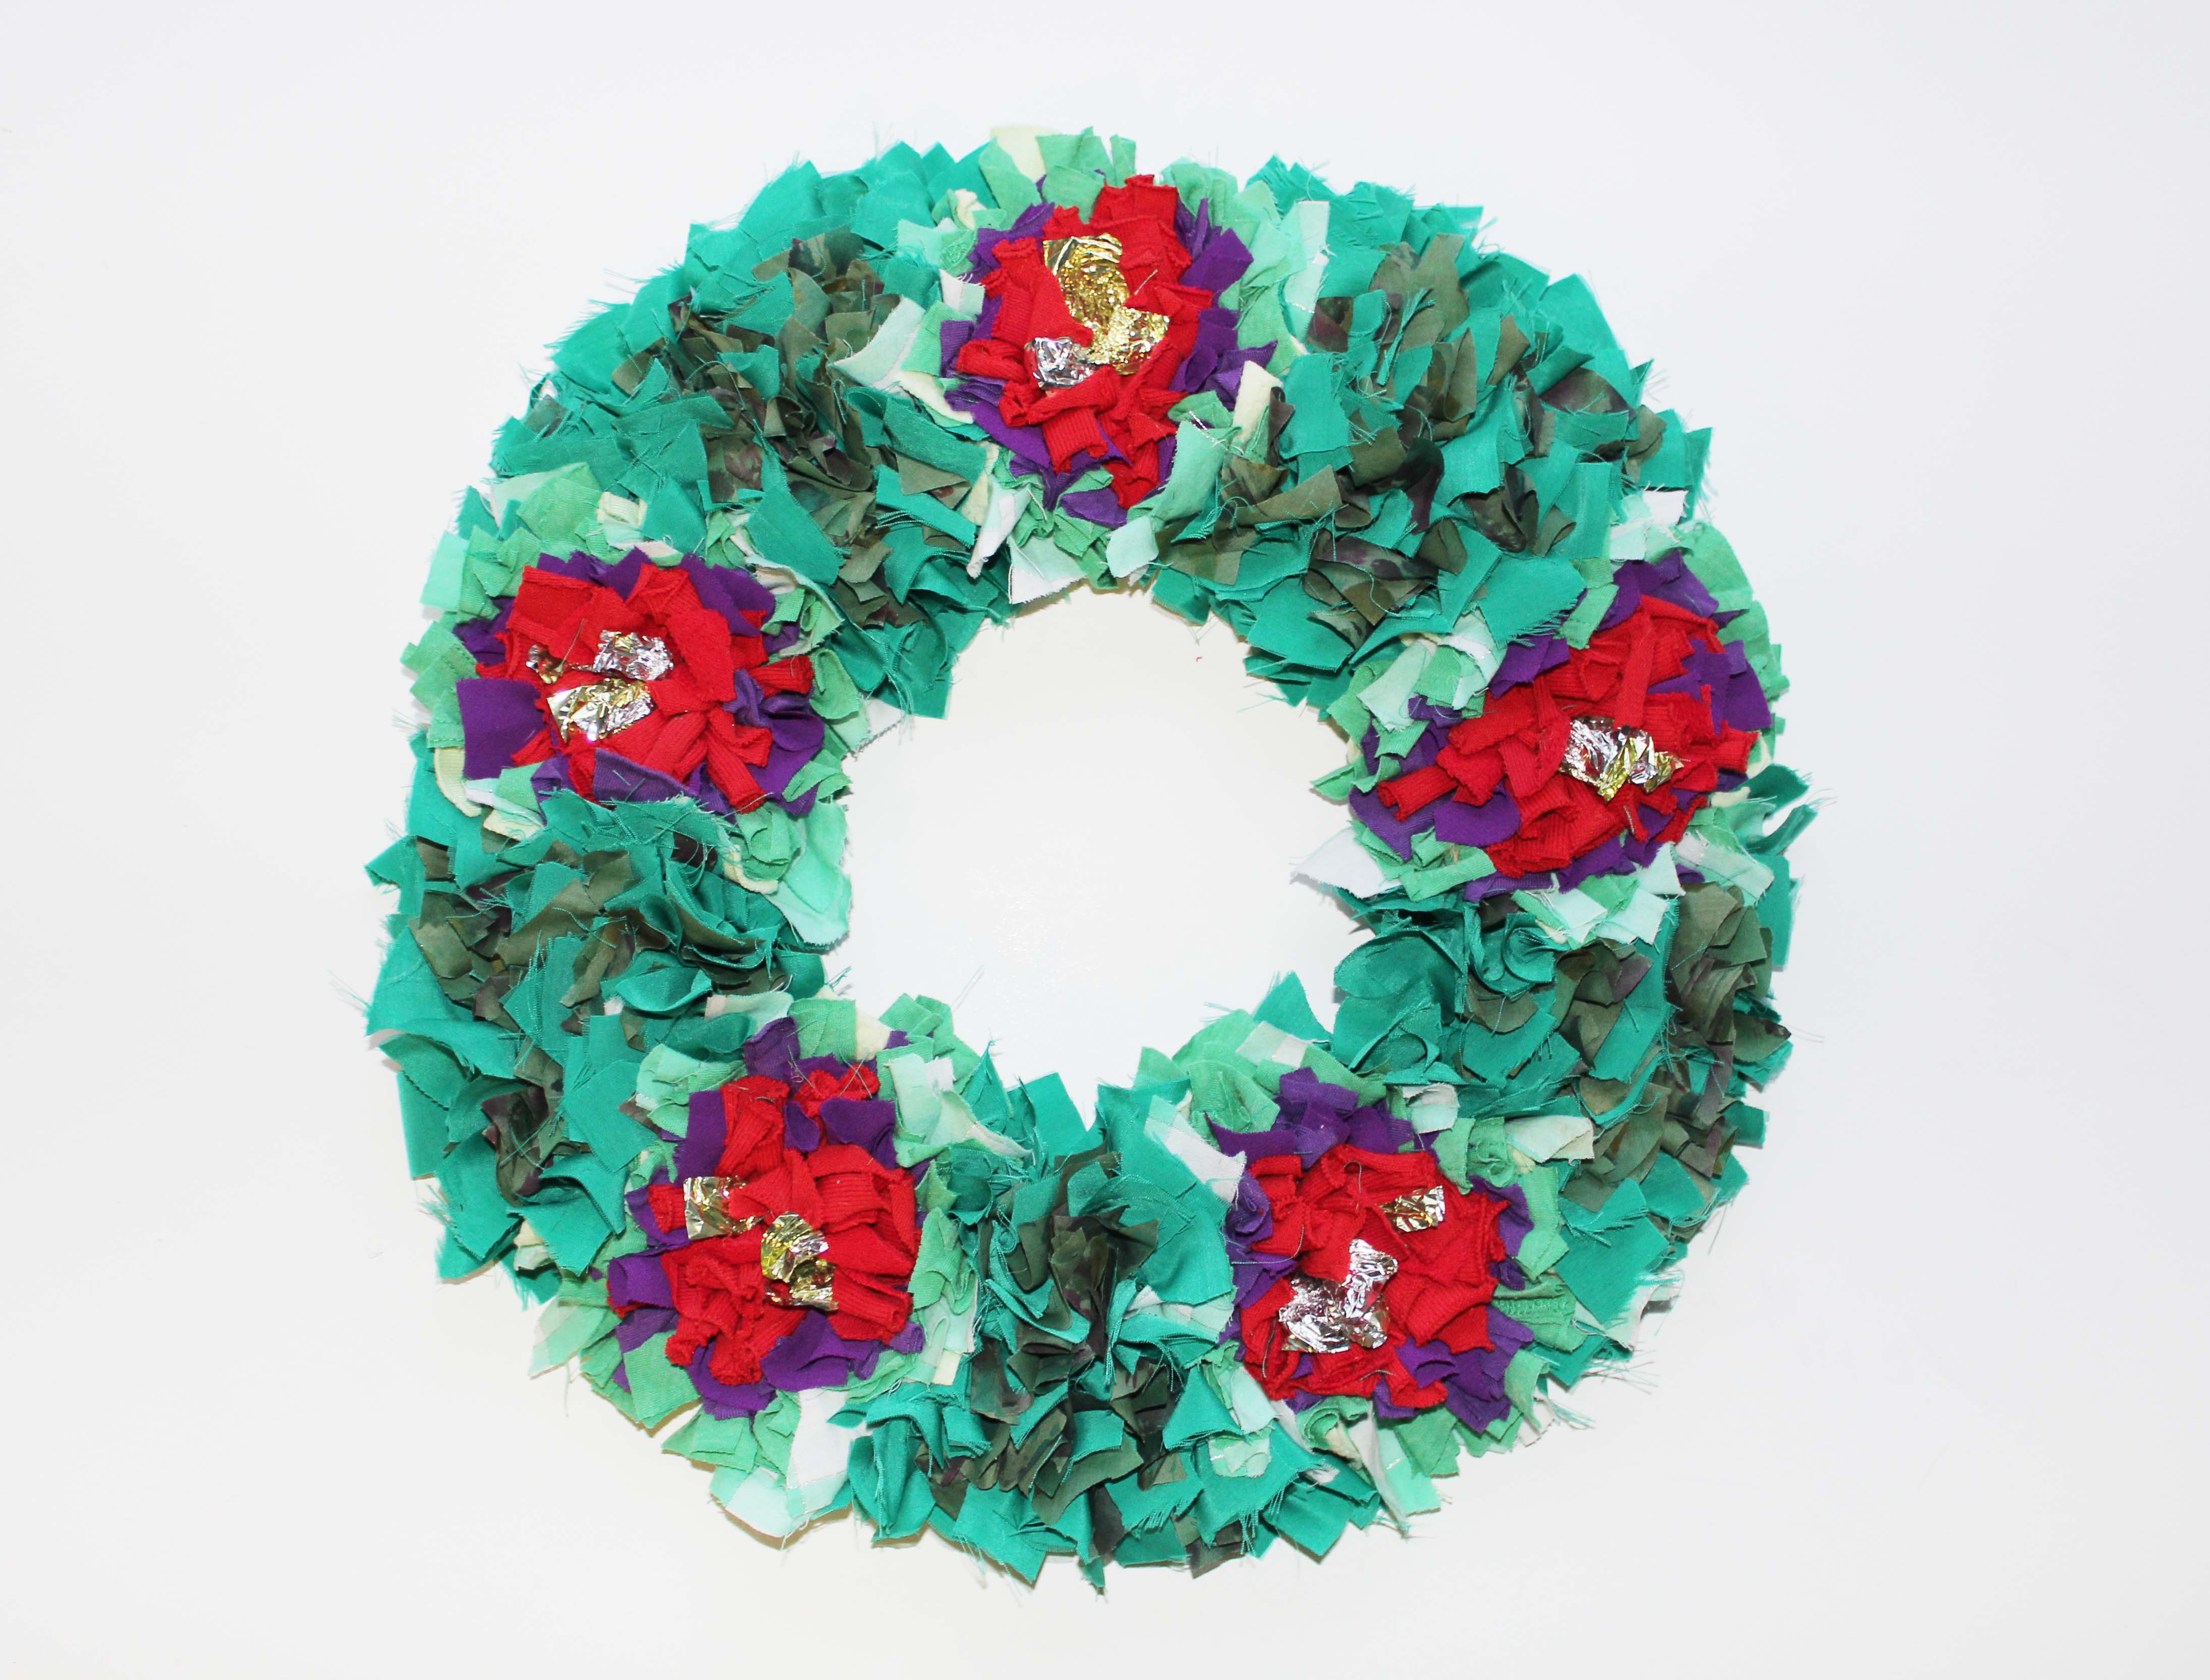
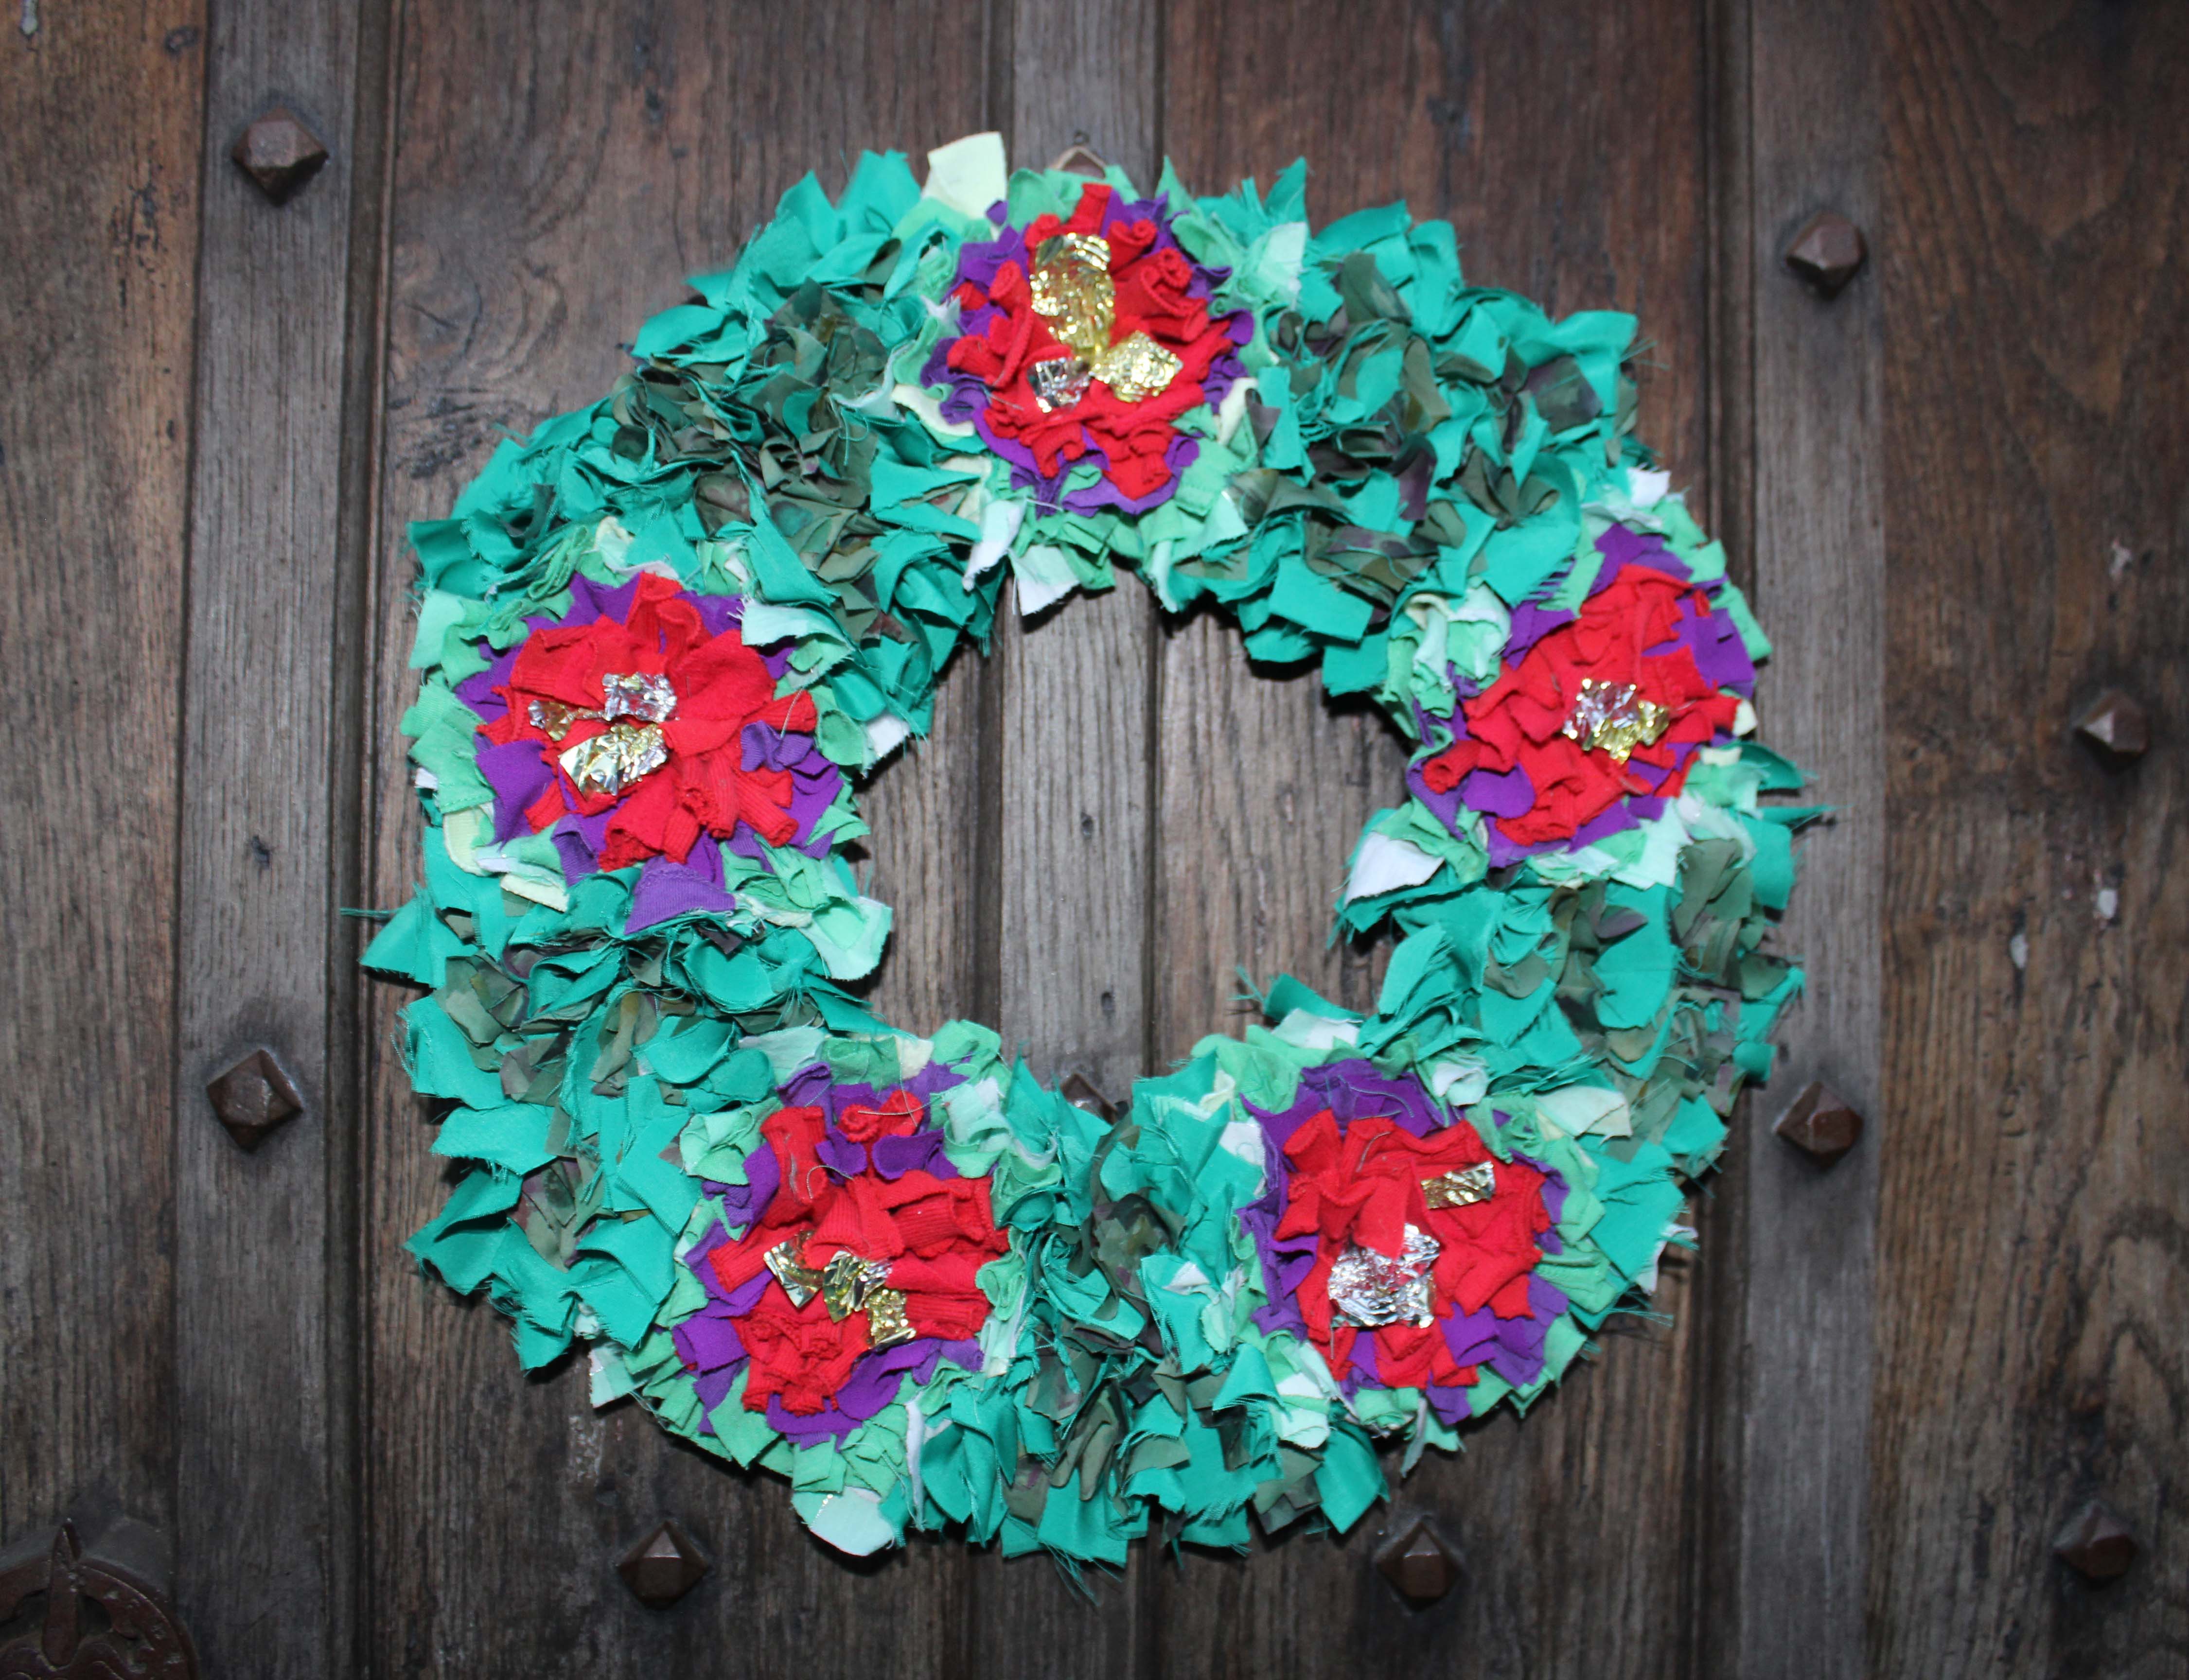
Rag rug wreaths are one of the easiest and arguably most satisfying rag rug projects to make. They only take a few hours to complete and the colour options and designs are never ending. Don’t believe me? Check out some of our former students’ rag rug wreaths here and one of our traditional Rag Rug Christmas Wreaths below…
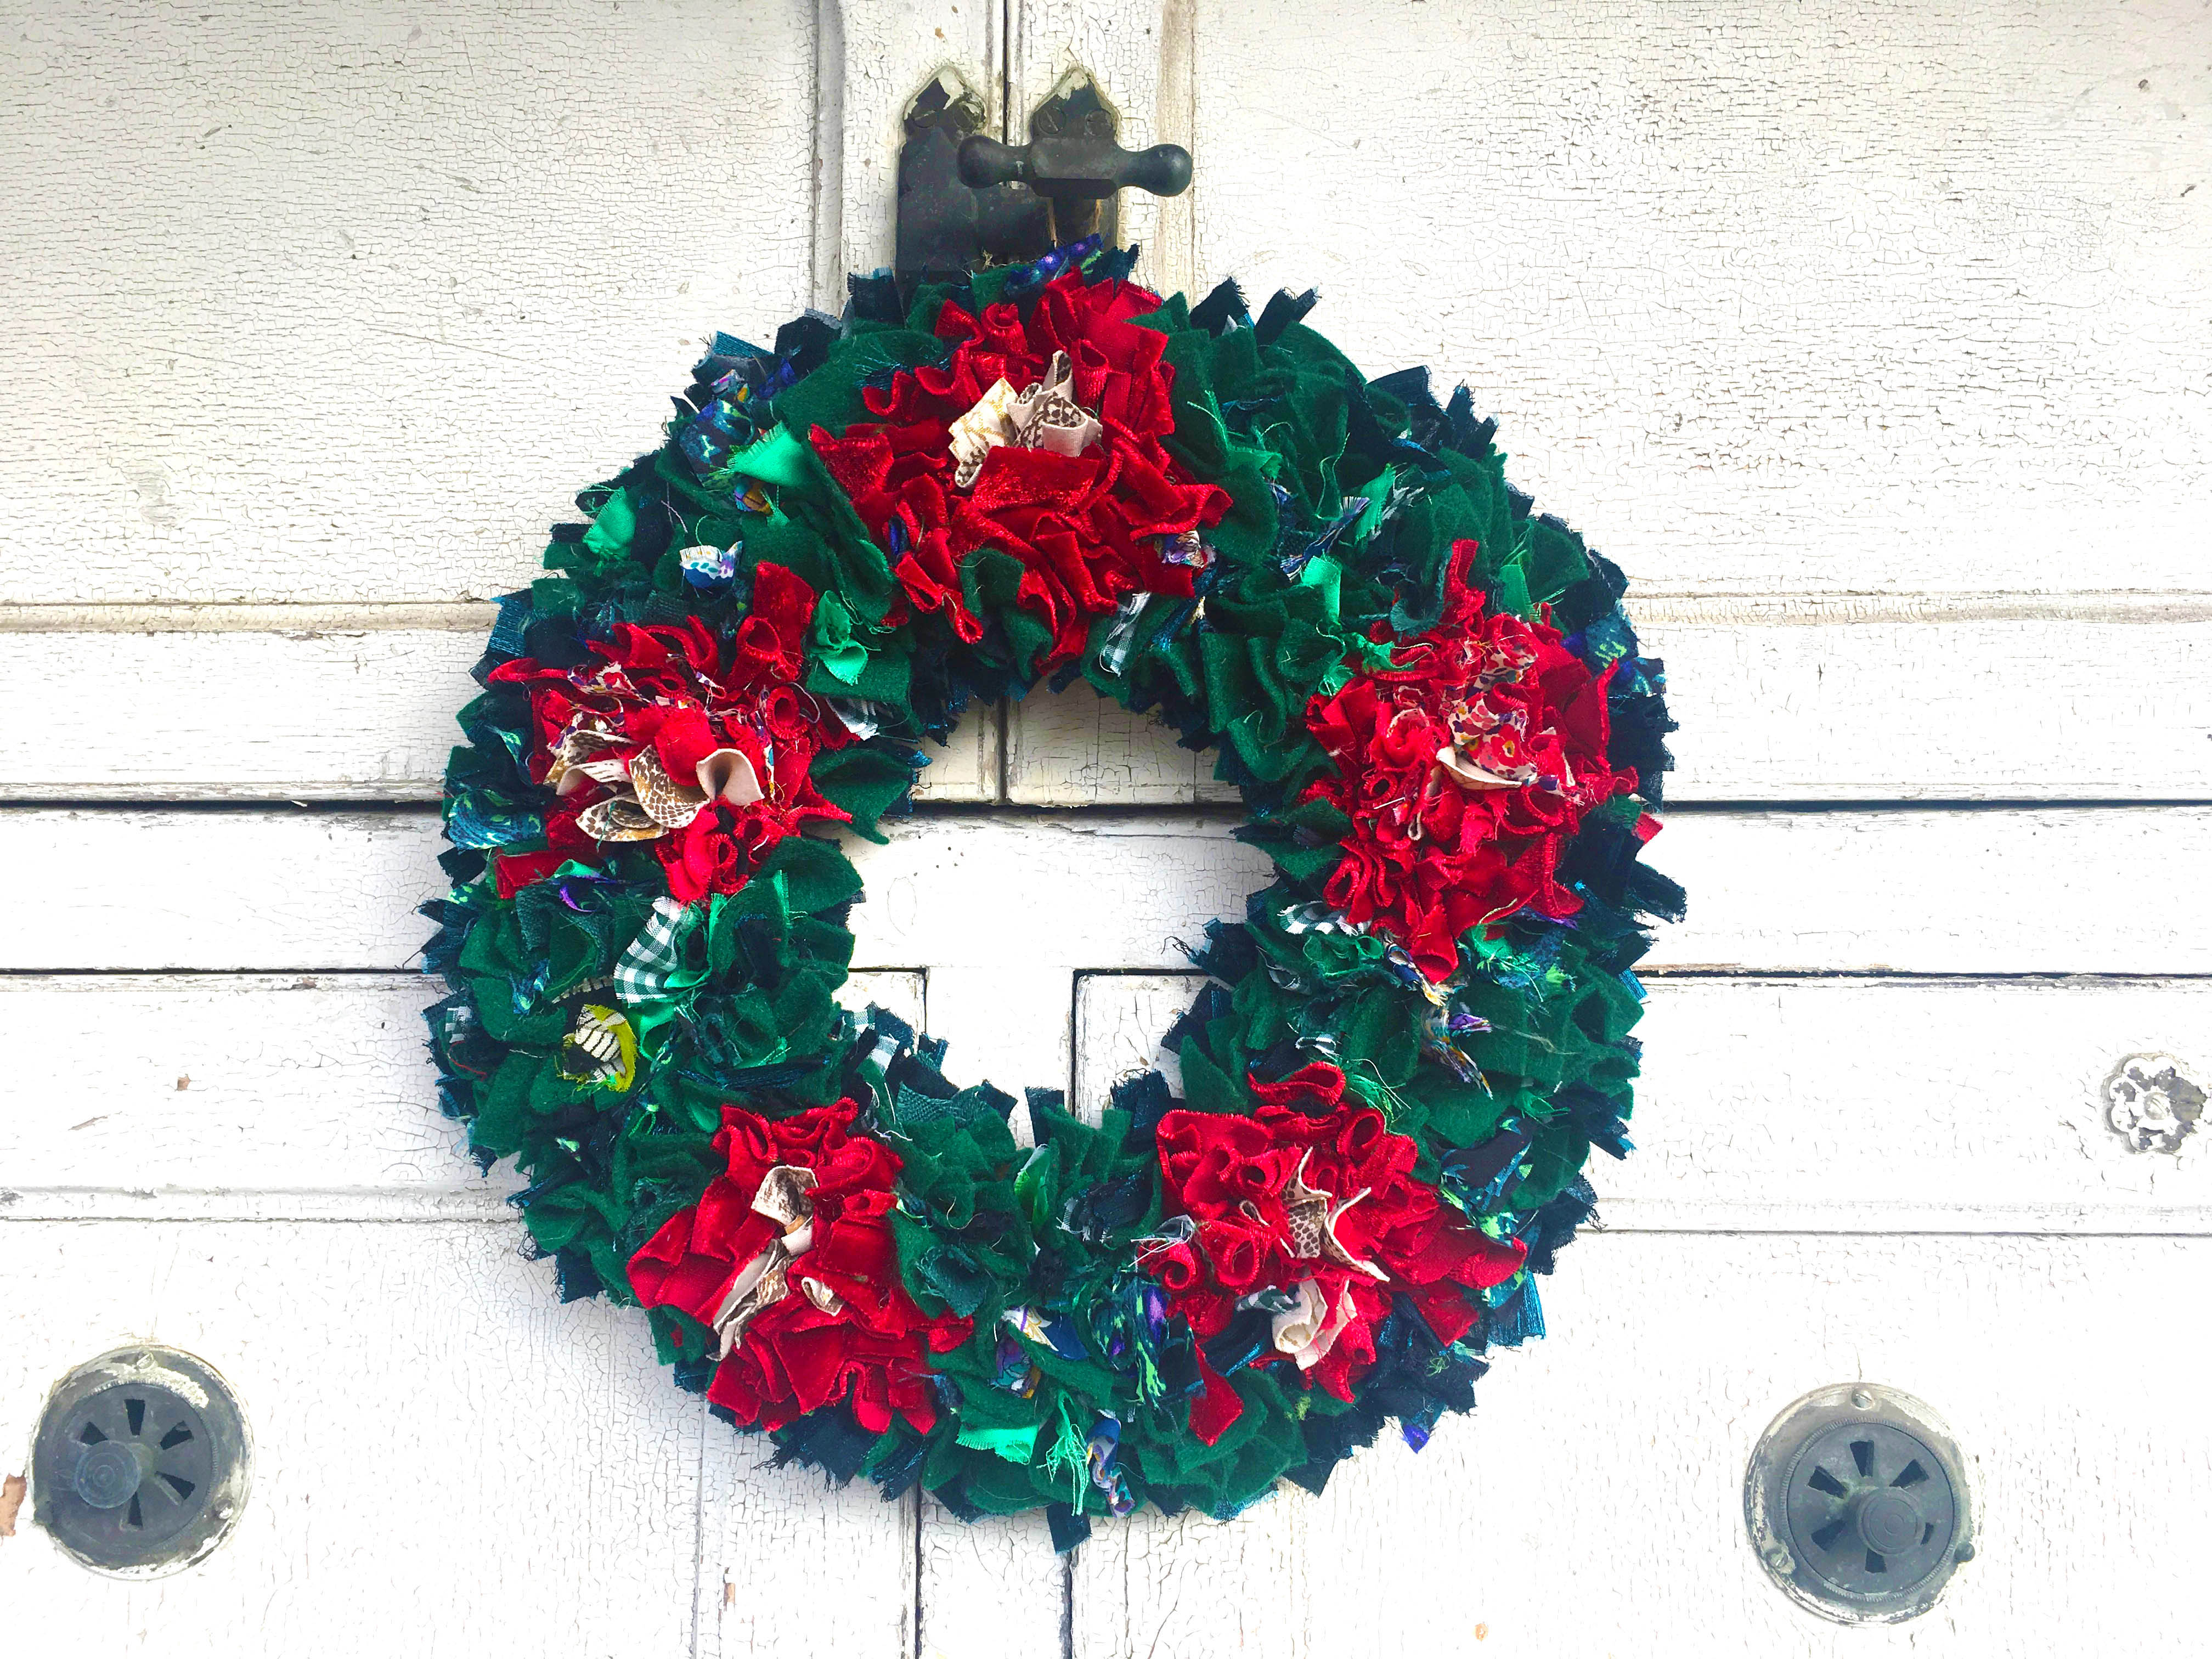
I always get so many compliments when I put my handmade rag rug wreath on the front door.
p.s. If you’ve made a wreath that isn’t in the hall of fame then please do email it over to hello@raggedlife.com to be included 🙂
Rag rug wreaths are generally made using the shaggy technique of rag rugging, which is a doddle to learn, particularly if you use a Rag Rug Spring Tool. Below are the step by step instructions on how we make our traditional Ragged Life Christmas Wreaths, but you can easily adapt the design to suit any time of year or home. We have a great spring wreath in my book, “Rag Rugs, Pillows & More”, for example. Right, enough babbling let’s get started…
HOW TO MAKE A RAG RUG WREATH:
WANT TO MAKE YOUR LIFE EASIER?
Steps 1-3 of our instructions below cover the hemming of the wreath hessian, as well as the preparation of the foam board mount. If you would like to save yourself the agro of doing these steps then you may want to buy one of our Rag Rug Wreath Kits or Hemmed Wreath Hessian, Board and Instructions (if you already have the rag rug tools). Trust me, you’ll probably thank me later!
Also, if you’re completely new to rag rugging, then before getting started we recommend that you watch our Introduction to the Rag Rug Tools video so you know what tools are what. If you don’t have all the bits and bobs then you can buy any of them on the Ragged Life Shop.
STEPS 1-3 (optional):
If your hessian isn’t pre-hemmed and you need a wreath mount, you will need to complete steps 1-3 before moving onto the actual rag rugging of the wreath itself…
WHAT YOU WILL NEED:
- Marker pen
- 5mm thick foam board / cardboard (enough for the size of wreath you would like to create)
- Scalpel and cutting mat
- Sewing machine and thread (doesn’t need to be colour matched as it won’t show)
Step 1: Prepare the Foam Board Mount
Use a marker pen to draw a ring onto foam board or cardboard. For a large wreath we recommend an outer ring diameter of 33cm and an inner ring diameter of 19cm, and for a small wreath we like to use a 28cm outer ring diameter and 16cm inner diameter. However, you can make the wreath as big or small as you’d like. Once the ring is sketched out, carefully cut the ring out using a scalpel and cutting mat.
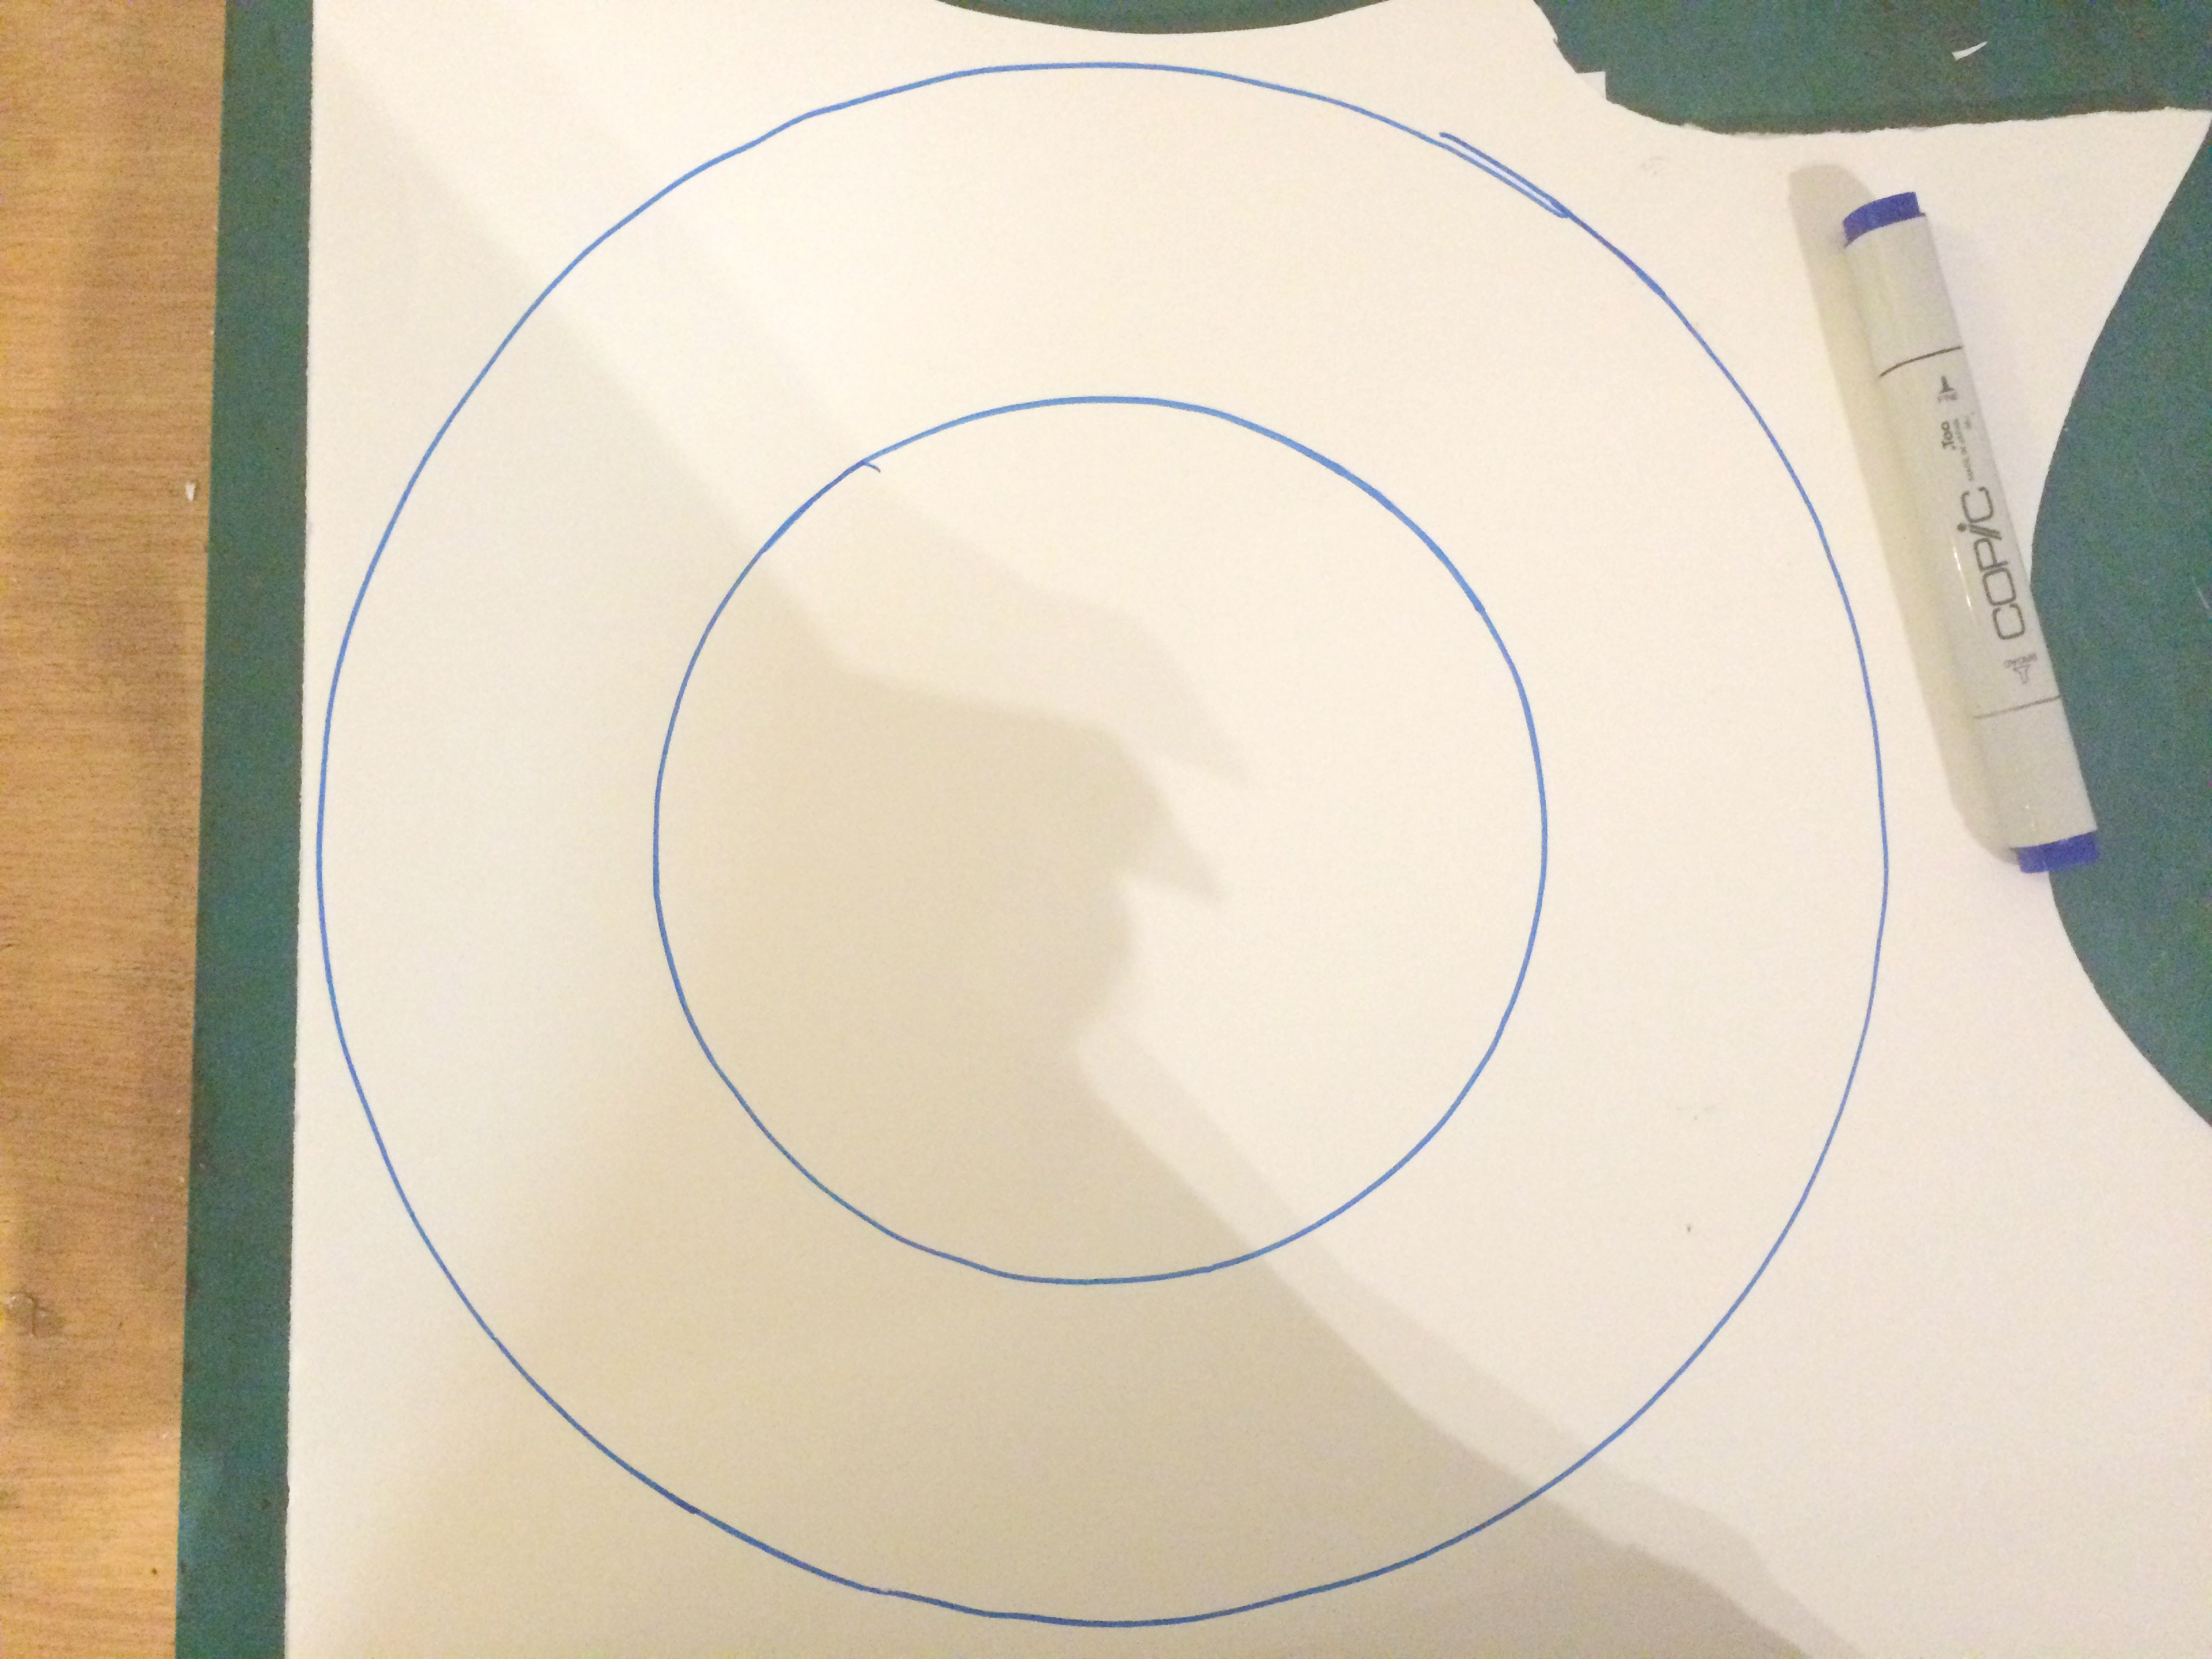
The drawn ring doesn’t have to be perfect.

Cut out the foam board ring, being careful not to lose any digits.
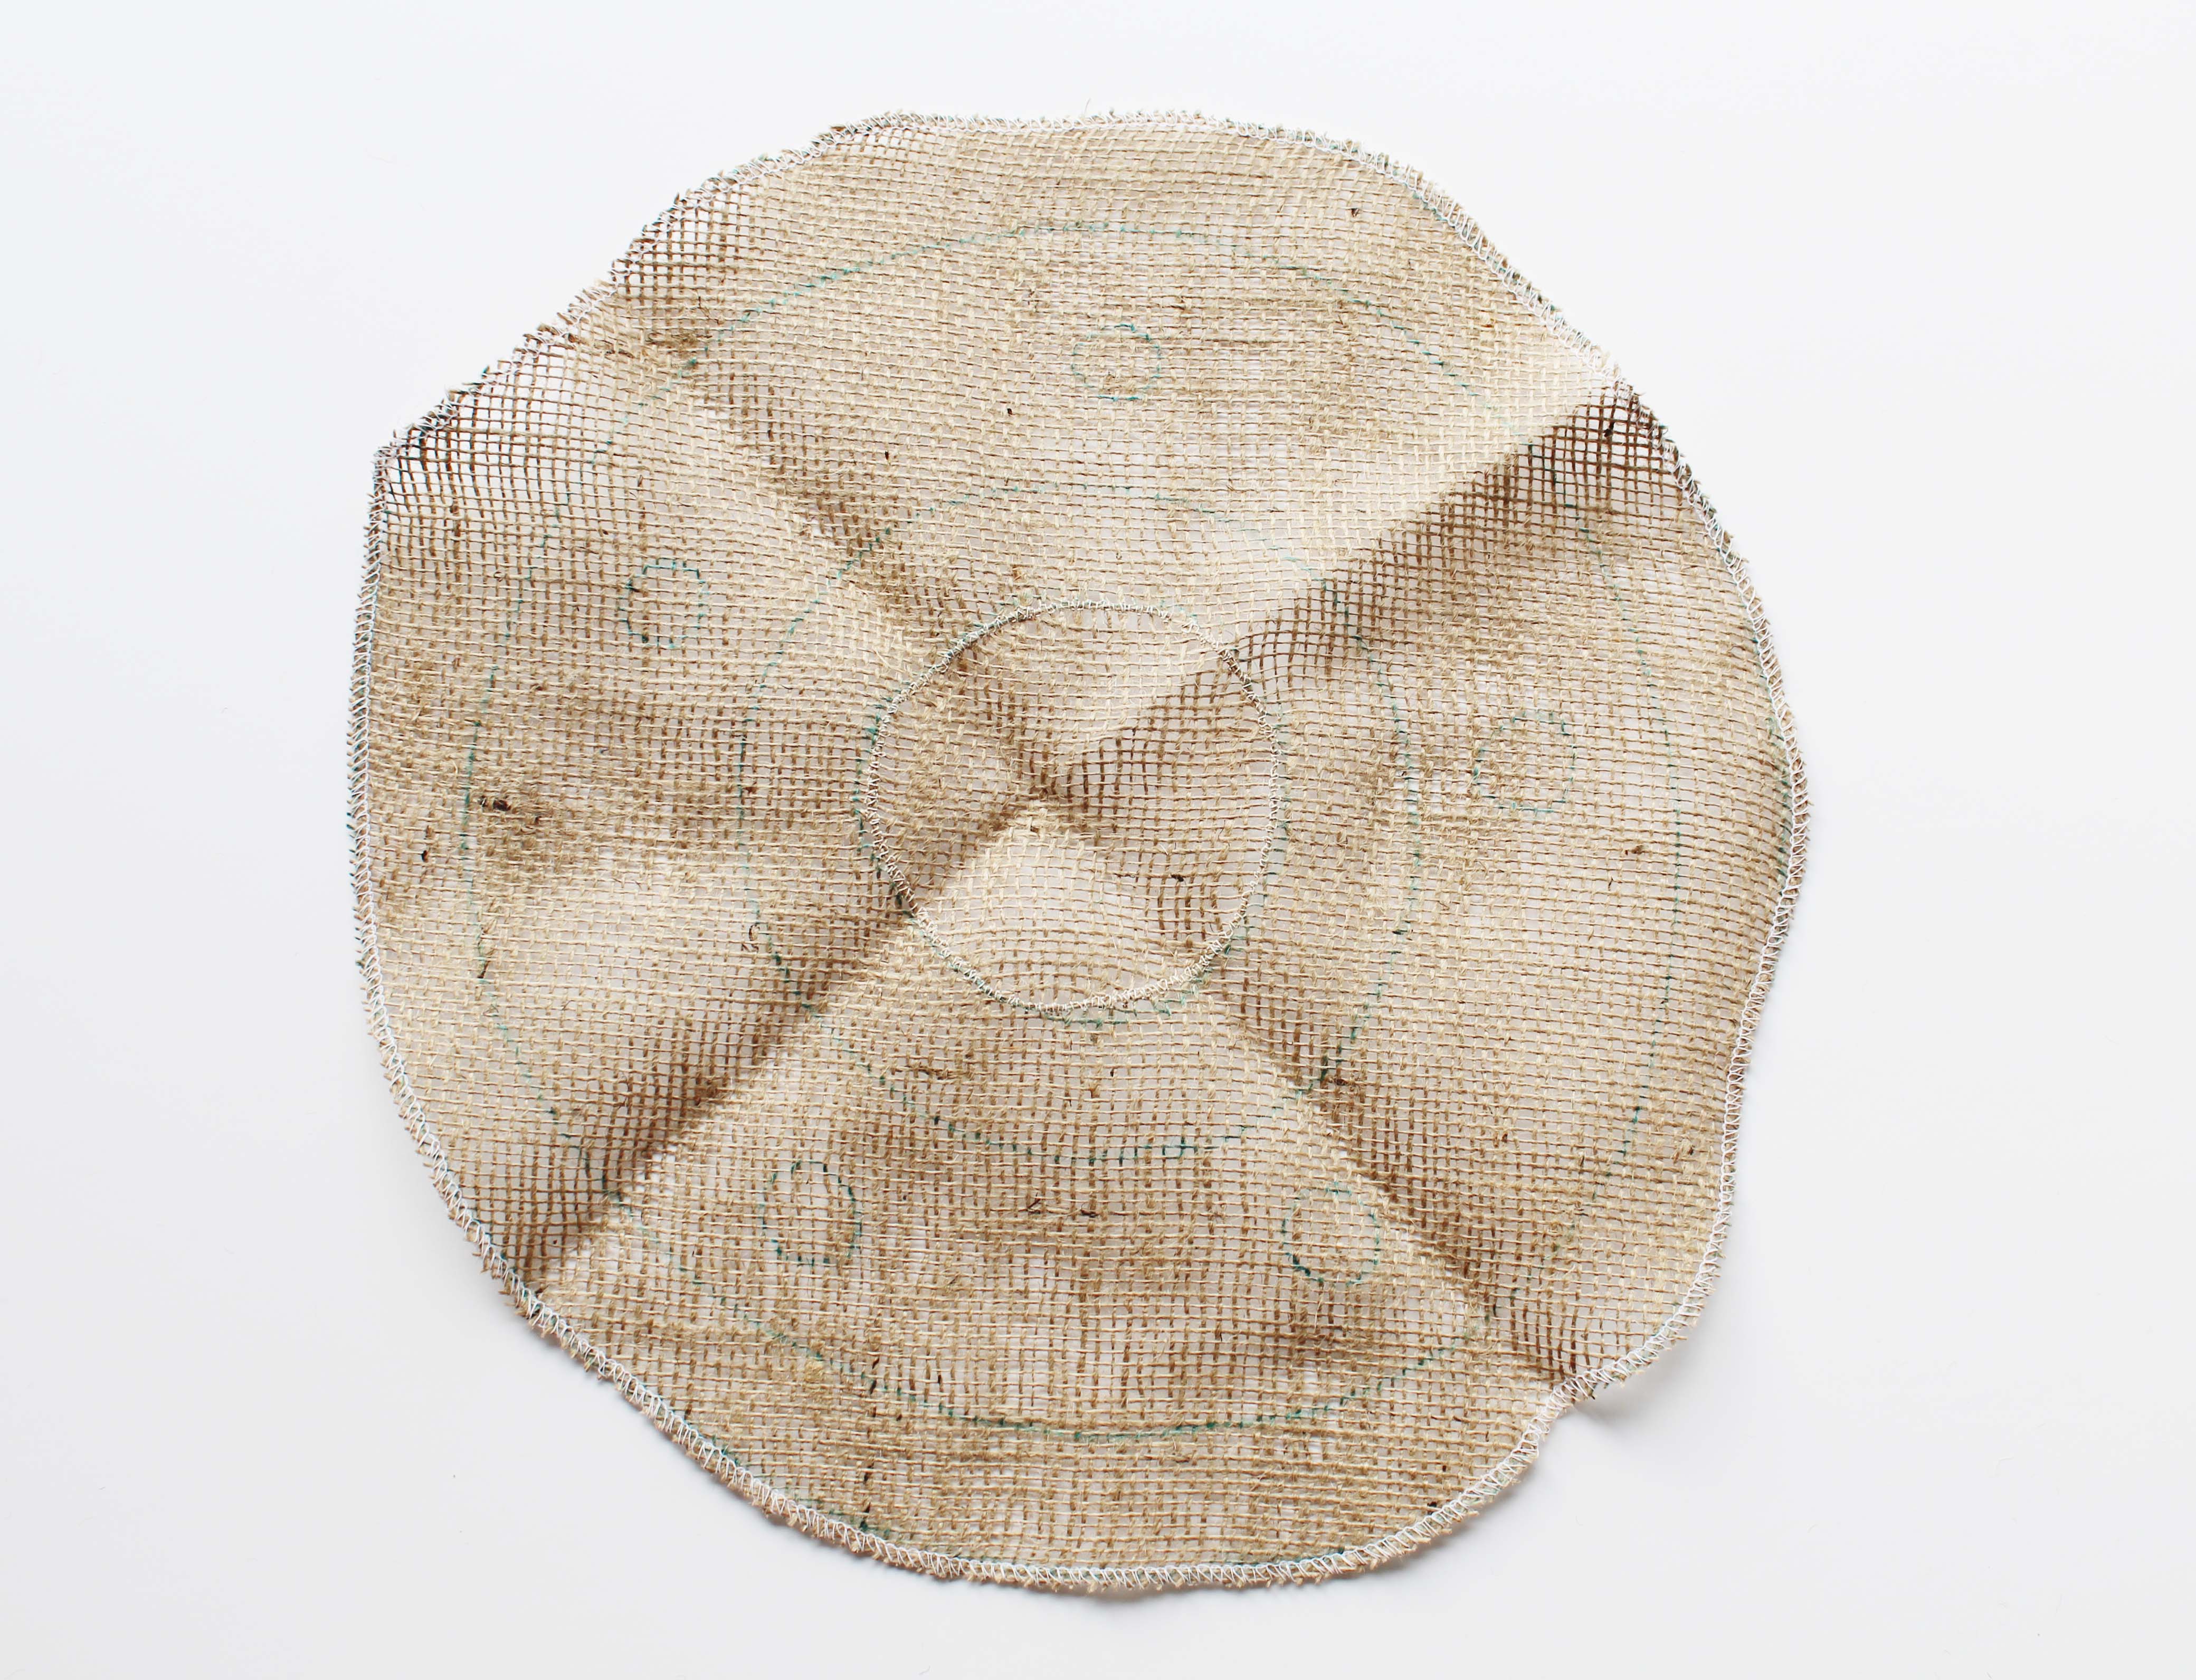
Step 2: Draw the wreath onto the hessian
Place the foam board ring onto the hessian, leaving a buffer of at least 5cm of spare hessian around the circumference of the outer ring. Draw around the inner and outer edges of the foam board ring using a marker pen.
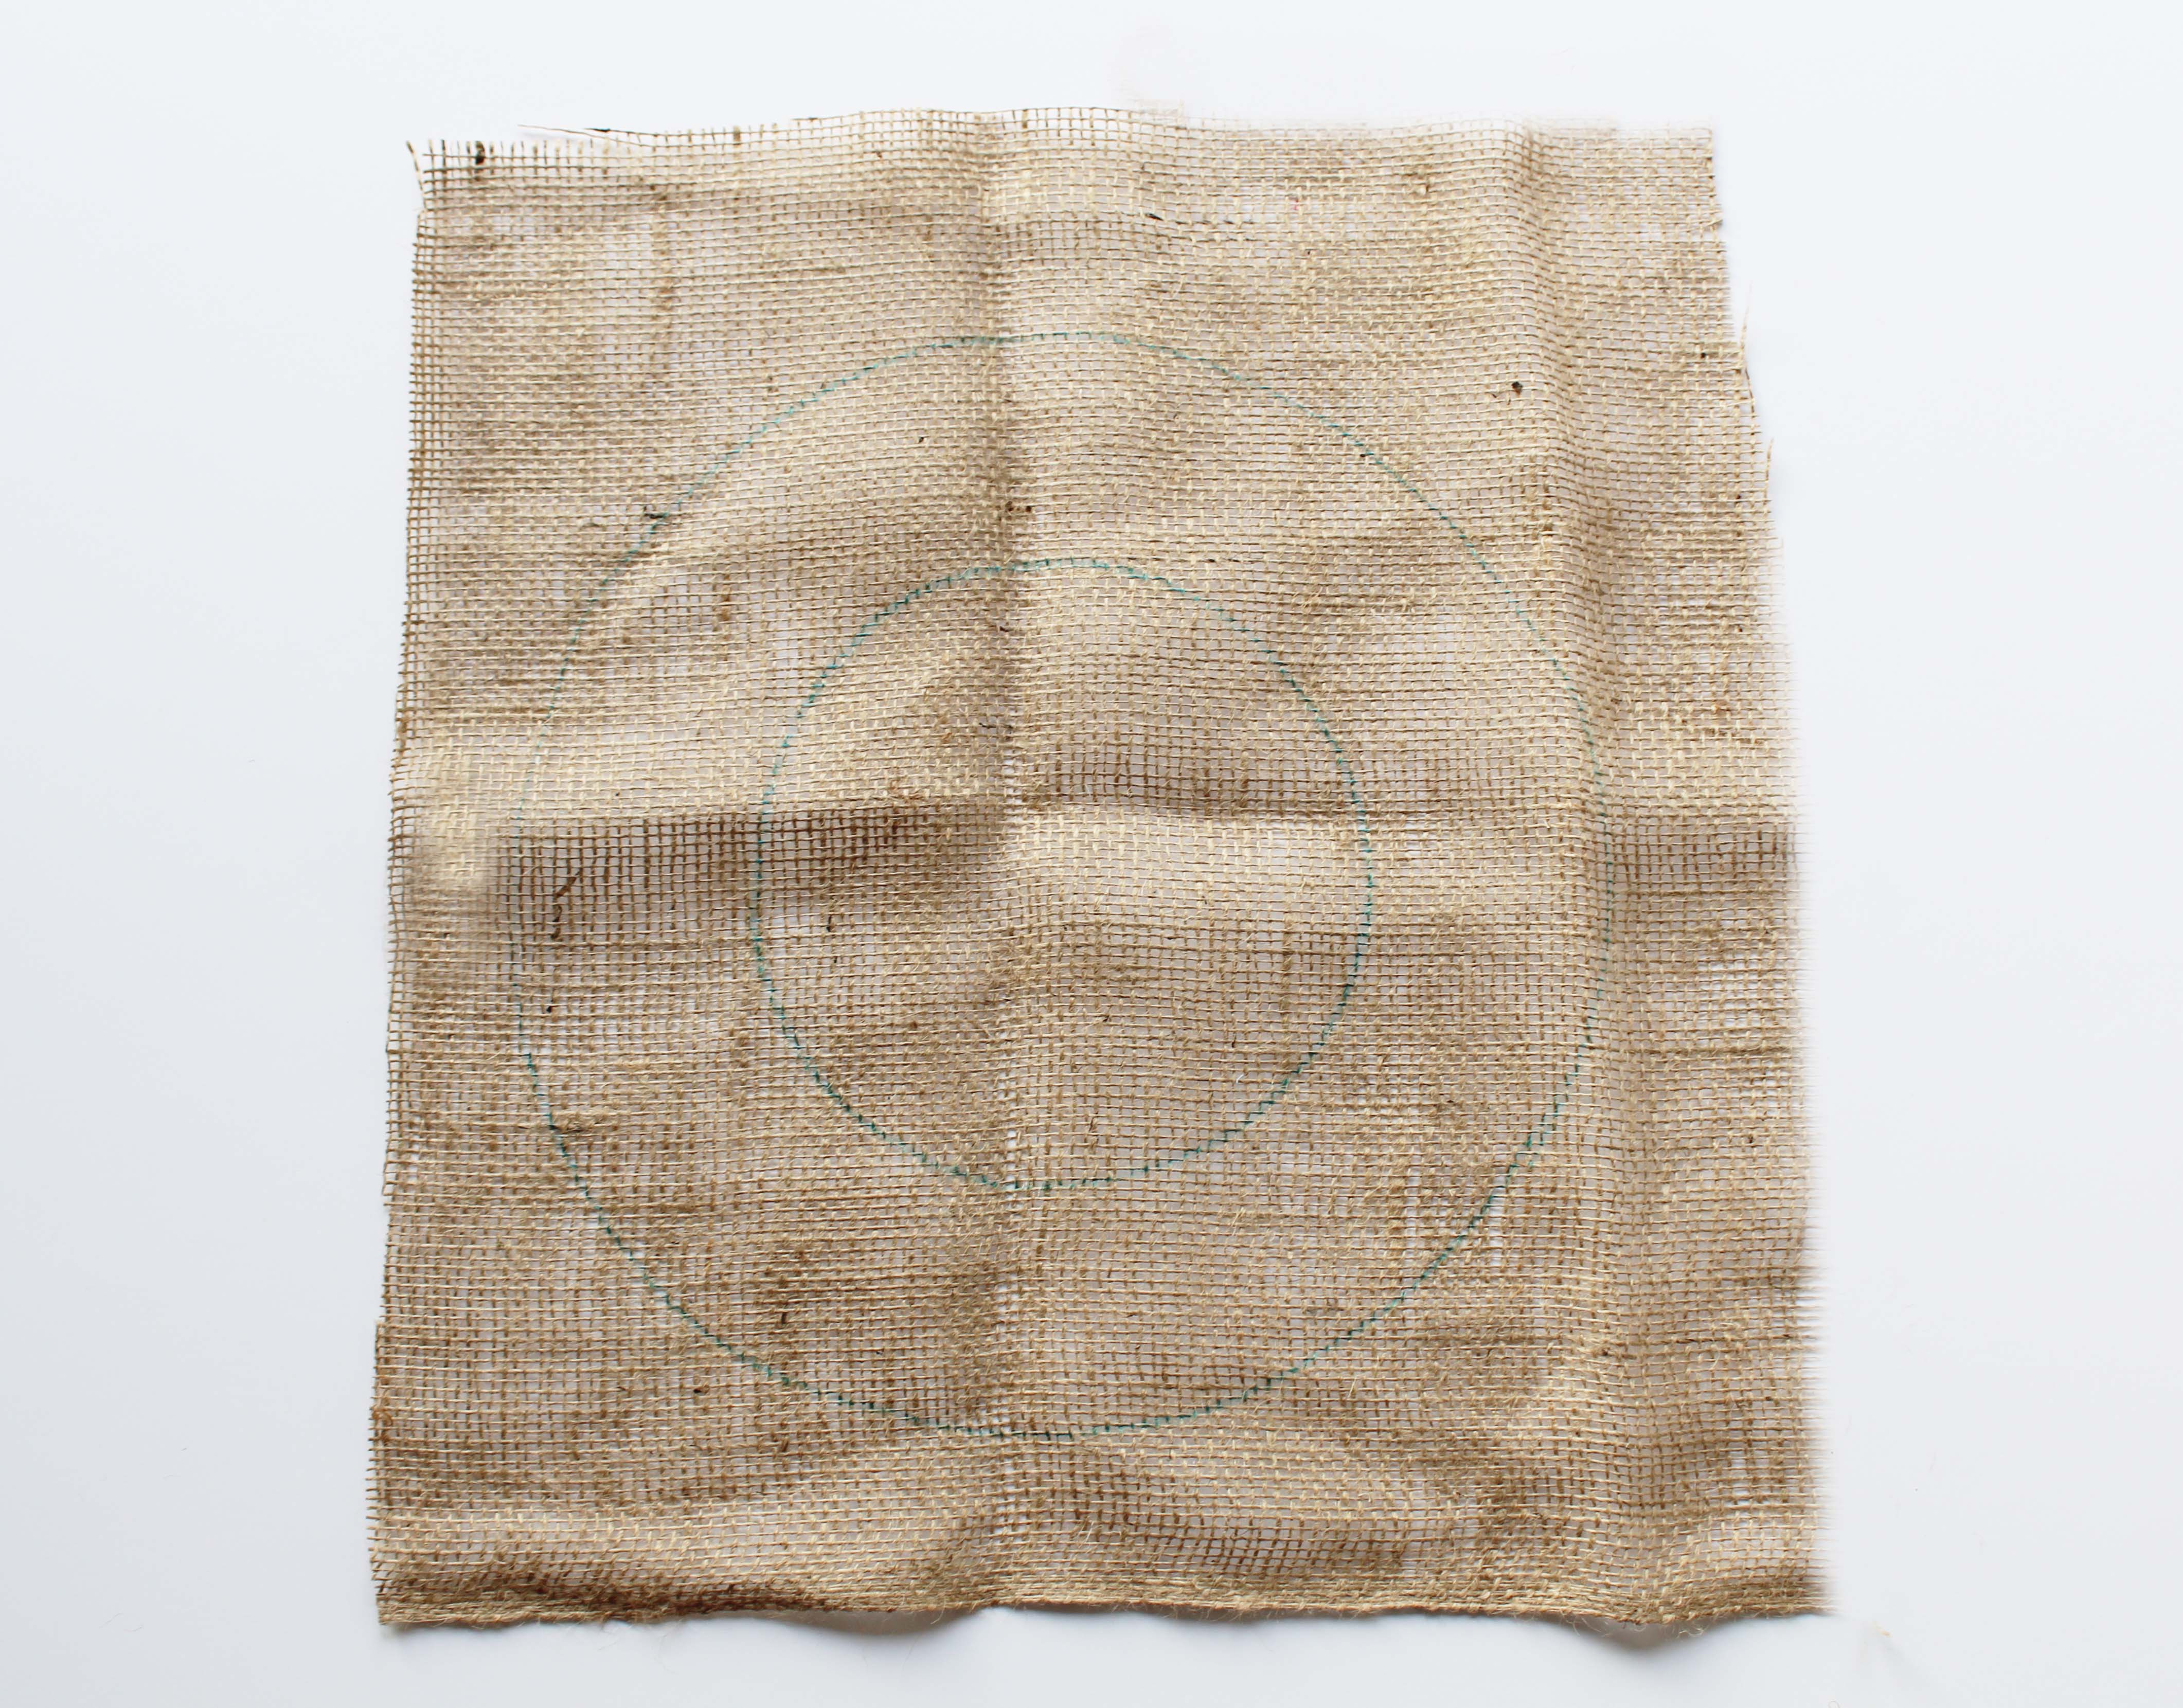
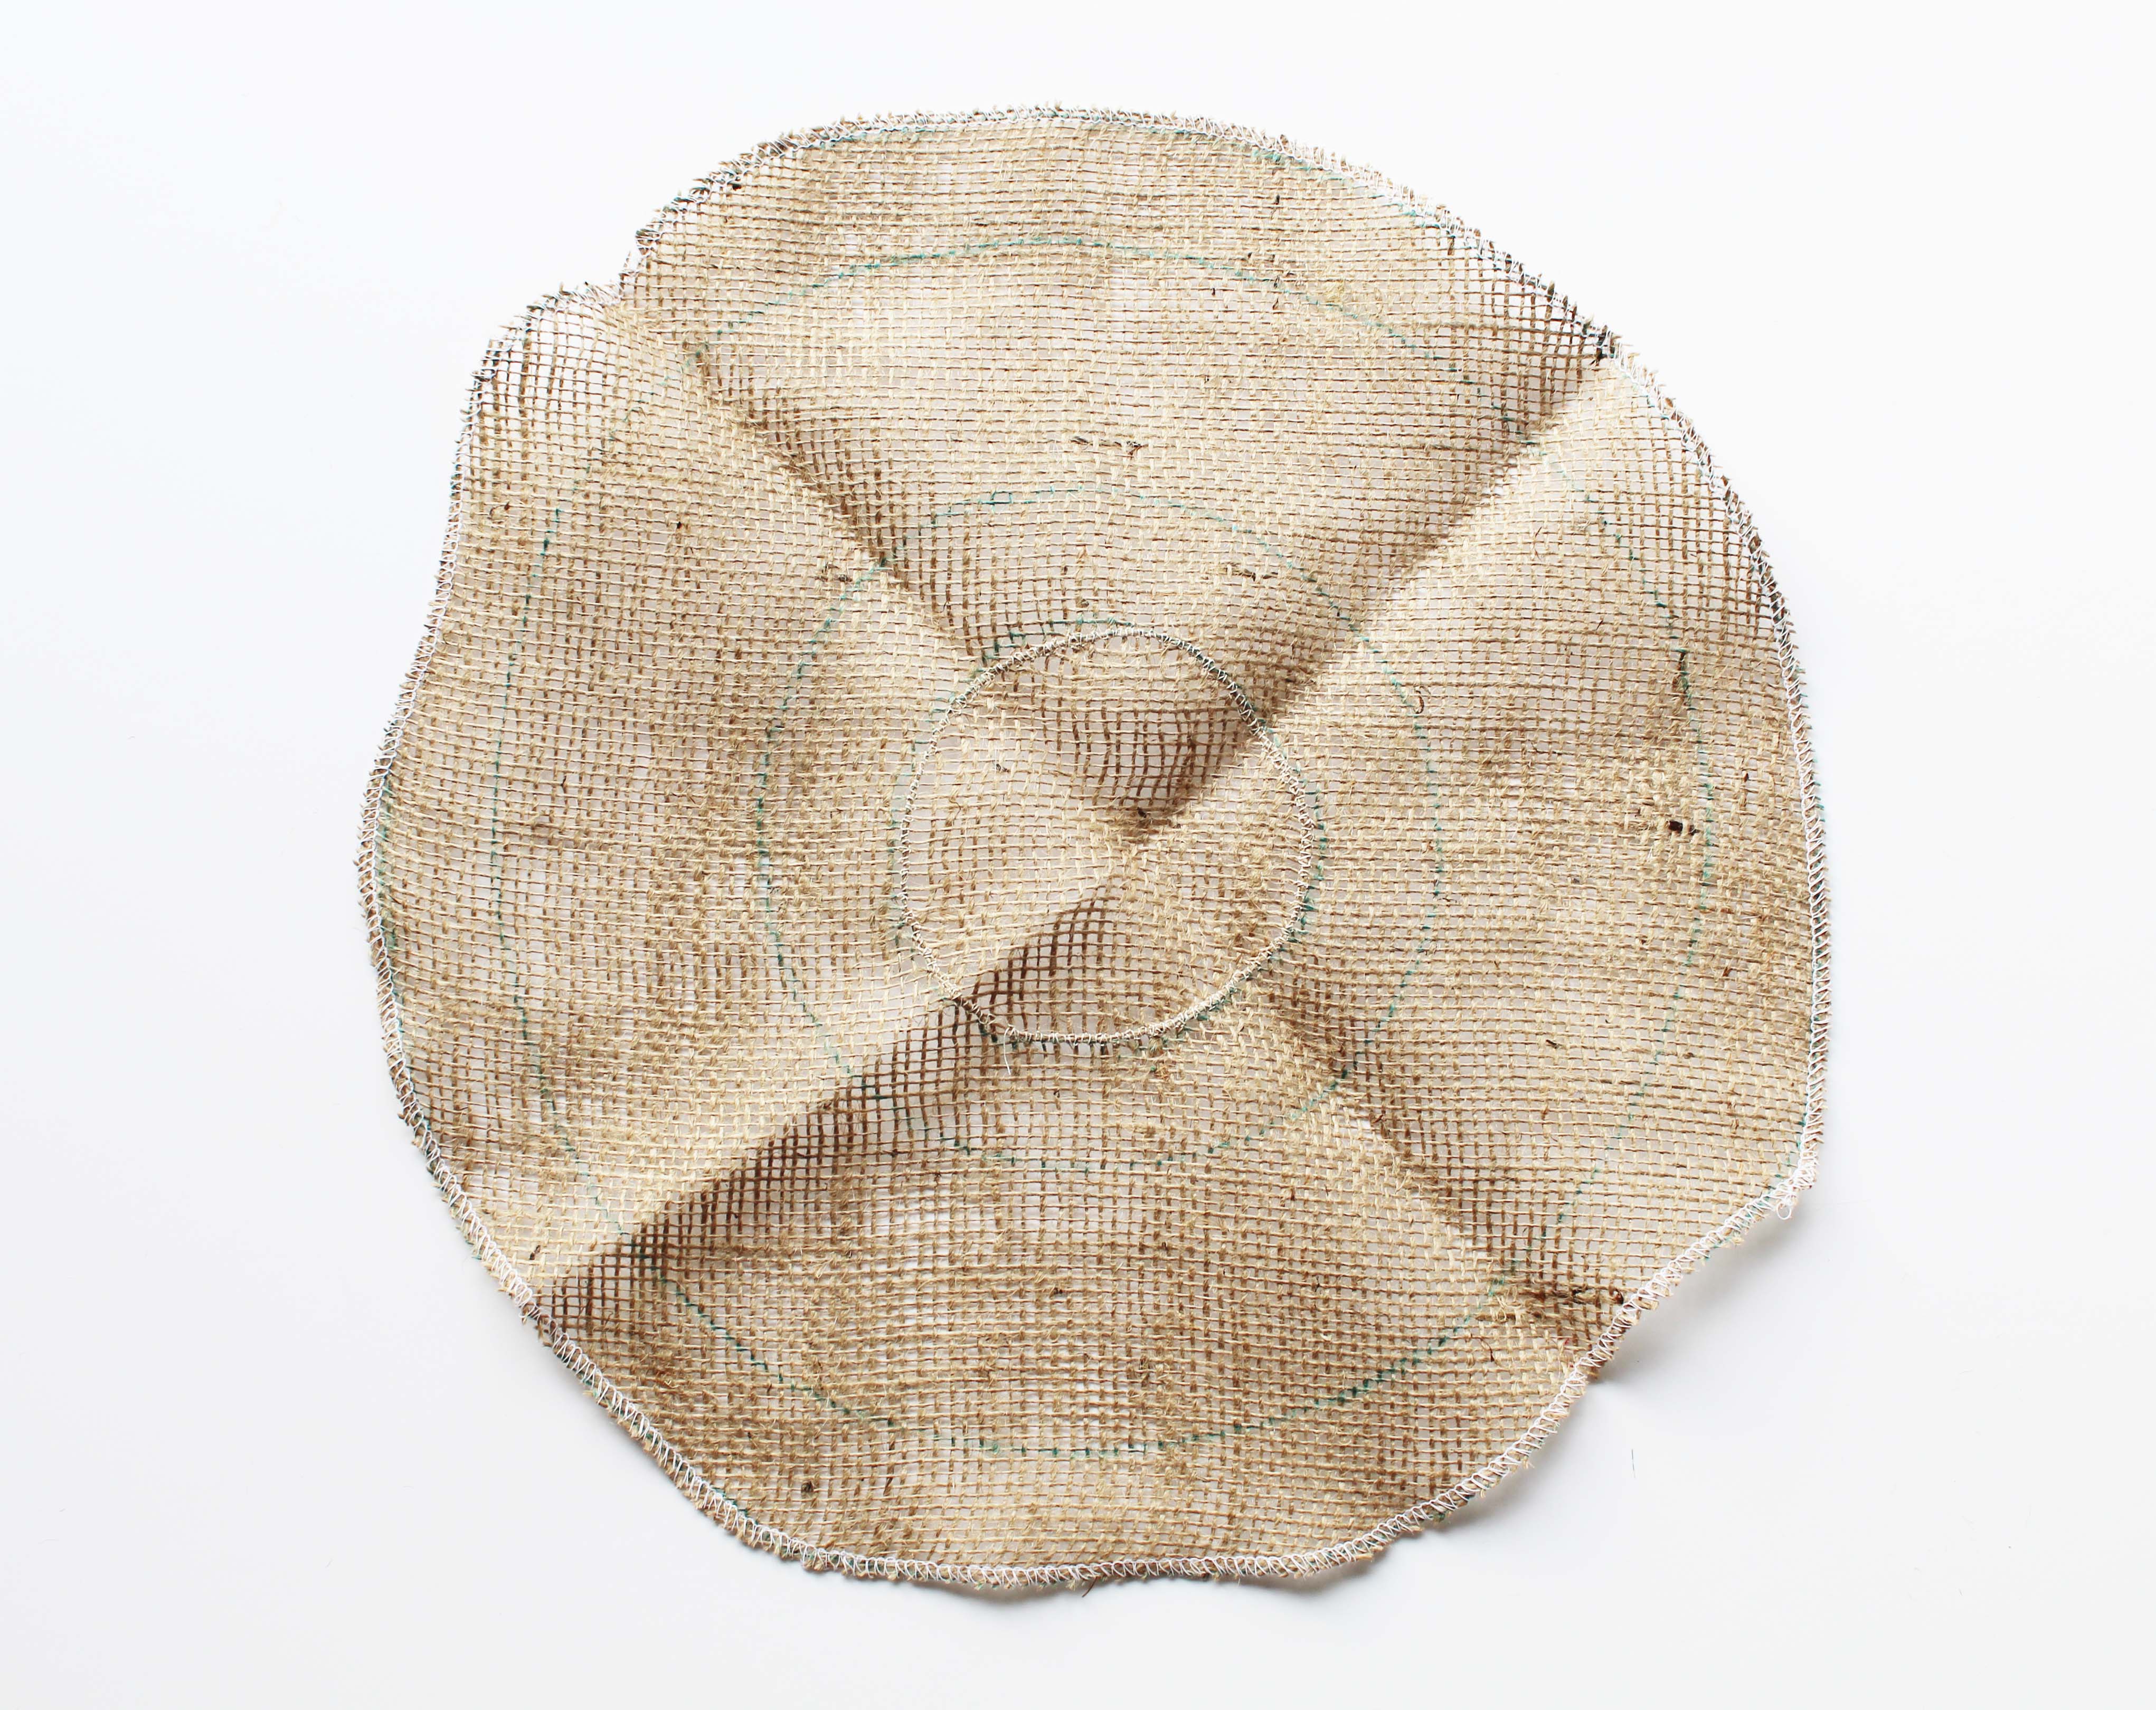
Step 3: Hem the hessian
Using placeholder hemming stitch (a wide zig zag stitch), hem the hessian about 3cm from the outer circle of the wreath and approximately 3cm inside the inner circle of the wreath. This will stop the hessian from fraying when you rag rug it.
Now that you’re all set with your hemmed hessian and foam board wreath mount, onto the fun part… the rag rugging itself…
WHAT YOU WILL NEED:
- Rag Rug Spring Tool or Latch Hook
- Hemmed Wreath Hessian (either pre-bought or hemmed as per the instructions above).
- Rag Rug Scissors or Fabric Scissors
- Fabric (I like to use red, green, gold and an accent patterned fabric to make my traditional Christmas wreaths).
- Pre-cut Foam Board Wreath Ring (either pre-bought or made as per the instructions above).
- Staple Gun / Glue Gun
- Felt or Thick Backing Fabric (this is to tidy up the back of your wreath at the end)
- Marker Pen (optional)
RAG RUG WREATH DESIGN TIPS:
Rag Rug Wreaths
Before getting started on your rag rug wreath, here are a few of our design tips:
- To make the flowers in the wreath look particularly great, use rich fabrics such as velvet or shiny fabrics to make them really pop. You can read more of our fabric tips here.
- Make sure to rag rug your red flowers right up to the very edge of the marked out wreath ring or they will appear too small once you’ve added the green into the design.
- Use a variety of different greens (at least three) to fill in between your flowers – this will make your design look more vibrant.
- Include a patterned fabric amongst your green to add interest.
- When filling in your green fabric, leave a bit of blank hessian around each of your flowers. This will create space for the flowers to open out.
Step 4: Mark up your hessian
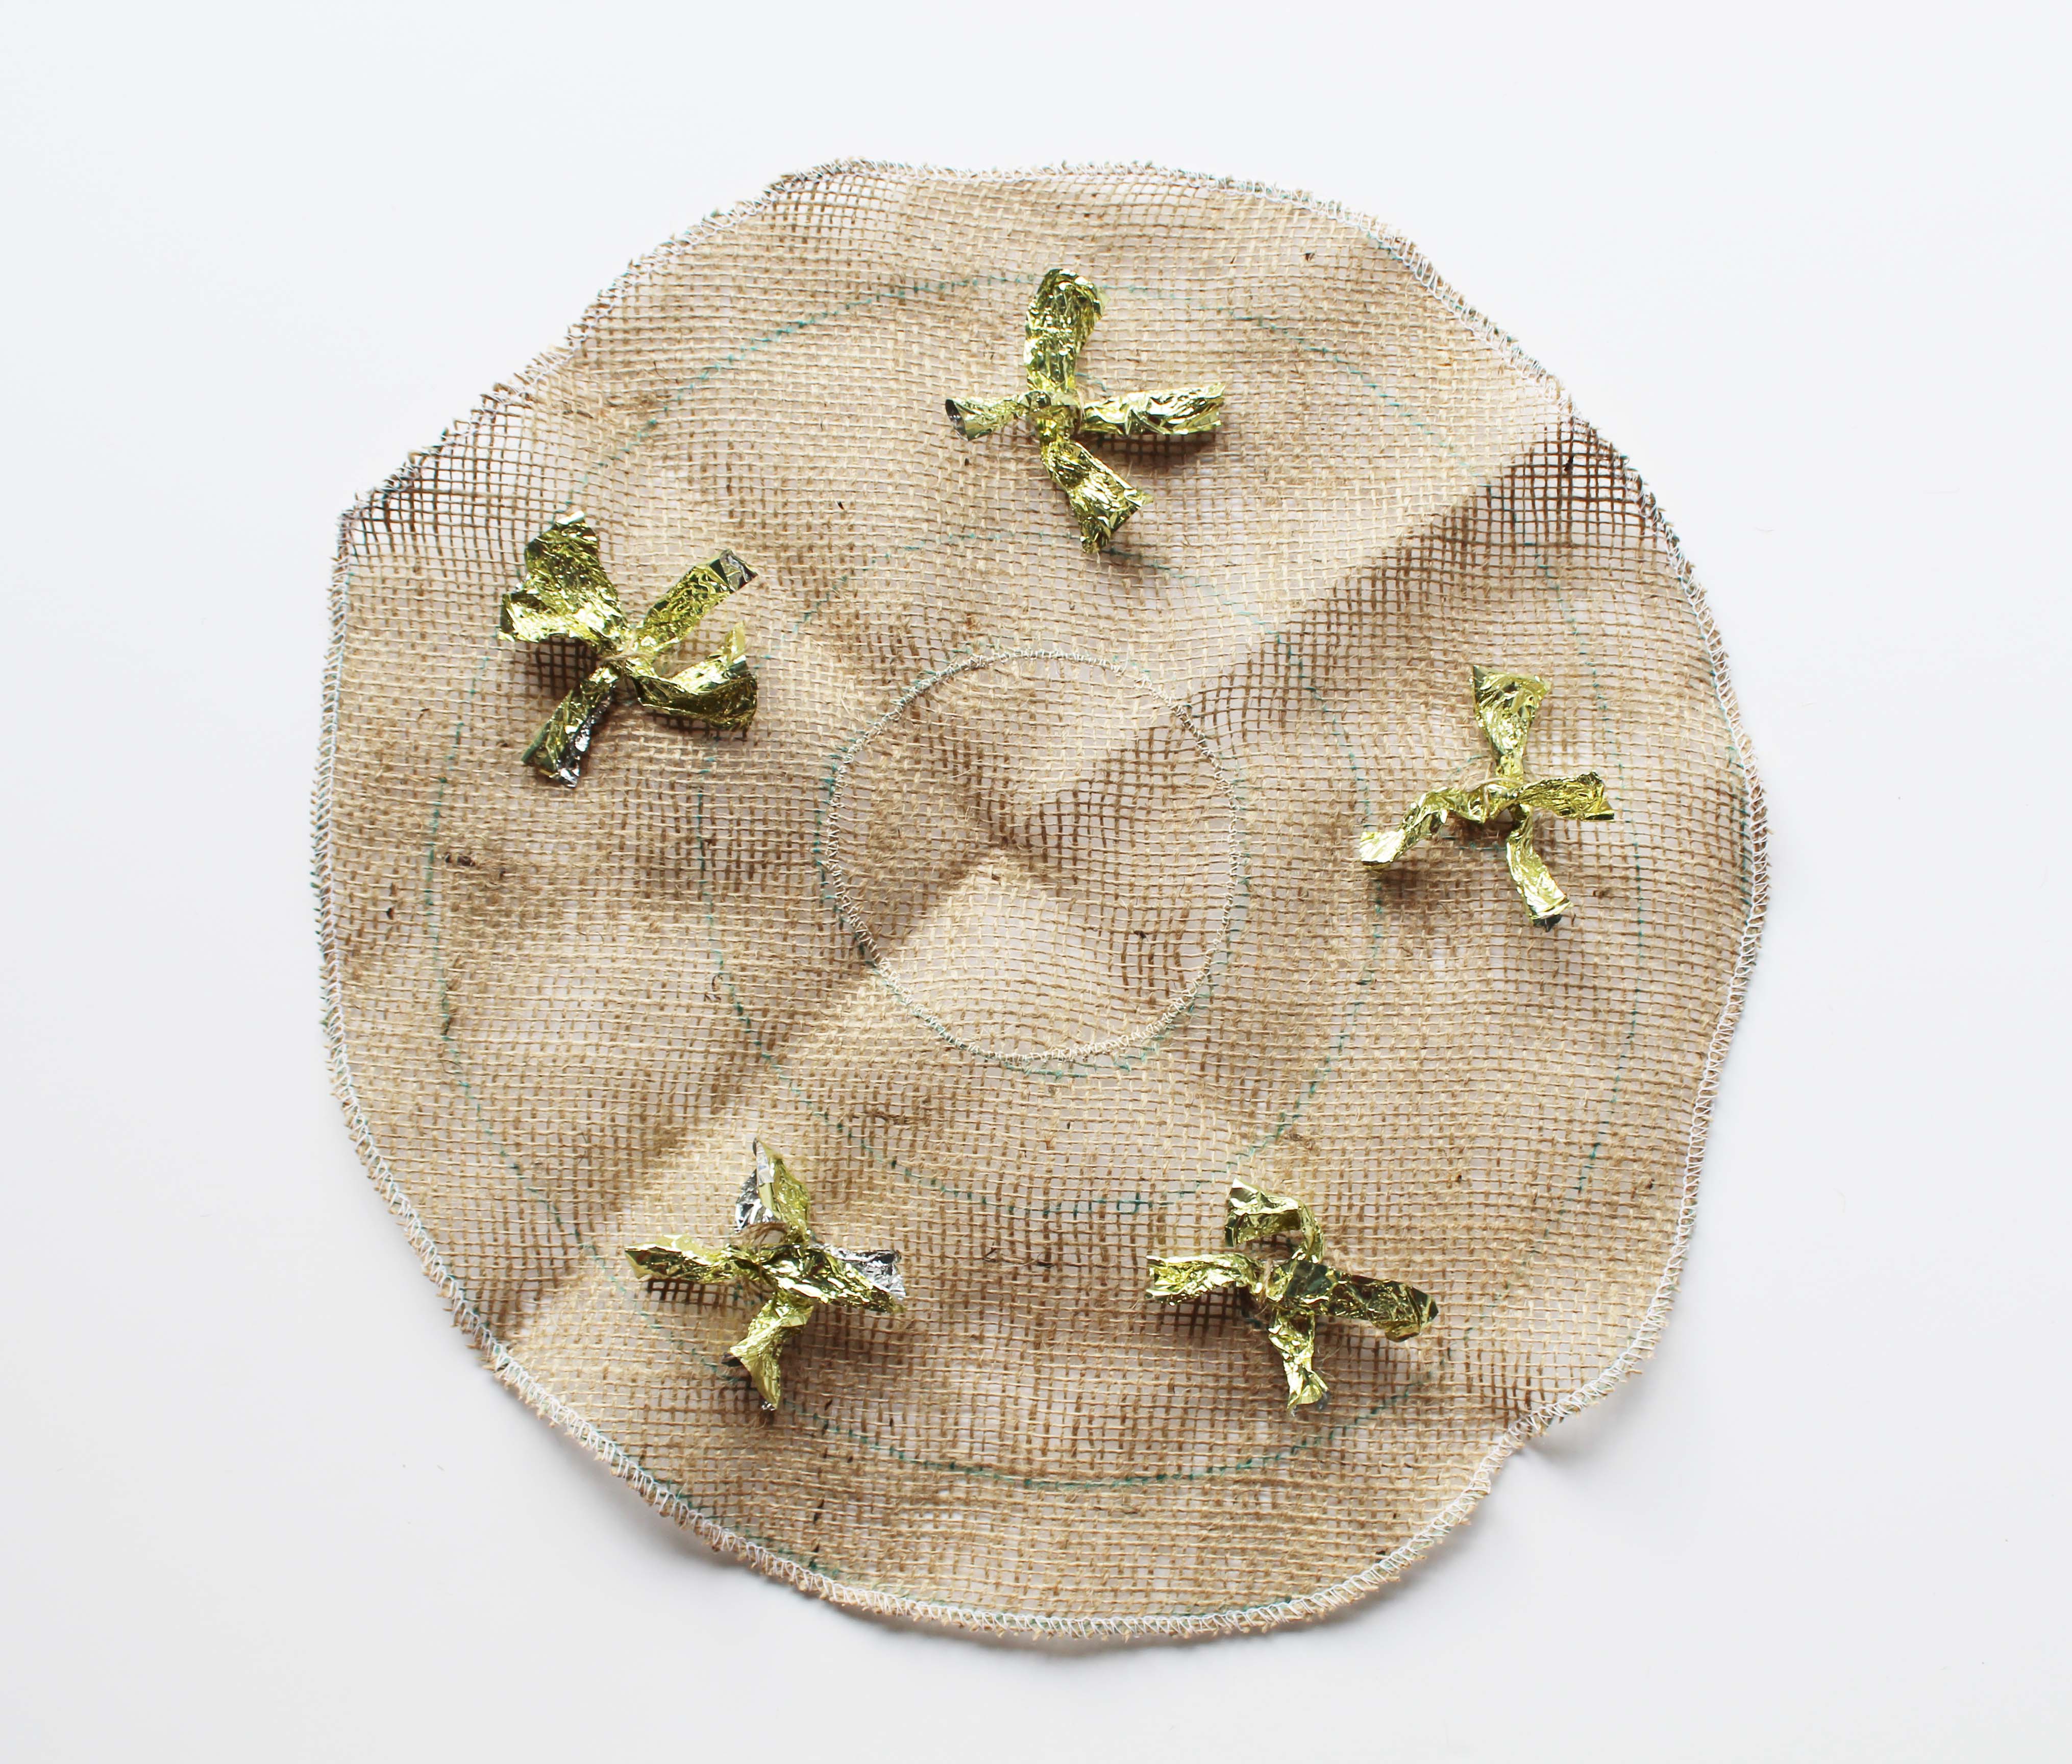
This is the nice part – choosing what design you fancy for your wreath. If you’re looking to make a traditional rag rug Christmas wreath then we recommend drawing five circles in the middle of the ring, equidistant from each other. These will become five stunning flowers. If you have bought your hessian from the Ragged Life Shop then these will already be marked on.
Step 5: Rag rug your flowers
At this stage you may want to remind yourself how to do shaggy rag rugging as there’ll be a fair bit to do. You can see our easy to follow video here:
And now it’s time to get started! If you’re doing a traditional style Christmas wreath then we find the best way to get started is to begin in the centre of the flowers and work your way out. Here we’ve used gold toffee wrappers as the centre of our flowers…
Next, take your first red and work around the centres of the flowers in consecutive circles. Feel free to use a few different shades of red, but it generally works best to end on a plain, bold red to help the flowers stand out in the sea of green. When building up the flowers, occasionally turn the hessian over to make sure that you’re not going too wonky.
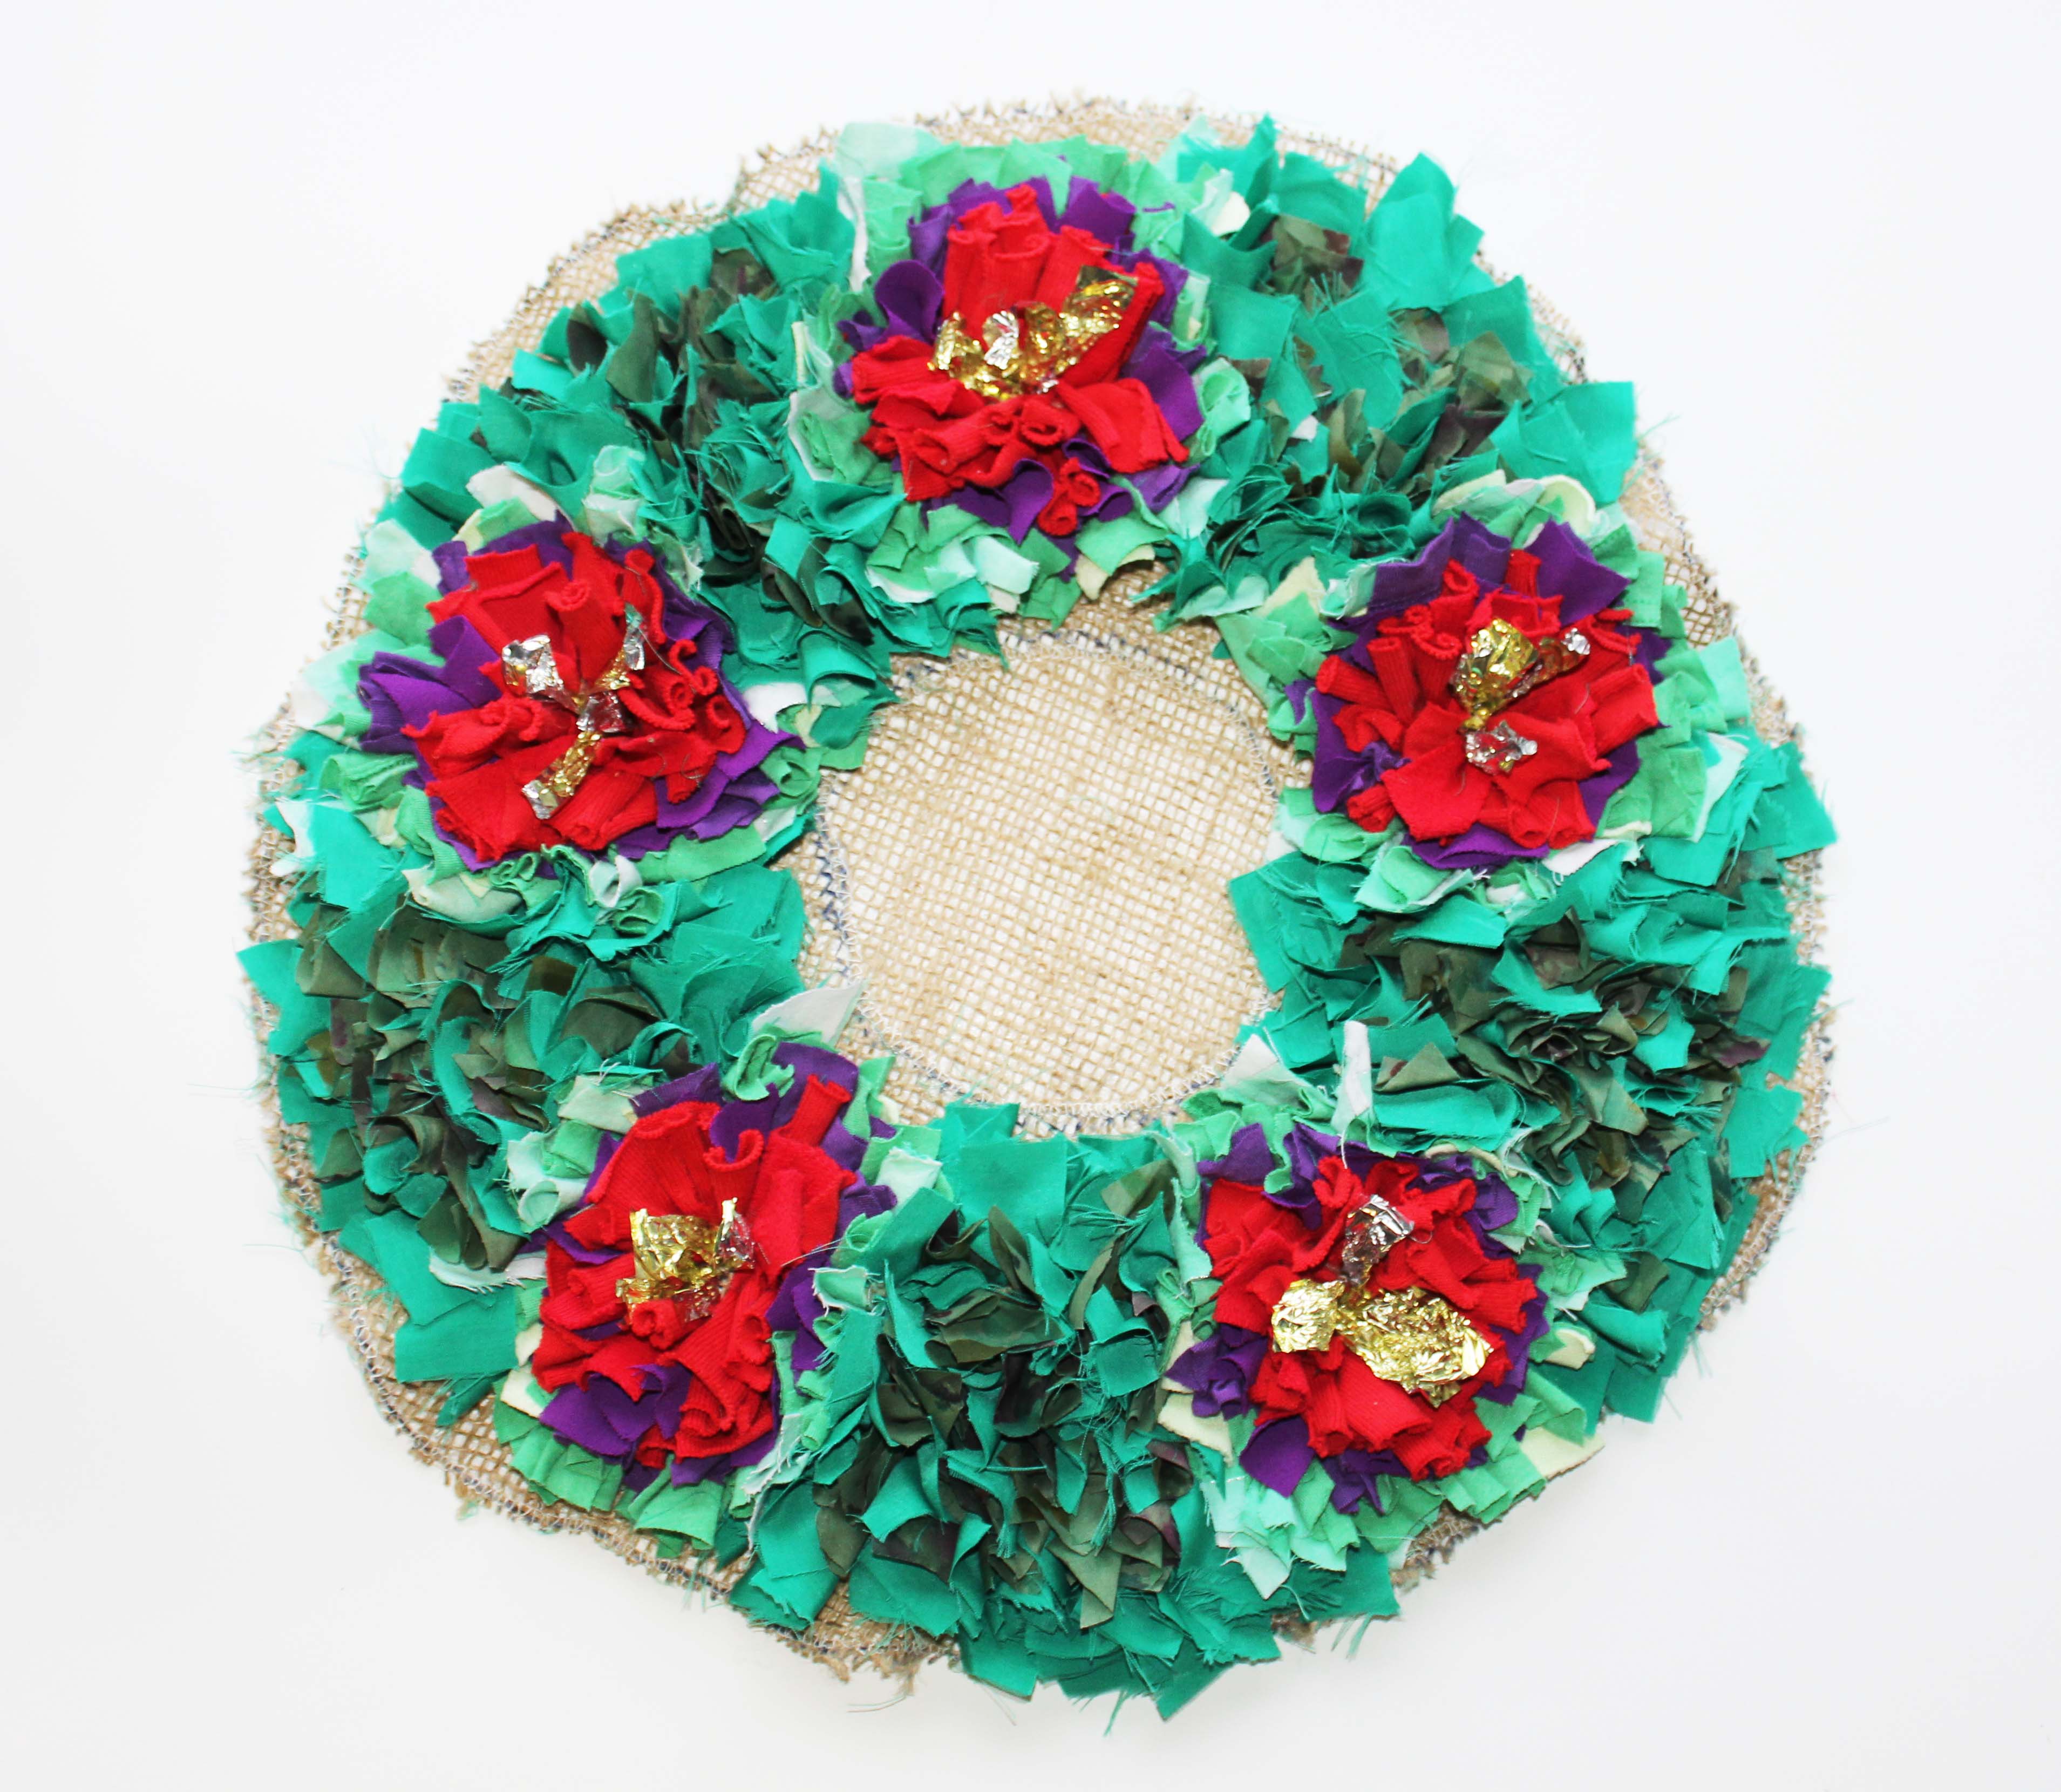
Step 6: Fill in the foliage
Once your flowers are complete, you fill the rest of the ring with a mixture of different greens. Remember to leave a bit of blank hessian around each of your flowers to leave them space to spread out.
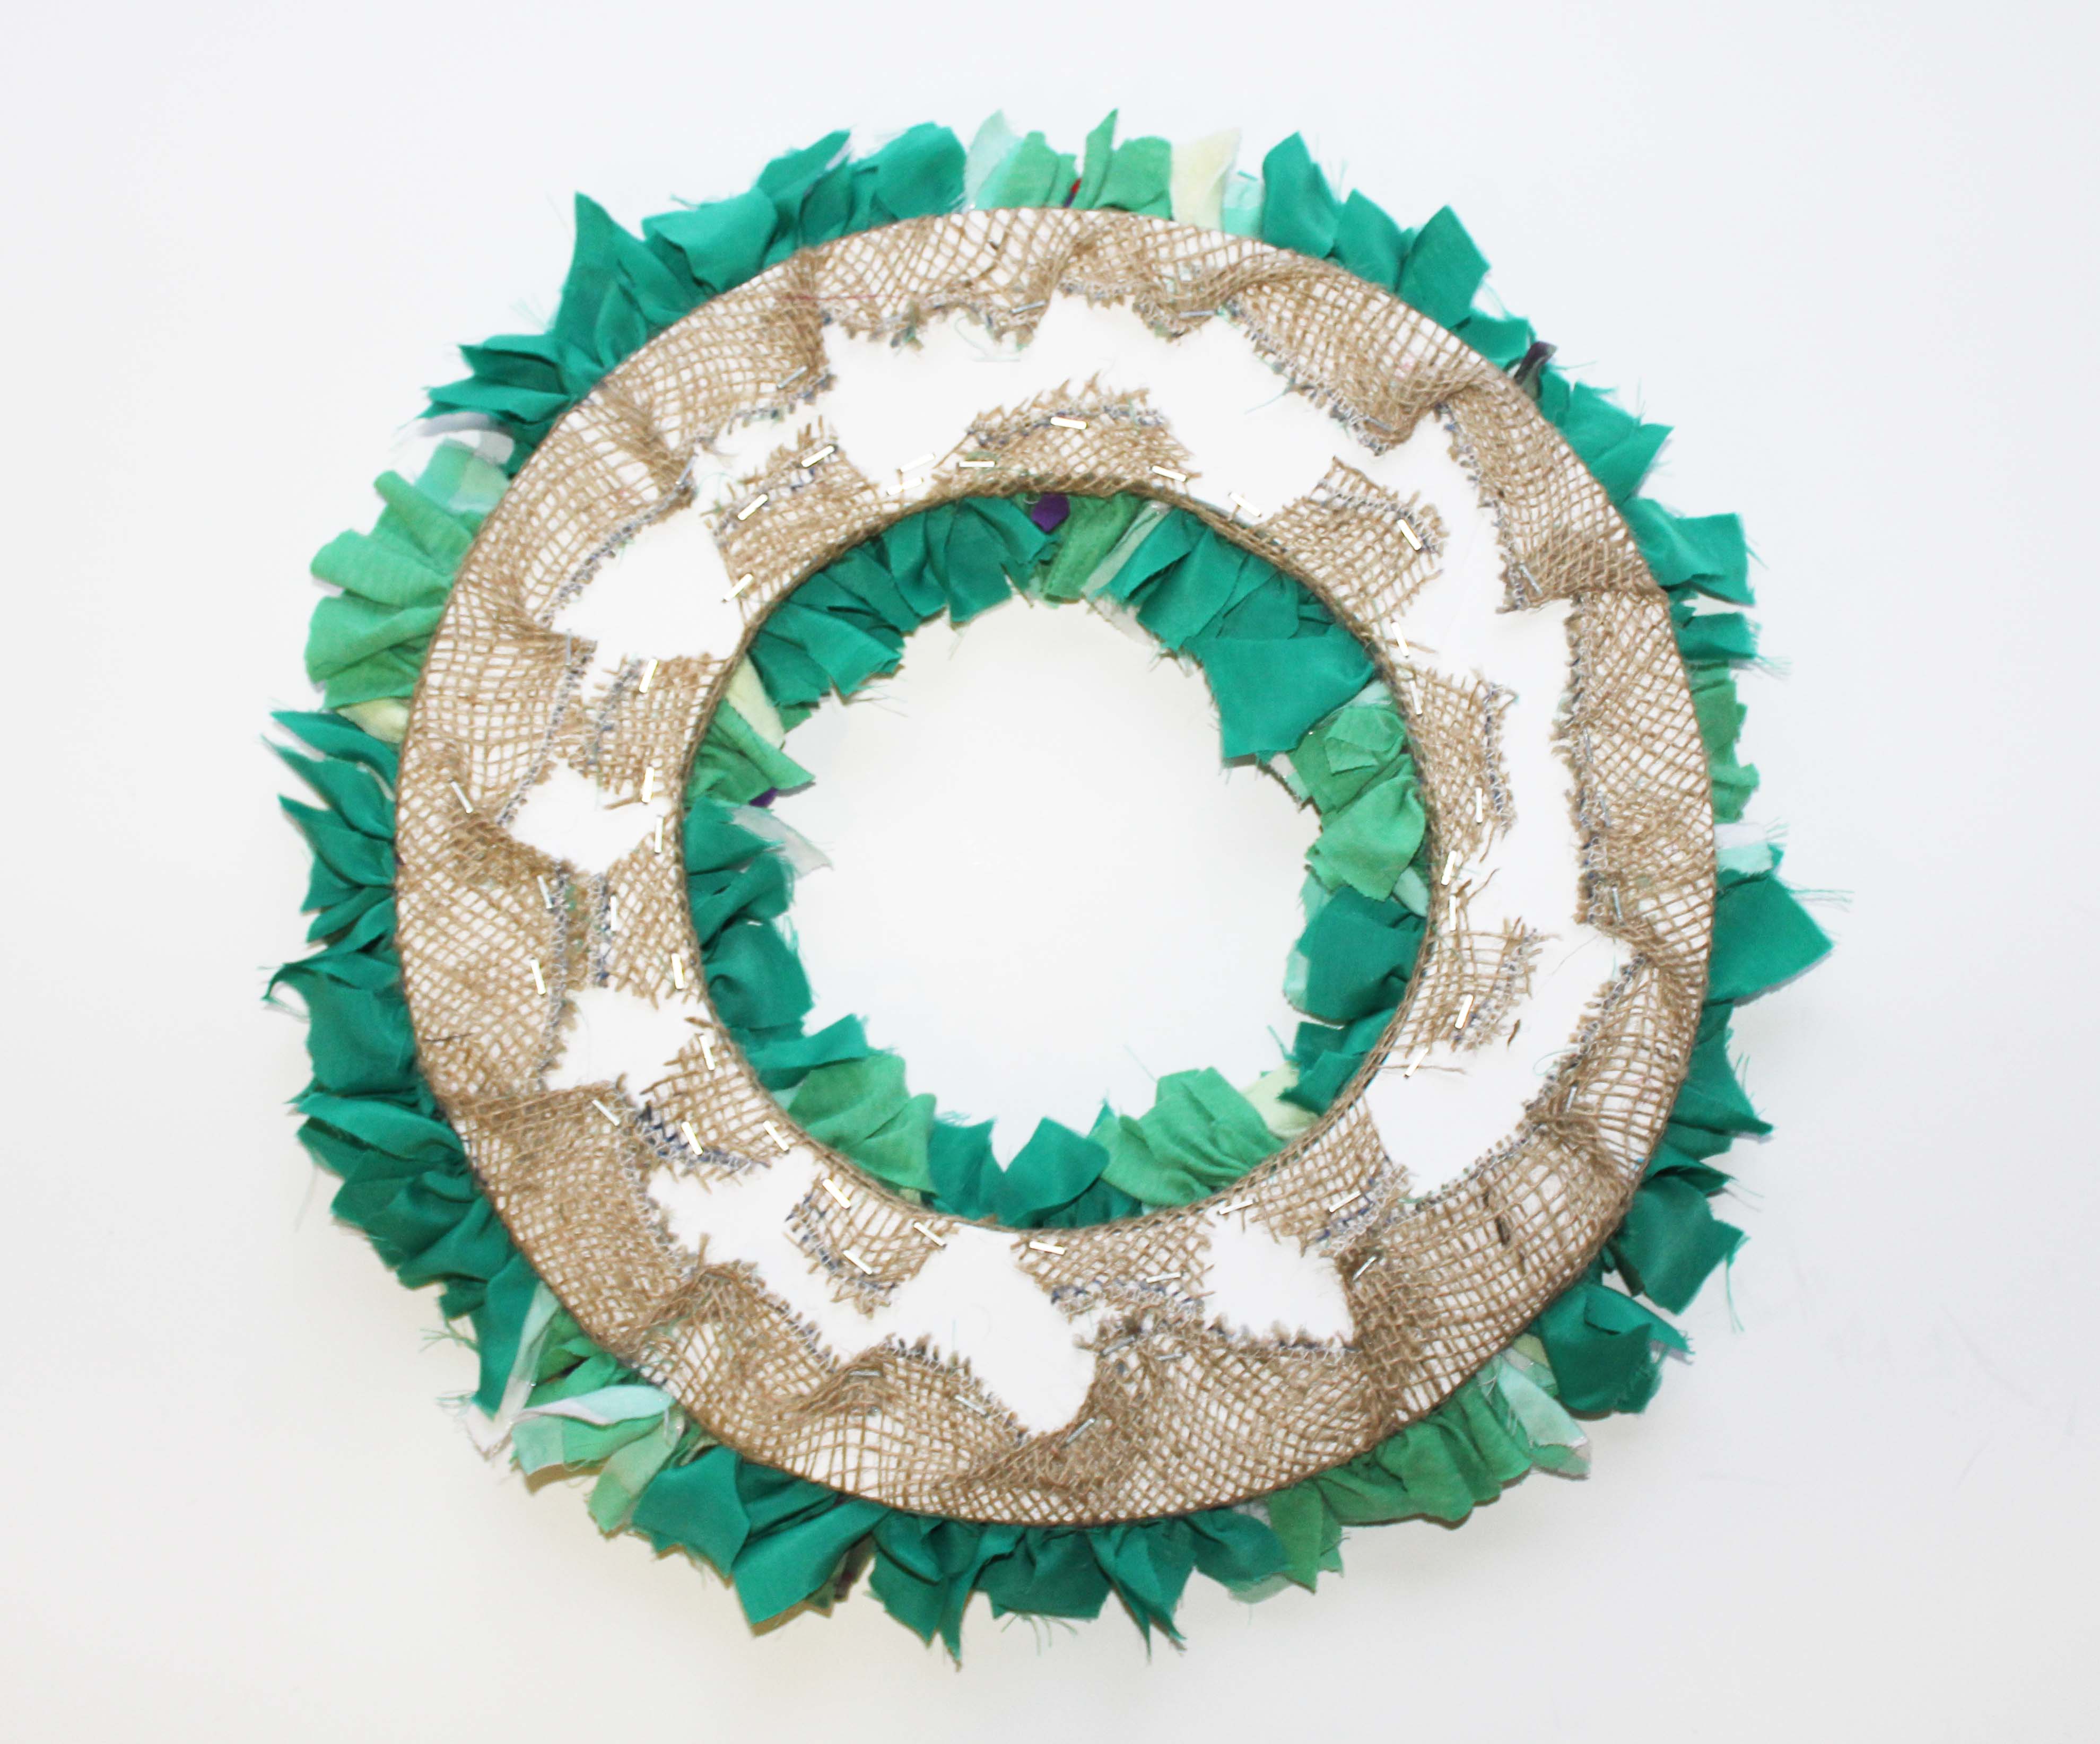
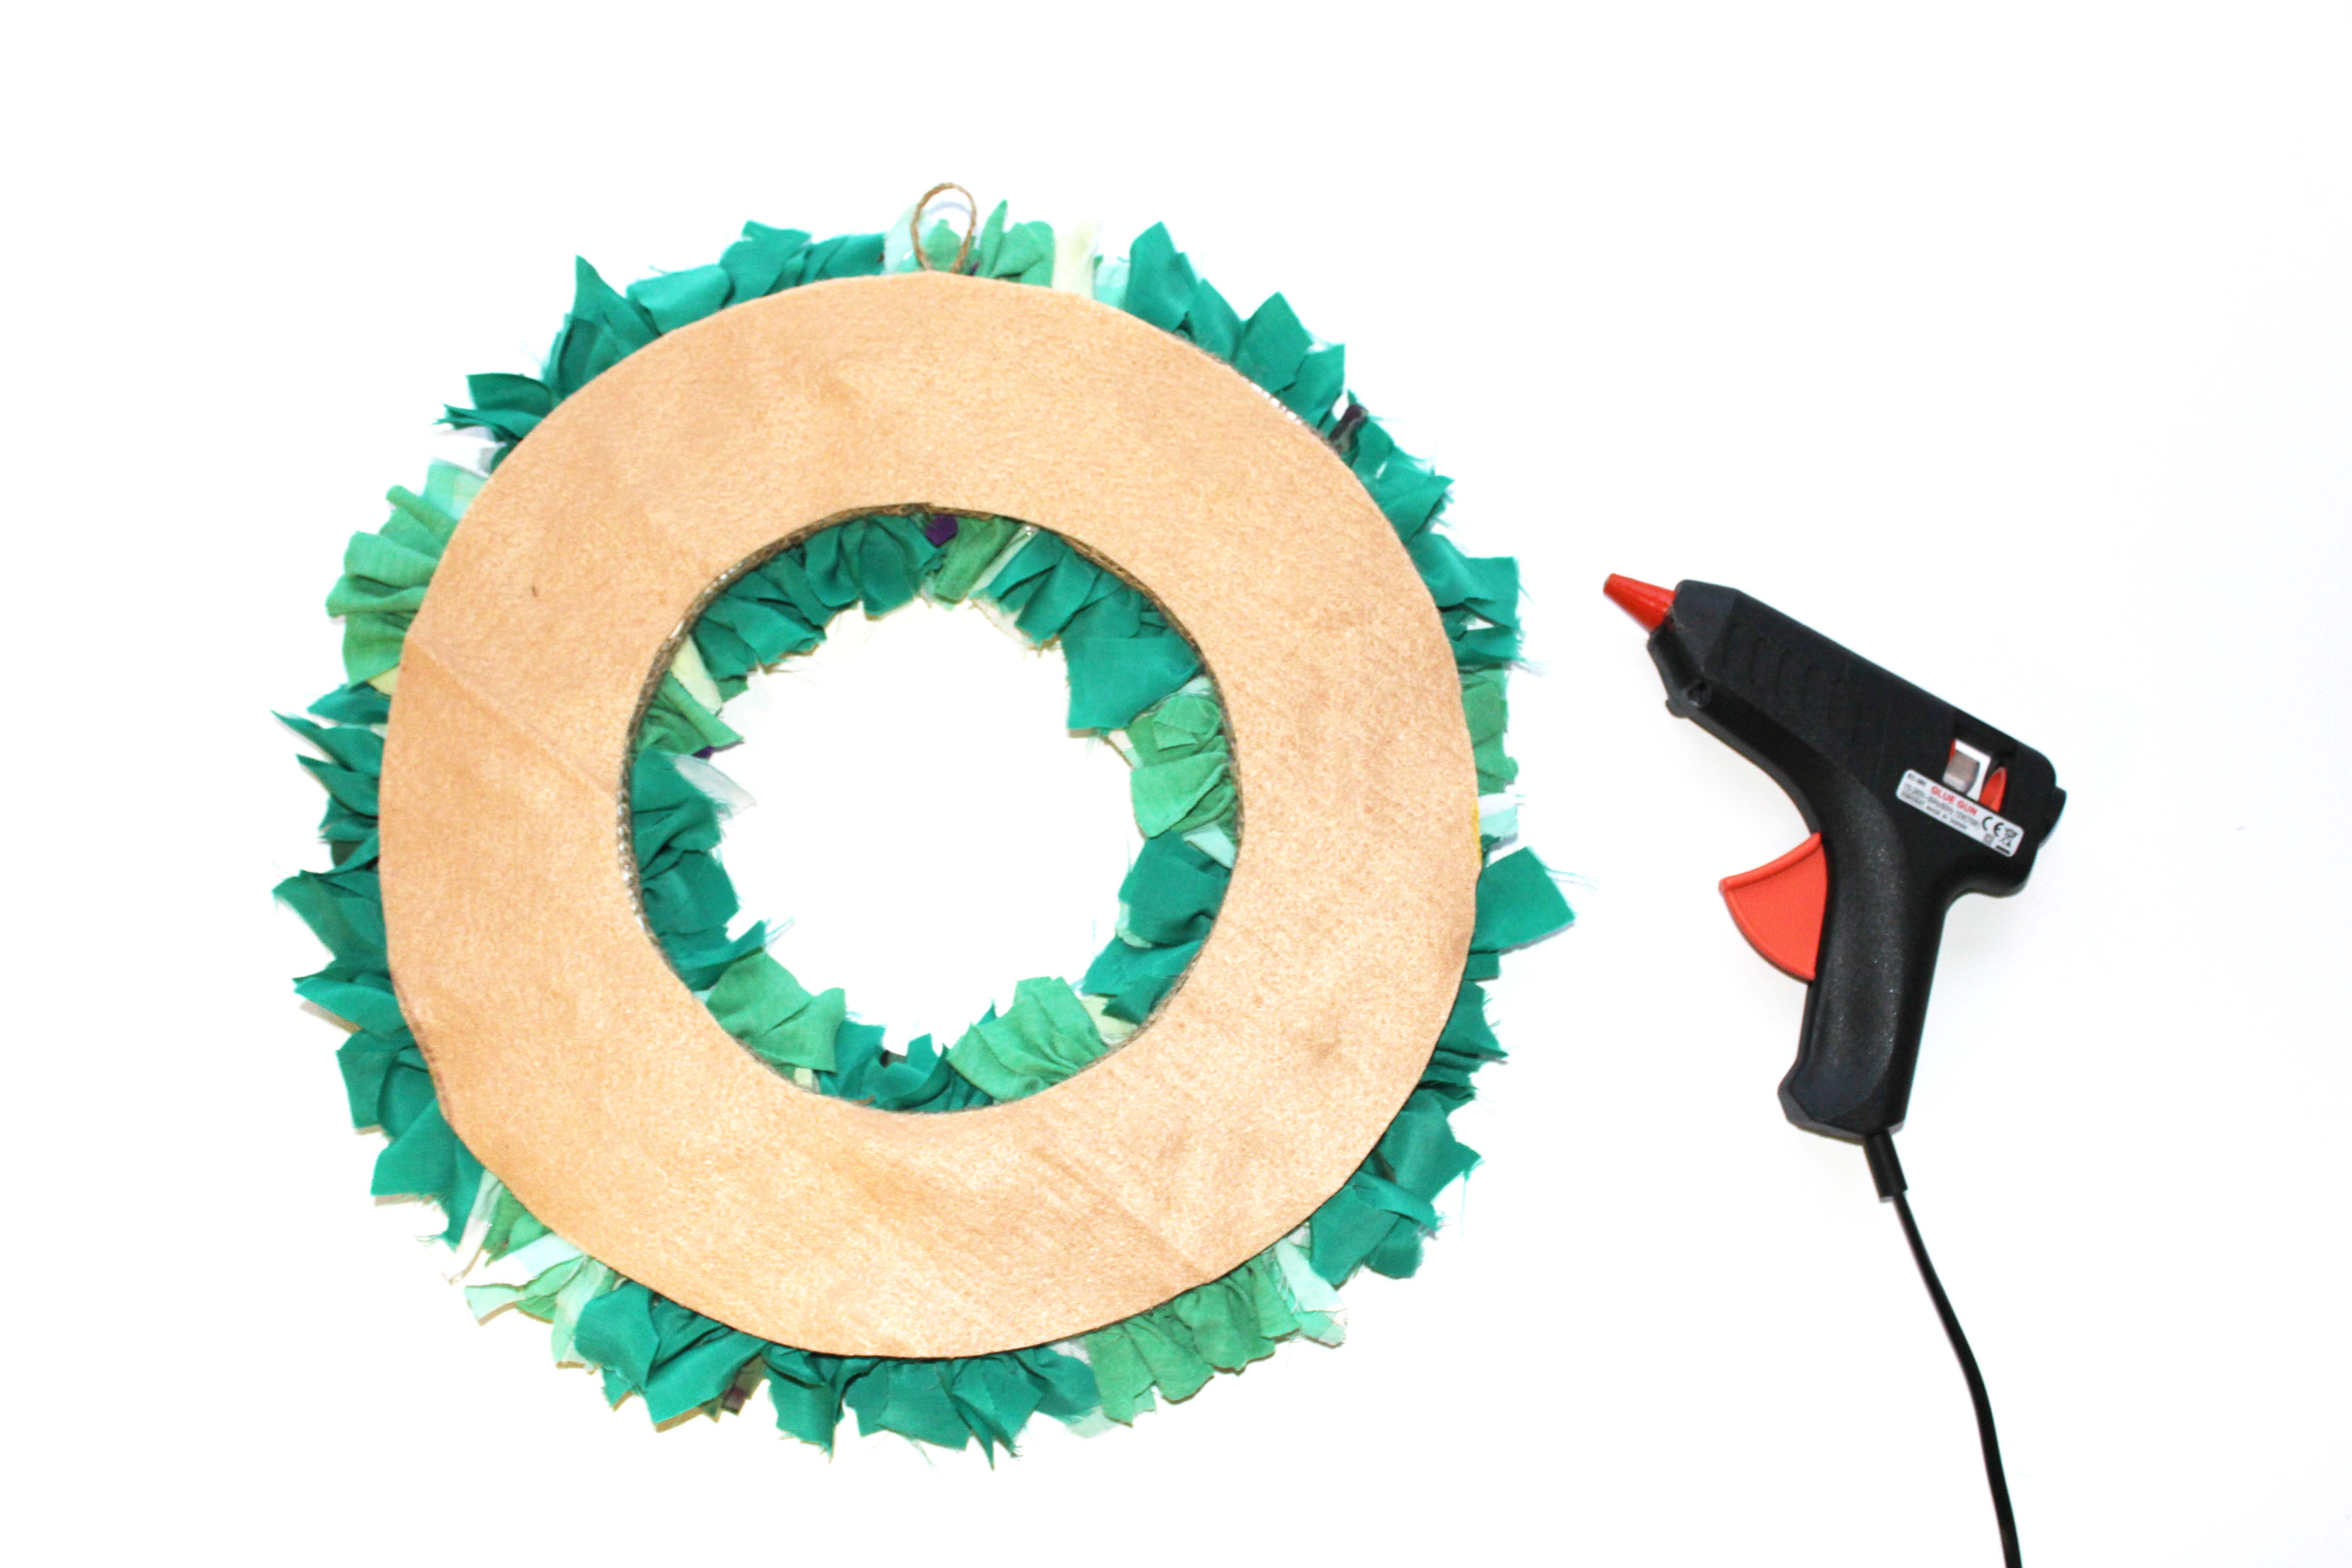
Step 7: Attach your wreath to the foam board ring
Once you’re happy with how your rag rug wreath is looking, turn the hessian shaggy side down and align your foam board ring with the rag rugged part of the wreath.
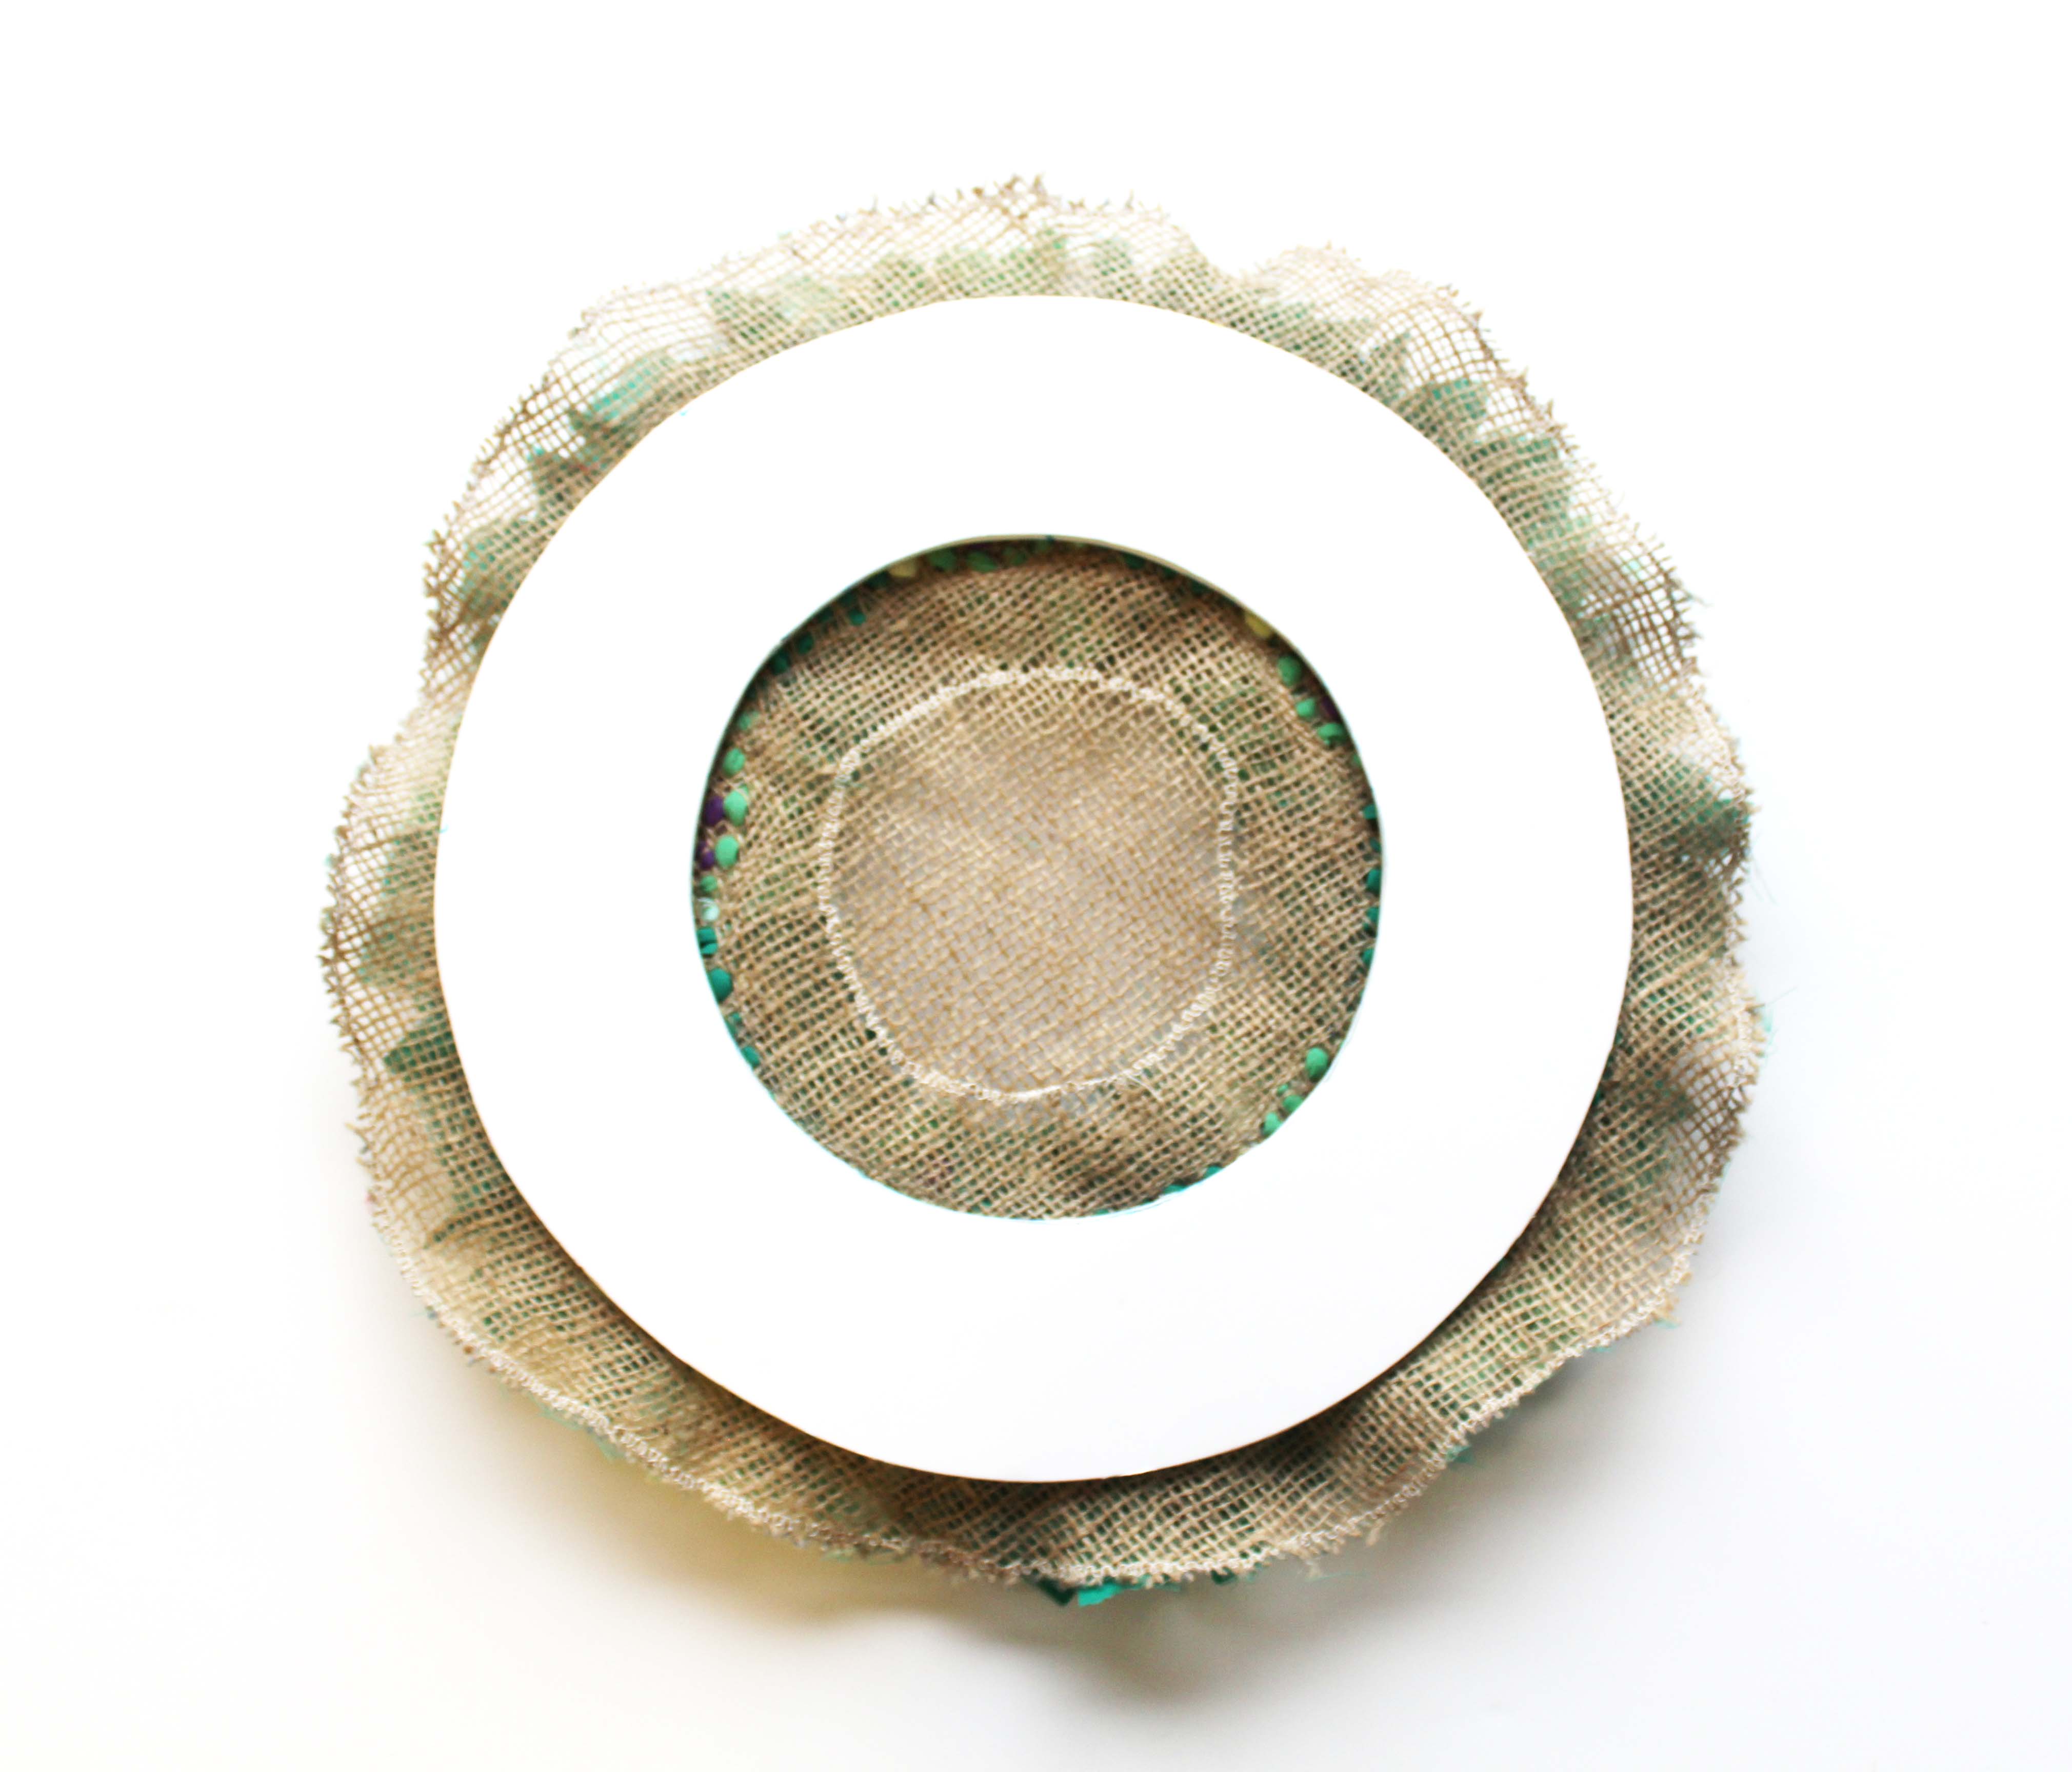
Fold the hessian border back over the foam board ring and staple or glue gun it in place. I generally start with four equally spaced points.
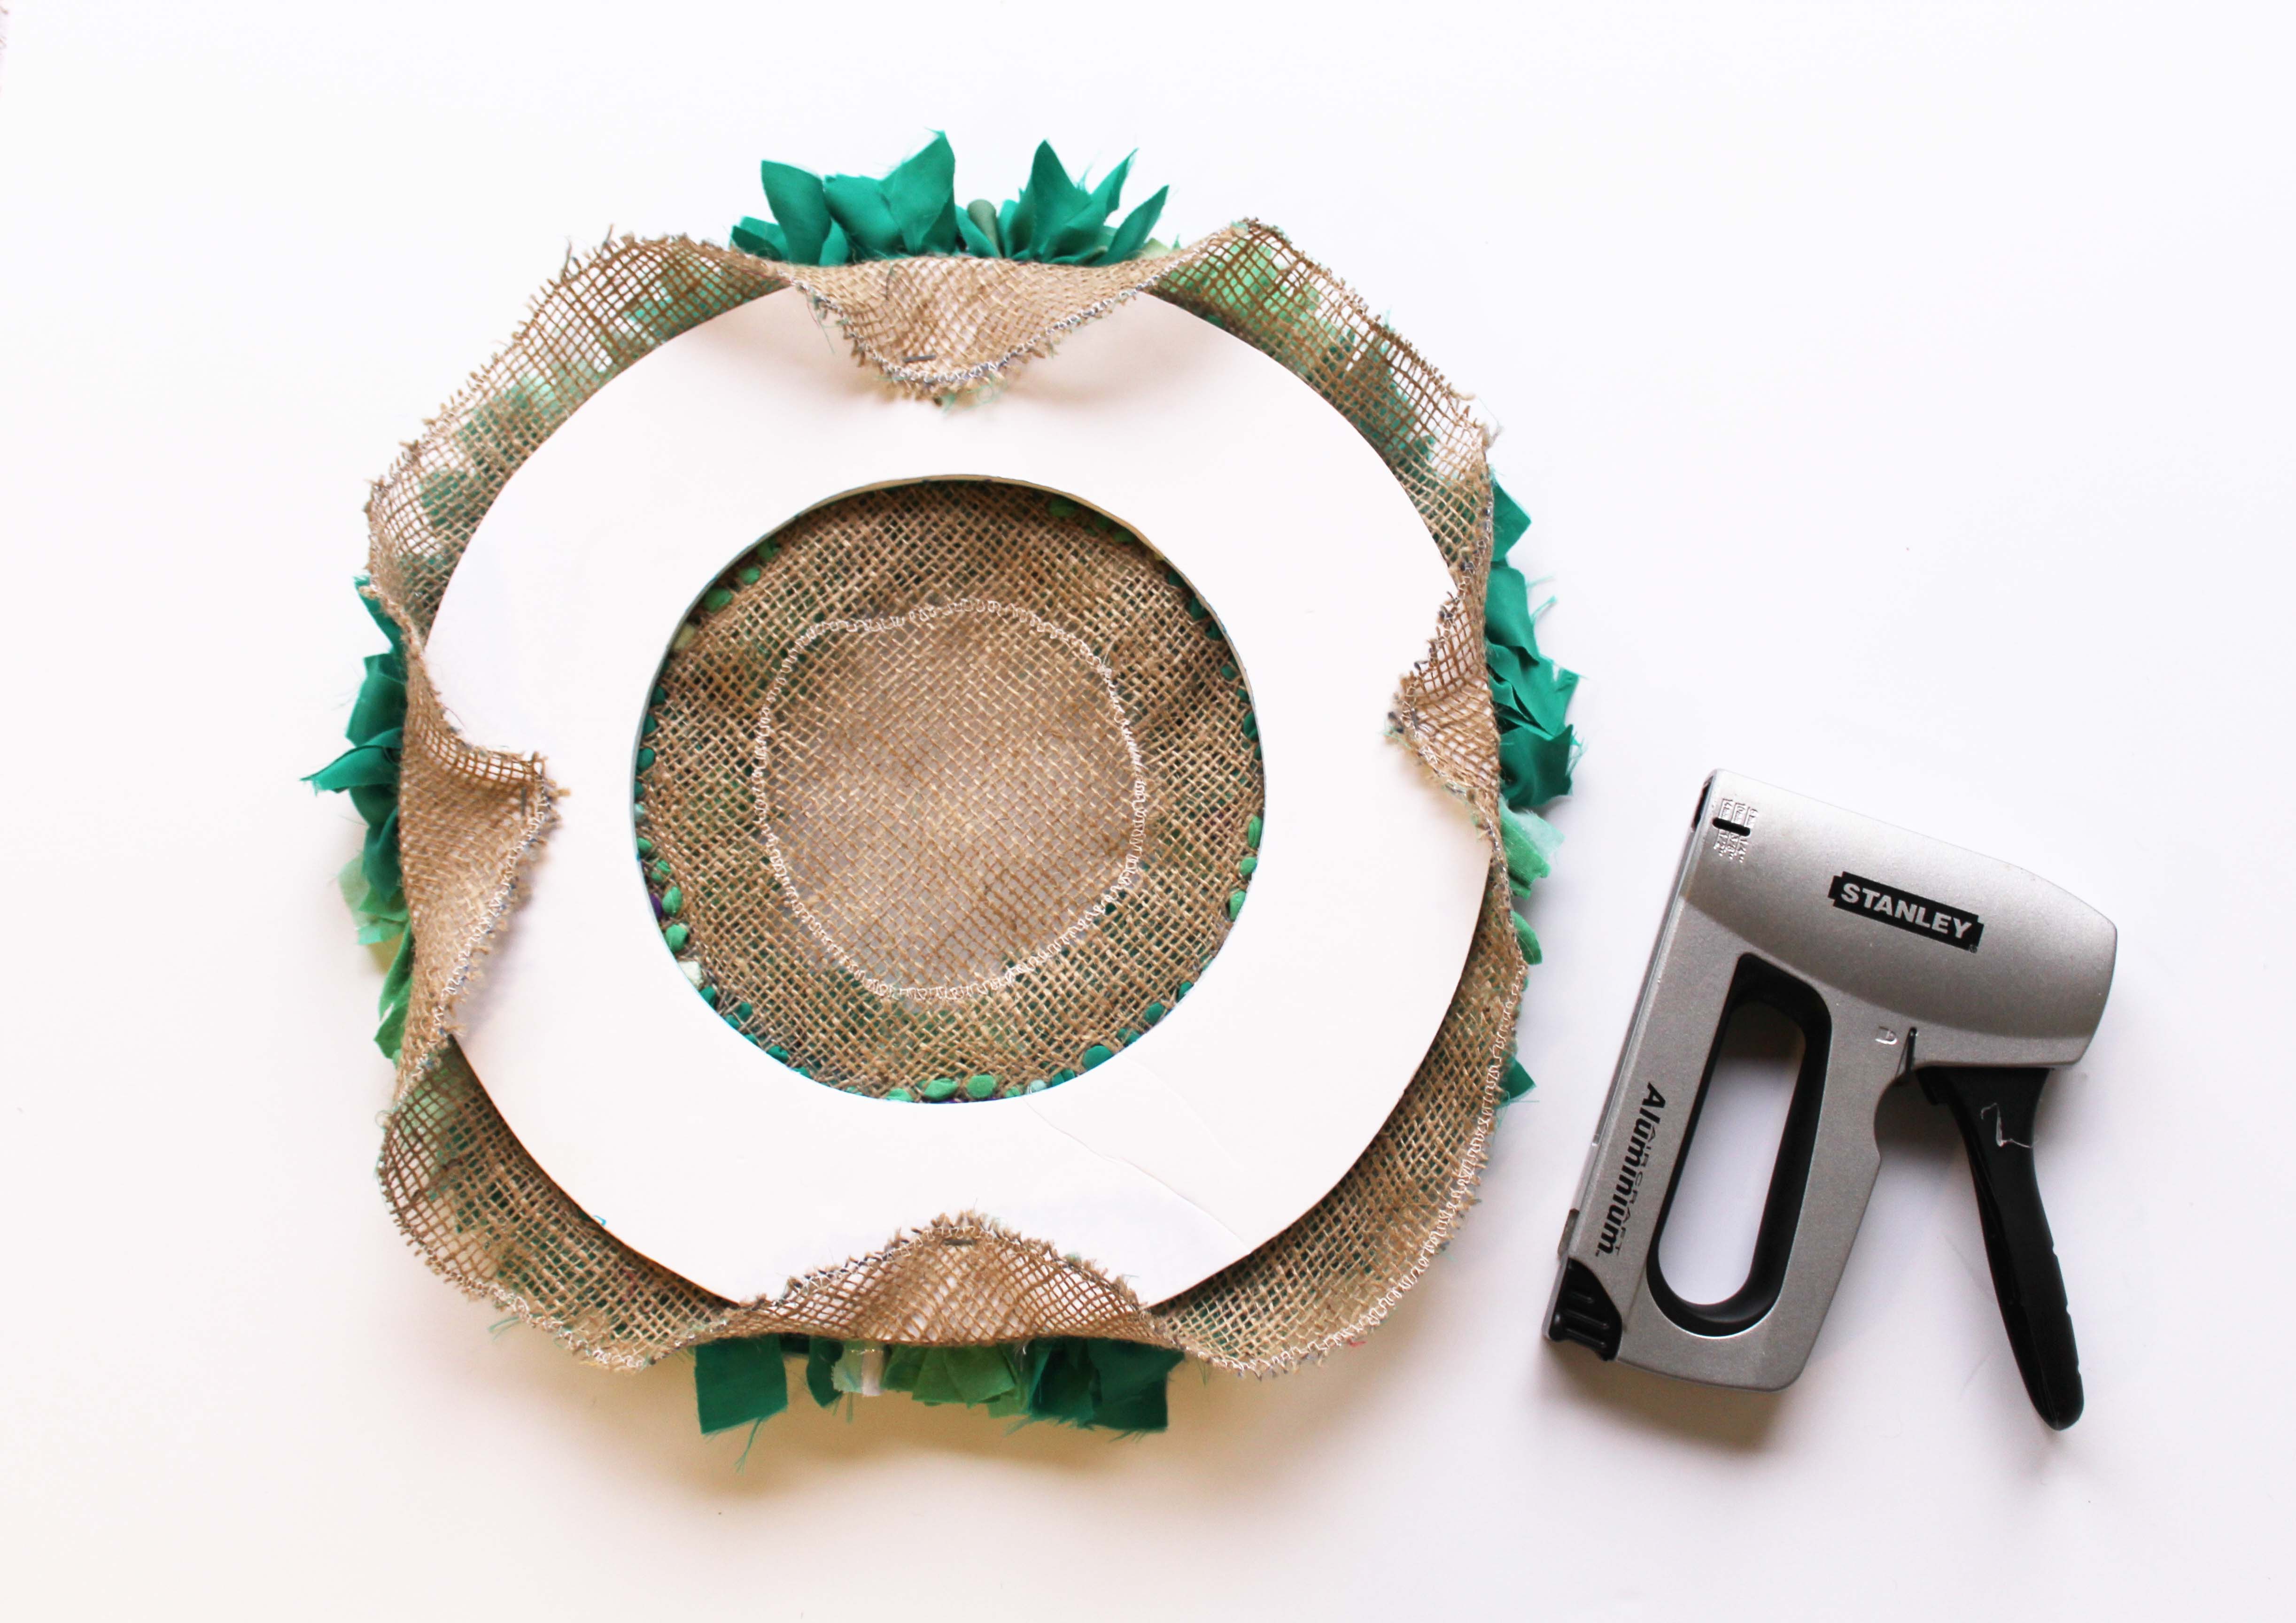
Continue around the outside of the ring, concertinaring as you go until it looks like below…
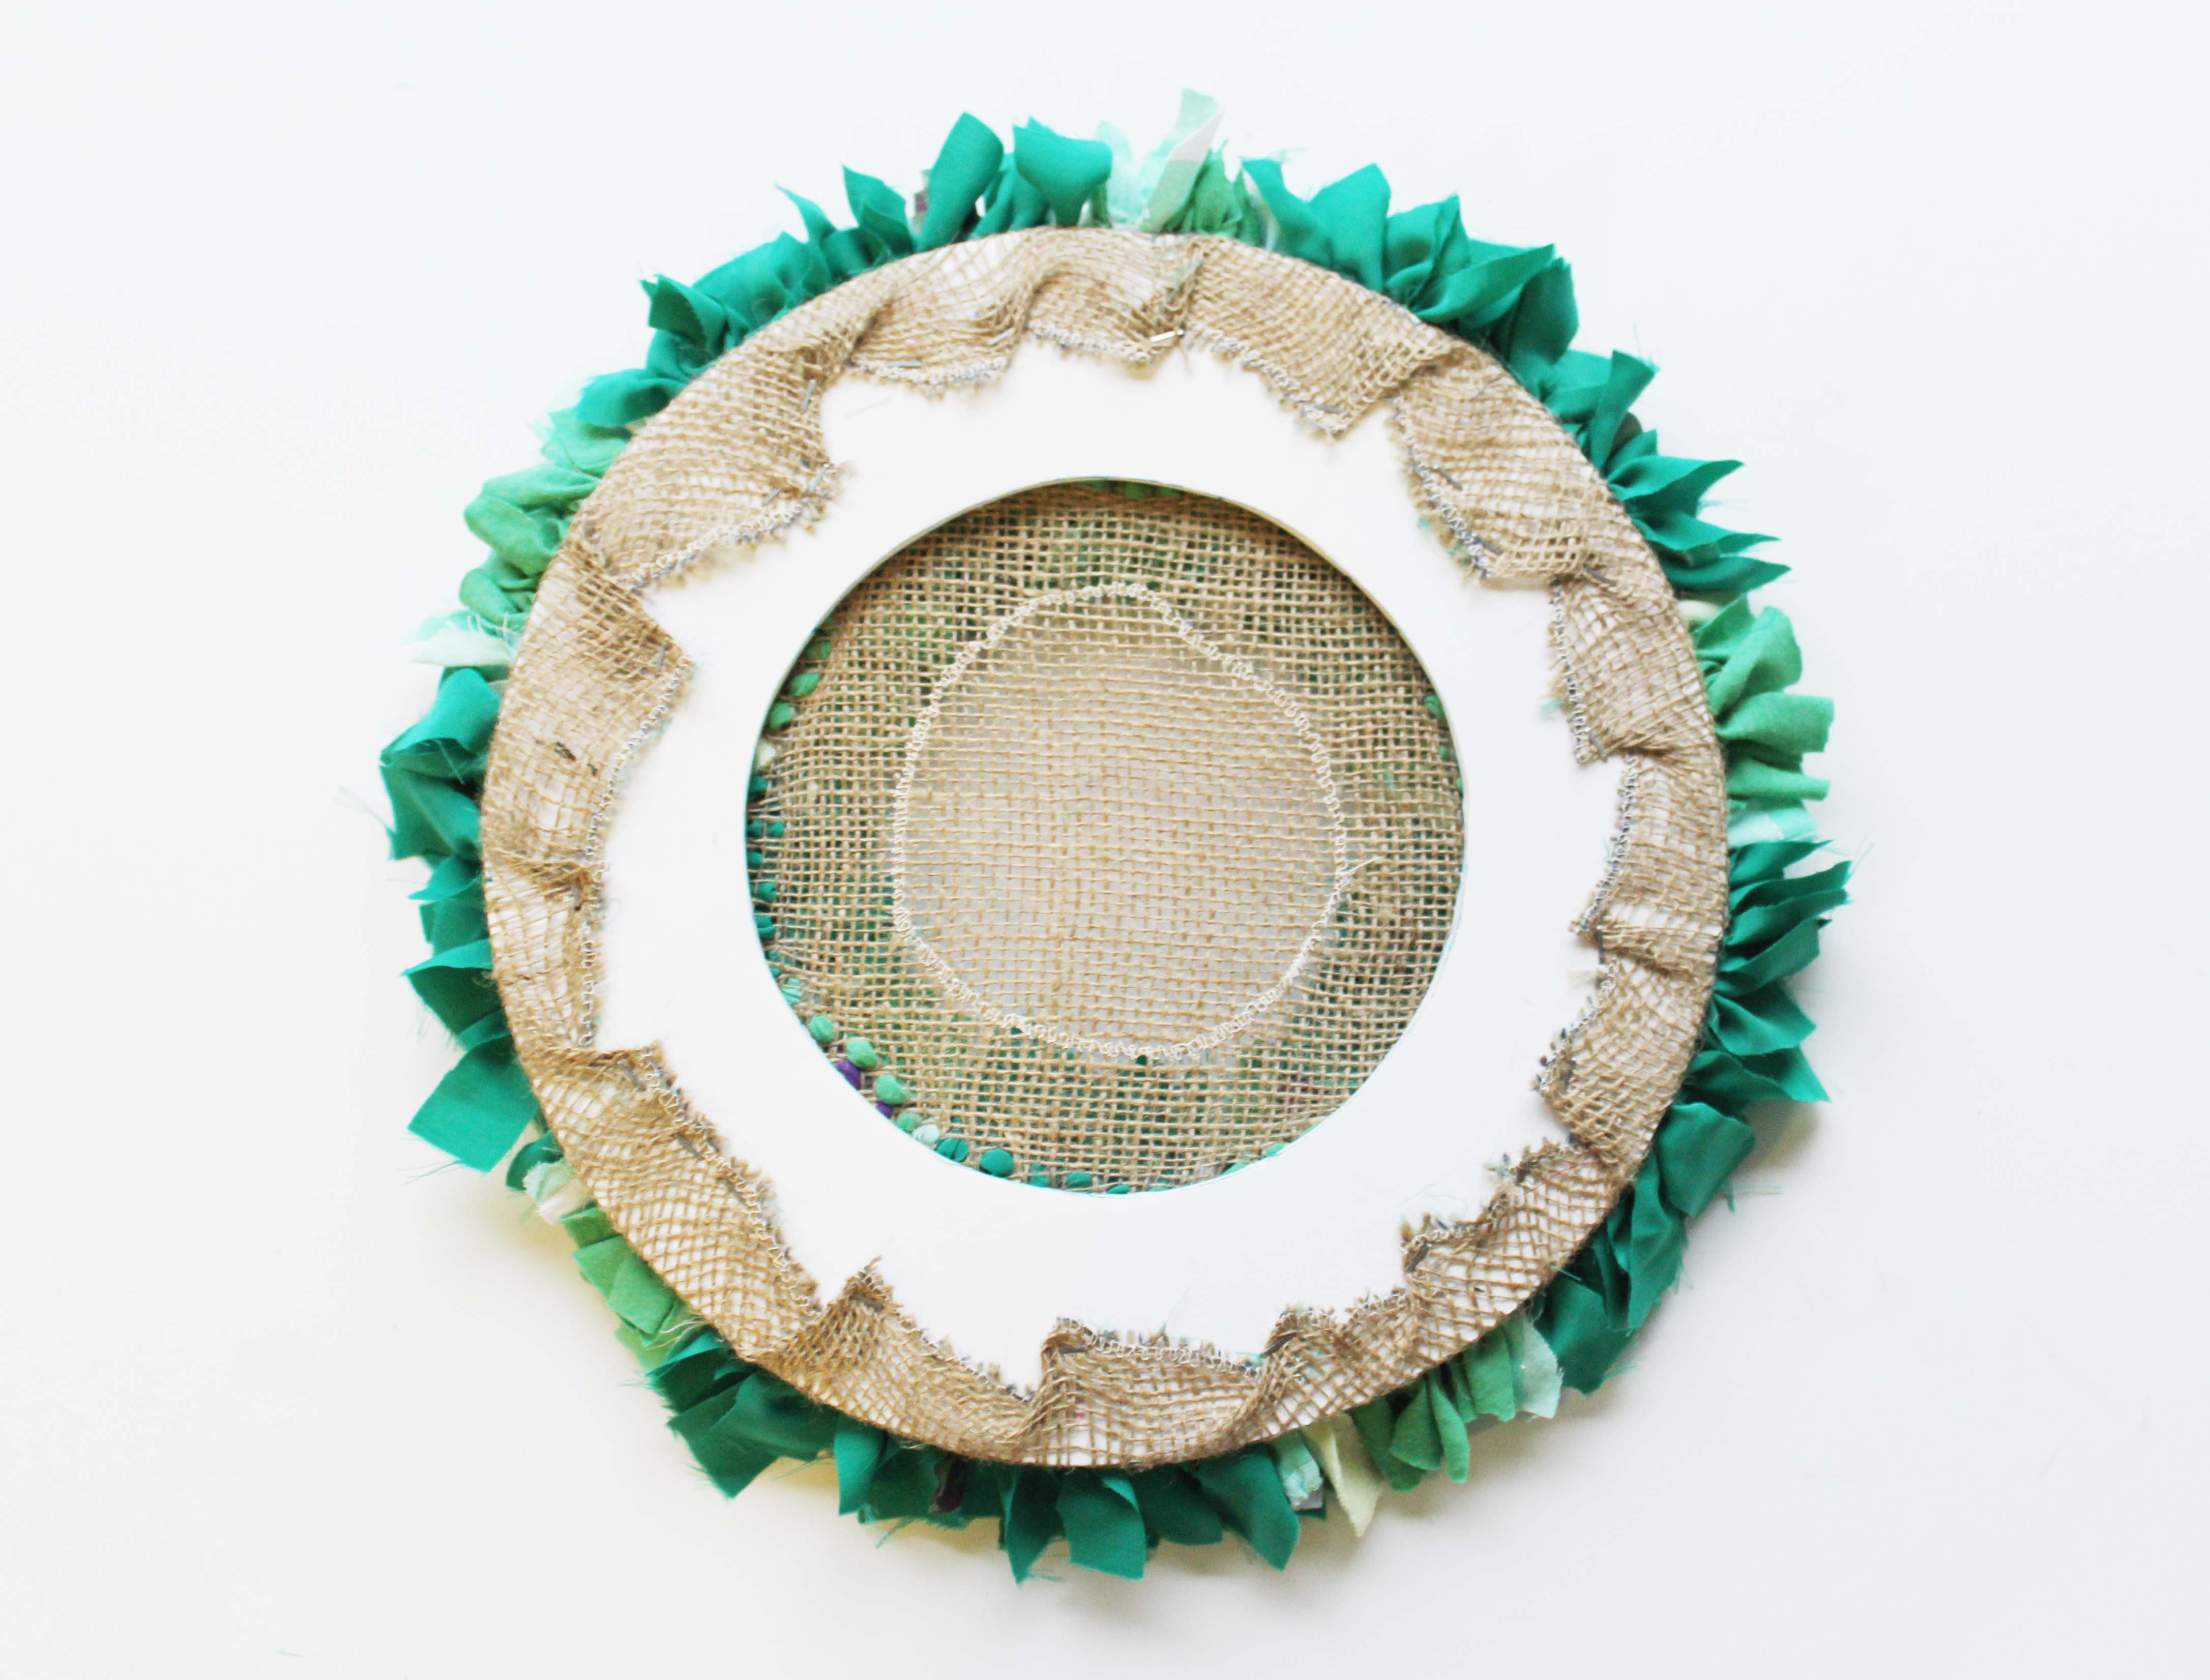
Step 8: Secure the inside of the wreath:
Once the outside of the wreath is firmly connected to the backing board, cut a circle inside the inner hemming of the ring so it looks like below:
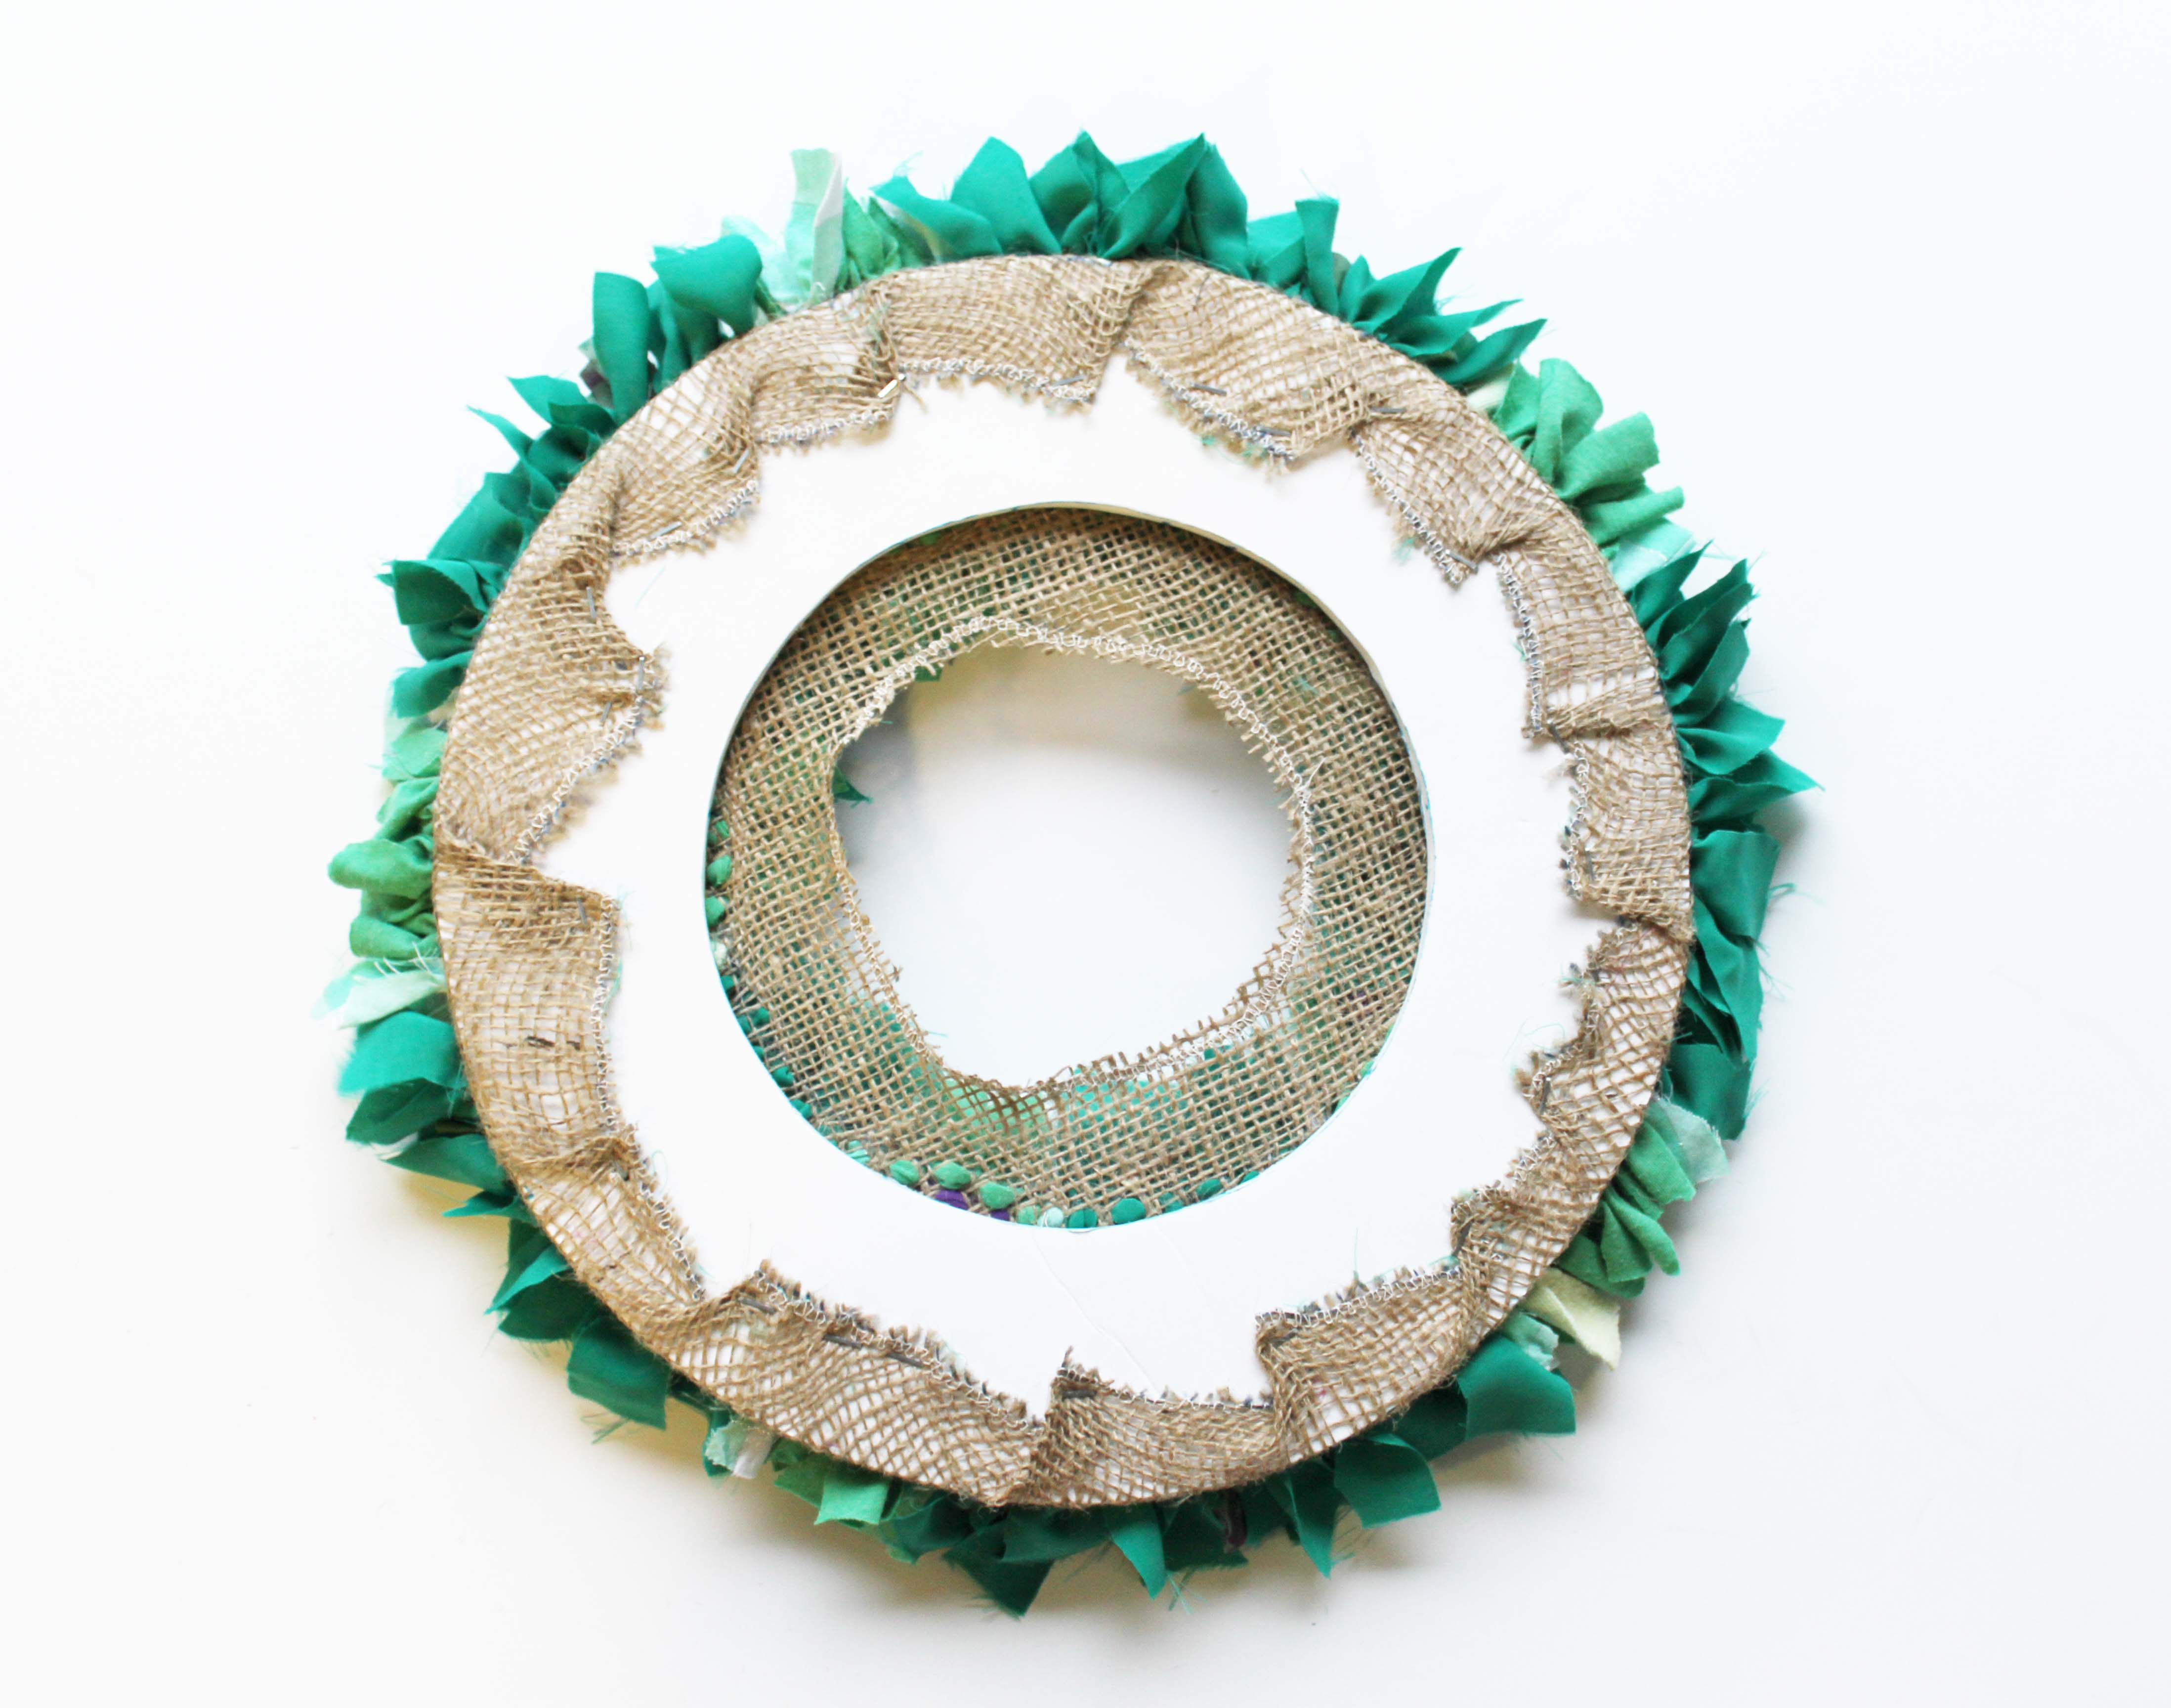
Next make slight cuts in the hessian, making sure not to cut too close to the rag rugged part.
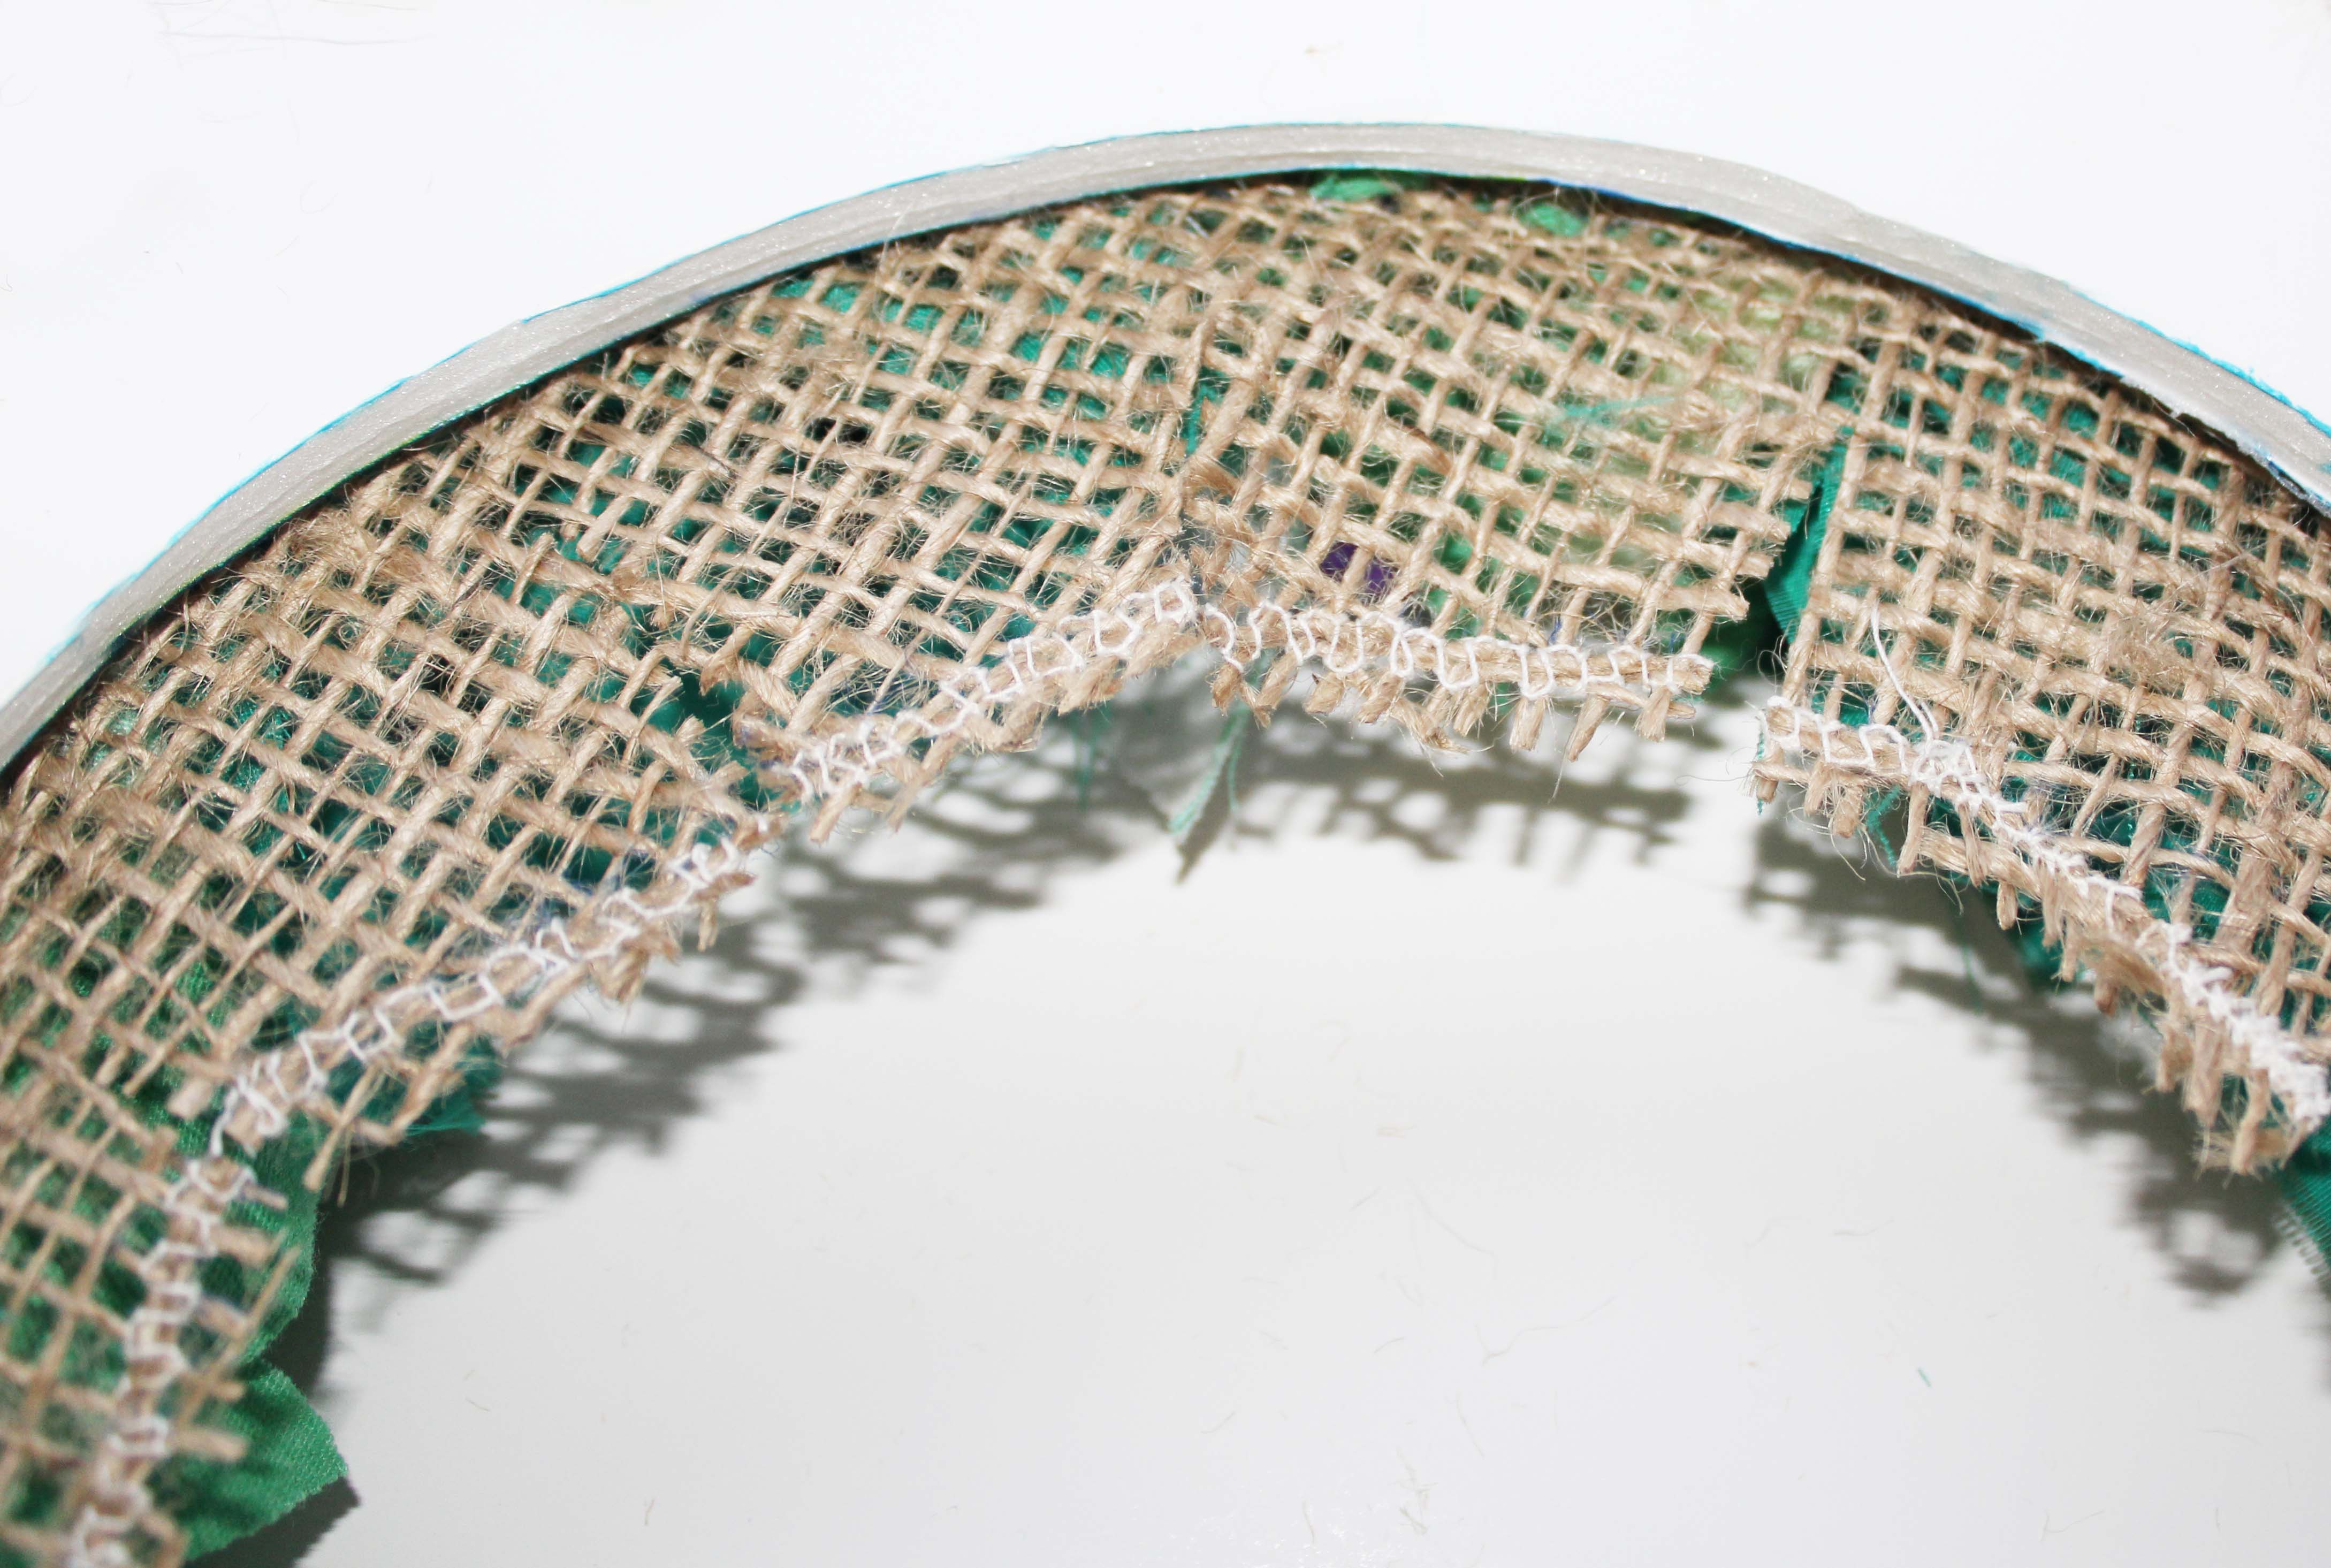
Next, use the staple gun to secure the inside hem to the foam board ring. The hemming will keep the hessian from falling apart.

Eventually, the back will look something like this…
And hooray, the front will look this!
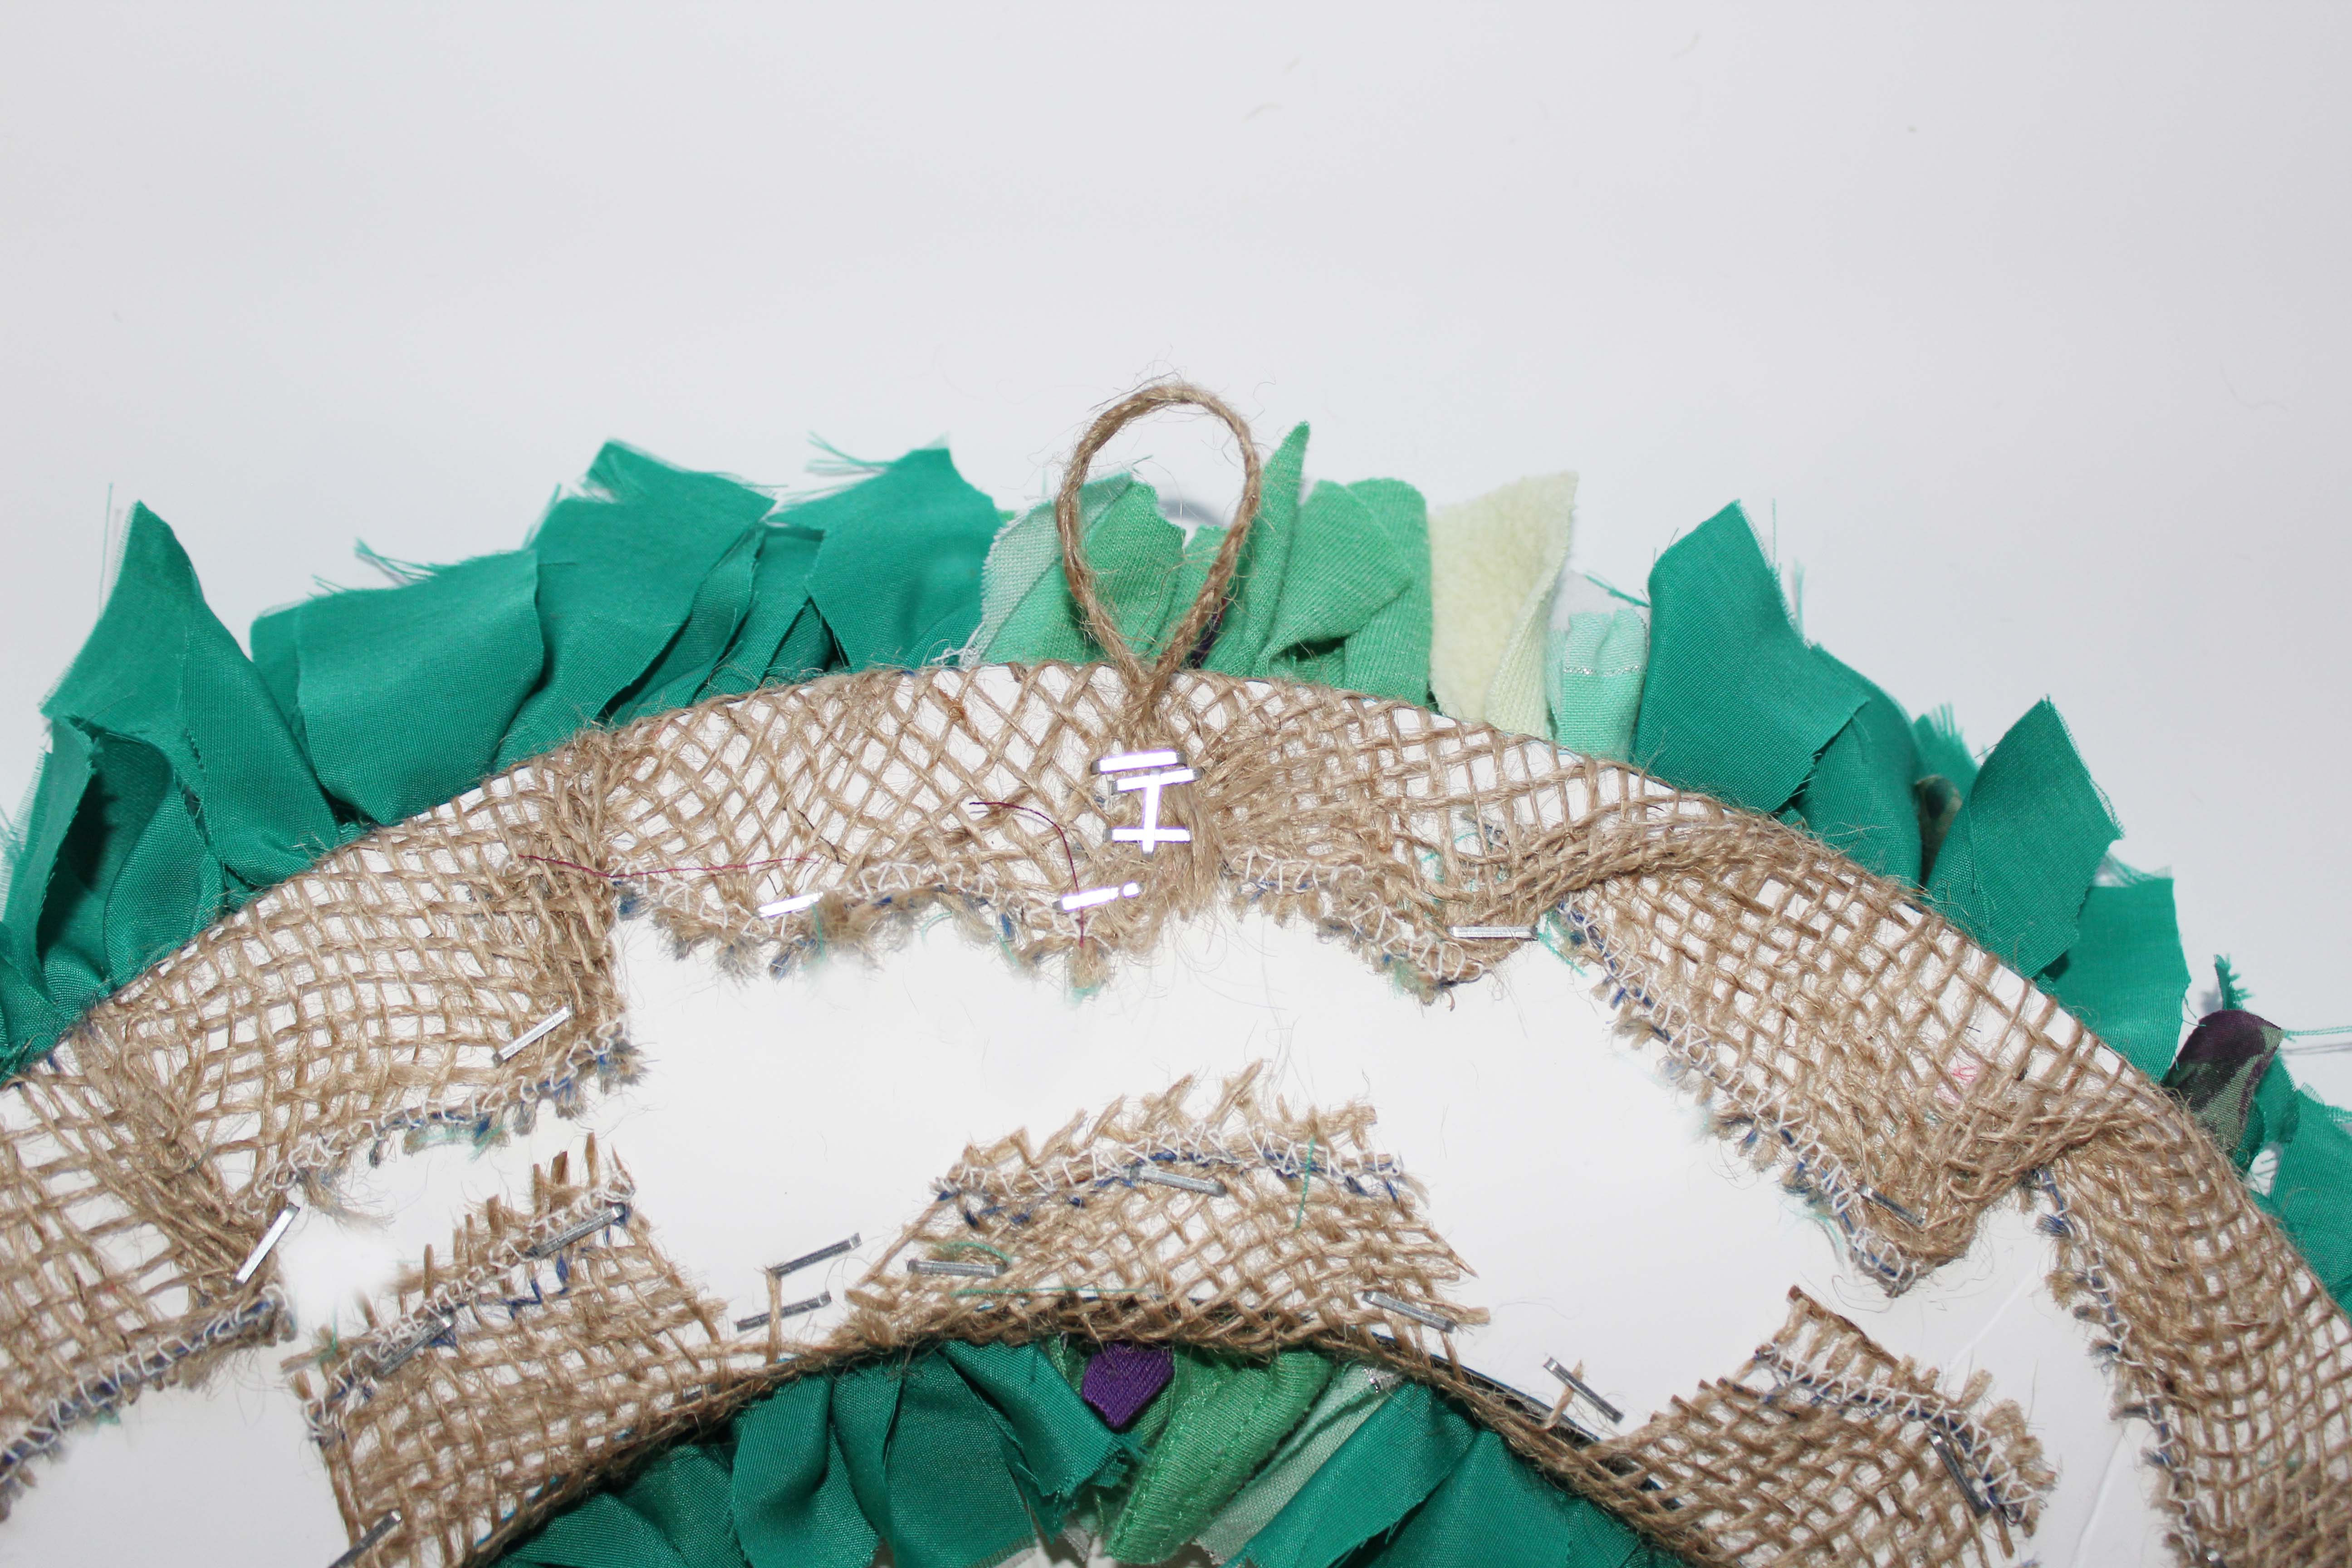
Step 9: Add a loop for easy hanging:
A minor point but it’s really handy to add a loop to your wreath to make it easier to hang. We do this by plaiting hessian strands and stapling the plait in a loop shape to the back of the wreath like below. You can use twine, ribbon or something more decorative as well.
Step 9: Tidy Up the Back of the Wreath (optional)
If you’re planning to give the wreath as a present or you just like things to be neat, then you may want to tidy up the back of your wreath. To do this we cut a ring of felt to the size of the wreath (you can do this by drawing around it) and glue the felt to the back of the wreath with a glue gun. Below is what this looks like:
And to end, here’s what your final wreath should look like – Ta-da!
CONNECT WITH US:
Well, that’s it for a deep dive into rag rug wreaths. I hope some of you decide to give the project a go and if you do, definitely send me a photo at hello@raggedlife.com. If you’d like to be the first to see other rag rug projects, why not join our Rag Rug Community on Facebook https://www.facebook.com/groups/RagRugCommunity/or join our fortnightly newsletter here.
OR CONNECT WITH US ON SOCIAL MEDIA AT:
Instagram: https://www.instagram.com/raggedlife/
Facebook: https://www.facebook.com/raggedliferagrugs/
Pinterest: https://www.pinterest.co.uk/raggedlife/
Twitter: https://twitter.com/raggedlife
As always, happy rag rugging!
Elspeth x
[…] To read a few more of our design tips for making a rag rug Christmas wreath, check out our How to Make a Rag Rug Wreath Blog Post. […]
[…] make a rag rug wreath, you can follow our step by step instructions here or you can buy a Rag Rug Wreath Kit or set of Hemmed Hessian and Instructions over on the Ragged […]
[…] Day rag rug project is a rag rug heart wreath. They’re made in a similar way to our traditional Christmas wreaths but use a heart shaped template rather than a ring. Don’t worry if they look disheveled when […]
[…] 1) Begin by prepping your Hessian. Begin by drawing the OUTER and then INNER circles of your “final” wreath. These are the 2nd and 3rd circles in the above. You then need to draw another circle 3cm from the outside and the inside circles – this is your hem and is very important, as it will stop your hessian from falling apart. You need to hem this circles. See more photos and step by steps instructions for drawing and hemming your hessian. […]