When we introduced our Rag Rug Spring Tool in 2018, it honestly felt like a miracle tool. We’d been shaggy rag rugging with the latch hook for years, but the Spring Tool just made it so much easier and fun. Well, over the past six months, the Ragged Life team and I have been working on a tool that does the same for the loopy rag rug technique that the spring tool does for the shaggy technique – a hook to make it easier, quicker and ultimately more enjoyable to rag rug. And we’ve finally done it!
Introducing our New Ragged Life Rug Hook!
Why bring out a new rug hook?
We’ve been happily loopy rag rugging with a latch hook for years and years. And, over time, we’ve become incredibly quick and skilled with it. However, whilst teaching others how to rag rug, we noticed that a good number of people struggle to use the latch on the latch hook and it seemed to be making their lives harder than it should. If you’re thinking “that’s me!”, don’t worry because you’re certainly not alone!
In an attempt to find a workaround, I then started to also teach students How to Loopy Rag Rug using the Spring Tool. It helped for some students, but was ultimately difficult to make the loops short.
So, we needed to find an alternative. We knew that rug hooks already existed (mainly for woollen rugs), so we started researching and trying different versions to create a rug hook that would combine all the best elements from all the existing rug hooks out there. What we’ve ended up making is what we think is the best rug hook for loopy rag rugging into hessian with a variety of different fabrics. Sound good to you?
What makes our rug hook so great?
The loopy (hooky) technique is the hardest British rag rug technique to get to grips with. For things to look neat, you need to keep the height of the loops consistent, which can be a little tricky when you first start out.
Although, we’re not the first people to invent this form of rug hook (but neither is anyone living!), we’ve put a lot of thought and care into making a great product that will stand the test of time. Our Ragged Life Rug Hook has the below features:
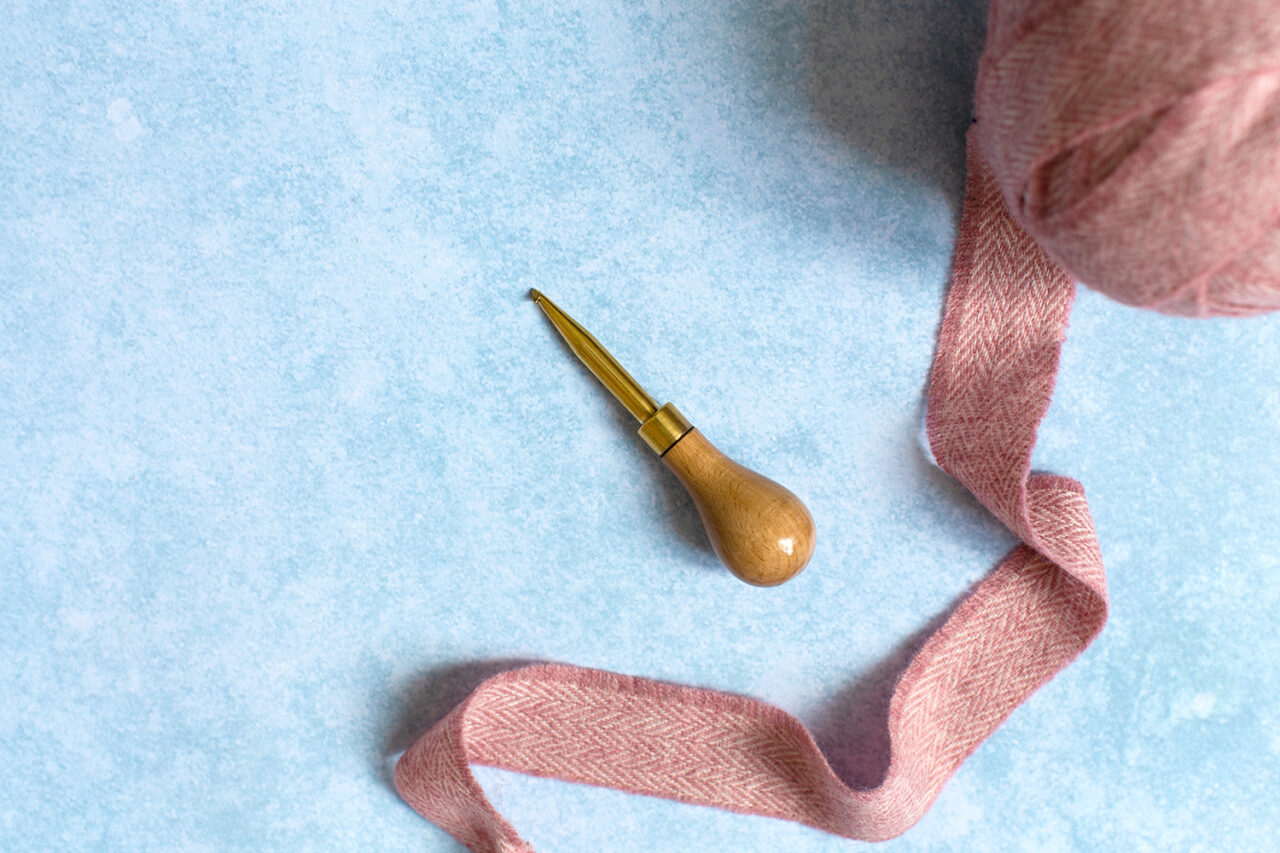
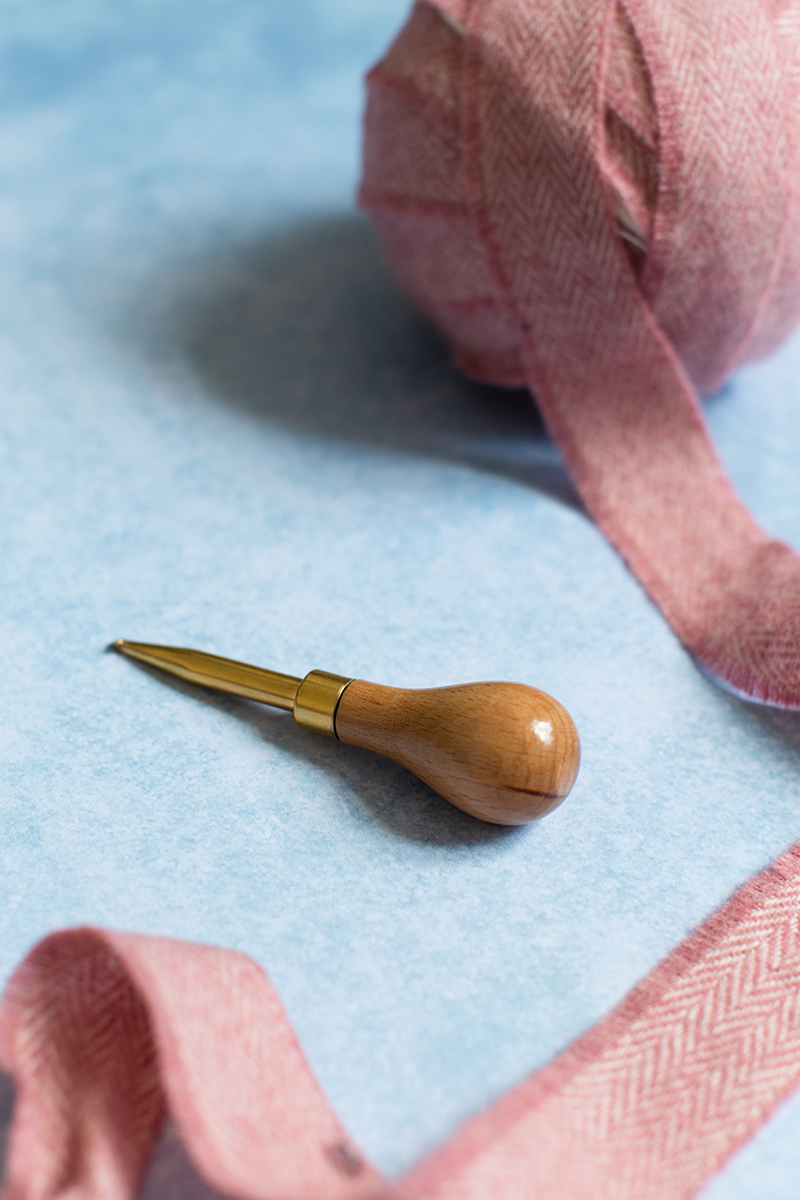
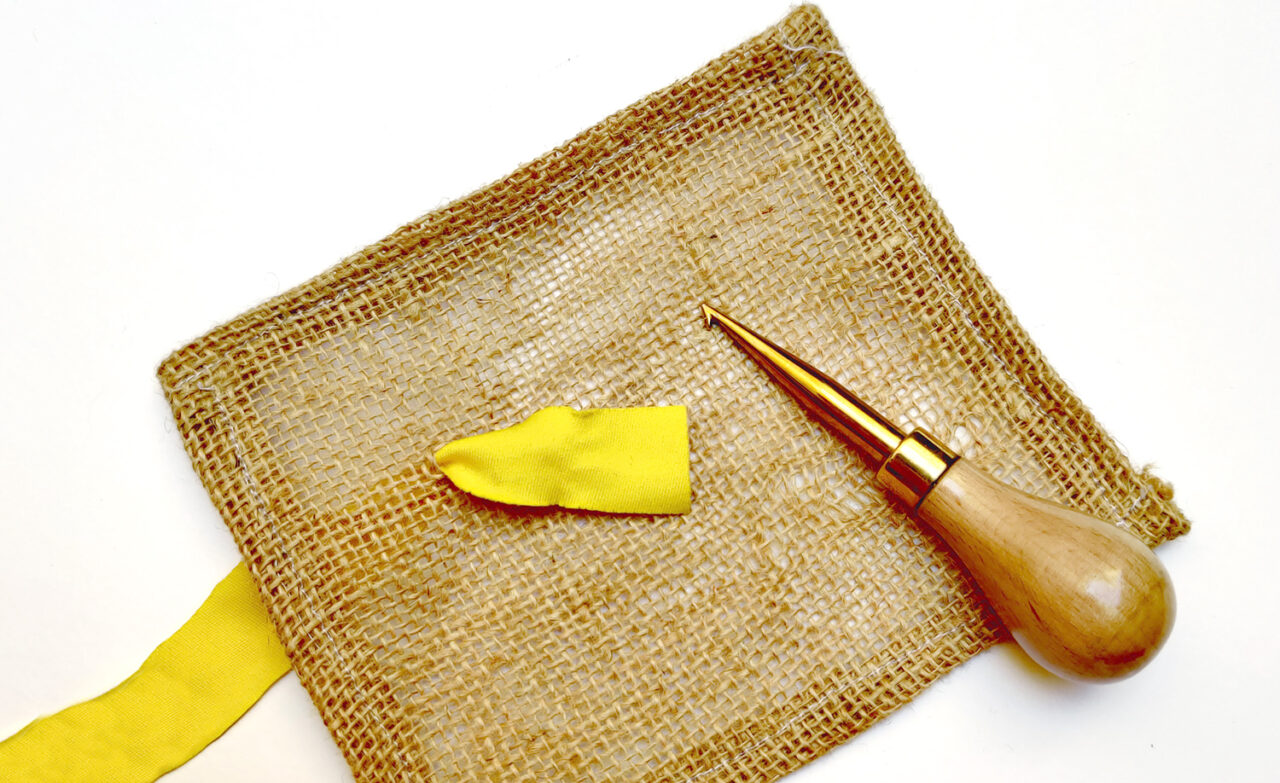
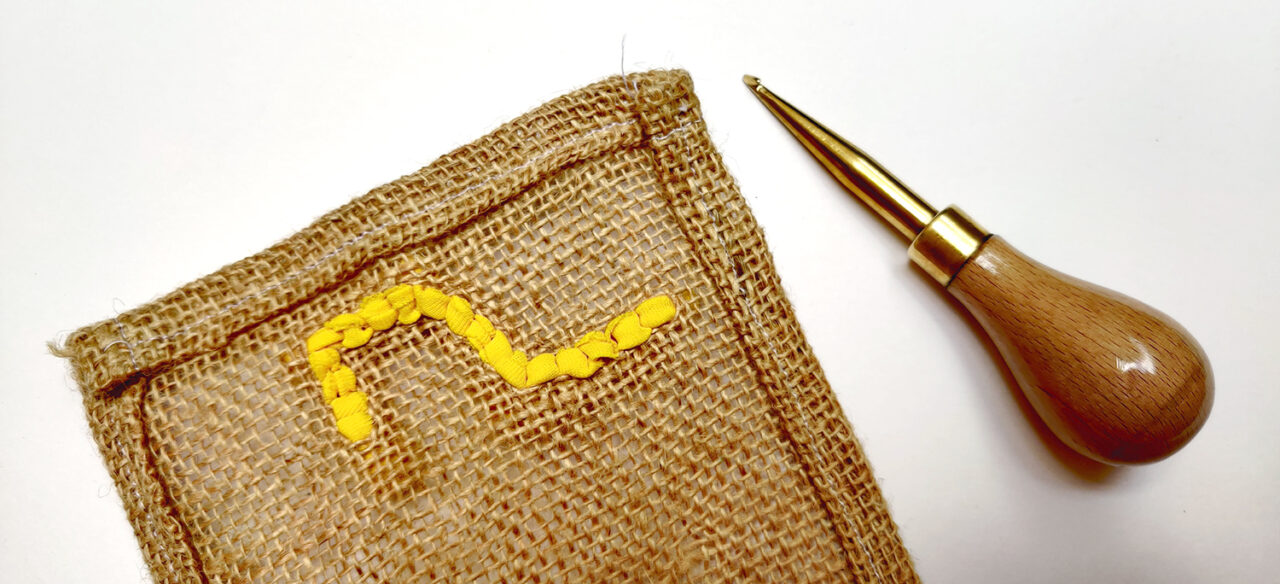
- A quality brass hook, which is sturdy, yet smooth. The smoothness of the brass hook means it glides through the hessian easily and doesn’t catch and snag on the fabric strips. Brass is not only beautiful, but also robust.
- A birch wood handle with a super smooth finish. These handles feel lovely on the hand and are the same great quality of our Rag Rug Spring Tools.
- A perfectly shaped hook for working with thick and fine fabrics. The hook itself works well with fabrics such as blanket yarn, jersey, cotton and fleece. It widens the hole of the hessian as you punch through the hessian, so that the hook doesn’t get caught on other strands of the hessian.
- The rug hook features a short neck, which means you don’t have to put as much through the hessian, which means you have more control. Anyone who has fought with the latch hook will know that this is a definite advantage!
So how does it work?
To loopy rag rug with our New Rug Hook, you use it in exactly the same way as the latch hook, without having to worry about the latch!
A video paints a thousand words, so watch our How to Use a Rug Hook Video below to see the Ragged Life Rug Hook in action or see step by step photos below…
Step by Step Instructions:
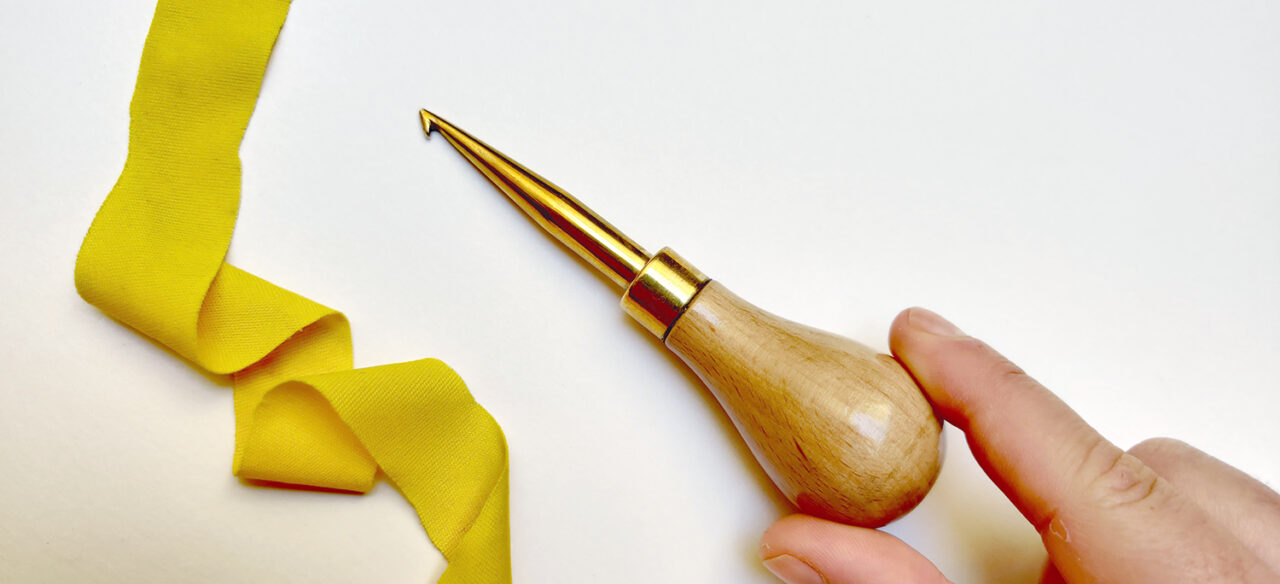
1. Prep your fabric into long strips using the method shown in our How to Make Fabric Strips for a Rag Rug video.
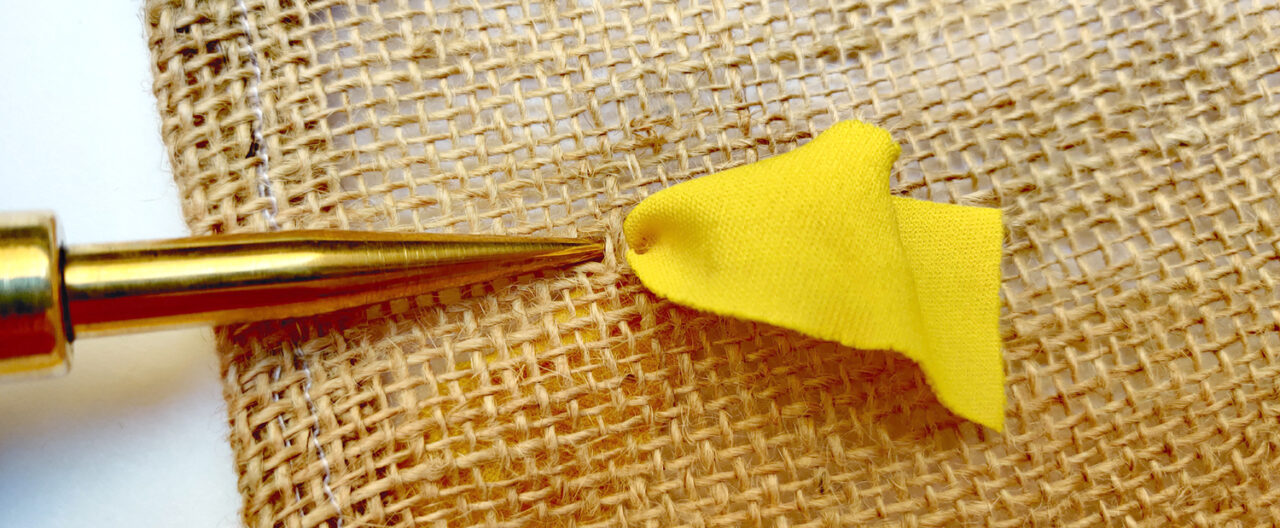
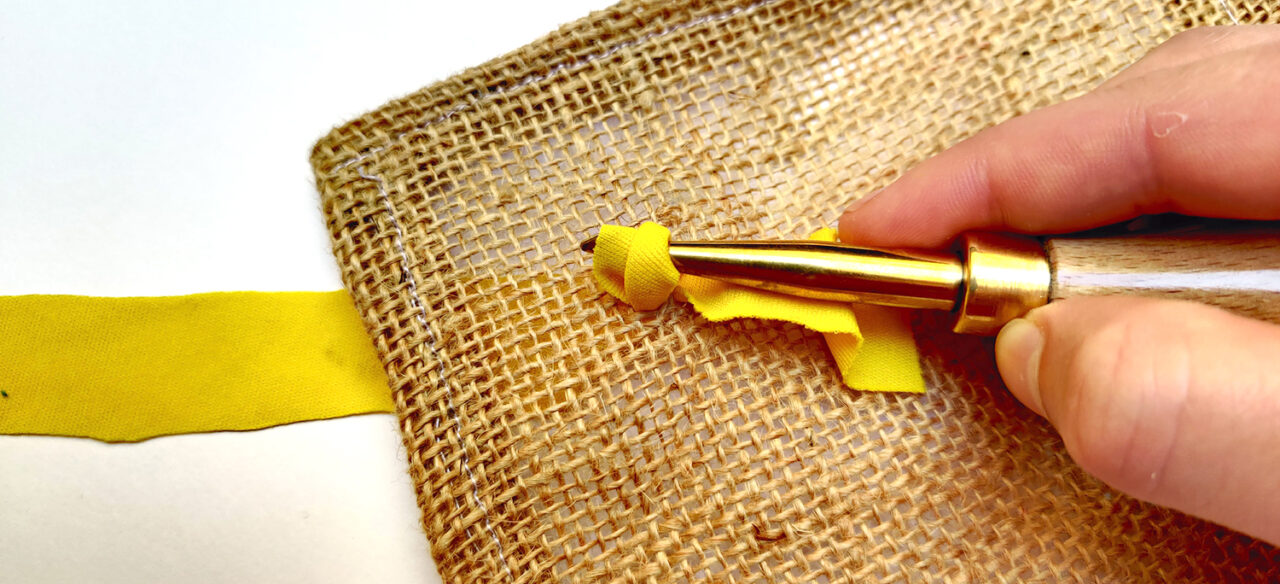
2. Push your Ragged Life Rug Hook into the hessian from the front of the hessian to the back.
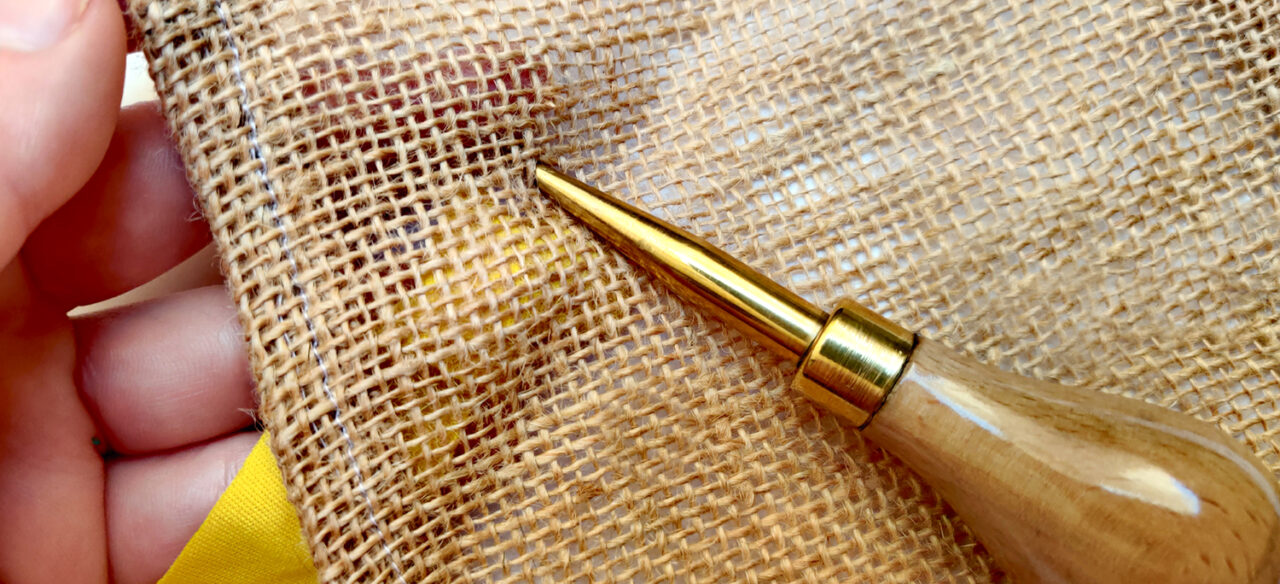
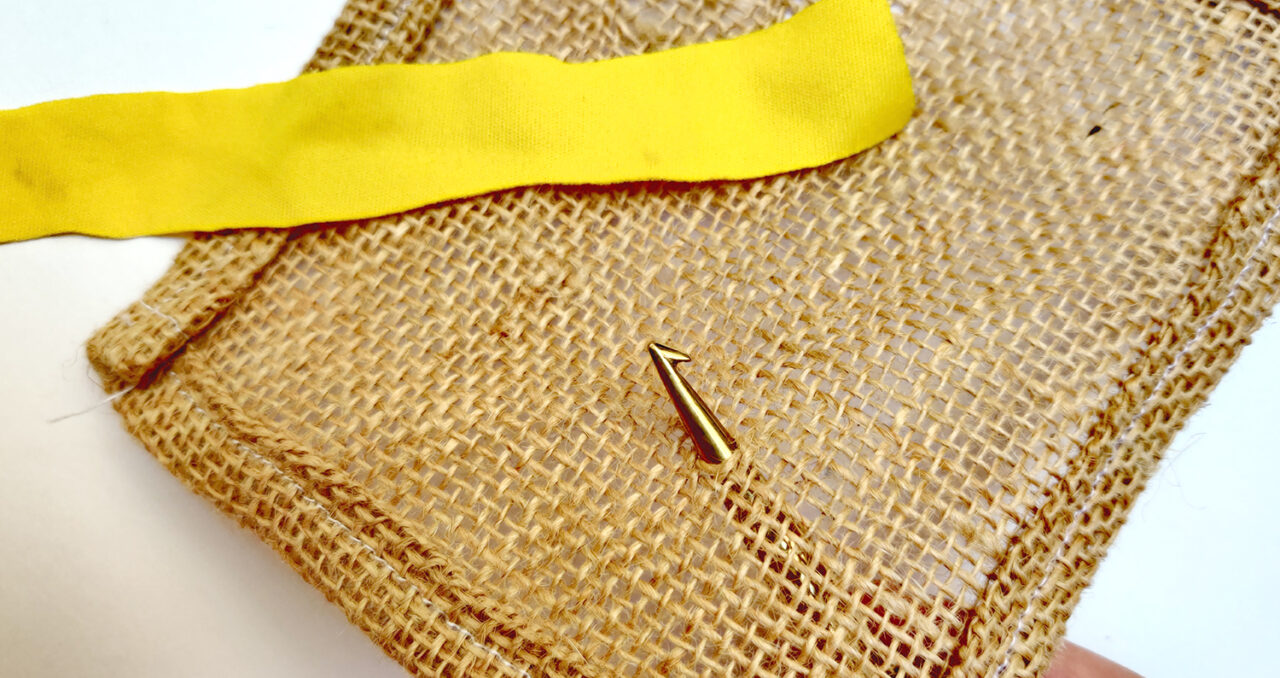
3. Hold the long strip of fabric behind the hessian, hook onto the top of the long strip and pull a single end of the fabric strip through to the front.
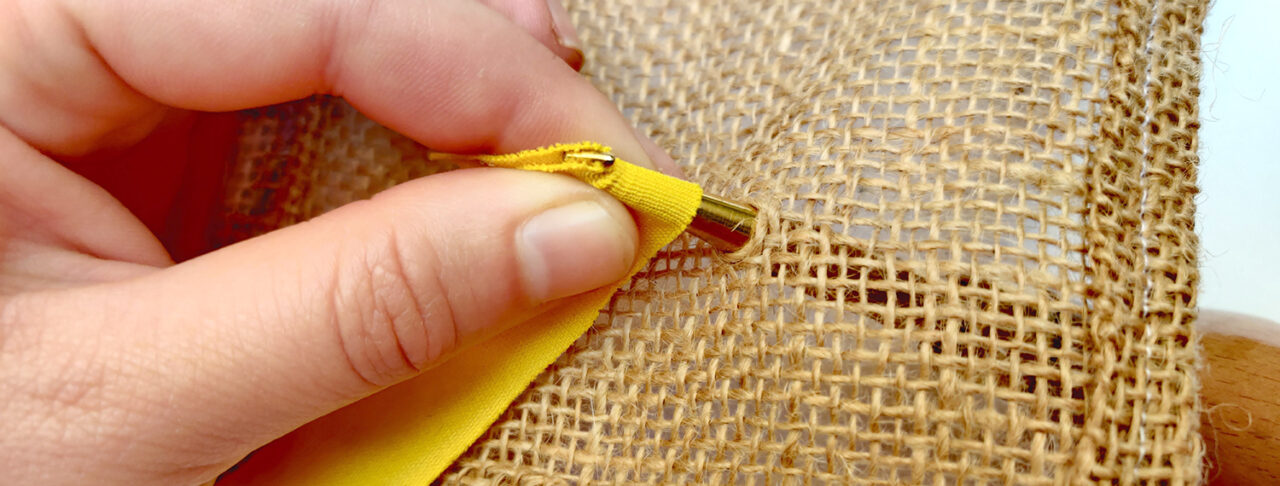
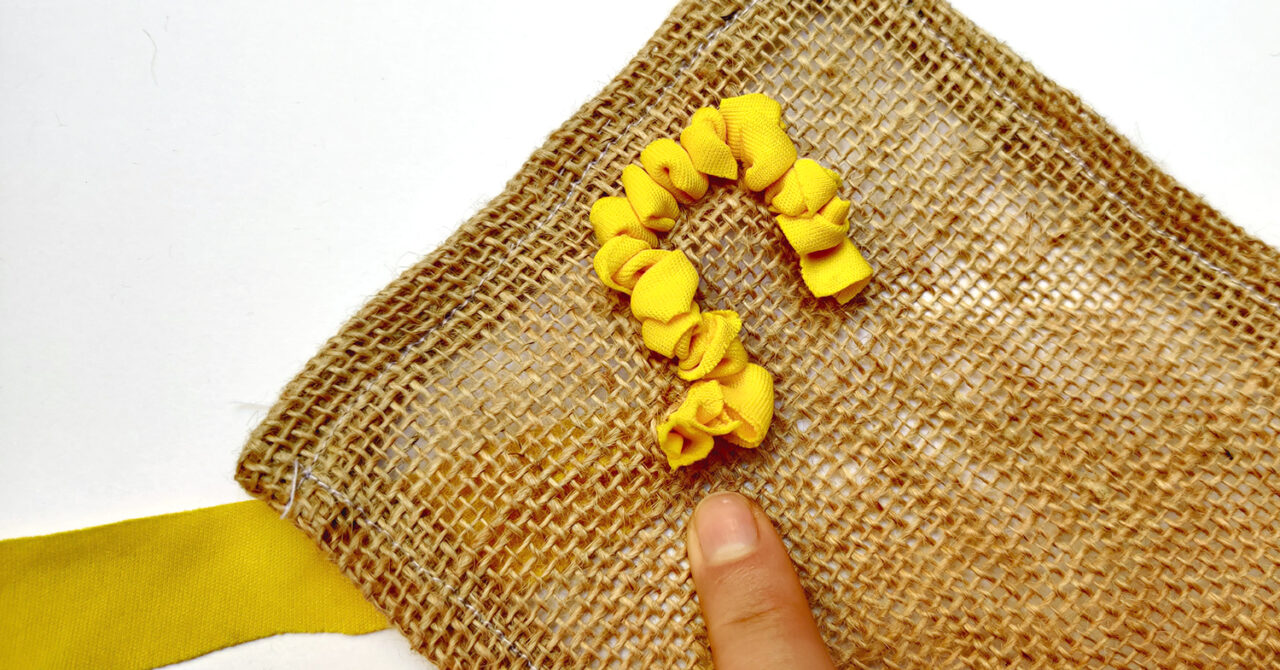
4. Miss out two strands in the hessian, push the hook down into a hole from the front to the back. It doesn’t matter which direction you go – you can even move diagonally.
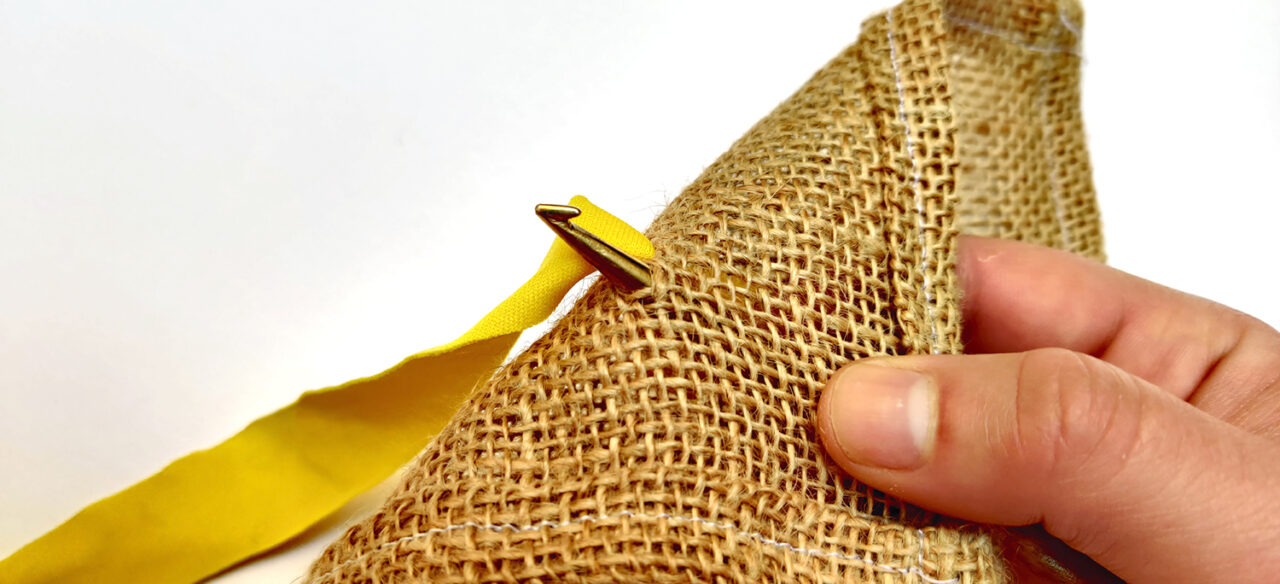
5. On the underside of the hessian, hook onto the long fabric strip near where it meets the hessian. I do this by placing the strip on top of the barrel where it meets the hook.
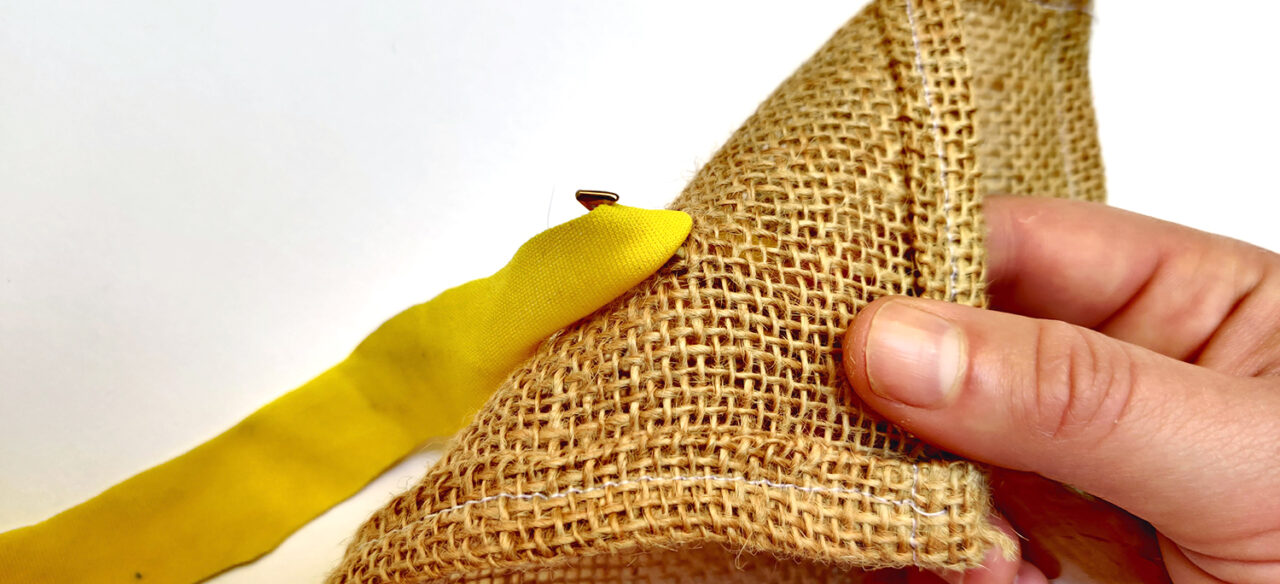
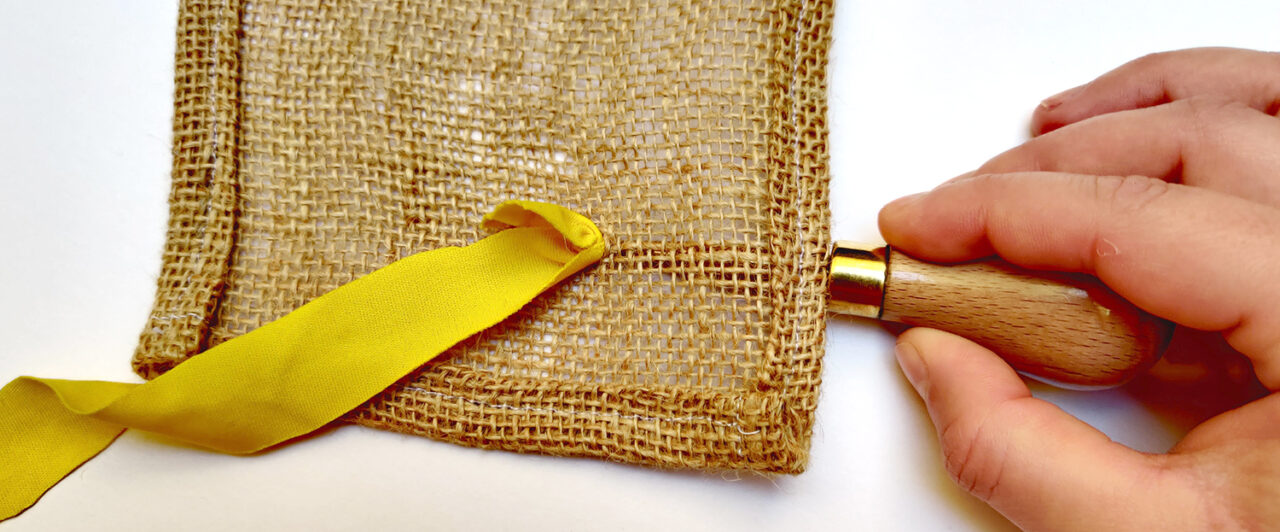
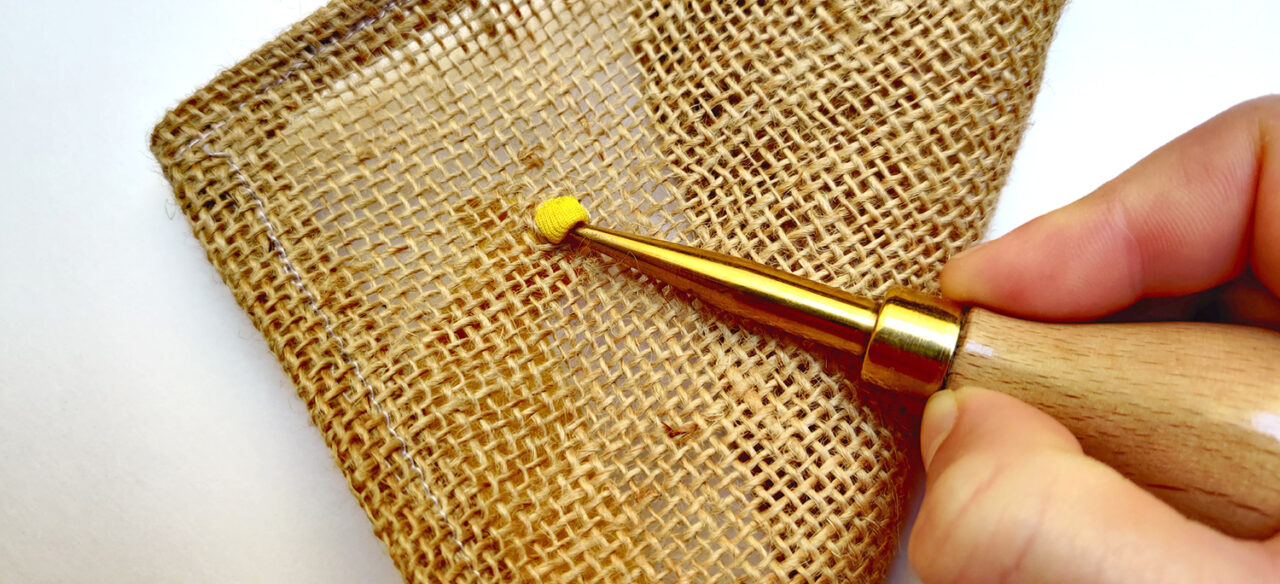
6. Pull a loop through to the top of the hessian. You can pull this loop to whatever height you’d like your loops to be, but I wouldn’t recommend pulling it less than 1cm in height when you’re first practising. Detach yourself from the loop once you’re happy with the height.
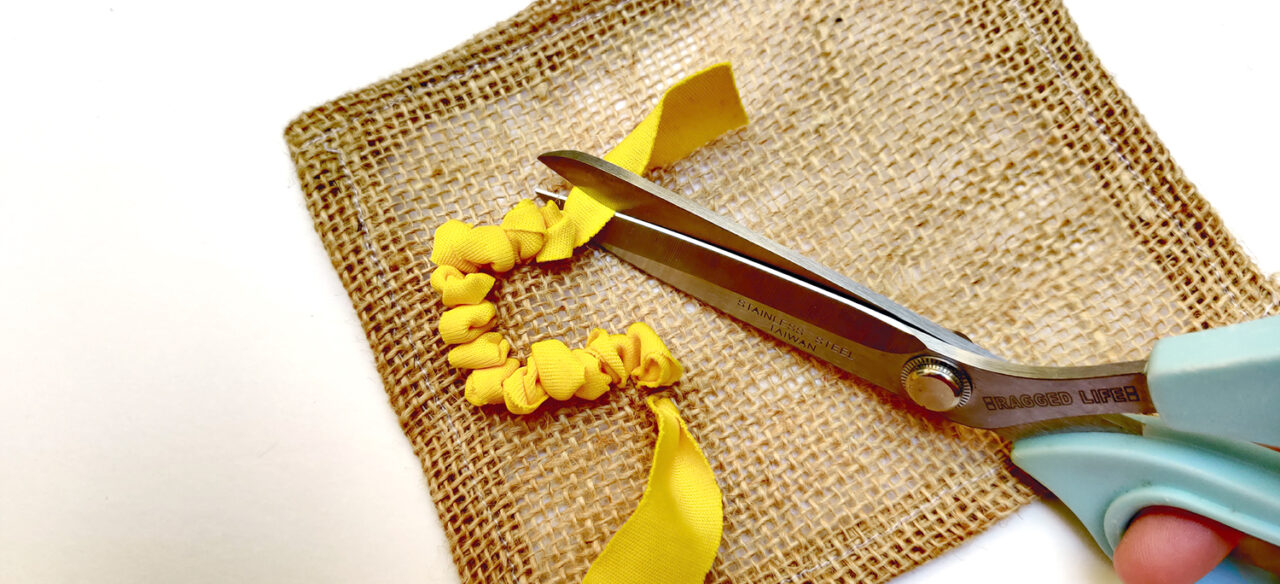
7. Repeat steps 4-6 until you reach the end of your strip of would like to change colour. As you can see in the photos below, you can rag rug in any direction. To finish your strip, pull your end through to the top of the hessian and trim that and your first single end (from step 3) to the same height as all your loops.
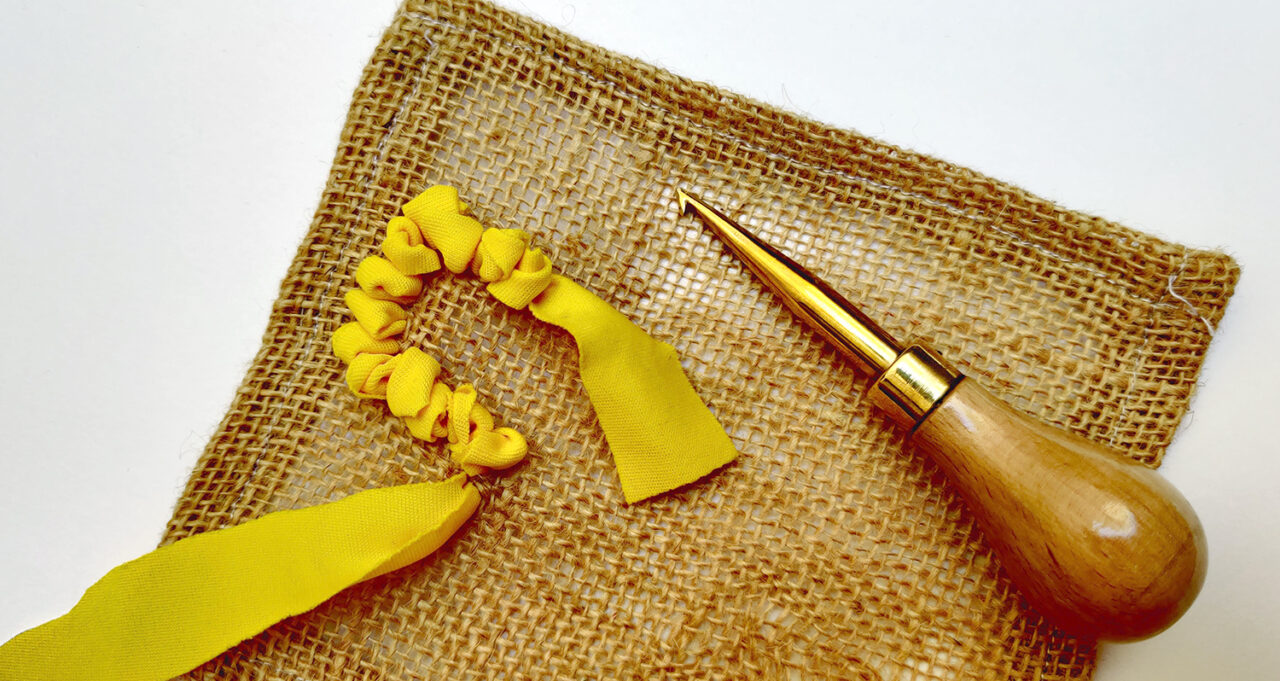
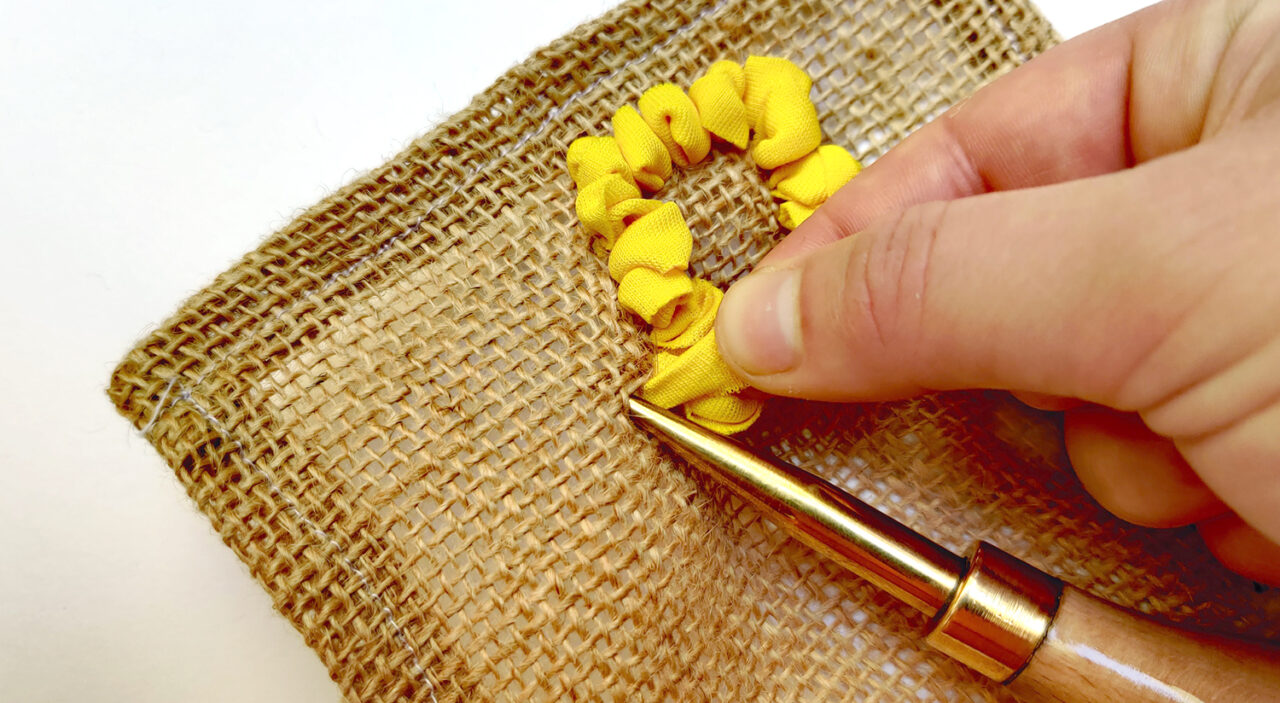
8. To start a new strip, repeat step 2 onwards, but pull the end of your new strip through the same hole you just finished in. Doubling up single ends into one hole makes the rag rugging more secure.
Eh voila! Loopy rag rugging made easy 🙂 And below is what the back of your rag rugging should look like…
So where can I buy this wondrous tool?
If you’d like to own a Ragged Life Rug Hook, then they’re currently available to buy on the Ragged Life Shop here.
Right, I hope you like the new tool and I can’t wait to hear what you think.
Elspeth x
p.s. connect with us on social media below if you haven’t already done so…
Instagram: https://www.instagram.com/raggedlife/
Facebook: https://www.facebook.com/raggedliferagrugs/
Pinterest: https://www.pinterest.co.uk/raggedlife/
Twitter: https://twitter.com/raggedlife
Love to read your blog and find inspiration for my rugs.
[…] silk ribbon comes in pre-cut strips. These tend to be the perfect width to loopy rag rug and short shaggy rag rug with, reducing the time taken to prep your […]
[…] silk ribbon comes in pre-cut strips. These tend to be the perfect width to loopy rag rug and short shaggy rag rug with, reducing the time taken to prep your […]
[…] using a particularly chunky yarn with a loose weave, I switched from the Rag Rug Spring Tool to the rug hook because I could pull each end of the strip through more easily. The thicker blanket yarns made the […]