Hello, rag rug enthusiasts! Whether you’re just starting your rag rug journey or looking to expand your collection of beautiful handmade pieces, you’ve come to the right place. Today, we’re diving into some beginner-friendly rag rug patterns and designs which work brilliantly for the traditional shaggy (proggy), short shaggy and loopy (hooked) techniques of rug making. These rag rug patterns are a great place to start if you’re new to rug making and guarantee success every time. Grab your fabric scraps, a cup of tea, and let’s get crafting!
NB: If you’re completely new to rag rug making and would like to see the techniques in action, visit our Ragged Life YouTube channel here or the Ragged Life website.
5 Beginner-Friendly Rag Rug Patterns
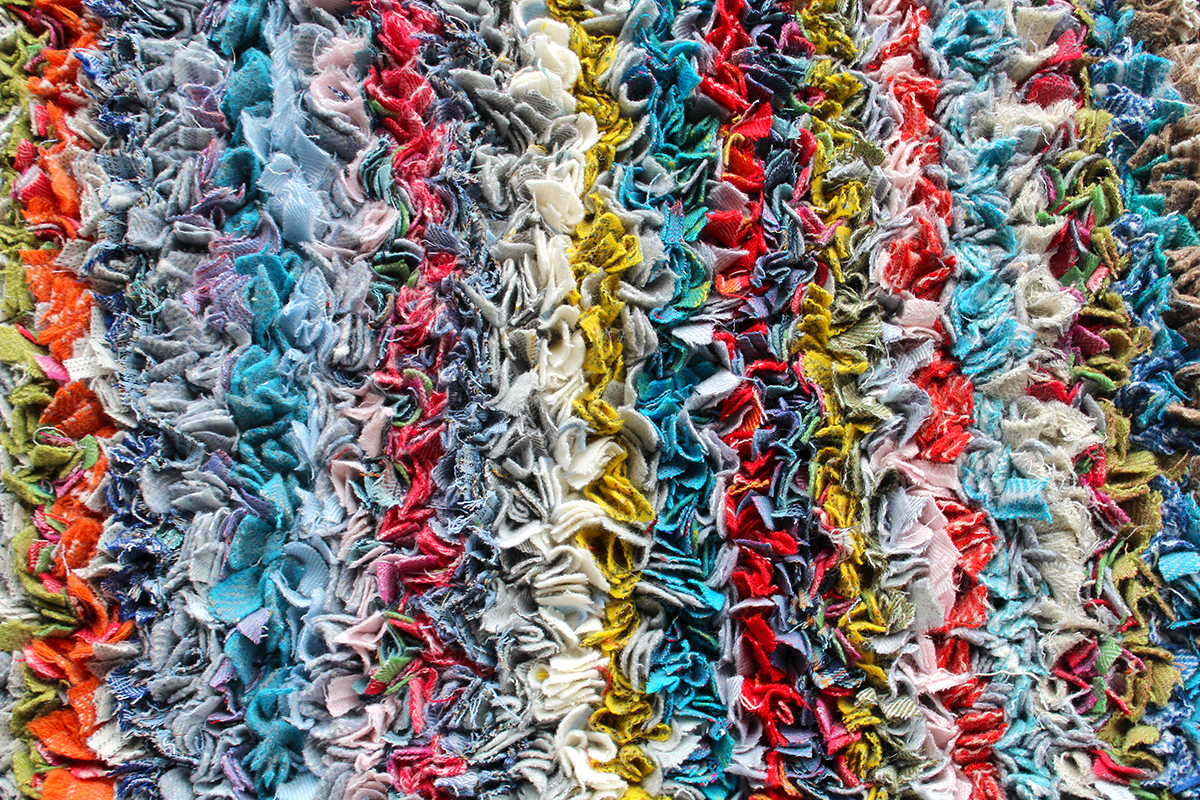
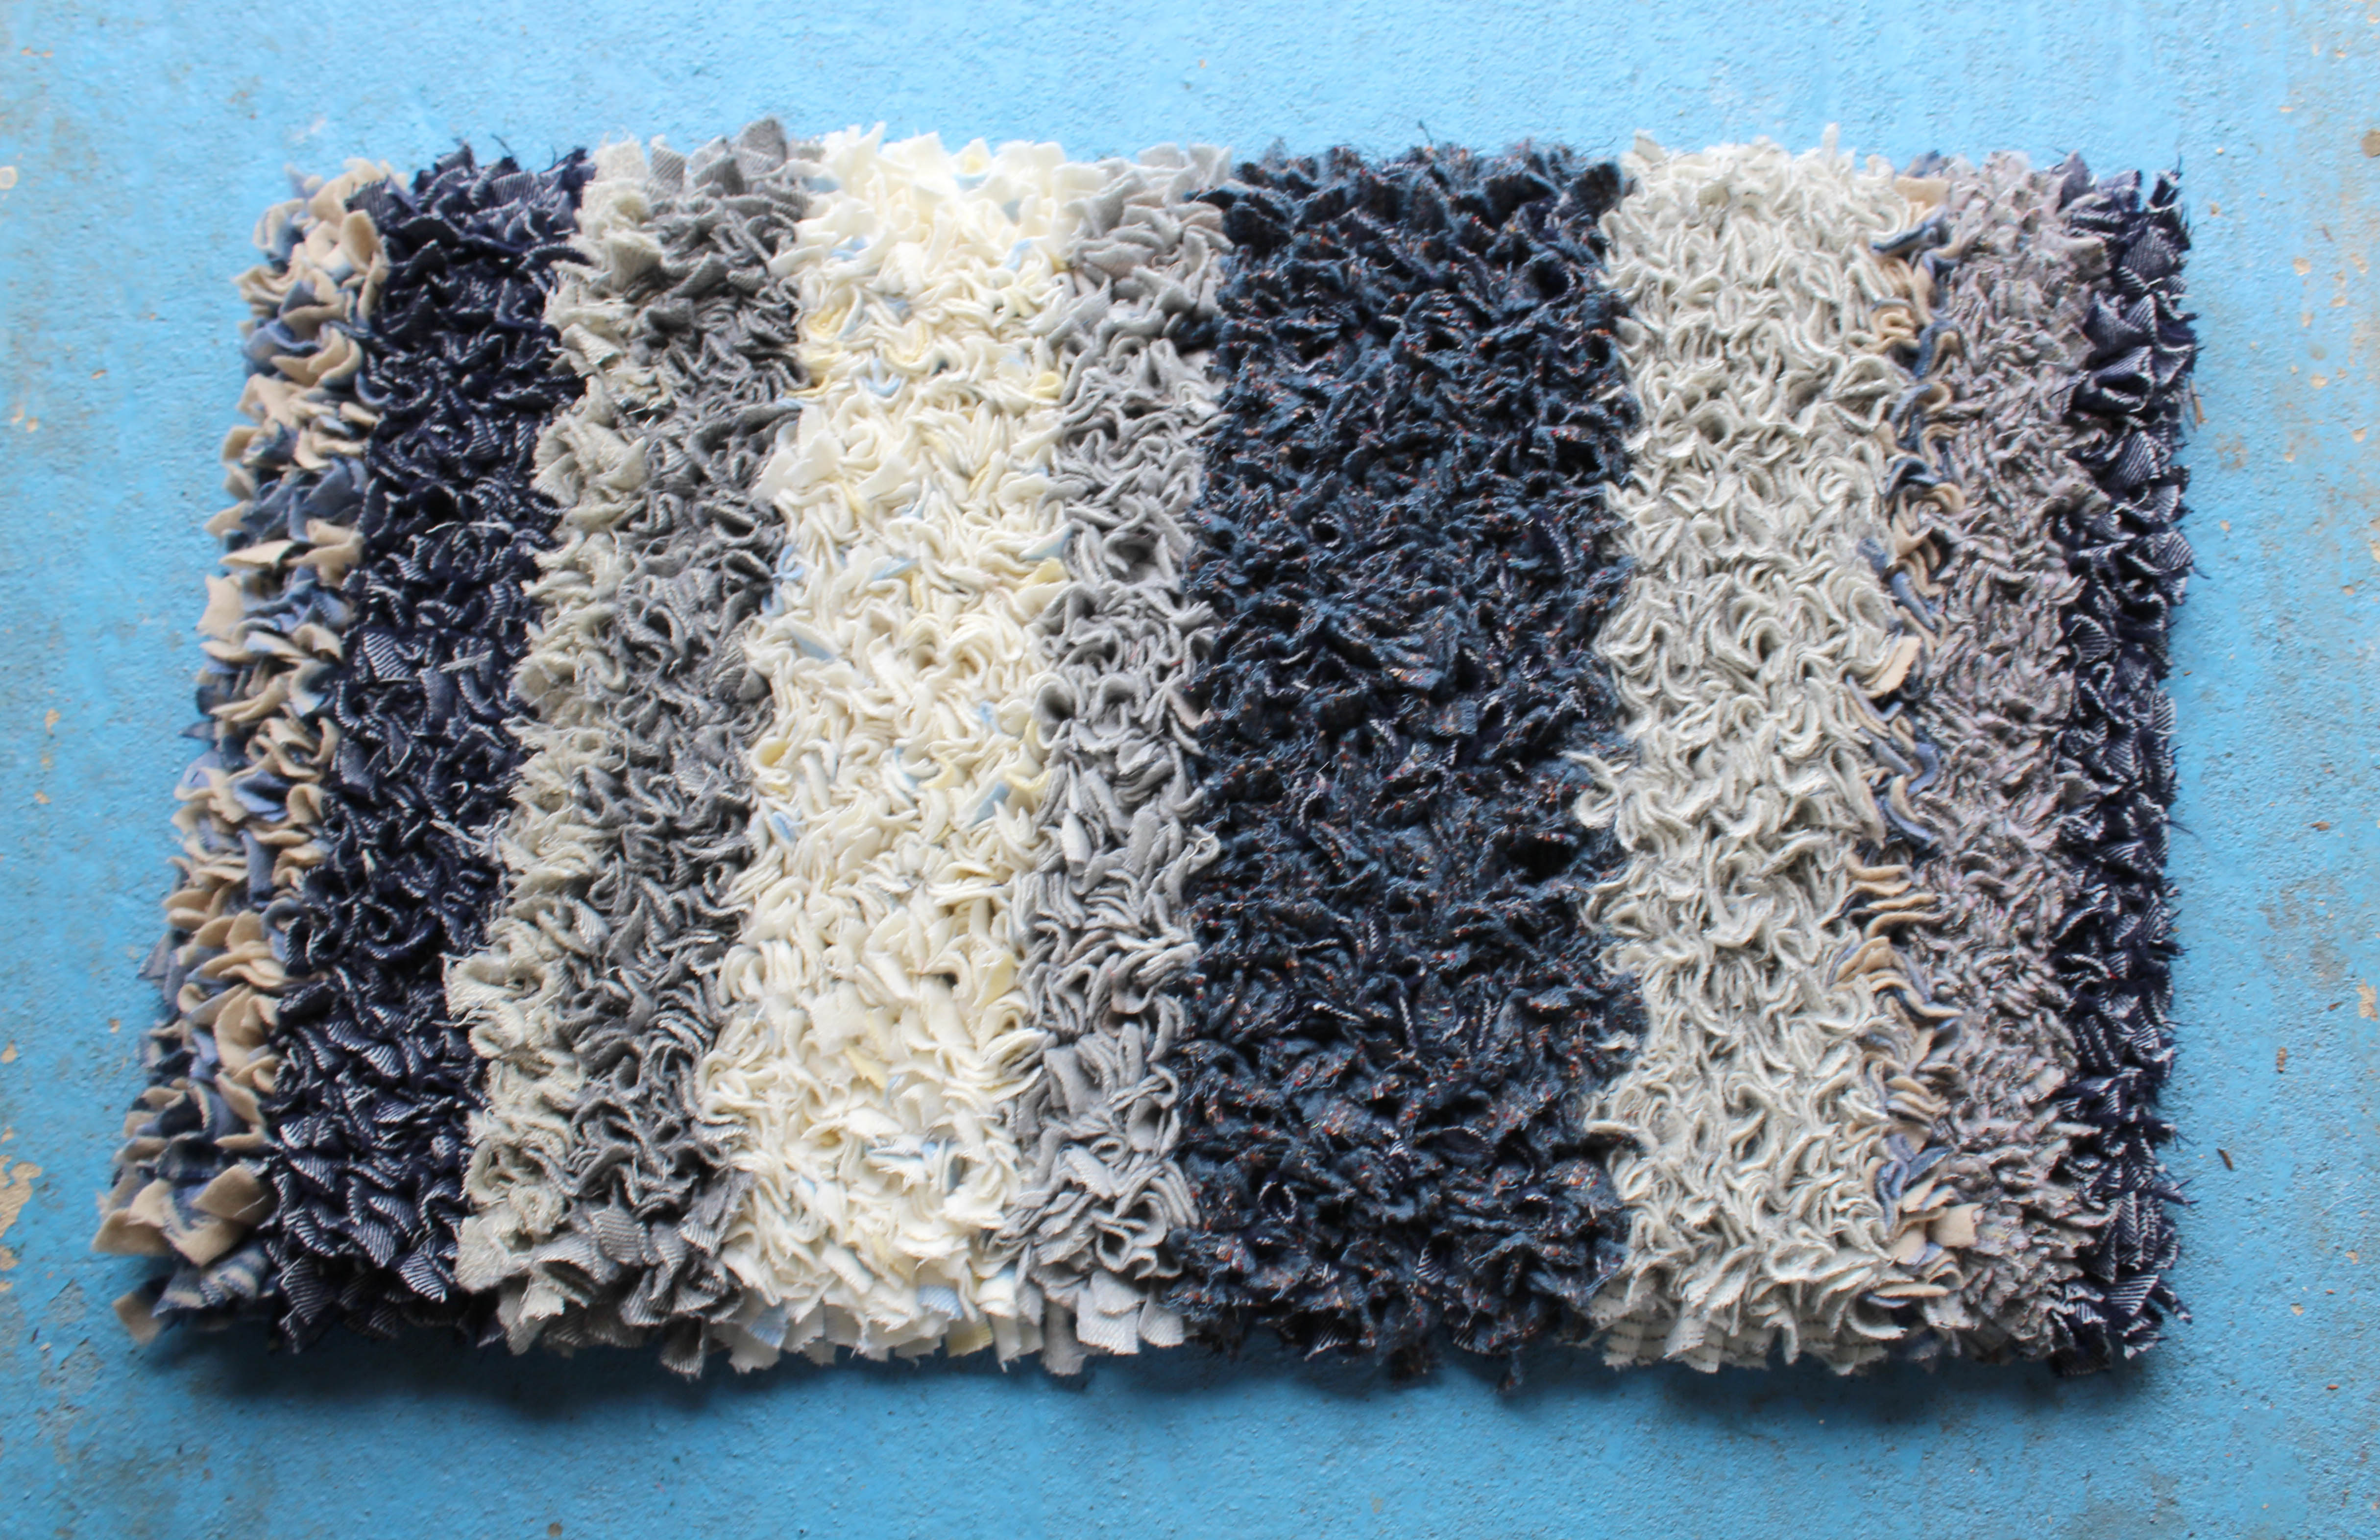
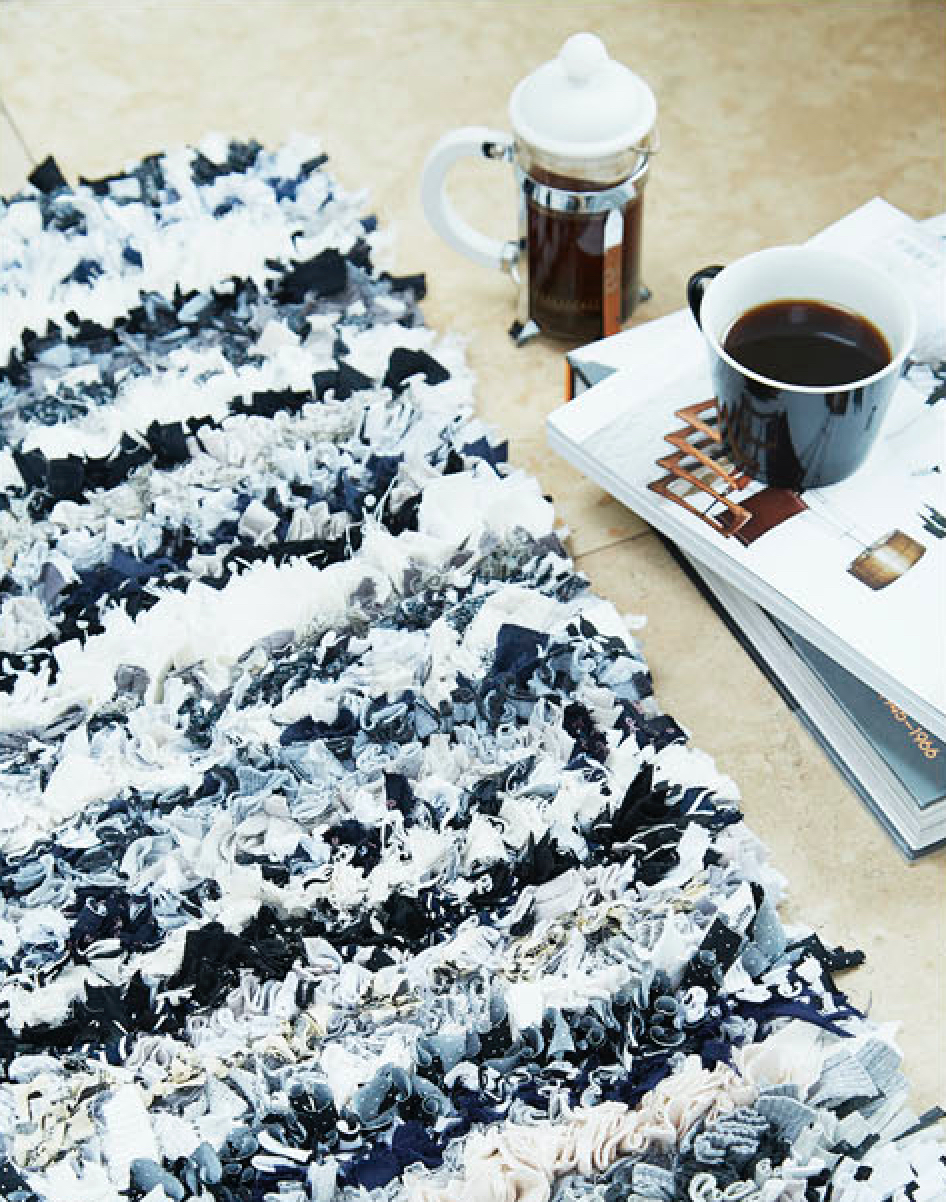
1. The Classic Striped Rag Rug
Why We Love It: A striped design is a timeless classic. It’s one of the easiest patterns to start with and can be customised to fit any colour scheme. Even a very simple colour scheme looks gorgeous in a striped design and you can just work your way peacefully from one end of the rug to the other, one row at a time.
Tips for a Successful Striped Rag Rug:
- Use neutral colours to good effect. If you are blending together lots of different colours into one striped rag rug, you can transition between colours that don’t necessarily pair well together using a neutral colour (cream, off-white, navy, grey, black etc…)
- Balance contrast colours. If you have a colour that stands out very strongly (a neon yellow for example), make sure to distribute it regularly across the length of the rug so that it balances. This means that you’ll need to hold some of that fabric back for later in the rug.
- Challenge yourself. Bored of single stripes? Take your design to a whole new level by varying the widths of stripes and even changing their direction.
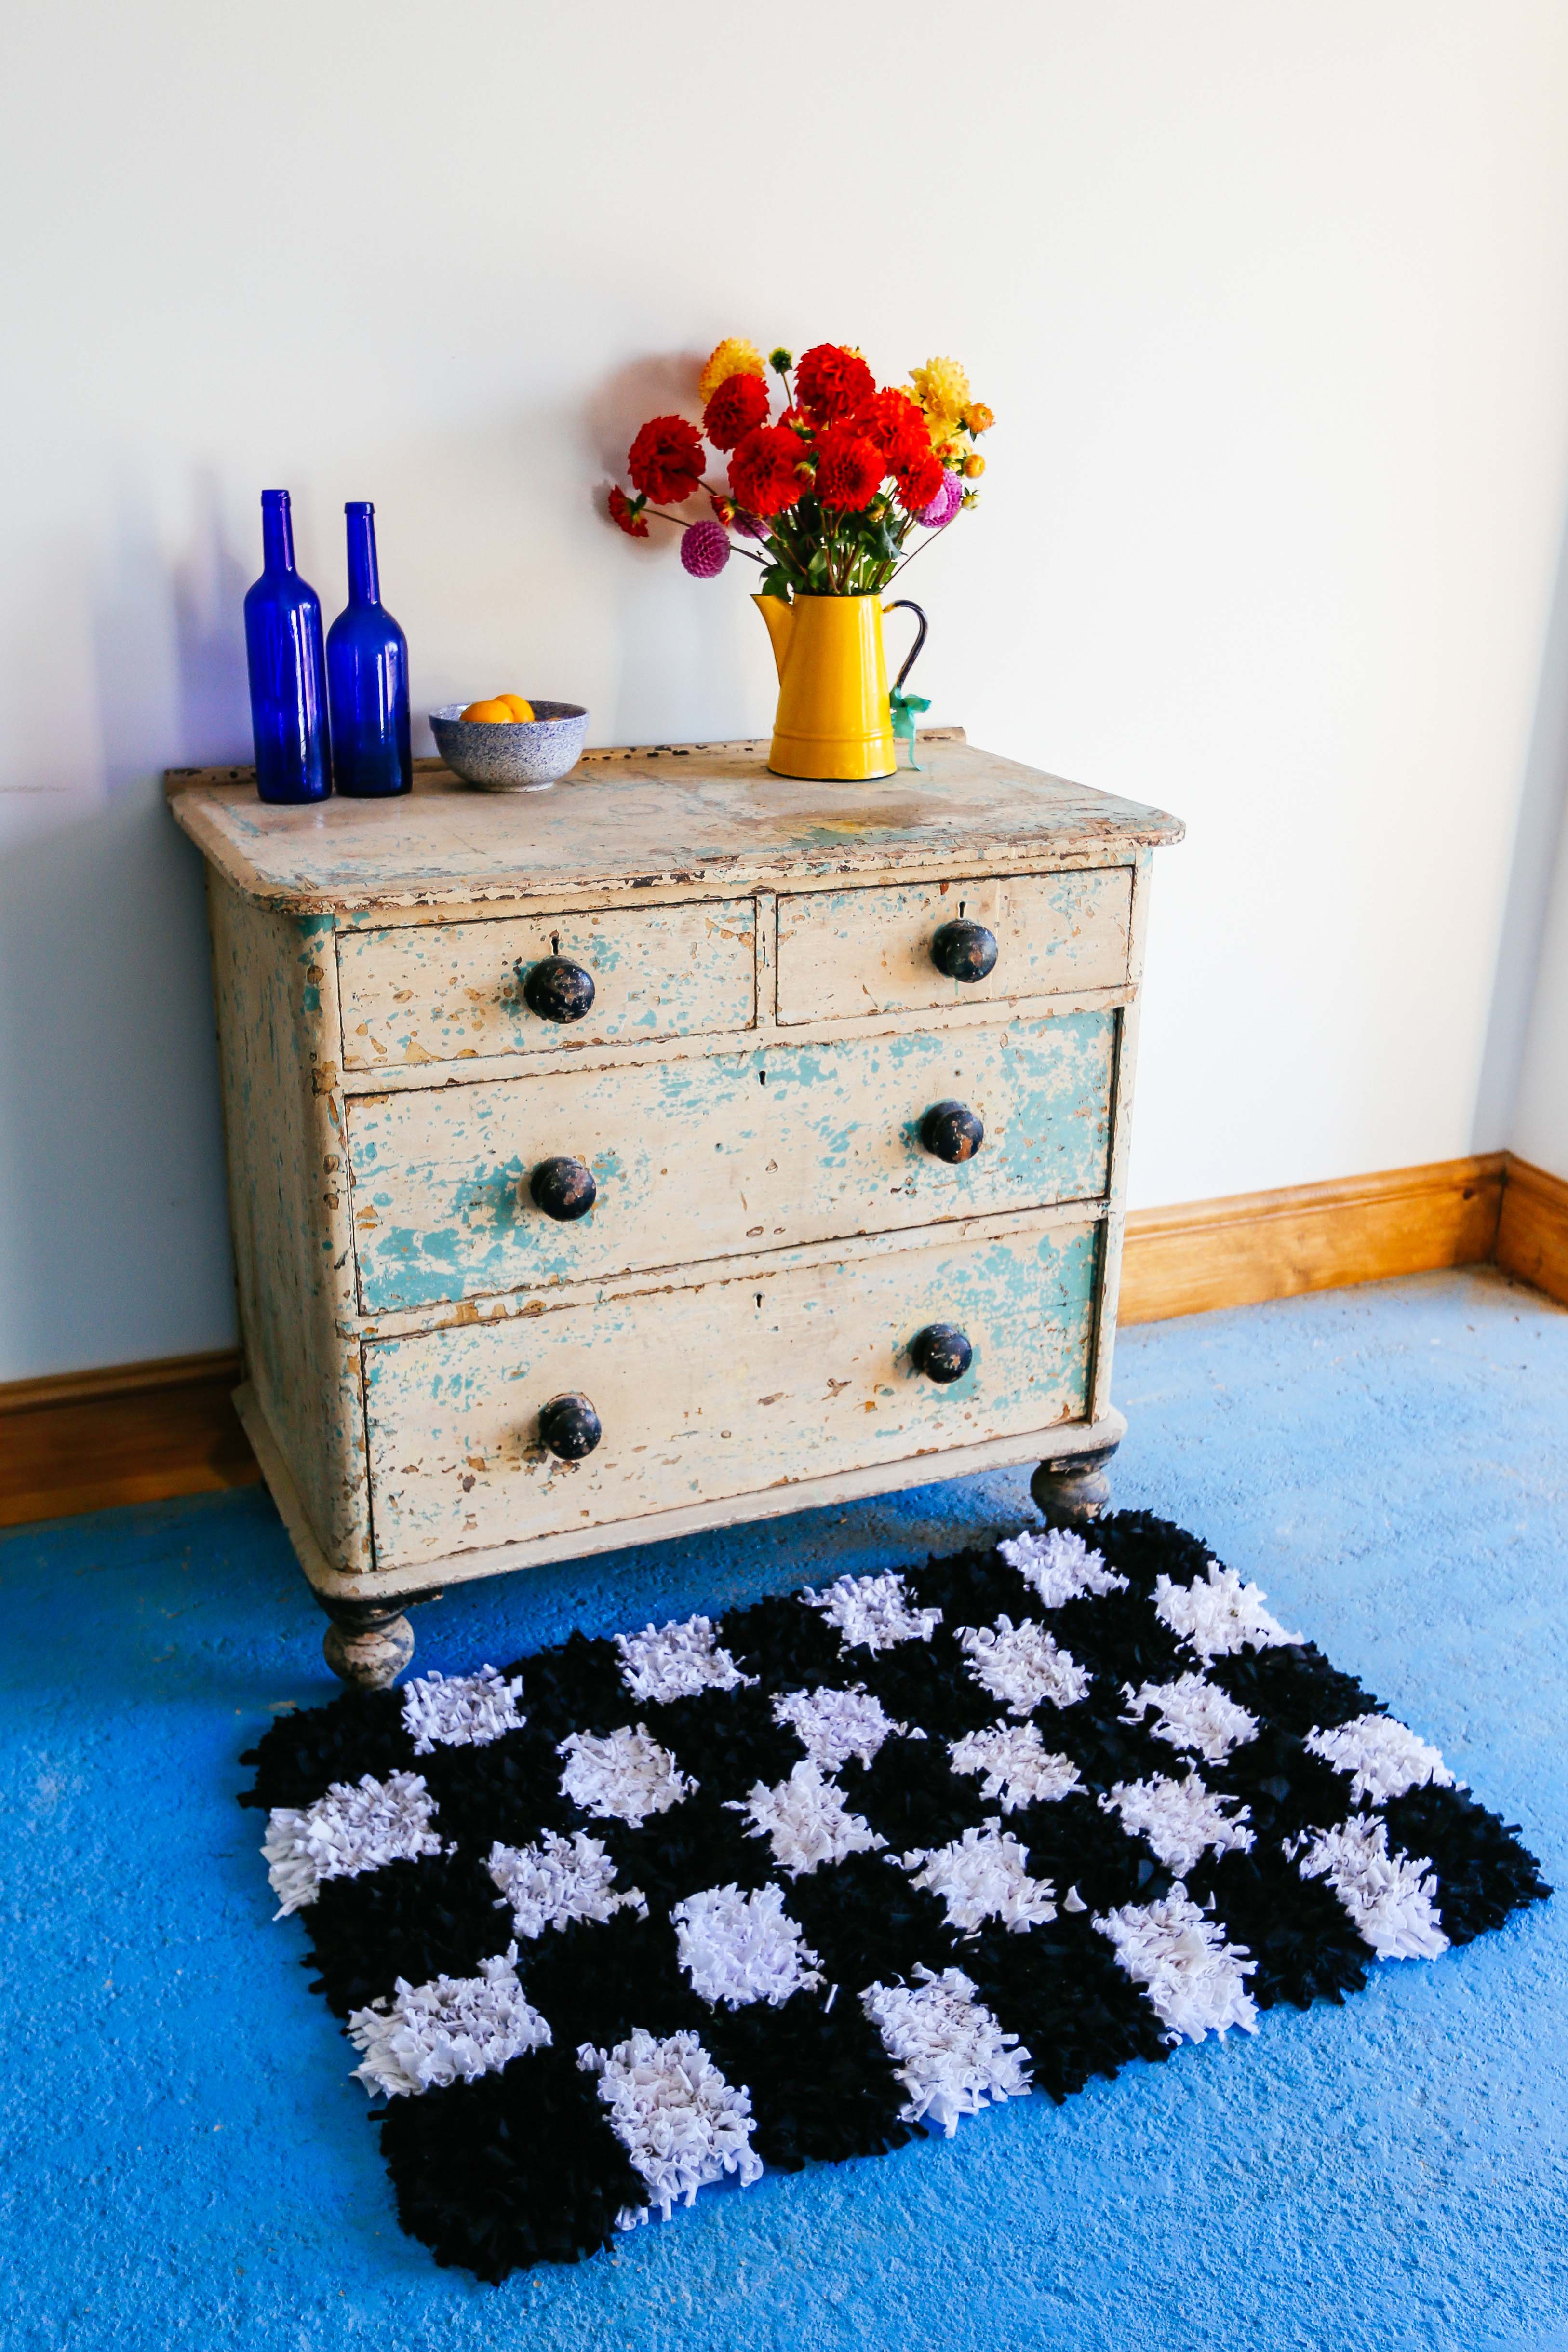
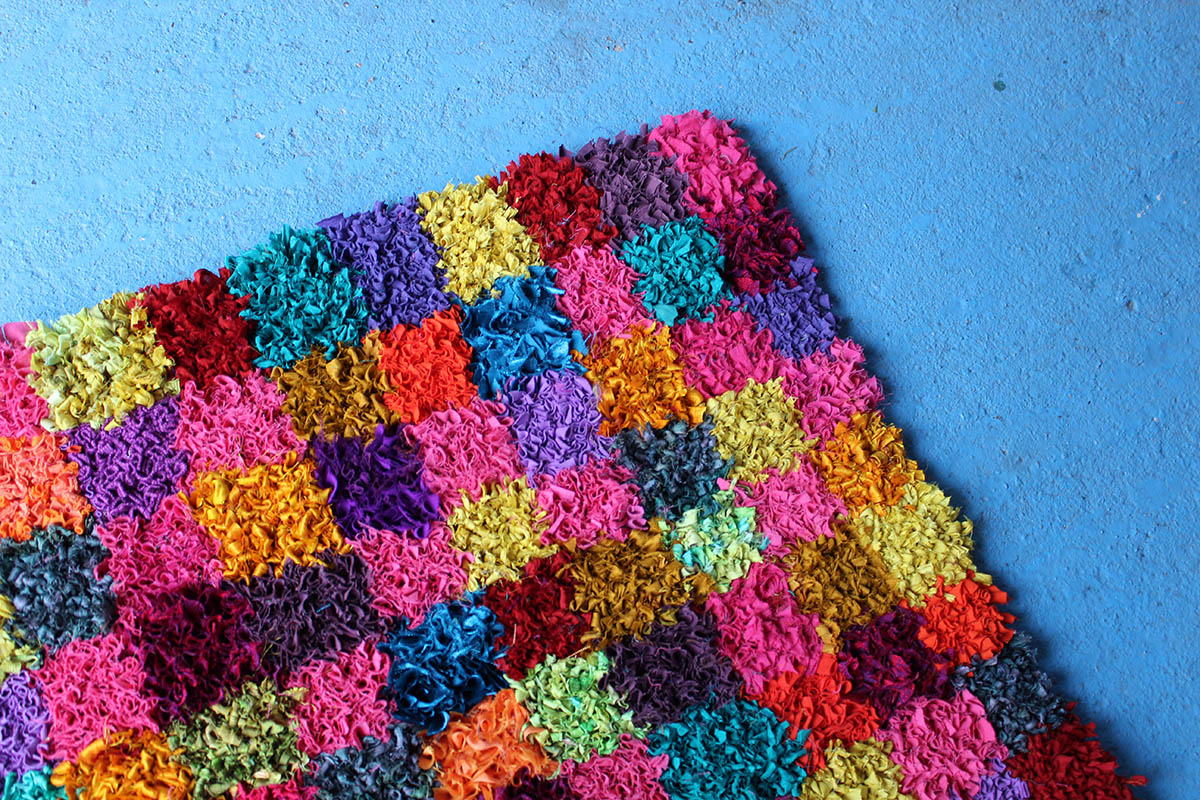
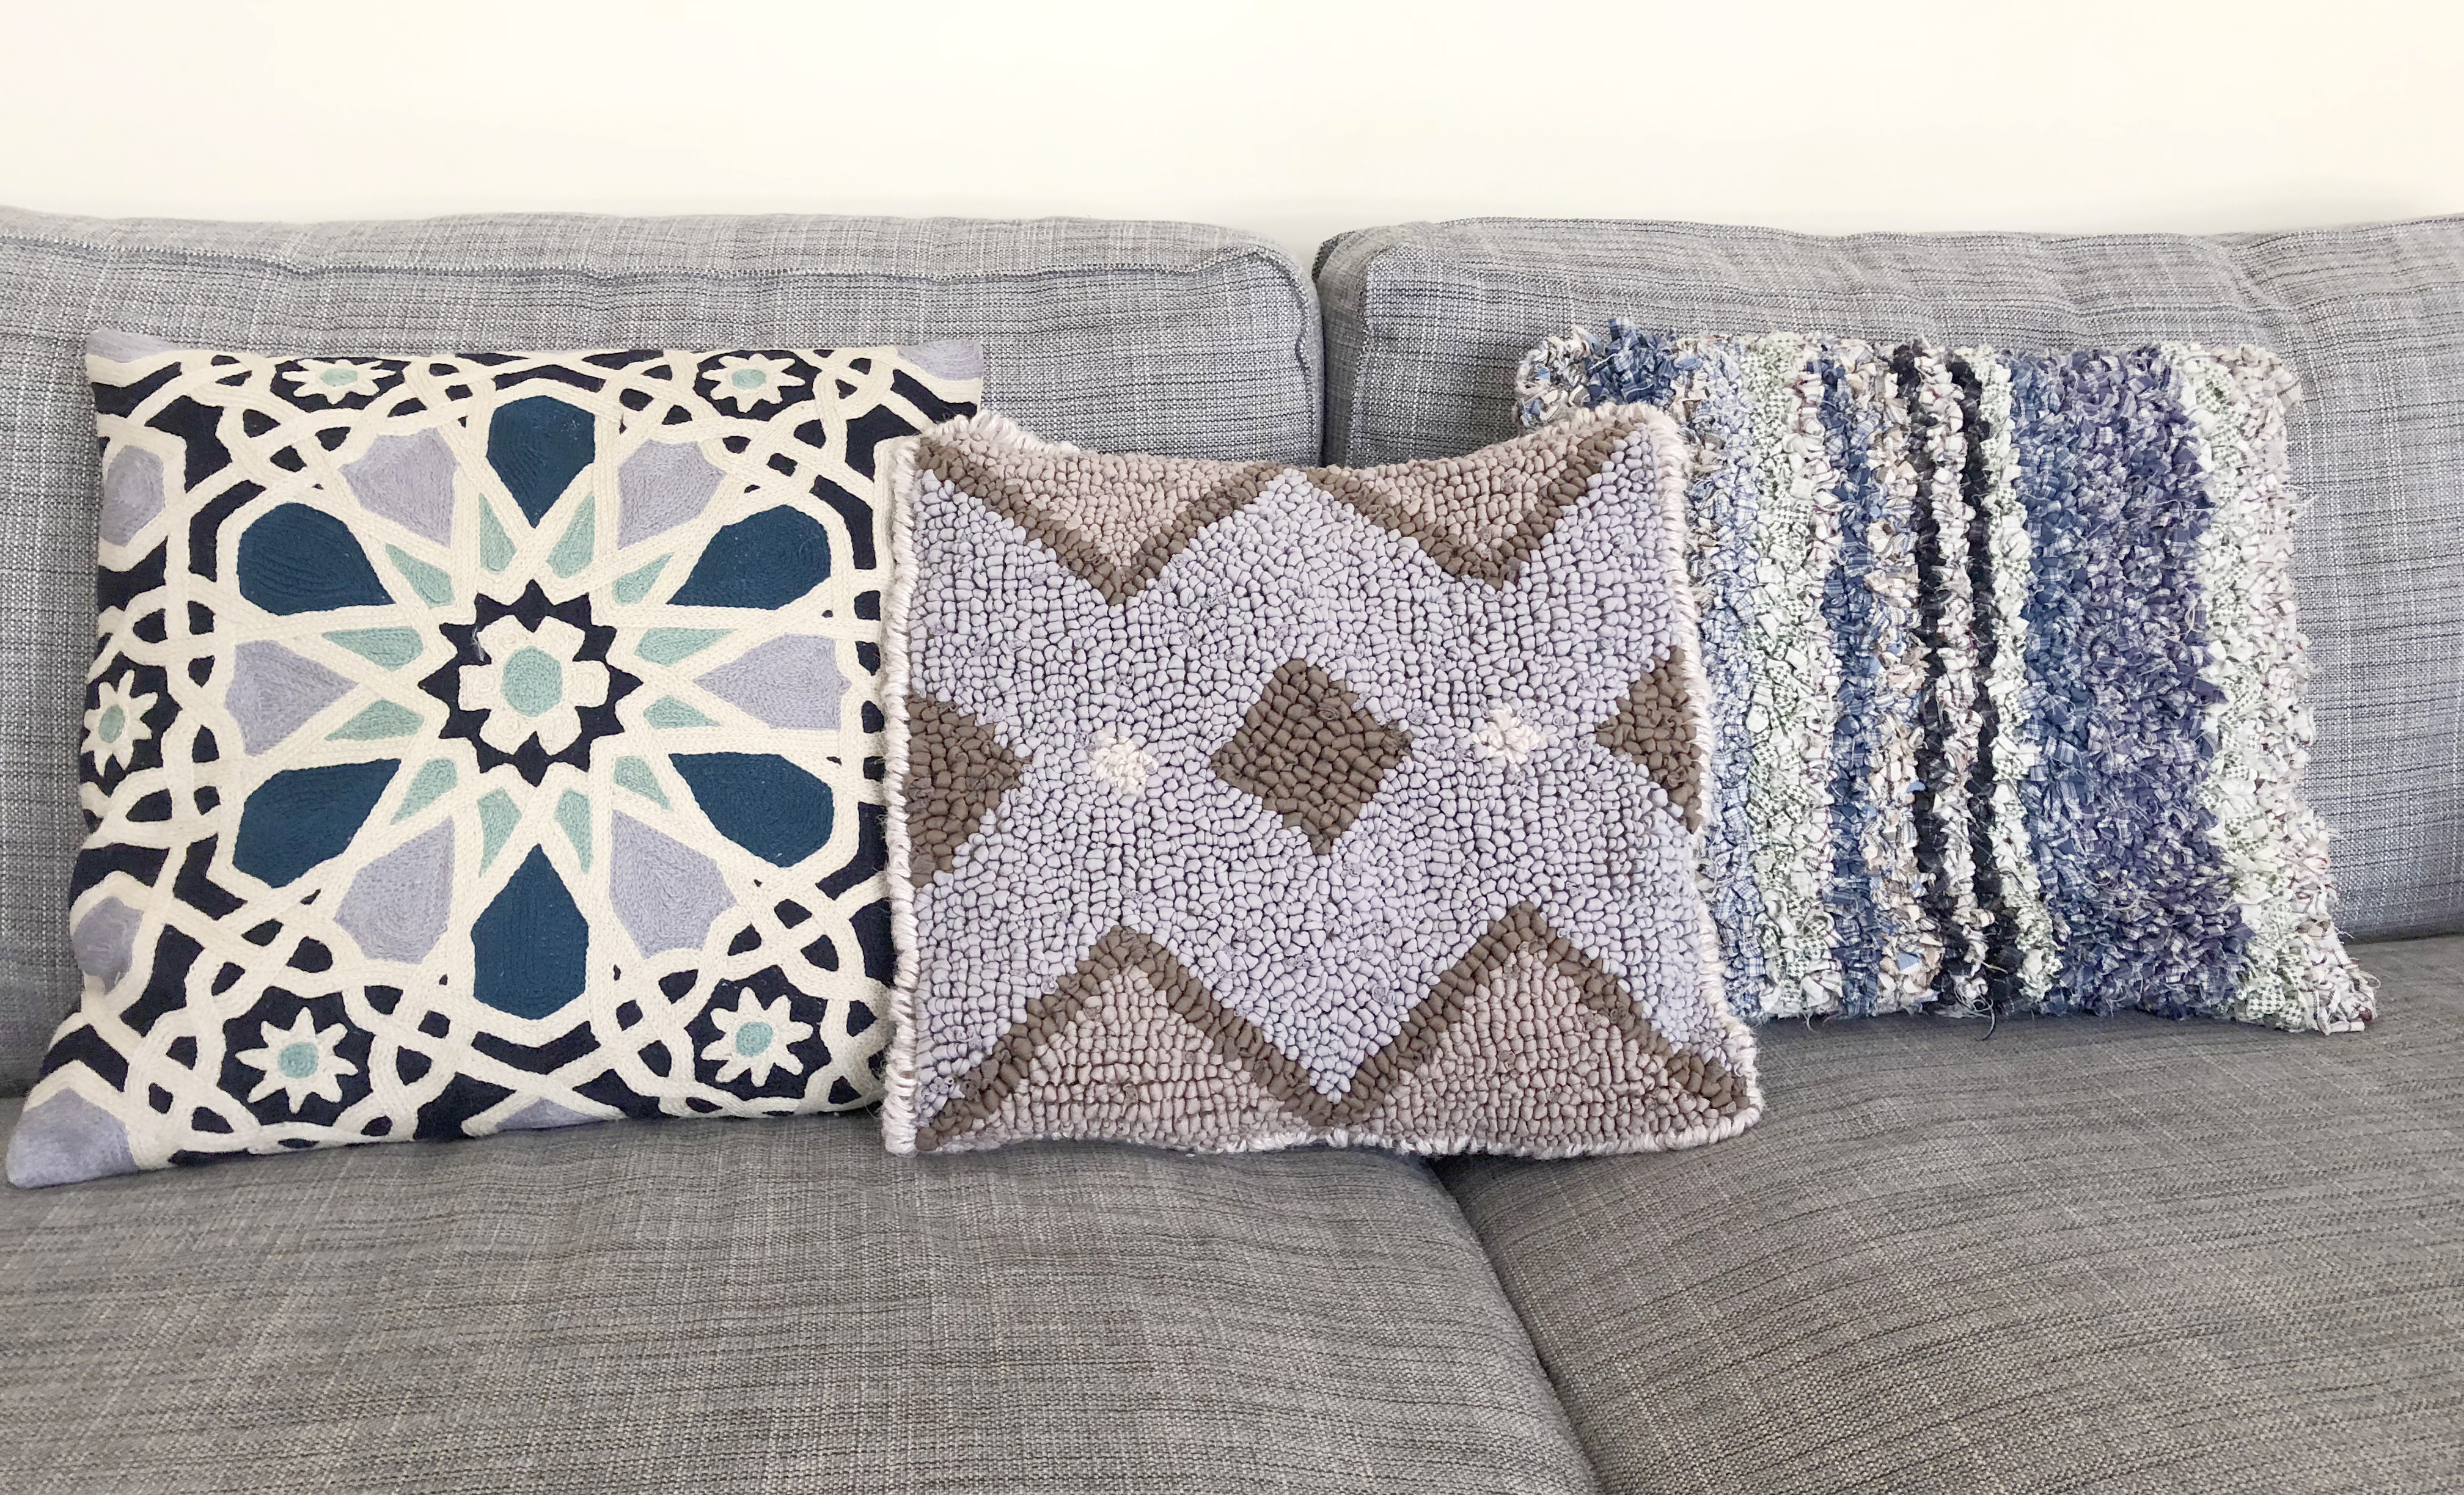
2. The Humble Checked Rag Rug
Why We Love It: A checked rag rug pattern is perfect for those who like the idea of breaking down their project into manageable, bite-sized chunks. You can easily take the design one-square at a time, which feels mindful and logical.

Tips for a Successful Checked Rag Rug:
- Sketch the check out beforehand. Use a marker pen and tape measure, but remember that your squares don’t have to be perfectly square. In fact, all our checks above are rectangular and a bit wonky – it never really shows in the end product. I decide roughly how many squares I’d like along the short edge of the rug (I prefer an odd number) then use that measurement to work out approx how many squares I’ll get along the length of the rug. This is why my squares generally end up rectangular! For the rugs above, we used a 100 x 60cm Ragged Life Medium Sized Hemmed Hessian.
- Repeat a unifying colour. In our short shaggy India-inspired rag rug (above centre), we used a similar pink colour to rag rug two or three squares in each row of the rug. This pink ties together all the other colours and creates balance in the rug.
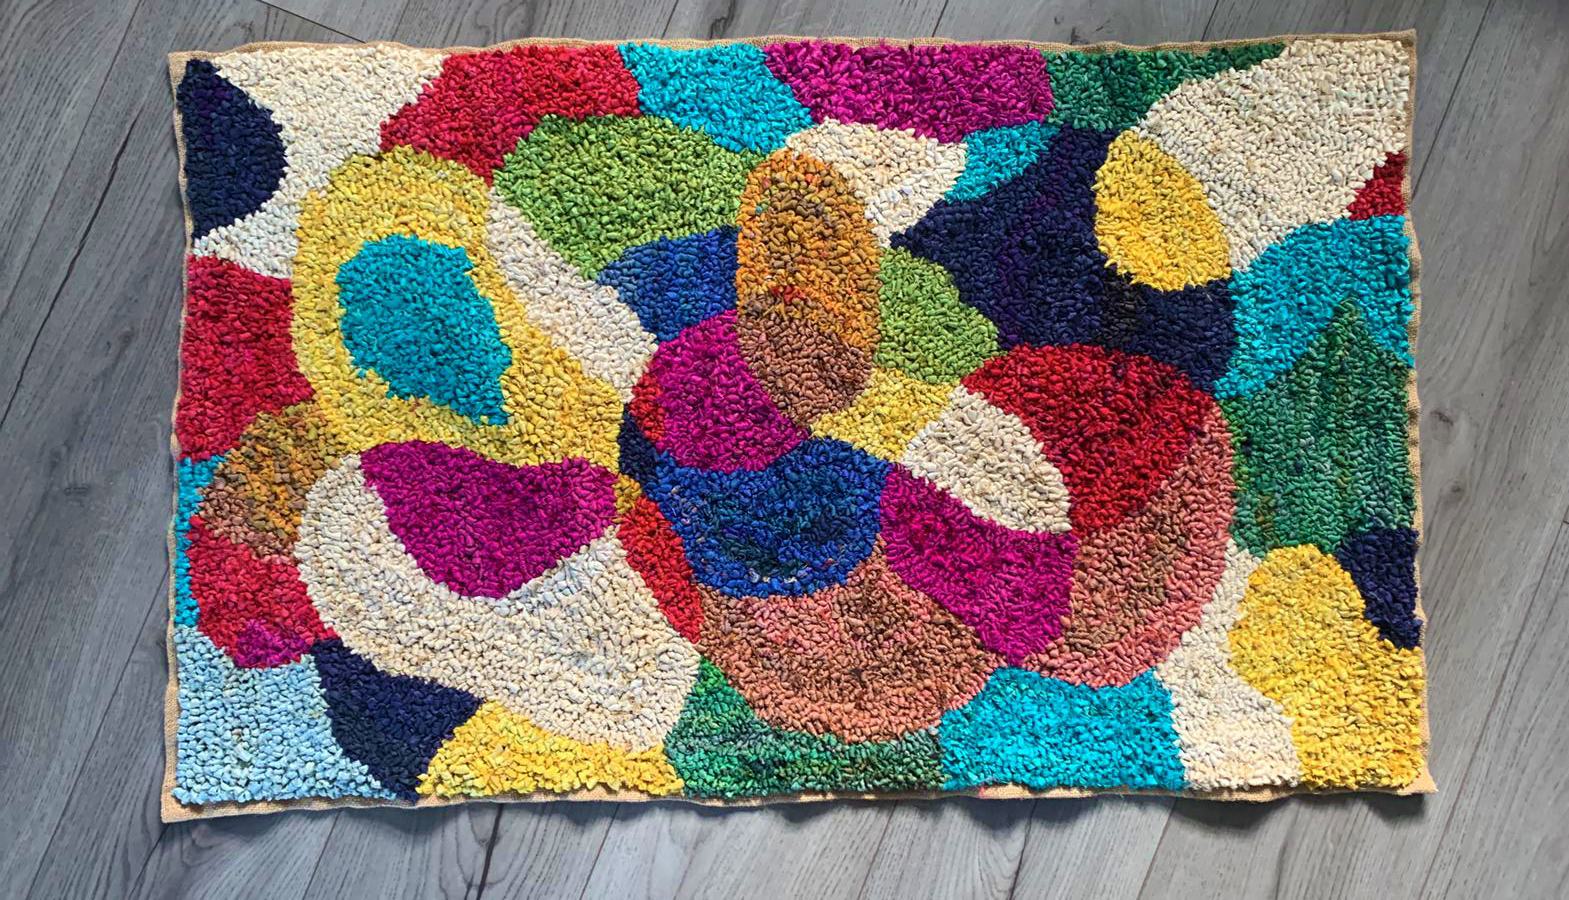
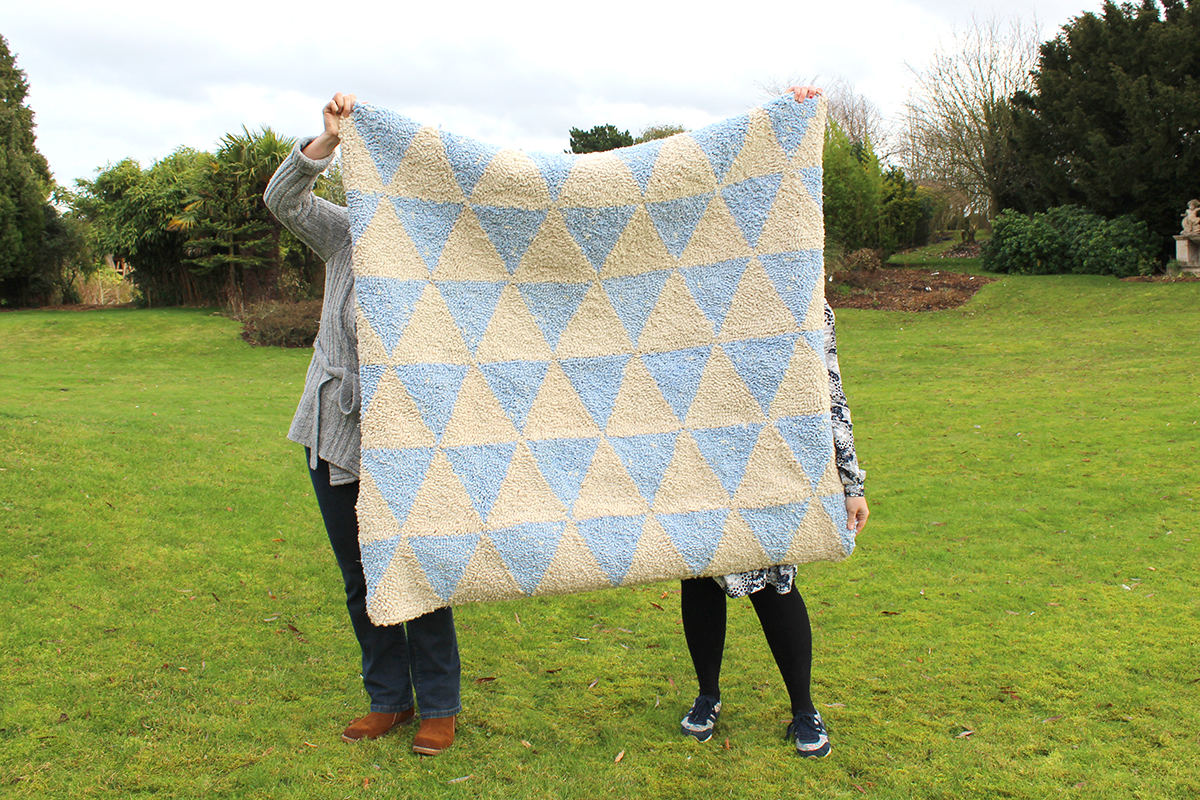
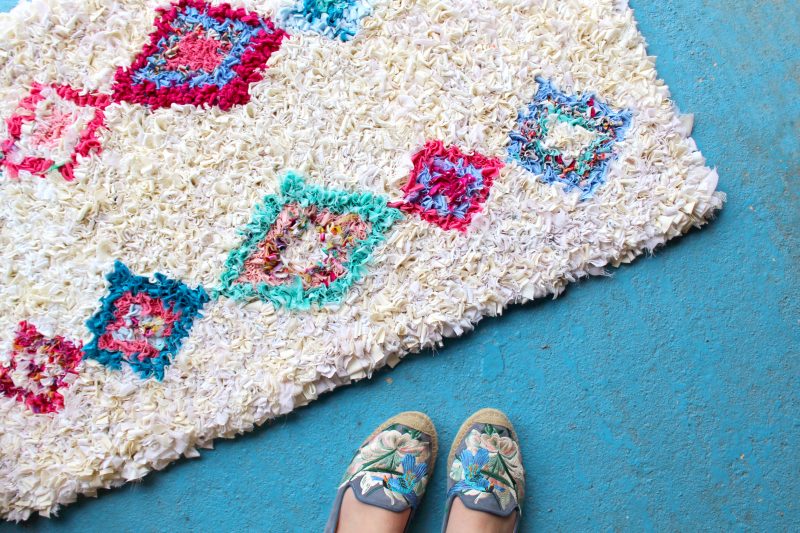
3. Circles, Spots and Polkadot Rag Rug Patterns
Why We Love Them: It’s super easy to find something circular to draw around and within minutes you can have a design to start rag rugging. Stick to all the same size circles for a dotty effect or vary the size of the circular templates you use to create a more organic design.
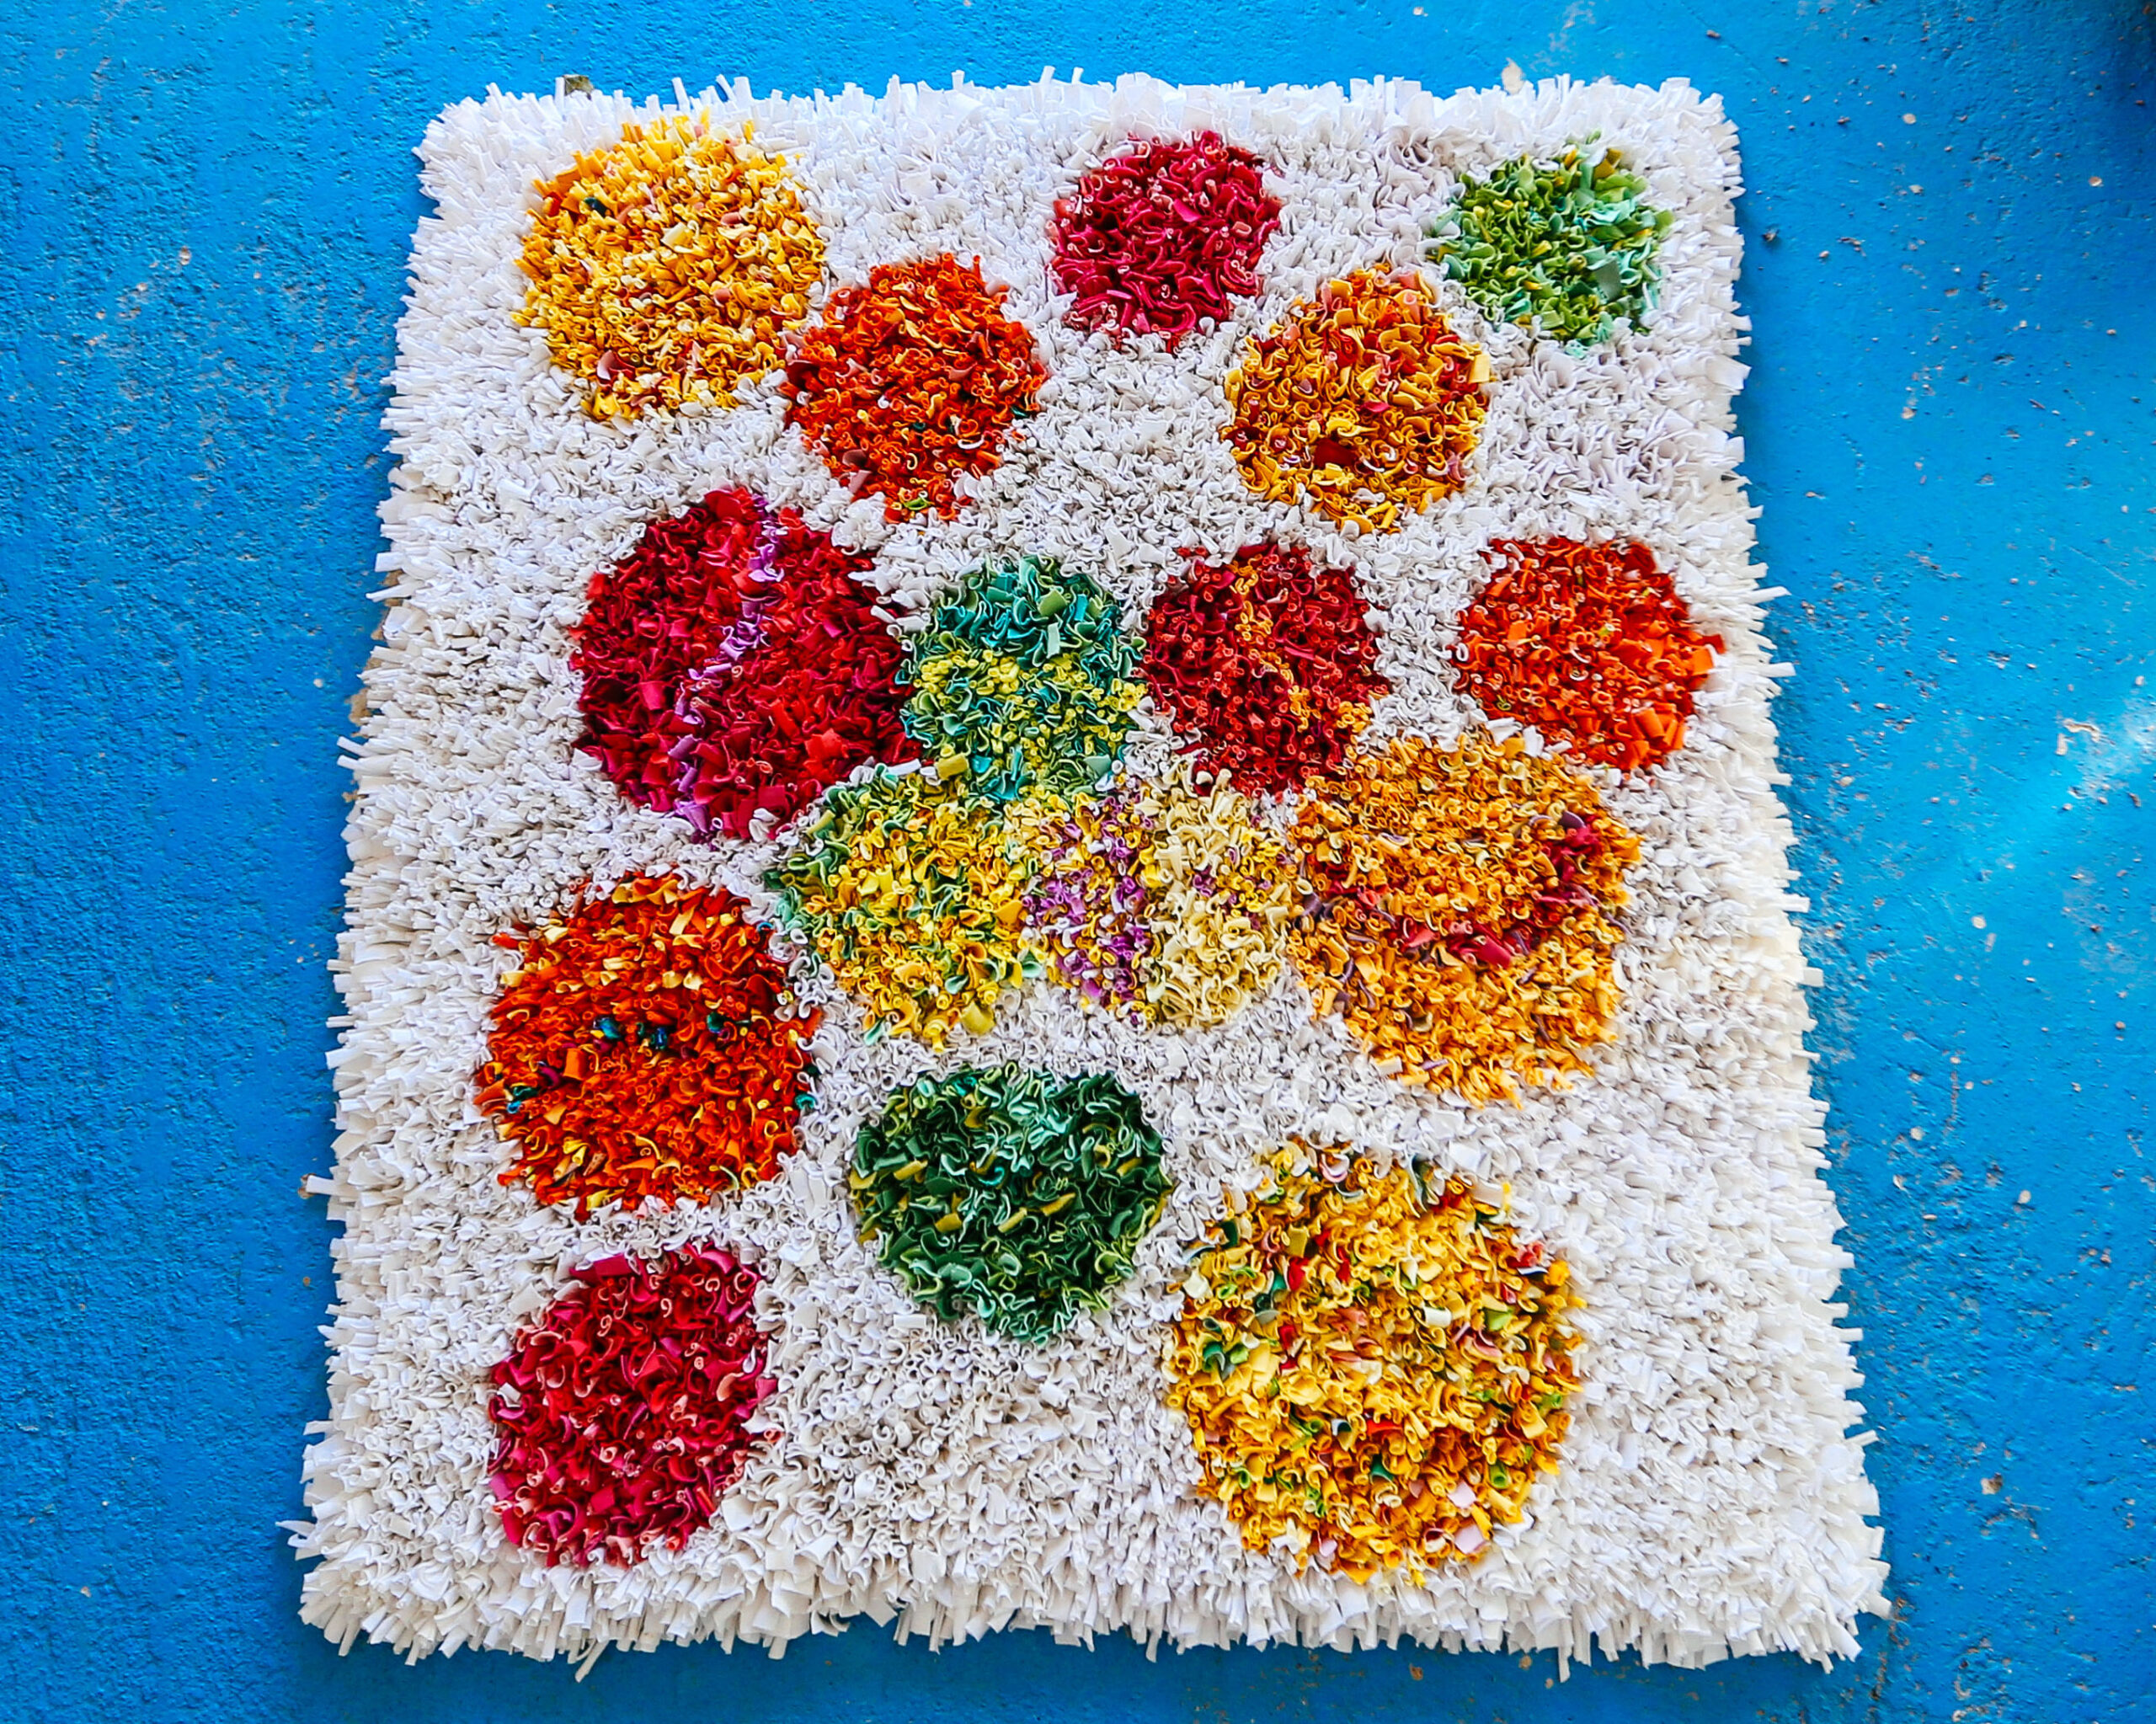

Tips for a Successful Spotty Rag Rug:
- Make your own templates. Use different-sized plates, pots, bins, ramekins… anything round… to create the perfect circle template. You can place your “templates” onto the hessian before you sketch around them to get an idea of the spacing, which means you can play around with the rag rug pattern before committing. You can even have the circles running off the edge of the hessian!
- Choose your background colour first. Choose your background colour (or colours) first so that all your circles will stand out enough against that colour.
- Use up odds and ends. Just because you have a circle sketched out doesn’t mean that it needs to be entirely one colour (particularly in the shaggy and short shaggy techniques). Choose the main colour of that circle and use 80% that colour (for example yellow) but mix in other small scraps to use them up and add interest to the design.
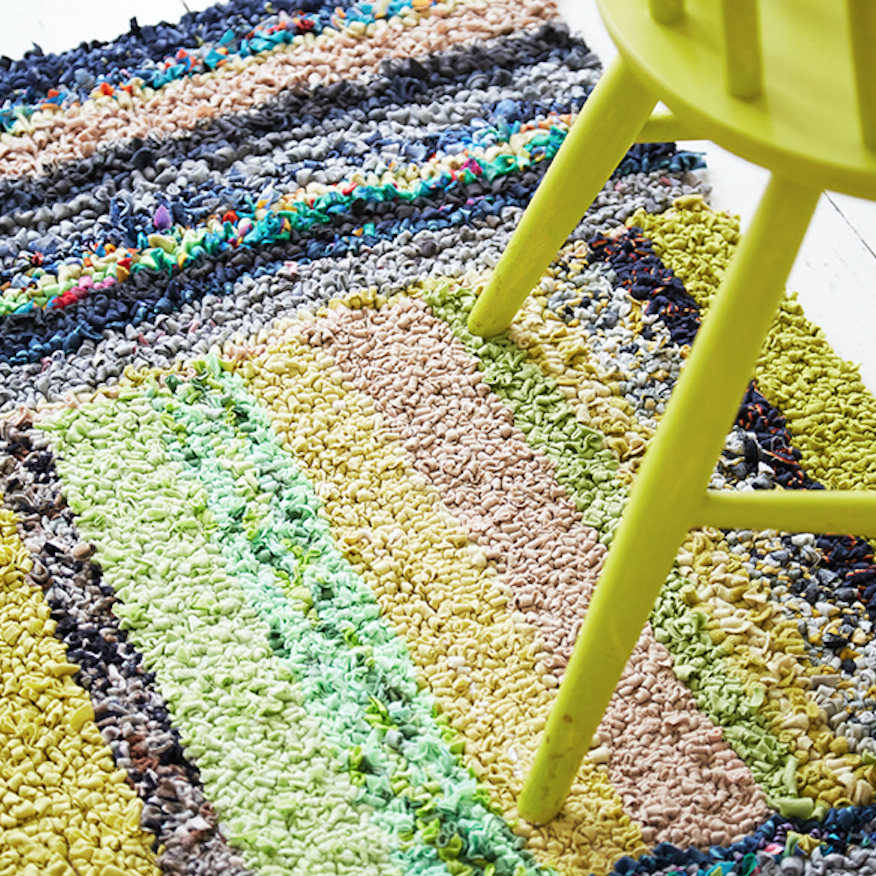
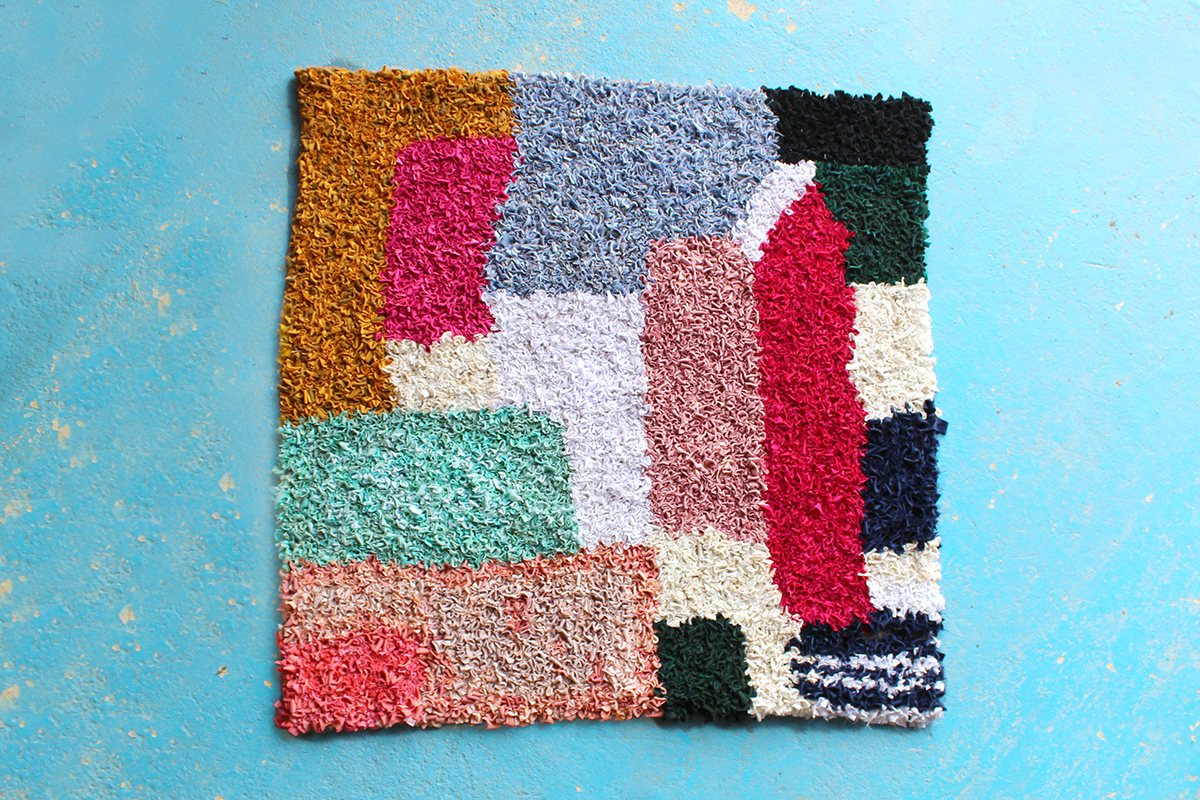
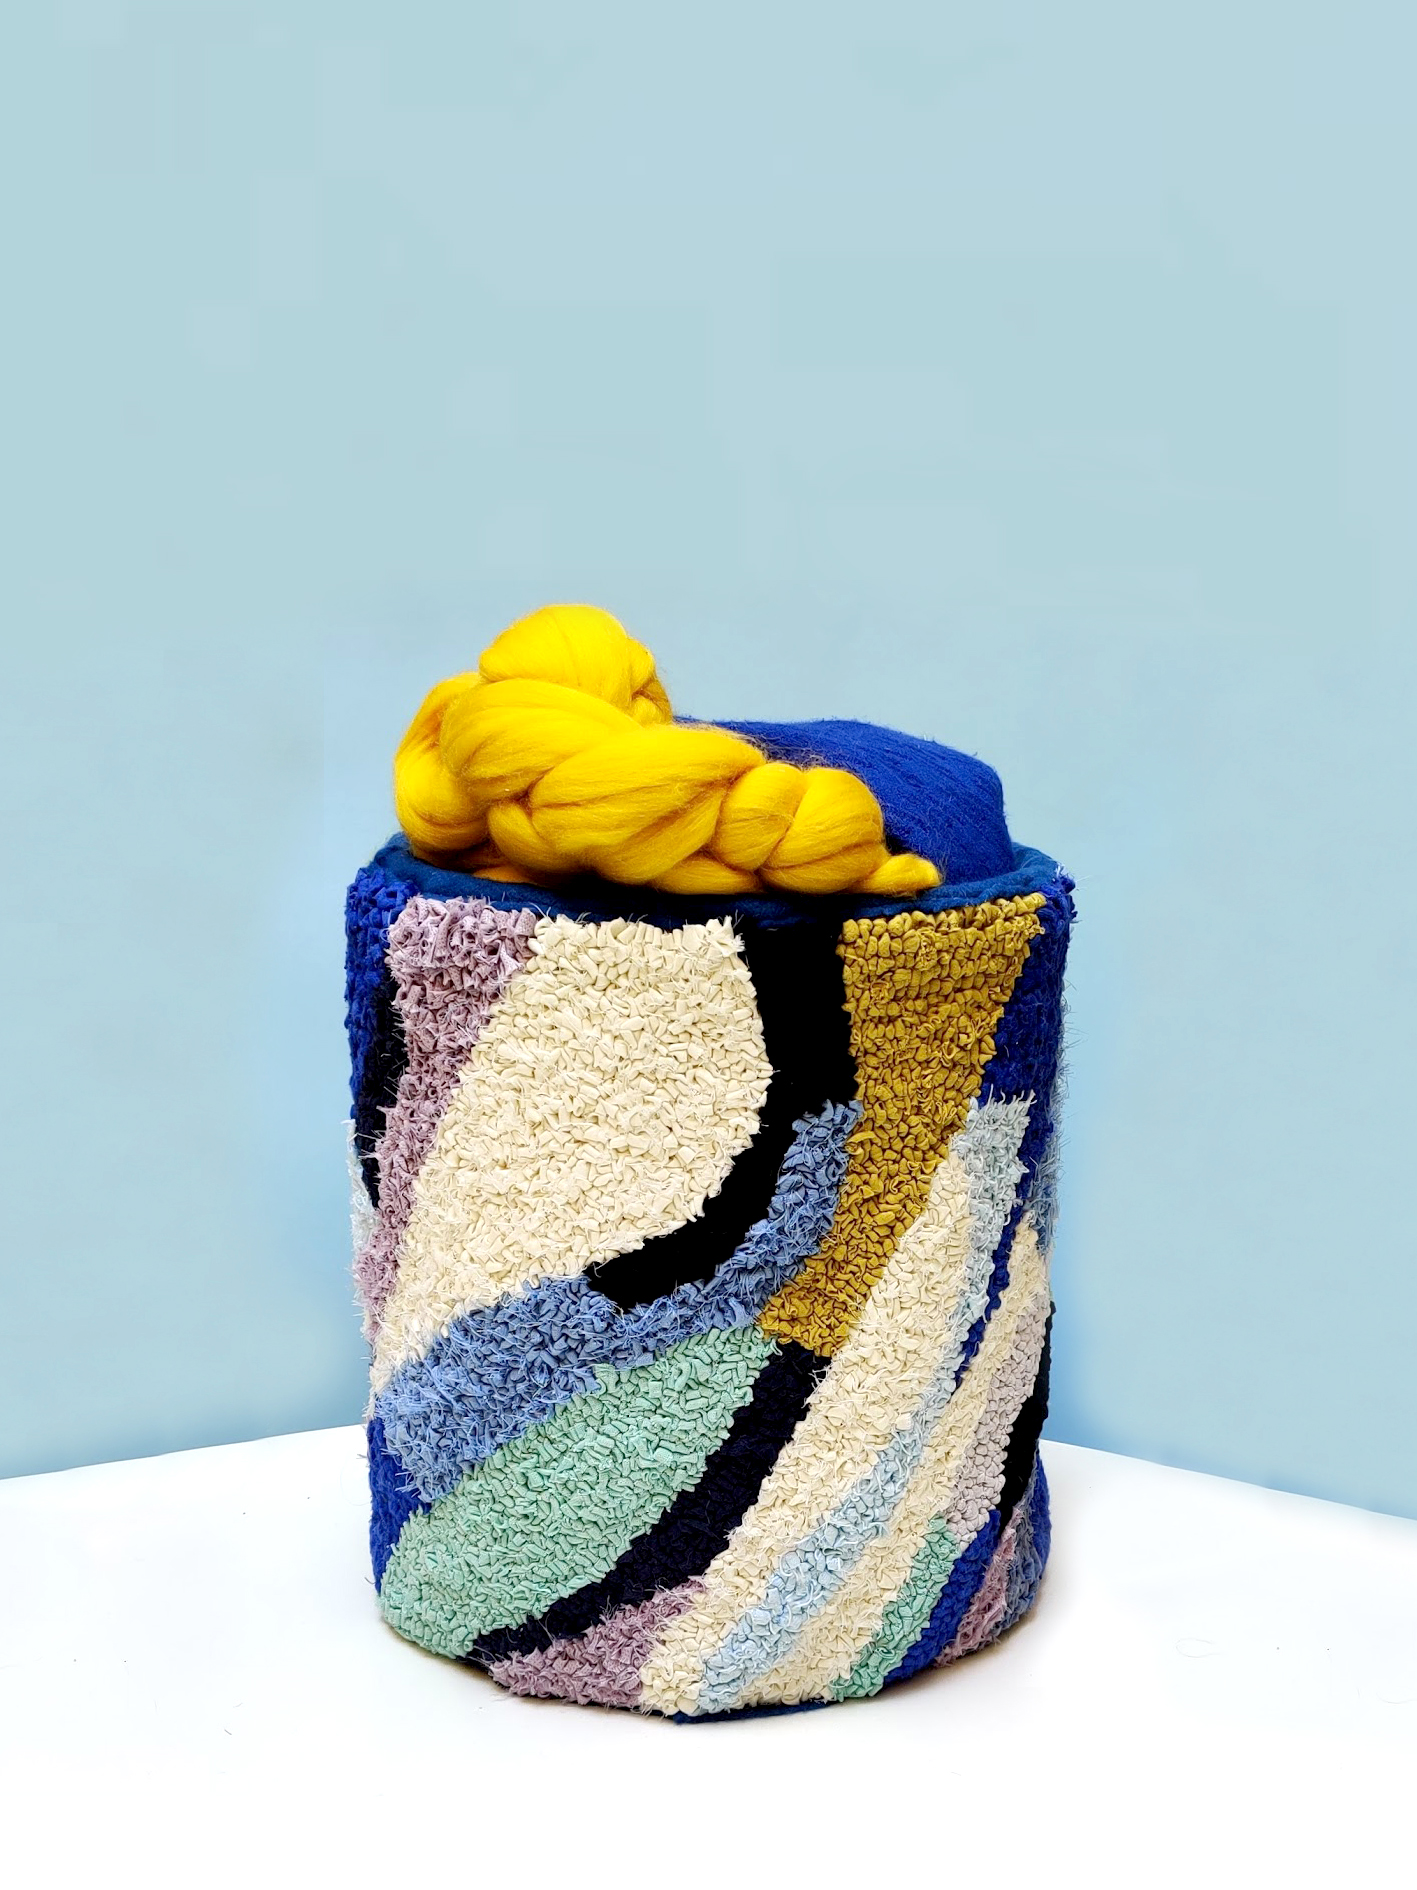
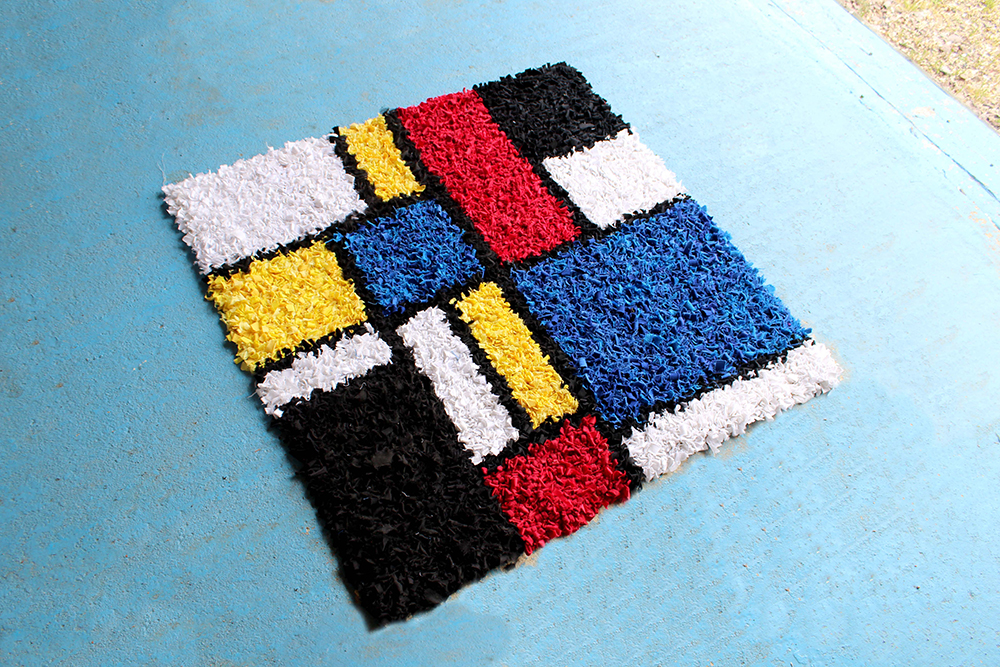
4. A Cool, Colour-Blocked Rag Rug
Why We Love Them: Colour-blocked rag rugs look artistic no matter what colour scheme or configuration you choose. It looks like you’ve done something fancy with minimal effort which is always a bonus! The variety of different-sized blocks means you can use up all kinds of fabrics in your stash too. Think crazy paving designs, abstract expressionism, Mondrian, Rothko etc…
Tips for a Successful Colour-Blocked Rag Rug:
- Use a light, a dark and a bright. Colour-blocked designs are all about contrast. They work particularly well when you use at least one dark colour (navy, grey, black, dark shades of any colour), one light colour (cream, off-white, light shades of any colour) and at least one bright colour – that’s to say, something that will stand out in the design. This combination creates visual interest in the design.
- Plain colours stand out stronger. For a really strong colour-blocked design, use plain colours as the eye will gravitate to these first. However, you can achieve the appearance of a plain colour by mixing together lots of shades of a similar colour together into one block. Don’t lose sight of the fact that rag rug making is all about using up stuff you already have!
- Be brave! Drawing the first line is half the battle. Once you’ve got your first line in place, it’s easier to draw other lines that intersect with it, swirl past it etc… Remember, you’re going to be covering the hessian with rag rugging anyway, so any mistakes can easily be redrawn.
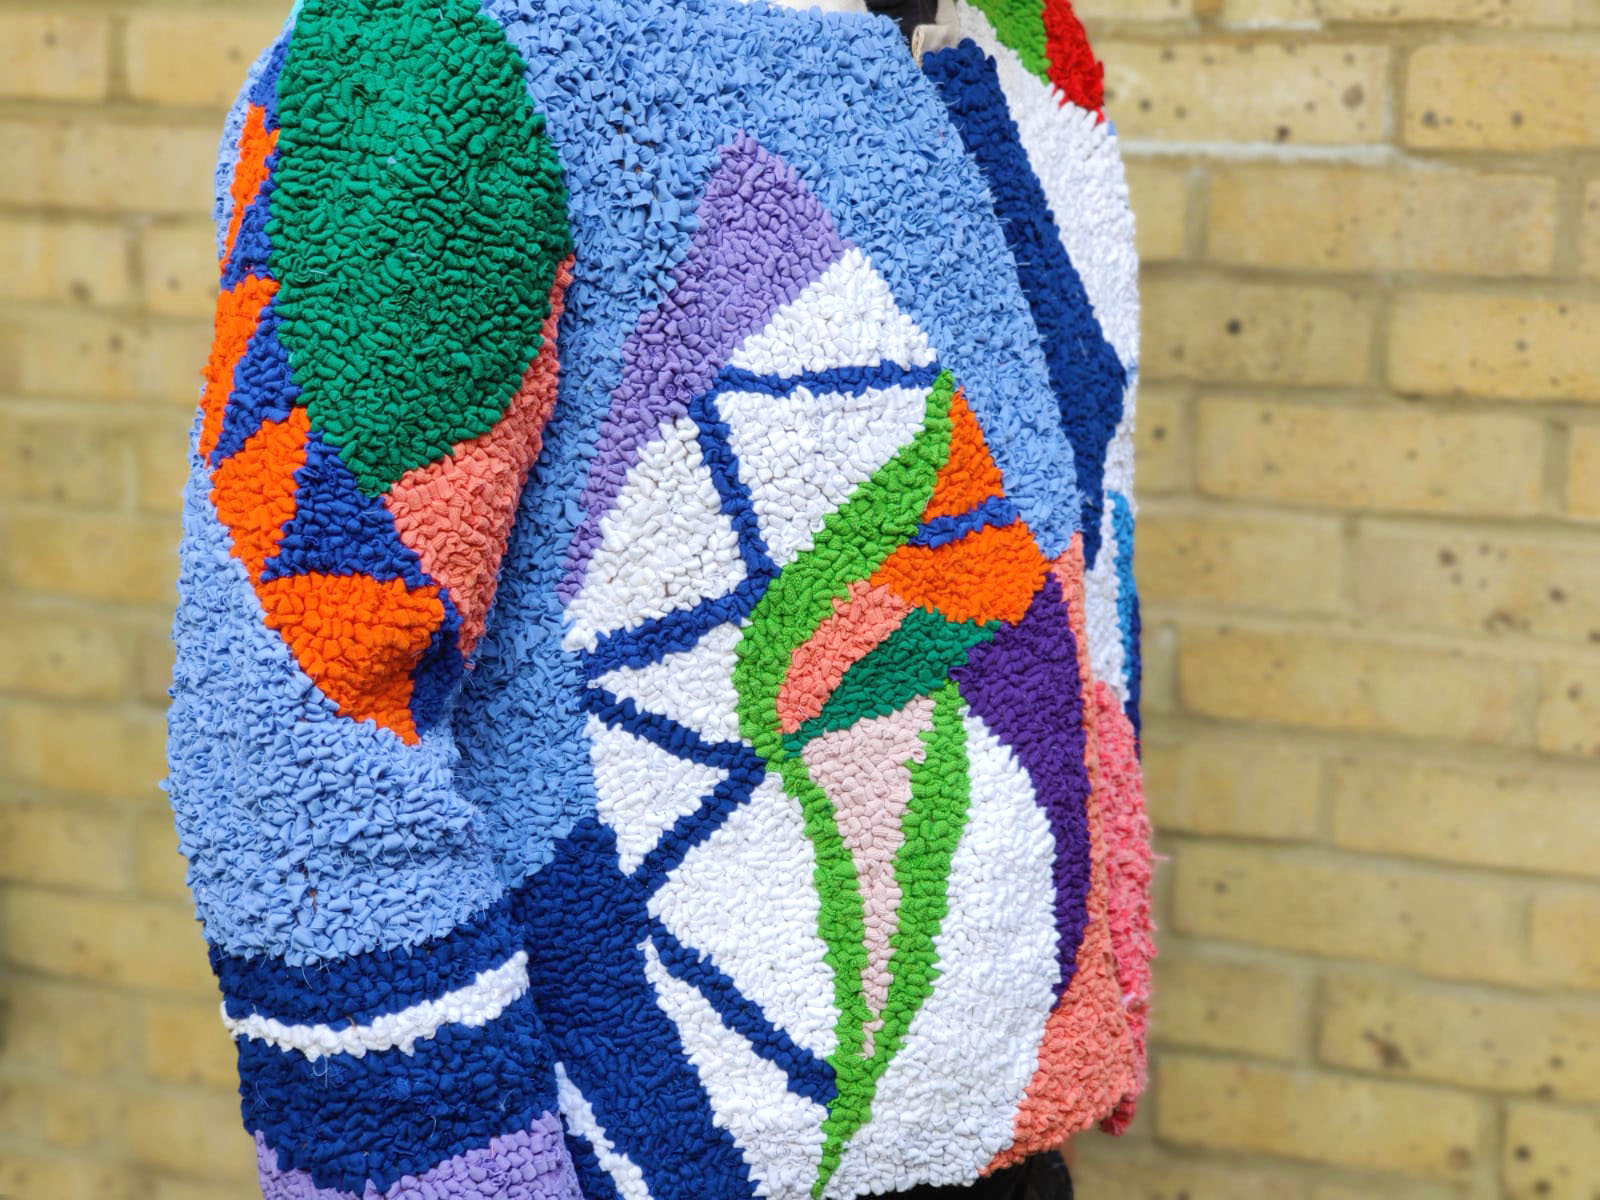
5. A Bold, Angular Geometric Pattern
Why We Love It: All the lines on these designs can be drawn using a ruler, so these rag rug patterns are ideal for anyone looking for a neat and orderly design. Triangles, diamonds and chevrons appear in rug designs from every culture across the world – they are truly timeless!
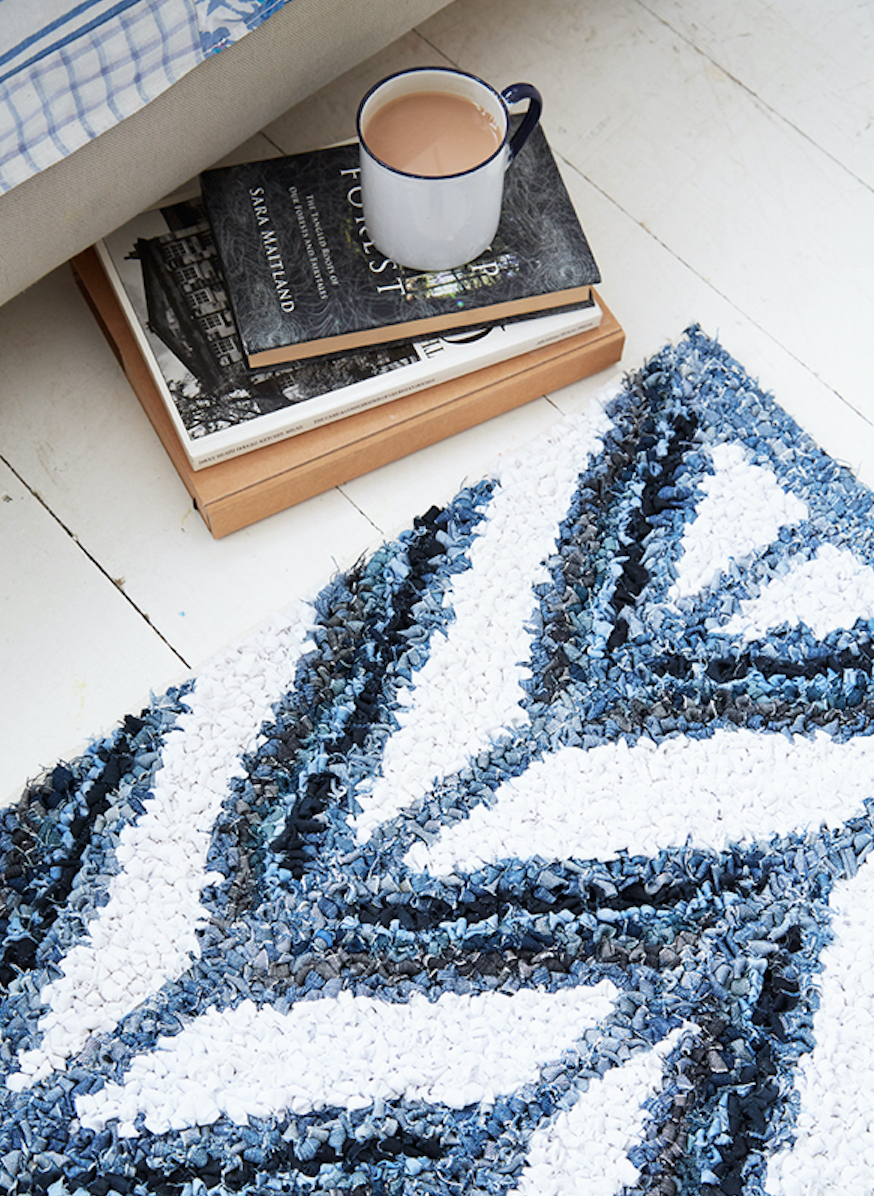
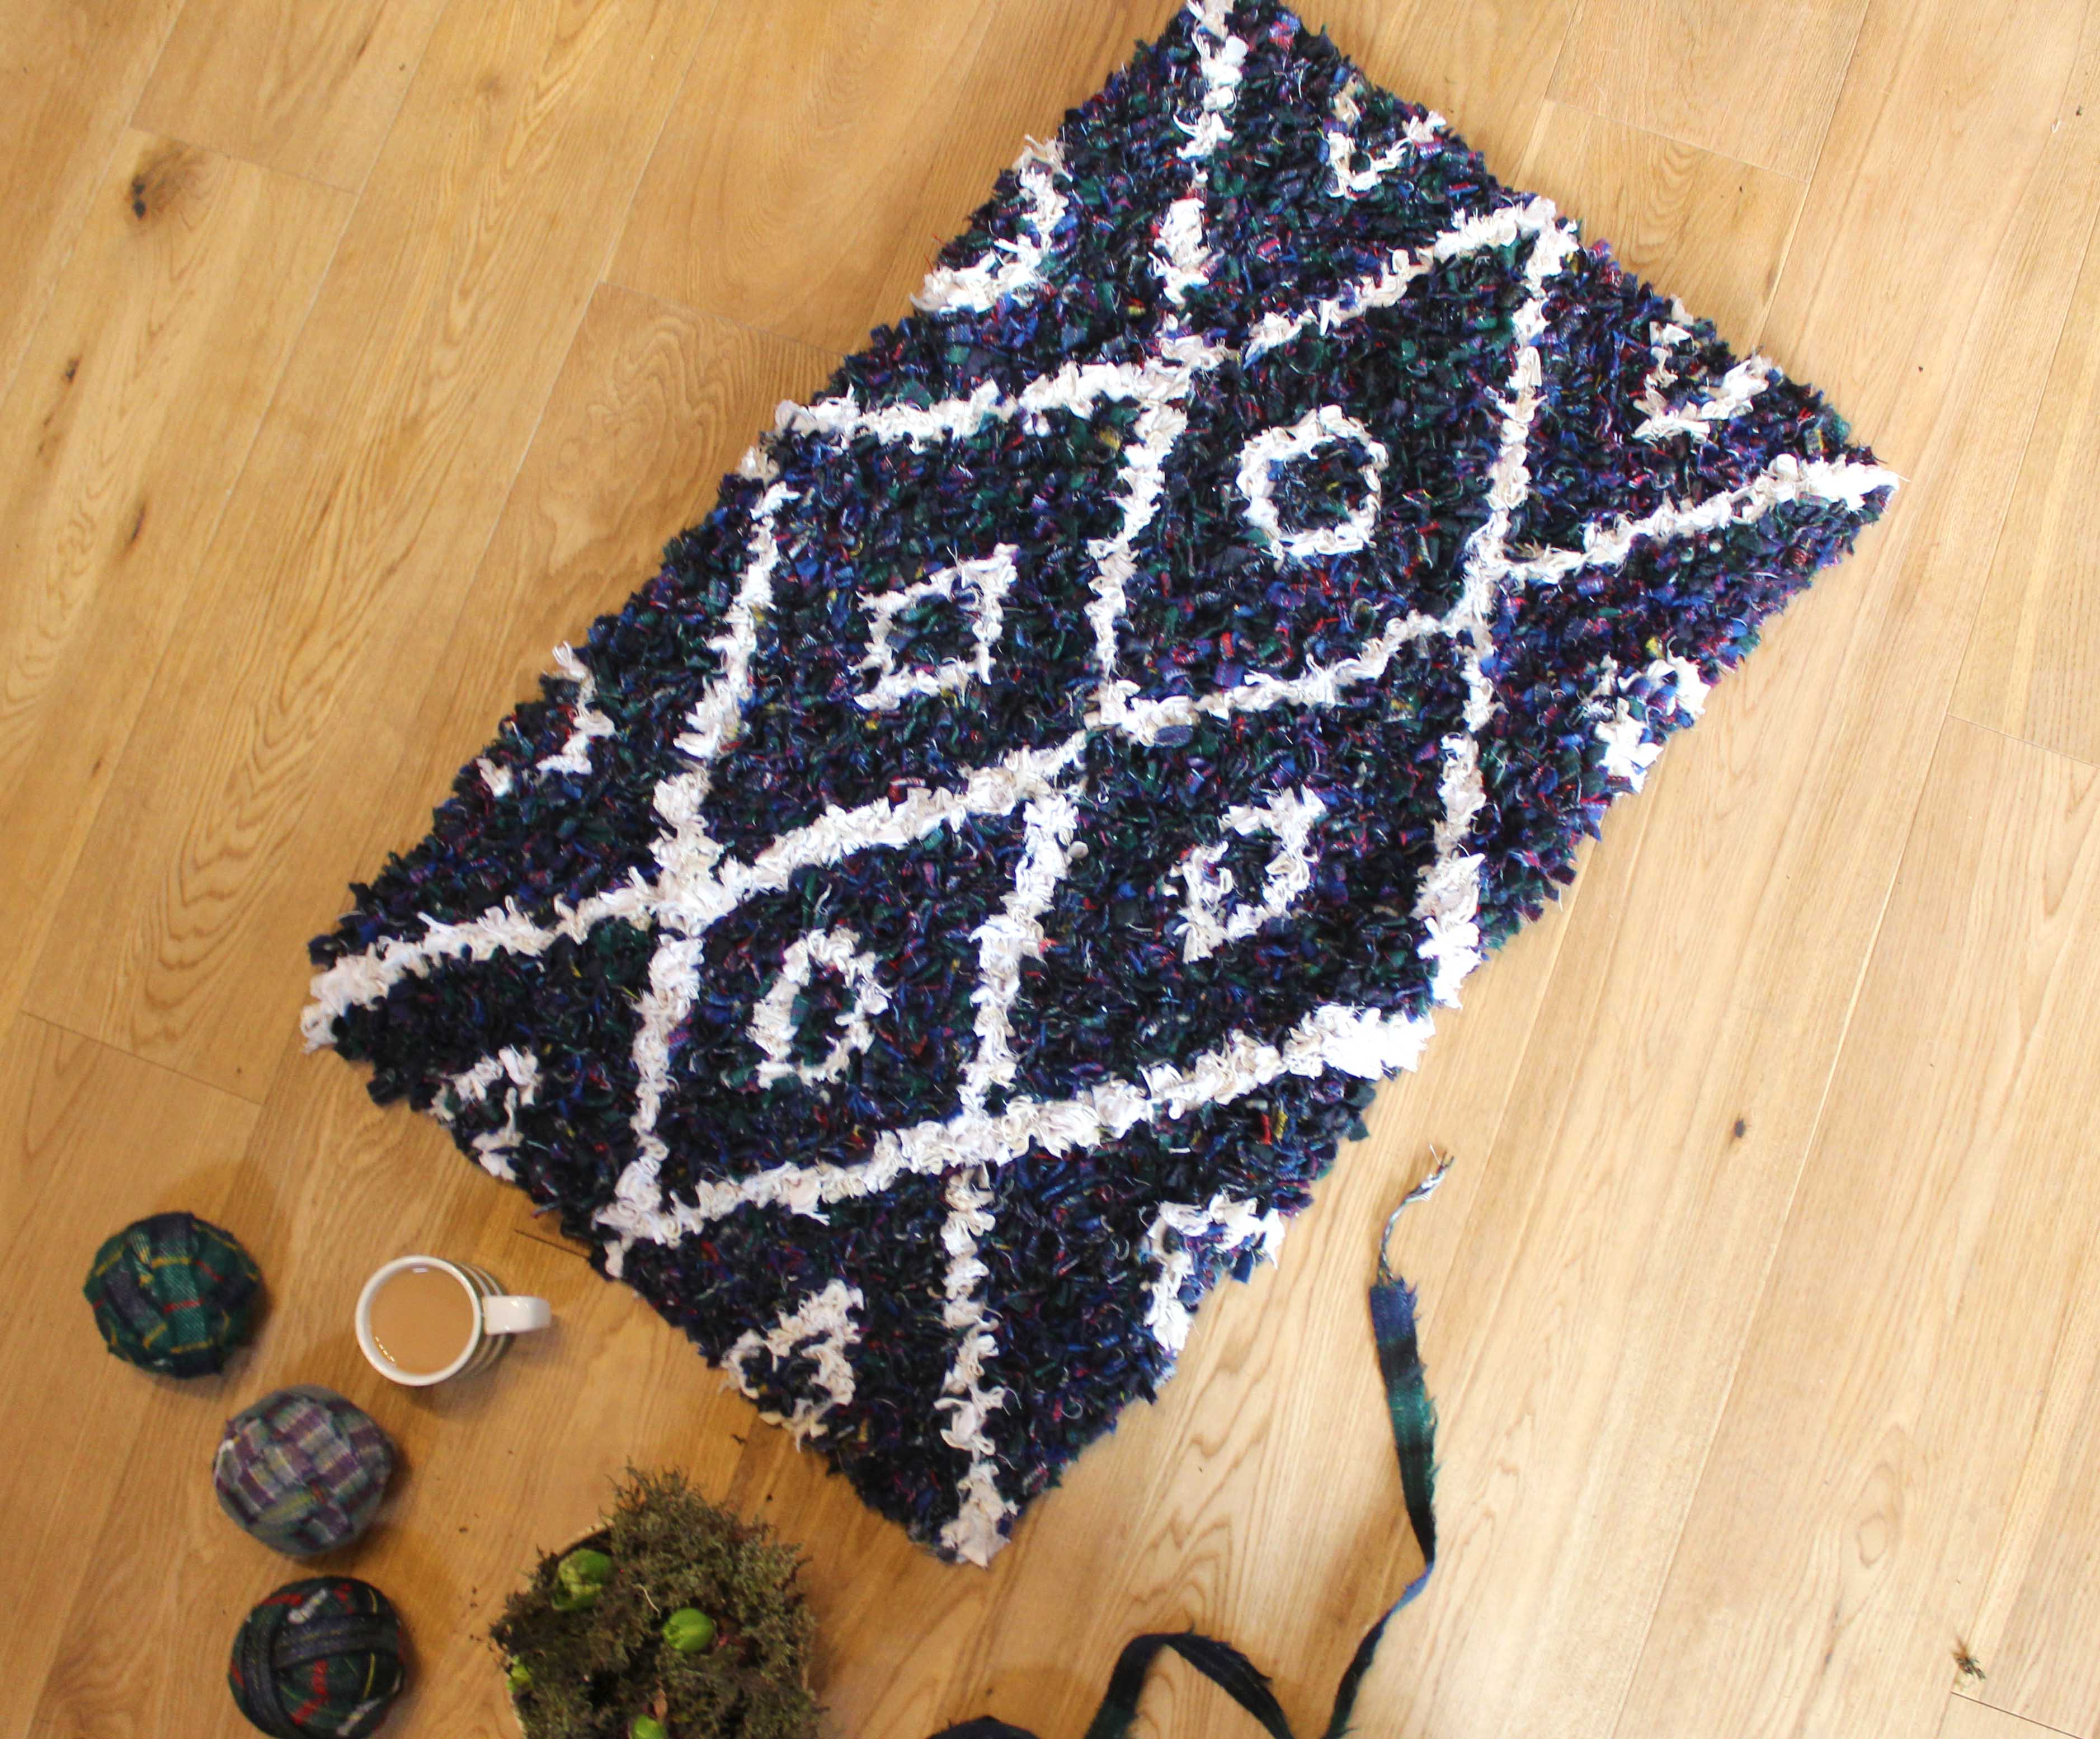
Tips for a Successful Angular Geometric Rug:
- Use a tape measure and ruler. These designs are generally symmetrical, so marking out division lines along each edge of the rug can be a good place to start in knowing where to join up lines. These are generally the half way mark along each edge, the quarter way mark etc…
- The shorter the rag rugging, the sharper the line. Angular designs look softer and more impressionist, the longer the fabric pieces you work with. This means that the shaggy technique will make lines look blurrier than the short shaggy or loopy techniques.
So there you have it! Five fantastic, beginner-friendly rag rug patterns that will give you the motivation to get started on your next project. Remember, the beauty of rag rug making lies in its imperfection and the unique touch you bring to each piece.
If you’re looking for more inspiration, you may be interested in our two books on rag rug making – Rag Rugs, Pillows and More and Rag Rug Techniques for Beginners. Each book includes over 25 rag rug projects with step-by-step instructions.
Happy crafting!
p.s. If you try any of these patterns, we’d love to see your creations. Share your photos and experiences with us in the comments below or tag us on social media (@raggedlife). Keep those fabric scraps handy and stay tuned for more rag rug adventures!