If you’ve ever felt daunted by the idea of starting a full-sized rag rug, you’re not alone. At Ragged Life, we hear from lots of people who love the idea of rag rugging but worry about the time and commitment involved. The good news? You don’t need to dive straight into a big project to enjoy the magic of rag rugging.
Whether you’re a complete beginner or a seasoned stitcher looking for a quicker make, these 10 small rag rug projects are perfect for getting crafty without feeling overwhelmed. Unsure about what rag rug techniques there are out there? Read our beginners guide here.
🧶 1. Rag Rug Coasters
Quick, easy, and a brilliant scrap-buster. Rag rug coasters can be made in a whole host of different rag rug techniques, including rug hooking, locker hooking, braiding and even the short shaggy technique, but we think they lend themselves very well to the coiled cord technique. Taking only around 30 minutes to make one, these little gems are a perfect introduction to eco-friendly crafting and make excellent handmade gifts.
Why we love them: Small surface area = instant satisfaction. They’re great for using up leftover strips from bigger projects. Even selvedges are fair game!
What you need: Cotton cord (buy cord on the Ragged Life website here. It takes 1.5 metres to make one coaster), a sewing machine that’s able to do a zig zag stitch, fabric strips in colours of your choice (cut approx 1cm wide and max 1 metre in length).


🪴 2. Plant Pot Covers
Wrap your houseplants in handmade love! Create personalised covers to pop around your pots for a splash of colour and texture. This project works particularly well with the twined rag rug technique onto a wire basket, but also the coiled cord technique mentioned above. We’ve even wrapped hessian around plant pots to create rug hooked and proggy covers in the past although the texture does add some bulk!
Tip: Tie colours in with your interior for a truly personalised craft project.
What you need: To twine a plant pot cover, you will need a wire basket with vertical bars spaced at least 2cm apart, fabric strips that are ideally 50-150cm in length and a good pair of fabric scissors. Want to learn this technique in person, look out for our Twined Fabric Baskets for Beginners workshops on the Ragged Life website here.


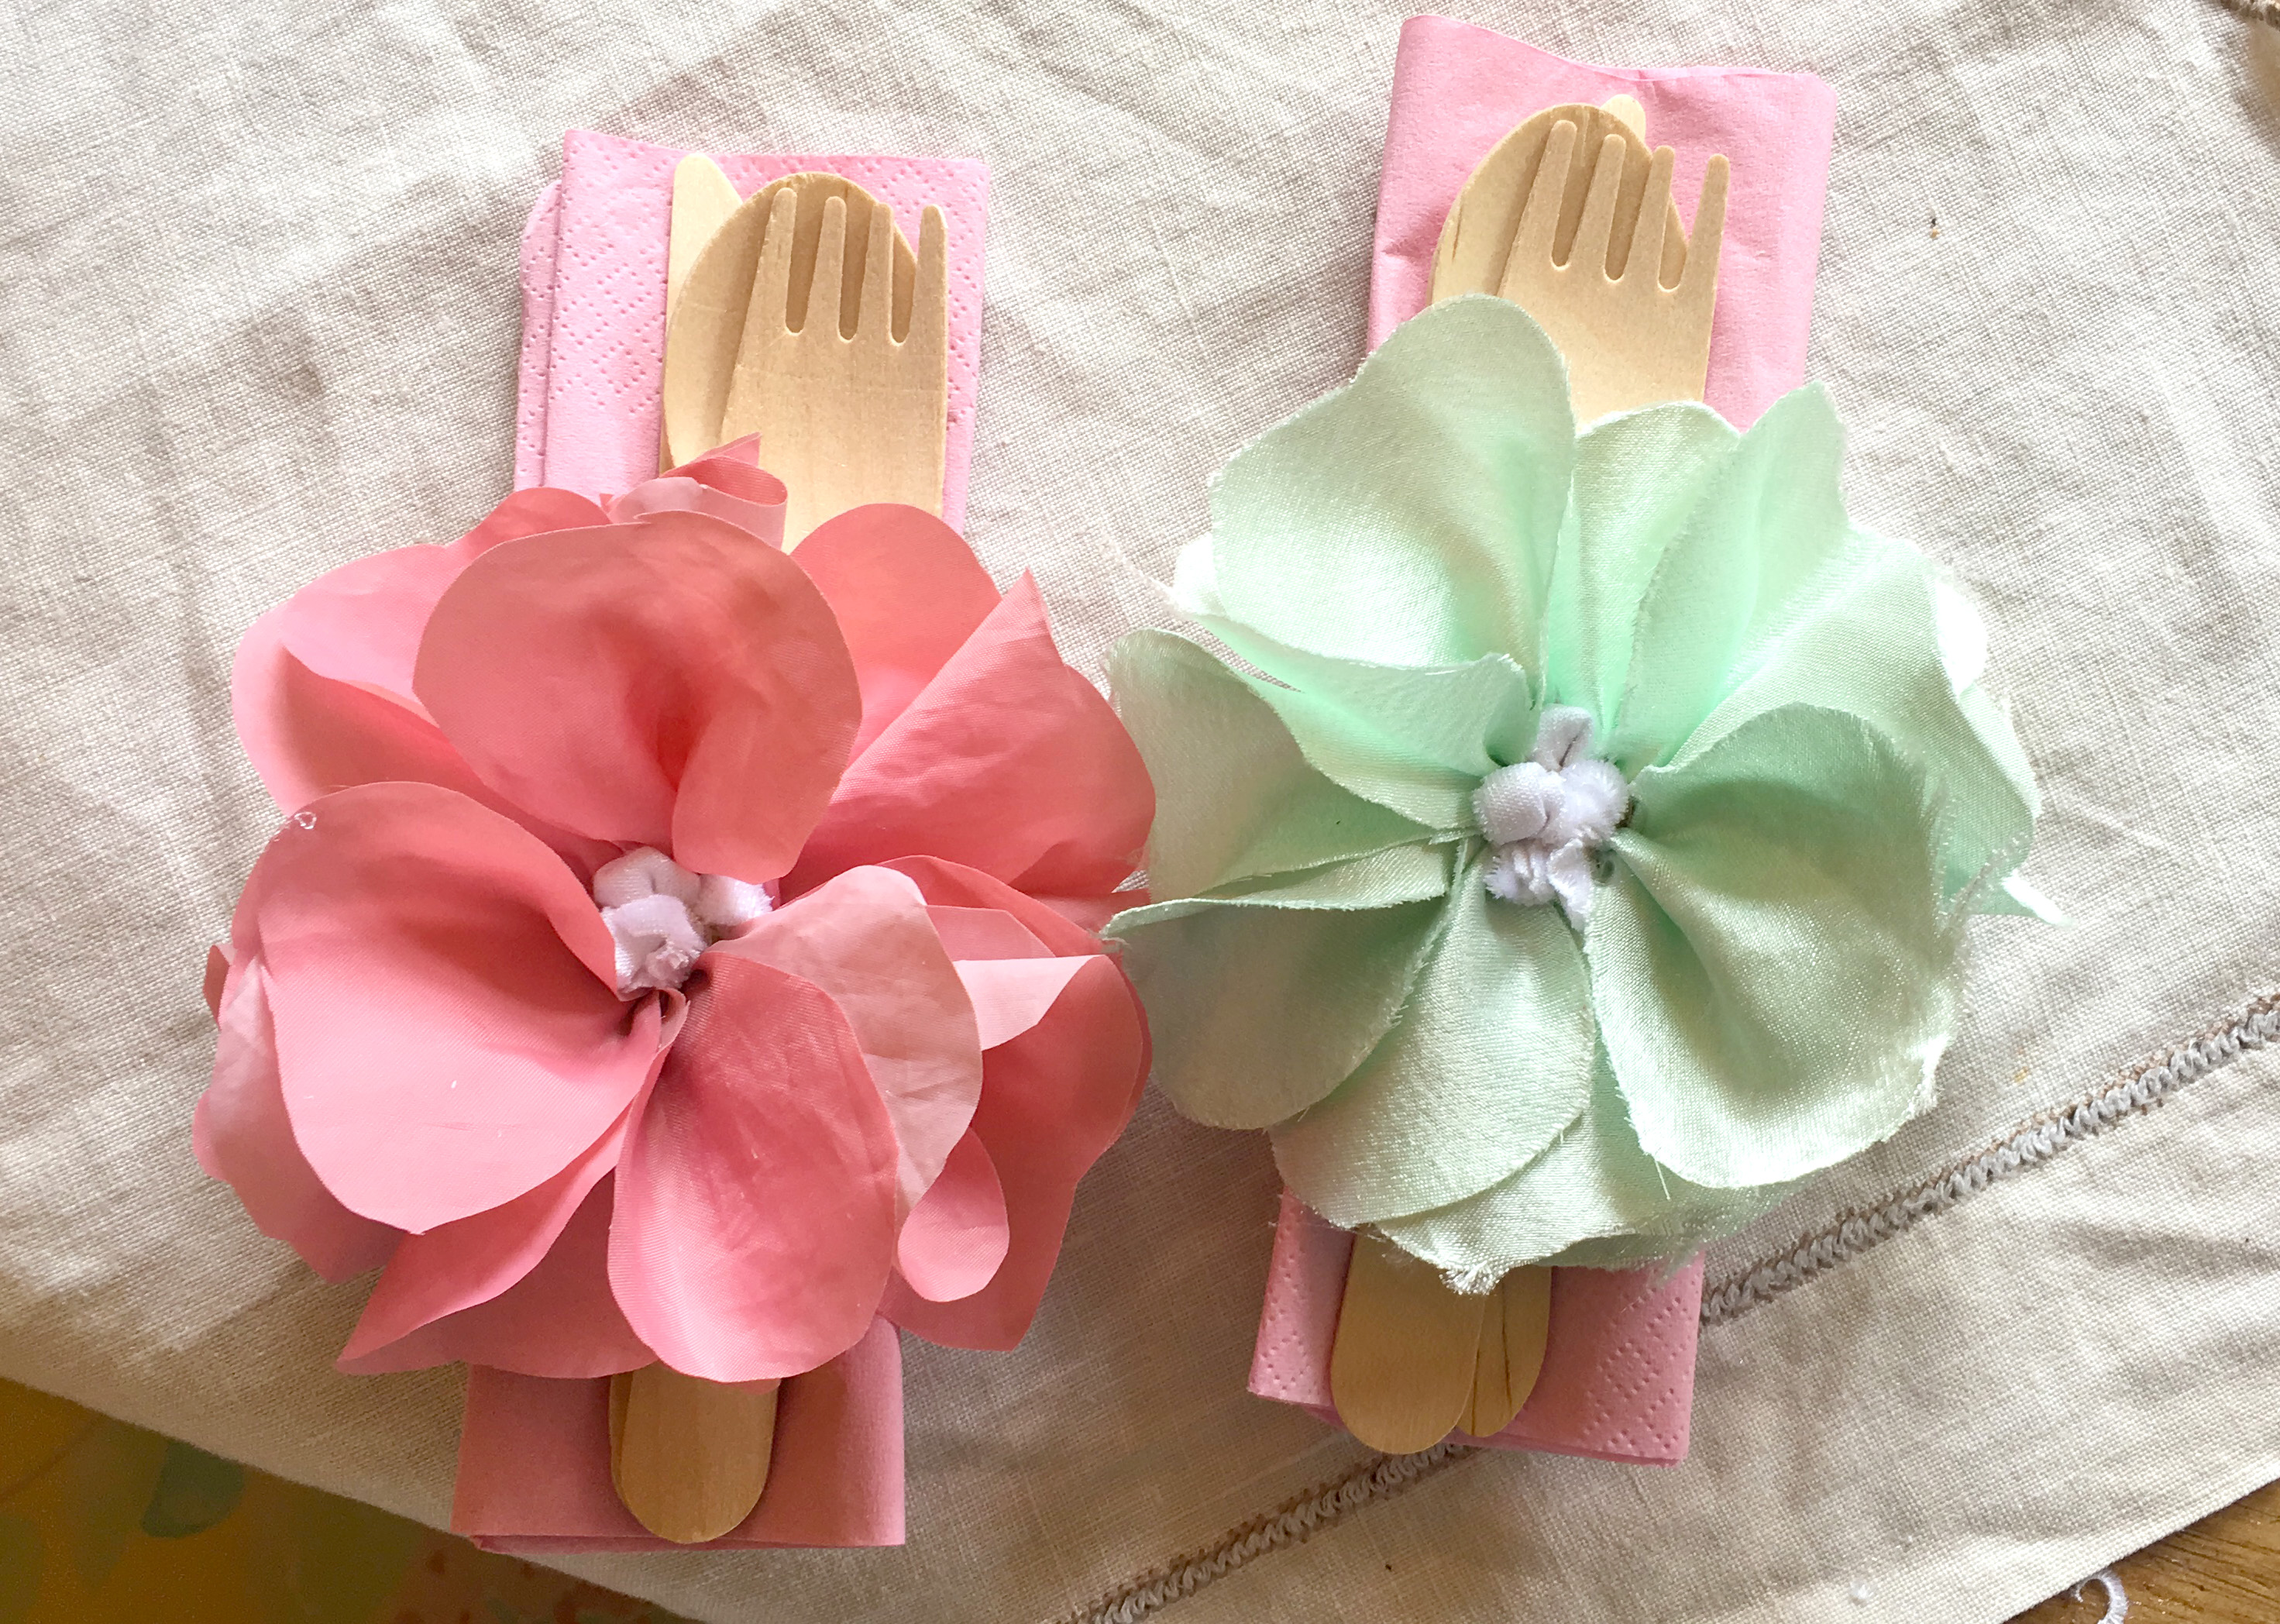
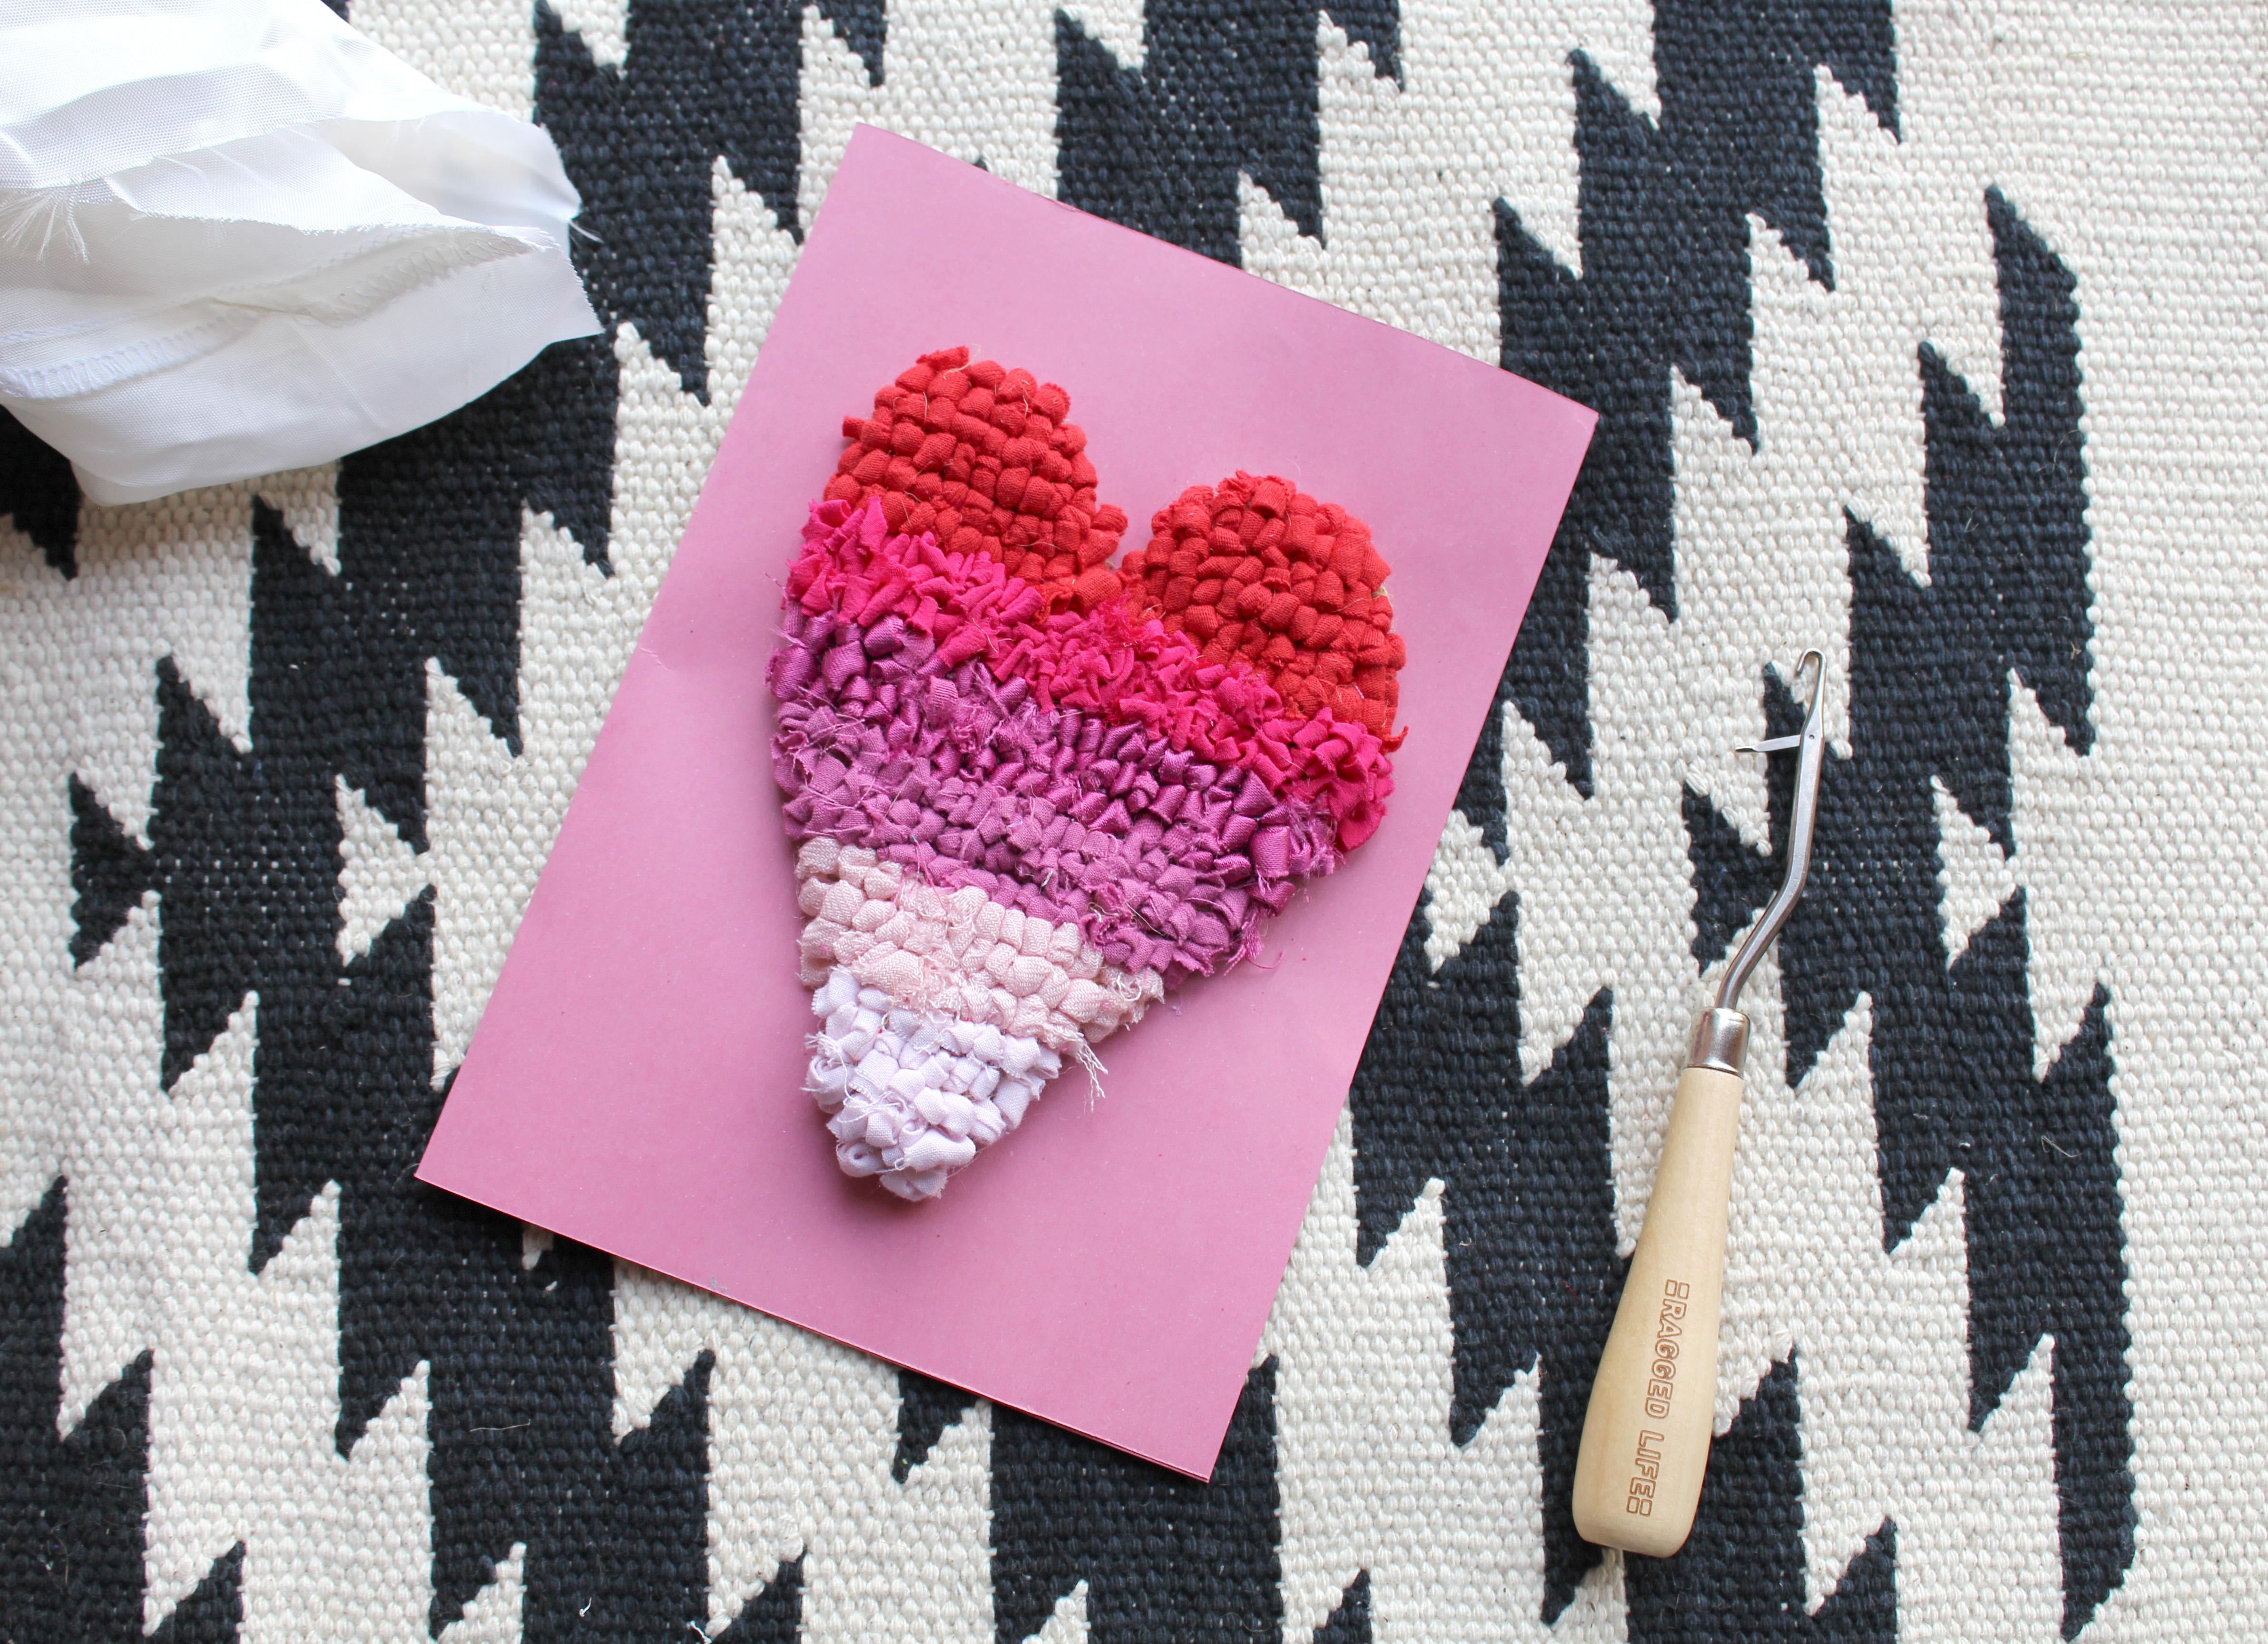
🎁 3. Brooches, Lavender Sachets & Card Embellishments
Crafted in minutes and lovely to gift. Stitch small circles or shapes onto hessian / burlap with a zig zag stitch then simply fill with the proggy rag rug technique or rug hooking before tidying up the back. Make them 3D and fill with dried lavender or stuffing, or simply add a felt backing and brooch back to wear your handmade creation with pride. Finish the lavender bags with a ribbon for a scented drawer sachet or keepsake ornament.
Great for: Craft fairs, stocking fillers, wedding favours.
What you need: To rug hook a small rag rug shape, you’ll need hessian (a small piece left over from another rag rug project is ideal), a rug hook, a marker pen, fabric scissors and fabric strips cut approx 1cm in width. You can find instructions on how to make the green rag rug heart below on the Women’s Institute website here or watch our free Rug Hooking Tutorial video on YouTube here.


👣 4. Small Doormat or Bath Mat
Want a functional piece without the scale of a full rug? Try a small mat – big enough to make an impact but small enough to complete in a couple of weeks. Around 40 x 60cm is an ideal size for a small rag rug project which won’t devour too much fabric. You can make doormats and bath mats in many rag rug techniques including rug hooking, proggy style, short shaggy rag rugging, locker hooking and peg loom weaving (browse how these different styles look here), but we think a great place to start is with the classic British techniques – proggy and rug hooking.
Tip: If your rug is going to be in a high footfall area then use darker colours which won’t show staining as easily.
What you need: To make a doormat similar to our hello rag rug below, you will need – a 60 x 40cm piece of hemmed hessian, a rag rug spring tool and cutting gauge, a rug hook, fabric scissors and strips of fabric in colours of your choice. If you’re a complete beginner then one of our classic Beginner Rag Rug Kits are a great place to start.


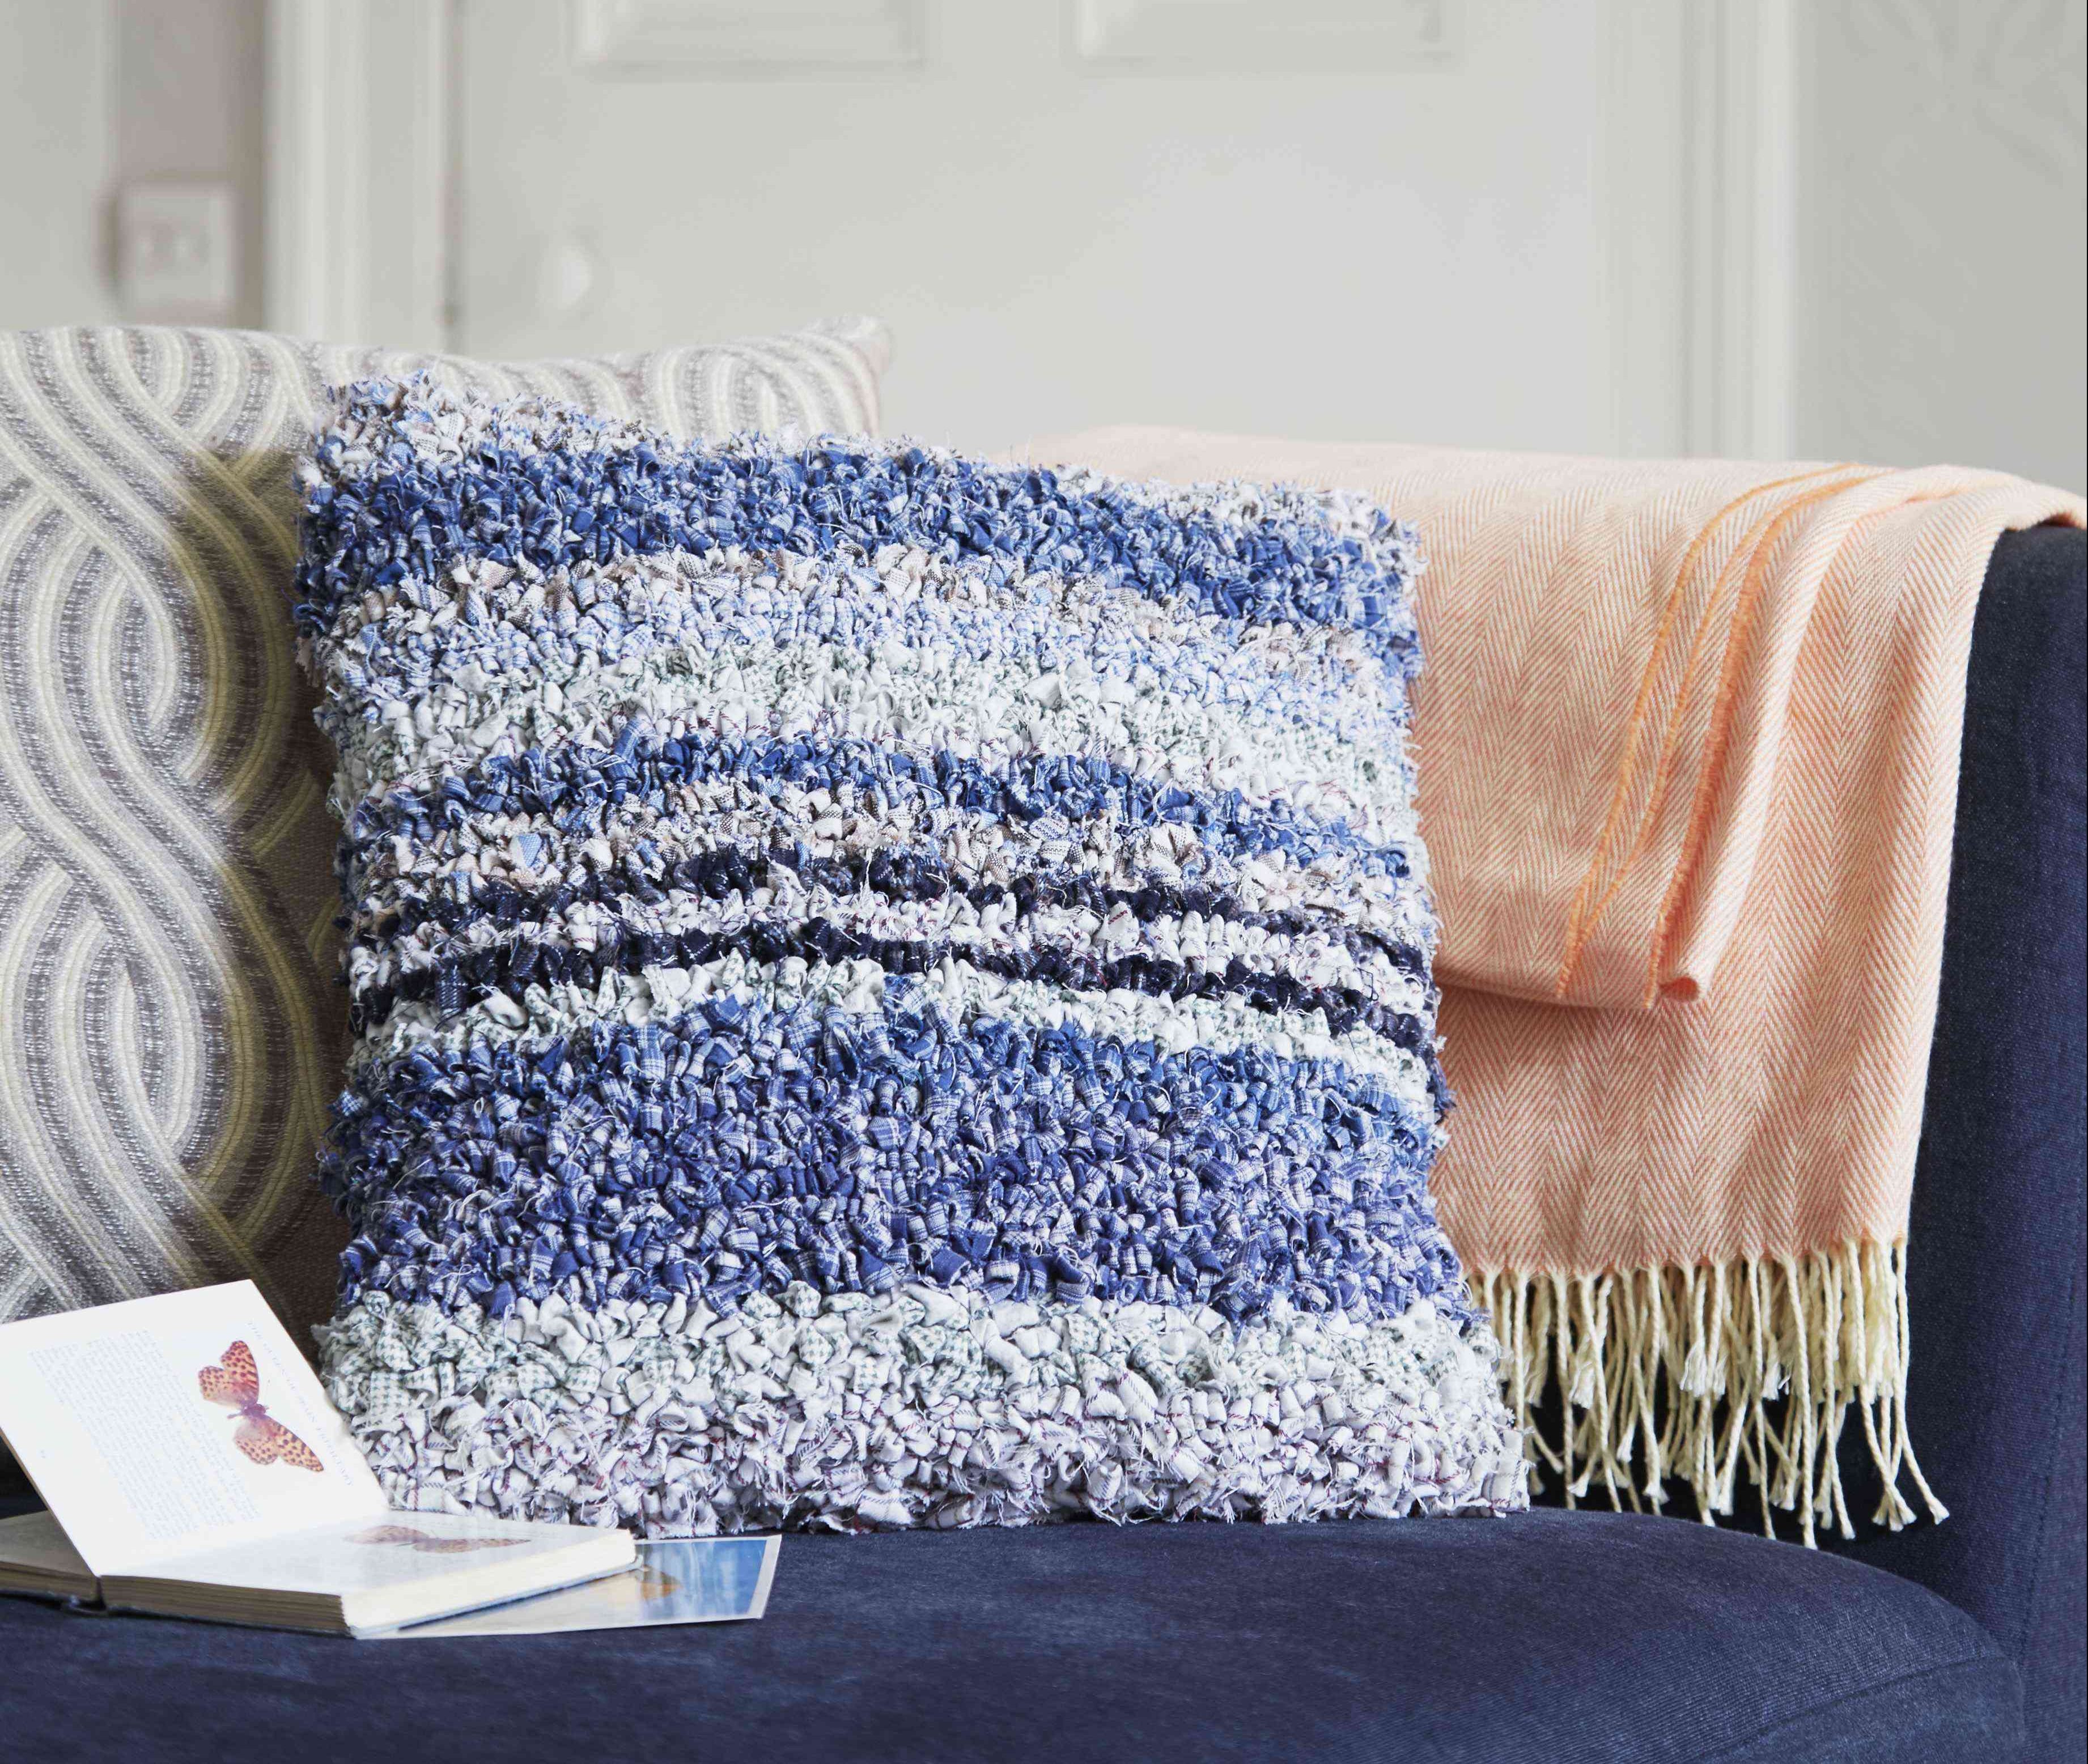
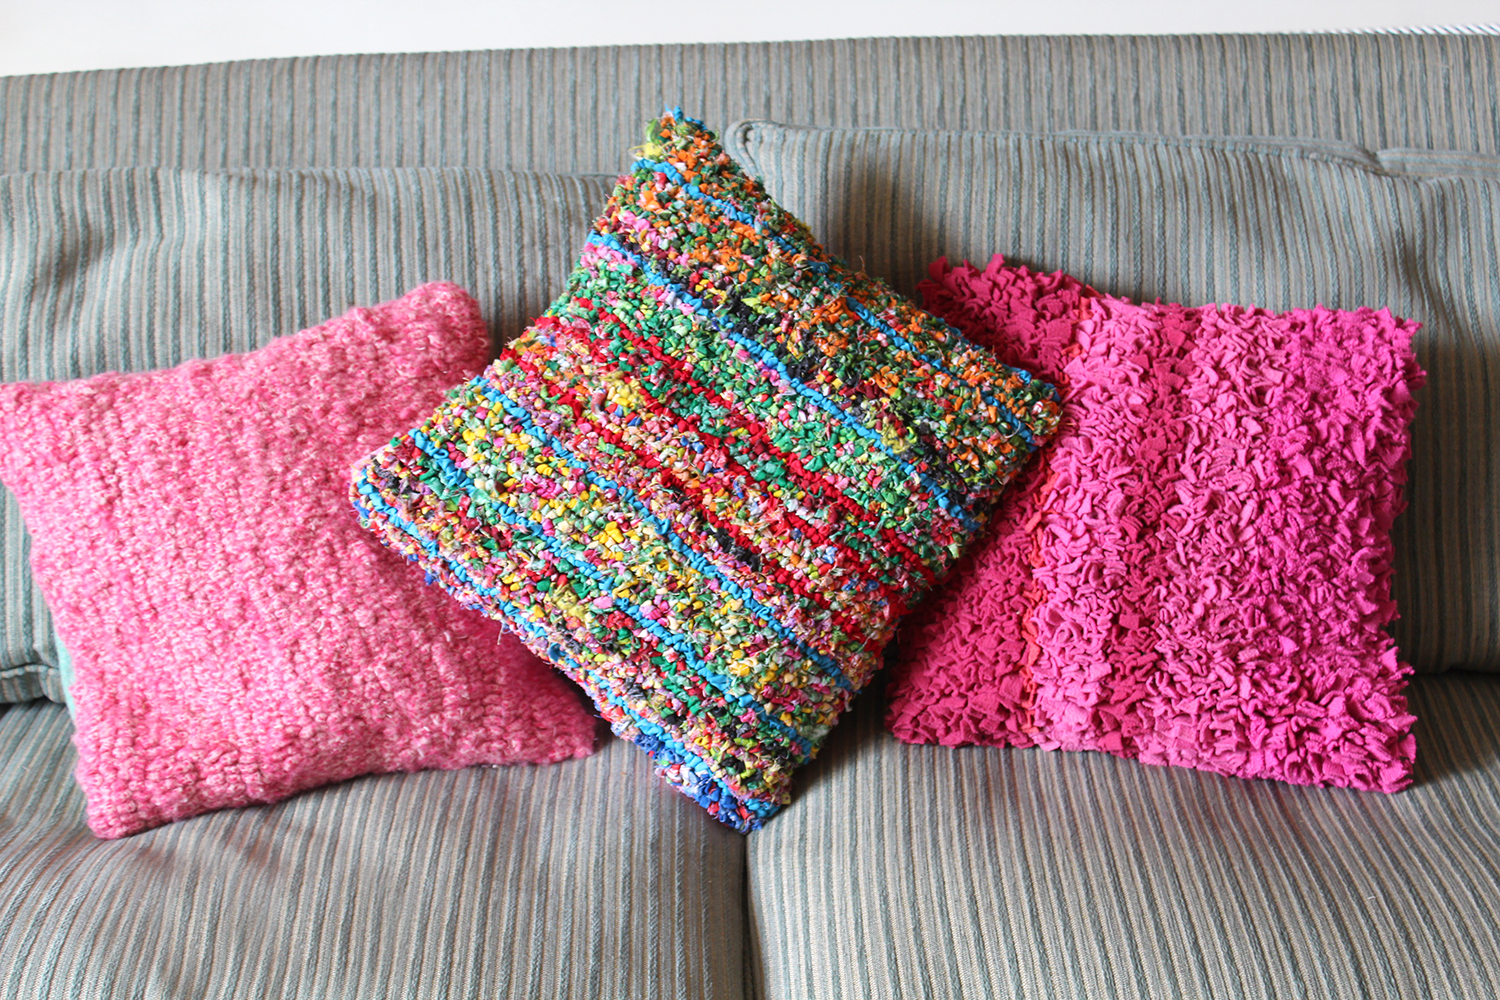
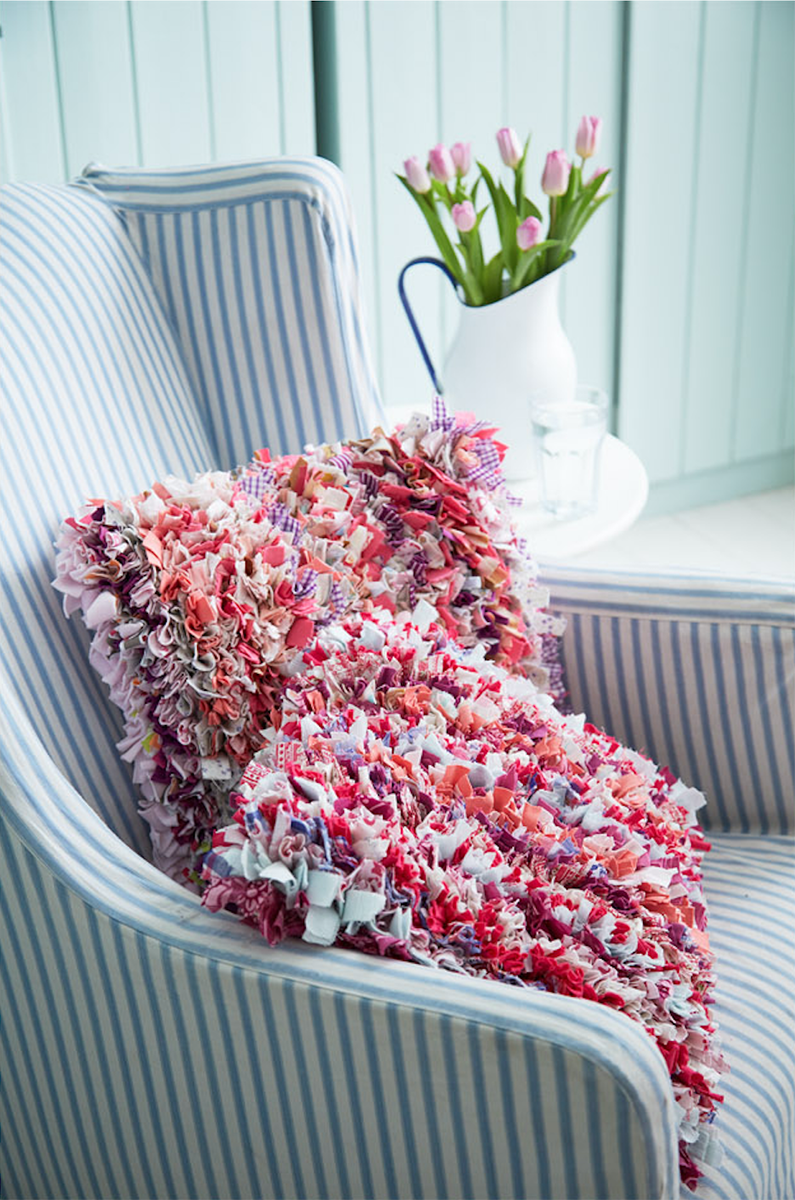
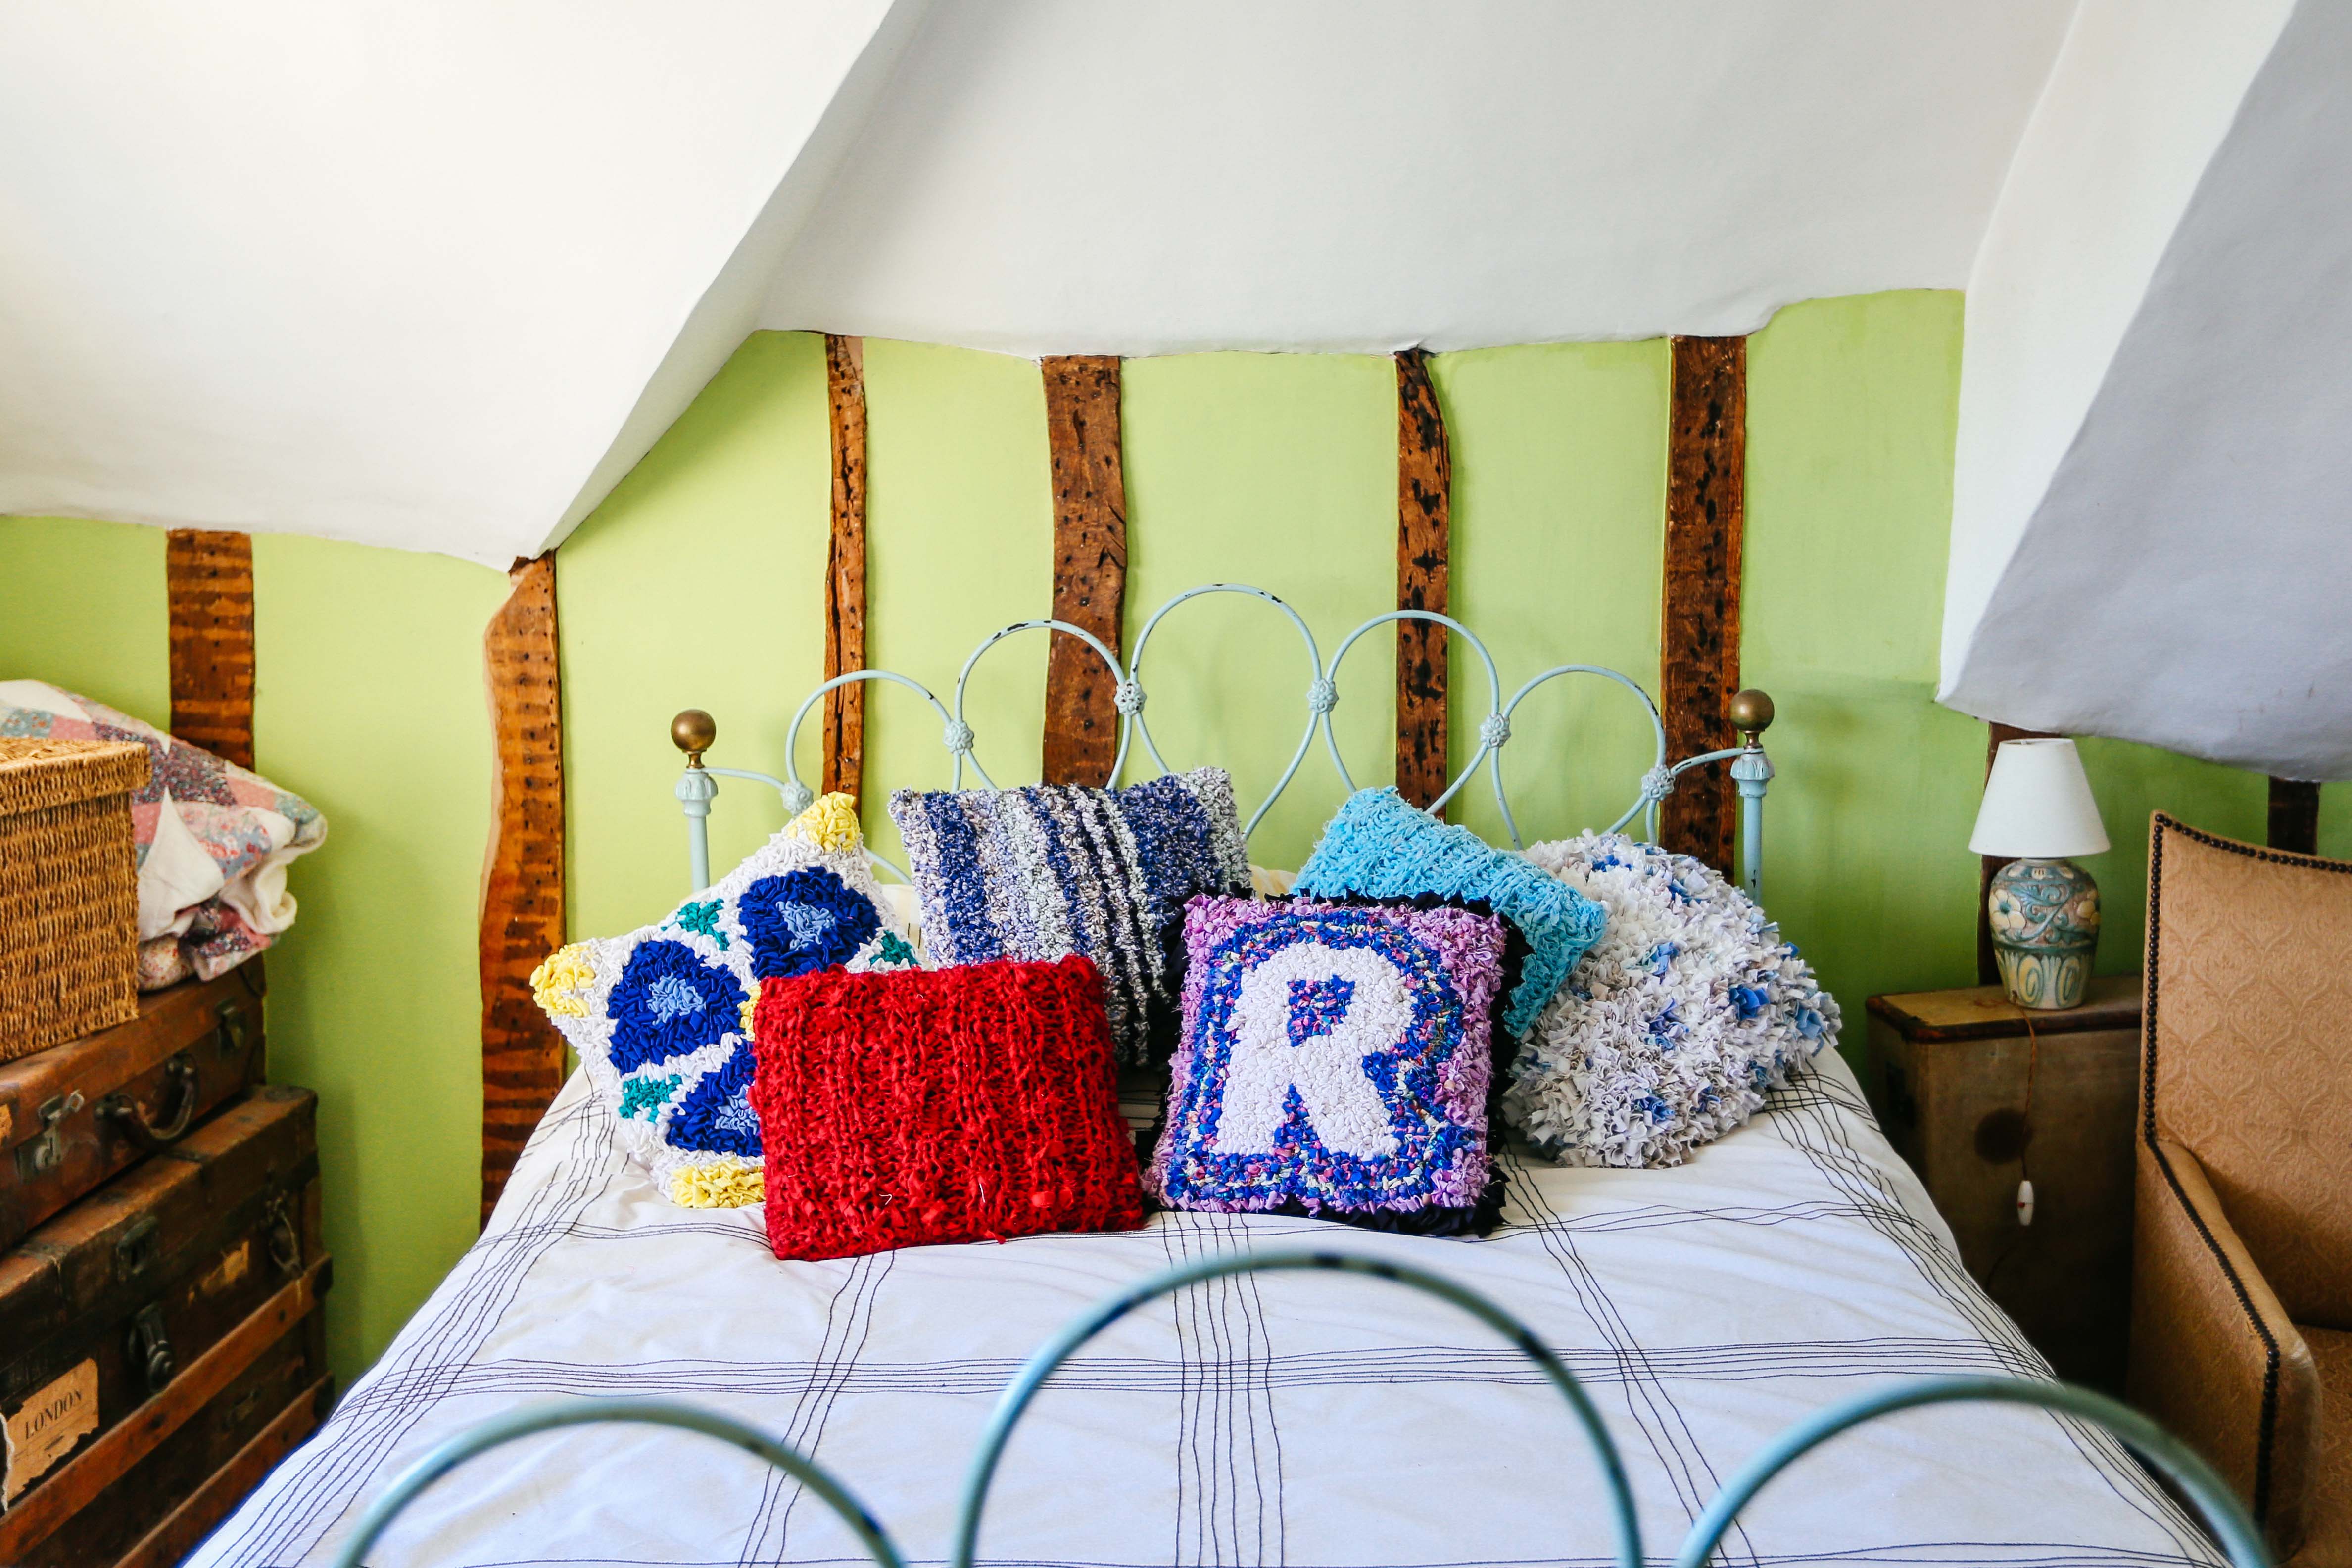
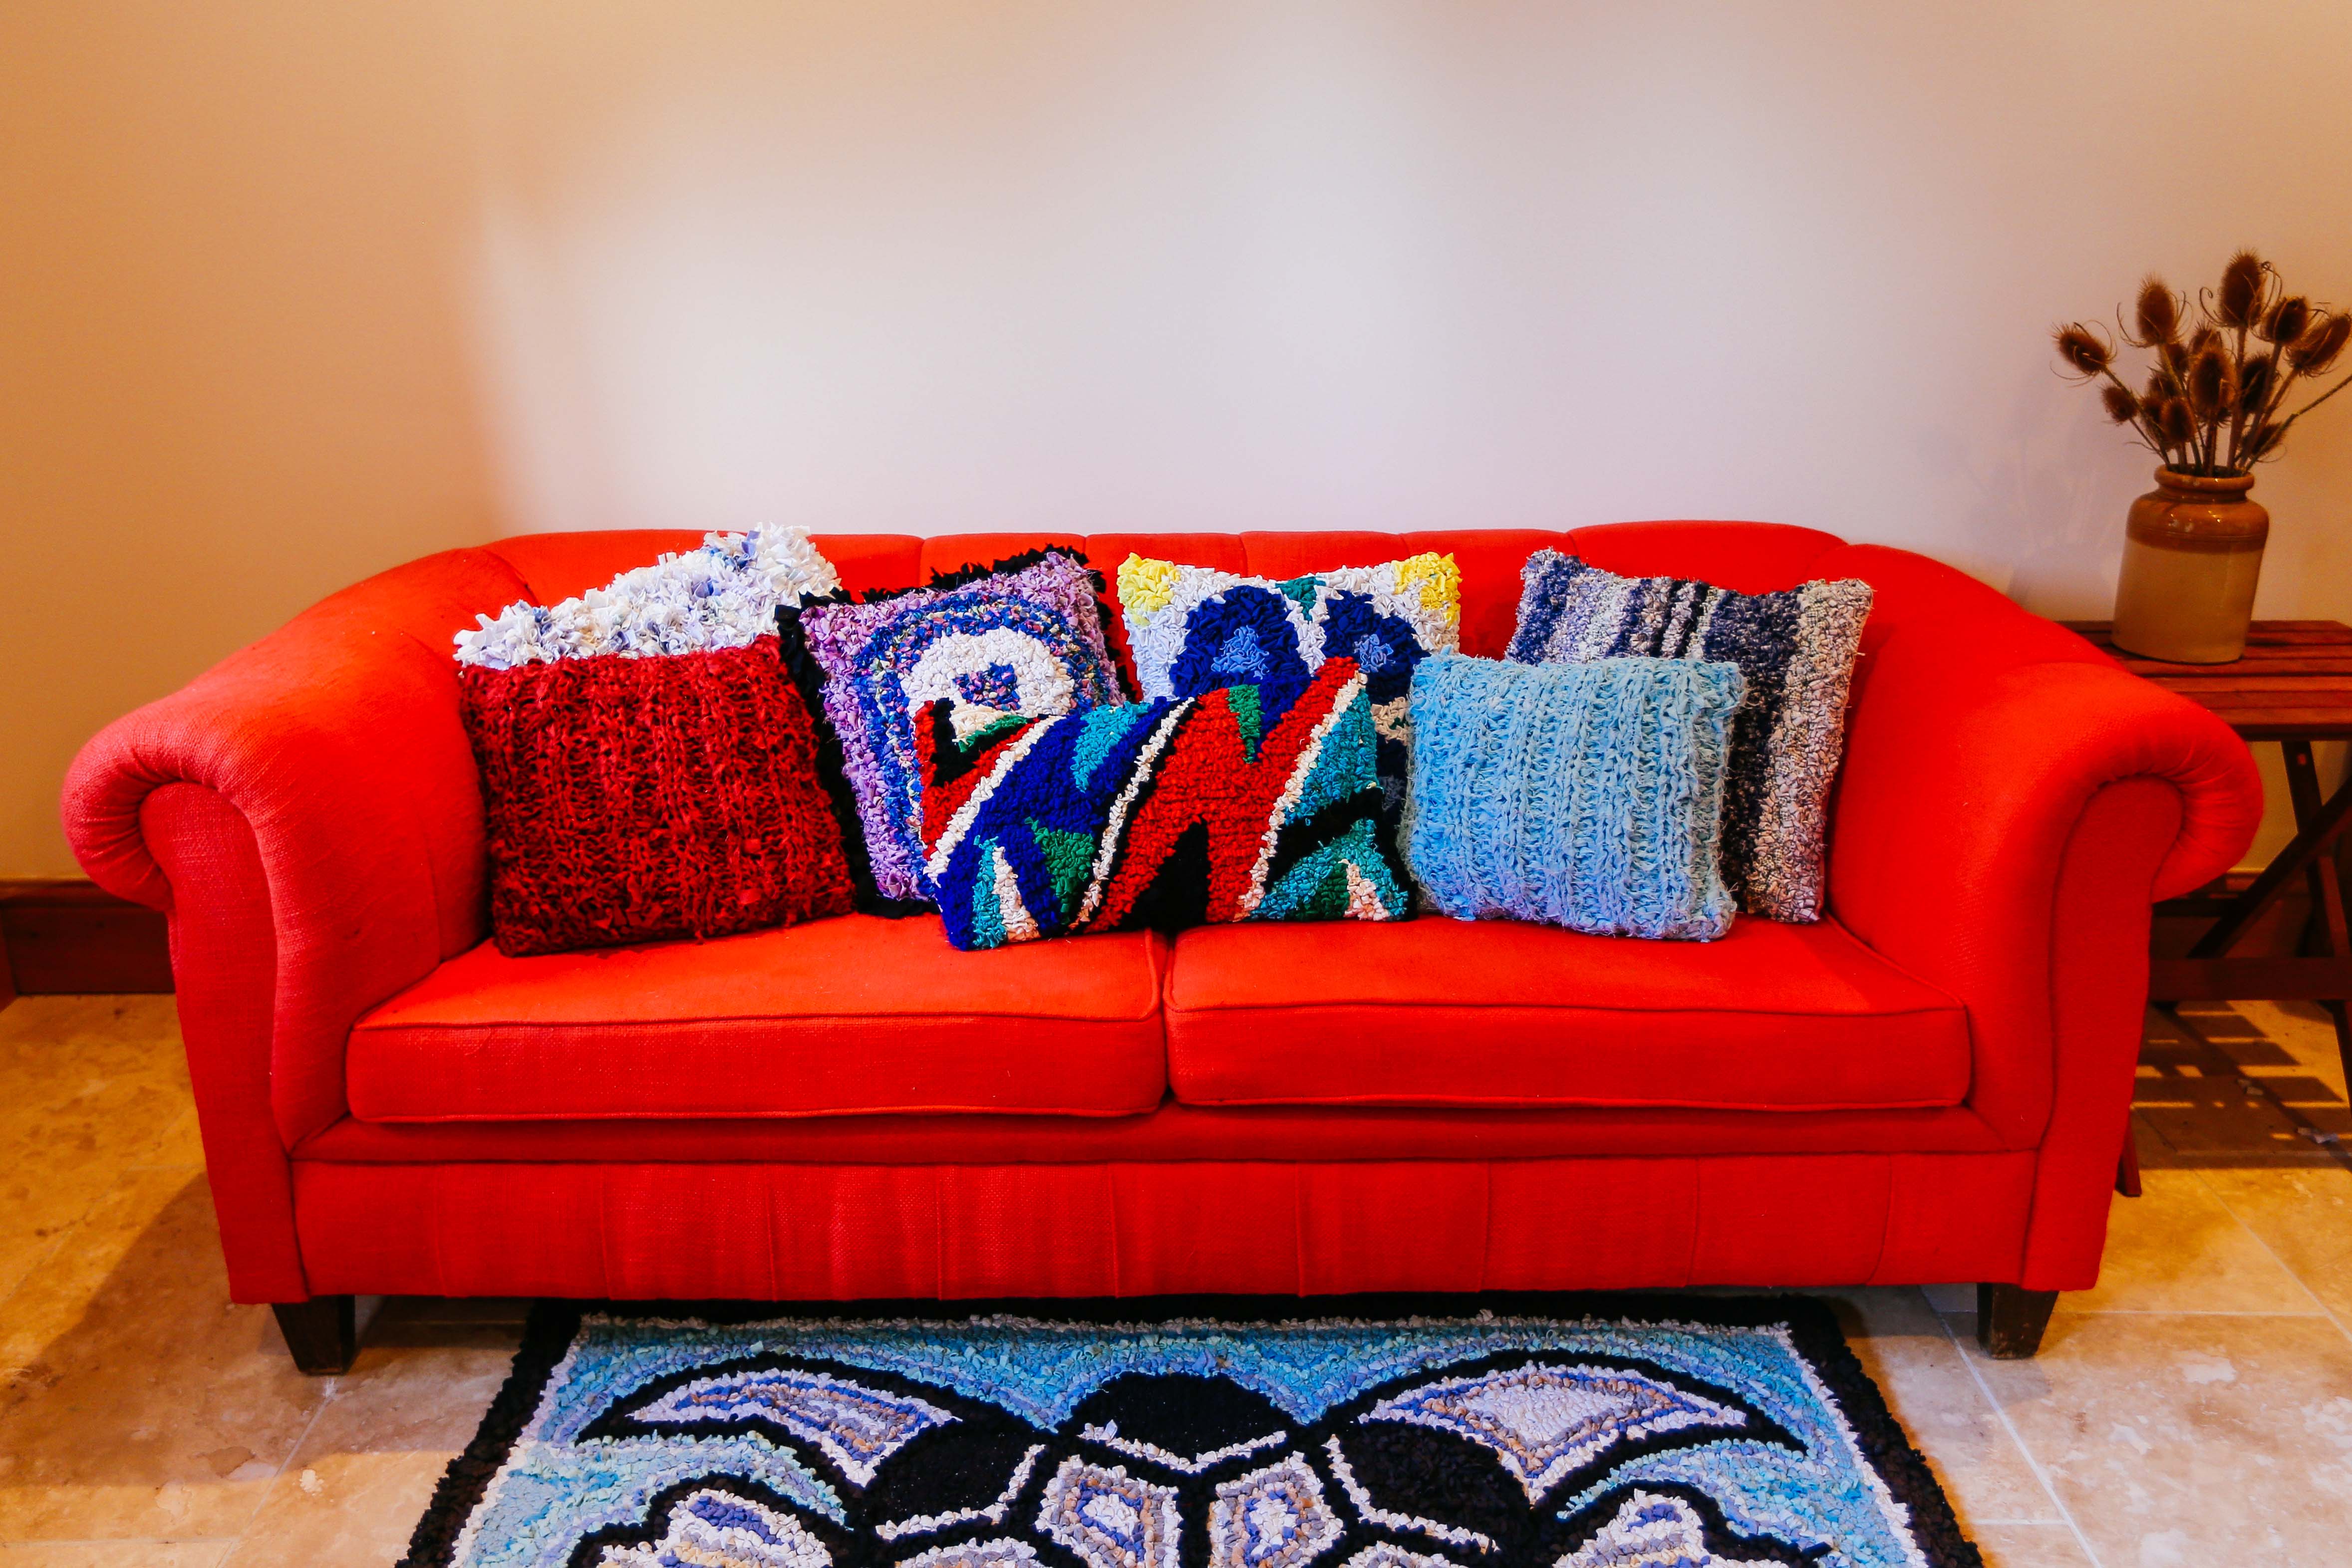
🪑 5. Rag Rug Cushions & Seat Pads
Rag rug cushions and seat pads are a great way to change up an interior and they’re a manageable step up from smaller projects like placemats or wreaths. They can be made in a lot of different rag rug techniques – loopy rug hooking for a smoother surface (see the first row of images below), the proggy shaggy style for a tufted, textured finish, and locker hooking and twining for solid seat pads. Peg loom weaving is one of our favourite techniques for rag rug cushions as they build so quickly (particularly with pre-cut strips like woollen blanket yarn or recycled sari silk ribbon).
What you need: To peg loom weave a cushion, you will need: a peg loom (we sell 50cm peg looms and 90cm peg looms on the Ragged Life website), warp string, fabric scissors, strips of fabric and a latch hook to sew in the tails at the end. You can watch our free “Peg Loom Weaving for Beginners” series on YouTube here.
Tip: If you plan to rag rug a cushion front, as opposed to one larger rectangle that will form the front an back of the cushion, then an envelope back work best as it leaves enough space to turn bulky rag rugging through to the front.


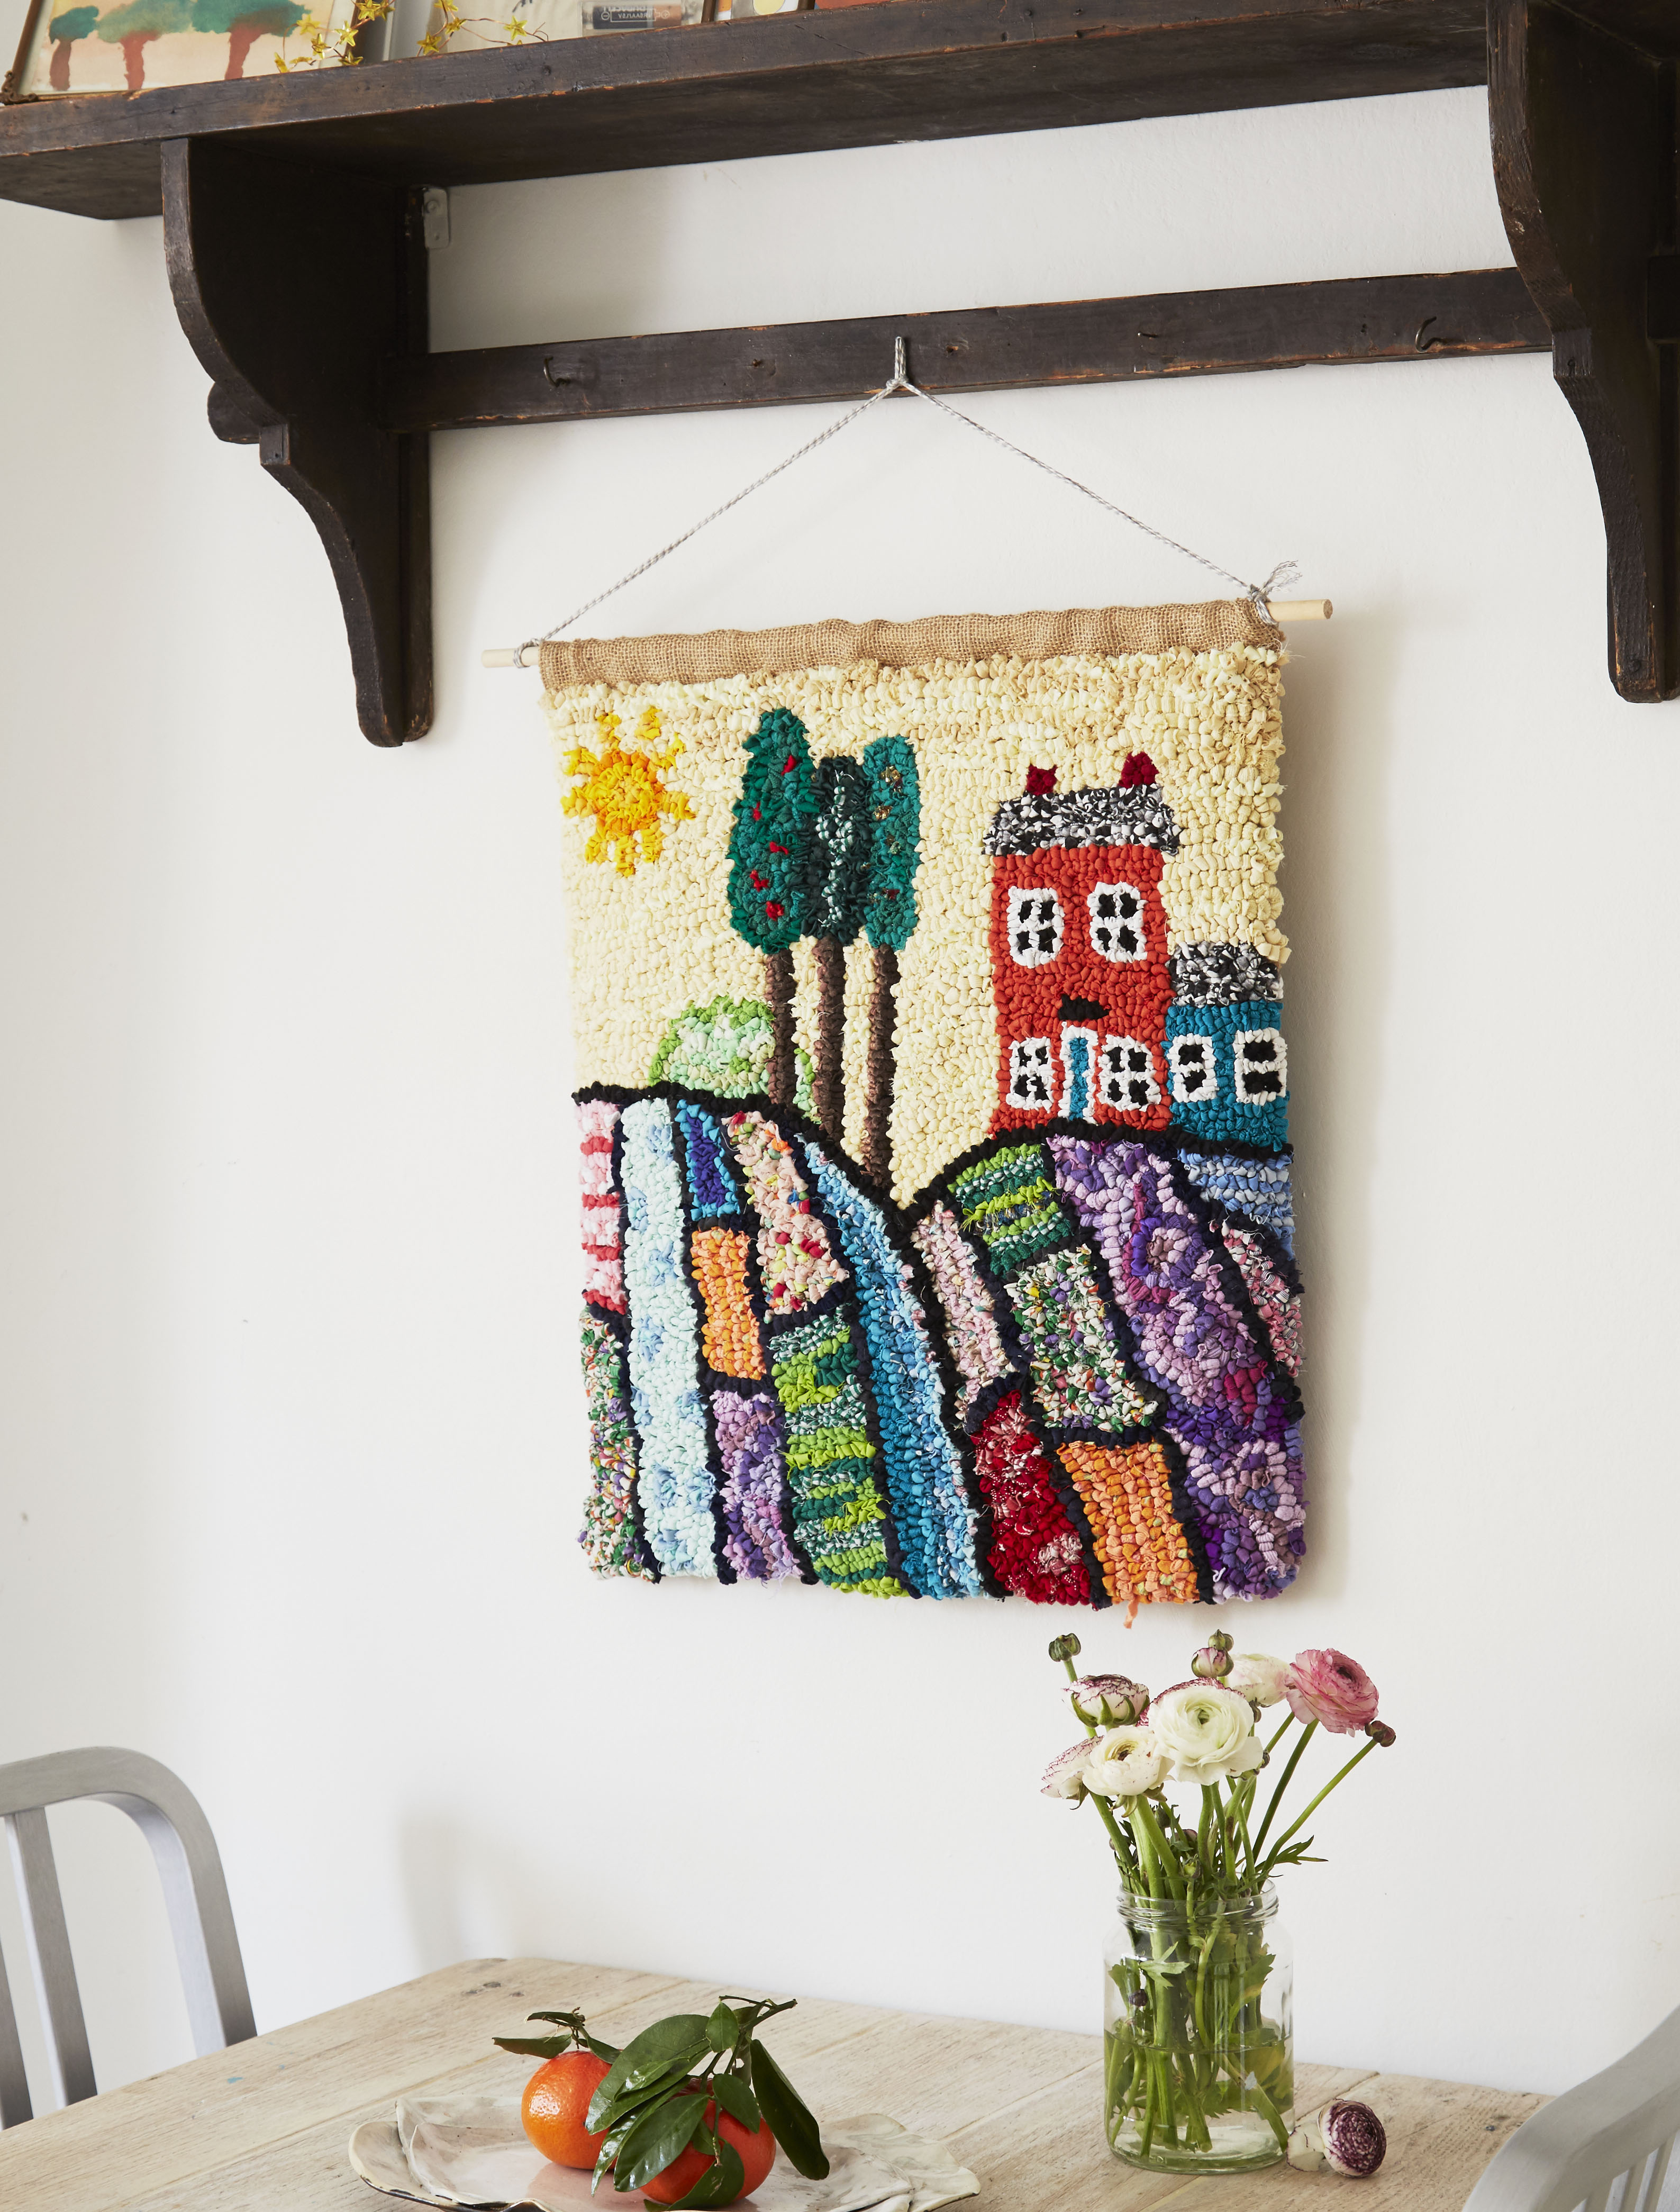
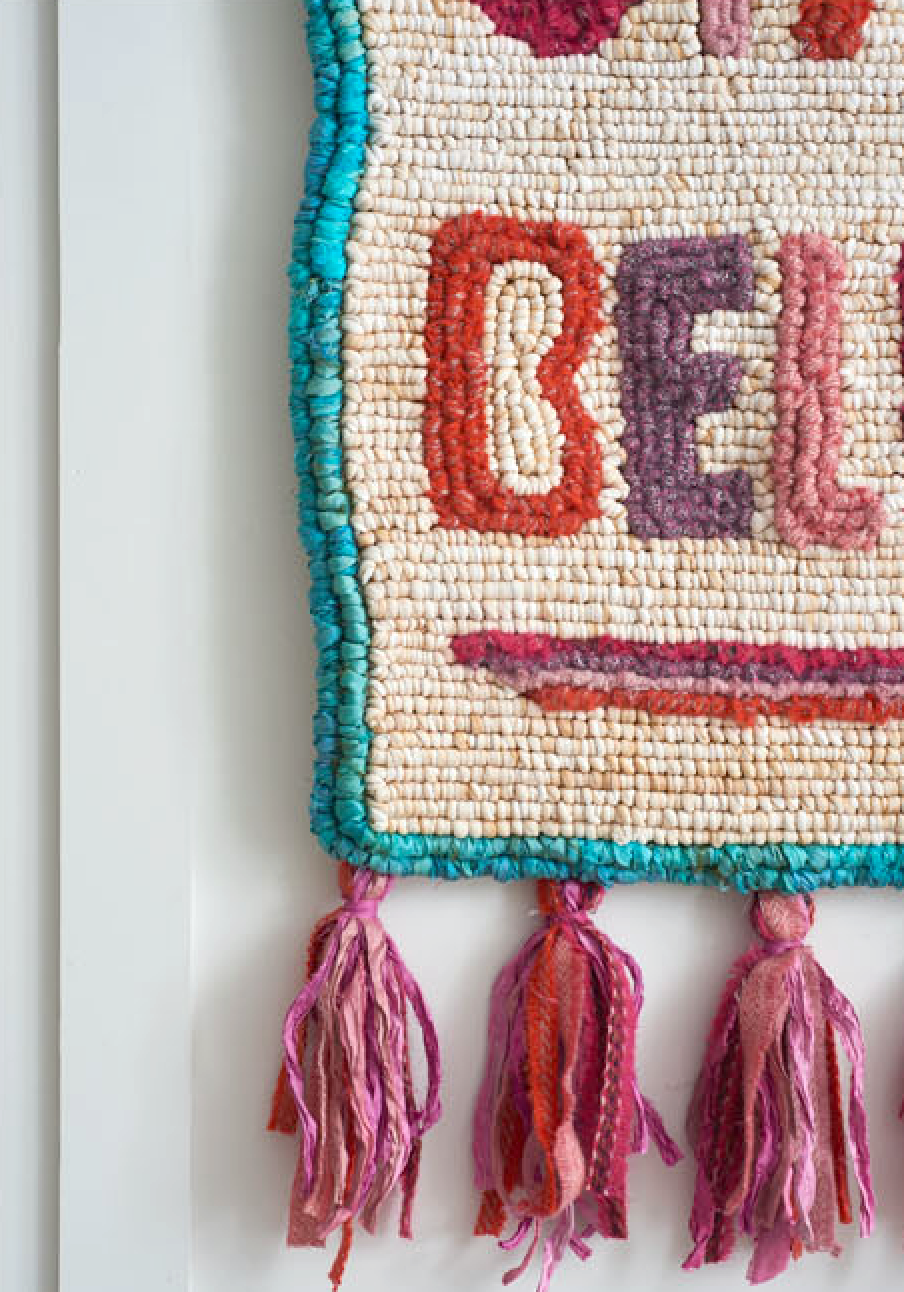
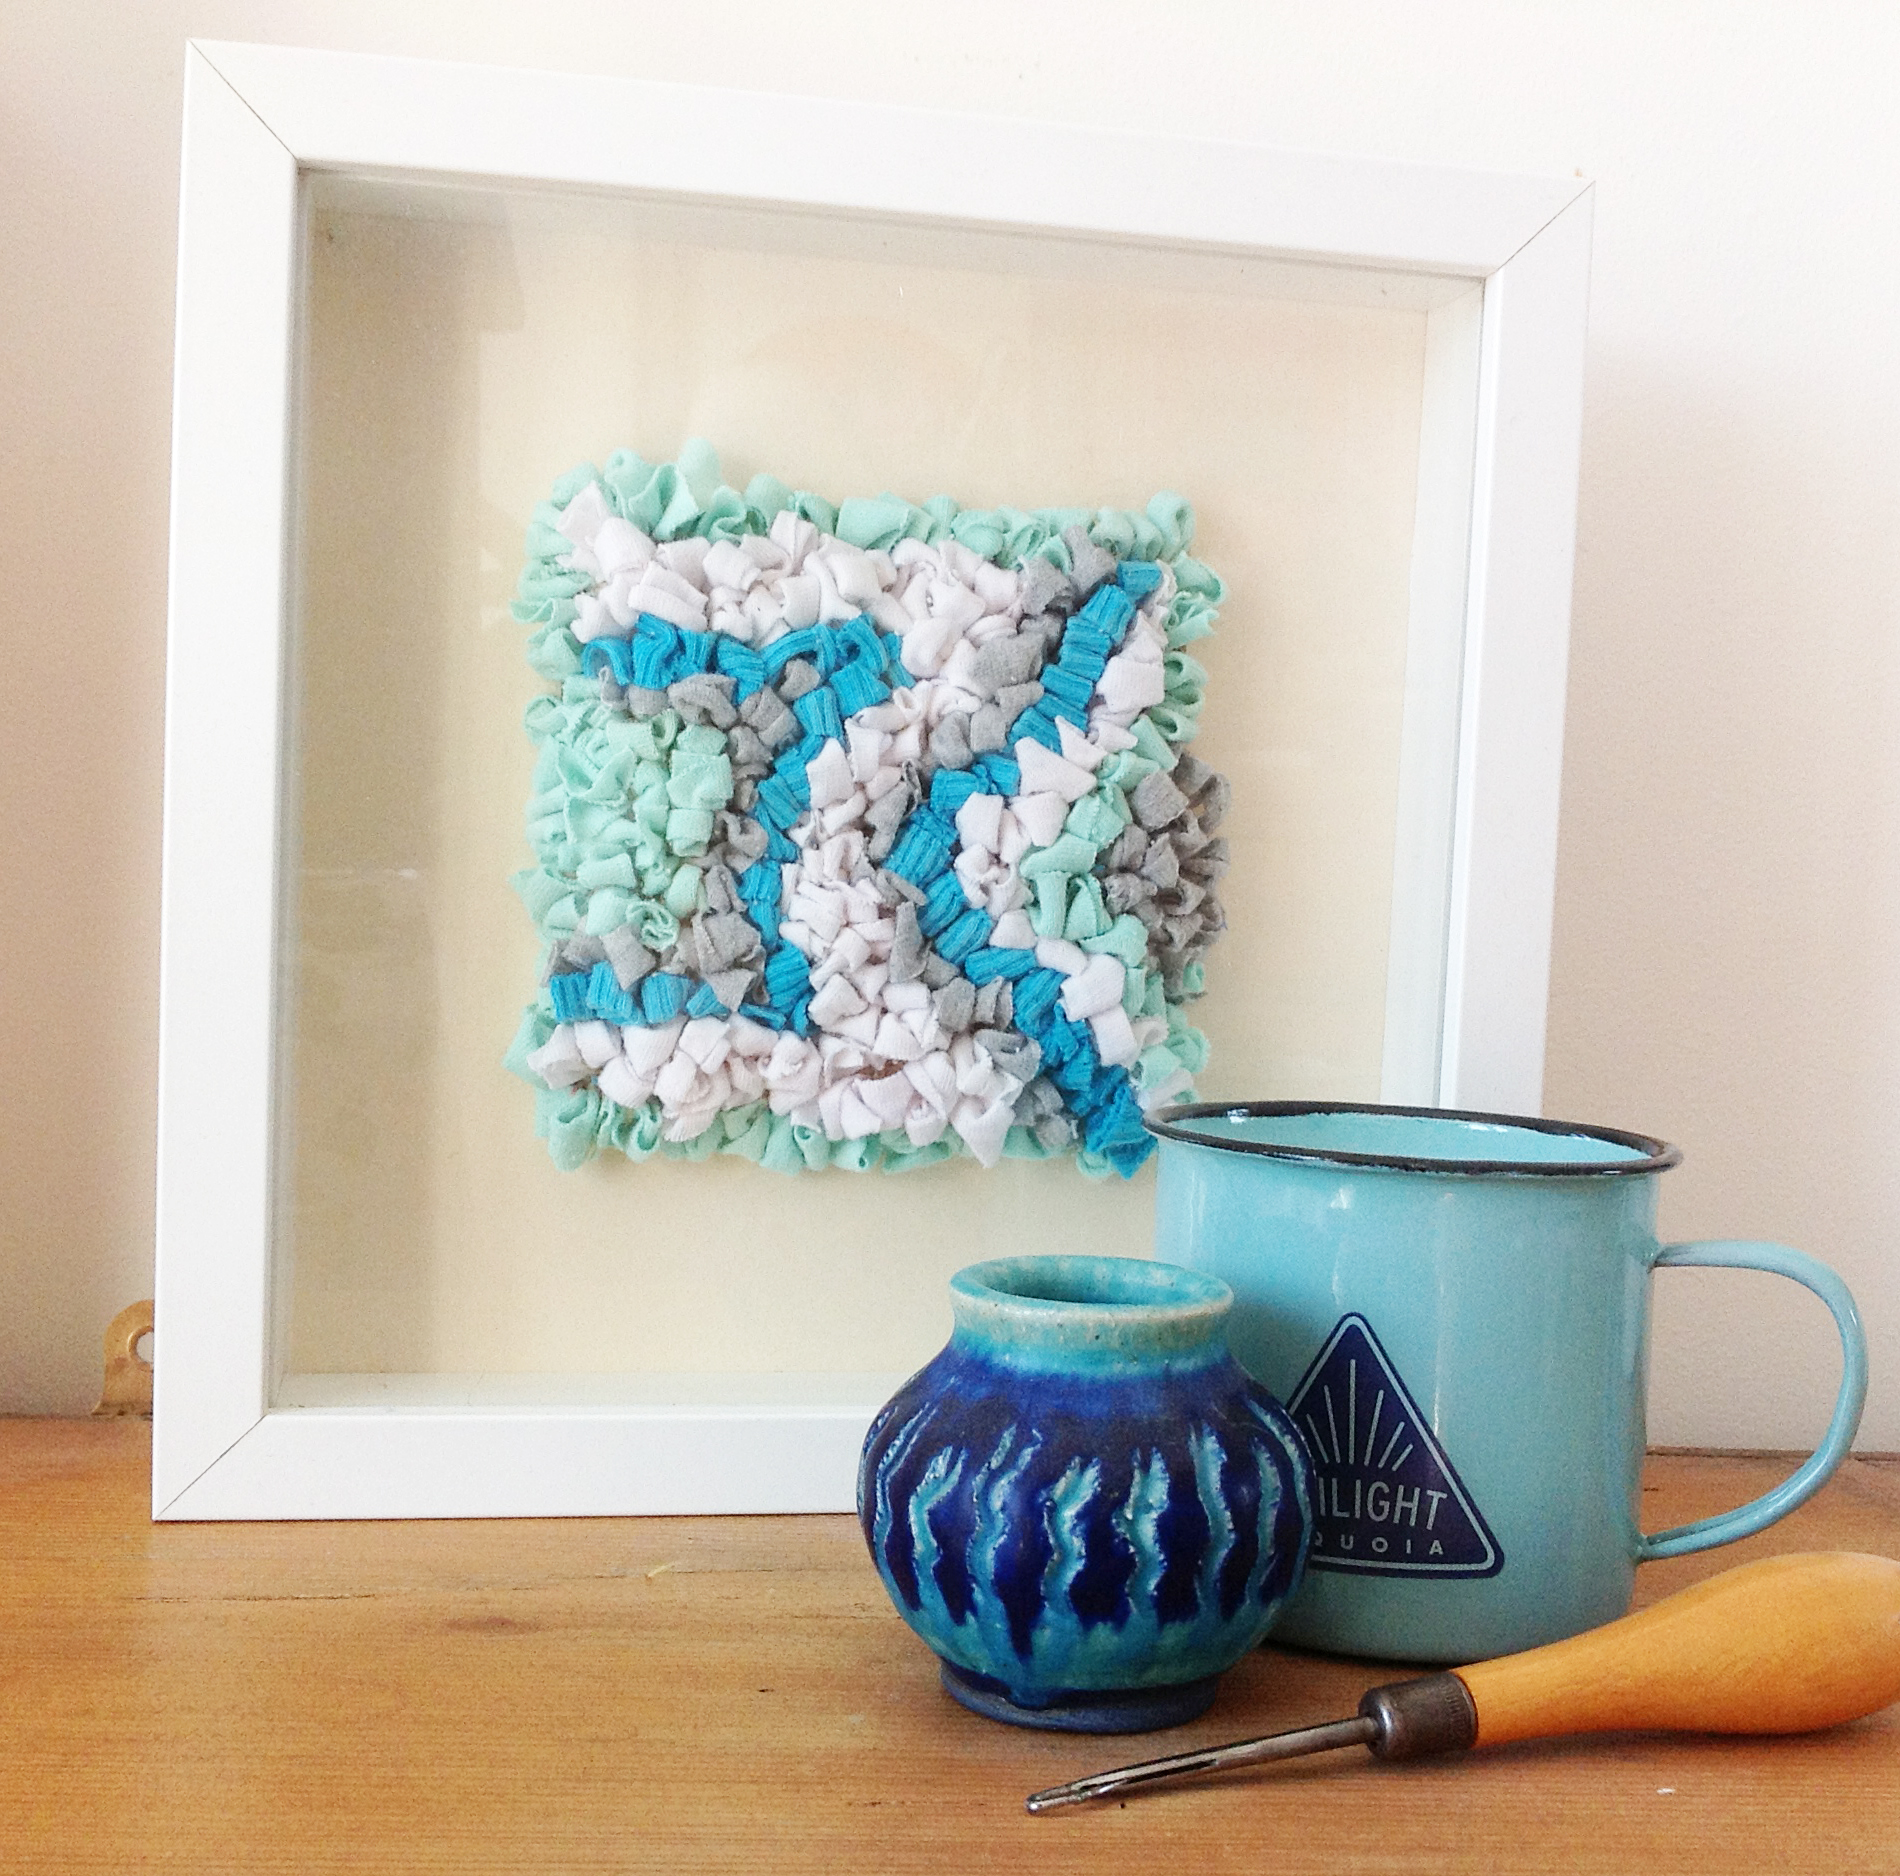
🖼️ 6. Wall Hangings / Framed Rag Rug Art
Want to make something beautiful that won’t be walked on or worn out? Rag rug wall hangings and framed textile art are a stunning way to explore colour and texture — and they’re perfect for turning your rag rugging into a showstopping focal point for any room.
Wall hangings give you the freedom to be bold with design, whether it’s abstract colour play, florals, landscapes, or lettering. You can use a number of different rag rug techniques depending on the look you’re after — loopy and hooked styles work particularly well for more detailed designs, where as a the classic proggy technique adds lots of texture (as in my wedding table plan below).
You can also frame smaller pieces of rag rugging like you would a painting. It’s a fantastic way to preserve and display your work, and makes a meaningful, handmade gift too.
What you need: Hemmed hessian (cut slightly larger than your desired art size), rug hook or spring tool, fabric strips, scissors, and a frame or dowel and cord for hanging. Watch our free Rug Hooking Tutorial video on YouTube here.
Display ideas: Frame them, hang from driftwood, or create a patchwork-style art wall.

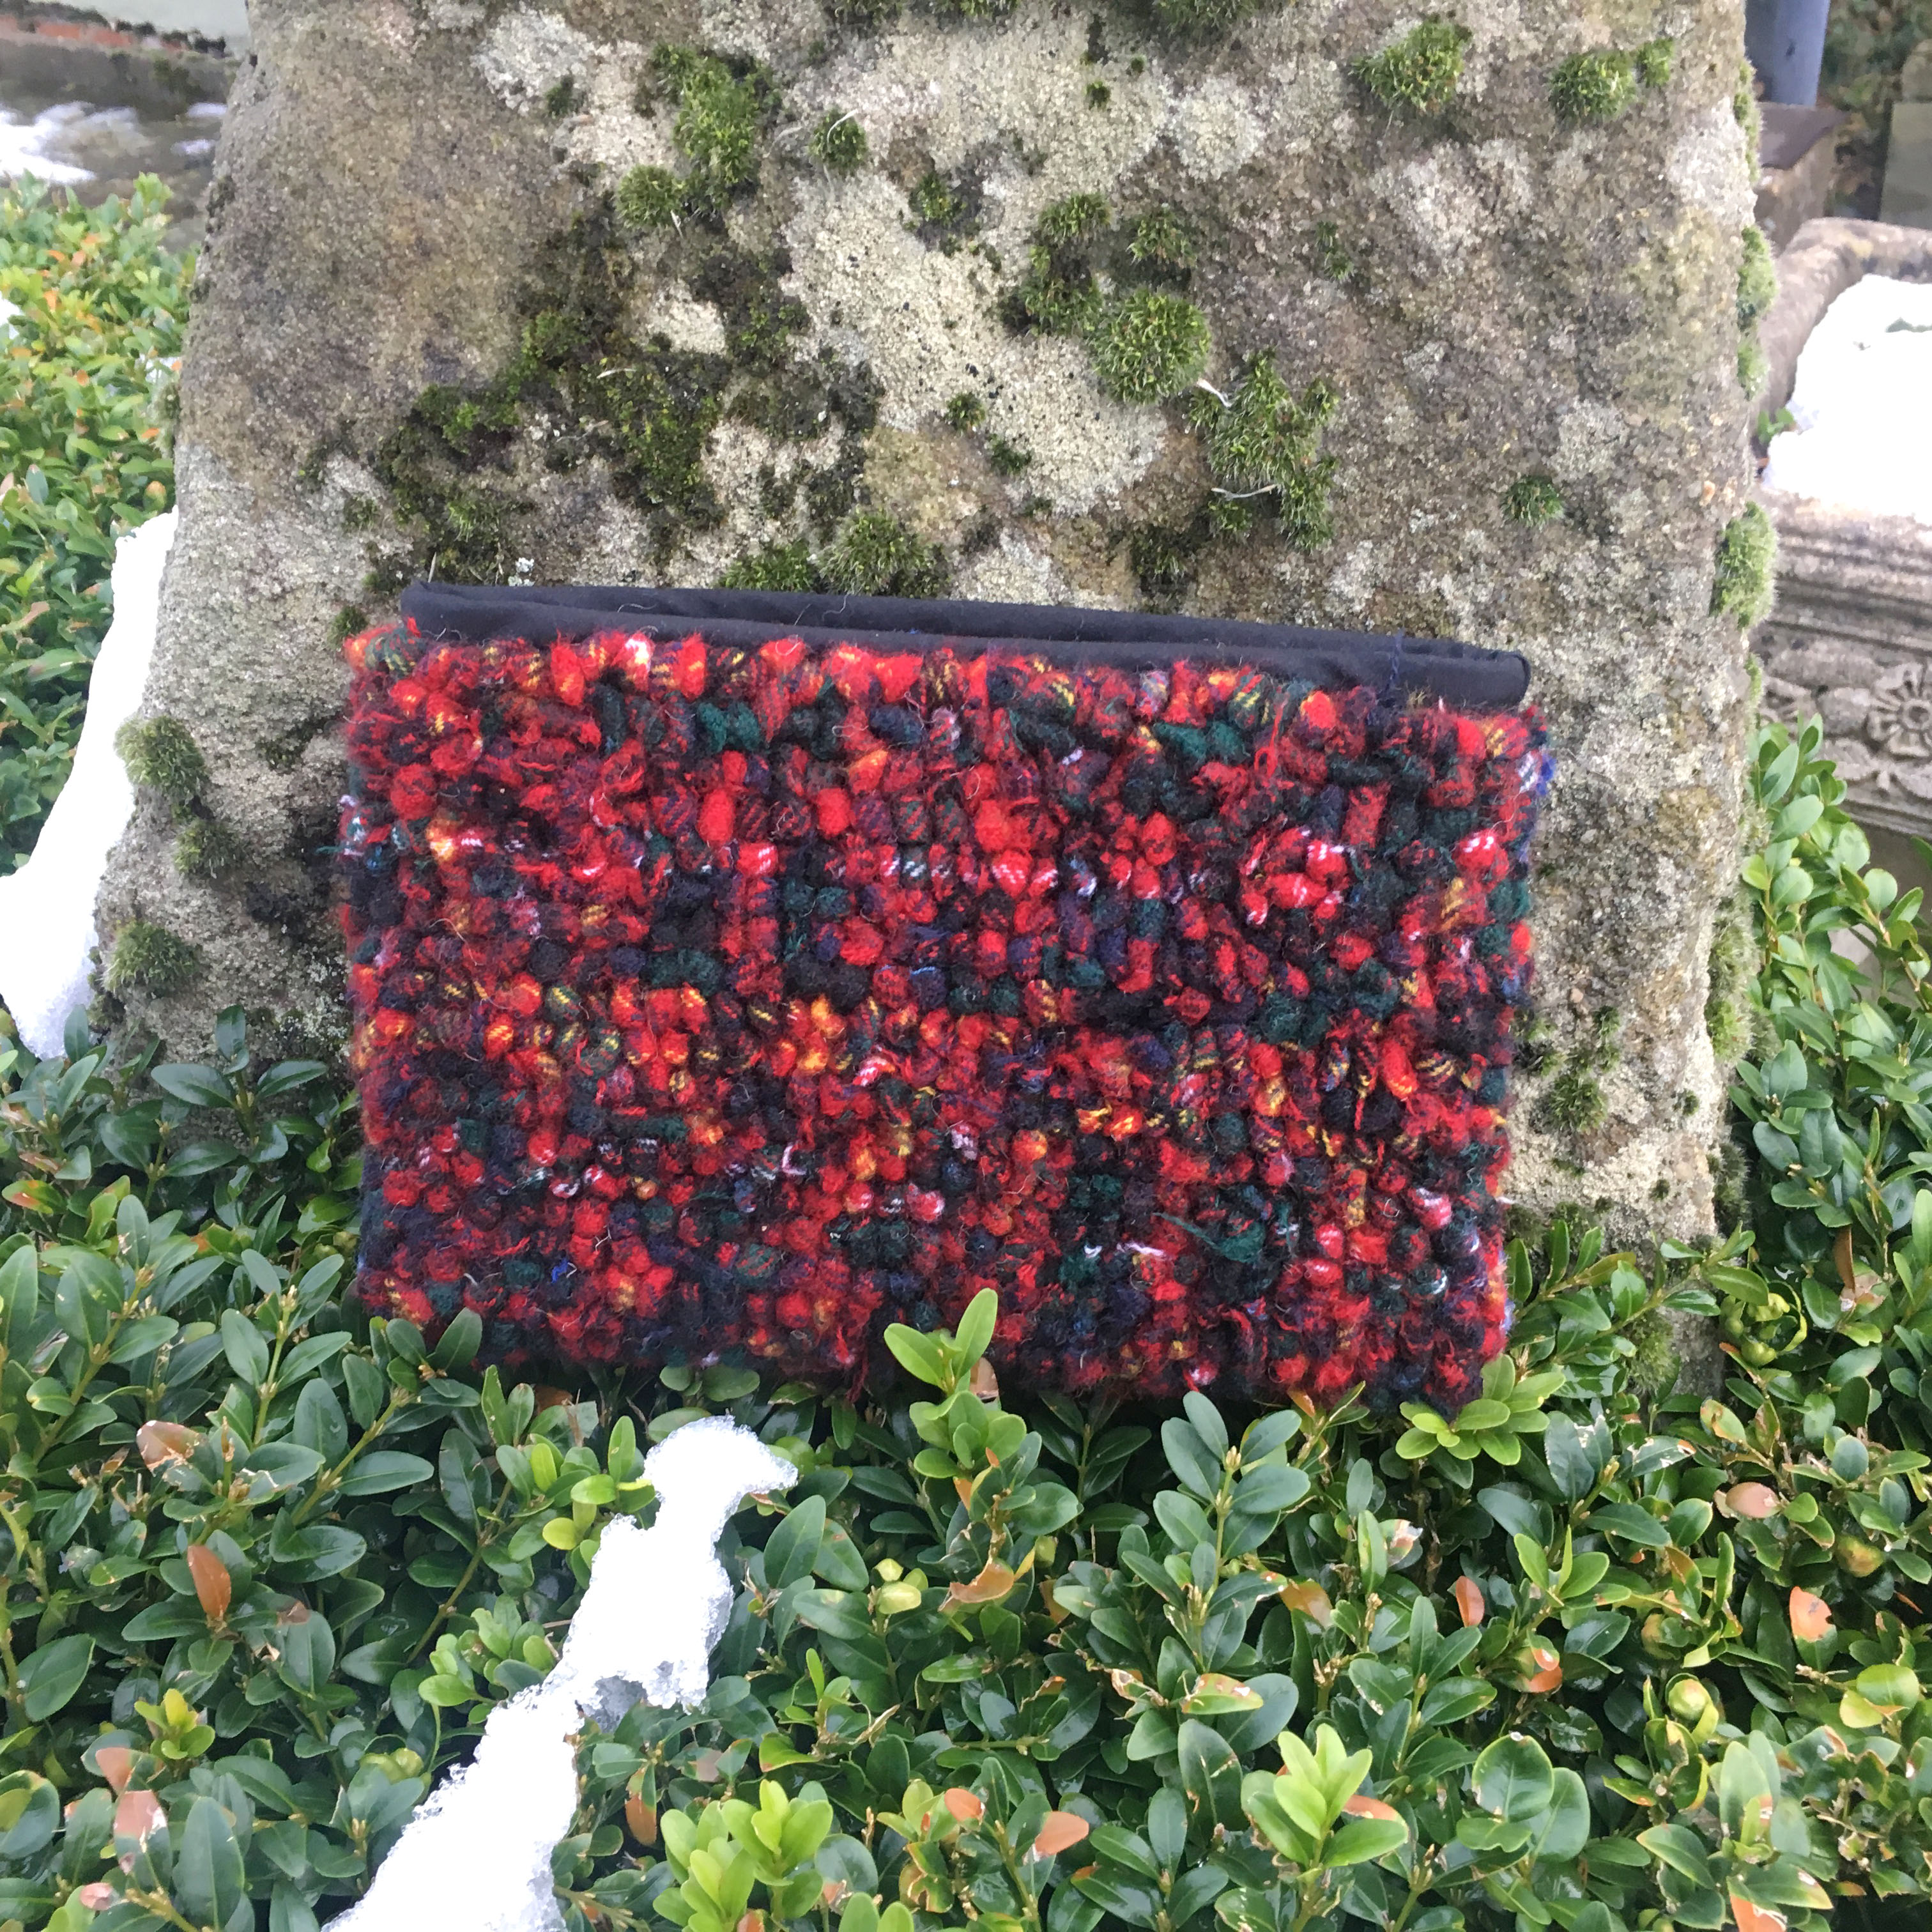
👜 7. Rag Rug Purses & Bags
Fancy turning your rag rugging into something wearable? Rag rug purses and bags are a fun, functional way to take your craft on the go — and they’re guaranteed conversation starters!
If you’re after a no-sew option, you can rag rug directly onto a pre-made hessian or burlap bag (we sell these on the Ragged Life website here) using proggy, short shaggy, or rug hooking techniques. It’s a great way to upcycle a plain tote and make it truly one of a kind.
Feeling confident with sewing? You can create your own purse or clutch panels in many rag rug styles, then stitch them into fully lined, handmade accessories. Whether you go for a bold statement clutch or a textured shoulder bag, the options are as creative as you are.
What you need: A hessian bag or piece of hessian, a rug hook and / or spring tool, cutting gauge, scissors, fabric strips, and (optional) a sewing machine and lining fabric for more complex makes. Watch our Rag Rug Sunflower Hessian Tote Bag video on YouTube here.
Tip: Stick to flatter techniques like rug hooking, twining and locker hooking to reduce weight and to avoid snagging.
Great for: Handmade gifts or statement accessories.


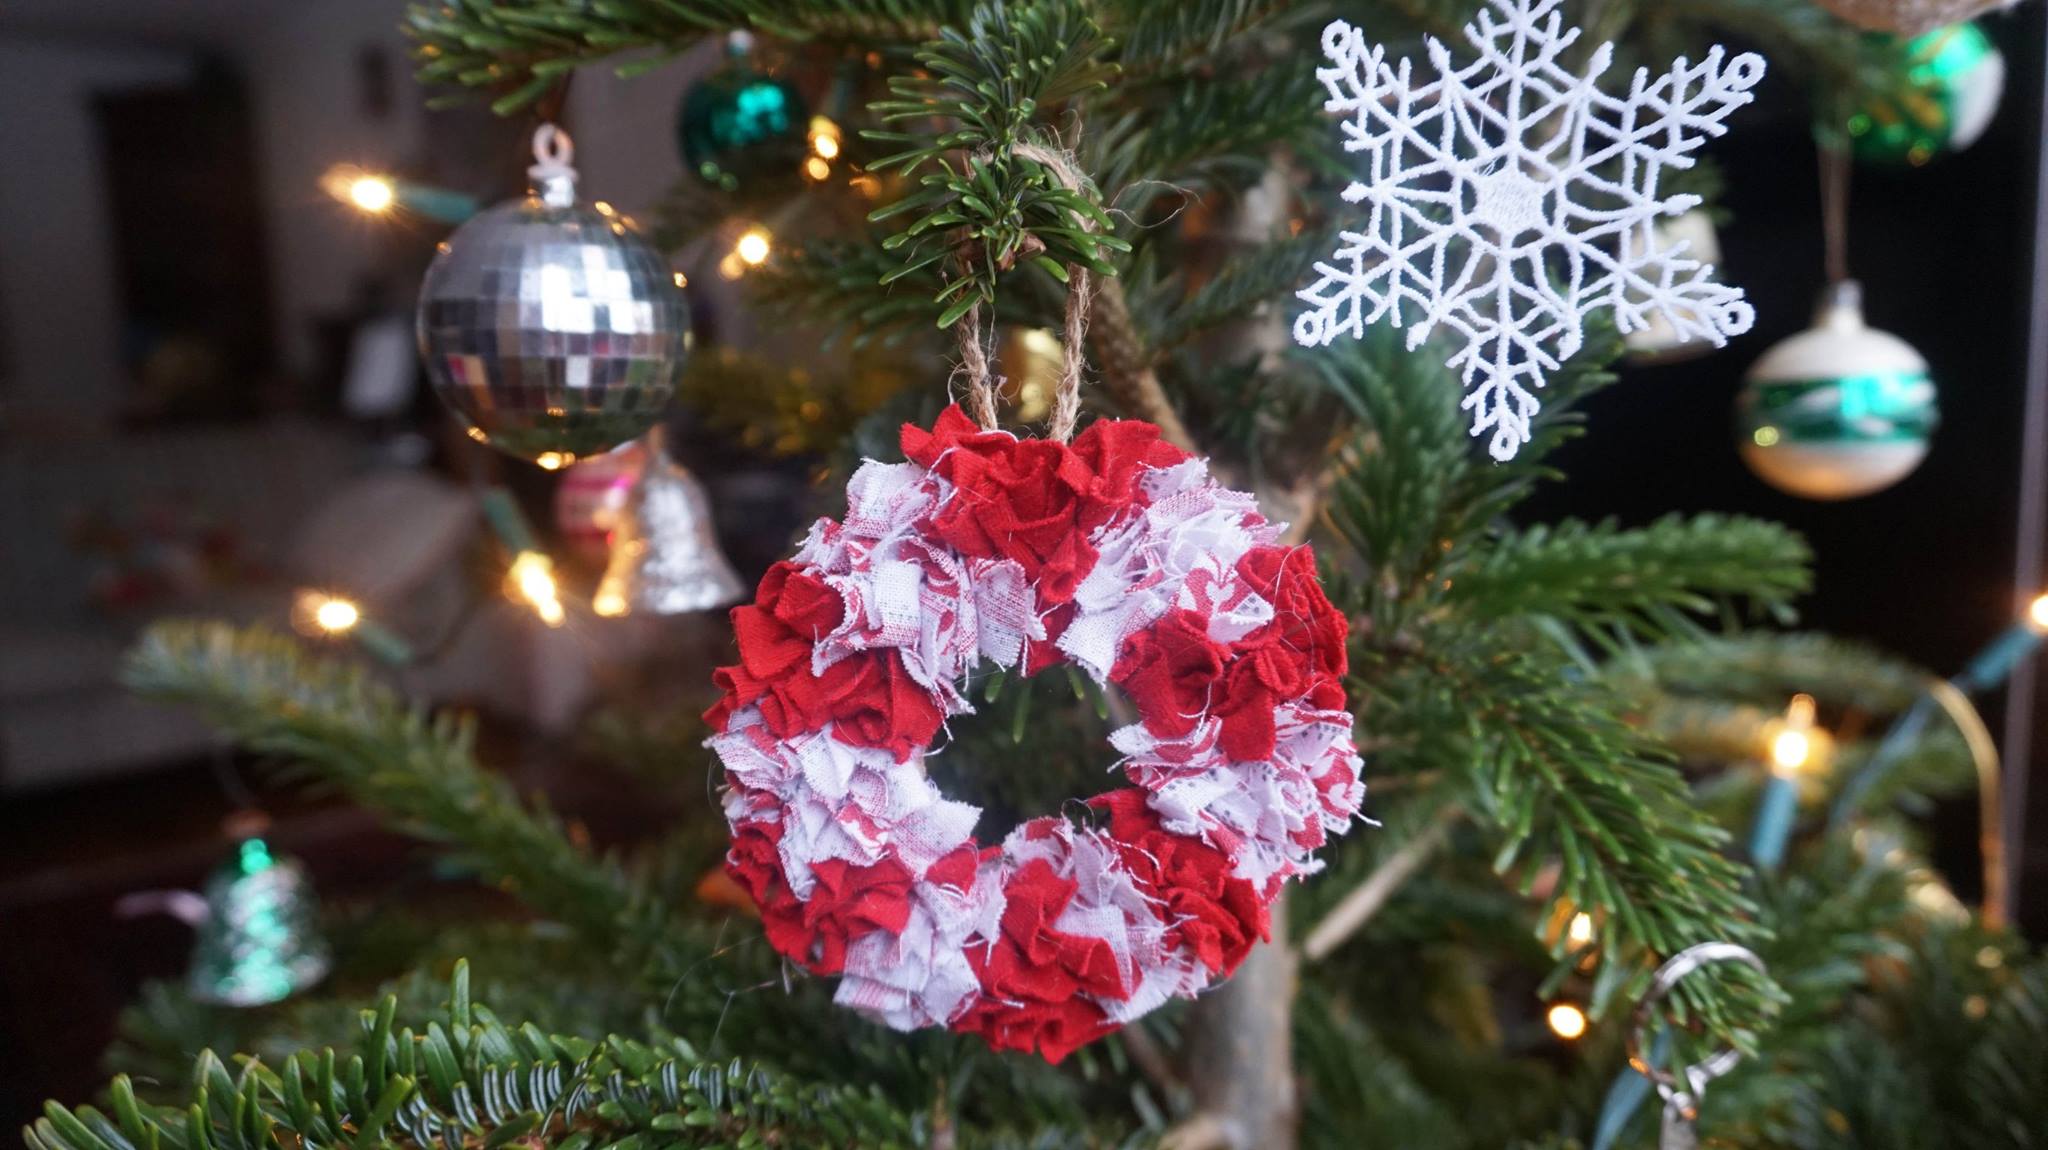
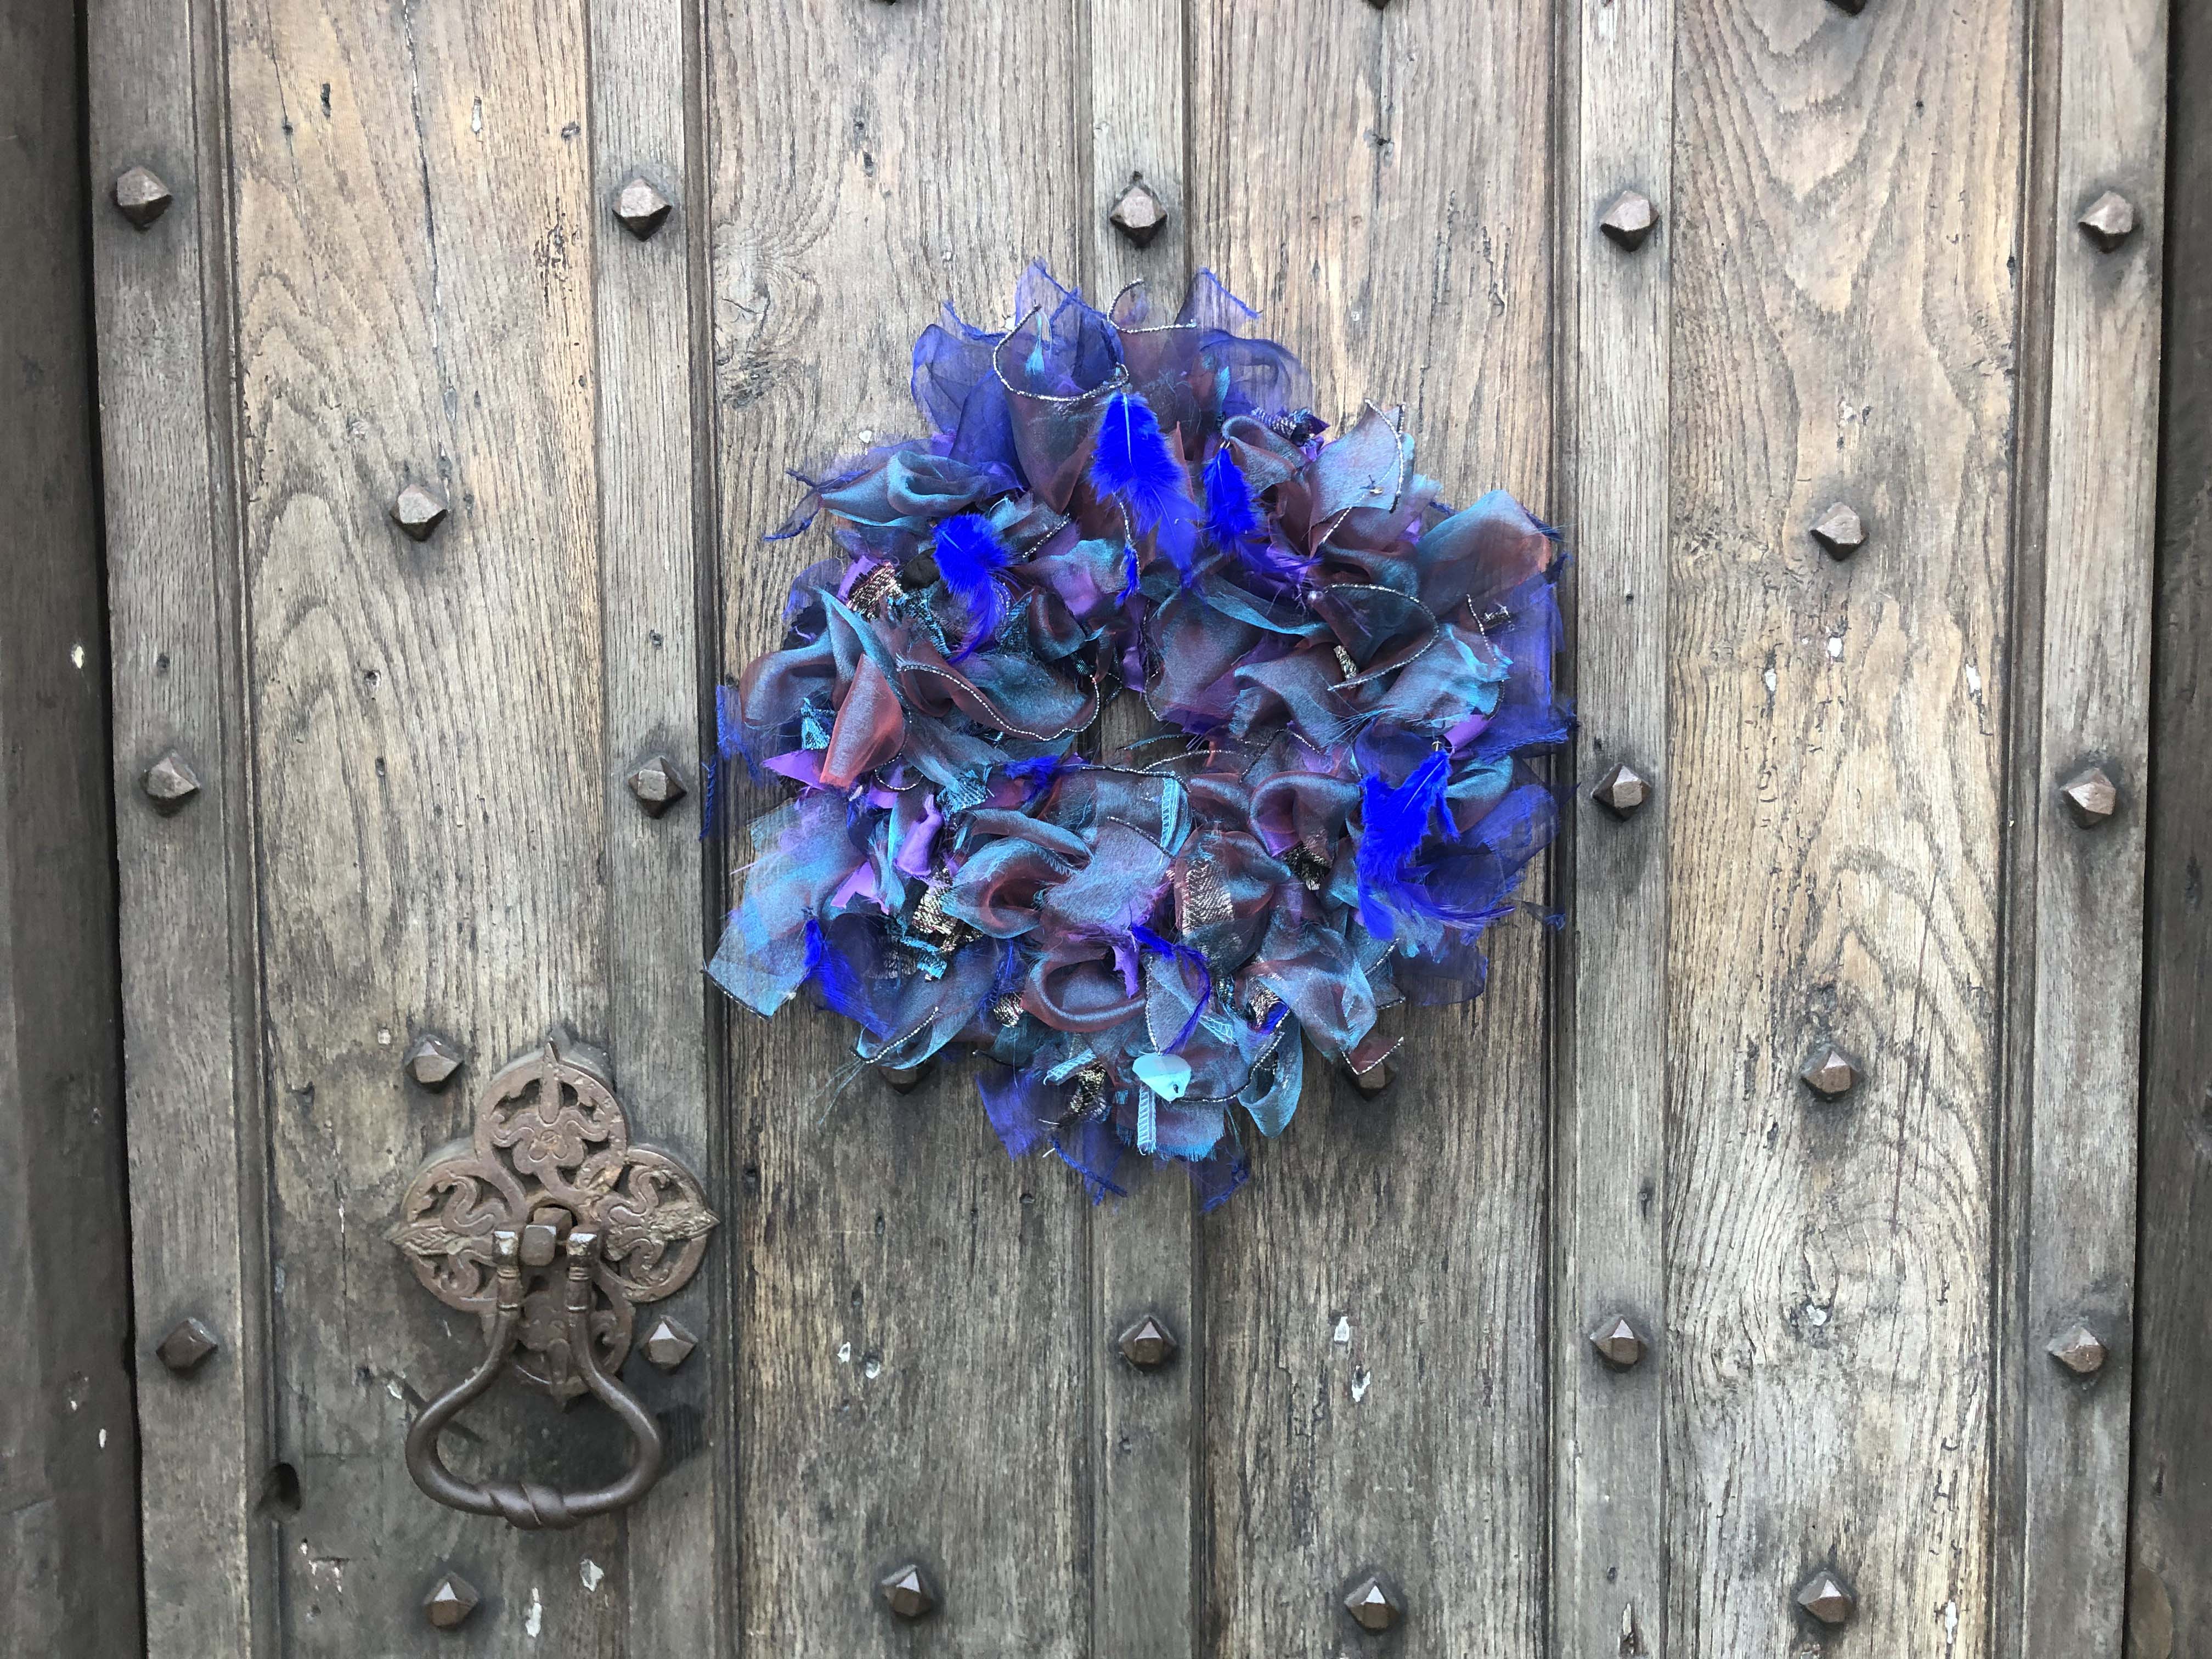
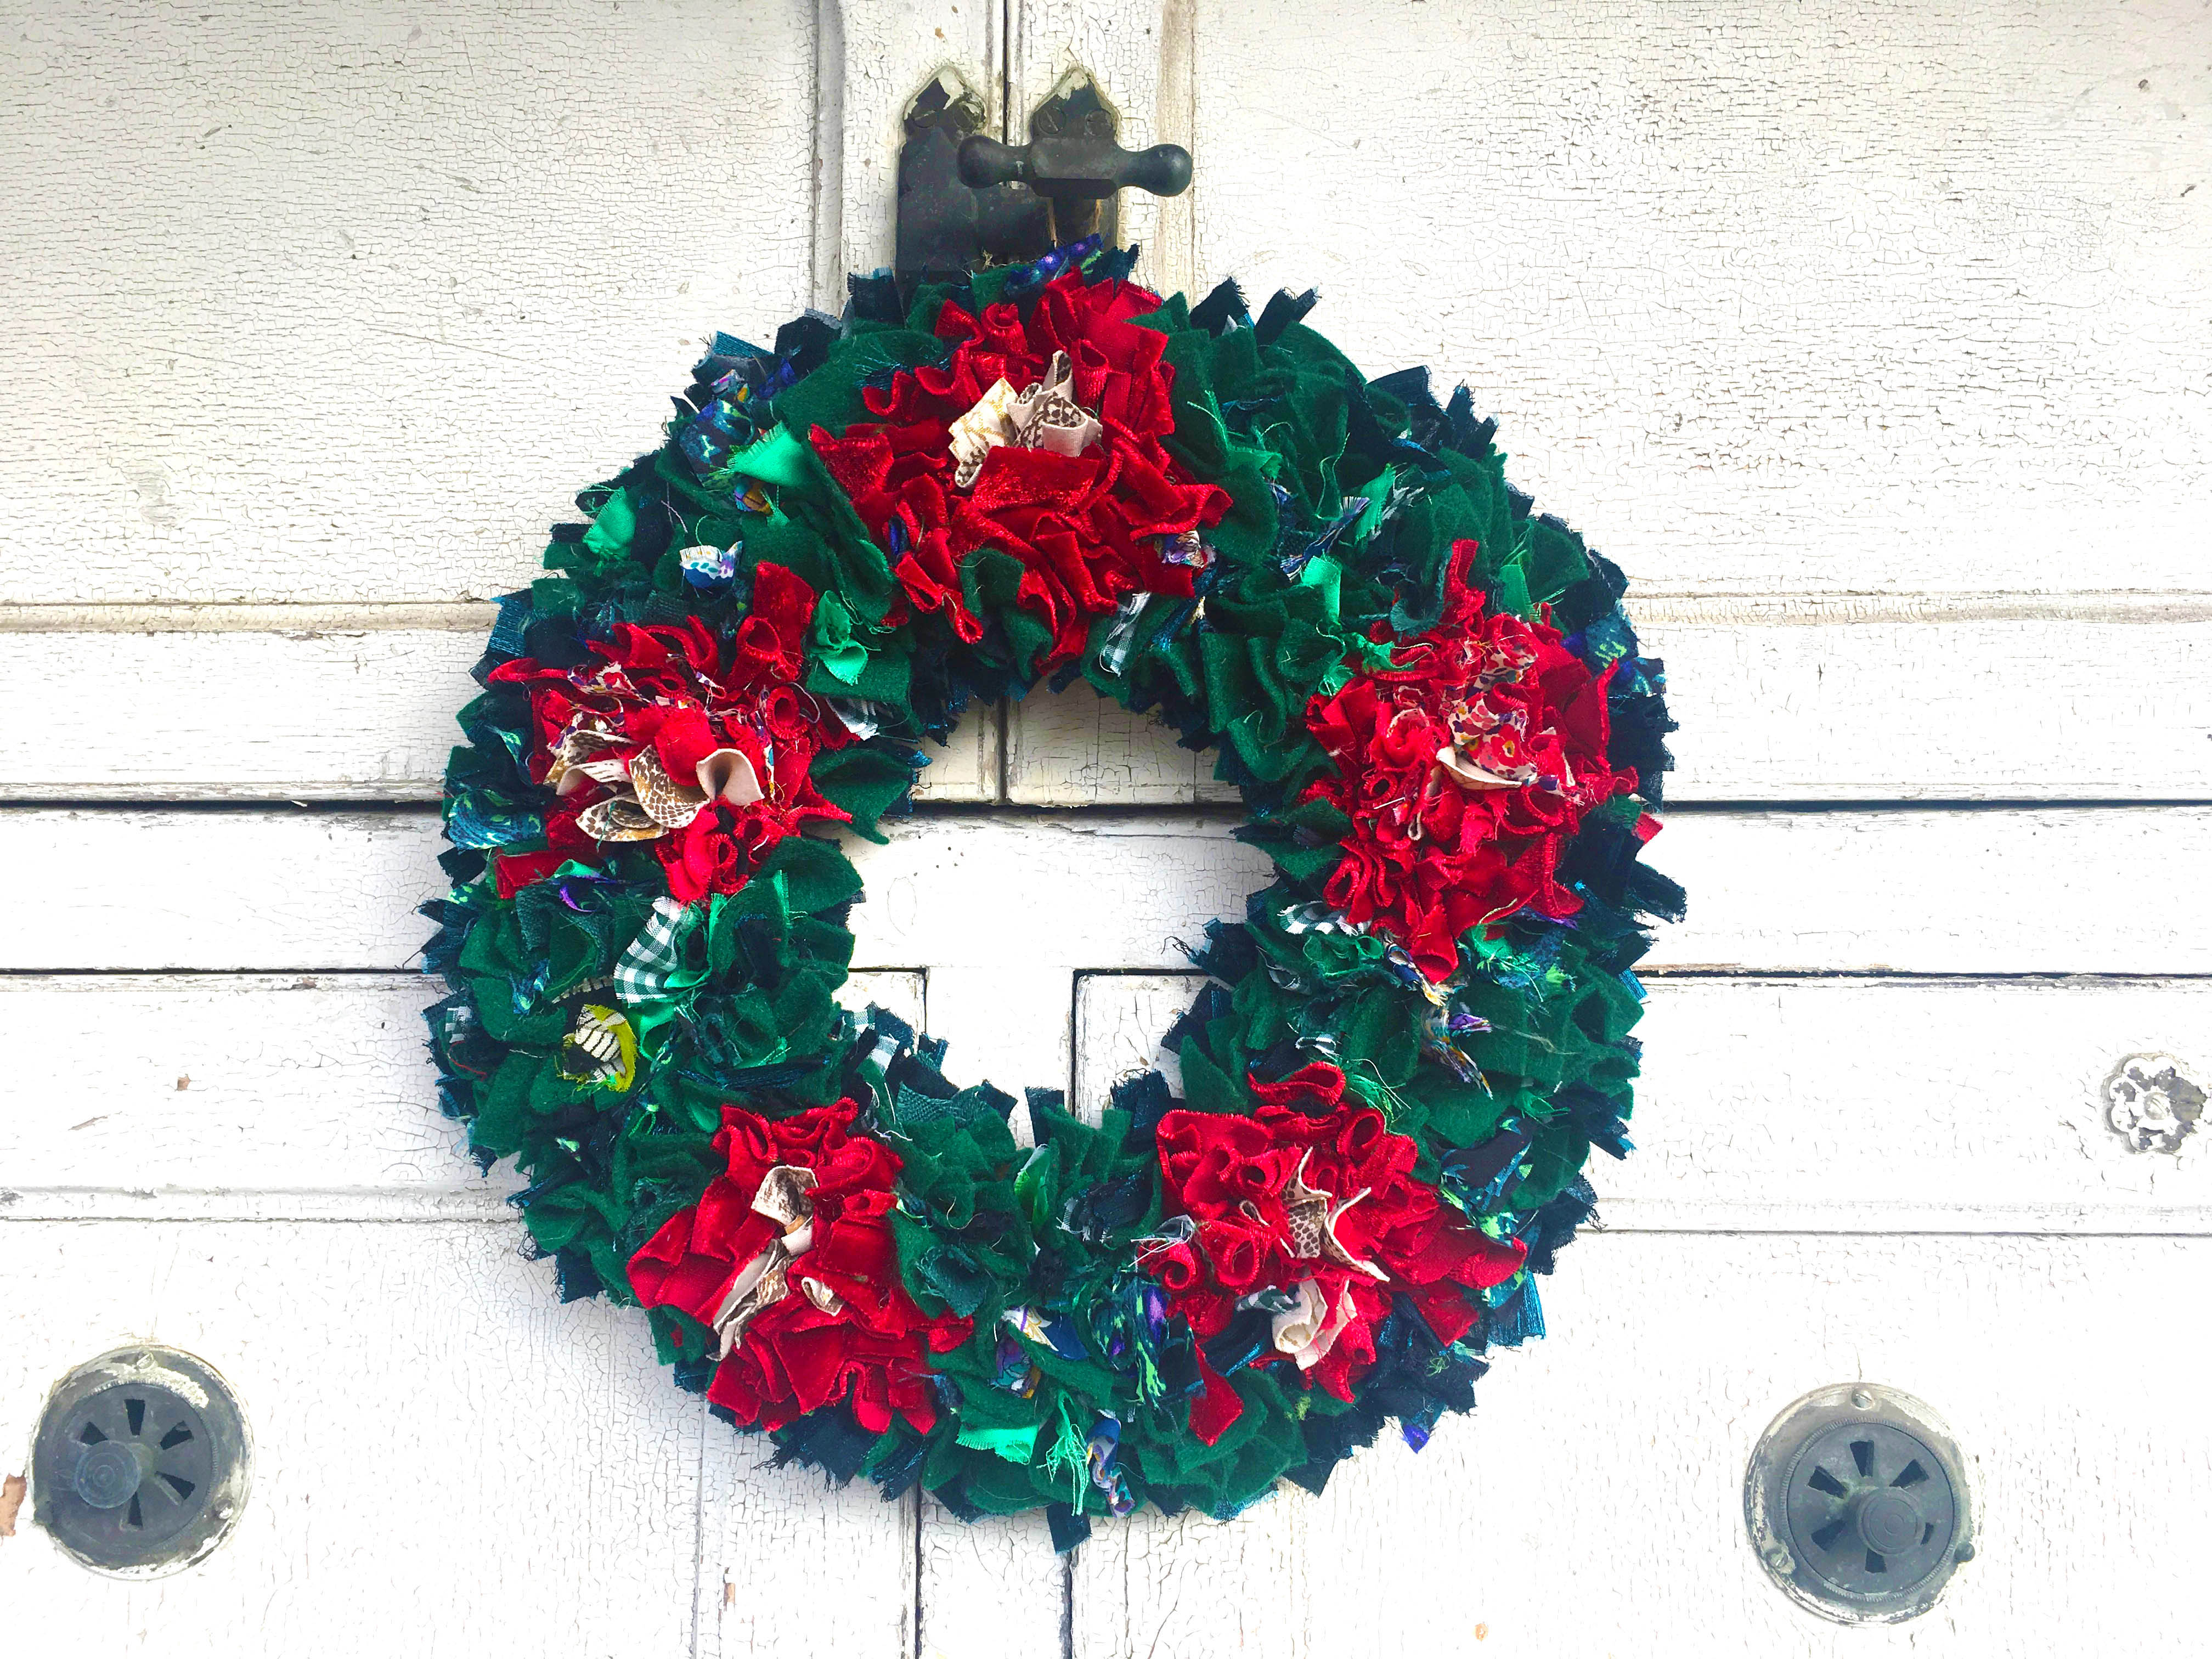
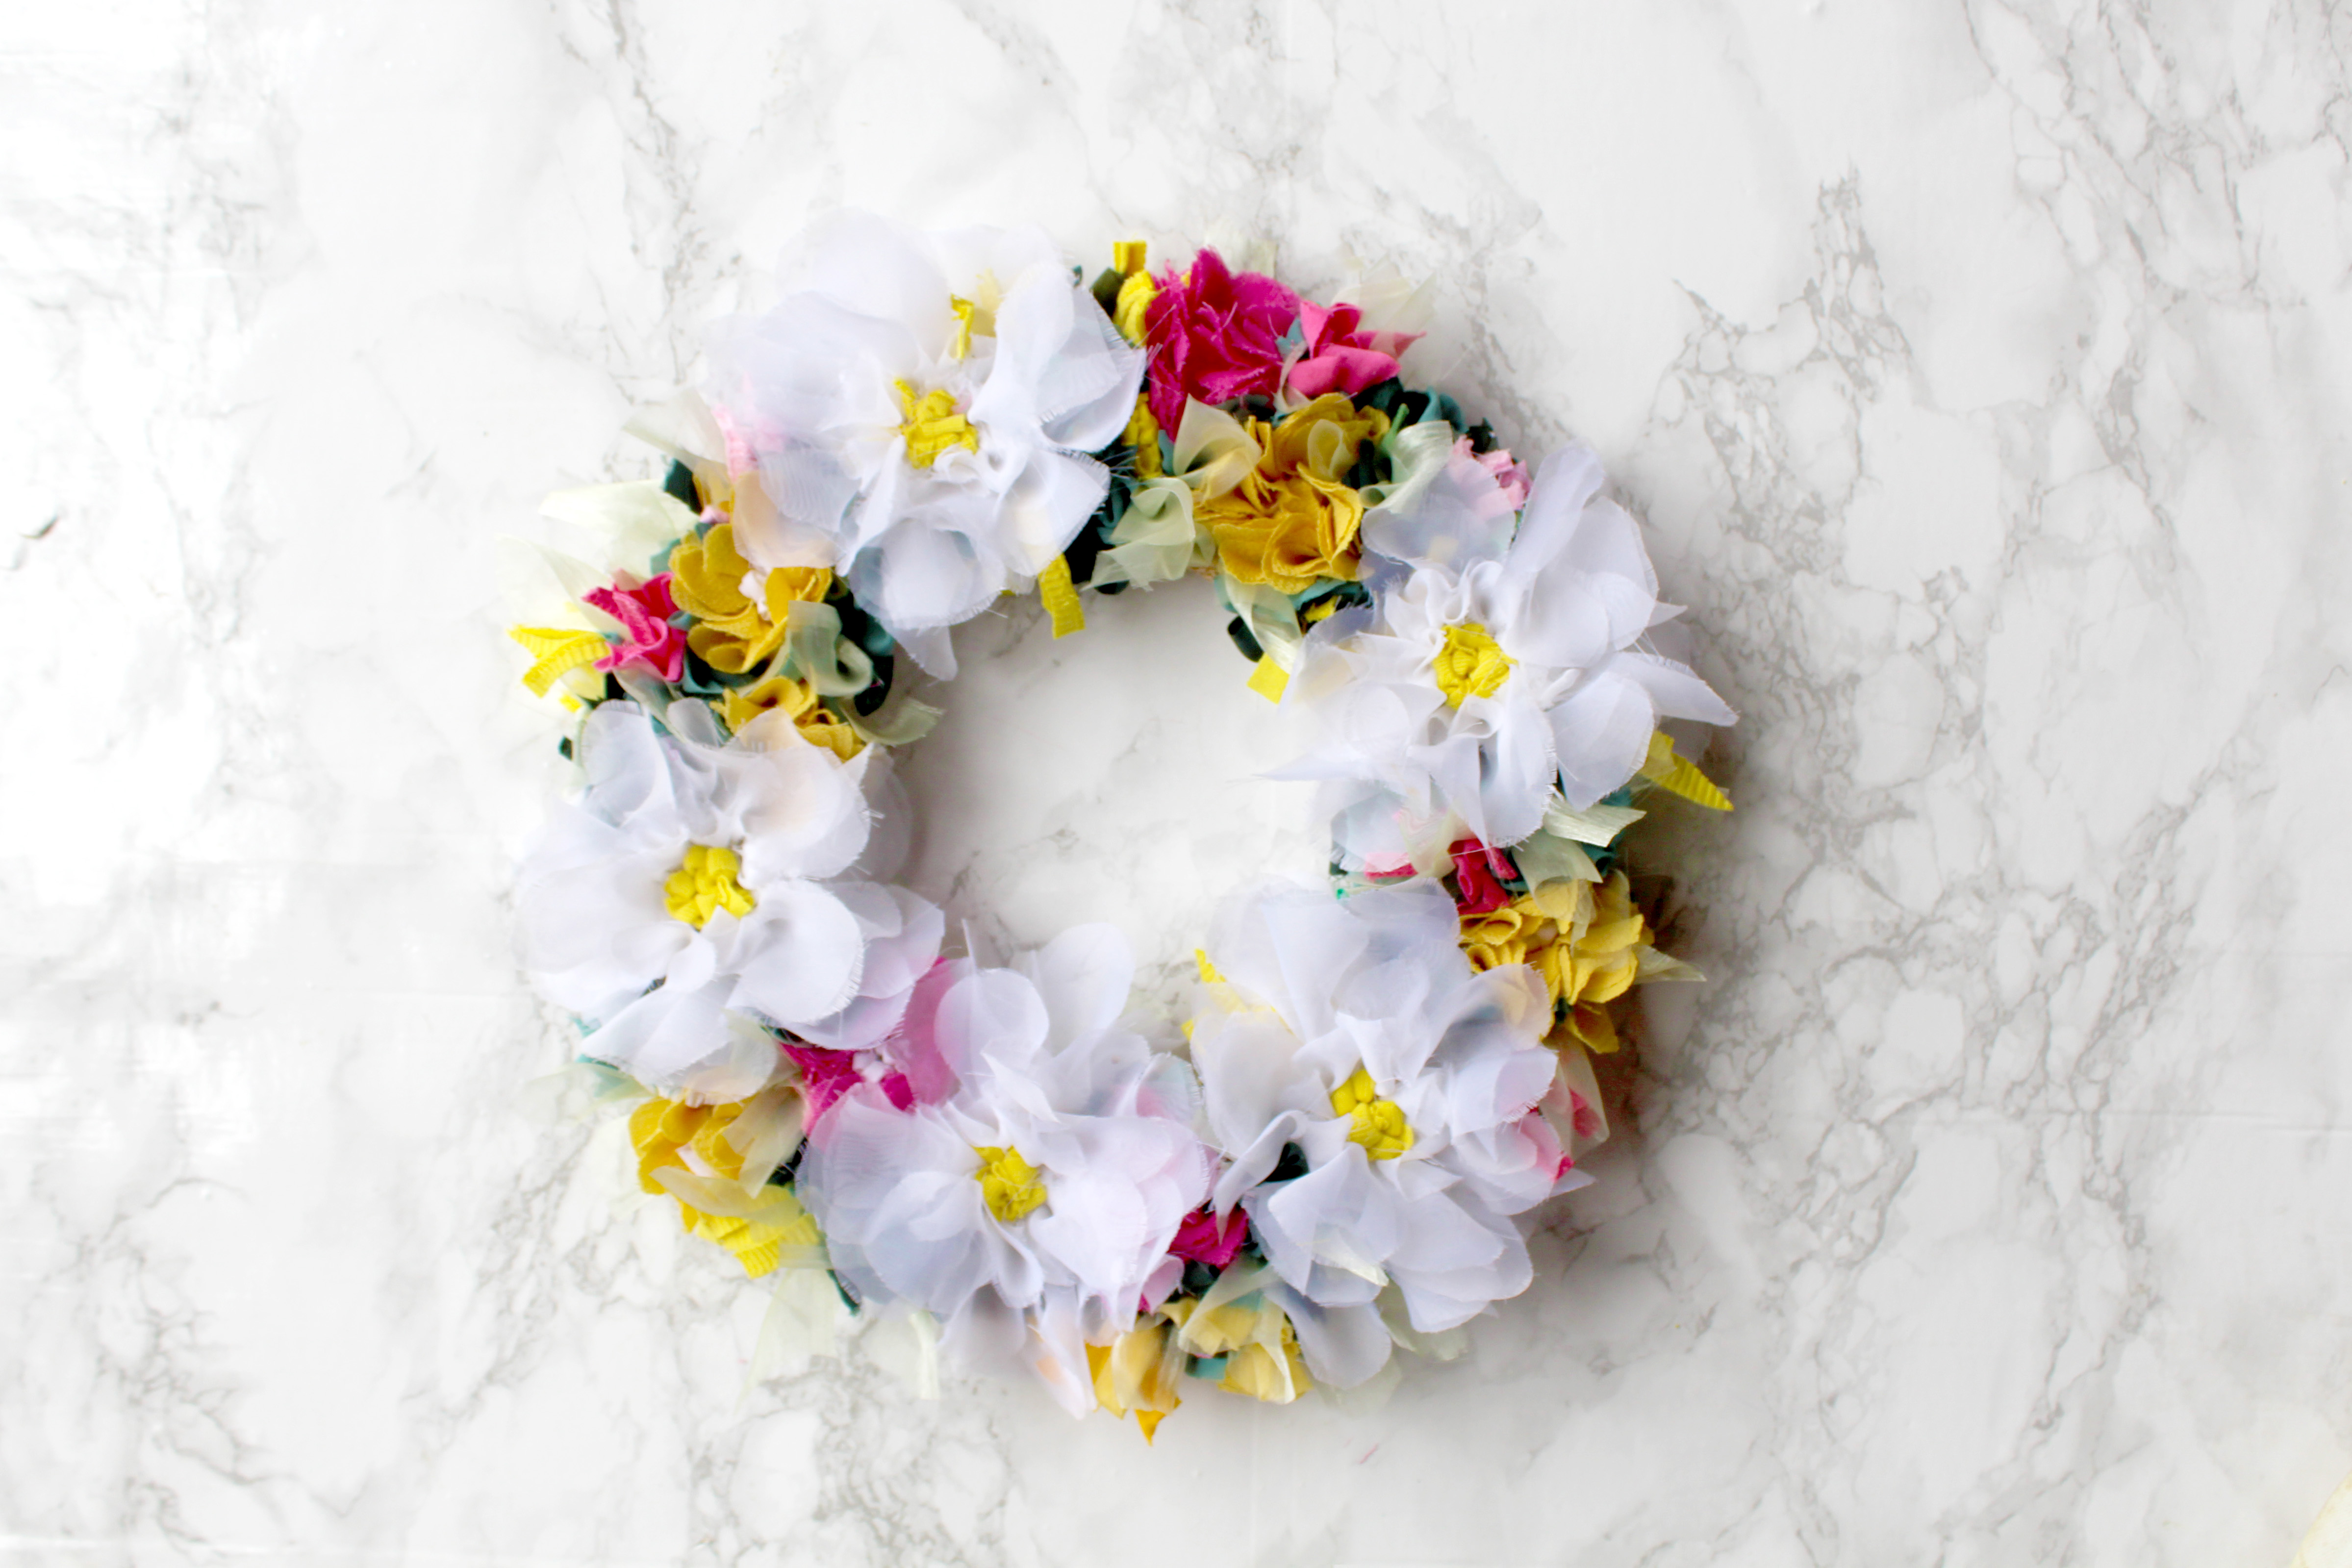
🎄 8. Small Seasonal Projects: Rag Rug Wreaths & Garlands
Looking for a quick, decorative project with festive flair? Mini wreaths, rag rug wreaths, and garlands are perfect small-scale makes that bring handmade charm to any season.
Rag rug wreaths and garlands lend themselves best to the proggy, shaggy rag rug technique as it mimics foliage best, but you can play around and add in some bits of loopy rug hooking for more variety (as red berry details, for example). All projects are easy to adapt with seasonal colours and the mini versions make adorable cupboard or door decorations.
What you need: Pick up pre-hemmed hessian for all three projects on the Ragged Life Online Shop here.
Tip: These small projects are great for kids age 12+, craft groups, or gift-making — fast, fun, and satisfying to complete.


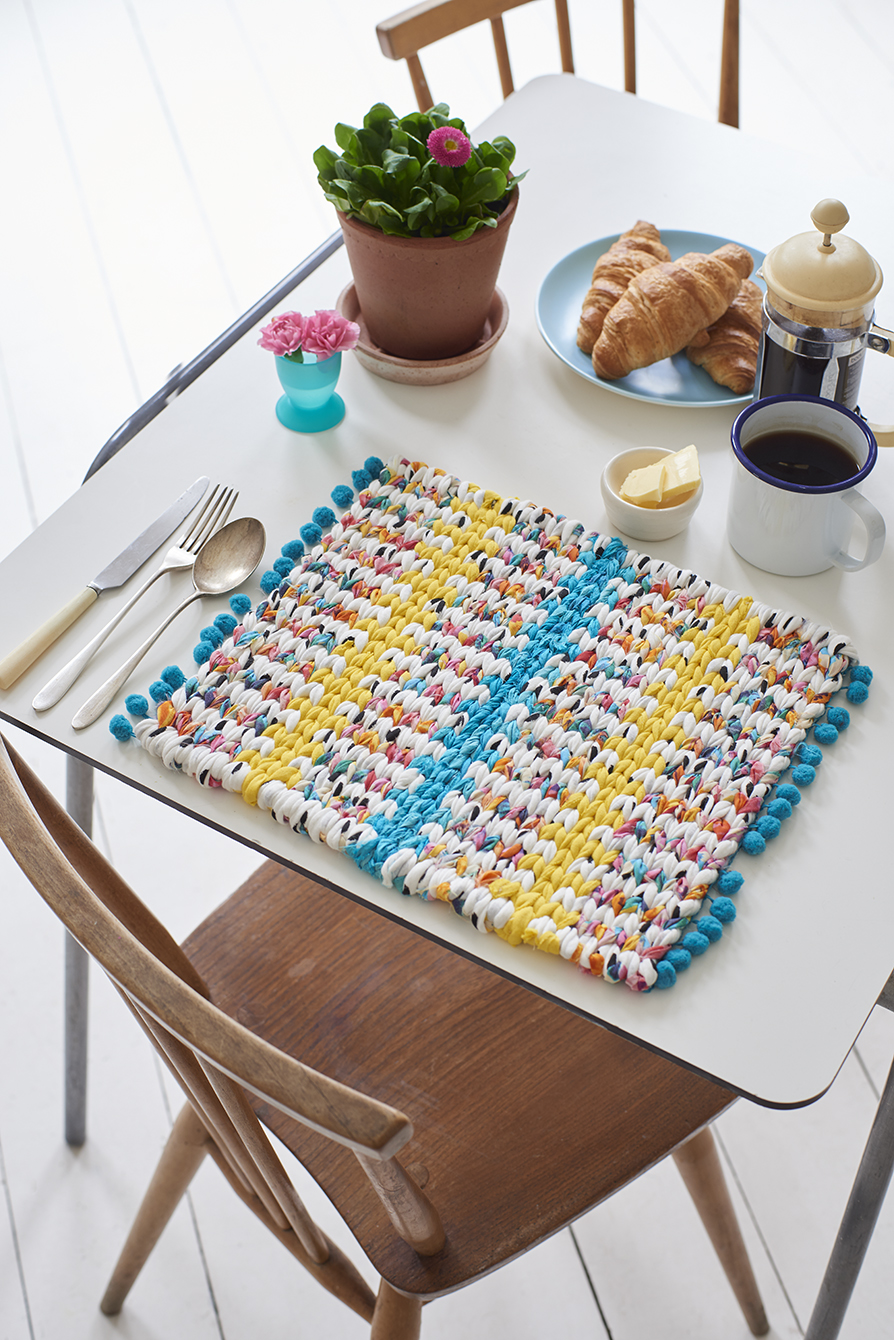
🍽️ 9. Rag Rug Table Runners & Placemats
Add texture and charm to your dining table with rag rug table runners and placemats — practical, pretty projects that are perfect for trying out new techniques on a manageable scale. Whether you go rustic or colourful, these pieces bring handmade warmth to everyday meals.
Placemats are an ideal size for beginners — small enough to complete in a few sessions, but big enough to experiment with colour blocking or patterns. Table runners make a slightly larger project and look beautiful in seasonal fabrics or neutral tones for year-round use.
Techniques that work best for placemats and table runners are harder-wearing techniques, such as the coiled cord technique, locker hooking, braid-in rug making and twining.
What you need: Cotton cord (buy cord on the Ragged Life website here. It takes around 10 metres to make one placemat), a sewing machine that’s able to do a zig zag stitch, fabric strips in colours of your choice (cut approx 1cm wide and max 1 metre in length).
Tip: Stick to fairly uniform thinner fabrics, such as cotton, to make the coiling easier and so plates and glasses sit evenly — or just use them as decorative centrepieces if you go more textural!


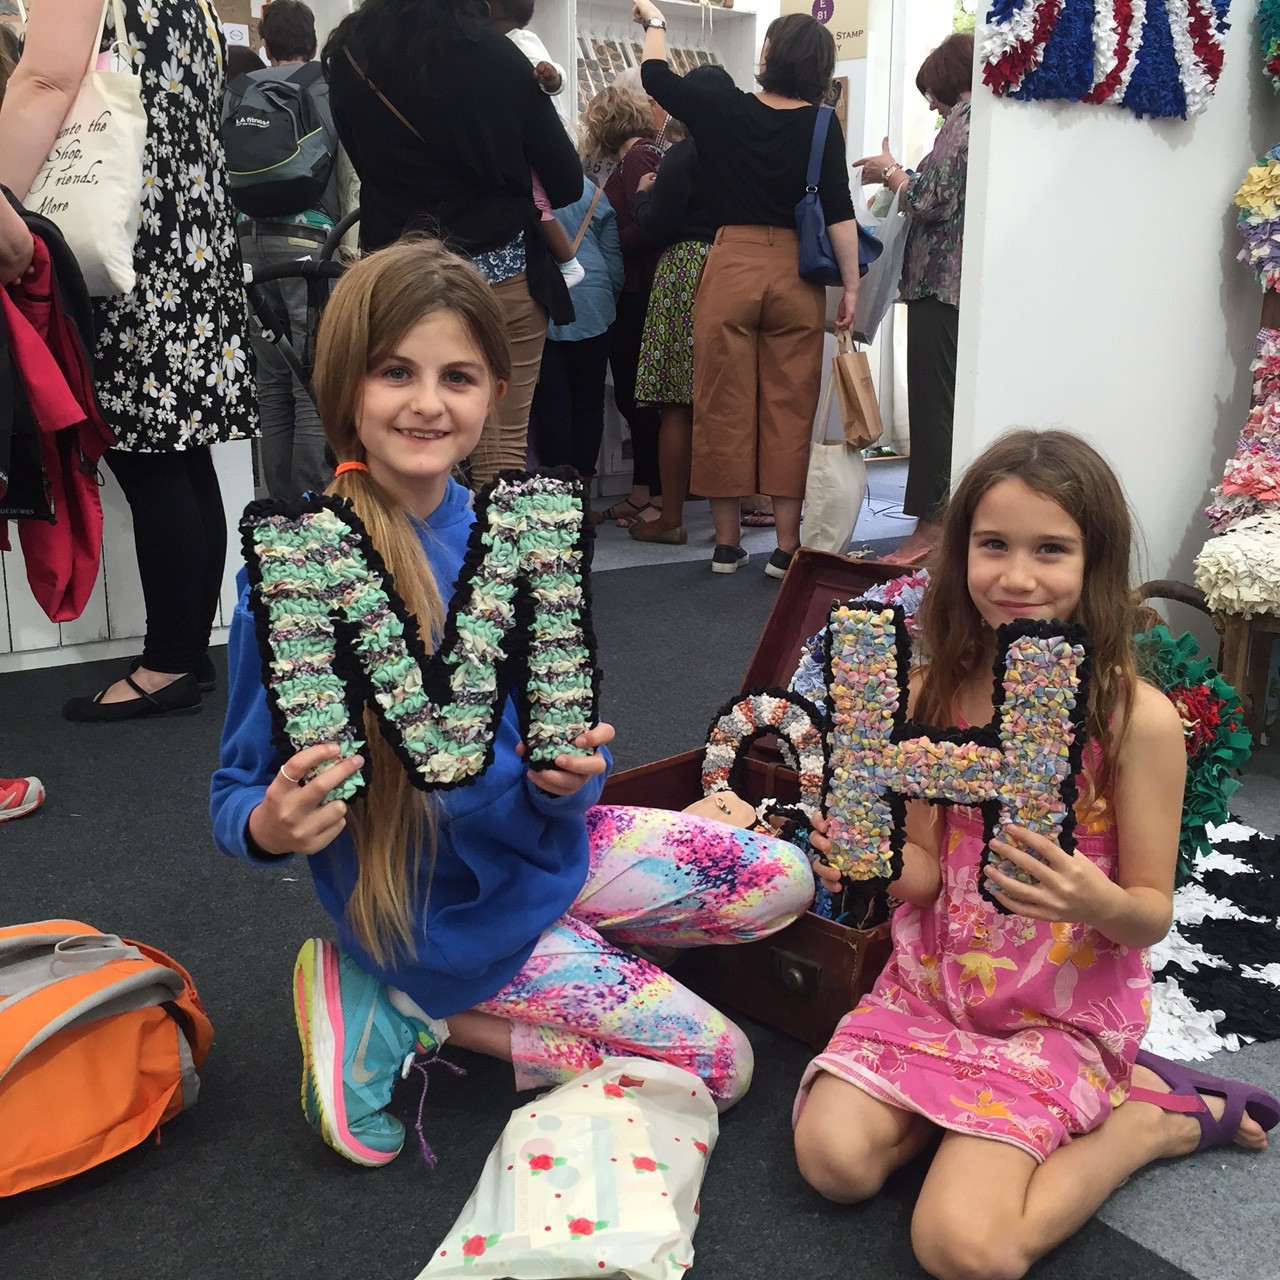
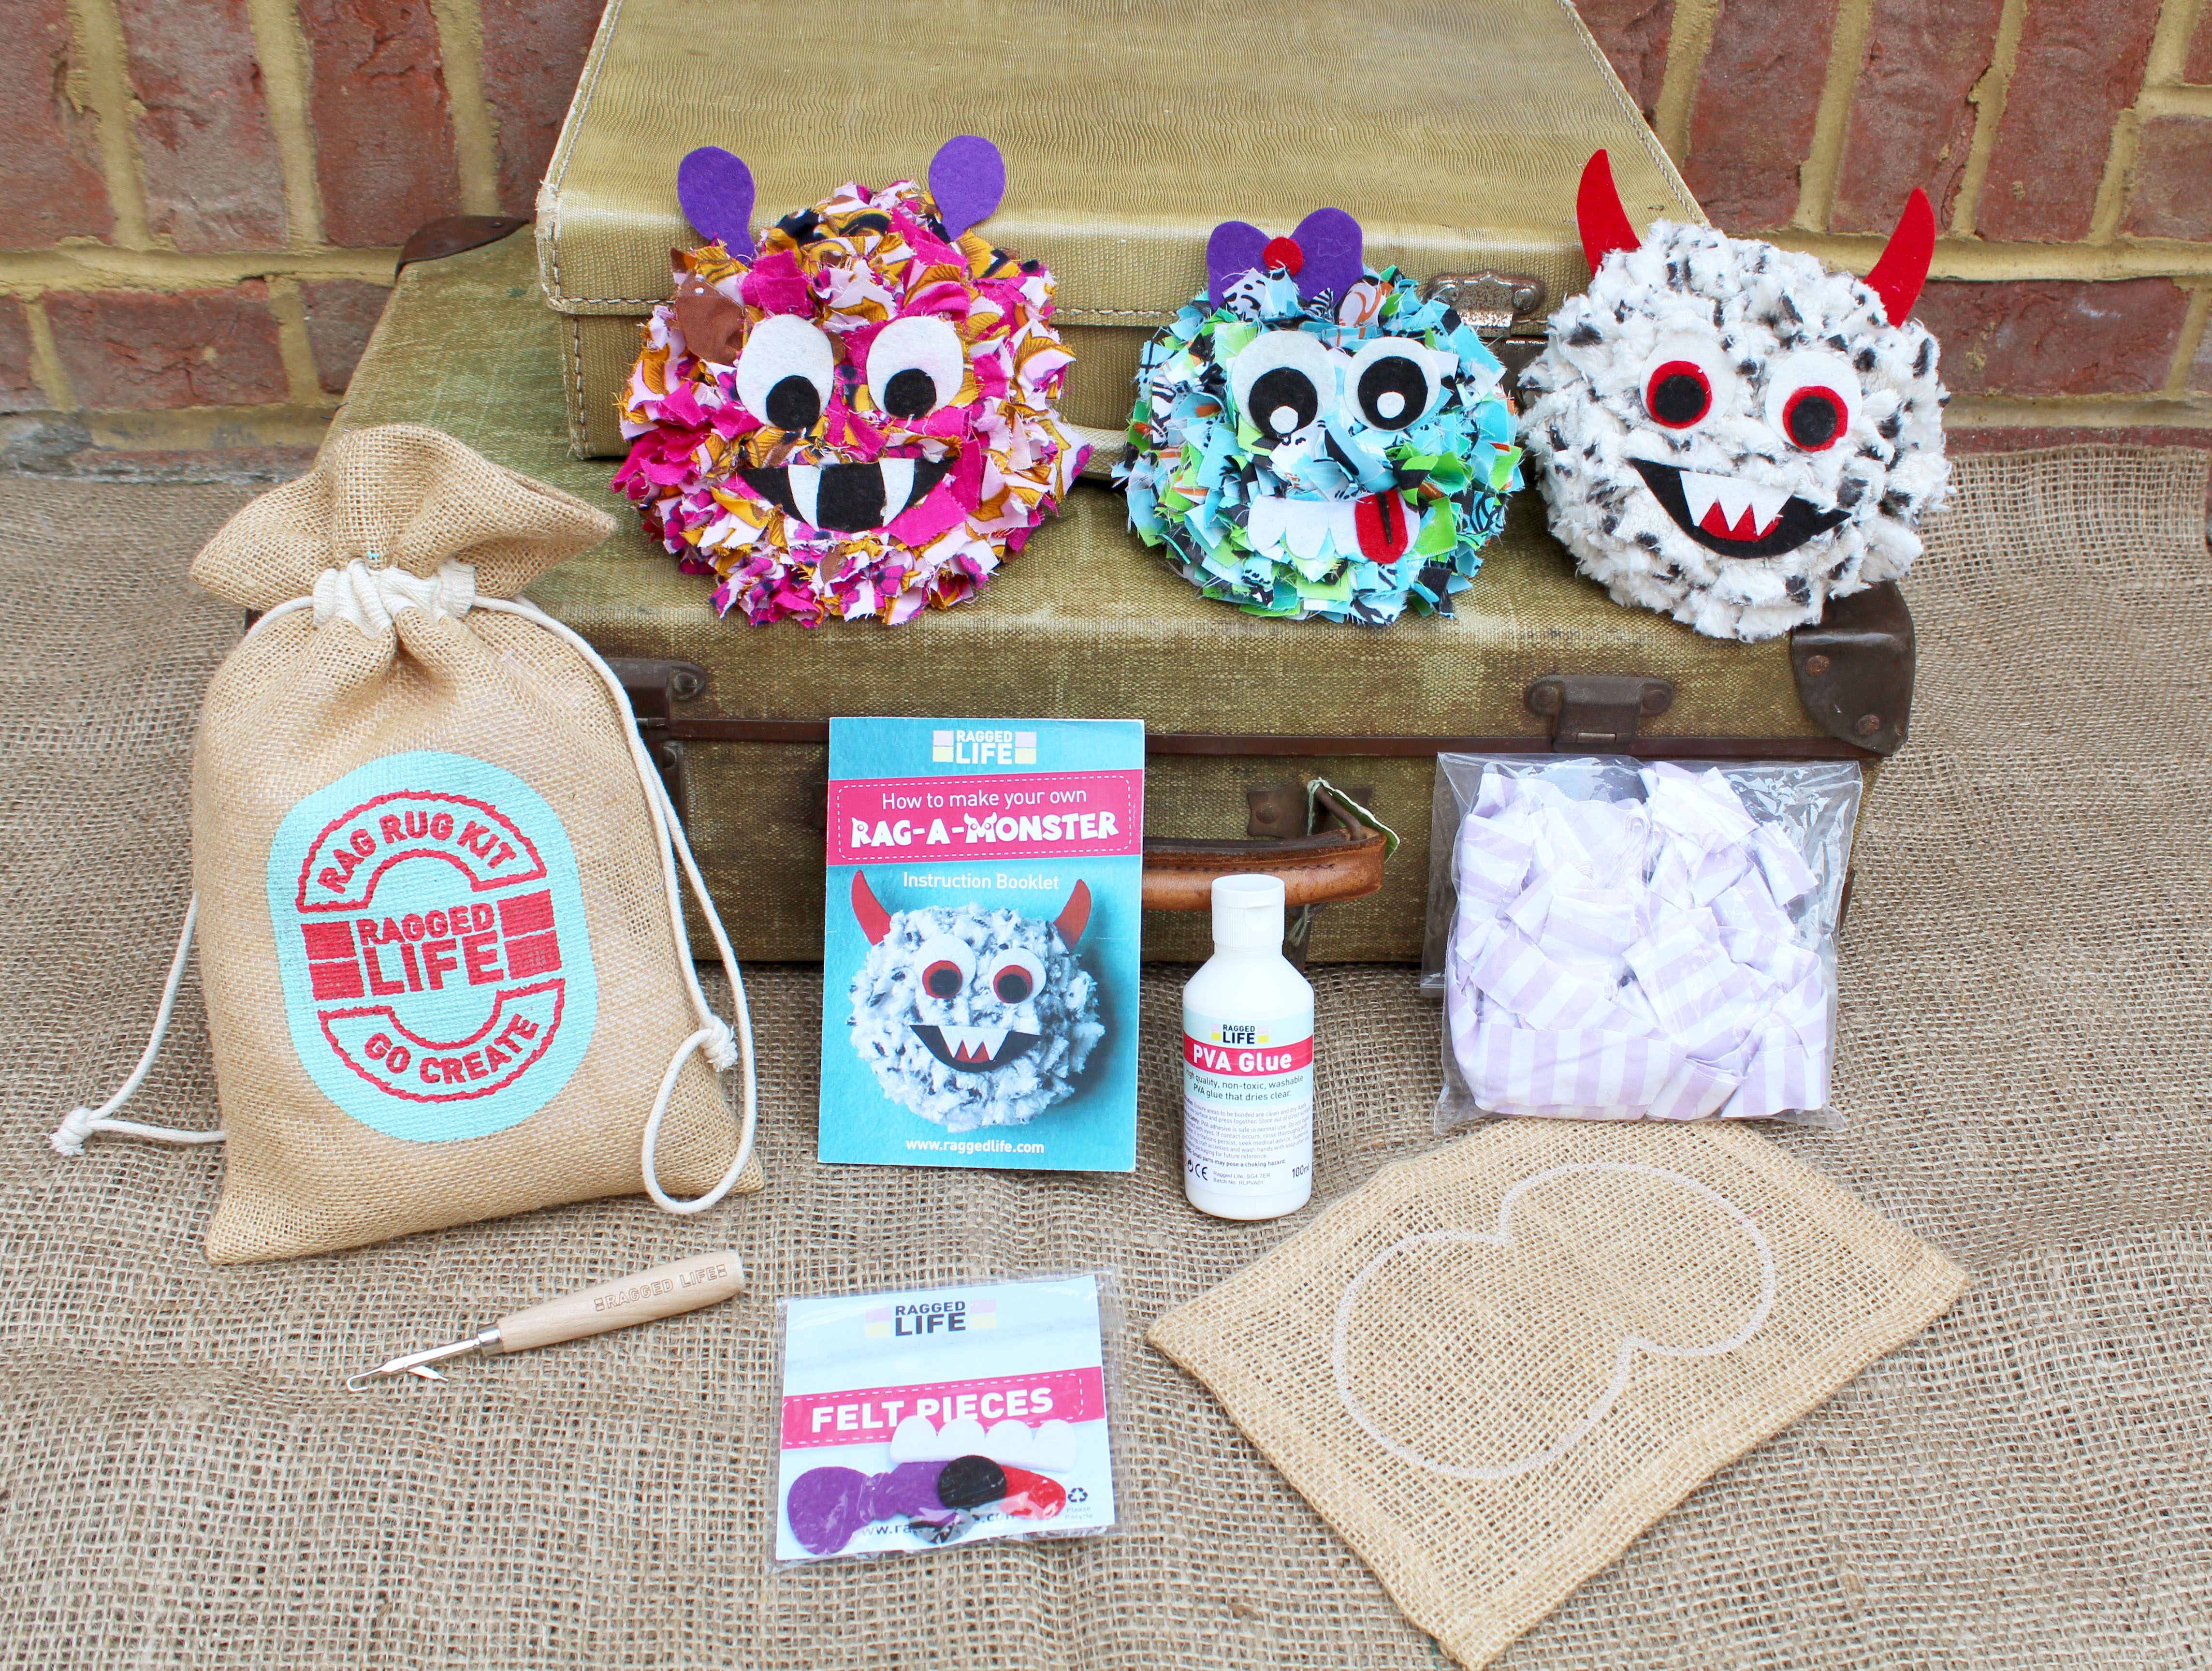
🧸 10. Kids’ Initials or Rag-a-Monsters
These playful, personality-packed projects are a huge hit with kids — and kids-at-heart! Whether you’re crafting with little ones or making a personalised gift, Rag Rug Initials and Rag-a-Monsters are a joyful way to get creative with fabric.
Rag Rug Initials are simple, rug-hooked letters made on a small piece of hessian — perfect for bedroom doors, nursery shelves, or as unique gifts for new parents. Choose colours to match their space or make a whole name across multiple letters or just the one initial. Watch how to make rag rug letters here or find step-by-step instructions in Elspeth’s book “Rag Rugs, Pillows & More”.
Rag-a-Monsters are brilliant beginner projects designed especially for kids aged 12+. These quirky creatures are made using the traditional British proggy technique and let young crafters explore colour, shape, and texture in a fun, low-pressure way. We sell Rag-a-Monster Kids Kits with all the materials on the Ragged Life website here. You’ll be working with a small piece of hessian, children’s latch hook, pre-cut fabric pieces, PVA glue and felt monster pieces. The kit comes in a cute kit bag so is very giftable!
Tip: These projects are ideal for rainy days, school holidays, or birthday party activities — easy to customise, quick to complete, and full of personality.


🌟 Ready to Get Started?
We’re big believers that crafting should feel joyful, not stressful. That’s why we’re putting together a whole range of small project rag rug kits — designed to help you dip your toe into the world of rag rugging without committing to a huge project straight away.
Sign up to our newsletter to be the first to know when they launch, or check out our Beginner’s Kits for everything you need to get started today.
💬 Have you tried any small rag rug projects before?
We’d love to see them! Tag us on Instagram @raggedlife or use the hashtag #RagRugJoy.
Happy rag rugging,
Elspeth & the Ragged Life Team ✂️🌿