Although I like to think of myself as pretty thorough when I’m teaching people how to rag rug, sometimes it’s easy to forget to answer some of the most obvious of questions. So, we’ve compiled some of the most common questions that we get from beginners and the answers to those questions. We hope you find them useful…
Rag Rug Beginner Questions:
In this blog post, we’ve covered the questions below…
- Q1: What fabrics can I use in a rag rug?
- Q2: Where can I source my fabrics?
- Q3: How can I clean my rag rug creations?
- Q4: How long does it take to make a rug?
- Q5: Do I need to do anything to secure the ends of my fabric strips?
- Q6: Do I rag rug through the hemming?
- Q7: My fabric is shedding a lot – is that bad?
If you have a burning rag rug question that isn’t one of those above, comment below and hopefully we can add it to the post 🙂
Q1: What fabrics can I use in a rag rug?
Where rag rugging is concerned, you can use pretty much anything to rag rug with. Over the years, I’ve used everything from old towels and sweet wrappers to silk and chunky wool. However, historically rag rugging was all about the “make do and mend” attitude of using up everything you had, so traditionally old clothing was used. To this day, that’s still the main source of our material. In terms of old clothing, you can use almost anything, but I do avoid certain fabrics that shed a lot and some materials are harder to use than others. There are a few factors that play into how easy a fabric is to work with:
- The thickness
- The stiffness
- The smoothness
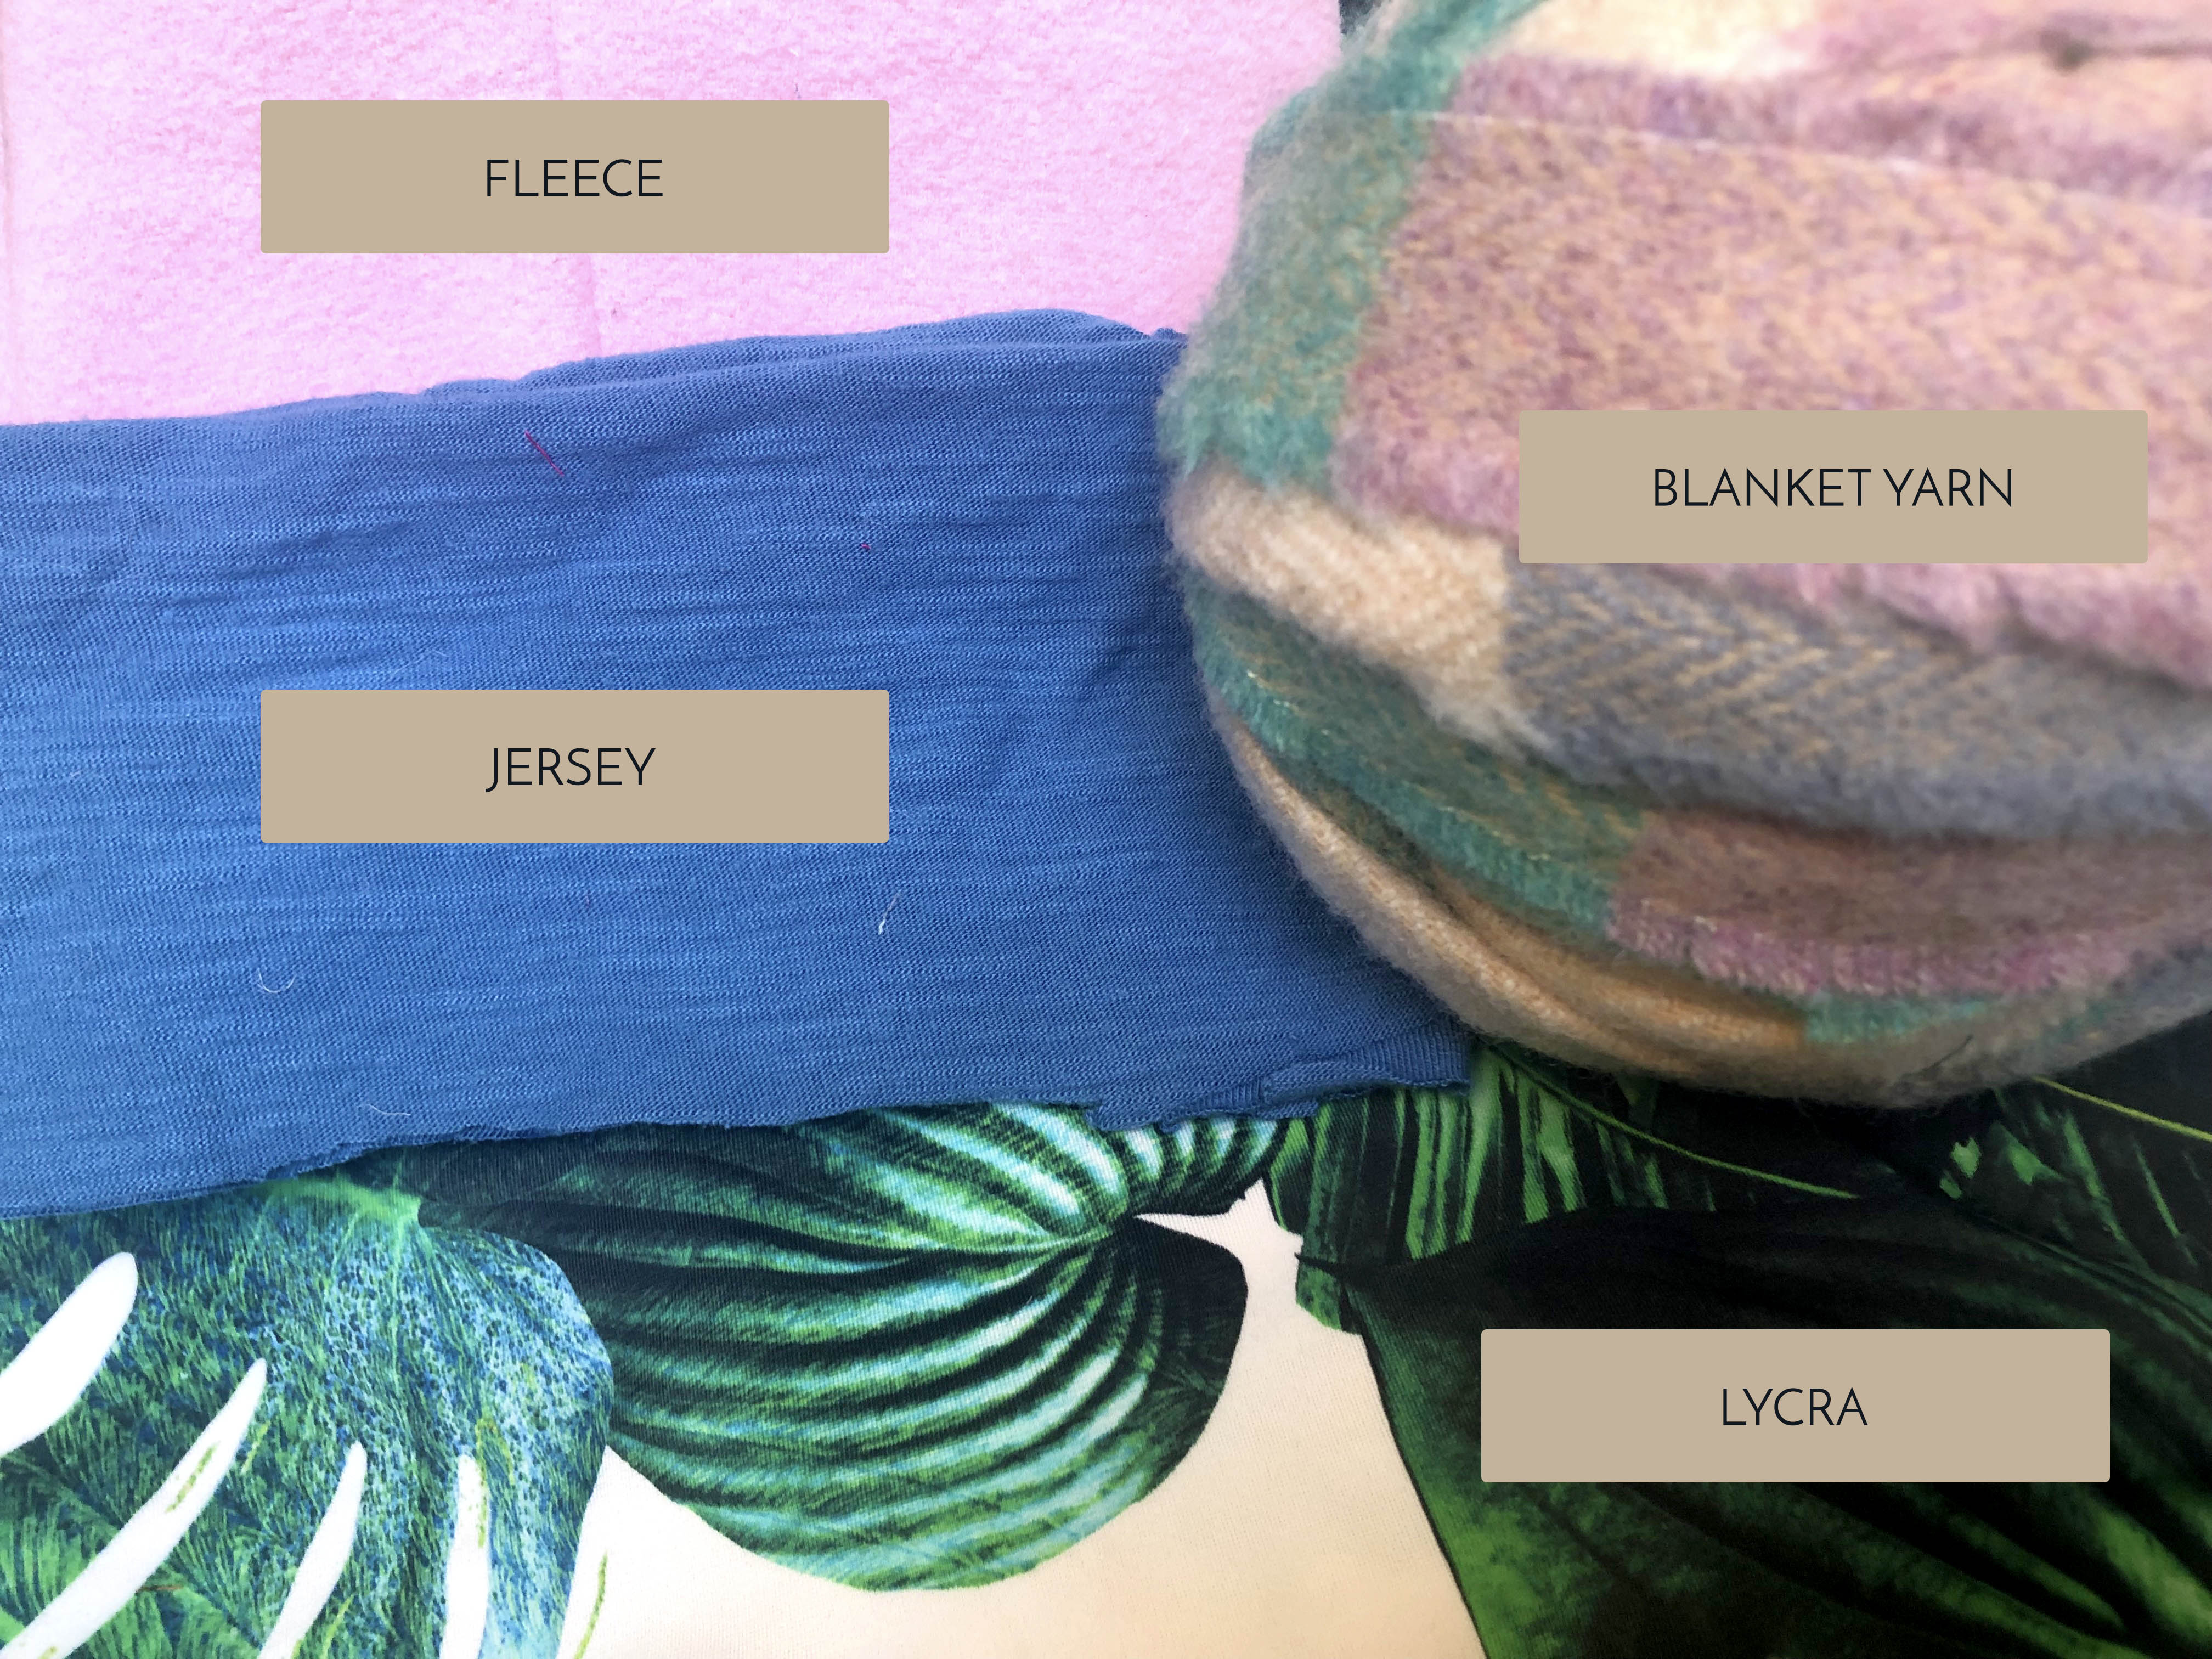
Specifically, the thicker, stiffer and more jagged a fabric is, the harder it is to use, and the thinner, softer and smoother a fabric is, the easier it is to use. This means that the hardest materials to use for a rag rug beginner are things like thick upholstery fabric (like offcuts from curtains or sofas), sturdy denim, jersey with stiff vinyl print on it and loose weave lace (which has jagged edges when cut). I rarely actively avoid any of those fabrics, but I wouldn’t do a whole rug in them.
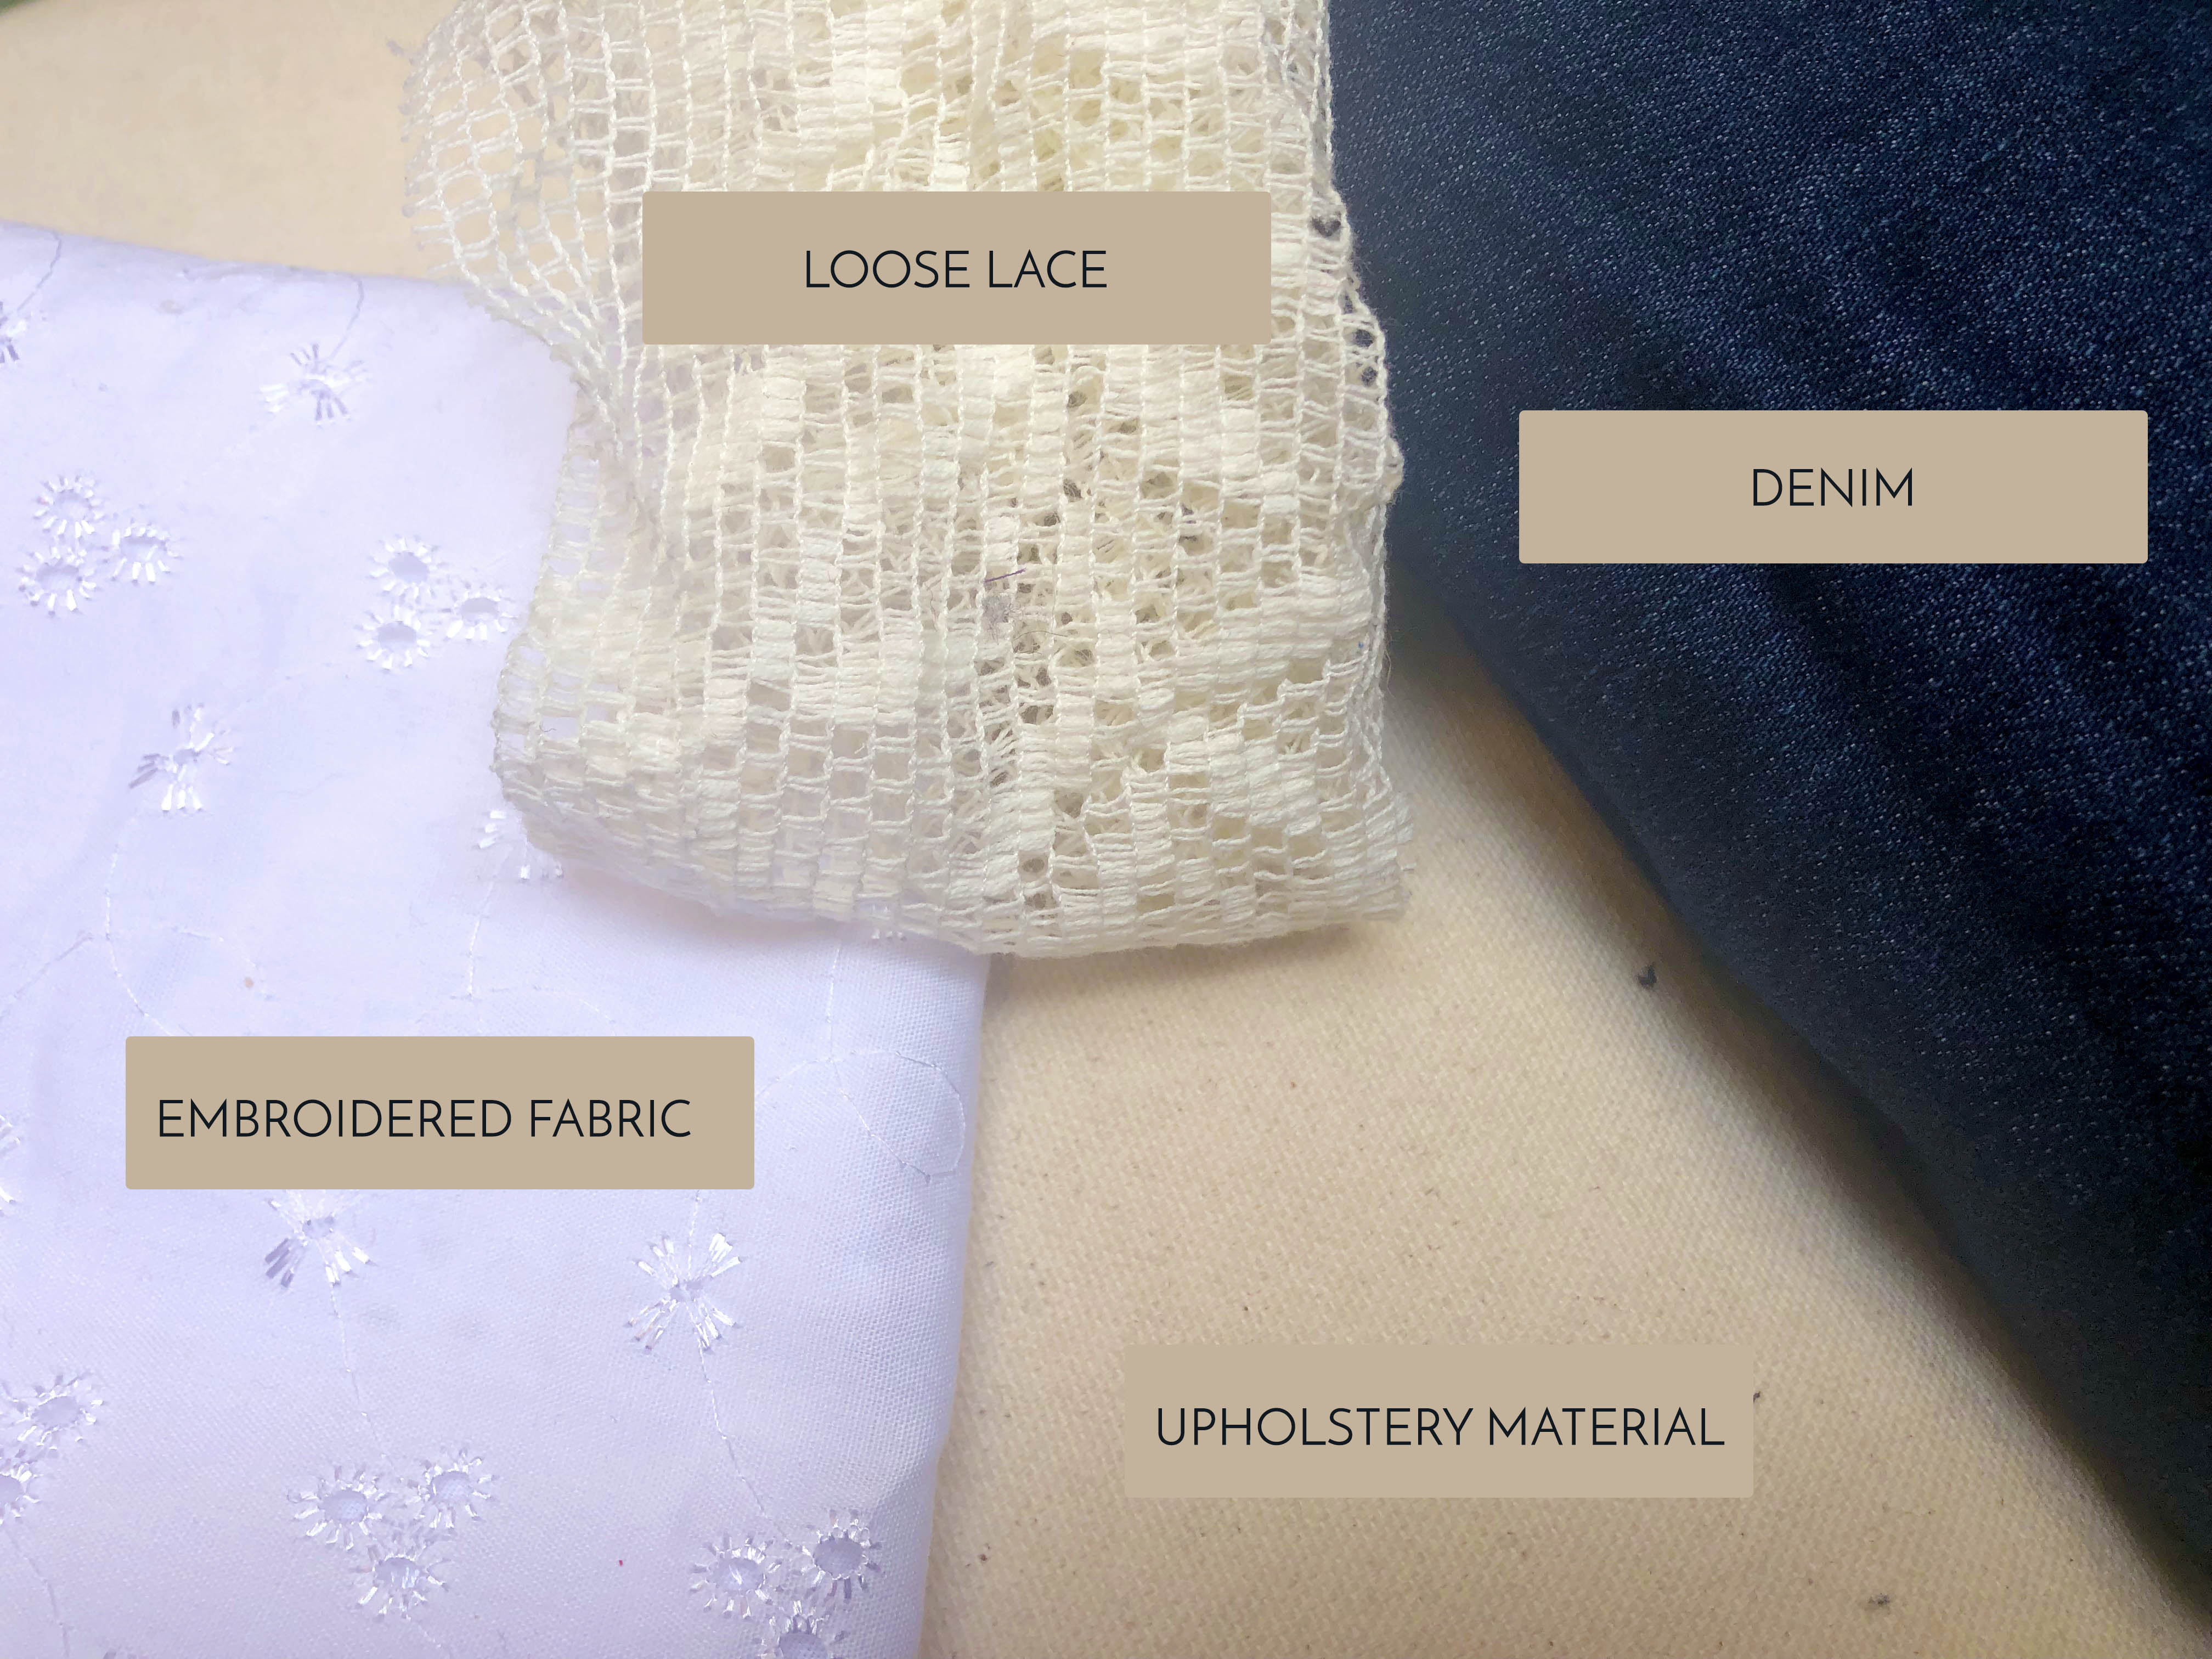
The easiest fabrics for a rag rug beginner to work with are things like soft jersey, lycra, fleece and blanket yarn, which pull through the hessian (burlap) smoothly and easily.
As well as the ease of use of a fabric, another factor to bear in mind when selecting old clothing to cut up is whether they will hold together or not when they’re cut up. Certain fabrics will fray and shed a little, where as others will simply fall apart. Fabrics made out of larger strands, more coarsely woven together are more likely to disintegrate. For example, you can use certain knitted fabrics to rag rug with, but only if they are woven tight enough…
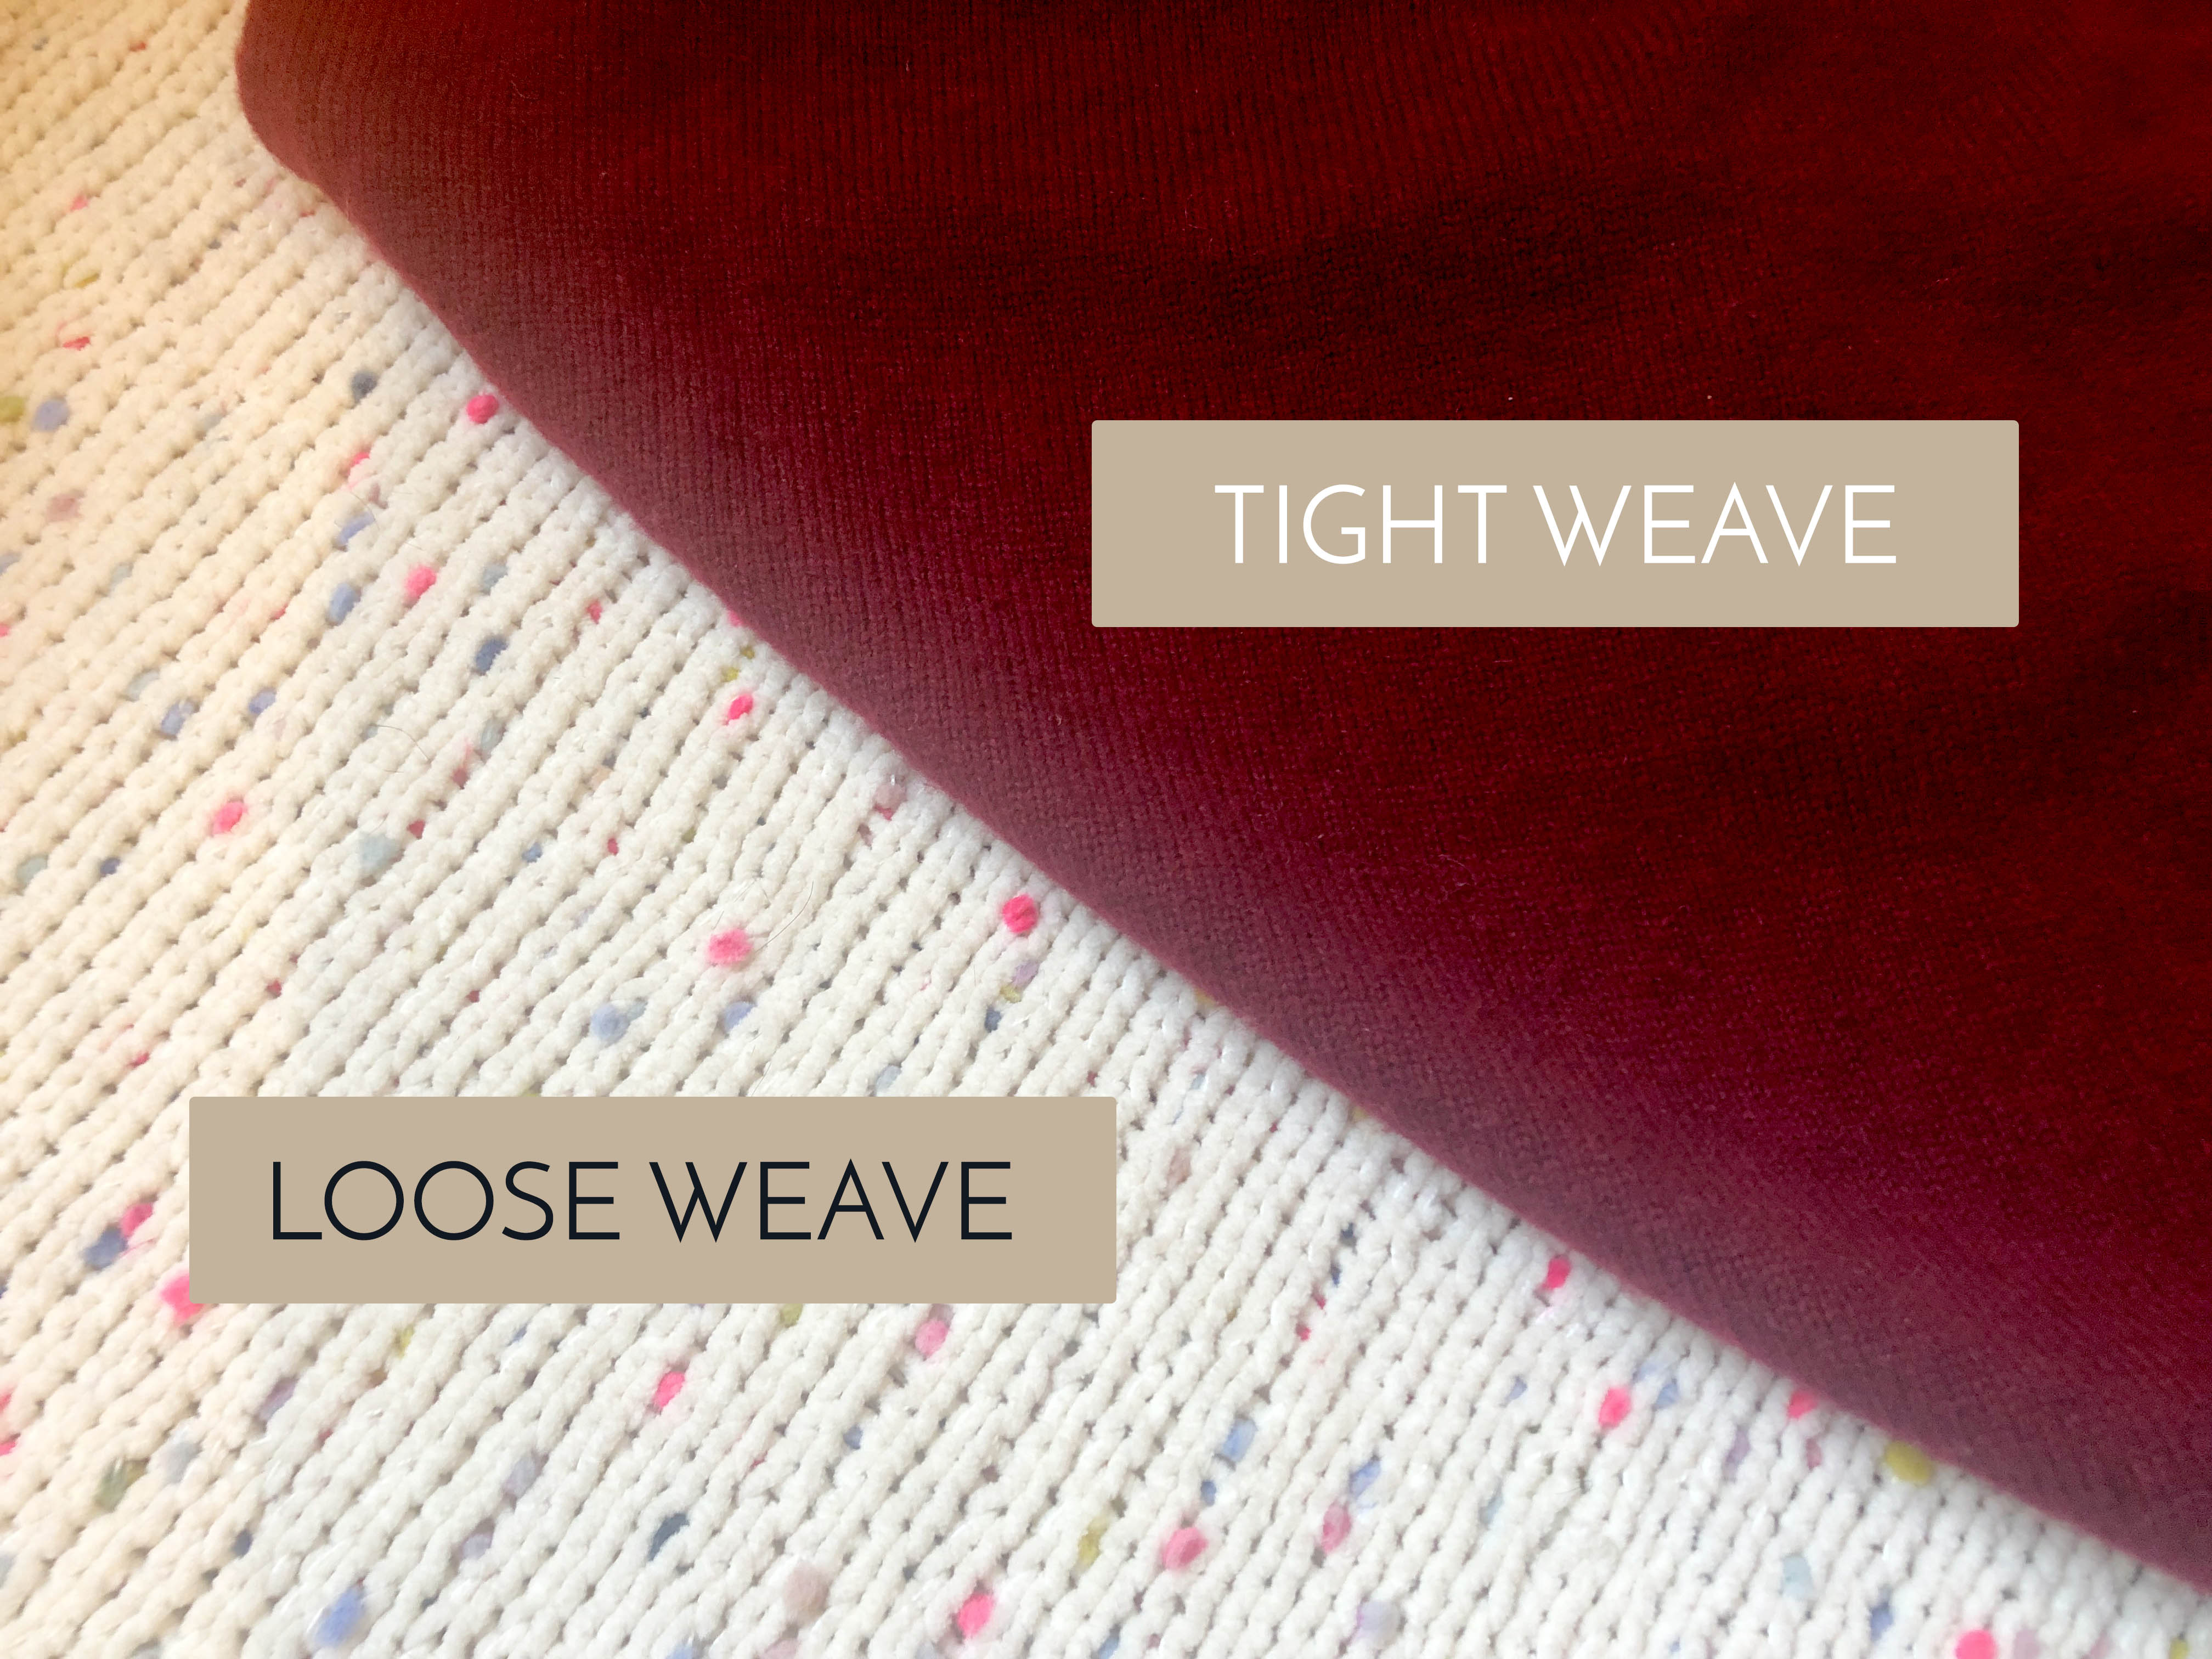
Sometimes if you boil-wash knitted fabrics, the weave will tighten up enough for them to be cut up successfully.
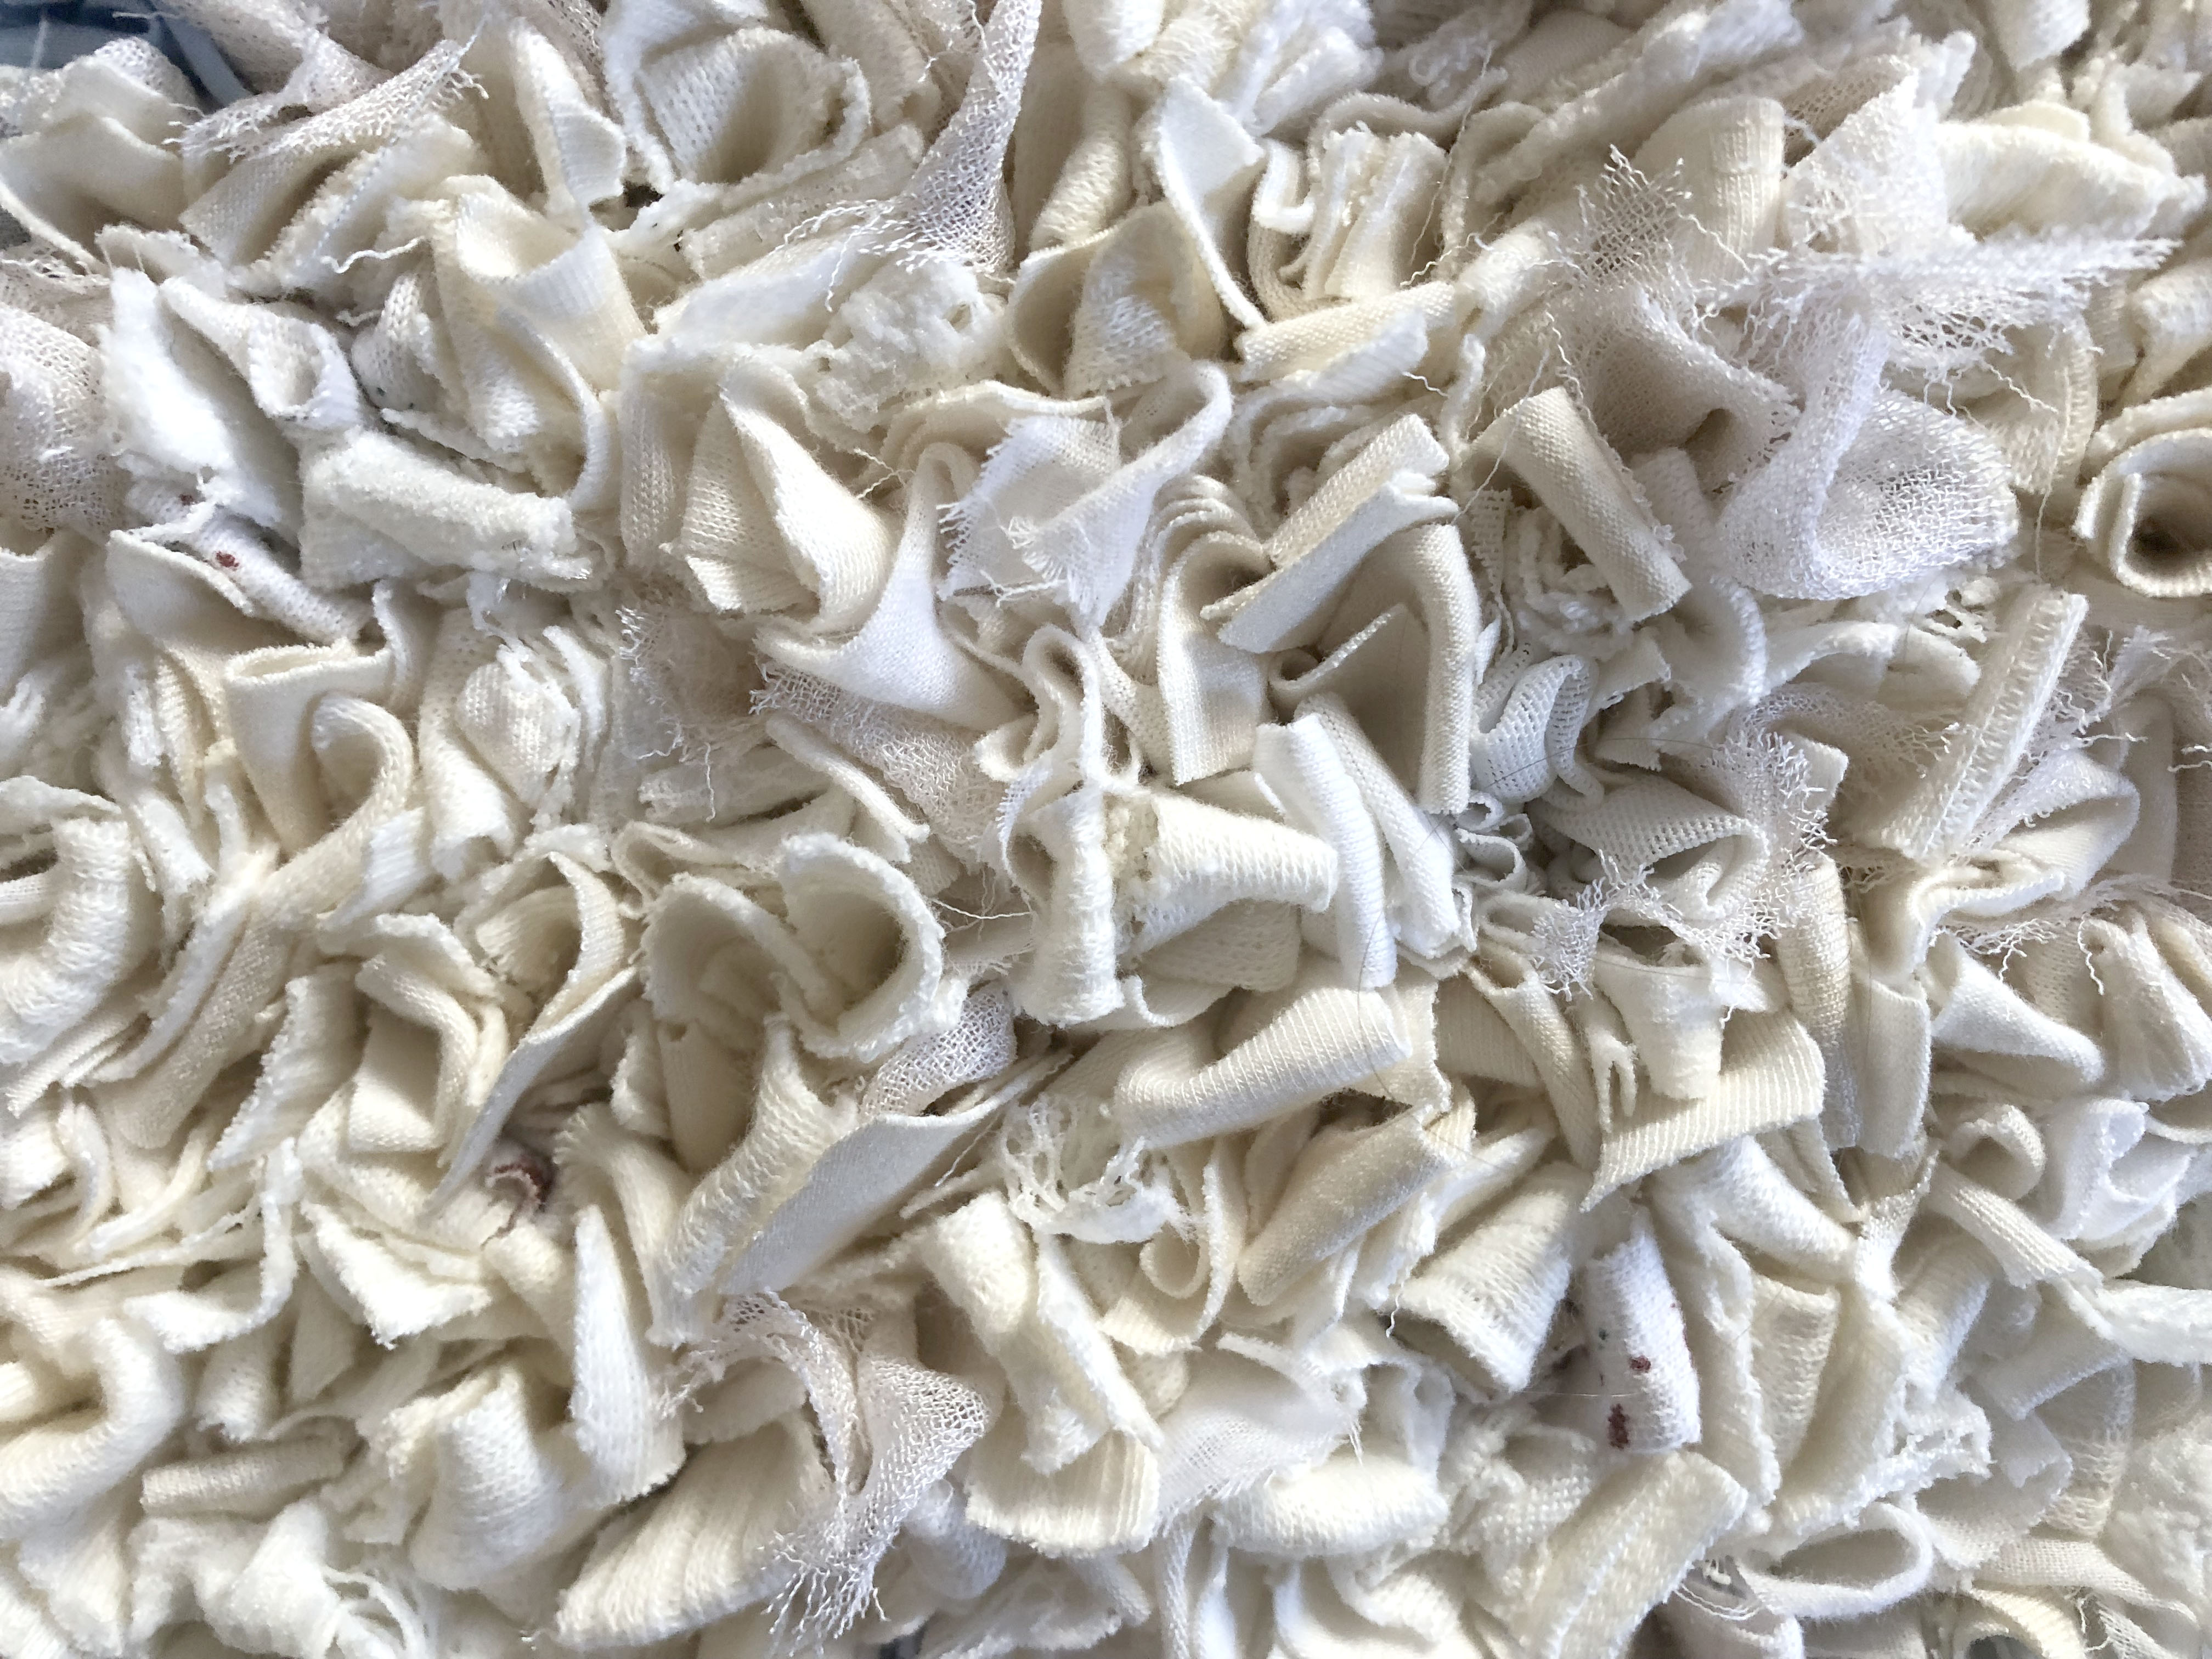
I like to use fabrics that fray a bit (like cotton) in my rag rug pieces, as they add texture. However, I don’t like fabrics that shed too much, like upholstery fabrics or towelling material, which sheds a fine dust that gets everywhere. If you’re unsure how a fabric will react to being cut up, try a small amount first before cutting up the whole garment.
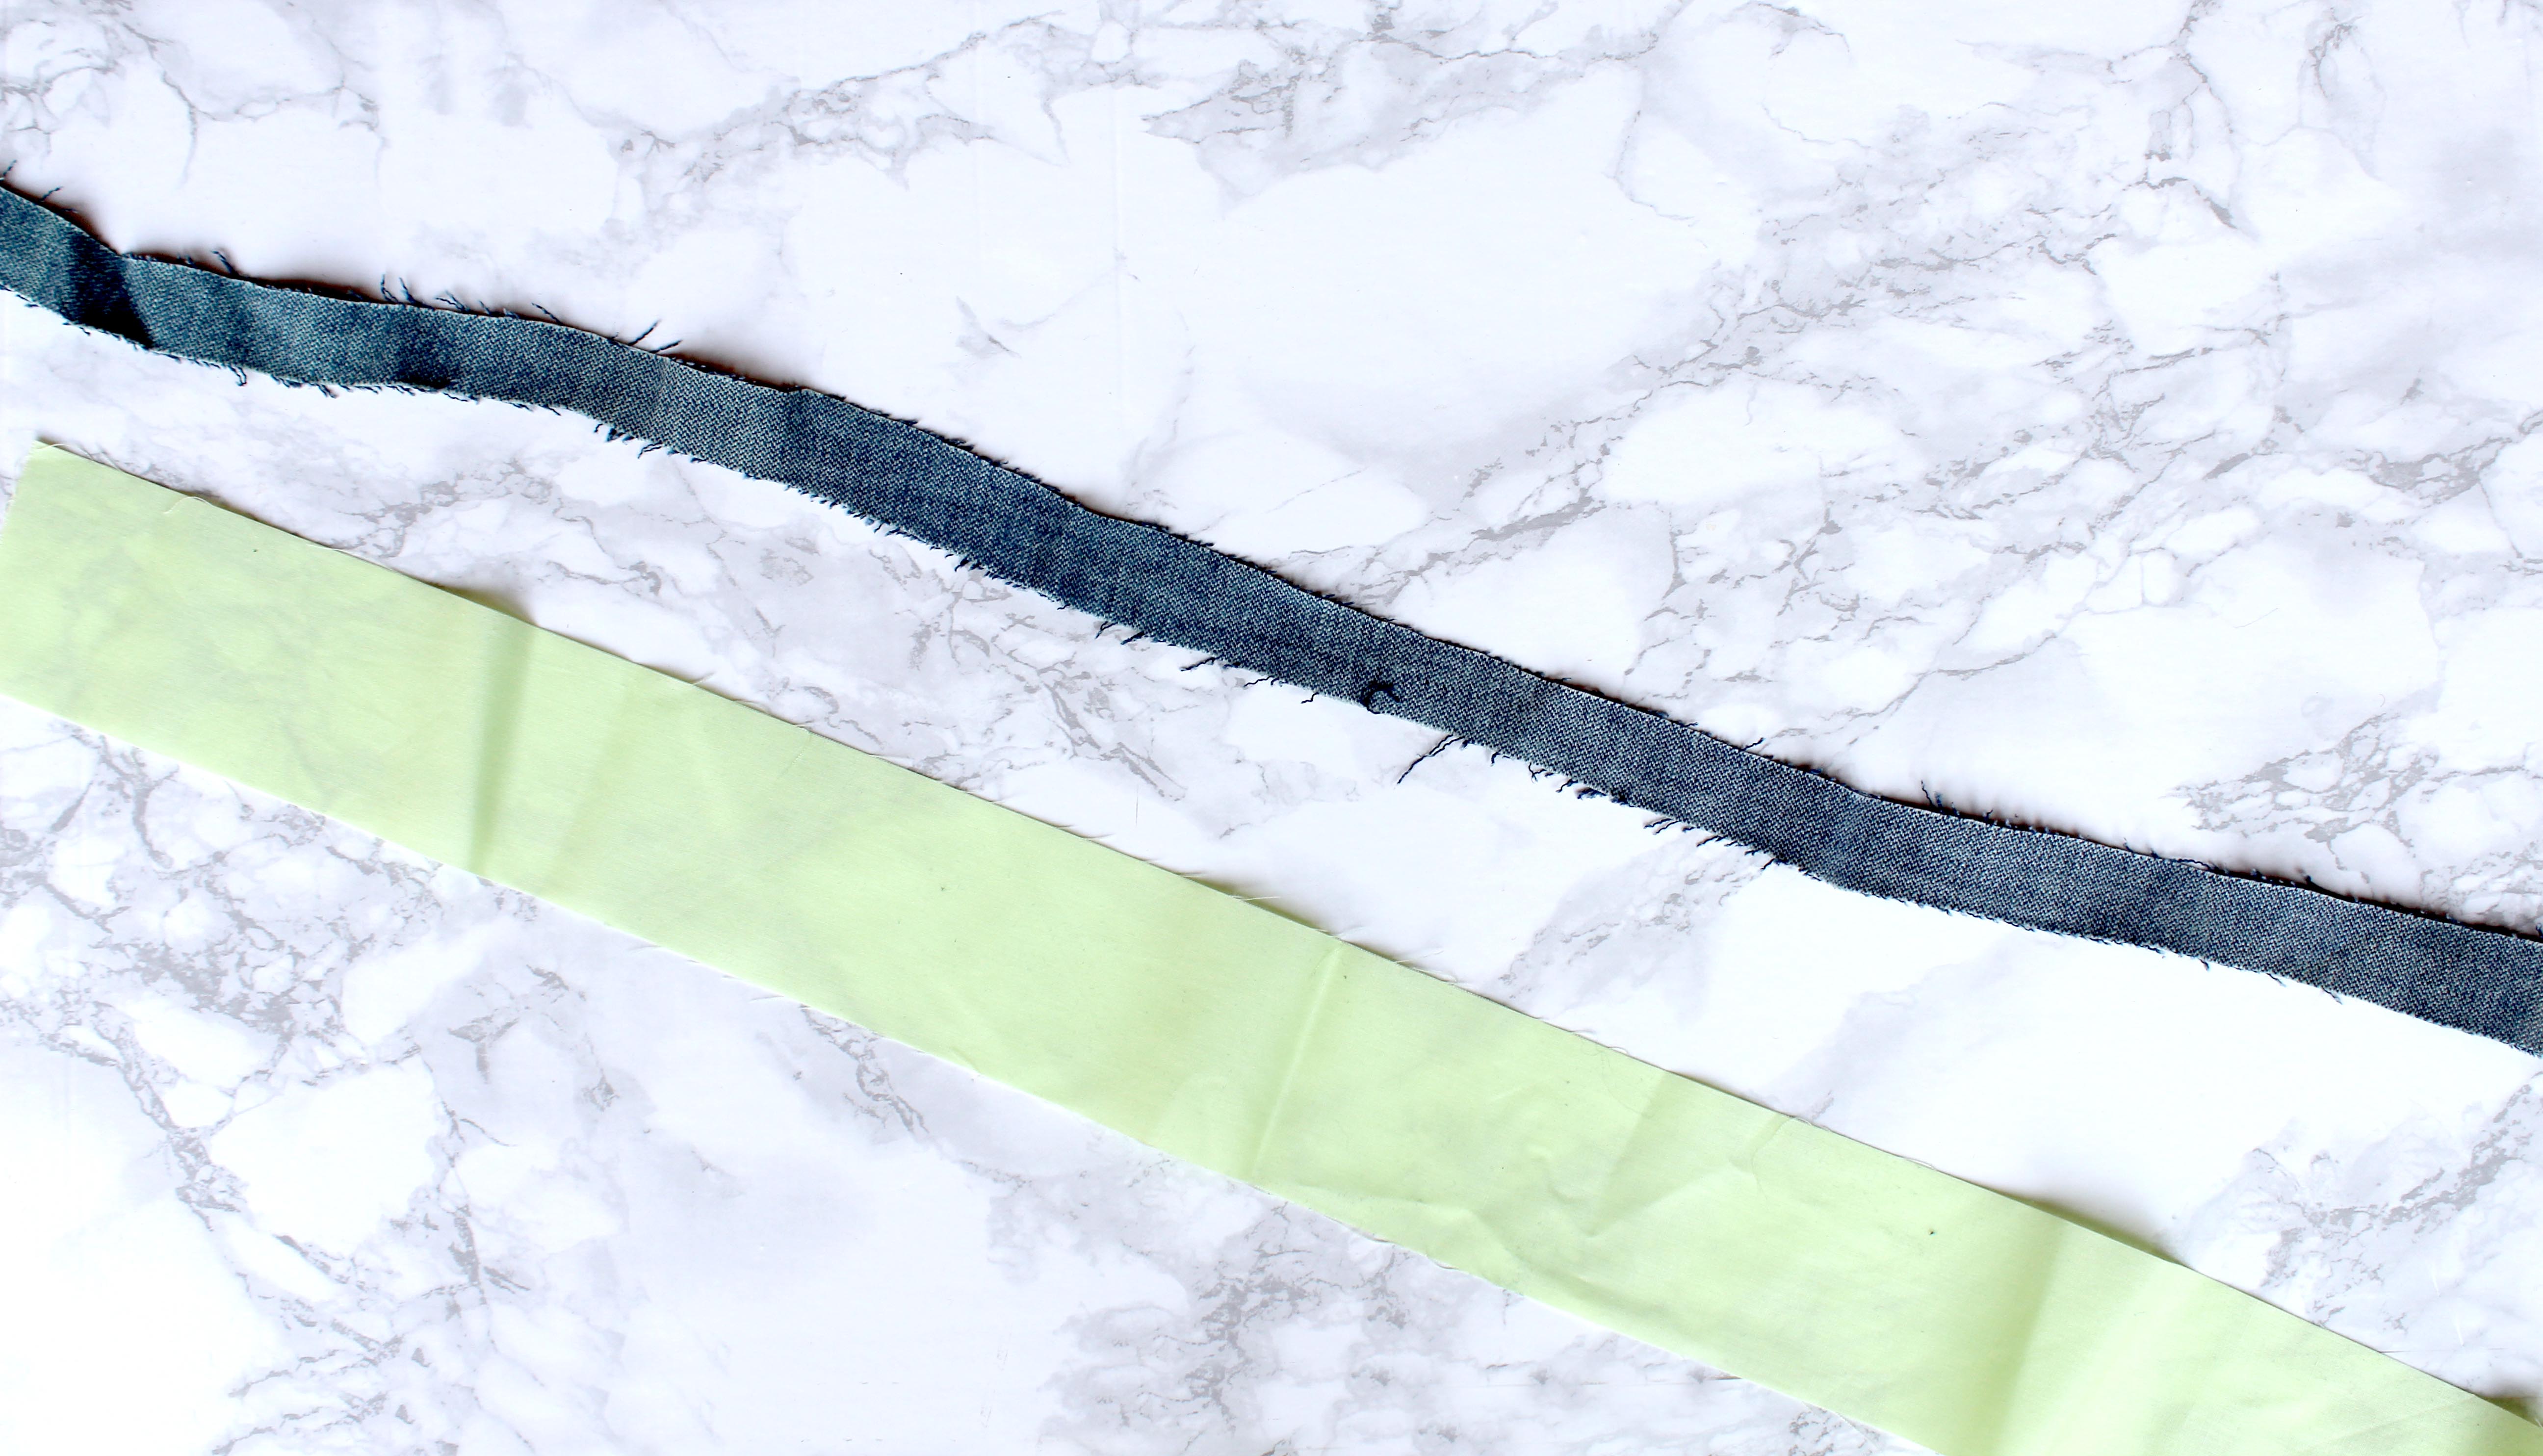
Most importantly though, whatever fabric you choose to rag rug with, it still needs to be thick enough to pad out the holes of the hessian (burlap) and tighten it up. This means that if you’re using a thin fabric like a chiffon, you need to cut your strips wider, where as thicker fabrics like denim need to be cut narrower.
More Resources:
If you’re a rag rug beginner and you’d like to learn more about fabric usage or to see how certain fabrics look when rag rugged, read my “Rag Rug Fabrics – What can and can’t be used” blog post or watch my Fabric Usage YouTube video.
Q2: Where can I source my fabrics?
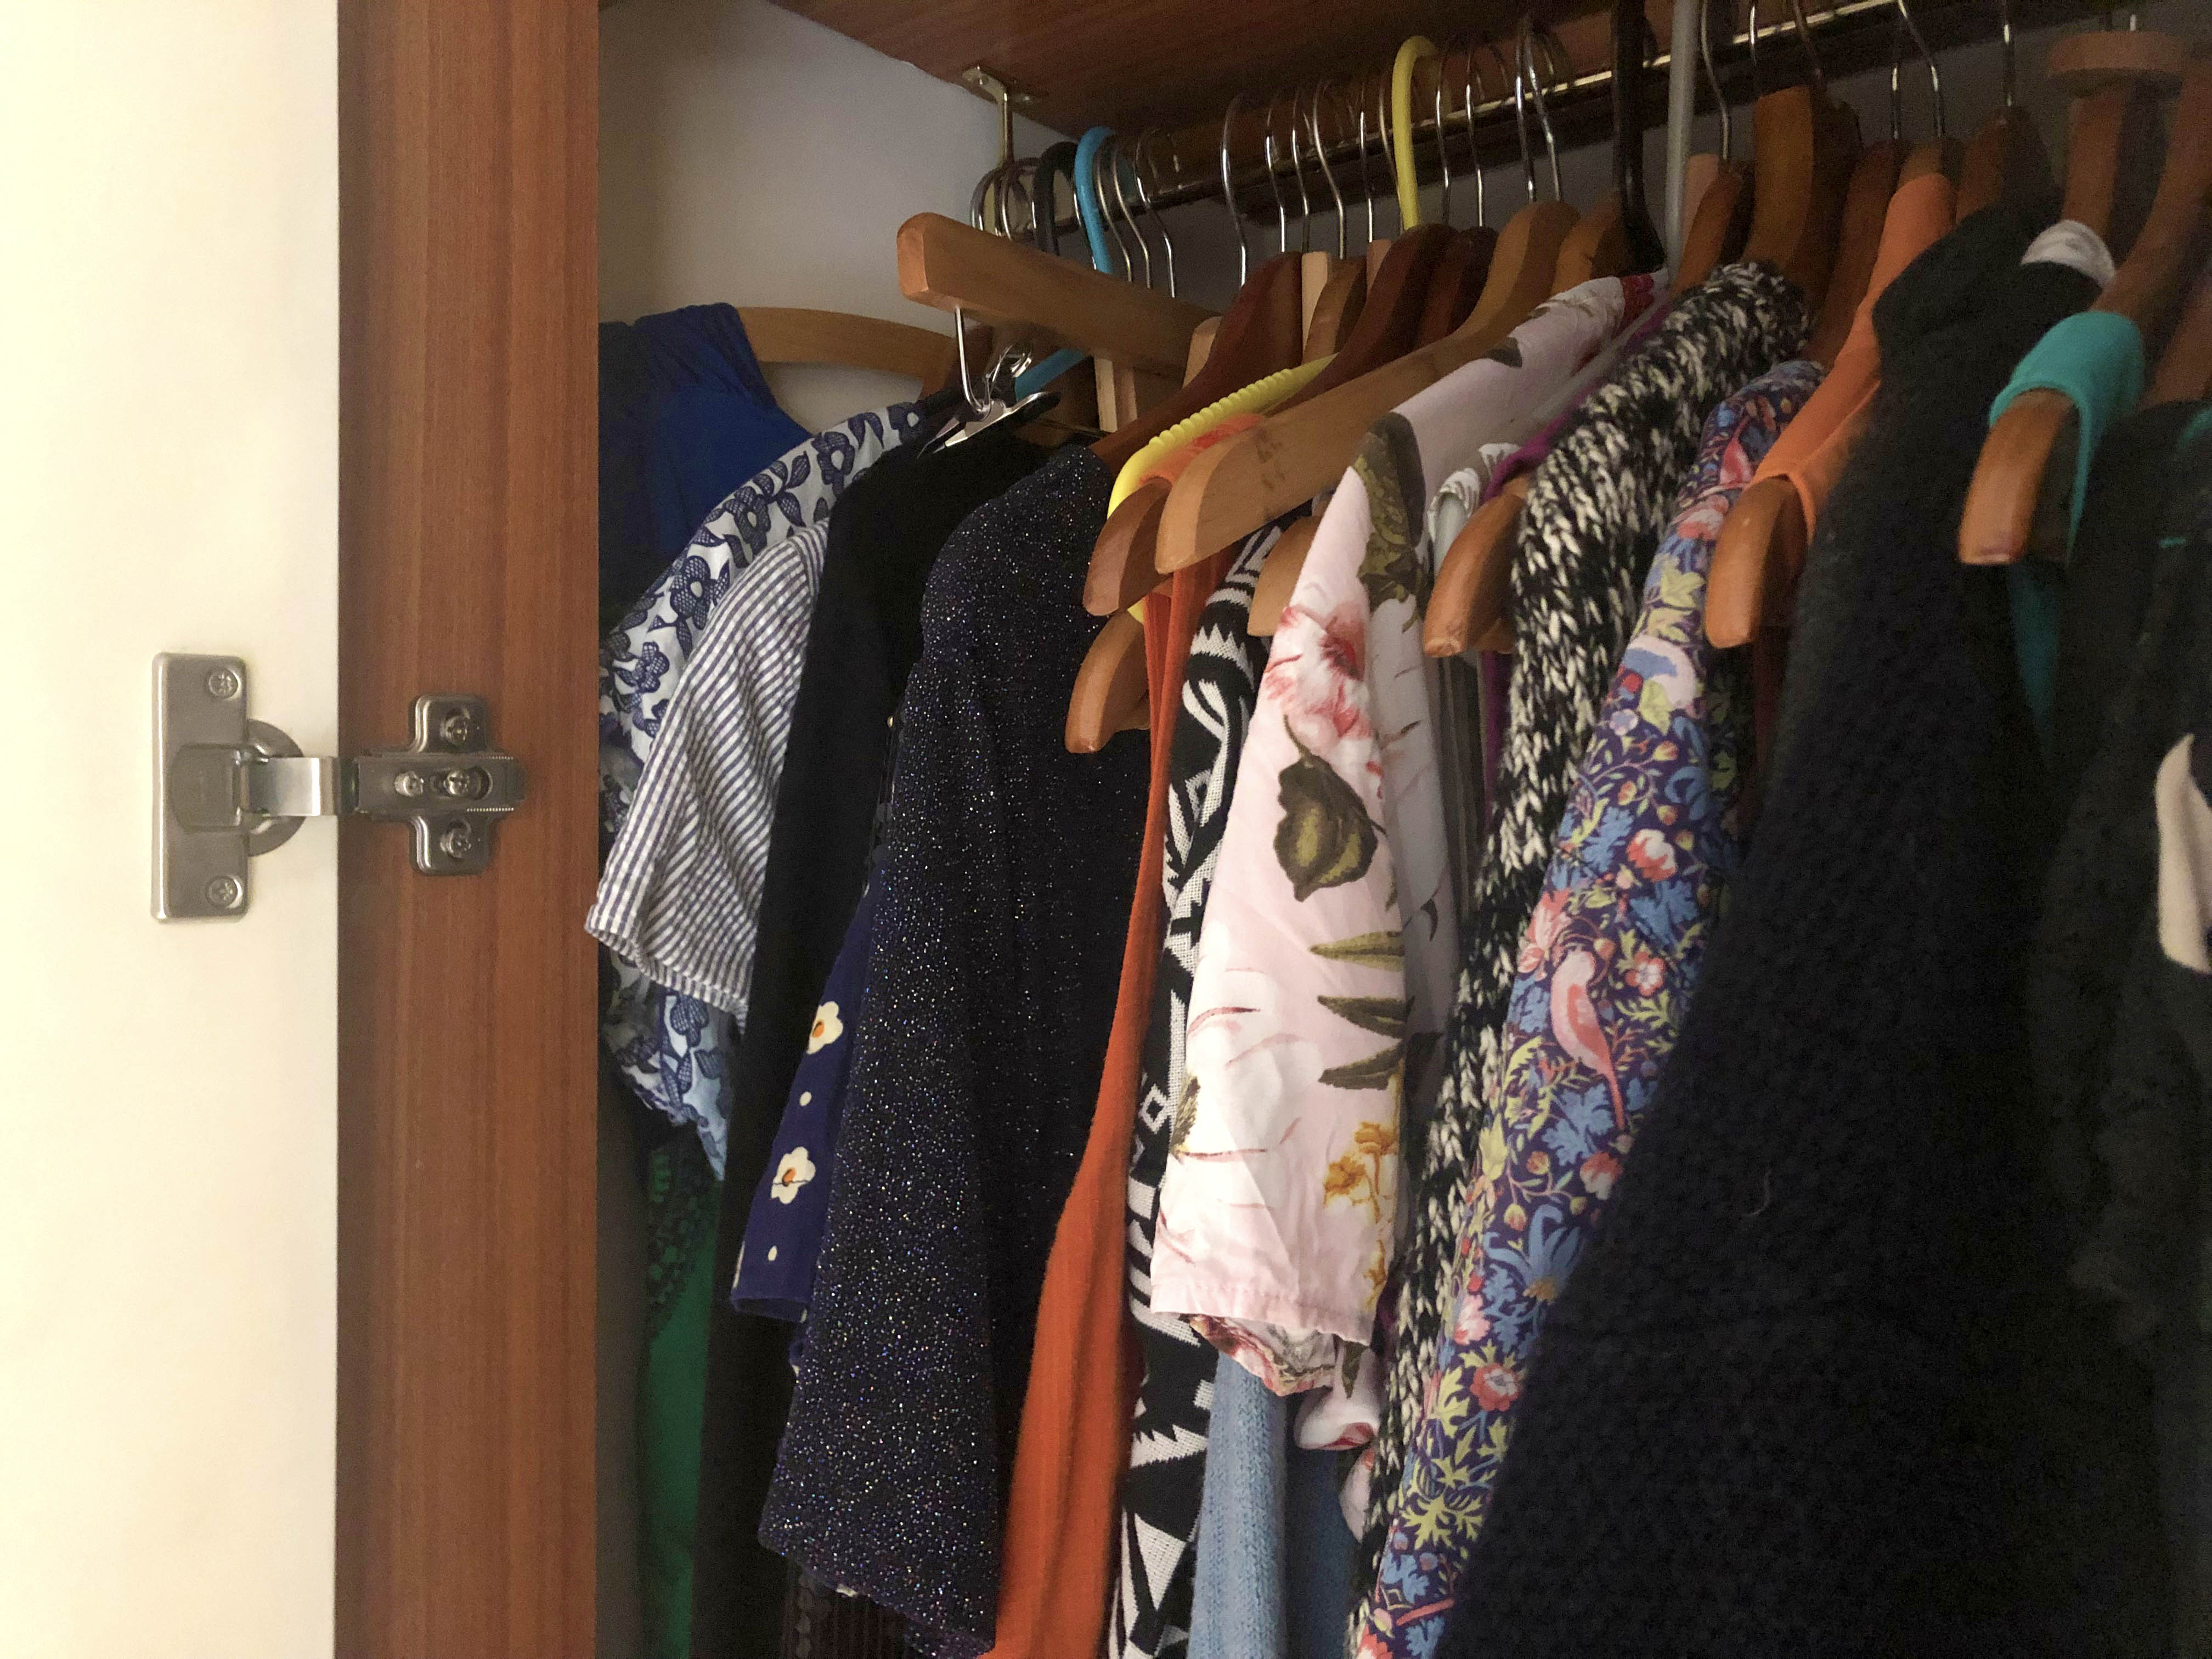
As the ethos of rag rugging is all about recycling, I’d always recommend sourcing second hand clothing or textile waste where possible. This means that we’re reducing textile waste, rather than contributing to the problem. Whenever I’m making a new piece, my first port of call is always my own wardrobe or stash – making a rag rug is great incentive to do a little clear out. After rading those areas, I normally turn to friends. Ask a couple of good friends (particularly patchworkers, quilters and sewers) if they have any bits lying around that they were thinking of getting rid of. You’d be surprised how much stuff comes your way.
Although that’s normally a good start, sometimes you’re looking for exact colours to bring a piece to life. This is where the good ol’ charity shops come in handy. I look for items which will give me the most amount of fabric with the least number of seams. In particular, maxi dresses, bedding sets, XXL t-shirts and tunics are great. Dresses with lining fabrics give you two complementary fabrics for the price of one and the beauty of rag rugging is that an old sheet will do just as nicely as perfectly pristine fat quarters. In fact, using a variety of different fabrics will make your piece look more interesting as you’ll have different textures throughout.

In terms of how far the fabric will go, it’s hard to calculate, but a good rule of thumb is, if you fold a piece of fabric in half four times, that will roughly show how much that piece of fabric will cover in area in the shaggy technique. If you fold it three times, that’s roughly the area covered in the loopy technique. This is only a rough estimation though as the area covered depends on a number of factors including, the thickness of the fabric, the tightness of the rag rugging and the height of the fabric pieces.
Rag Rug Beginner Tip: If you’re worried that you won’t have enough of a certain fabric to cover an area, mix the fabric with similar fabrics to begin with. This means you won’t be left in the lurch and it will deliberately look like part of the design.
Q3: How can I clean my rag rug creations once I’ve made them?
Cleaning a rag rug is a lot less bothersome than you might think. There are a few ways you can go about it…
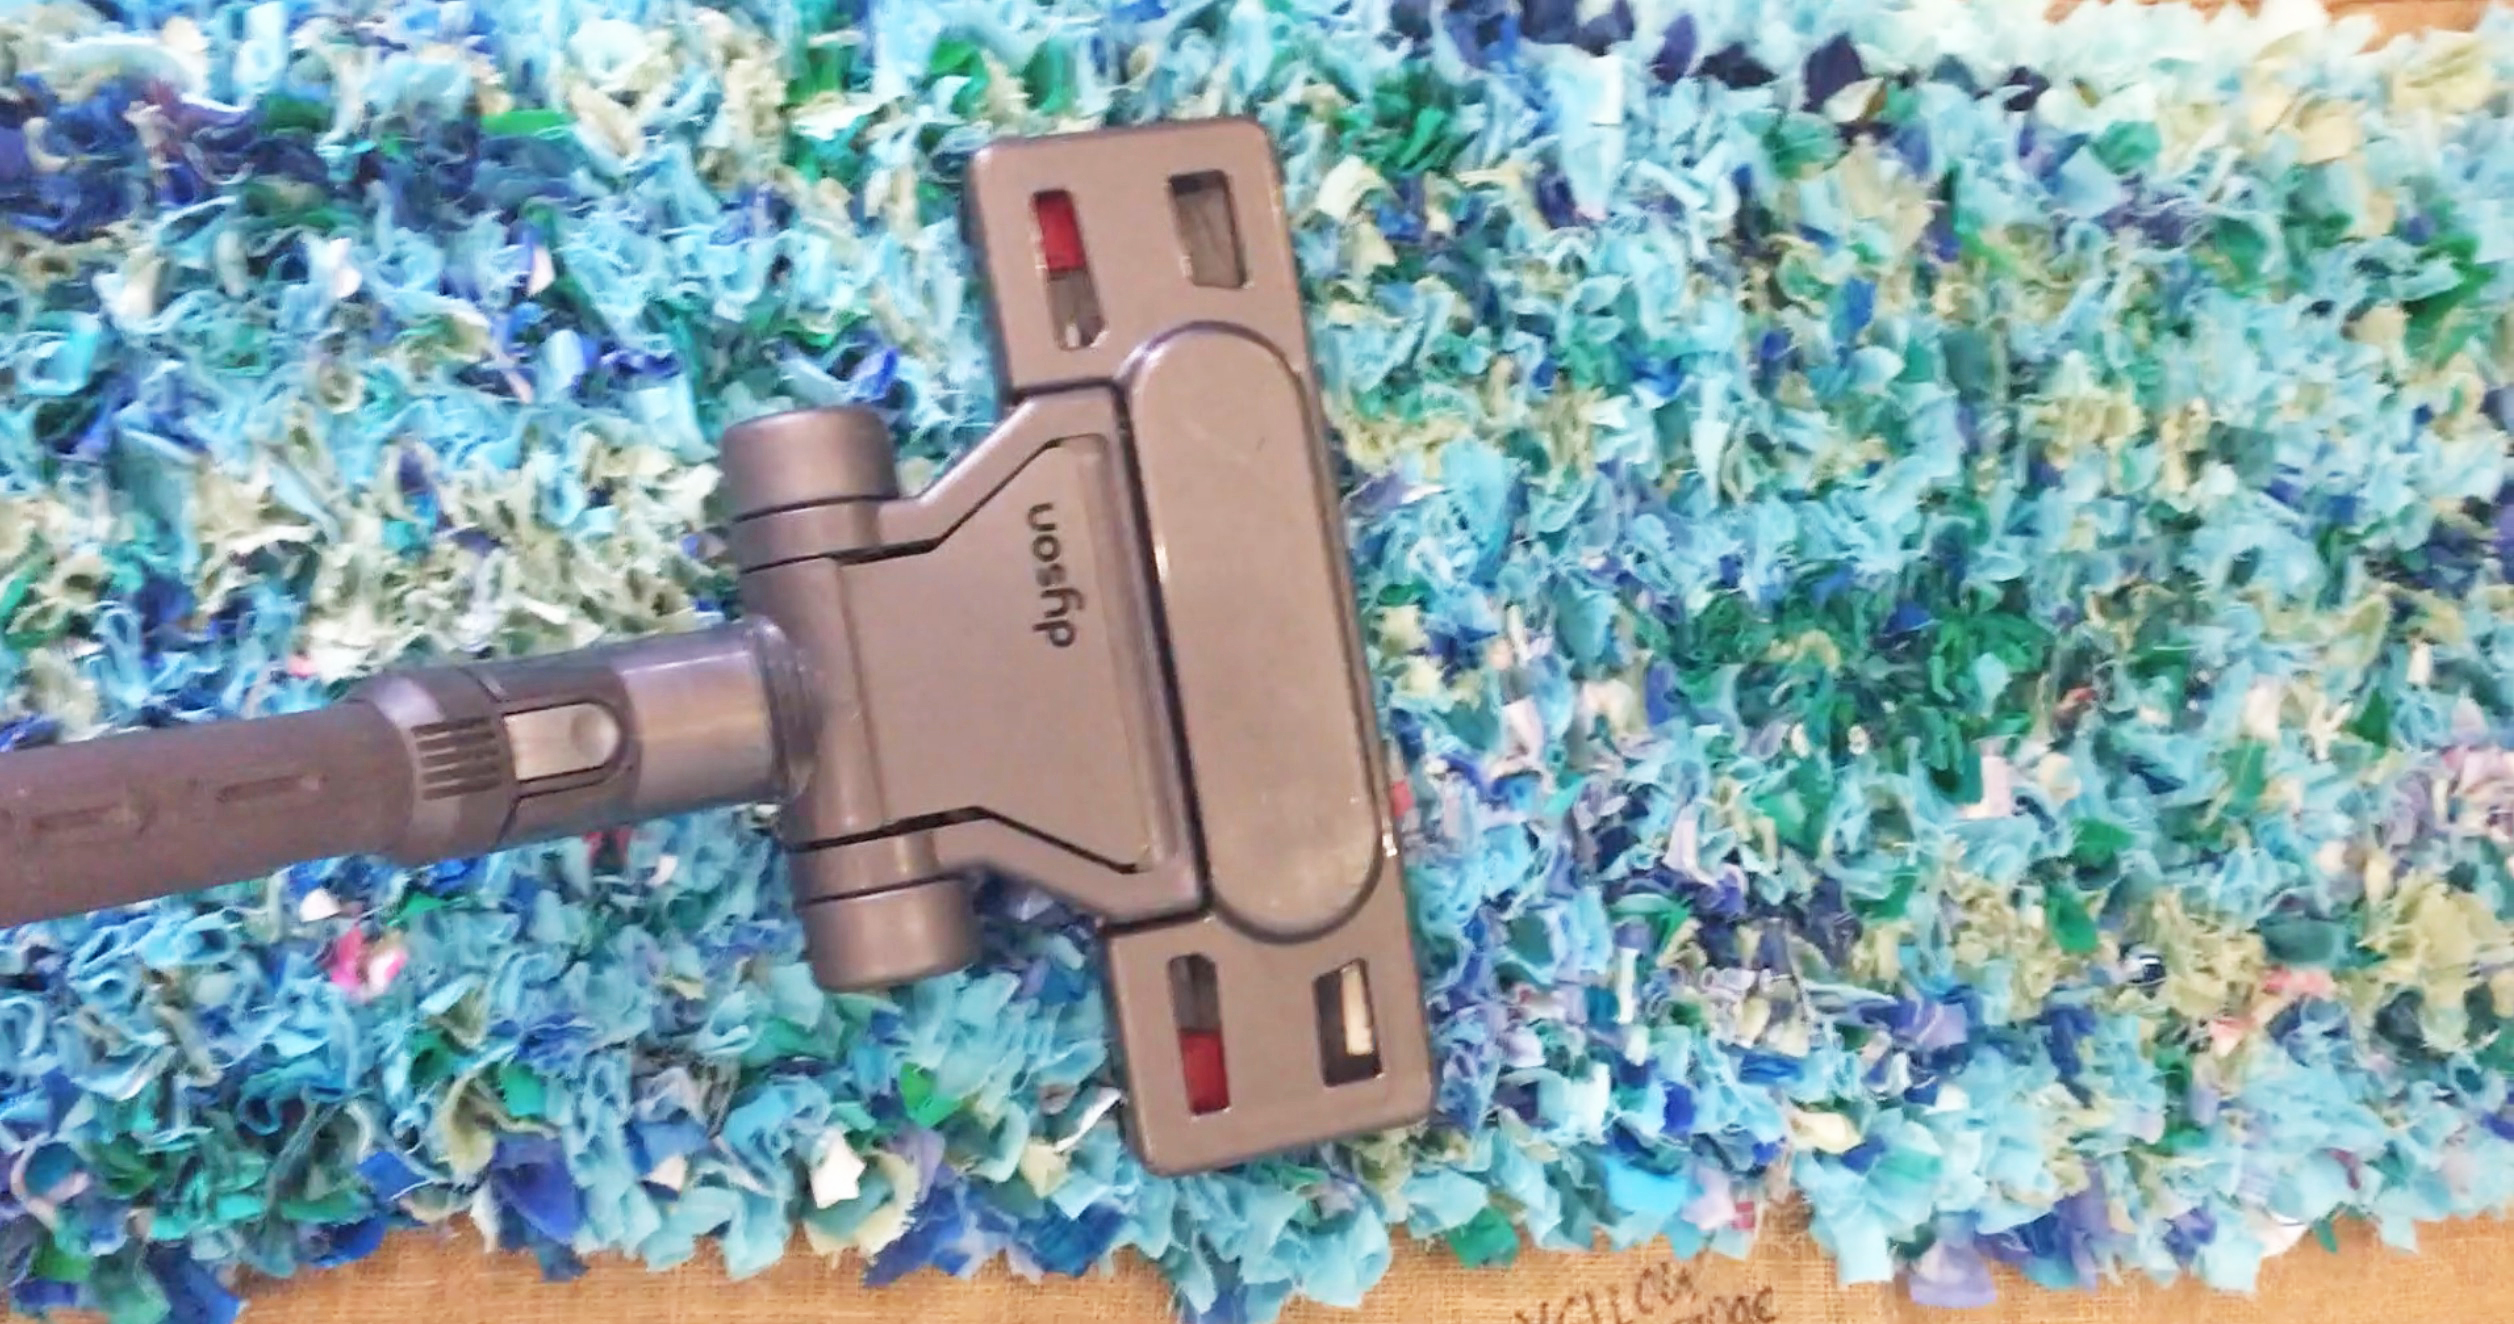
1. Give it a quick vacuum. Rag Rug Beginners are very surprised when I tell them that I vacuum my rag rugs, but that’s how I keep them relatively clean on a weekly basis. As long as you’re carefully not to snag the loops of loopy rag rugs, it’s one of the most effective ways of keeping your rugs in good nick.
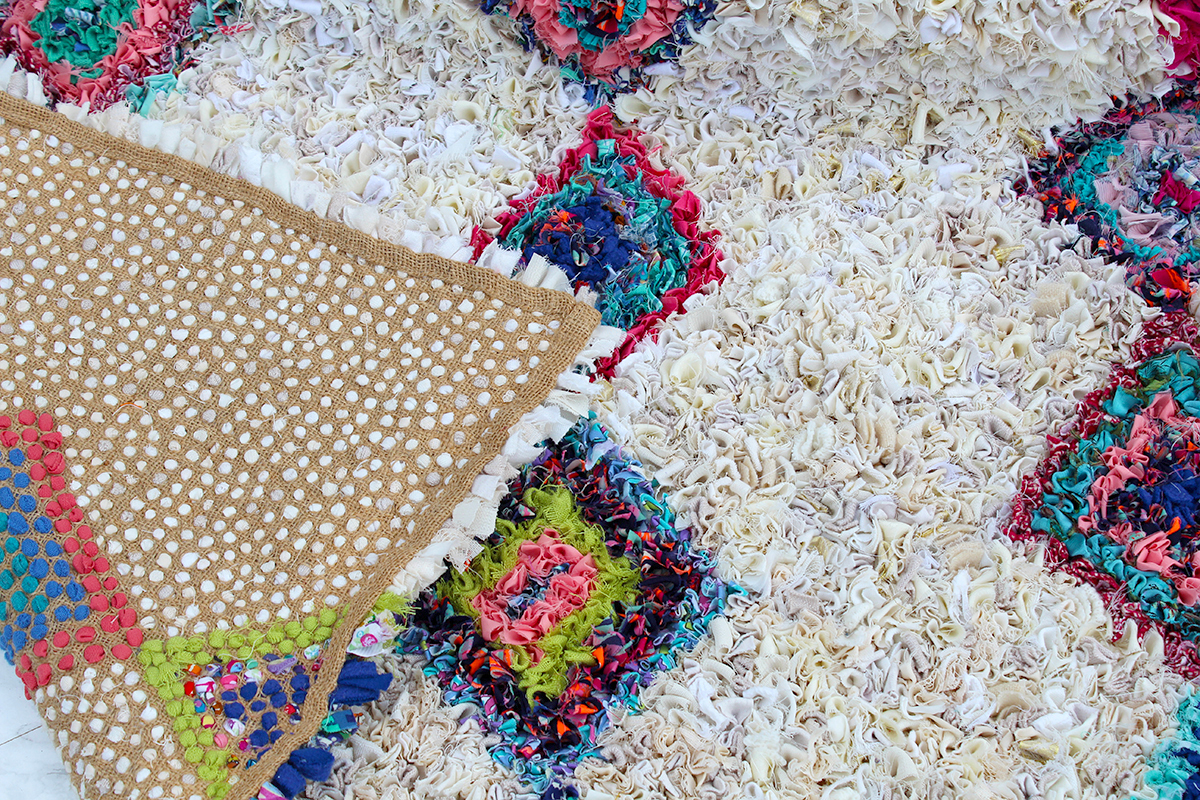
2. Give it a good beating. The traditional way to “clean” a rag rug is to give it a good shake outside or, better yet, a beating on the line. Not only does this shake loose any small bits of debris that have got trapped in the rug, but it also fluffs the rug up again, which gives it a new lease of life. We never back our rag rugs, as doing so, traps the dust been the backing and the rag rugging. This means that dust can’t pass through the rug.
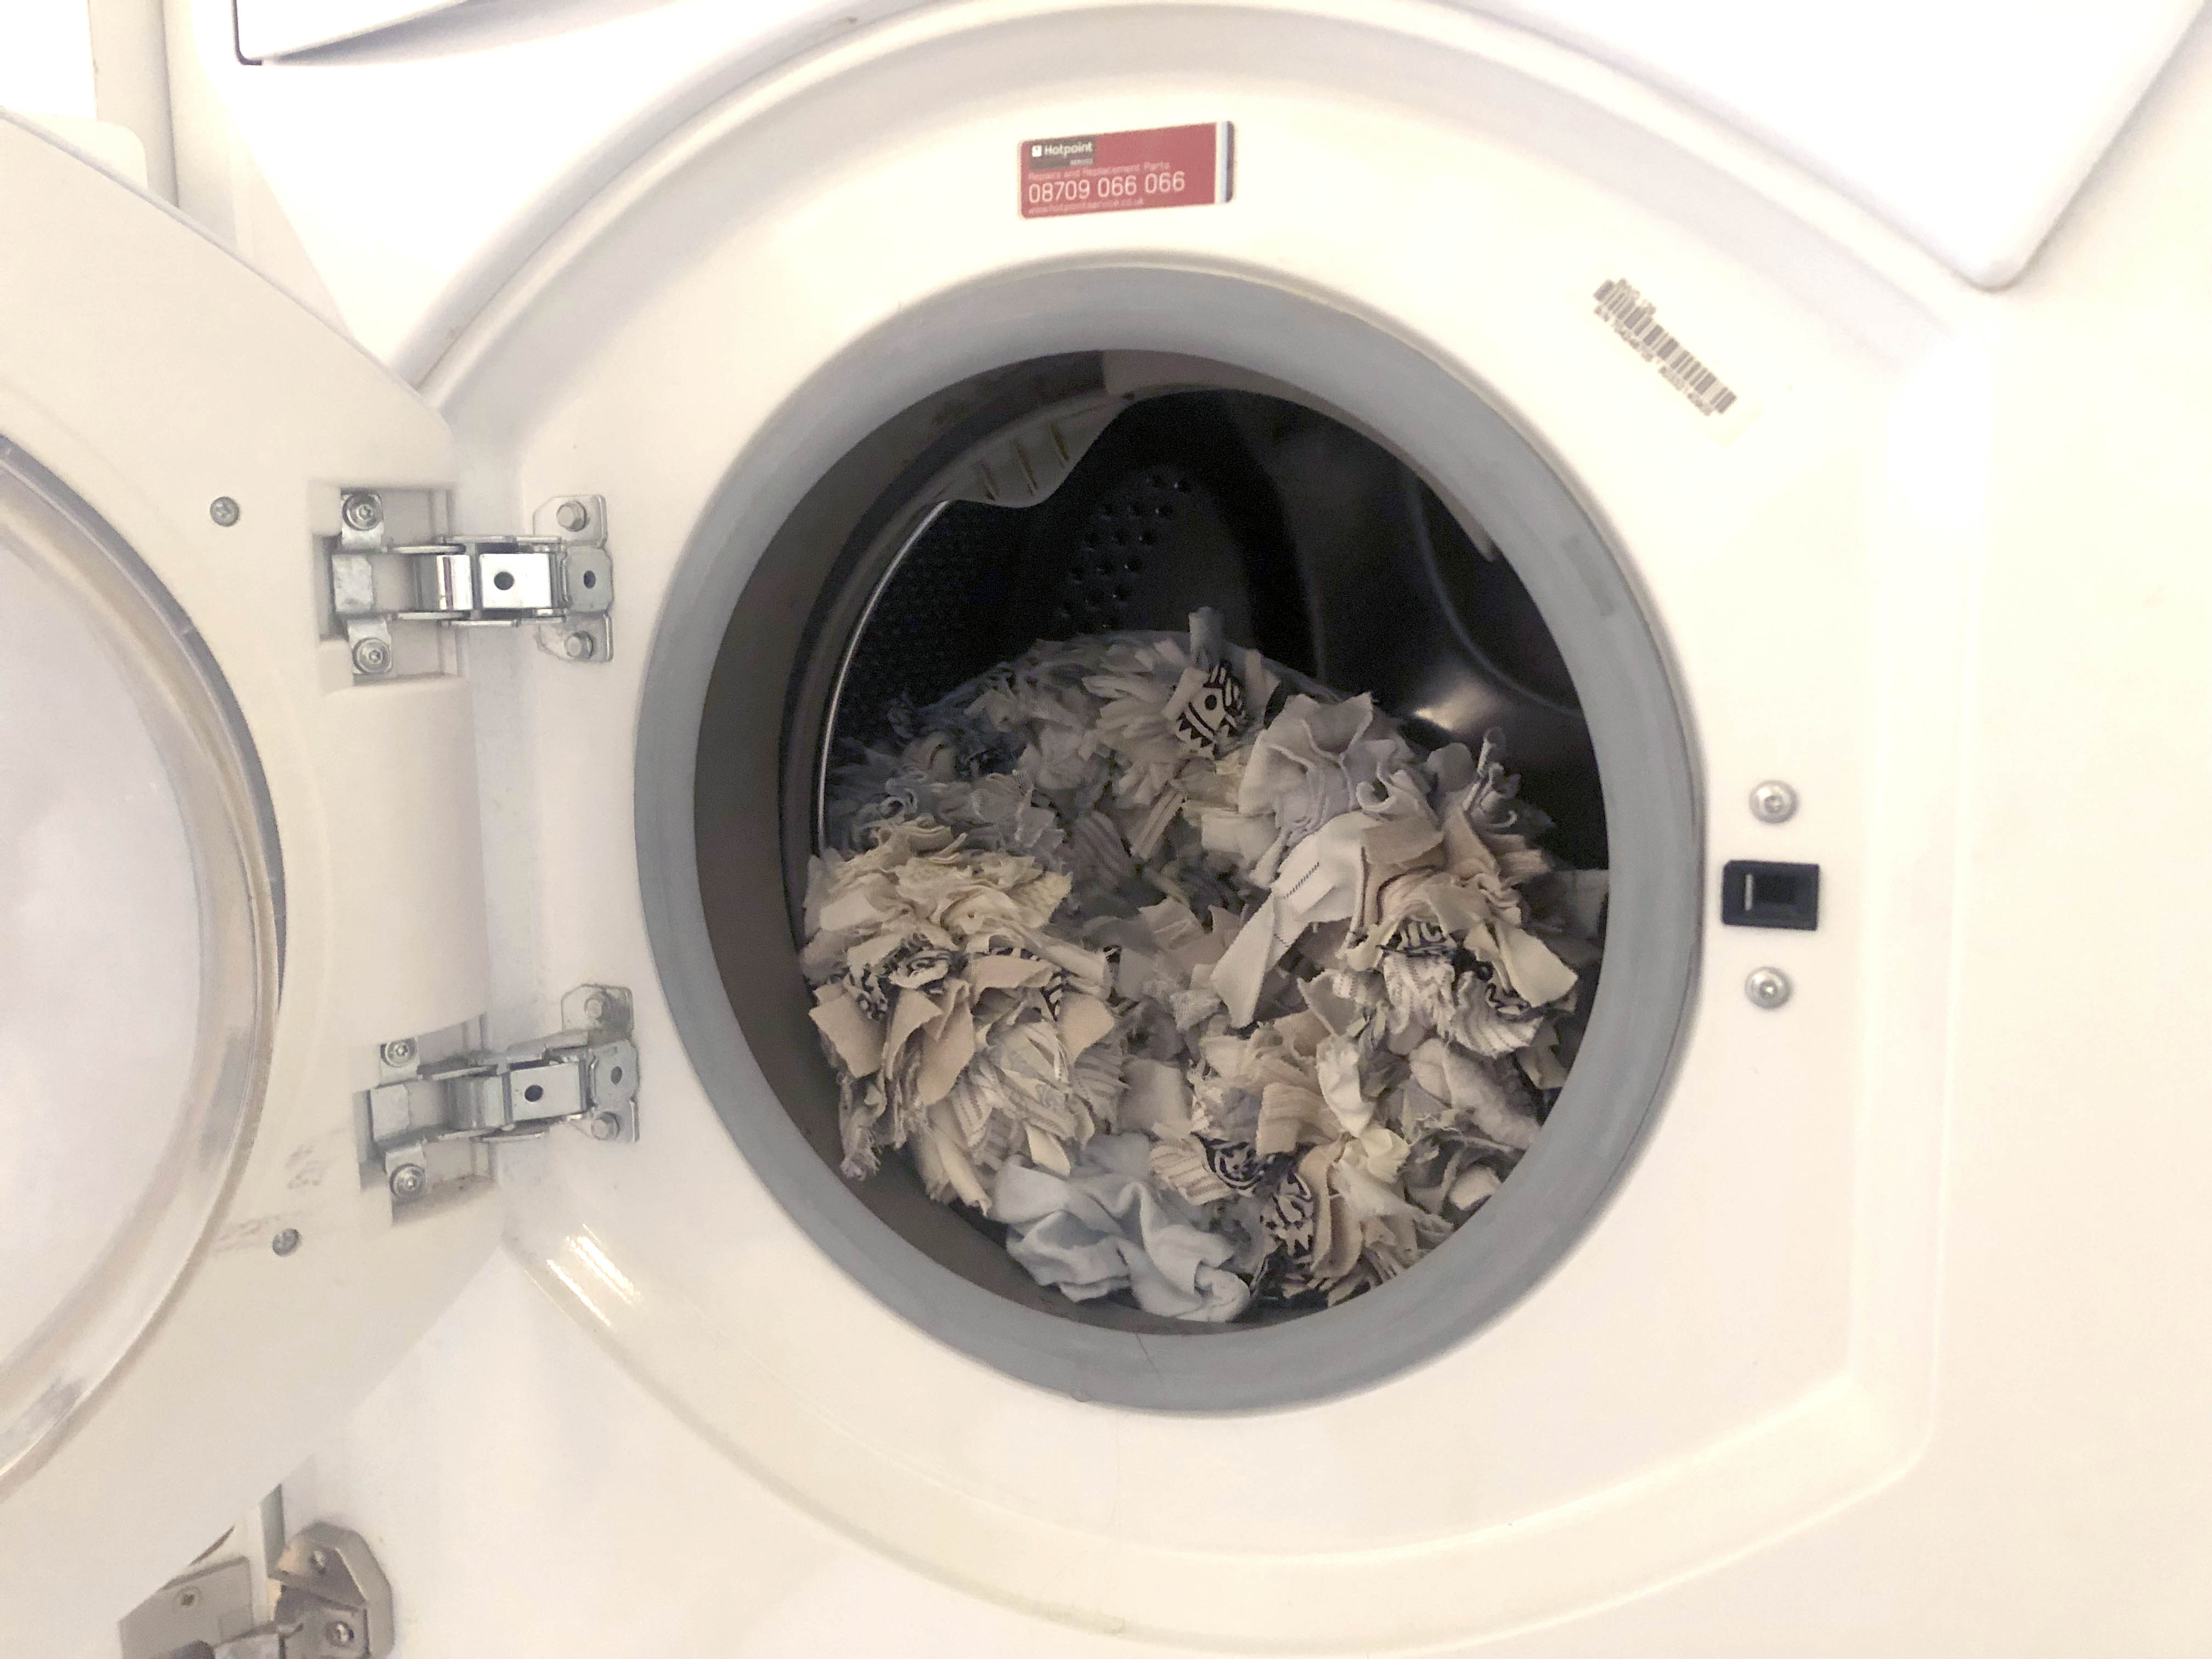
3. Put it in the washing machine. If your rug is in a high footfall area, it will need the occasional deep clean. I wash mine approximately once a year in the washing machine. As long as your rug has been rag rugged into the correct weave of hessian (burlap) at the correct tension, it will stand up to a washing in the washing machine, but if in doubt, don’t do it. If your rug fits easily in the washing machine, wash it in a pillow case or old duvet cover on a 30 degree wash with non-biological washing powder. Larger rugs can be washed in the same way in commercial washing machines at your local laundrette. Rag rugs take a while to dry out fully, so we recommend hanging them out to air dry on a sunny day. Never dry clean or tumble dry a rag rug.
4. Re-rag rug a section. If something terrible has befallen your rug… a glass of red wine for example, don’t panic. Firstly, remember that it’s fabric. Spot cleaning with something like Vanish will often fix things. However, if that doesn’t work, you can actually pull some rags out of the hessian (burlap) and re-rag sections. It can be difficult to match to the original colours, but it’s worth trying if nothing else has helped.
For more details on how to wash a rag rug, read our more in depth “How to Clean a Rag Rug” blog post.
Q4: How long does it take to make a rug?
I’m afraid that this is one of those “how long is a piece of string” questions. How long a rag rug piece takes to make depends on a number of factors including:
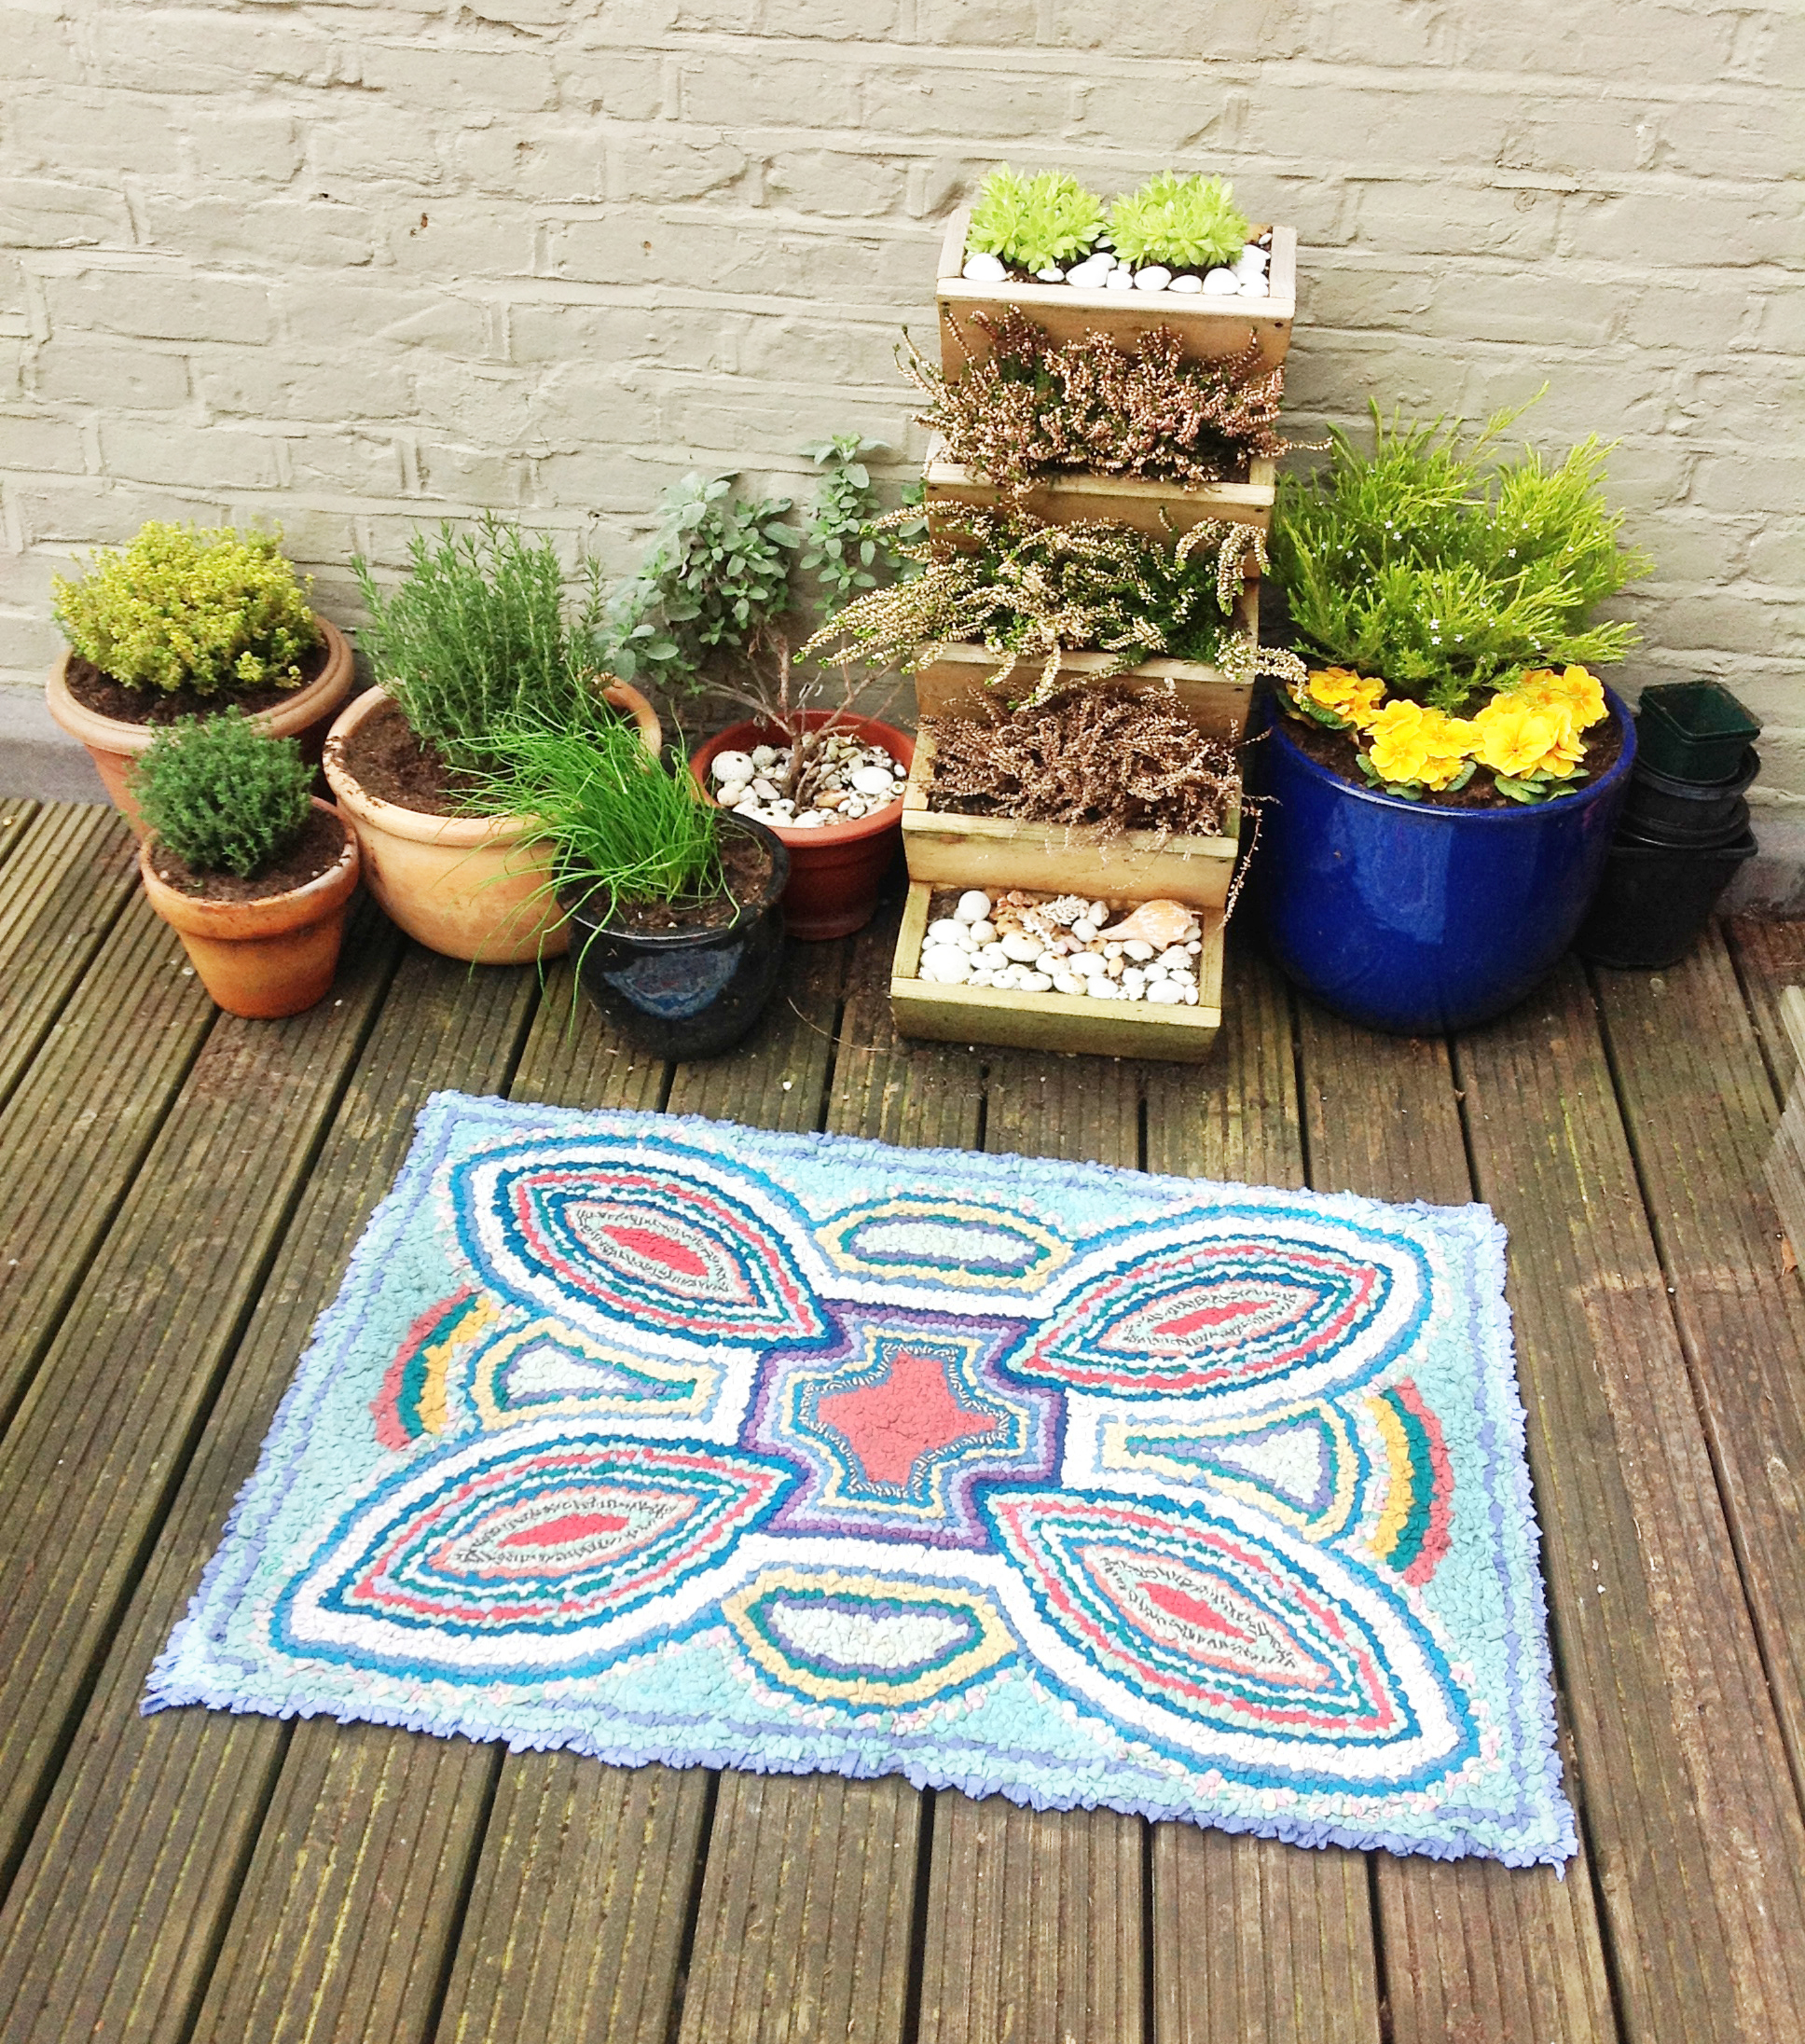
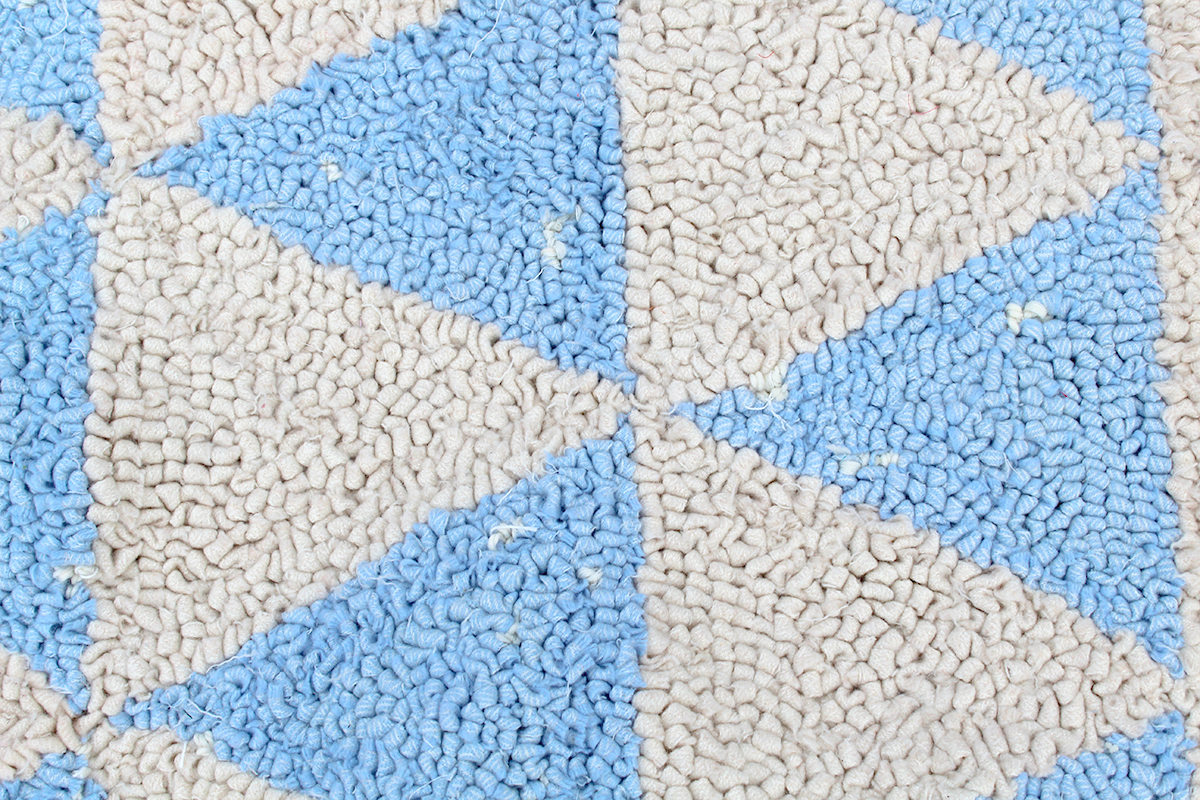
- The complexity of design. Generally, the simpler a design is, the less time it takes. The more complex a design is, the longer it takes. This is mainly down to the “thinking time” it takes to decide exactly what colours to put where. It’s one of the reasons why I often recommend simple, geometric designs as a first project for rag rug beginners. Stripey rugs are therapeutic and relatively quick to make, for example.
- The number of fabrics used. More fabrics = more chopping time. Plus, you can’t get into as much of a rhythm when you’re chopping and changing between colours.
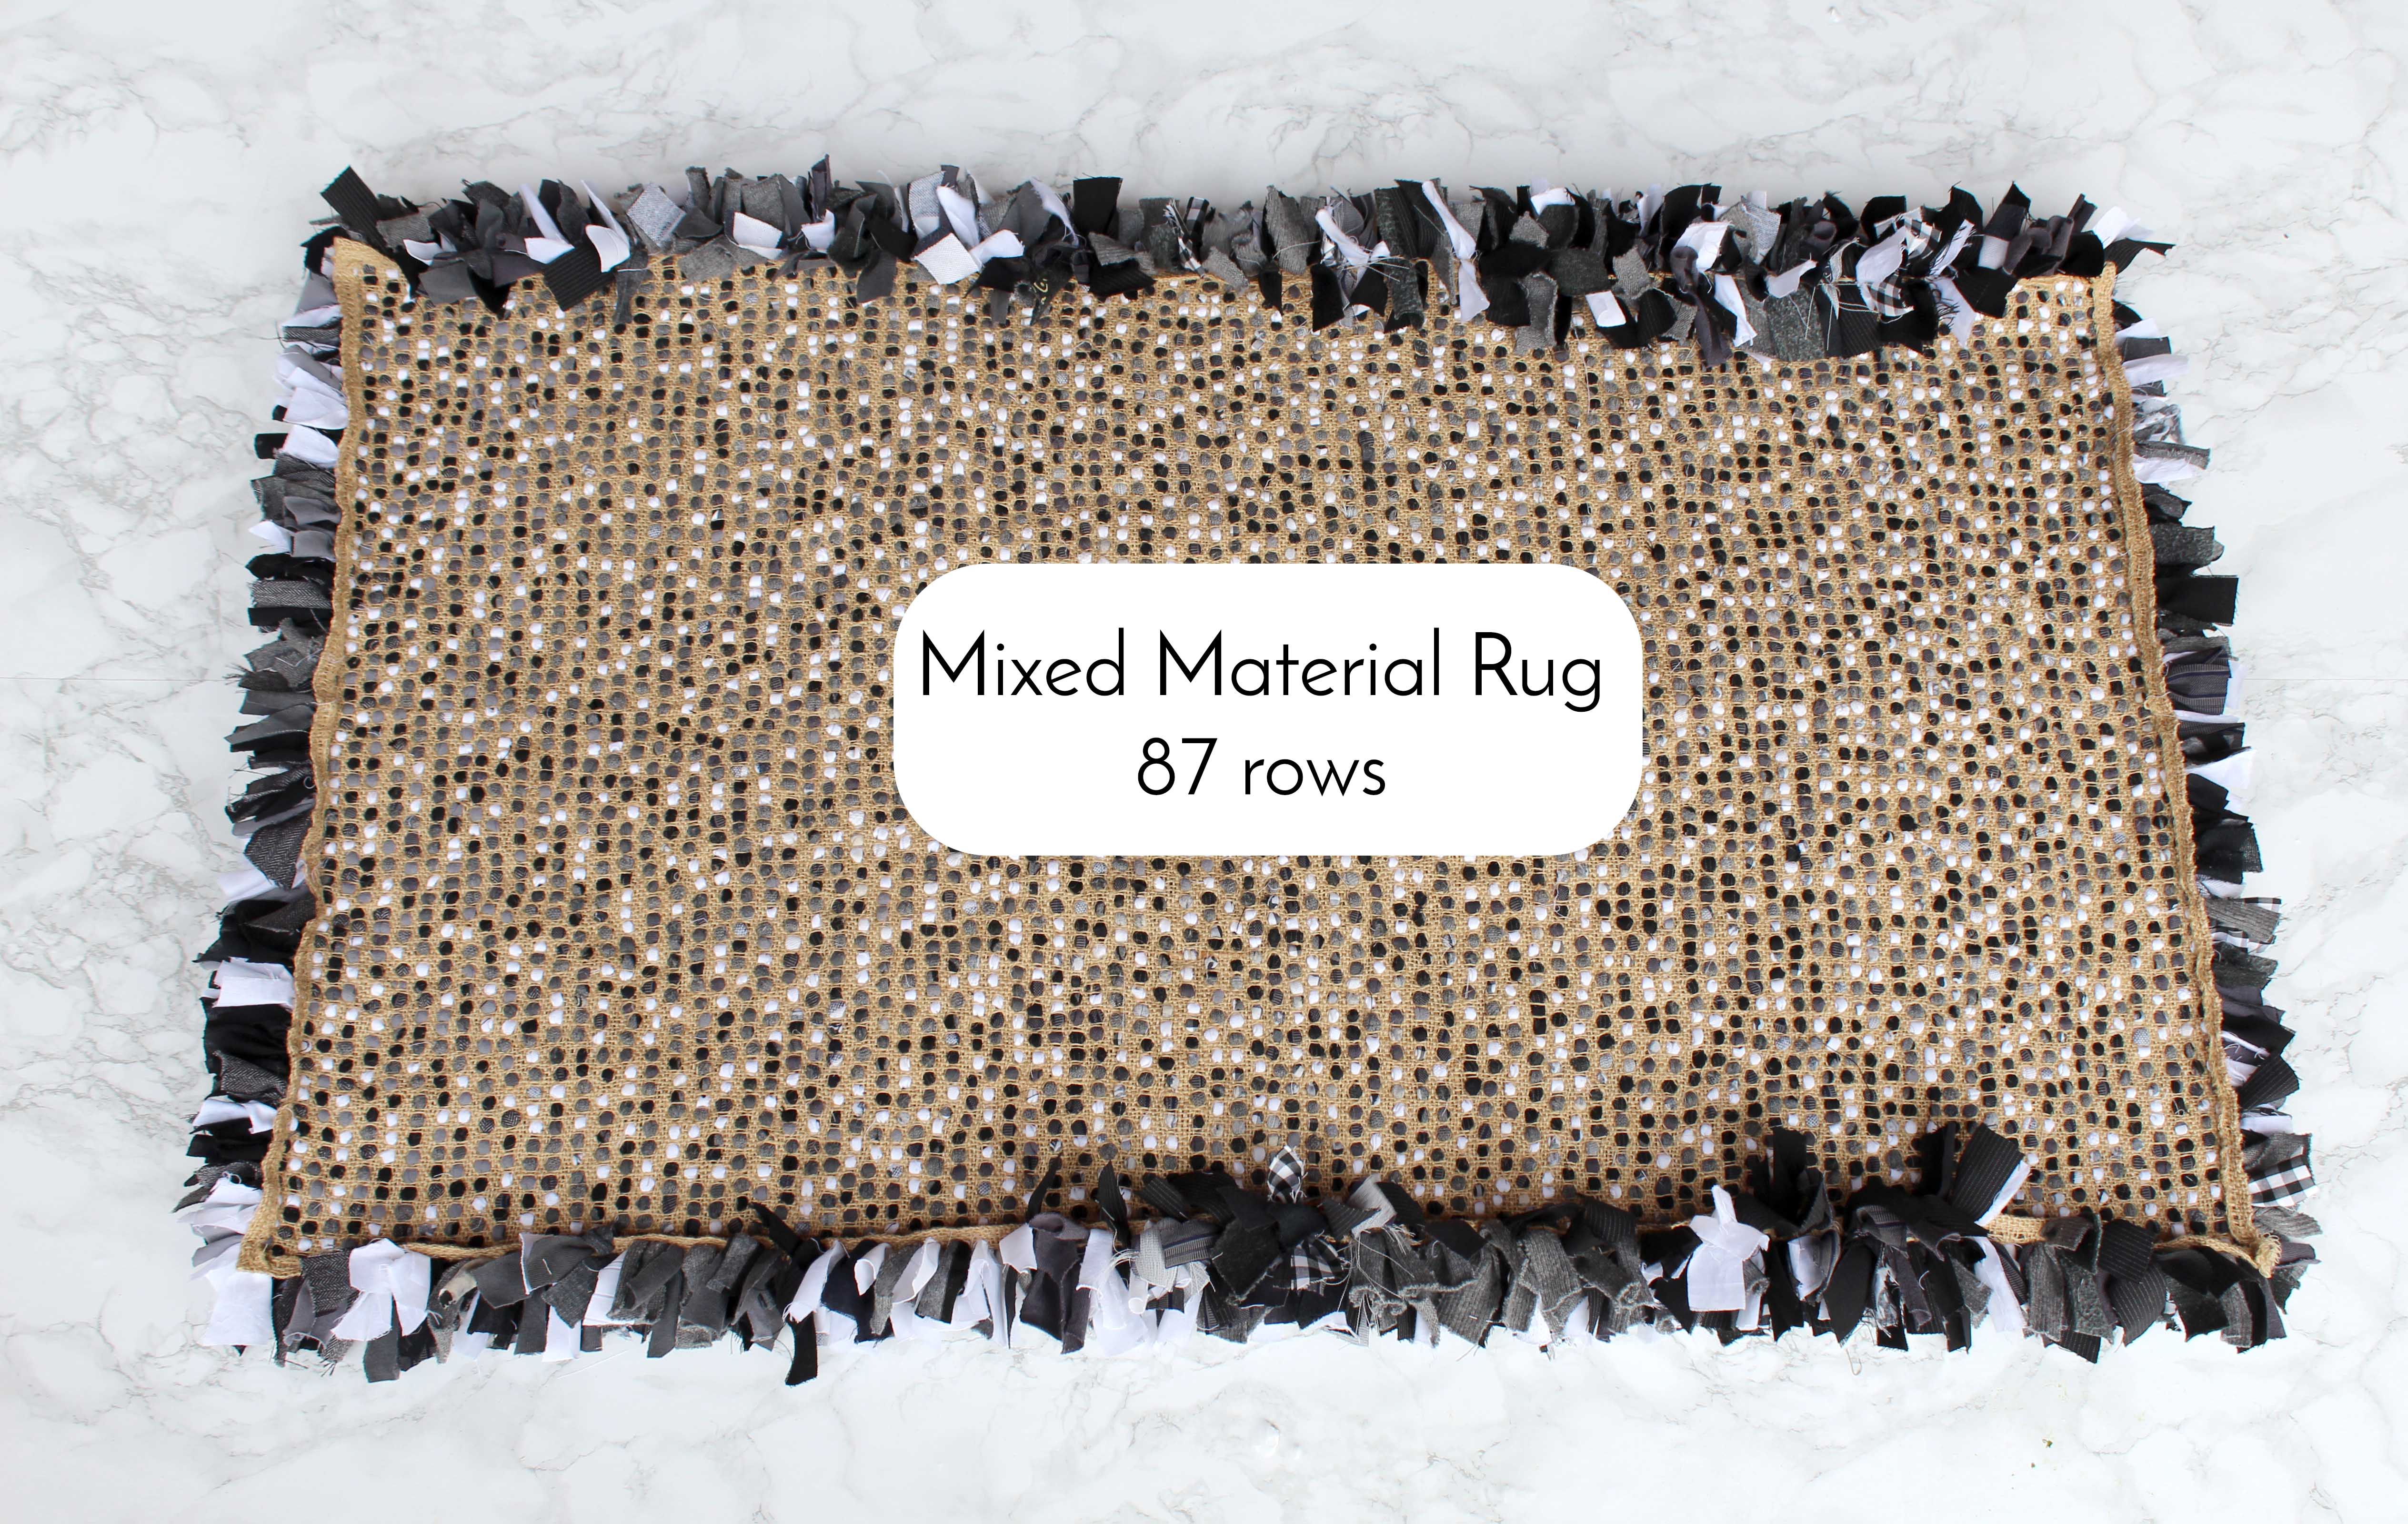
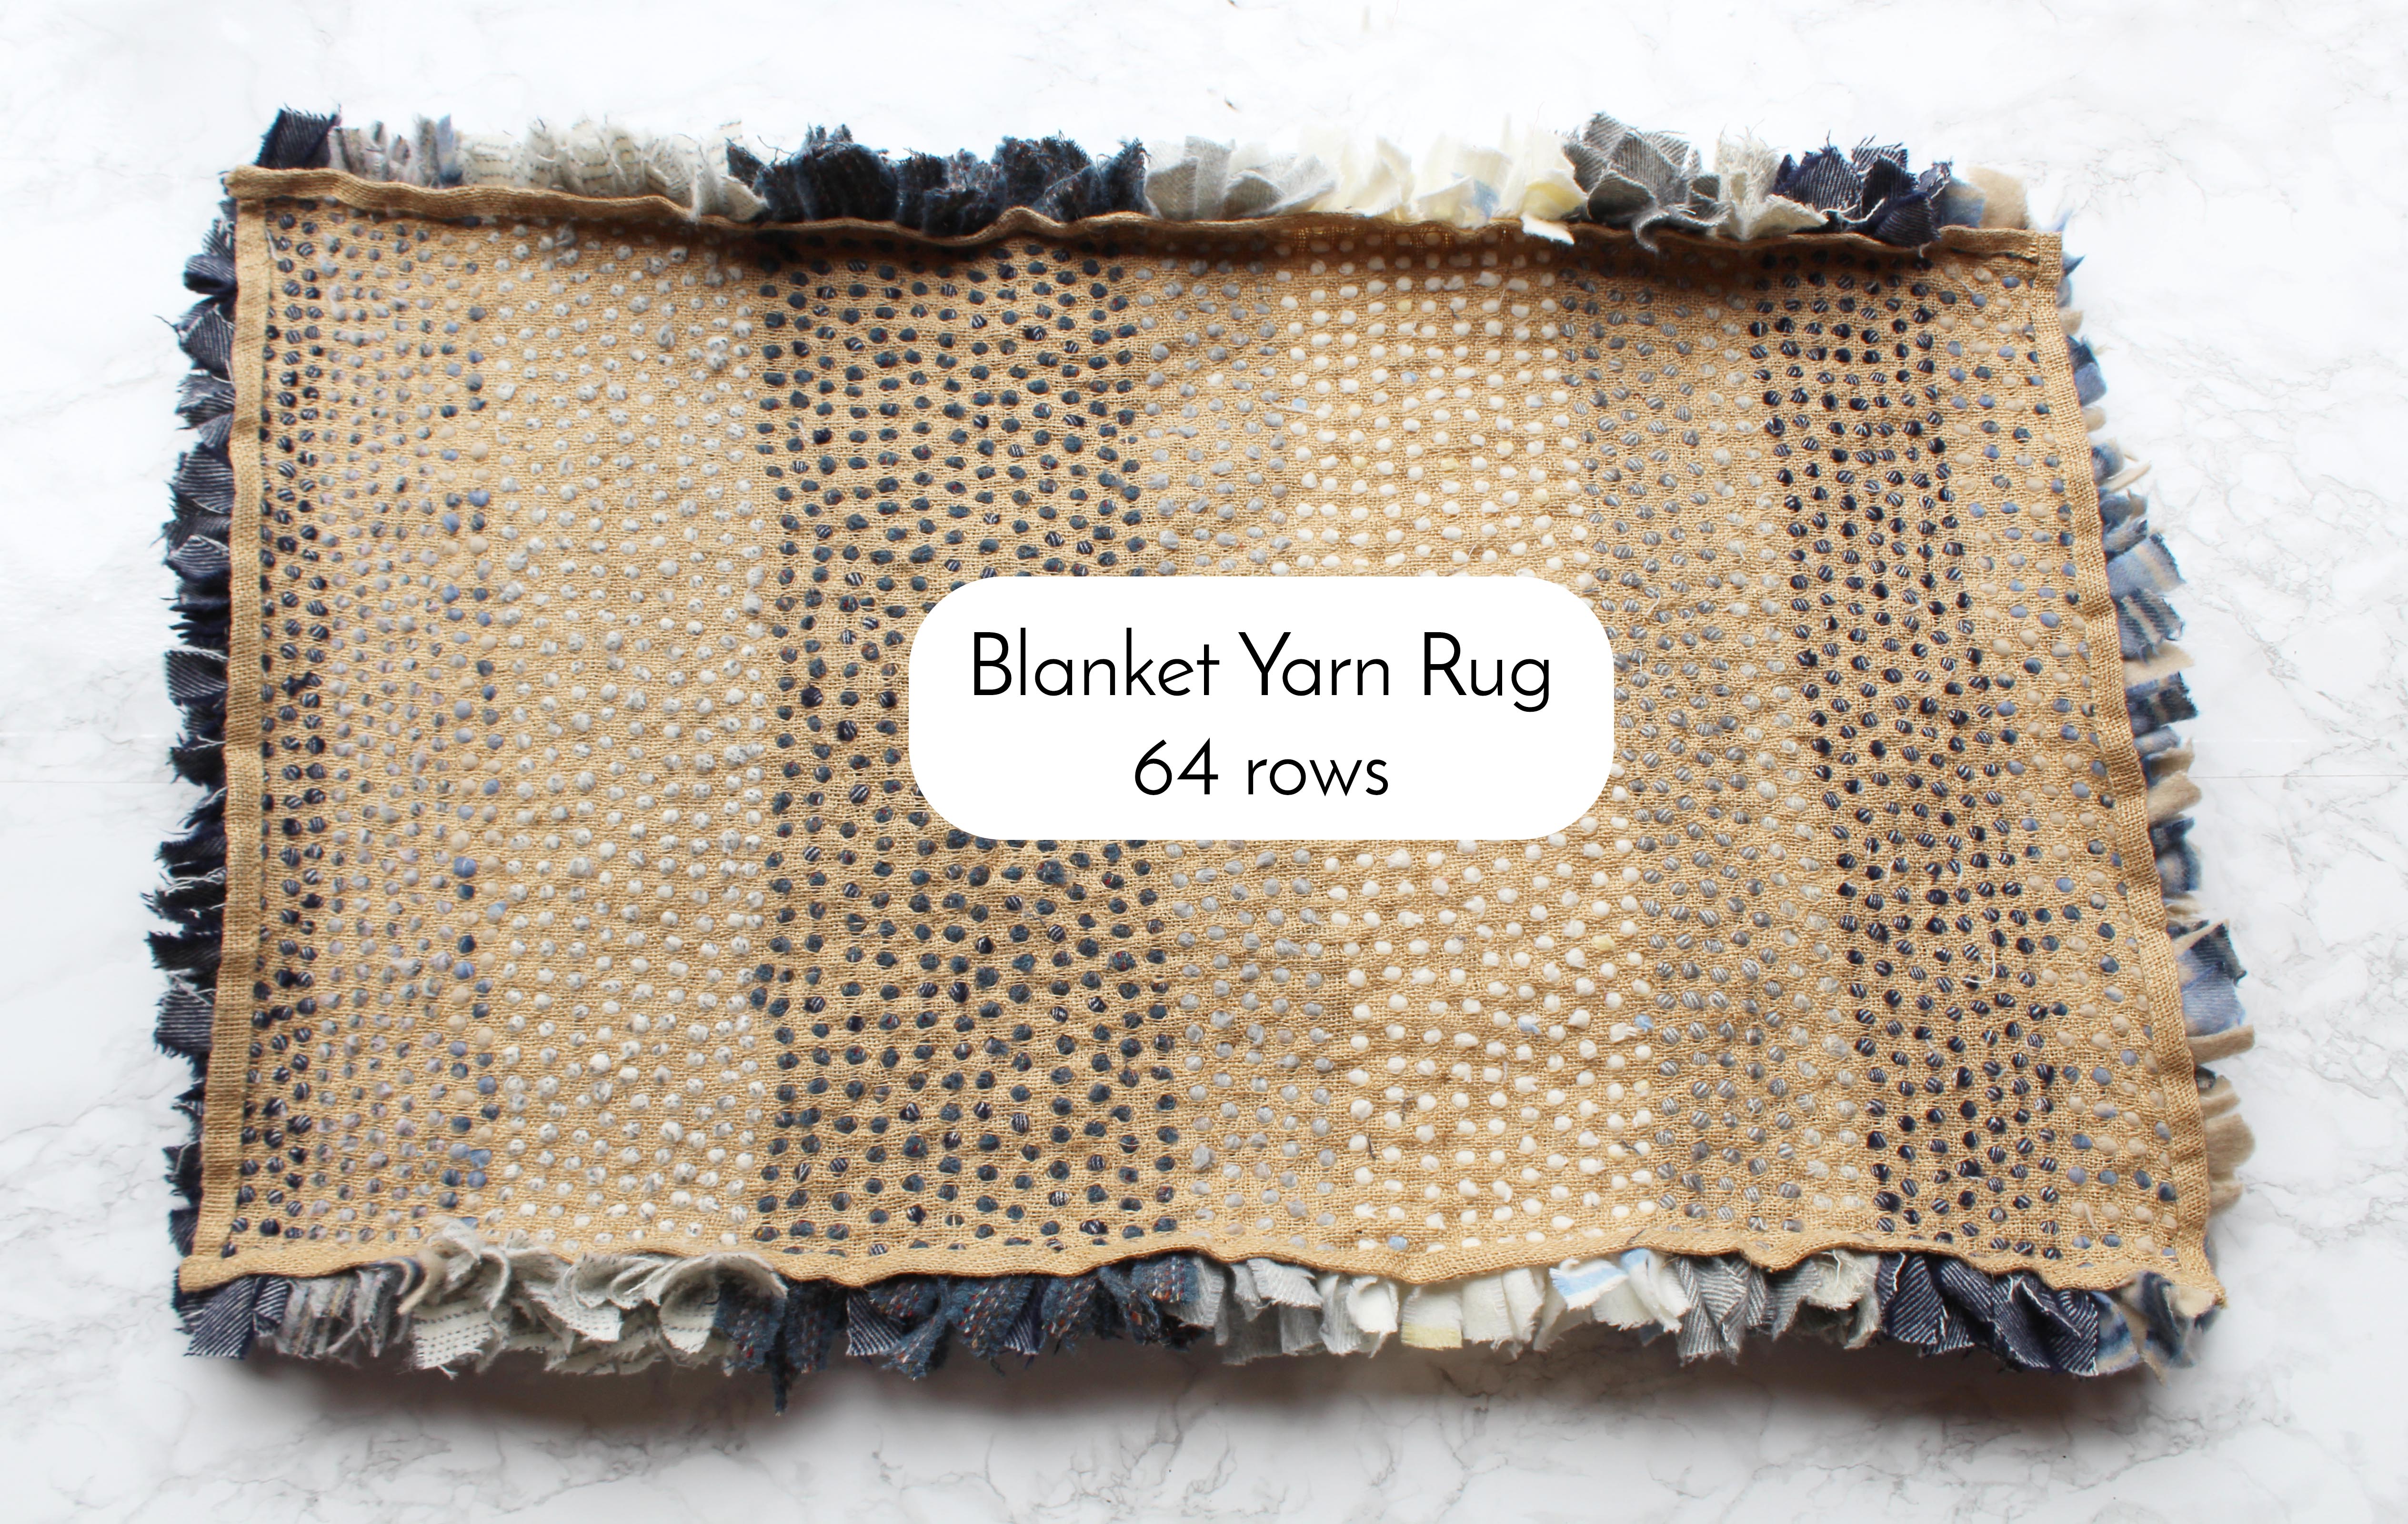
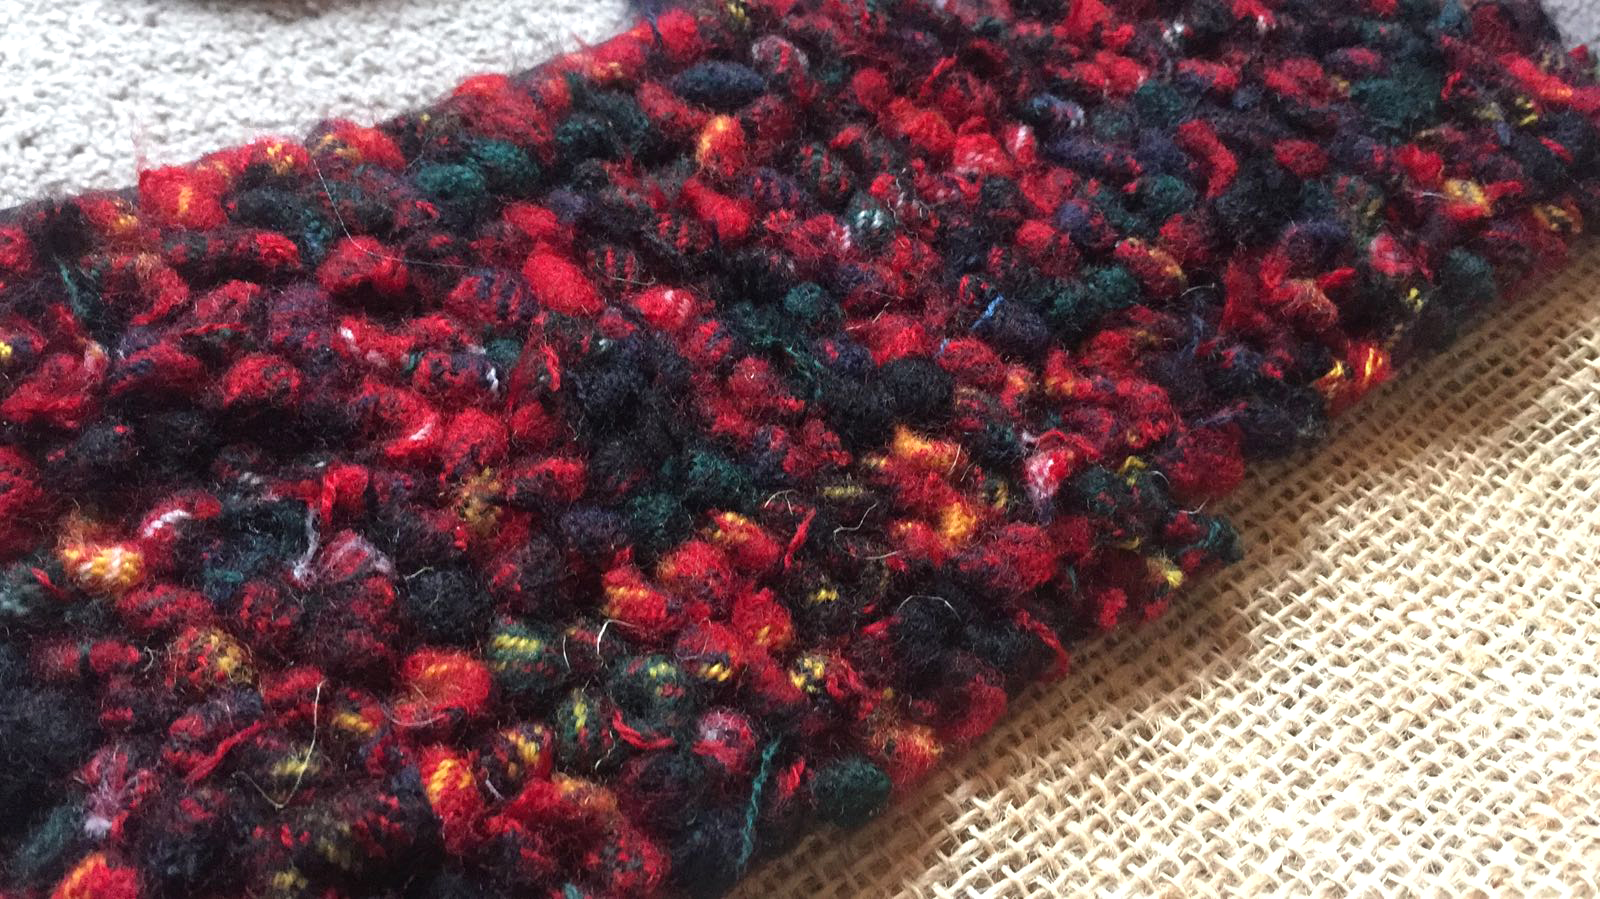
- The thickness of the fabrics used. Generally, the thicker the fabrics used, the further apart you can space your rag rugging and therefore the quicker you cover the hessian (burlap). That’s one of the many reasons why we love working with 100% wool blanket yarn.
- The height of your rag rugging. Particularly with the loopy technique, if you make your rag rugging short then it doesn’t cover the hessian as effectively as with higher pieces. This means that you have to rag rug closer together, which takes longer.
- Your experience level. Obviously, it goes without saying, but the more practice you’ve had rag rugging, the quicker you are at it. Generally, I would say that it takes an experienced rag rugger about half the time it takes a rag rug beginner to complete a project.
I’m aware that that wasn’t particularly useful, but as a guide, it takes me (an experienced rag rugger) three hours to rag rug a loopy cushion in just one blanket yarn… (so one fabric with a simple design).

Where as, I reckon it took me about forty hours to make my first ever rag rug, which had a more complicated design and colour scheme…
If you ask a rag rugger how long something took to make, you’re very unlikely to get a good answer. Chances are, they probably picked it up and put it down many times over months, which makes it very difficult to calculate the number of hours that went into it.
However, it’s worth remembering that a rag rug is a long term project that is enjoyable to make. Sometimes things are more about the journey than the end destination 🙂
Q5: Do I need to do anything to secure the ends of my fabric strips?
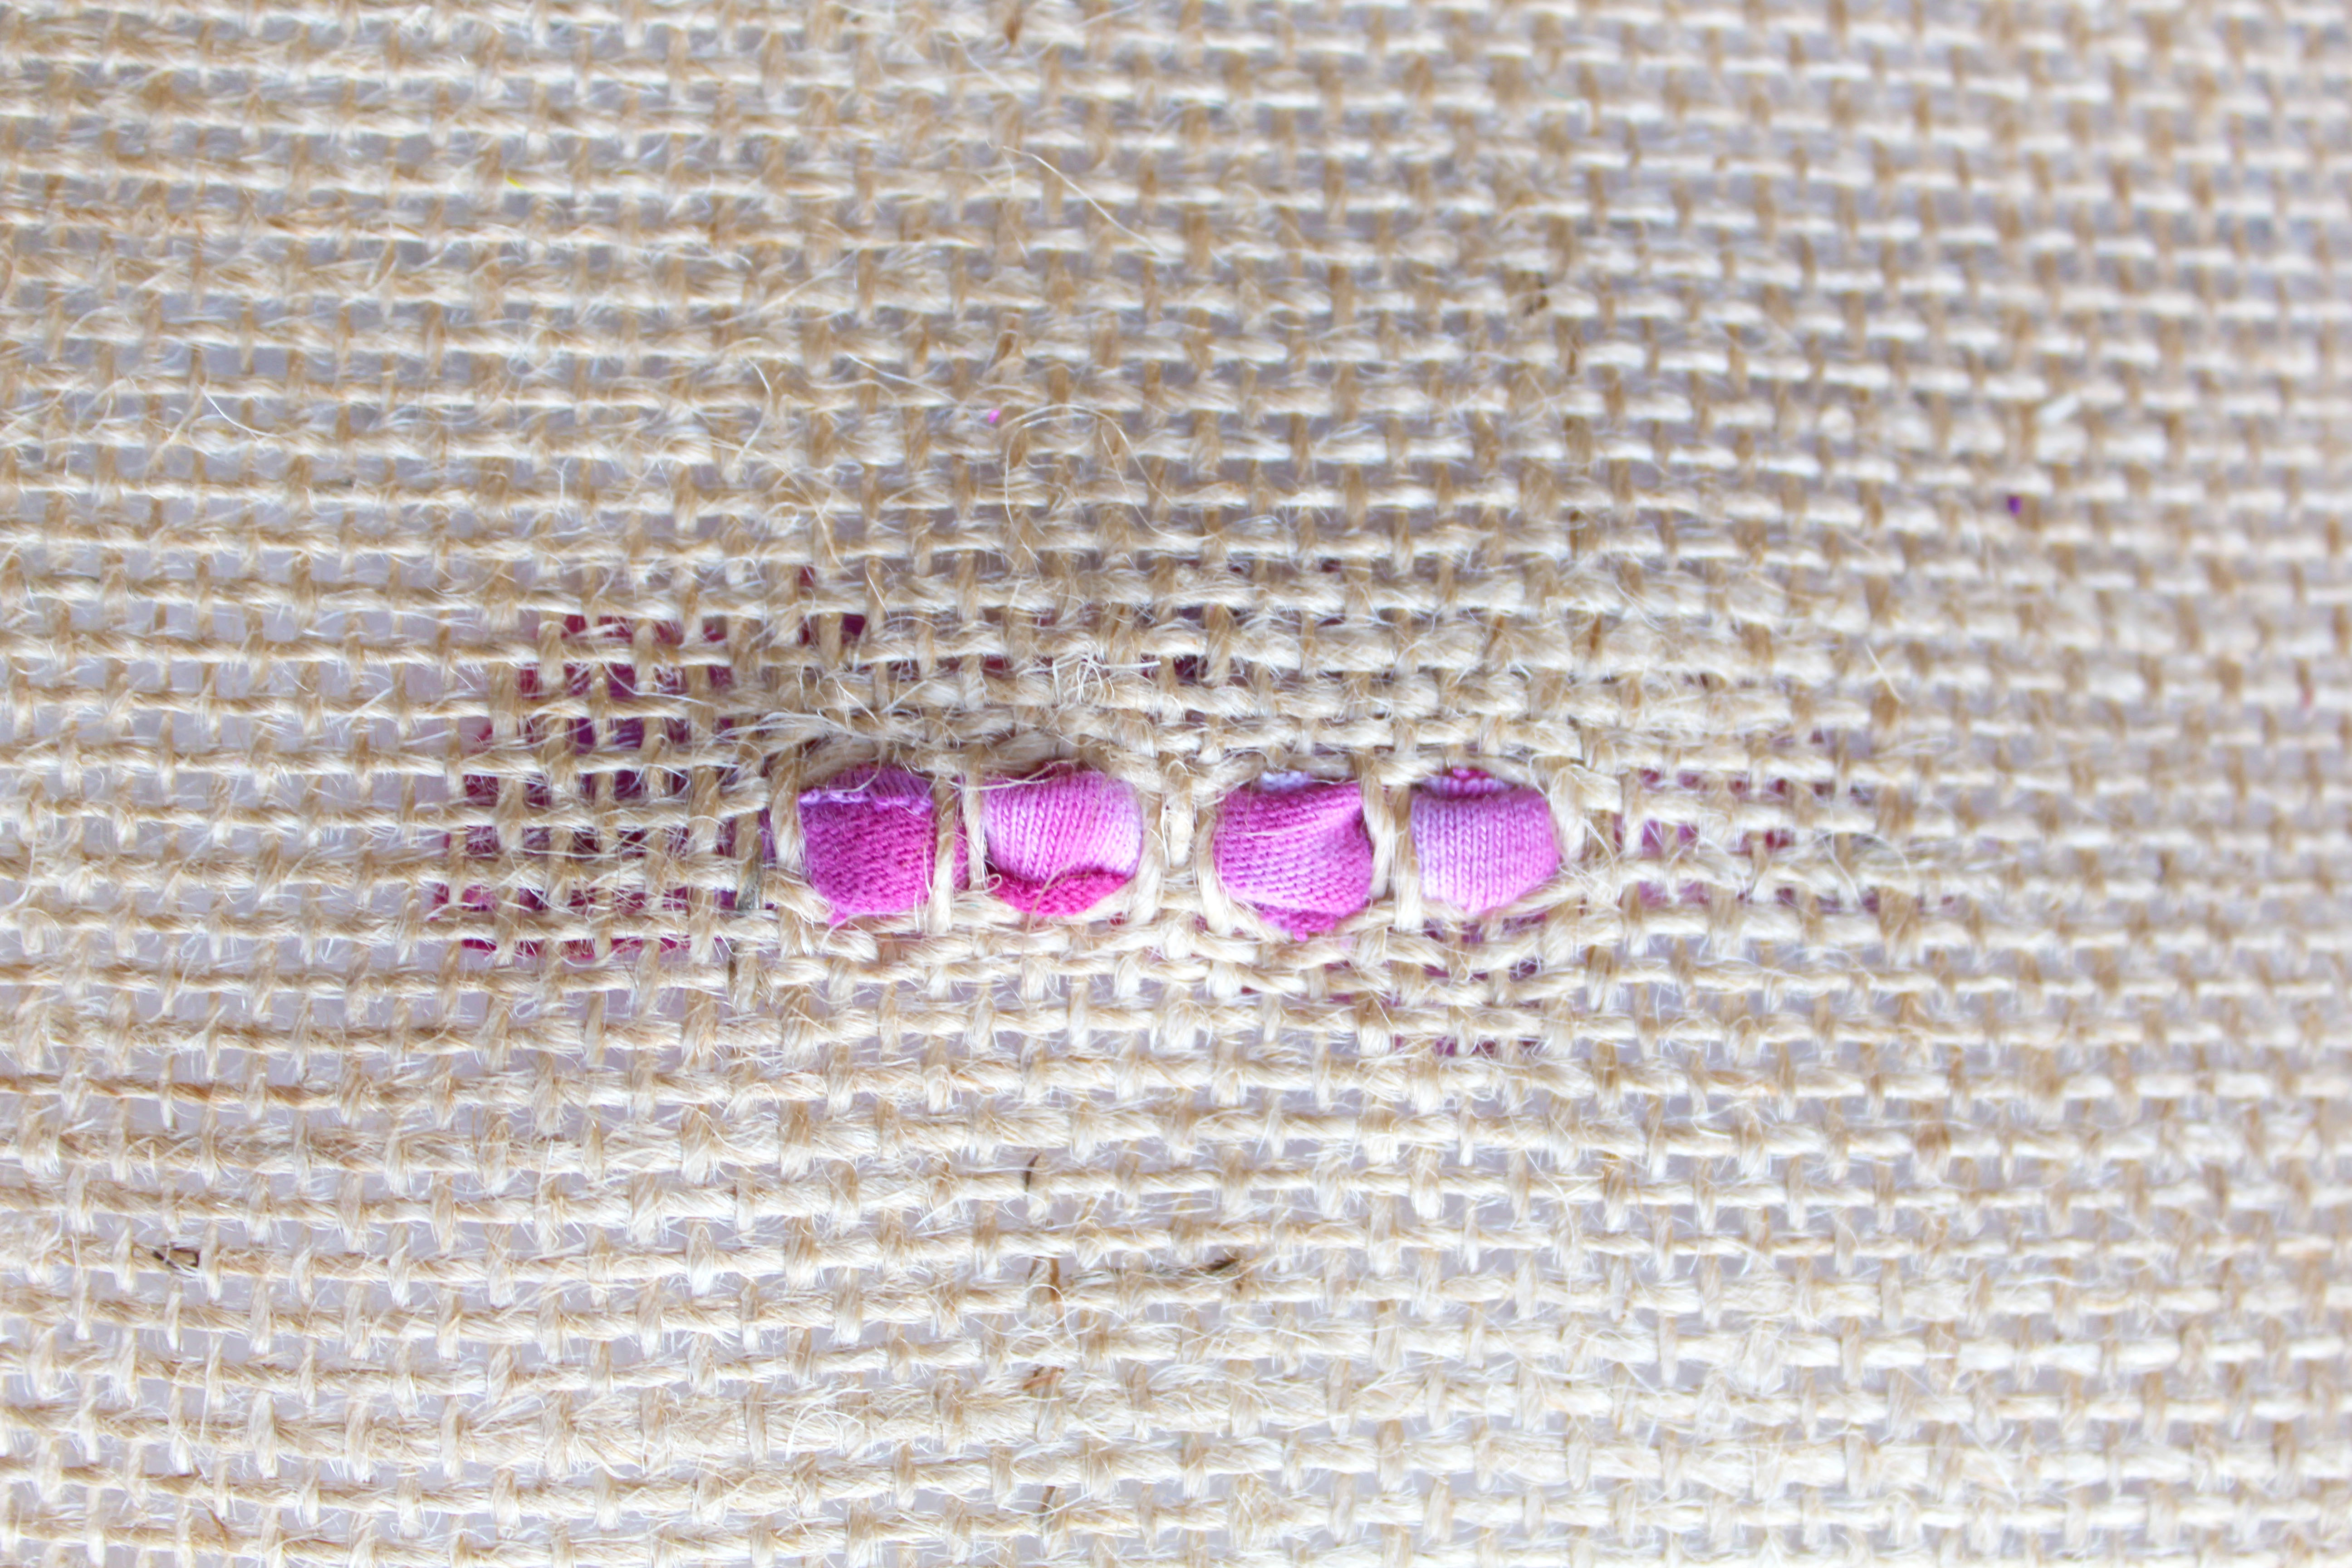
Rag rug beginners are often surprised to find out that the pieces of fabric in a rag rug aren’t actually knotted or sewn into the hessian. In fact, the only thing keeping them in place is the hessian tightening around them. Well, as long as you’ve used the correct weave of hessian and you’ve rag rugged at the correct tension (not too far apart, but not too tight) then there’s no need to secure them in any other way. This is what the tightening looks like from the back of the hessian…
Not sure you’ve got the correct weave of hessian? You can buy our Ragged Life-approved hessian on the shop here.
On the subject of securing ends, however, it’s worth pointing out that with the loopy rag rug technique, you should never leave ends of strips on the underside of the rug. If you do then they are not secured properly and can come loose over time (and can pull a whole strip out!) The ends of strips are completely disguised in the loopy rag rugging if they’re pulled to the top of the hessian and cut to the same height as all the loops, so there’s really no excuse not to pull them to the top 🙂
Q6: Do I rag rug through the hemming?
If you are working with our Ragged Life Hemmed Hessian then the hem around the edge will be approximately 2cm deep. With the shaggy and short shaggy rag rug techniques, you do not need to rag rug through the hemming itself, as the fabric pieces will fall over the edge to cover the hemming and hide it. However, with the loopy technique, the fabric does not cover the hemming as the loops are shorter. With this technique, you will either need to rag rug through the hemming itself to cover it, or rag rug up to the edge of the hem, then fold the hem and sew it underneath. Personally, I’d rather rag rug through the hemming itself to save myself from having to sew later on 😊
Q7: My fabric is shedding a lot – is that bad?
As I mentioned in Q1 above, I generally try to avoid fabrics that shed too much, as they make a right mess and aren’t particularly pleasant to work with. However, sometimes I’m determined to use a particular fabric even though I know it’ll shed quite a bit. I generally make these exceptions for decorative rag rug pieces that aren’t going to be disturbed too much (e.g. pieces that will hang on a wall etc…). If you’ve rag rugged a piece and the shedding is driving you mad, there are a couple of things you can do:
- Vacuum your rag rug thoroughly. This is a good way of removing the top fibres from your fabric and will slow down the shedding process. I’ve used my Dyson on my rag rugs plenty of times and I can promise you that it won’t suck all the pieces out!
- Spray your piece with a fixing spray. This is very much a last resort, but can work for pieces like cushions to slow down the disintegration. I’ve used Fray Stop spray in the past, but it doesn’t go very far.
- Pull out the fabric and replace it with a fabric that doesn’t shed. It’s not ideal, but if you haven’t done too much of the rag rugging, you’re best off replacing the irritating fabric sooner rather than cursing it later on.
Thanks for reading!
Right, those are some of your rag rug beginner questions answered. Still unsure of something? Comment on the blog post to let us know what topics you’d like for us to cover. If you’d like to be the first to see future rag rug tips and inspiration, why not join our Rag Rug Community on Facebook or join our fortnightly newsletter here.
OR CONNECT WITH US ON SOCIAL MEDIA AT:
Instagram: https://www.instagram.com/raggedlife/
Facebook: https://www.facebook.com/raggedliferagrugs/
Pinterest: https://www.pinterest.co.uk/raggedlife/
Twitter: https://twitter.com/raggedlife
As always, happy rag rugging!
Elspeth x
Where do I get my tools from?
Hi Kath, you can buy them here: https://www.raggedlife.com/collections/shop If you are based in a country that our shop doesn’t deliver to then we also have an Etsy shop where we post worldwide. I do hope that helps, Elspeth
Some of my ?sides of my rug are not connected to the weft. Can i sew these together
[…] rag rug. I’ve already answered a few of these crucial rag rug questions in my first blog post “7 Questions a Rag Rug Beginner May Have” and below is Part 2 with questions supplied by some of our wonderful Ragged Life fans. I do hope […]
Thank you for this very clear and informative post. Your tutorials for beginners are excellent too.
You are so very welcome – glad I could be of help 🙂 Elspeth
You answered so many of my questions, thank you! Still have one left though… I’m planning to make a rag rug for my girls in mermaid colors- multiple pinks, purples, blues, teal’s, etc. Got a bunch of beautiful flannel second hand, but it has two problems. First the color is all on one side of the flannel, and the other side is mostly white with a little color showing through. Second, most of them are printed with patterns or characters that do not go with the theme- from tiny dogs to florals and hearts. Worried that the shaggy technique will… Read more »