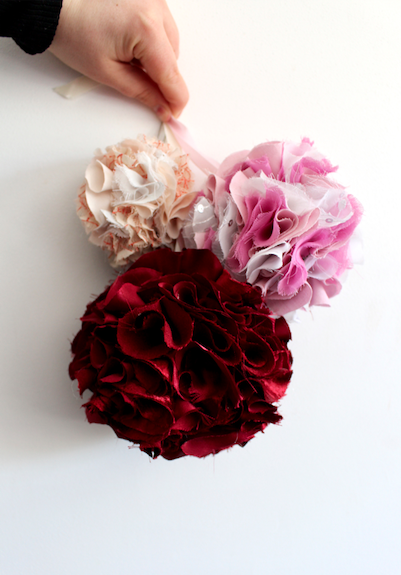
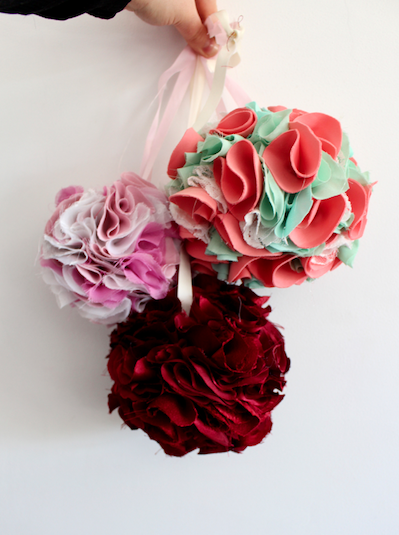
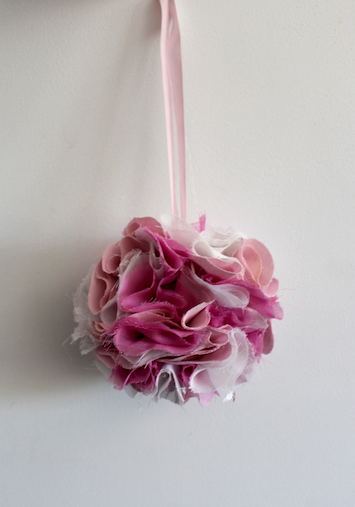
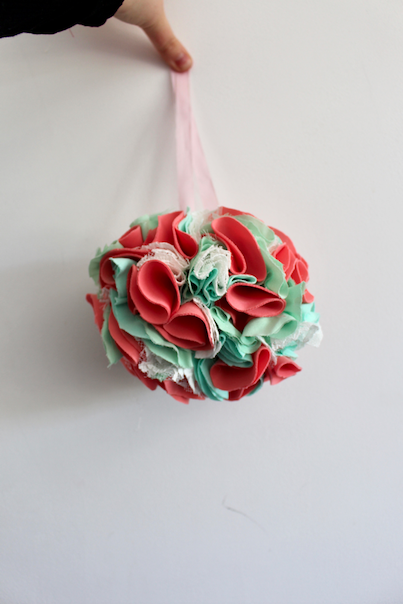
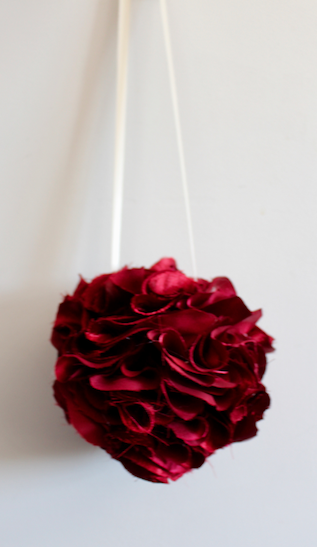
If you thought we’d tackled all things rag rug already, then you’re in for a surprise. Over the last week, we’ve been experimenting with DIY party pom poms made from recycled fabric. And they’re made… wait for it… without hessian! Yes, I repeat, without hessian, and even without the rag rug tools for that matter. We think they look pretty cute anyway!
At the moment, it’s the height of lockdown, so we won’t be hanging these DIY party pom poms at any large family gatherings any time soon, but that doesn’t mean that they weren’t a lot of fun to make. Below you can find easy step by step instructions to try them out at home. We think they’d look so cute in neutral colours at a wedding. So here it goes…
What we love about DIY Party Pom Poms
- They are eco-friendly. These pom poms are made from recycled materials and fabrics meaning they’re sustainable.
- They are inexpensive to make. You can use just about any fabric that you have at home to create these designs so they’re perfect if you’re on a budget.
- They require minimal tools and supplies.
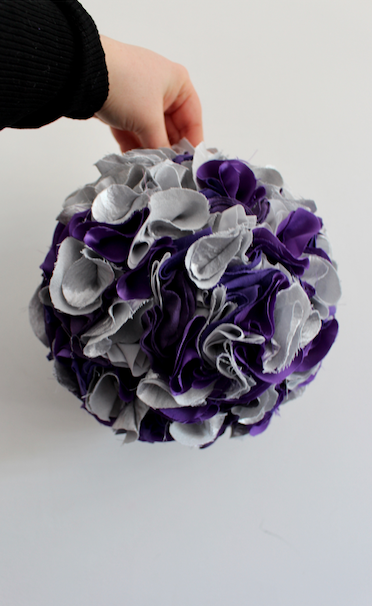
- They’re personalised. You can chop and change colours, sizes and styles of these pom poms to cater to your preference and taste. This means they are adaptable to compliment any event or theme.
- It’s a fun DIY project. I have to say I did enjoy making these. There was something very therapeutic about constructing the pom poms and seeing the end result. But don’t take my word for it, try them for yourself…
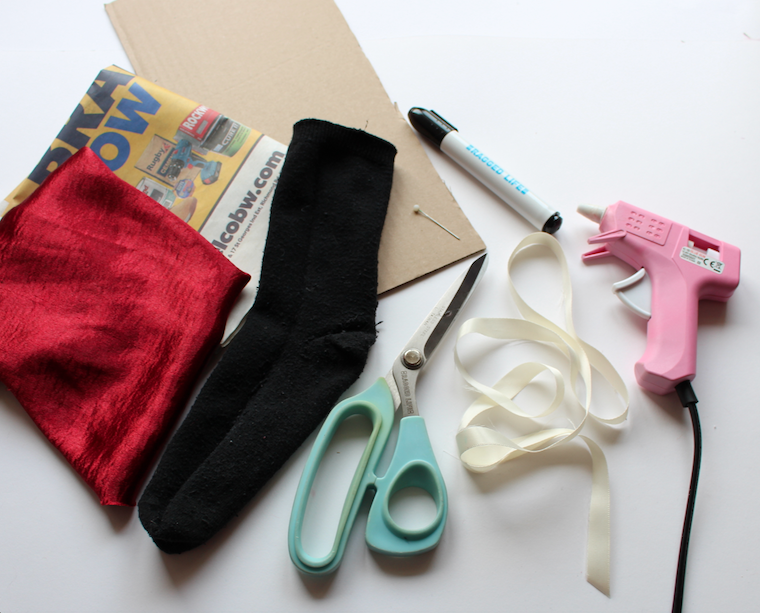
What you will need:
- Hot Glue Gun
- Fabric
- Cardboard
- Pen
- Scissors
- An old sock & newspaper/ Chinese lantern / bauble
- Pin
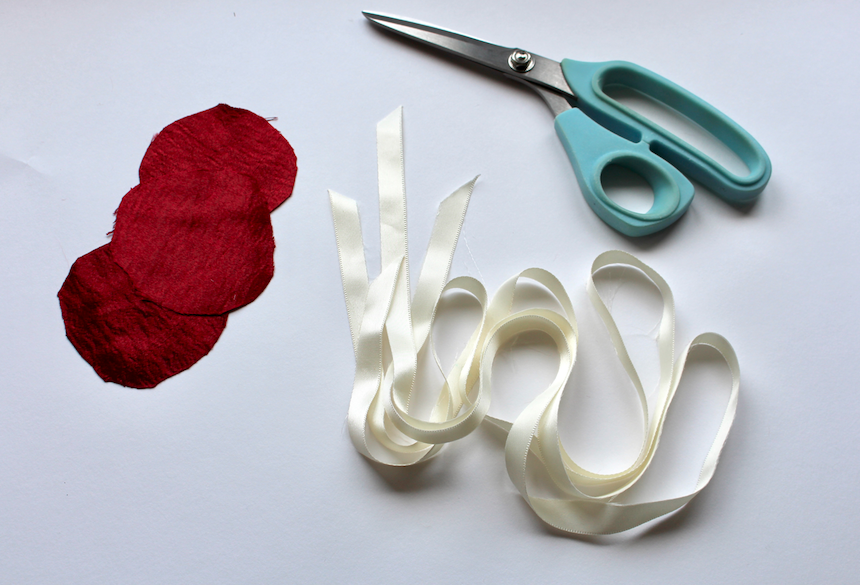
- Ribbon
Step by step instructions:
Preparing the materials
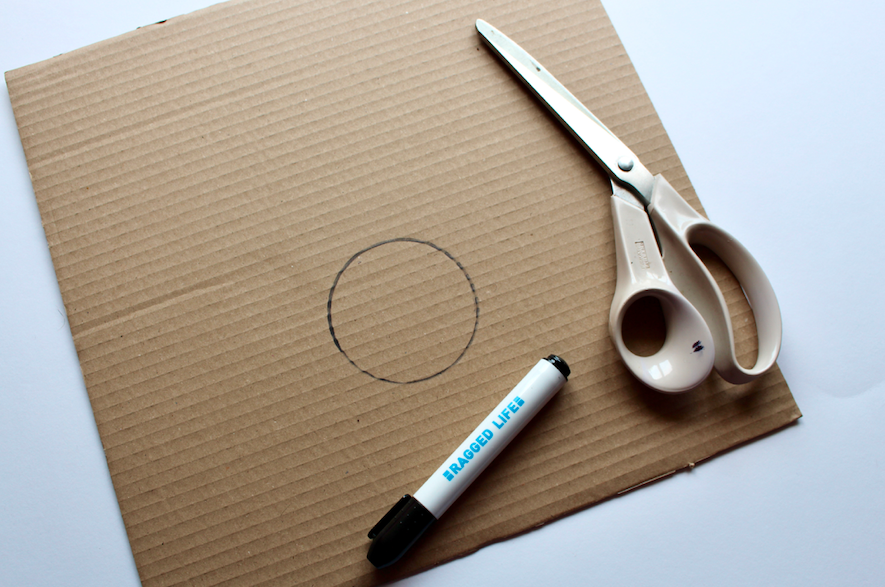
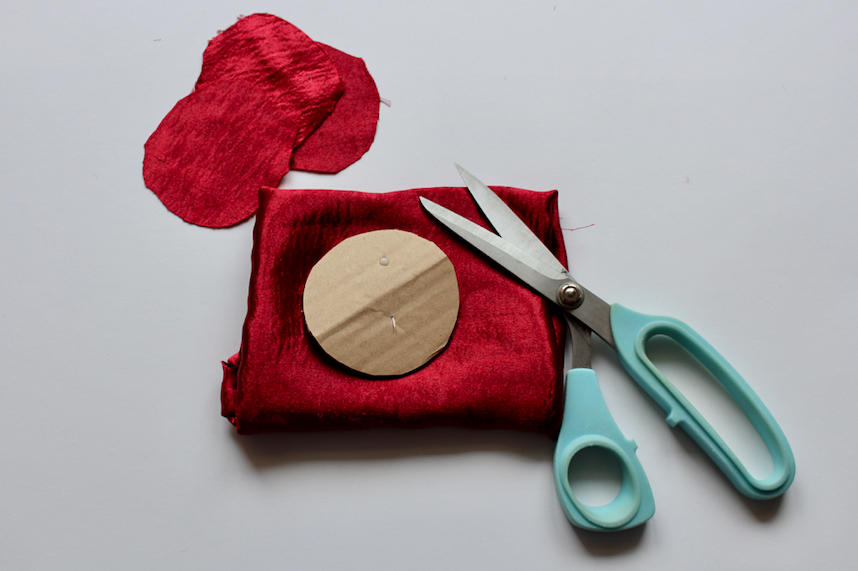
Step 1) The first thing to do is to make your circle template. (This will make it a little bit easier when you come to cutting the fabric pieces out). It is up to you how big you want your circles. The ones I made for the sock base were roughly 7cm wide.
Step 2) Once you have your template you can move onto your fabric. If you are using a garment and you haven’t done so already you need to deconstruct it and remove the seams. If you need any guidance on how to do this check out our instructional video here.
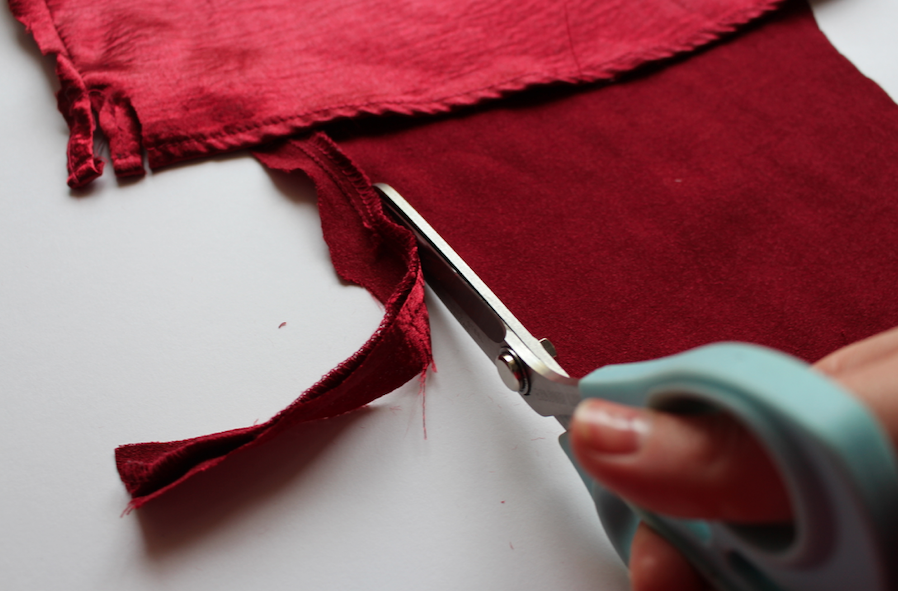
Step 3) The next step is cutting your circles. I started by folding over the piece of fabric several times and used a pin to secure my circle template on. I then cut around it using my scissors.
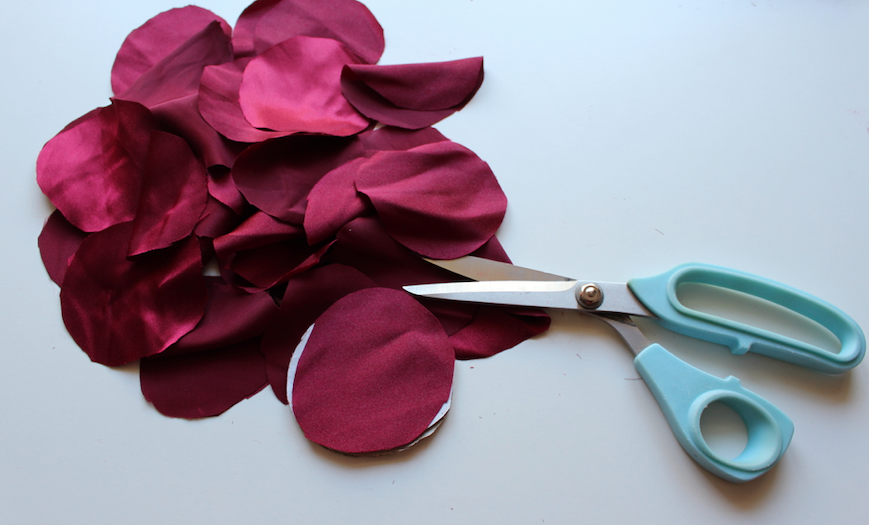
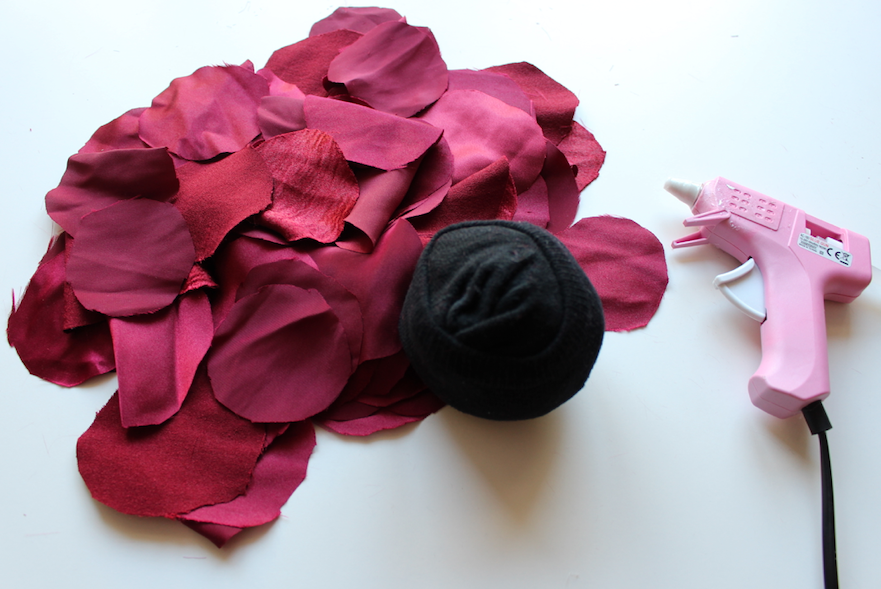
It depends both on the size of your base and how bushy you want your final piece to look as to how many circles you cut. I used around 100 to make mine.
psst: You can save your fabric offcuts to stuff your other DIY pom poms.
Step 4) Repeat this process with your different pieces of fabric until you have roughly enough. You can always come back and cut a few extra circles later if you need to.
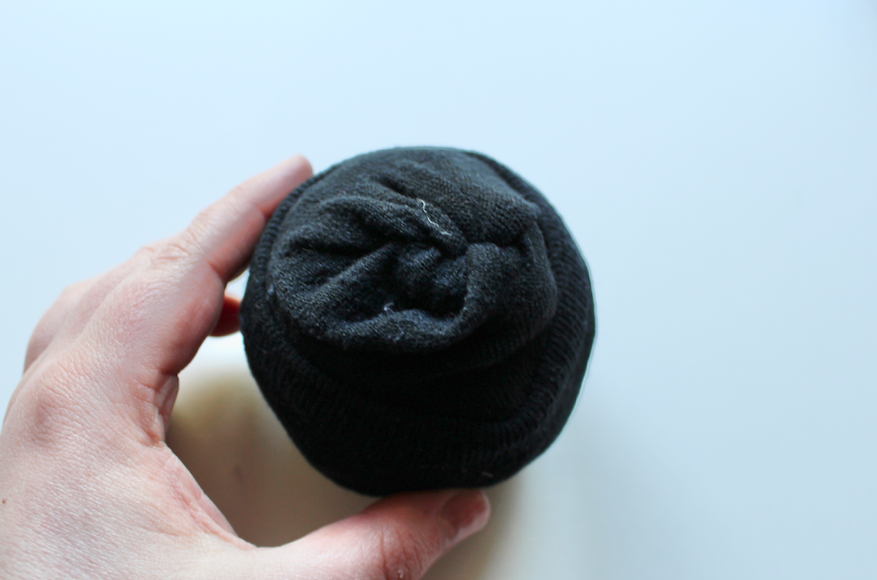
Step 5) Once all your circles are cut, move onto your base. Get a few pieces of newspaper, scrunch them up and stuff them all the way to the bottom of the sock. You want to keep the stuffing in the foot section to make it as round as possible and tie a knot.
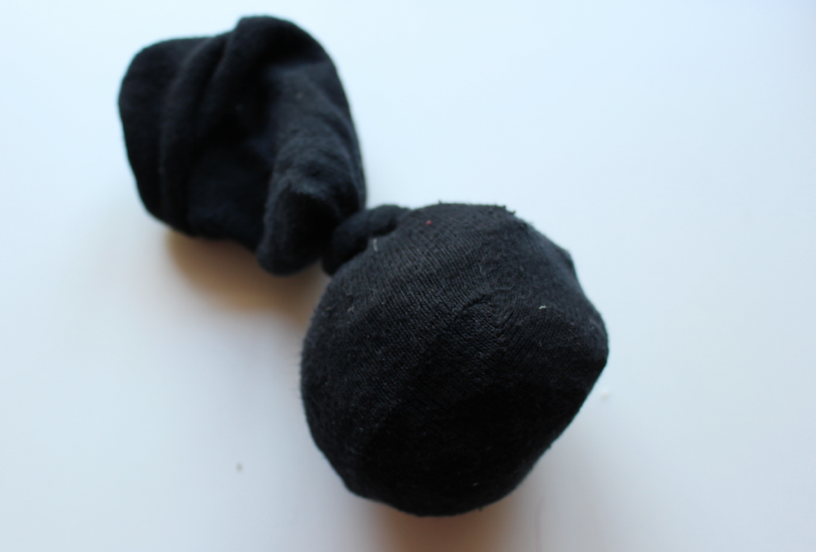
Step 6) Tie a knot in the end of where the stuffing finishes. Cup your hands around it and try your best to squeeze the stuffing so it’s in as much as a sphere shape as possible. I then just folded over the ankle part of the sock a few times to tighten.
Step 7) Next prepare your ribbon. Cut two pieces to your desired length and set them aside for later.
Assembling the pom pom
Step 8) Now the preparation is done. You can start heating up your glue gun and getting everything laid out ready to begin assembling.
Step 9) Take your first circle and fold it in half. Place a small dot of glue in the middle and fold the circle into quarters.
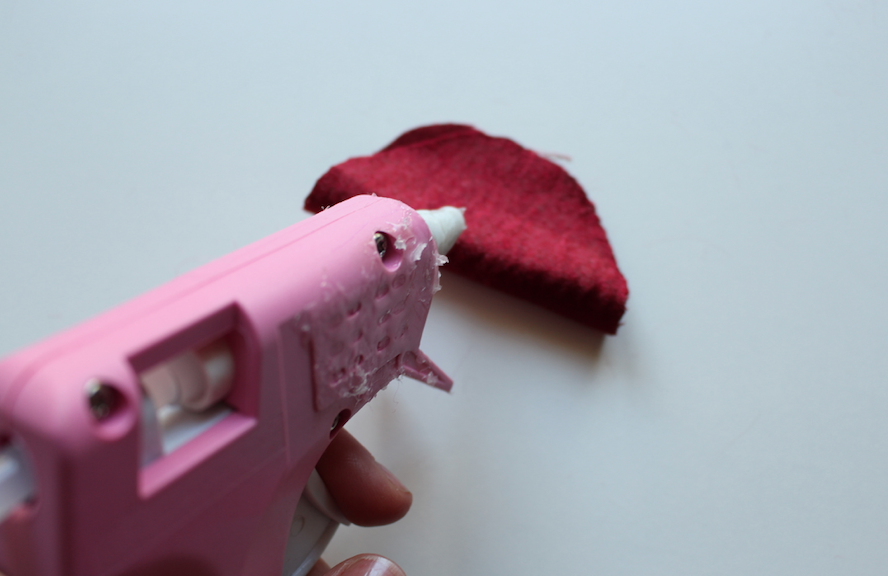
Step 10) Add another dot of glue on the corner edge.
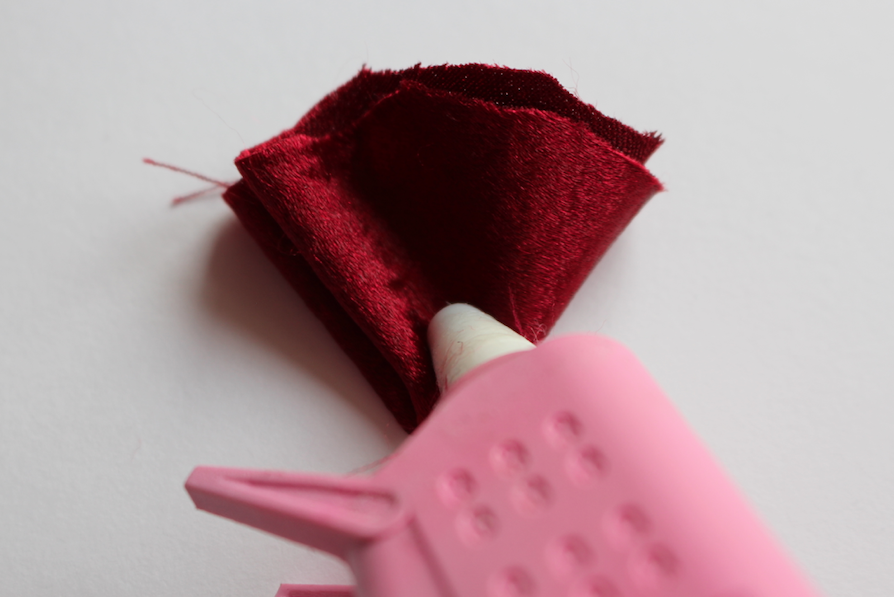
Step 11) Stick the glued corner of the circle down onto your base. (I started at the top rim of mine.) Press gently and hold in place for a few seconds before letting go.
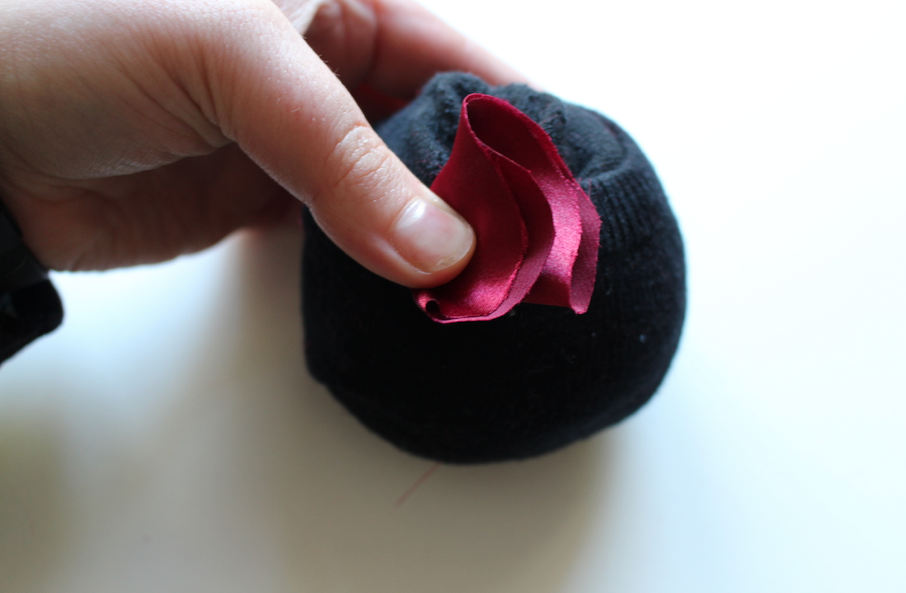
Step 12) It should roughly look like this with one circle on the base. It should spring up similarly to a flower petal.
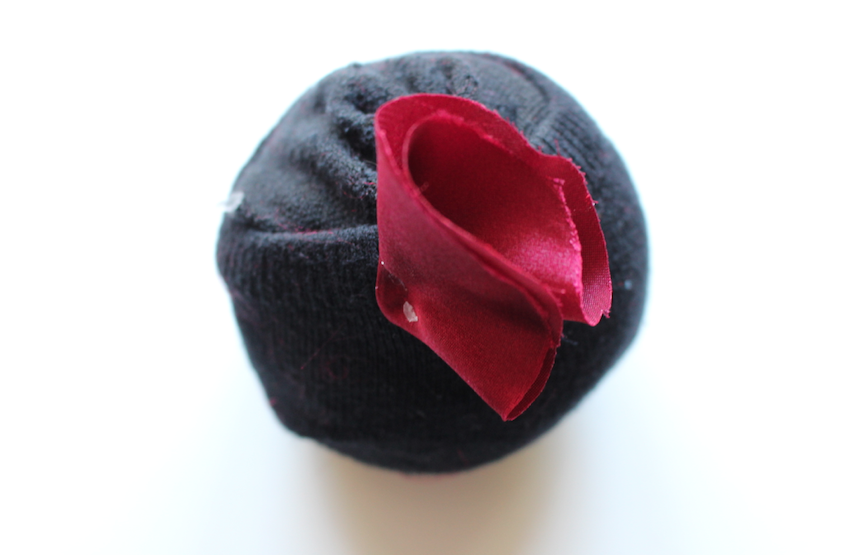
Step 13) Repeat this with the rest of your circles until half of your base is filled.
(The placement of the circles is completely a design choice. You can add more in different places as you go to create a bushier effect.)
Step 14) When you get to around half way covering your base, you can attach your ribbon. Flip over your ball so that the empty side is upwards. Place a small line of hot glue onto one side of your ribbon and press it down in the centre on one side.

Step 15) Repeat with the other side, gently holding for a few seconds for the glue to dry. Once this is done you can begin covering the bottom part of the ribbon with circles to secure it down further.
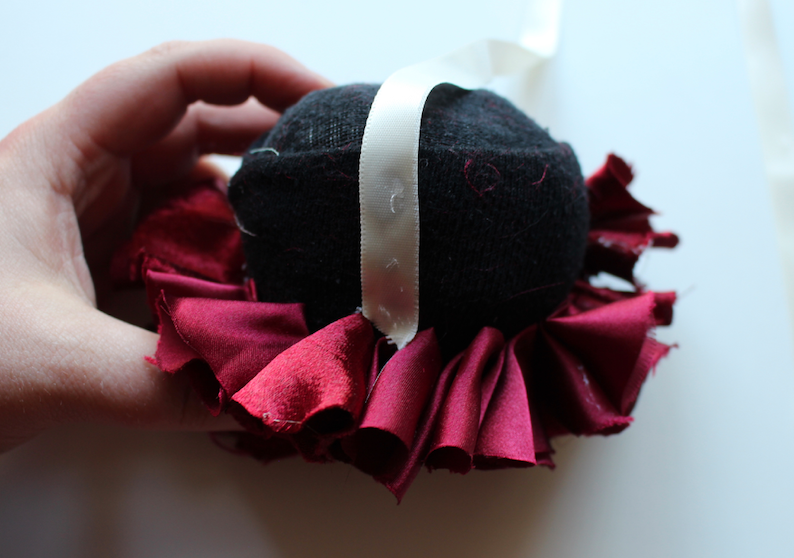
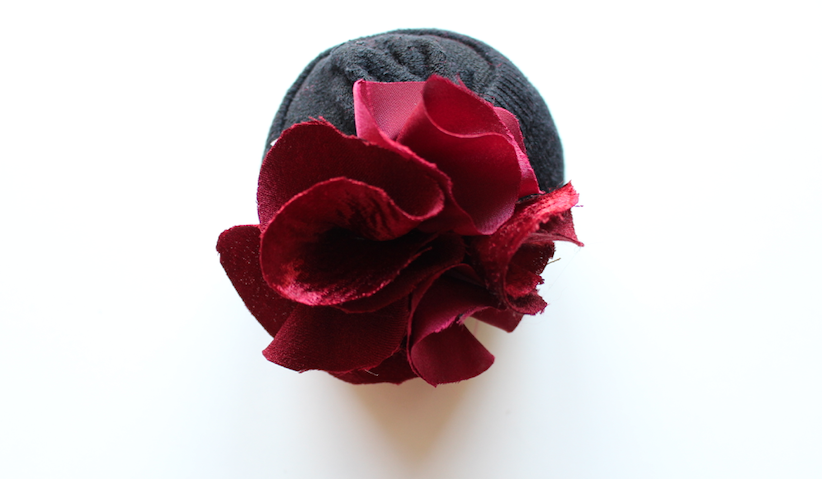
Step 16) Proceed to finish covering the entirety of your base with your fabric circles.
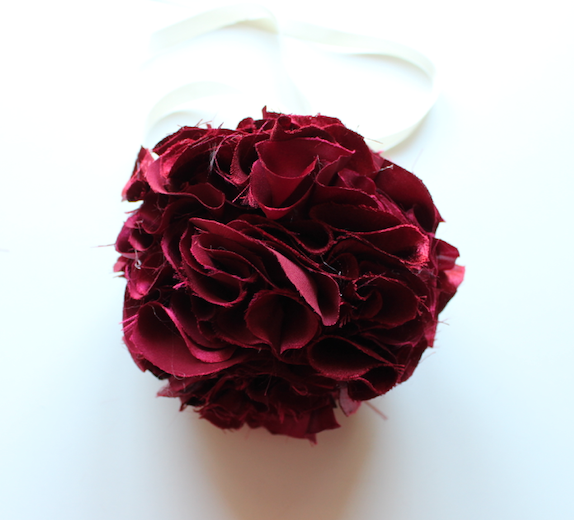
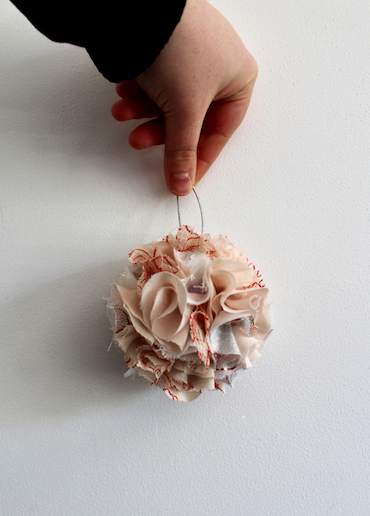
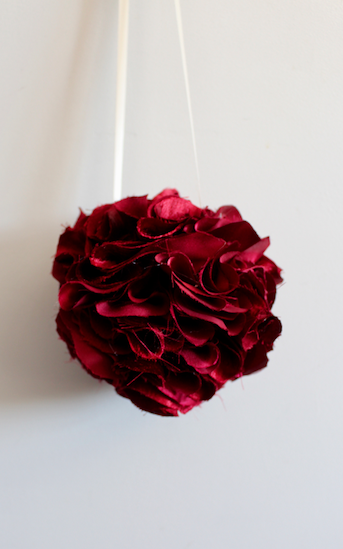
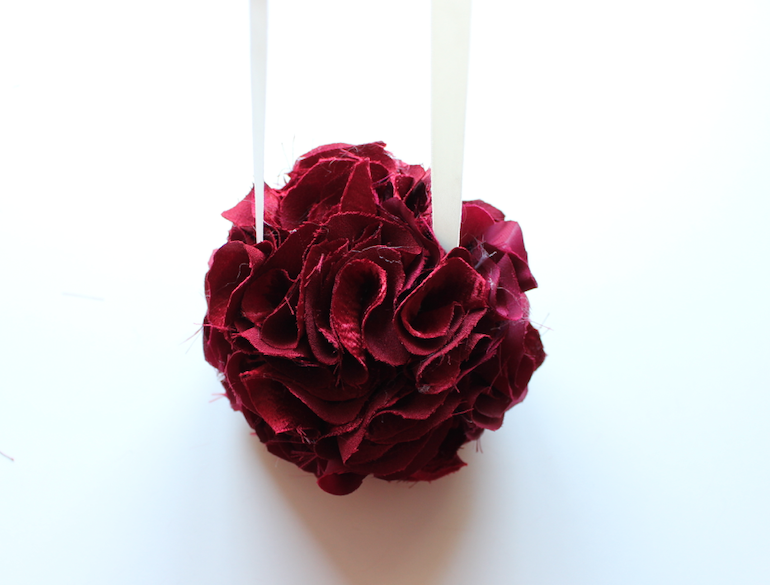
And voila! 🙂
You have your very own finished DIY party pom pom.
Note:
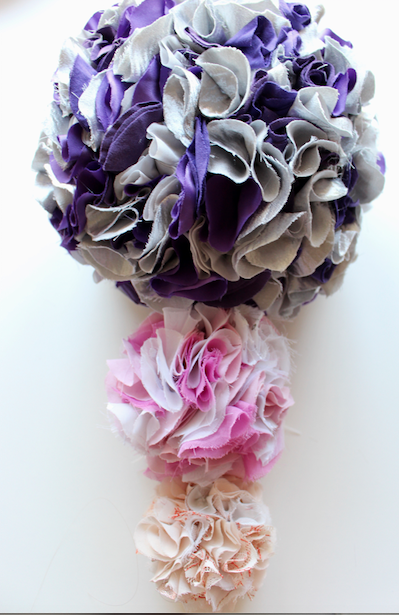
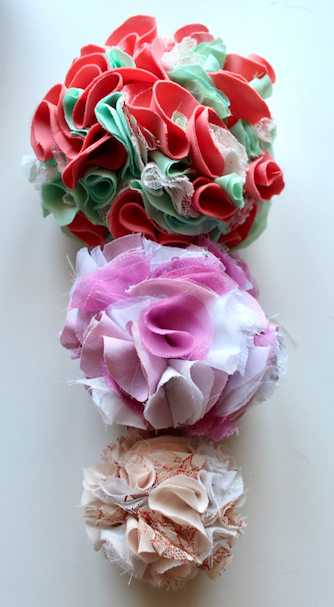
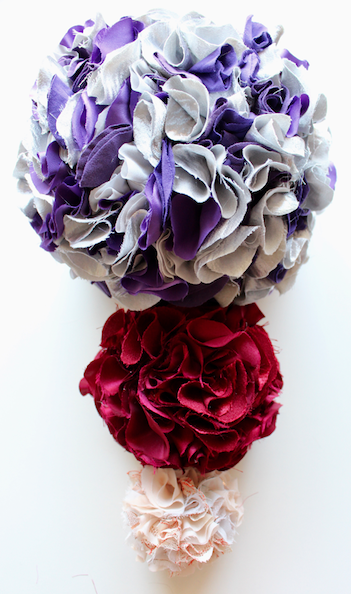
This DIY project is completely adaptable. Although we liked using the old socks as a base, as it was a good use of recycling, I tried out a few different bases, including Christmas baubles and Chinese lanterns. They all provided similar and attractive results.

I also tested out different sizes, which involved using various sized circles as well as different sized bases. This DIY project is definitely one to experiment with and cater to your taste. This is what I think makes it so fun because it really is about individual choice.
Thanks so much for reading. I hope you enjoyed this fun DIY party pom poms project and it left you inspired to have a go yourself!
If you liked this make and are looking for another fun DIY project. Check out our recent post about my rag rug laundry basket here.
As always, if you’d like to be kept informed then why not join our Rag Rug Community on Facebook, follow us on Instagram or join our fortnightly newsletter here.
OR CONNECT WITH US ON SOCIAL MEDIA AT:
Instagram: https://www.instagram.com/raggedlife/
Facebook: https://www.facebook.com/raggedliferagrugs/
Pinterest: https://www.pinterest.co.uk/raggedlife/
Twitter: https://twitter.com/raggedlife
As always, happy rag rugging!
Elspeth x
Brilliant Elspeth. I met you at Stitch Festival, in London, near Hackney end of February this year. I soooooooooo enjoyed my first experience of going to this sort of festival. I also took a coach trip to the event – first coach trip for many years, and managed not to feel ill, like I used to many moons ago. I remember how pleasant you were to me, and with others gathered around watching you demonstrate. It really encouraged me. I didn’t buy a kit at the time, as funds were not appropriate. I had a good look round about 4/5ths… Read more »