If you’re a subscriber to the Ragged Life Inspiration Newsletter then you’ve probably heard me rabbiting on about the September Sustainability Challenge that I’m taking part in in 2023. If you haven’t then you can read a bit more about it here. Long story short, me and four other full-time crafters are each making something from six balls of blanket yarn (offcuts from blanket and scarf production in the Yorkshire mills).
With this project, I chose to push myself outside my comfort zone and, rather than stick to my usual tried and tested forms of rag rugging, make a style of rag rug I’ve never tried before. Below is an update on how I’m getting on with my first ever braid-in rag rug…
What you need to make a braid-in rag rug:
Braid-in rag rugs are one of the most accessible forms of rag rug to make. They’re easy and repetitive to make and you need next to no specialist equipment to give them a go. At it’s most basic level, here’s what you need:
Fabric:
This could be any old clothing or textiles, cut into strips. You generally work with eight strips of fabric at once, which is what allows you to create different patterns. These fabric strips should be around 4cm in width for a medium-weight fabric, but as with many rag rug techniques, you cut thicker fabrics narrower and thinner fabrics wider to balance different weights. As well as the width being important, your fabric strips should also be max two metres in length, as any longer and it becomes tricky to pull tails through your work.
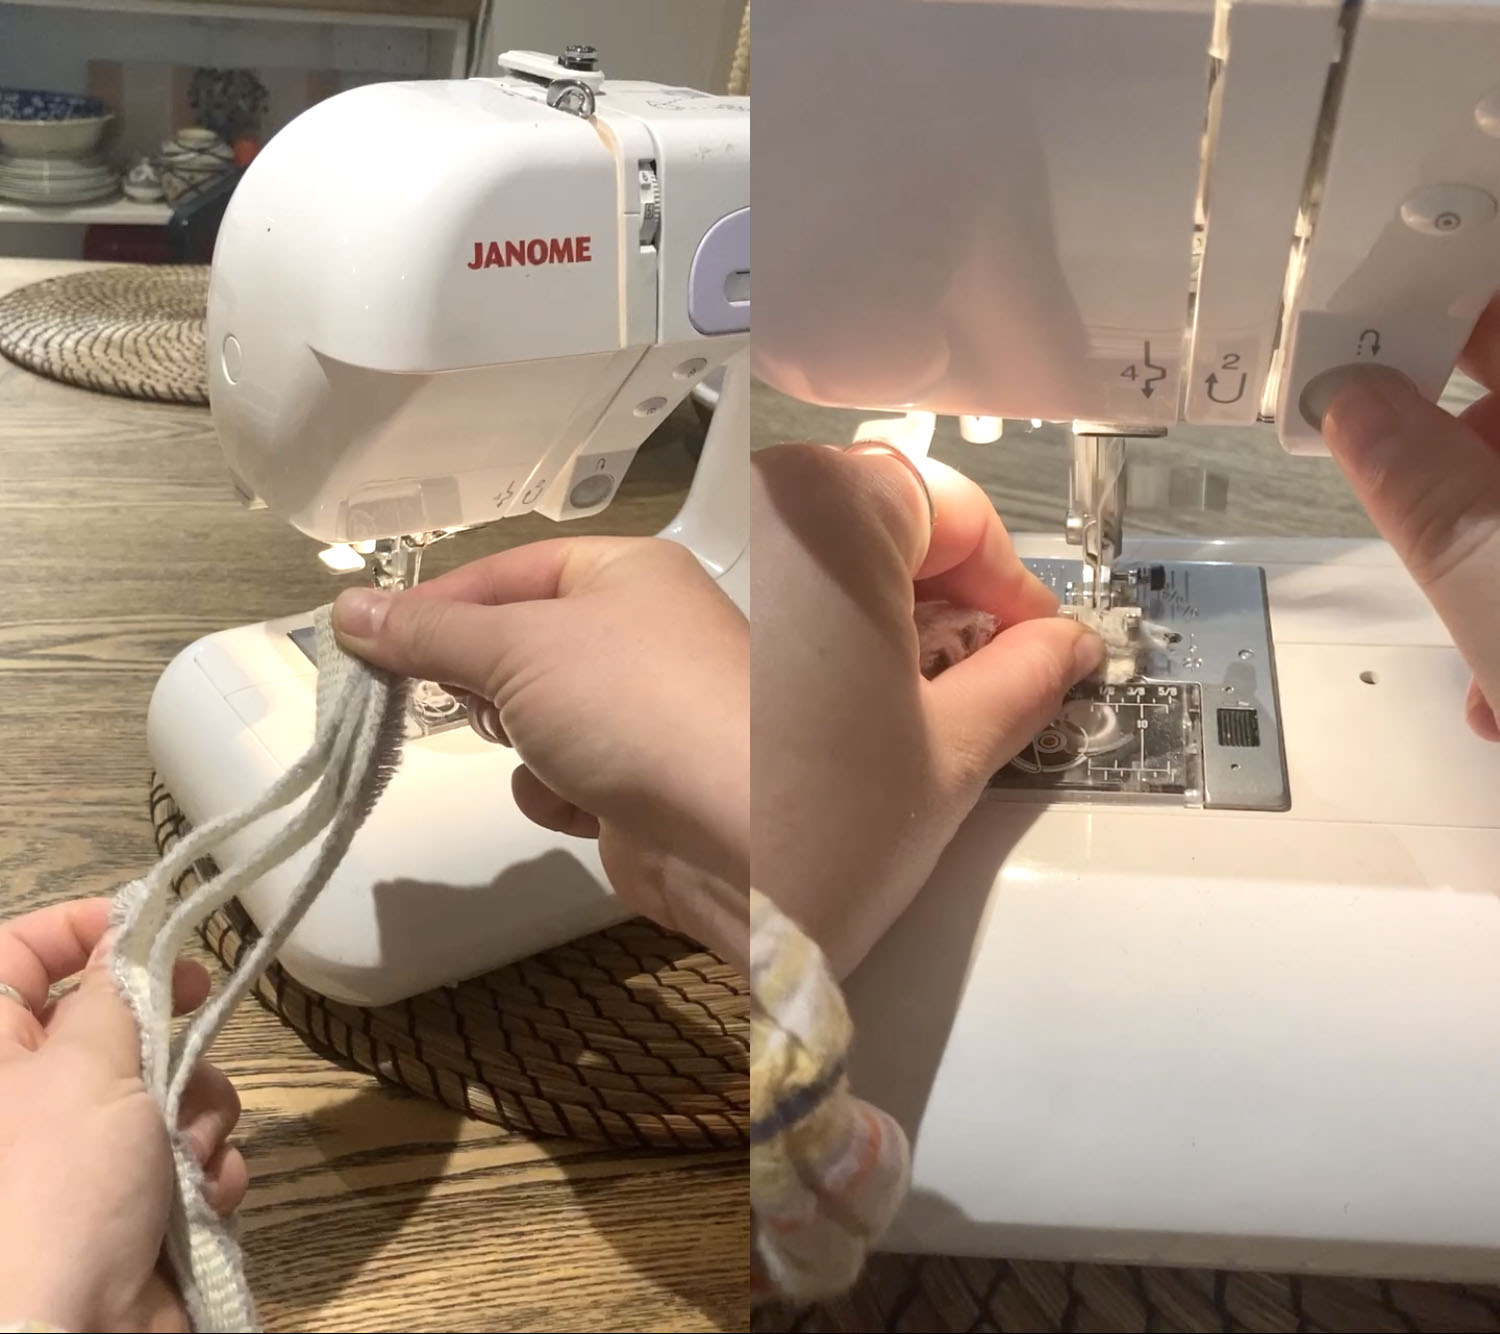
As you build up your rug, you must be able to join the ends of fabric strips together as your fabric strips get shorter. This can be done using a bias join on the sewing machine (my lazy, preferred method), by hand sewing using the “enclosed join” method or using a no-sew “buttonhole join”. All methods work equally well, but the buttonhole join generally works much better with fabrics that aren’t super thick.
Blanket yarn works brilliantly for braid-in rugs as it comes pre-cut into long strips that are the perfect width and thickness to create a cushy rug. I was particularly grateful to use it for my first project as it saved me so much time cutting. Time I could then spending making!
NB: as a beginner, I would steer clear of stretchy fabrics for a first project as I’d imagine it’s easy to weave too tight, stretch the fabric and create a rug that curls and doesn’t lie flat.
Safety pins (optional)
Safety pins are extremely useful as stitch markers to show where you begin and finish a “round” of the rug. They can also be pinned through the ends of strips instead of needles to make passing through stitches easier.
Toothbrush Needles / Darning needles / Crochet hook (optional)
You will need to pass the tails of each of the eight strips through “stitches” from the previous round. If you weave quite loosely, this can be done with your fingers but if (like me) you weave tightly, this is made easier by threading up the end of each strip into a large-eyed needle. I like to use toothbrush rug needles as they are just the right size.
Where to start with your in braid-in rag rug design:
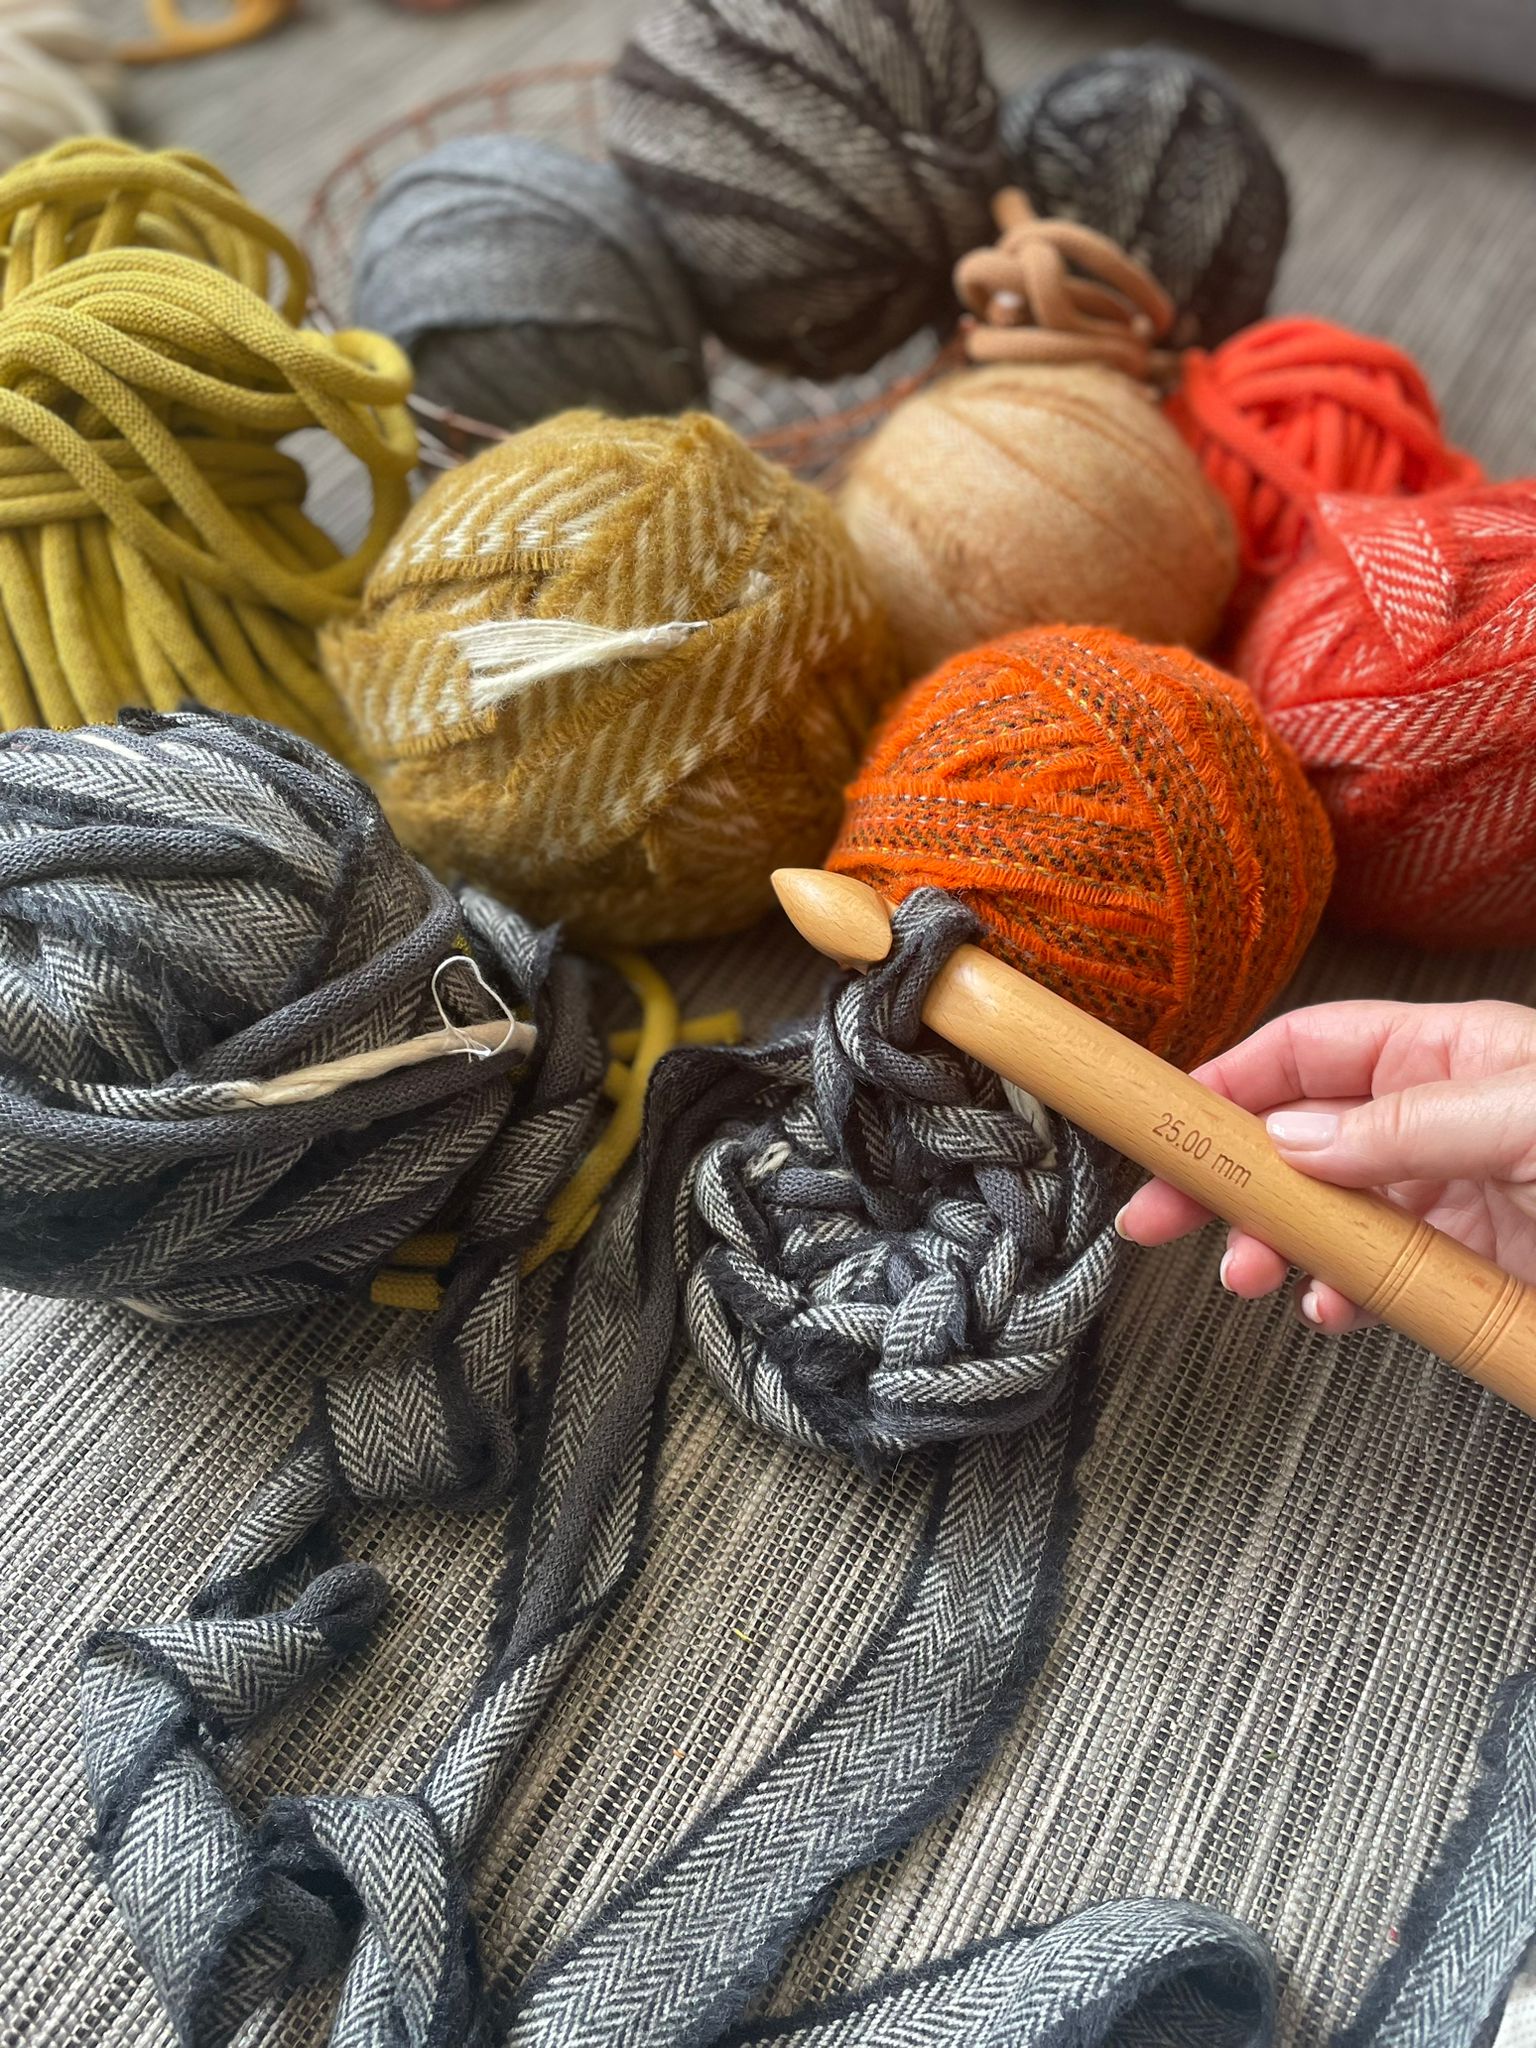
Generally, people make either oval or circular braid-in rag rugs. I wanted to make a circular rug for no reason in particular. Design-wise, I knew that I wanted a largely neutral base for the rug with an accent of green. I also chose one patterned blanket yarn as I was intrigued about how it would look. Here are the yarns I chose…

NB: I could have chosen eight yarns as I would be braiding with eight strips at once, but the challenge dictated I only use six balls, so that’s how many I chose.
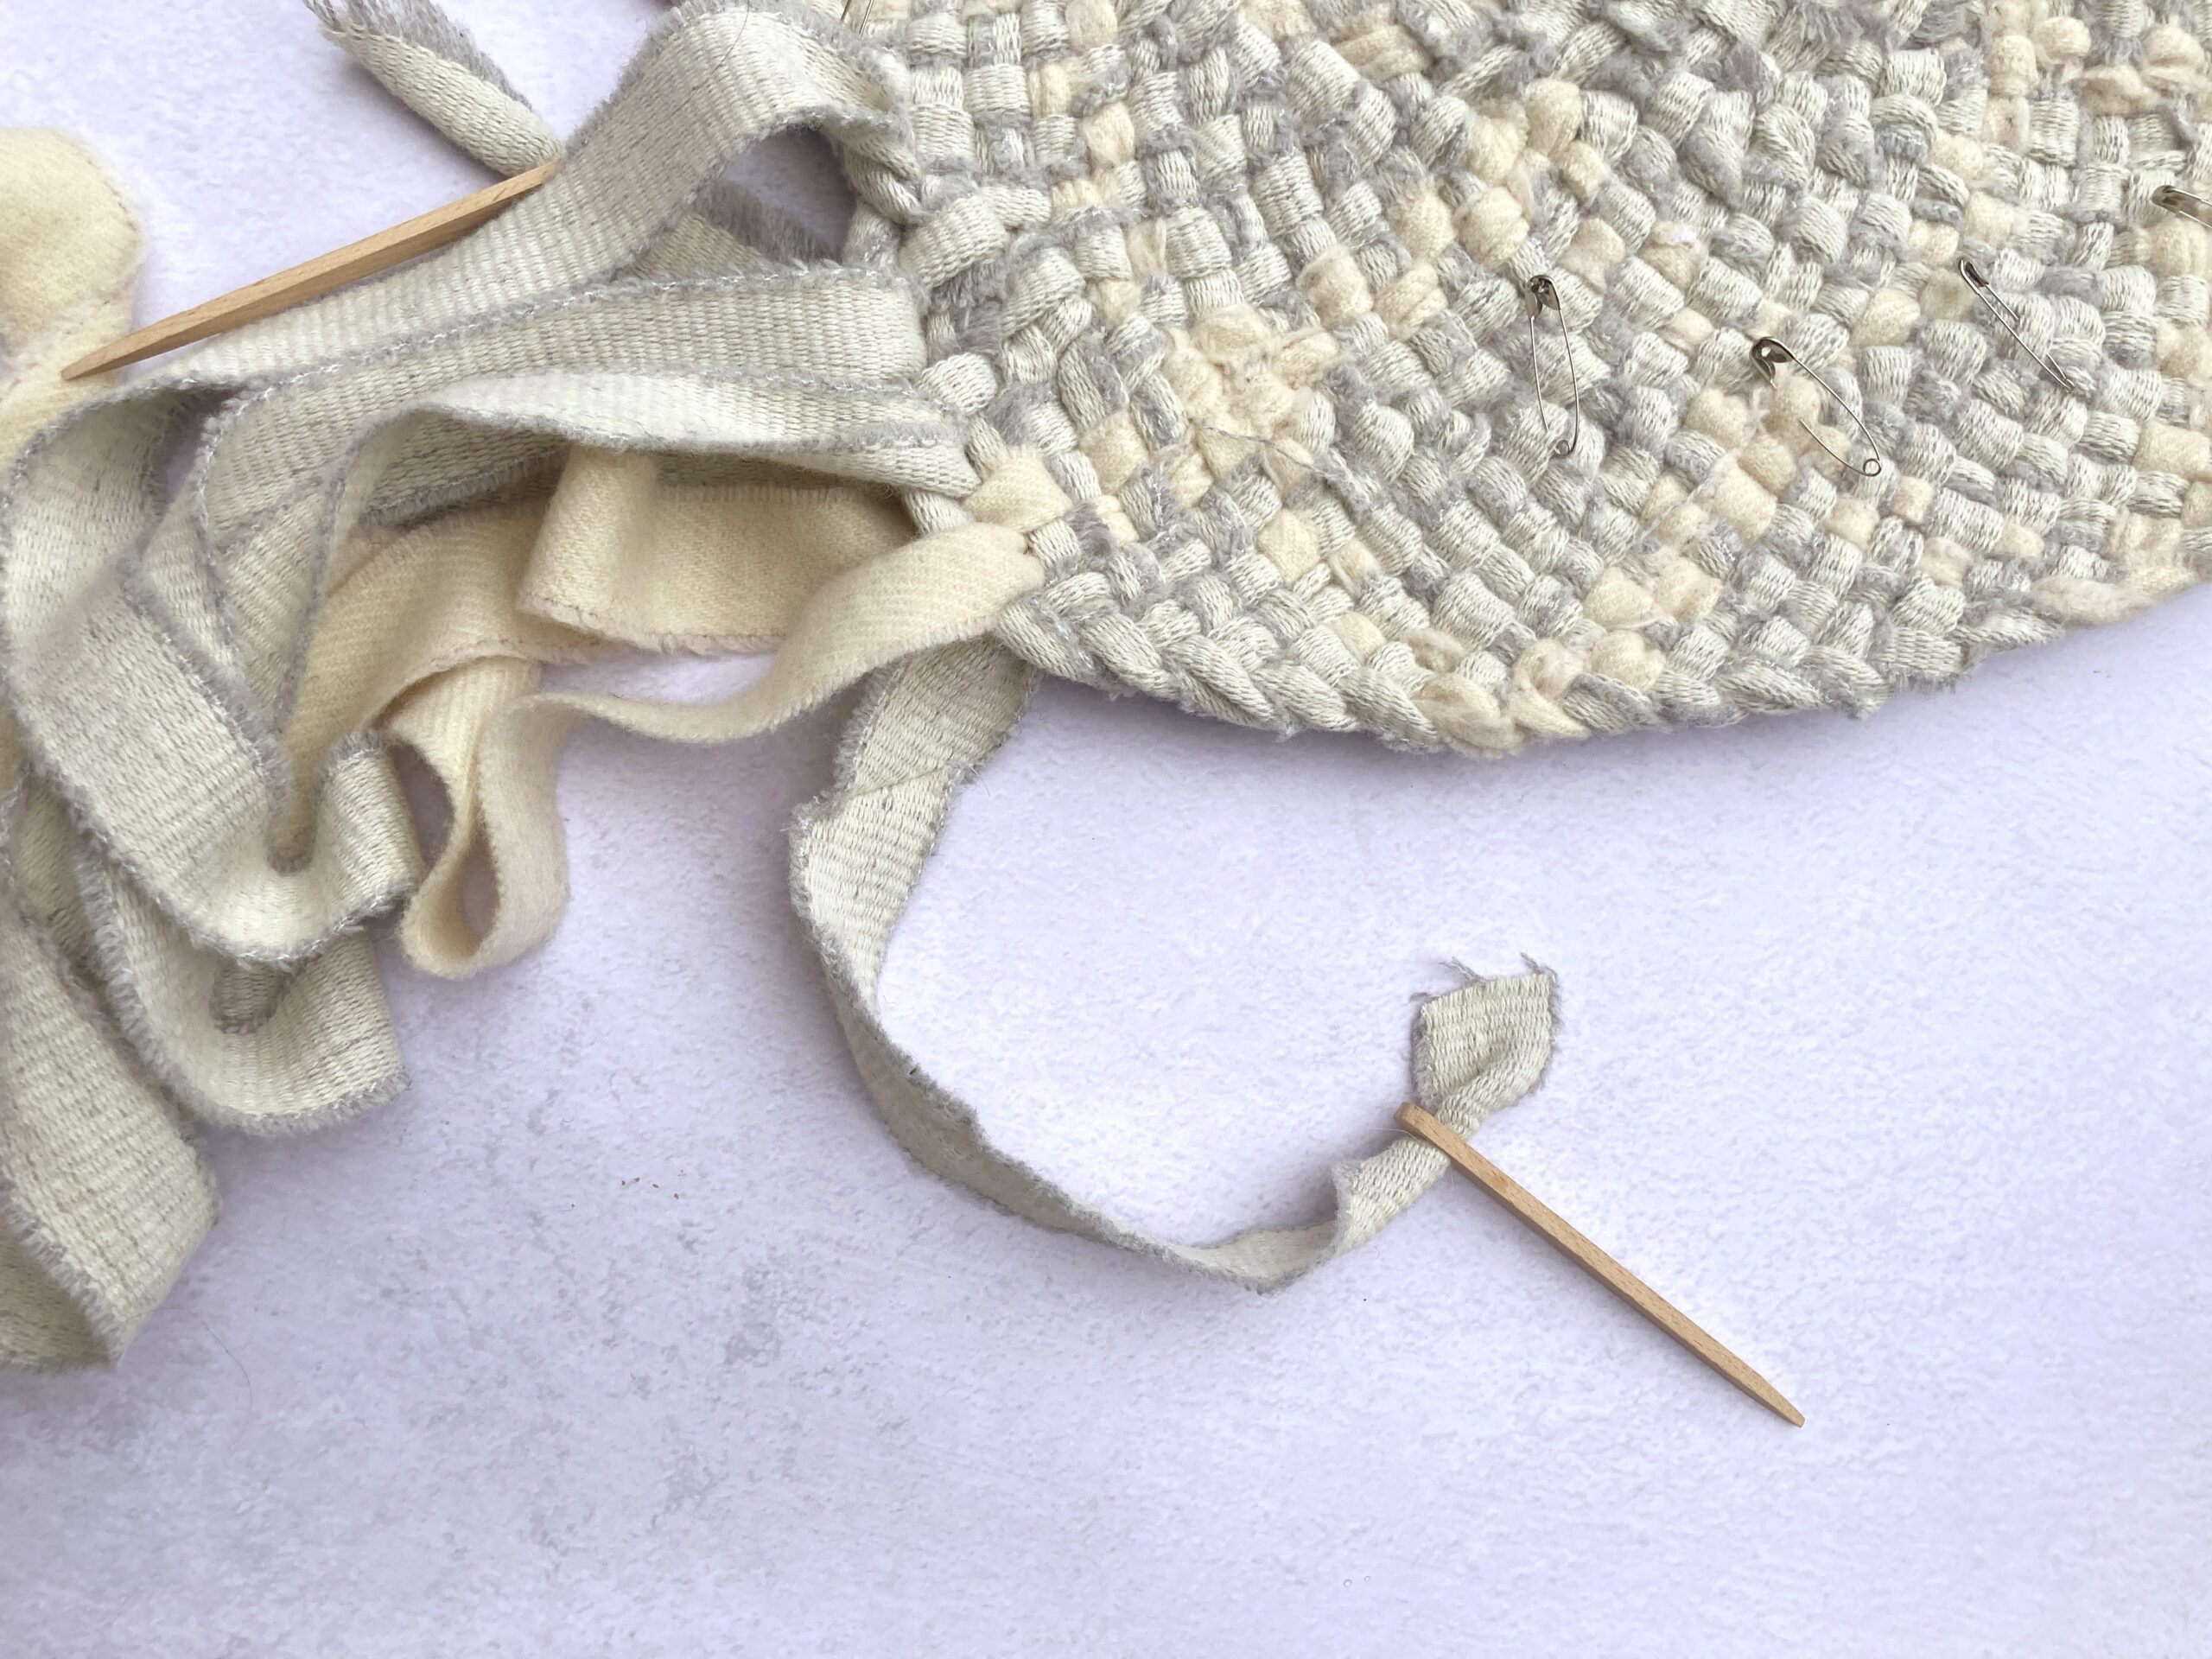
Logically, the beginning of any project is always the area where you’re most likely to make a mistake, so I decided that I would begin the centre of the braid-in rag rug all in the same colour. This meant that if anything went awry, it would be less obvious. At this stage, I had a vague plan to gradually add in the cream and green at some point to add a bit of contrast. However, as a newbie to the technique, I wasn’t exactly sure how far my fabric would go, so I wasn’t able to plan a design too prescriptively. Particularly as each round of a circular rug becomes bigger and therefore takes more fabric to reach the full circumference round. I chose the grey fringed white to begin the centre of my rug…
Beginning the braid-in rag rug:
The steps below are by no means a full how-to guide for this technique (whole books have been written on the subject), but they should give you an overall flavour of the process. If you’re interested in learning this technique, I’d highly recommend one of our Ragged Life workshops, which you can book onto here. Here’s an overview of how I got started:
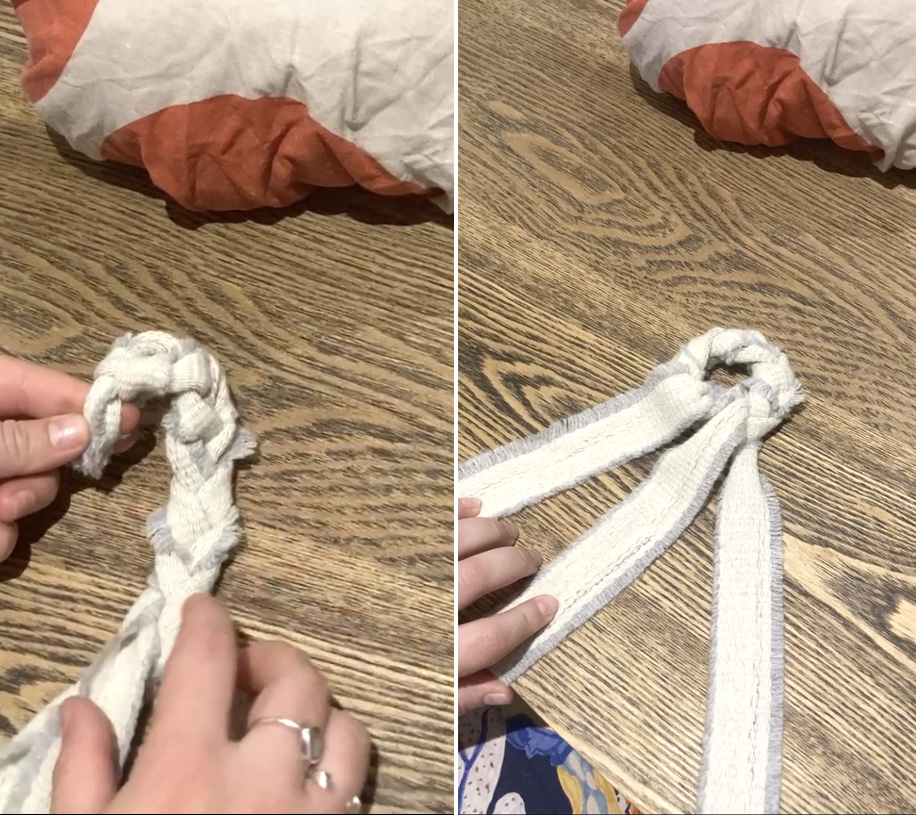
Step 1: Select three strips of fabric and align the tops together one on top of another. Fold the ends in half lengthways and stitch them together at the top by machine or by hand.
Step 2: Braid the three strips to create a braid (plait) with eight stitches. It’s easier to braid if you weigh the end of the strips down or pin them to something heavy (a fabric-covered rock in my case). Each of the eight stitches has been marked with a black dot in the image below so that they’re easier to identify.

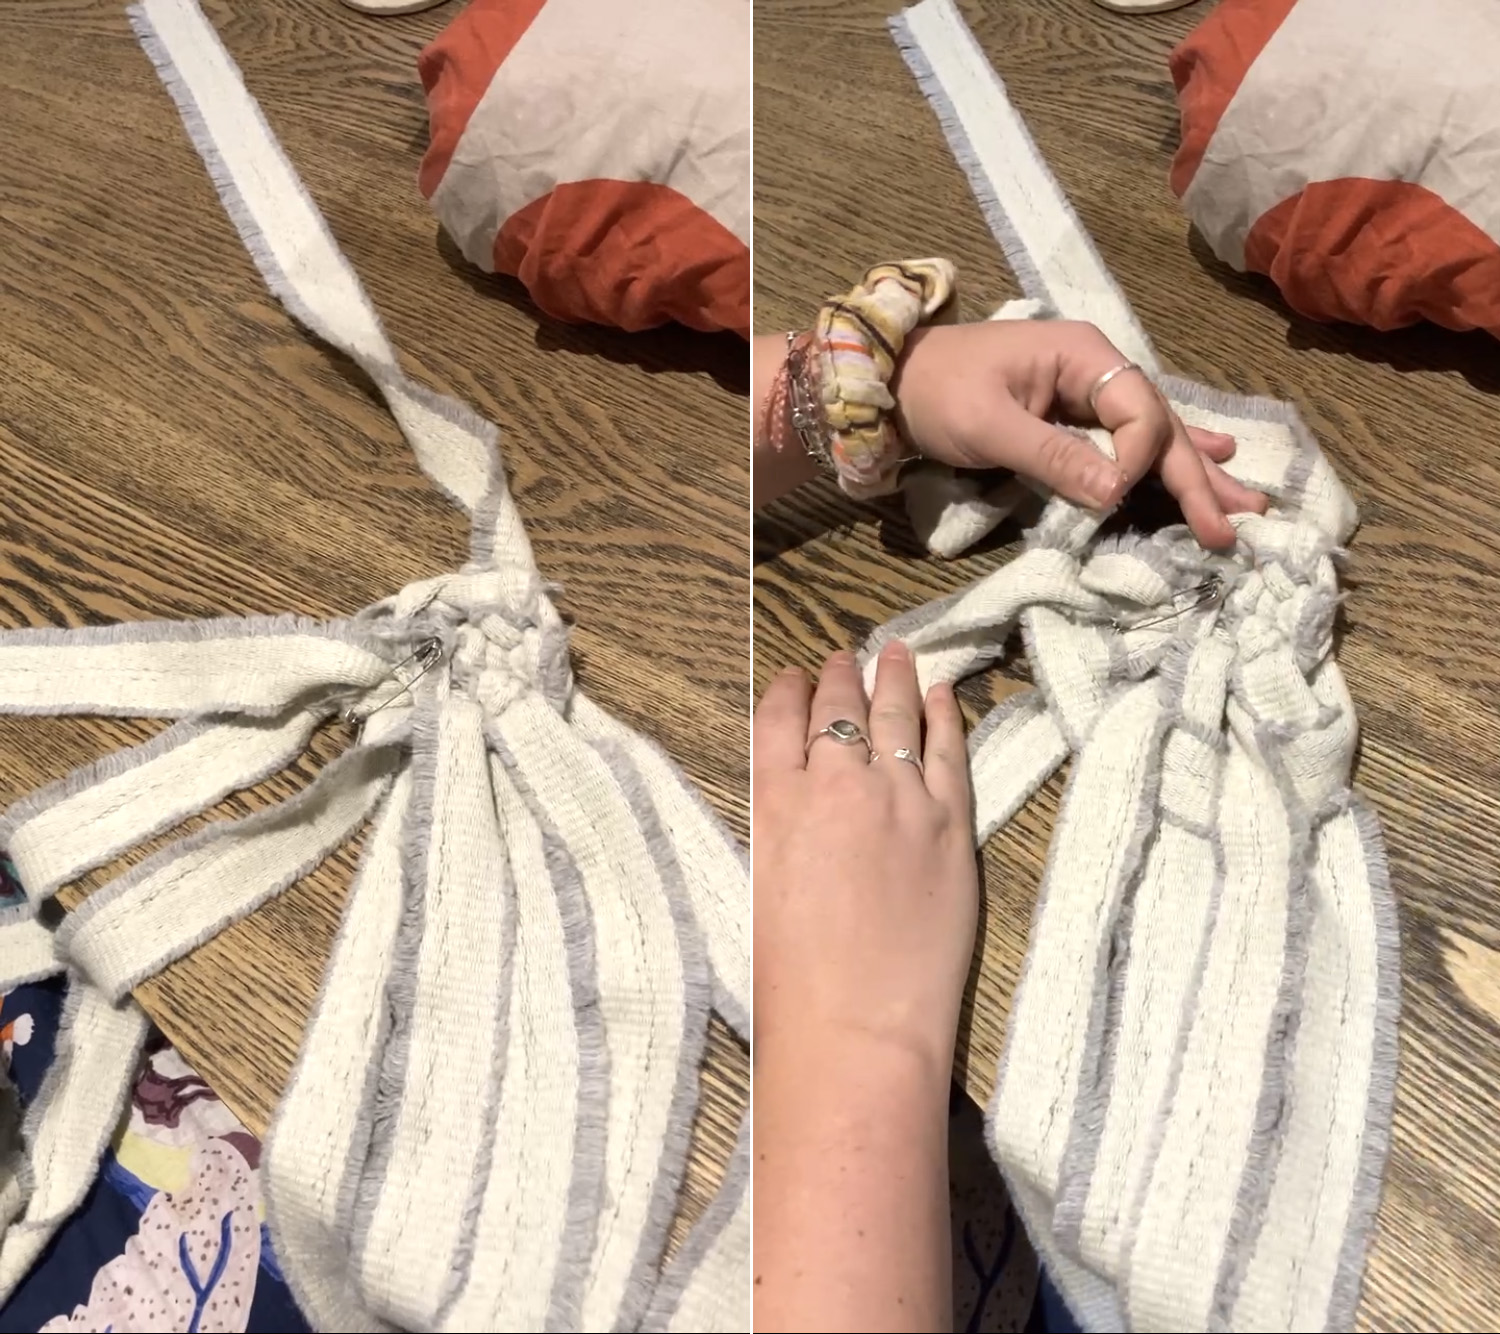
Step 3: Open up the “stitch” at the top left of the braid with your fingers and pull the tail from the bottom right of the braid up and through the “stitch”. This turns the braid into a circle with a hole in the centre. Flip the tails back towards your body so they lie flat on the table.
At this stage you only have three tails to work with, as opposed to eight. The next steps fix that issue.
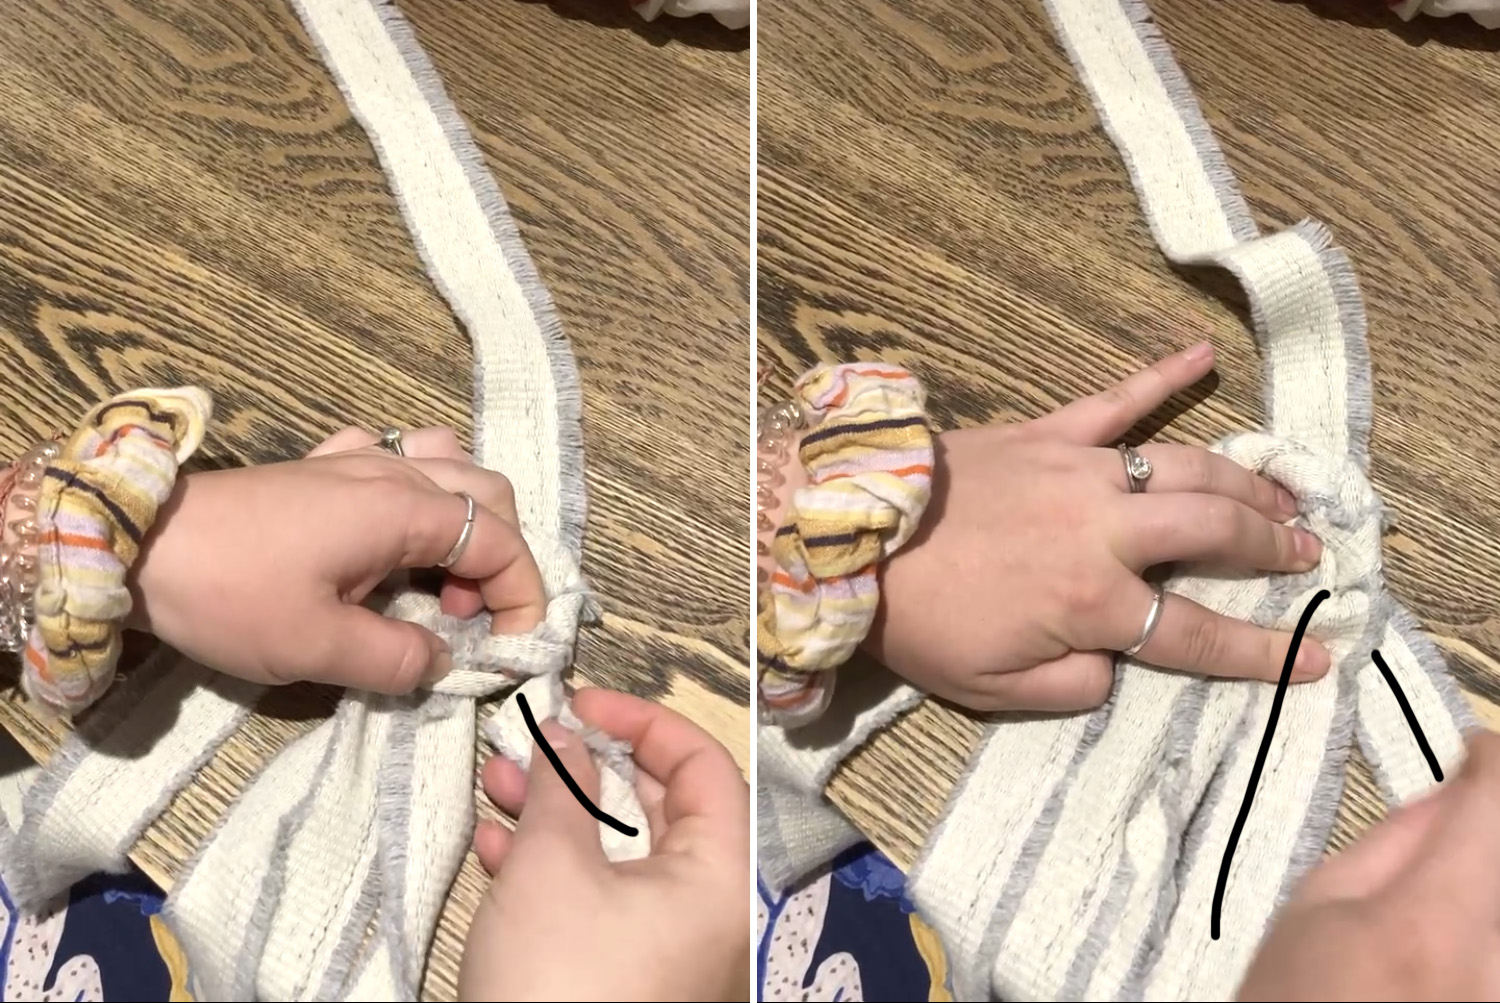
Step 4: Identify the “stitch” immediately to the right of the furthest right fabric tail on the outer edge of the circle. Open that stitch up with your fingers and pull a new fabric strip up and through. Pull a 30cm tail of fabric through the stitch. This 30cm tail will be used later to fill the hole in the centre of the rug, but for the time being, push it down into the central hole to the underside of the rug, out of the way. The black lines drawn on the images below show where the strip travels more clearly. The other end of the 30cm tail becomes your fourth strip to braid with.
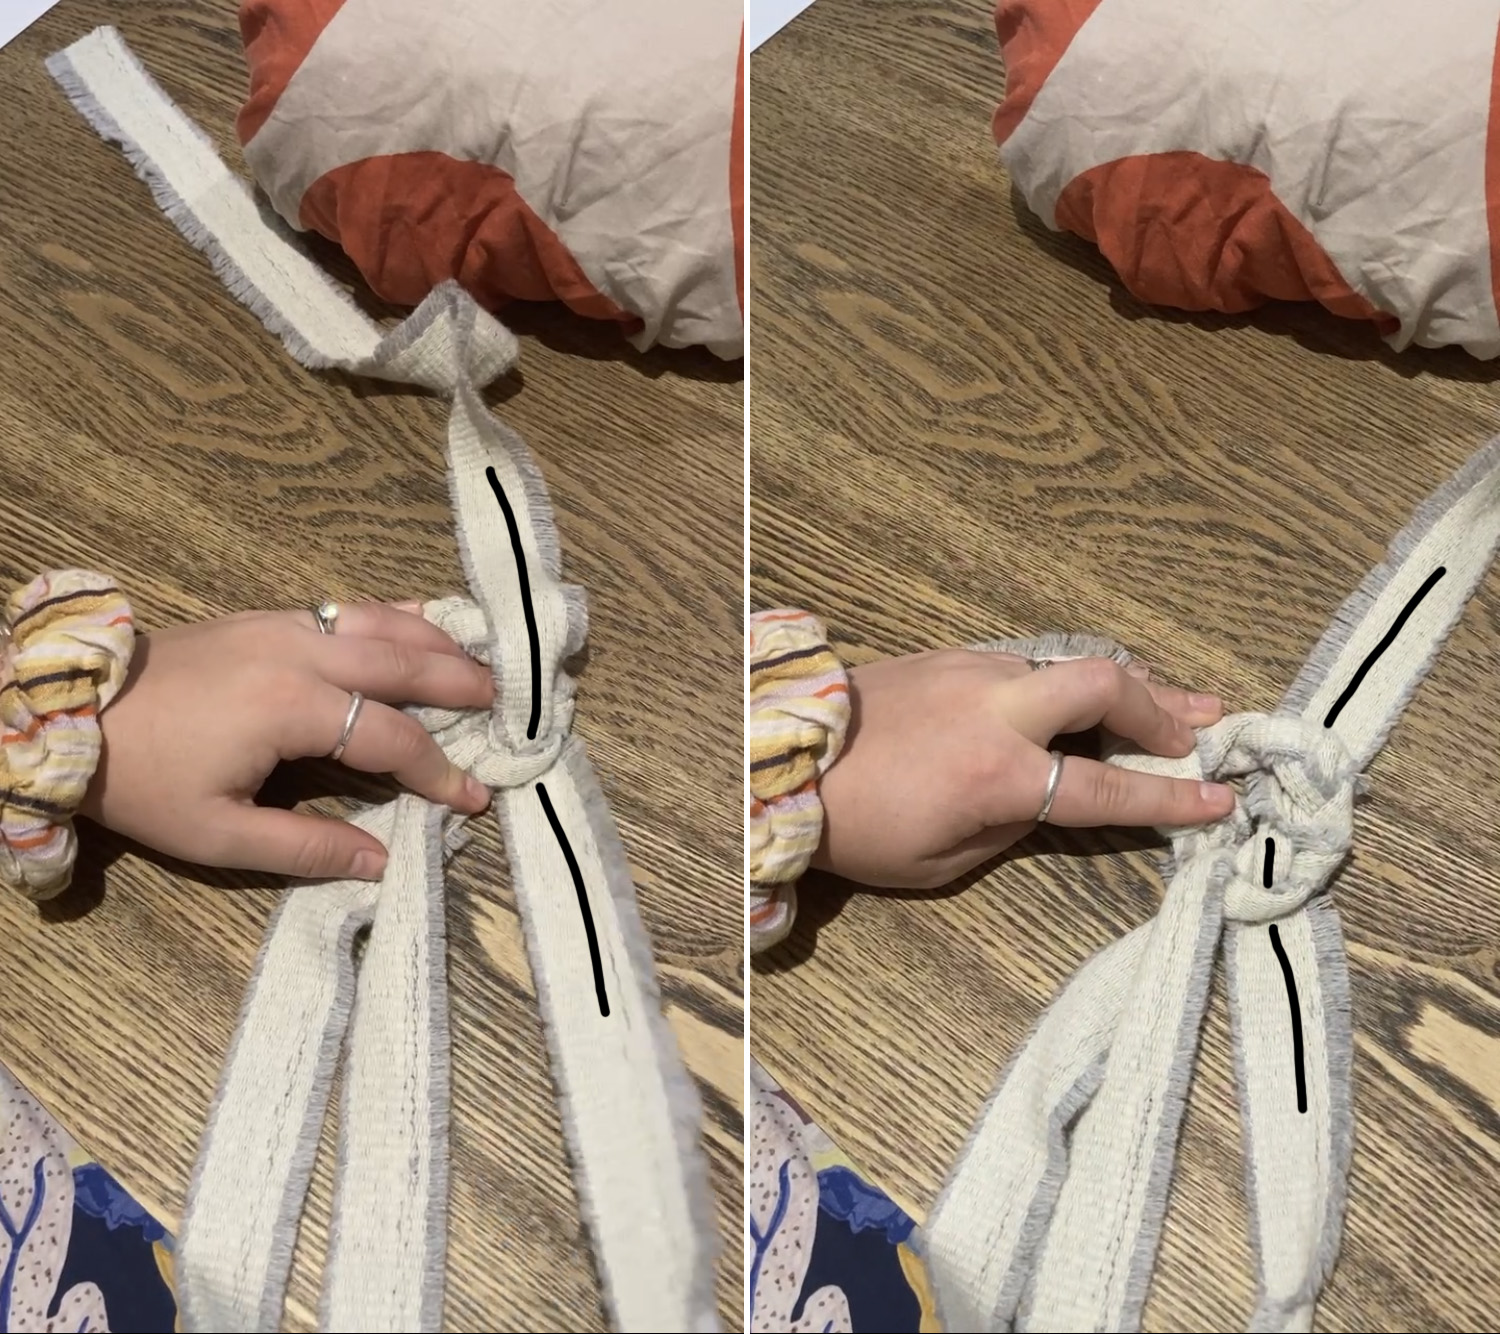
NB: Be careful in later steps not to confuse the 30cm tail with other fabric strips. I put a safety pin in it to differentiate it.
Step 5: Identify the “stitch” immediately to the right of the furthest right fabric tail (the one you just pulled through in step 4). Open that stitch up with your fingers and pull a totally new fabric strip up and through (black lines marked on images below). Fold the top half of the strip back and towards your body. One half of the strip becomes fabric strip number five and the other half becomes fabric strip number six. The fabric strip you just added would need to be two colours joined together if you wanted two different colour strips to work with here. The join of these two colours would need to sit inside the opened up stitch.
Step 6: Repeat step 5 to add another strip to the braid in the next stitch along, bringing the number of fabric tails up to eight in total. Lay out all the fabric strips flat on the table with the tails coming towards your body. Looking at the strips from right to left, the strips should alternate under, over, under, over, under, over, under, over. Under means the fabric strip comes from the underside of the braid, over means it comes from the topside of the braid.
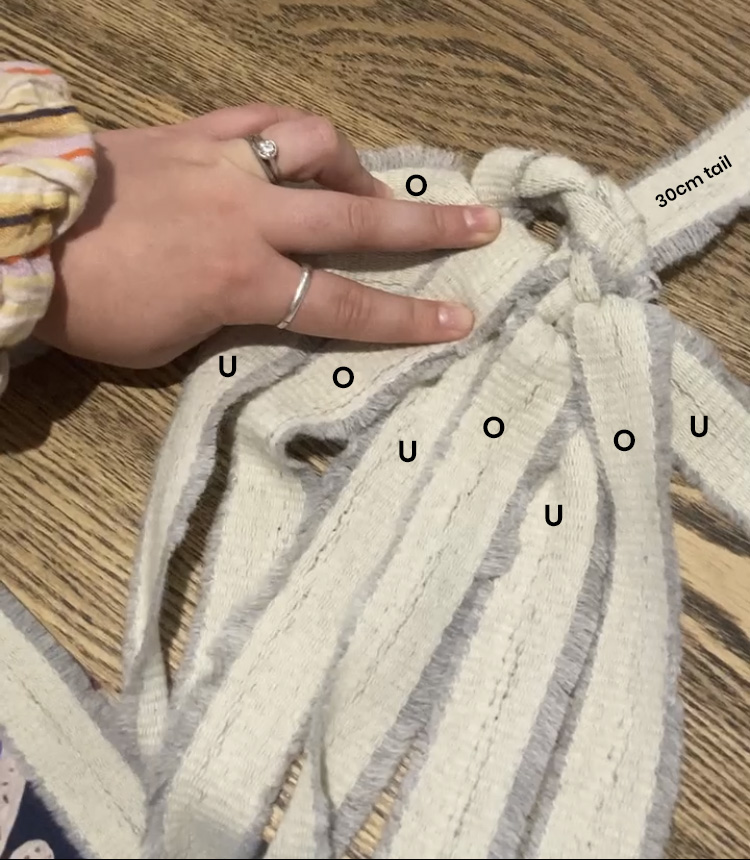
Step 7: Take the fabric tail that is furthest right and begin weaving it through the fabric tails from right to left – over, under, over, under, over, under, over.
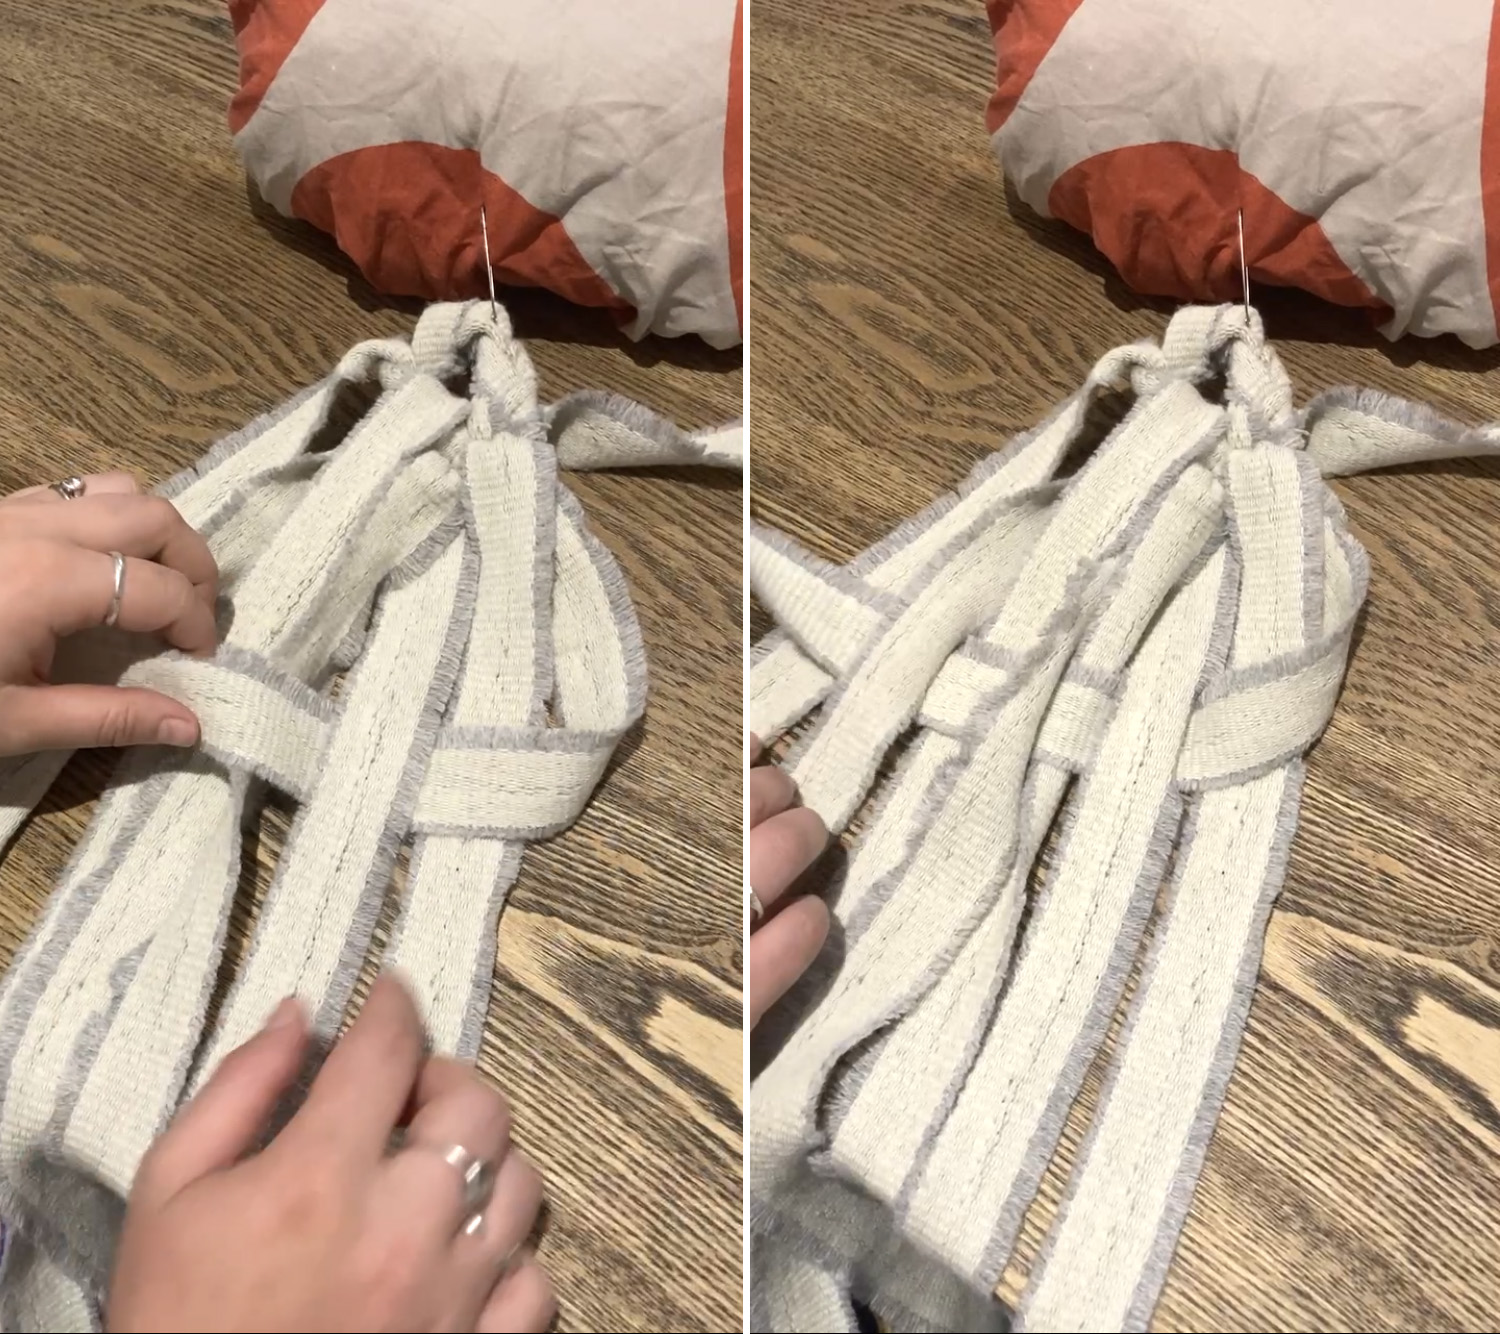
Step 8: Identify the stitch that the final tail you just passed over is in. Thread the woven tail up and through that stitch. Passing through the same stitch that already has fabric in is what we call an “increase” and helps to prevent the rug from curling. Once you’ve pulled any bagginess through the stitch, smooth the strip back towards your body so that it lies flat and in order with the other strips. How tight you pull the strip through that final stitch affects your tension and how the stitches of the rug lie. Do it too tightly and your rug will curl. Mark this first stitch with a safety pin, so that you remember where you began this round. Your first strip has now become your last strip.
Step 9: Take the fabric tail that is furthest right and begin weaving it through the fabric tails from right to left – over, under, over, under, over, under, over. Pull it up and through the next stitch along from where you pulled your last tail through in step 8.
NB: It may help to thread your fabric tails onto needles at this stage to make them easier to pass through the stitches.
Step 10: Take the fabric tail that is furthest right and begin weaving it through the fabric tails from right to left – over, under, over, under, over, under, over. Pull it up and through the same stitch you pulled your last tail through in step 9.
Step 11: Repeat steps 9-10 until your braiding has reached all the way around the braided circle, back to near the first stitch you safety pinned in step 8. You should have pulled two fabric strips through each “stitch” to complete a round of increases.
Continue building up rounds of the braid-in rug. For each round of the rug that you do, the frequency of the increases decreases. e.g. for round 2 of the rug, only increase in every other stitch. For round 3, increase in every third stitch etc…
Building the design as I went along…
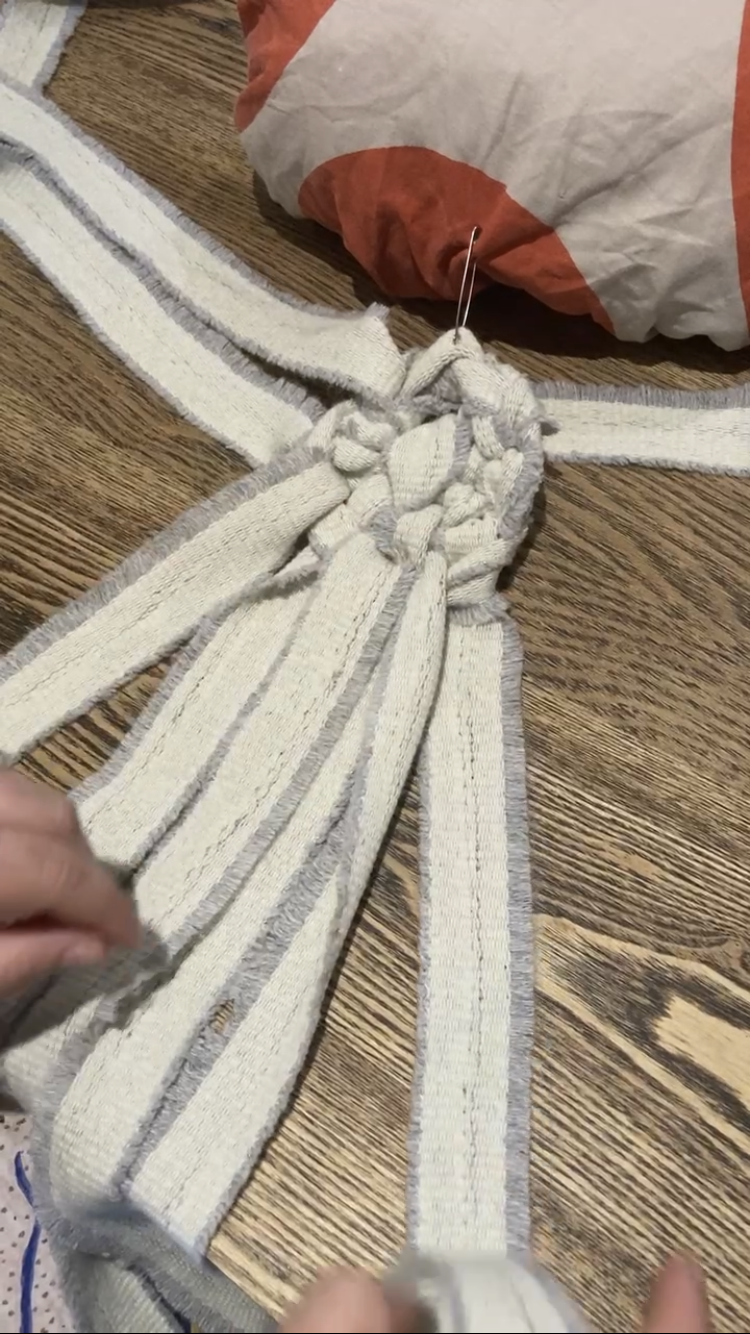
Any time I was running out of a fabric strip, I joined a new one to the end. After a complete first round, I realised that I was really working my way through my grey strips, so I decided to phase in some cream to warm things up a bit. It’s hard to see at this stage, but adding in a new colour creates zig zags of colour through the rounds. The more strips of a similar colour are next to each other, the more the pattern shows up. I changed two neighbouring strips to cream to see what happened. As you can see, it doesn’t show up hugely, but did add a little more interest to the design. It made me excited to bring in the green!
Here’s how the braid-in rug was looking after a couple of rounds…
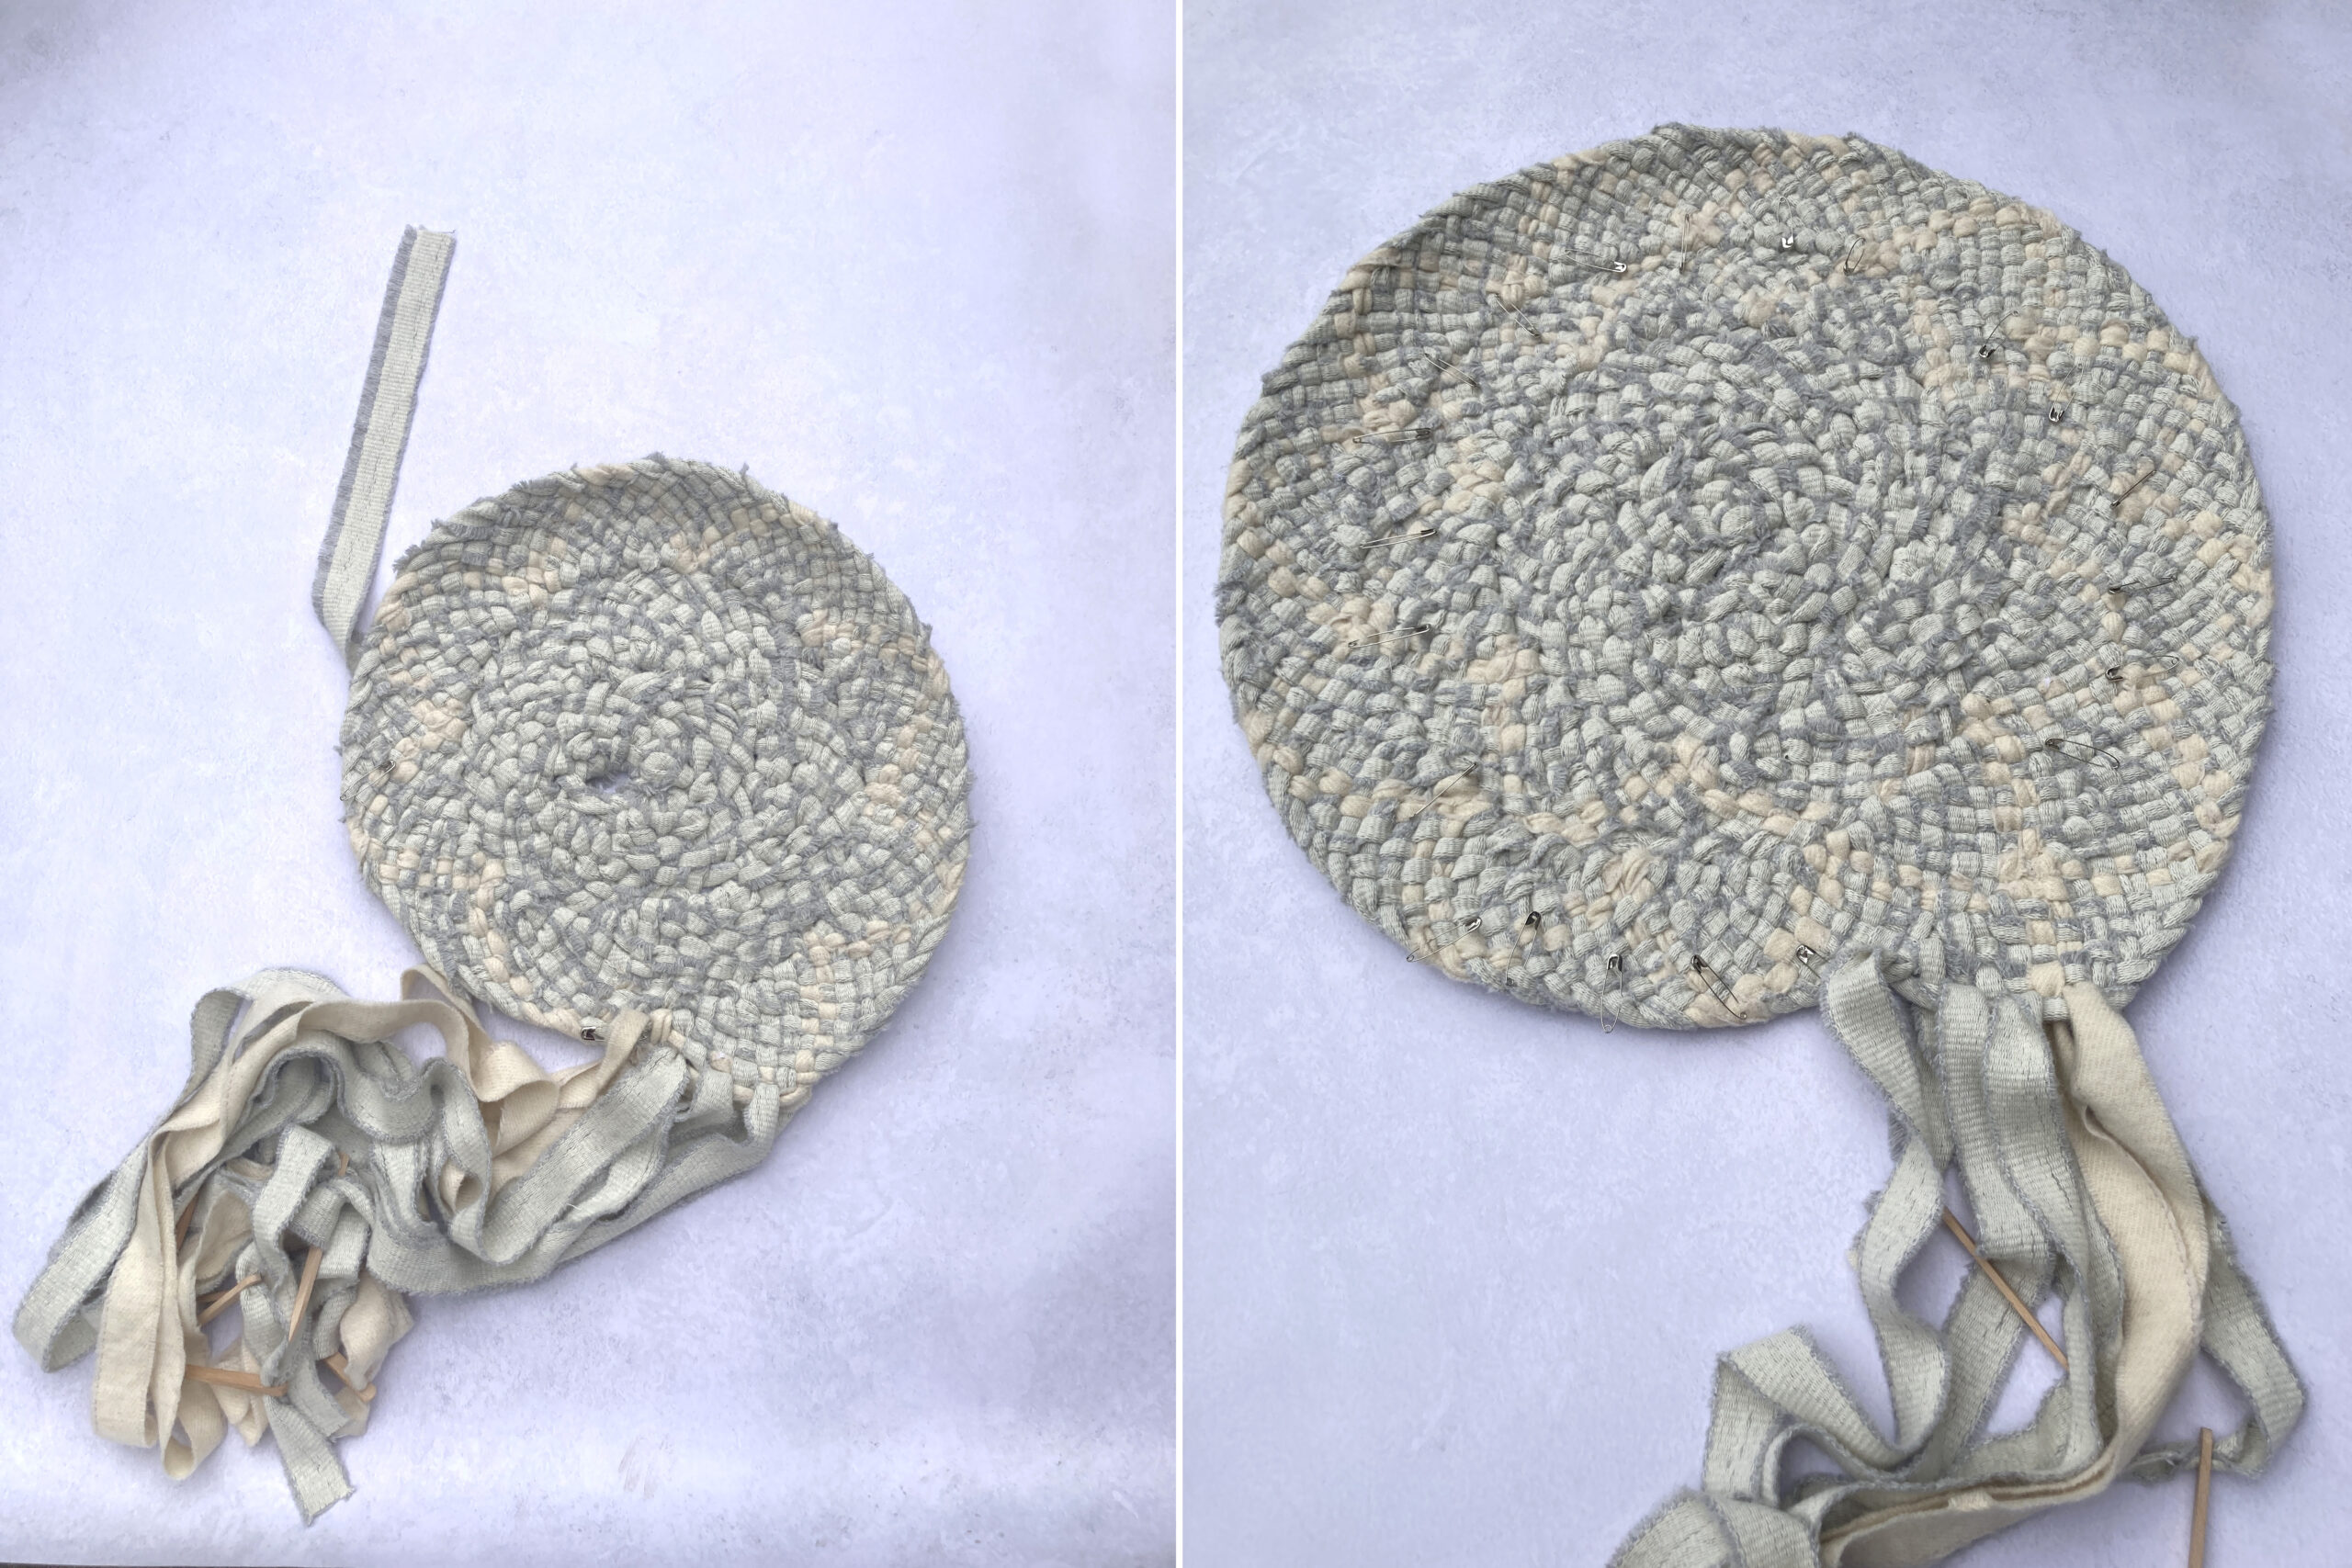
I felt like I started to get a real feel for things after a round or two and the stitches looked much neater than in the centre of the rug…
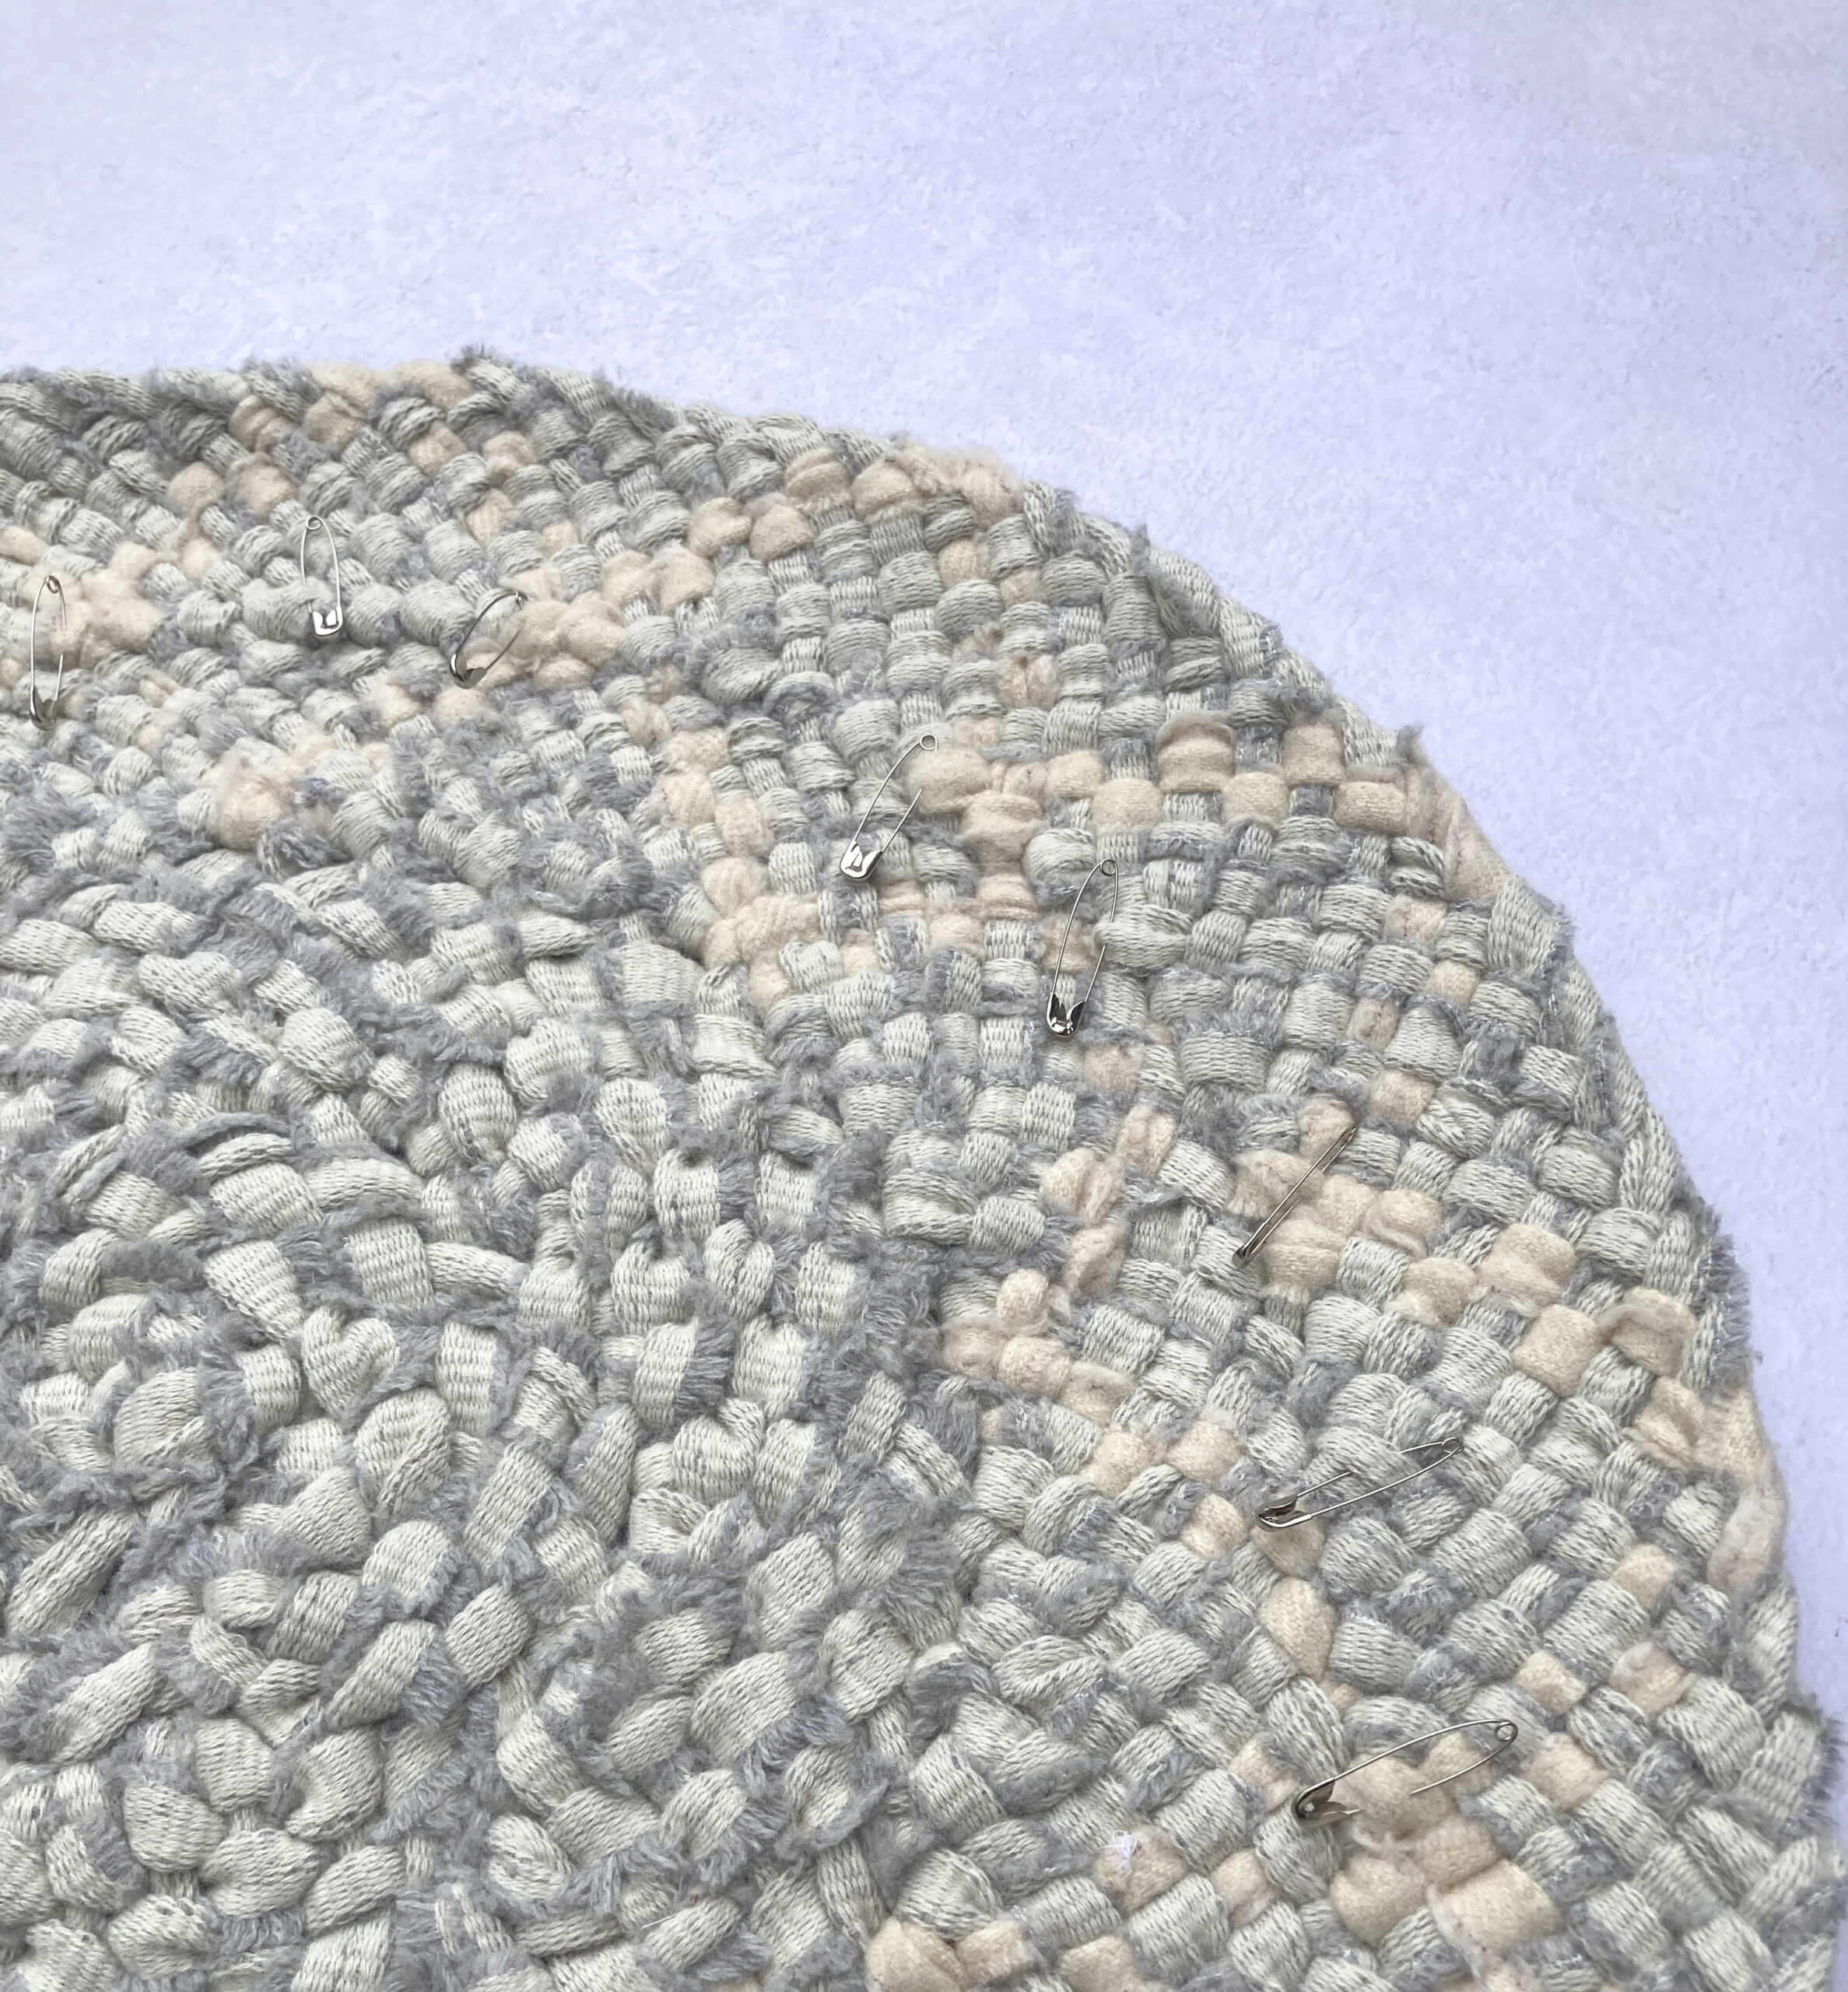
Braid-In Rag Rug – Stage 1 complete:
So that’s how I began my first braid-in rag rug, stay tuned for part 2 where I show the next steps and the final rug. And, just in case you’re intrigued, below is how the other full time crafters are coming along…
How the others are getting on…
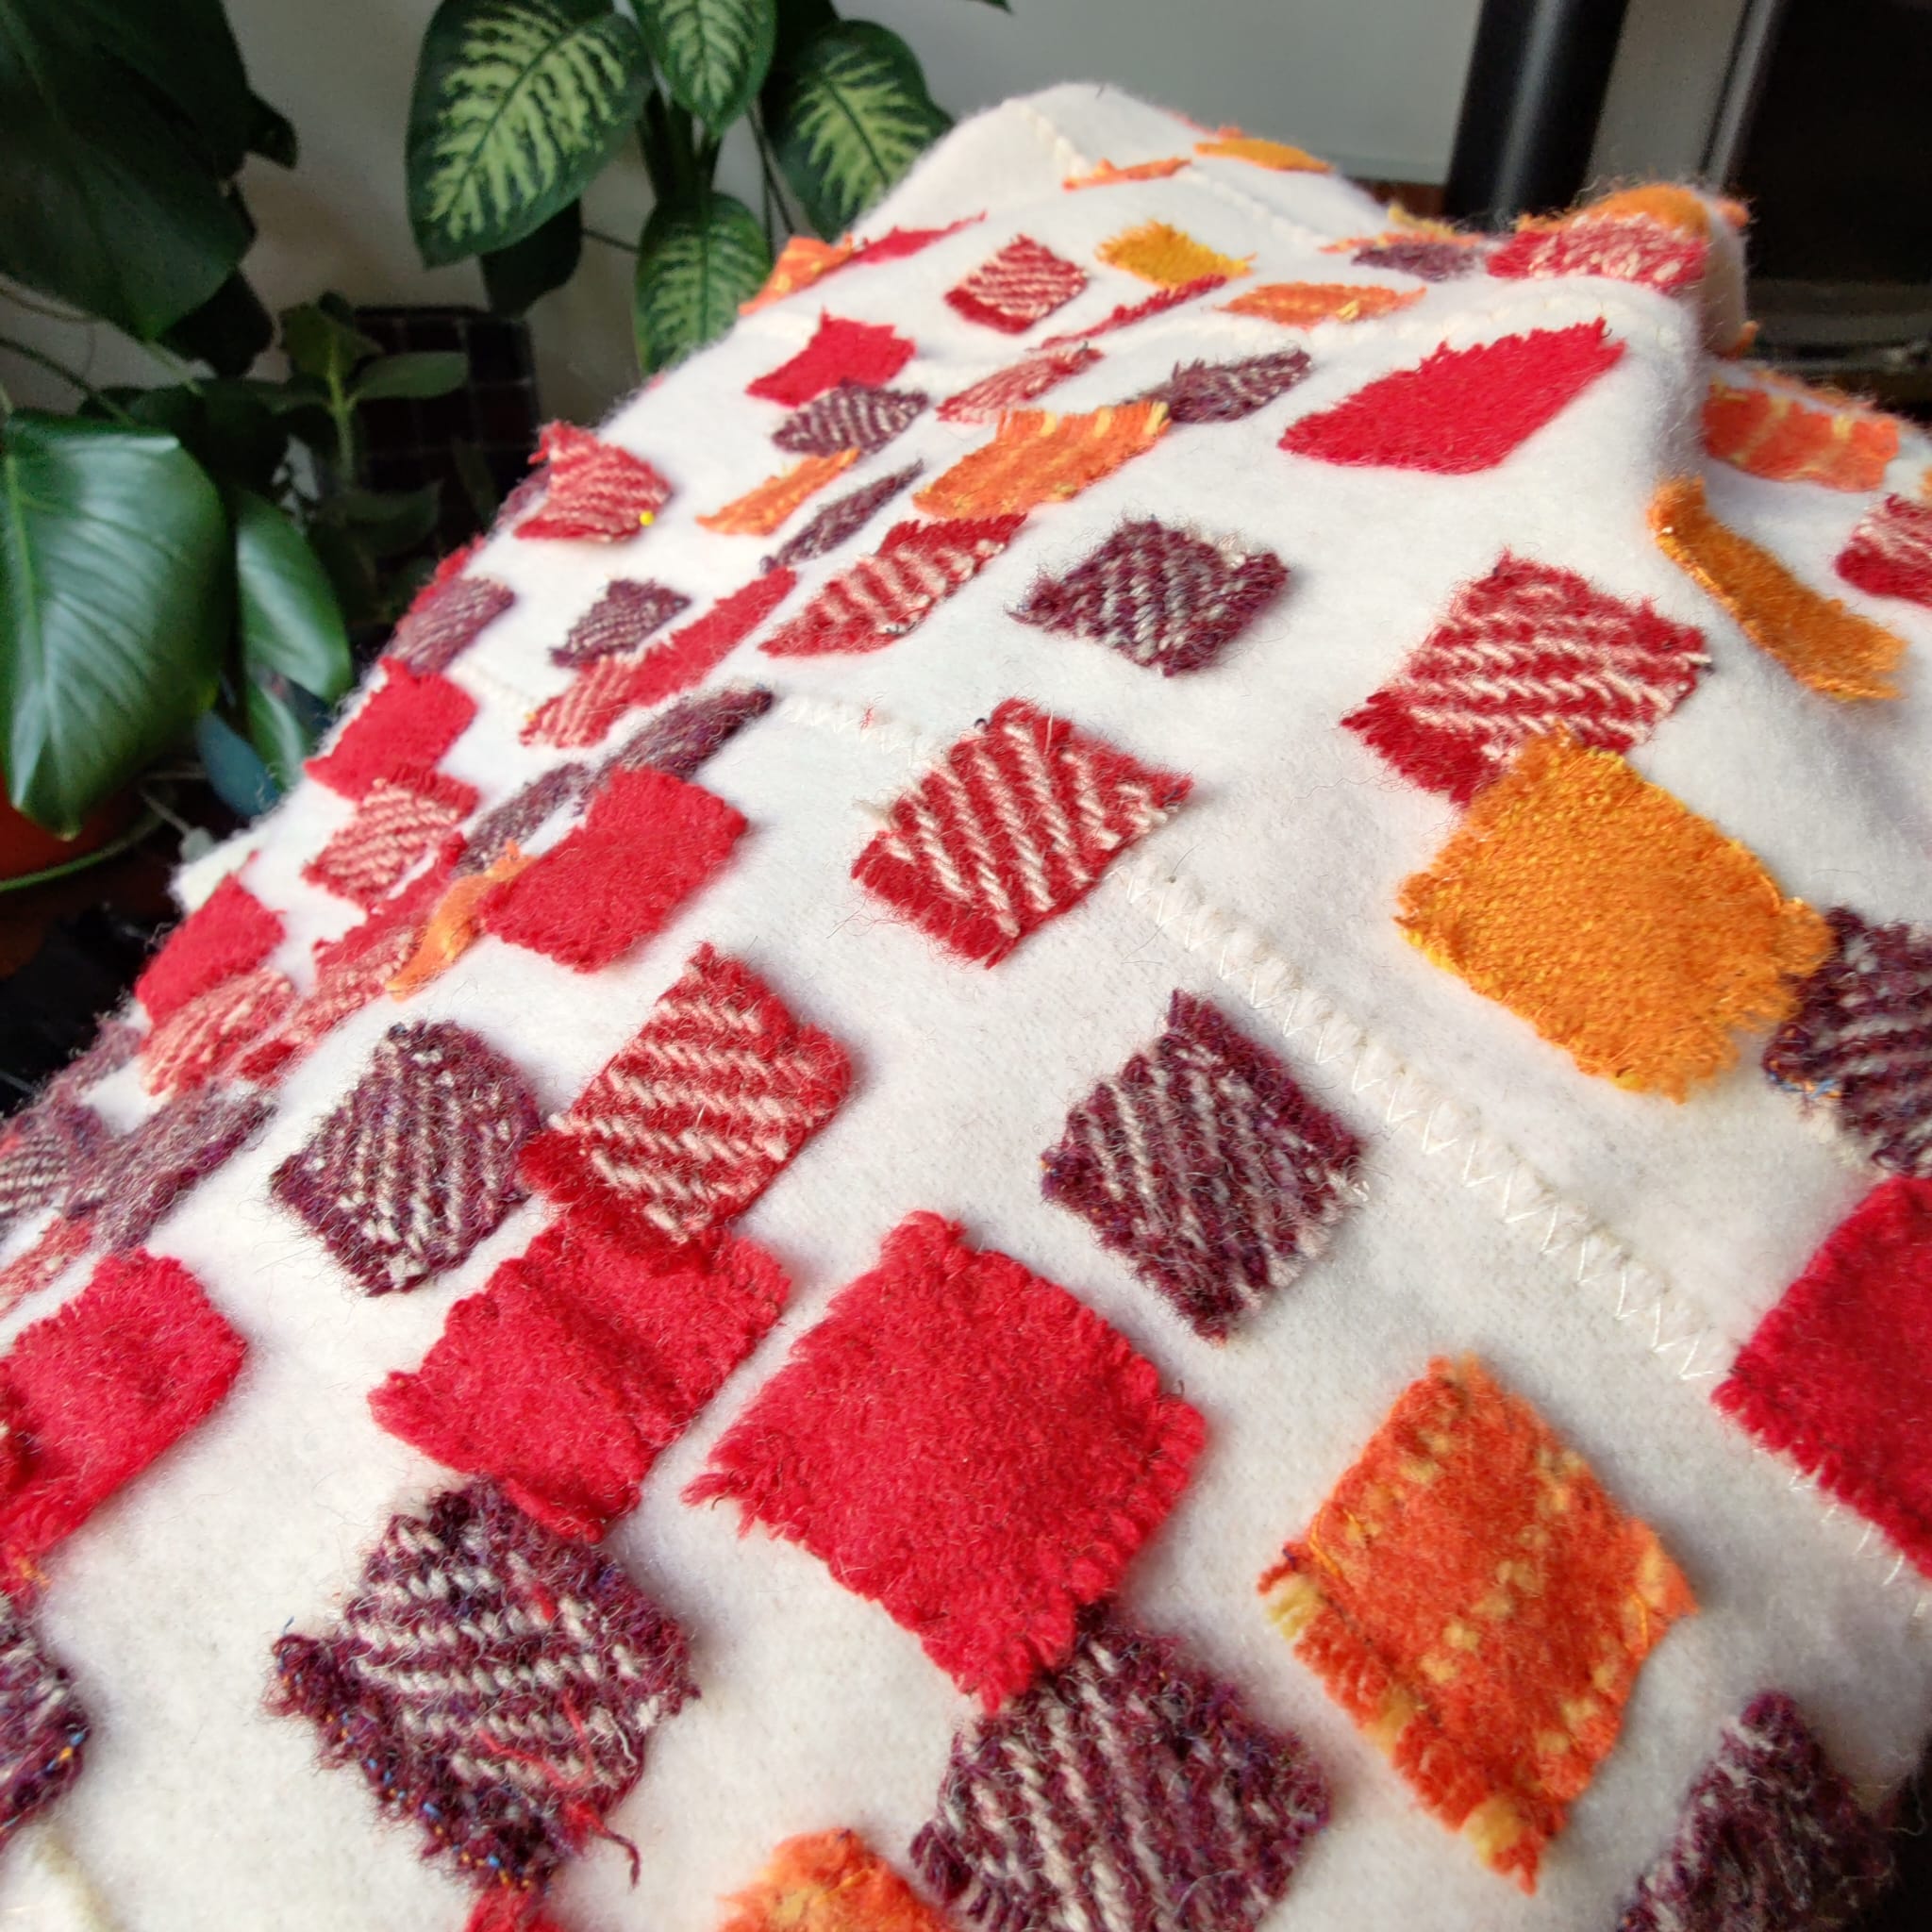
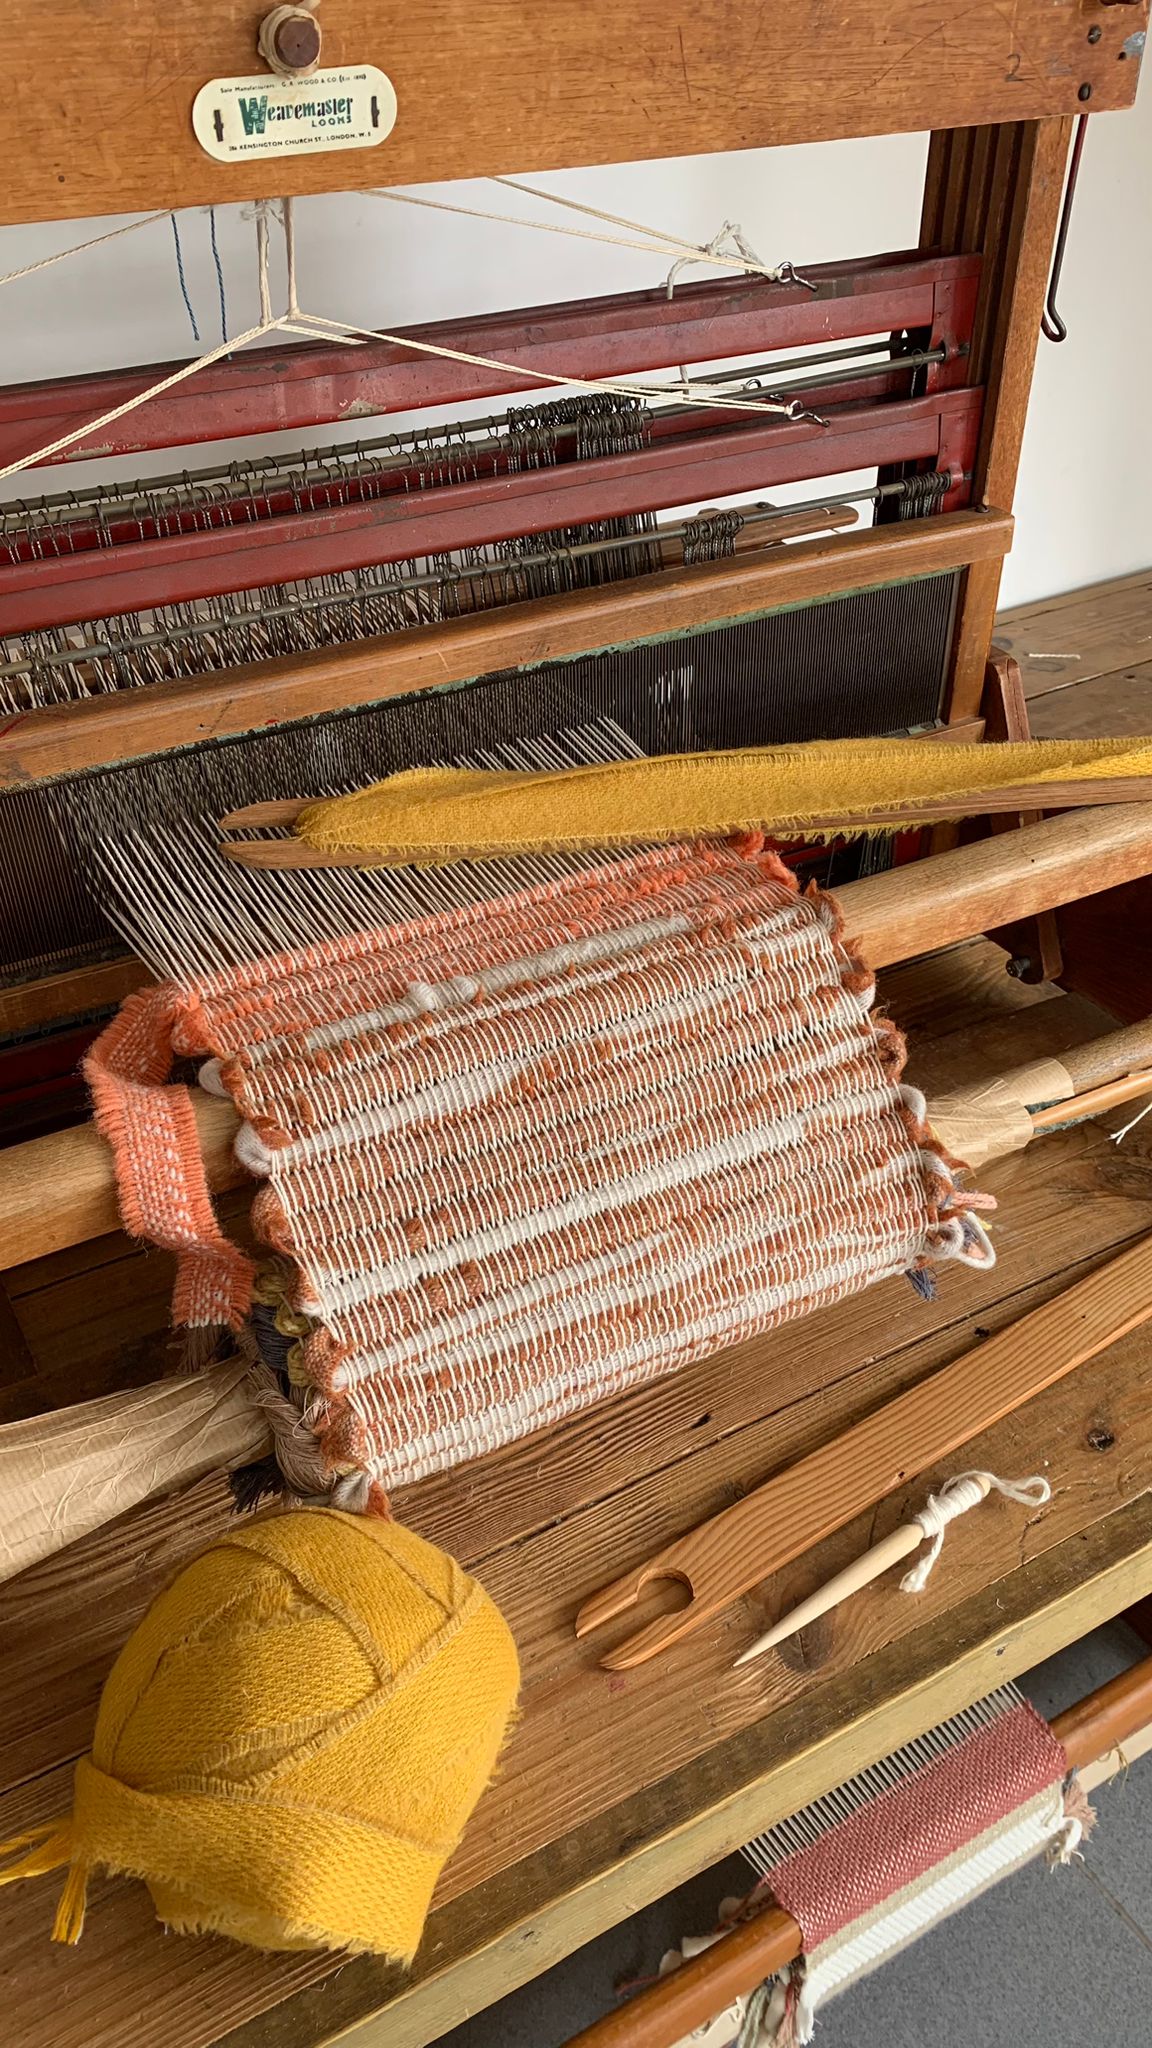
As, well as my journey, the other full time crafters are also well on their way to making something exciting and fun from their six balls of blanket yarn. Here’s a sneak peek of how they’re all getting on…
Thanks for reading and don’t forget to subscribe to the newsletter to be the first to know when new products are launched and blog posts are released!
Elspeth x
I’m new to rag rugs & I love this post!
Thanks so much Wendy 🙂