Last Christmas I was lucky enough to spend two whole weeks in the closest place to paradise I’ve ever been – Aitutaki in the Pacific Islands (you can see a few photos I took here). When I returned home I vowed that I would create a pacific island rag rug or two based on the beautiful landscapes I experienced out there and finally I’ve got round to starting one. Below gives a bit of insight into how I go about planning and making my rag rugs and I will be updating this post with photos and comments over the next few weeks to show you how the rug progresses 🙂
Finding your inspiration:
One thing I stress over and over again in my workshops is that you don’t have to choose a complicated design for something to look great when rag rugged. No matter what design you choose, it’s the mix of fabrics and textures which will make things look interesting and do a lot of the hard work for you. I make up a lot of my rag rug designs as I go along but it’s useful to start off with a source of inspiration even if you completely diverge from it later on. This could be anything from a simple colour palette, fabric swatch, old tile, favourite piece of art… anything you love really. The below oil pastel sketch of the beach by Etu Moana on Aitutaki is where I took my inspiration from:

My dad’s oil painting on a coconut was one of the inspirations for my rug.
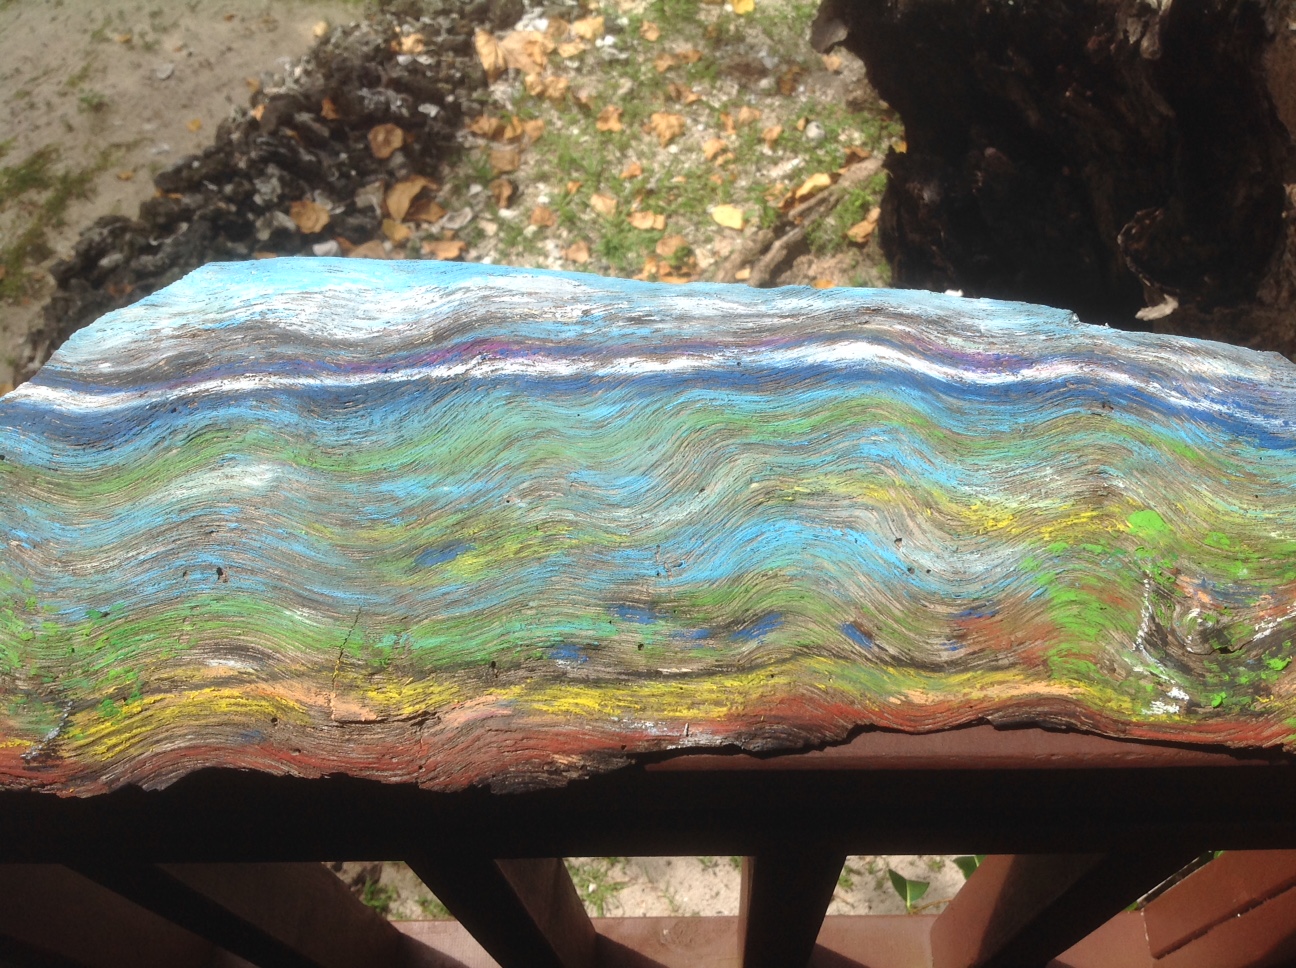
I took a lot of inspiration for the colours around the horizon from this painting on driftwood too.
Choosing a size:
The first thing I had to decide before diving into the rag rugging itself was what size I would like the rug to be. The standard size of rug I make is 100 x 60cm because it’s perfect for by the bed or in the bathroom (you can buy a pre-hemmed piece this size here). For this rug, however, I really wanted an impact piece – something that when people stepped into the room, it would be the first thing they would notice. With that in mind, I decided to go a little larger so I hemmed a 130 x 100cm piece of hessian that would fit perfectly in my kitchen (it’s always a good idea to have a place in mind before starting).
Sketching out your design:
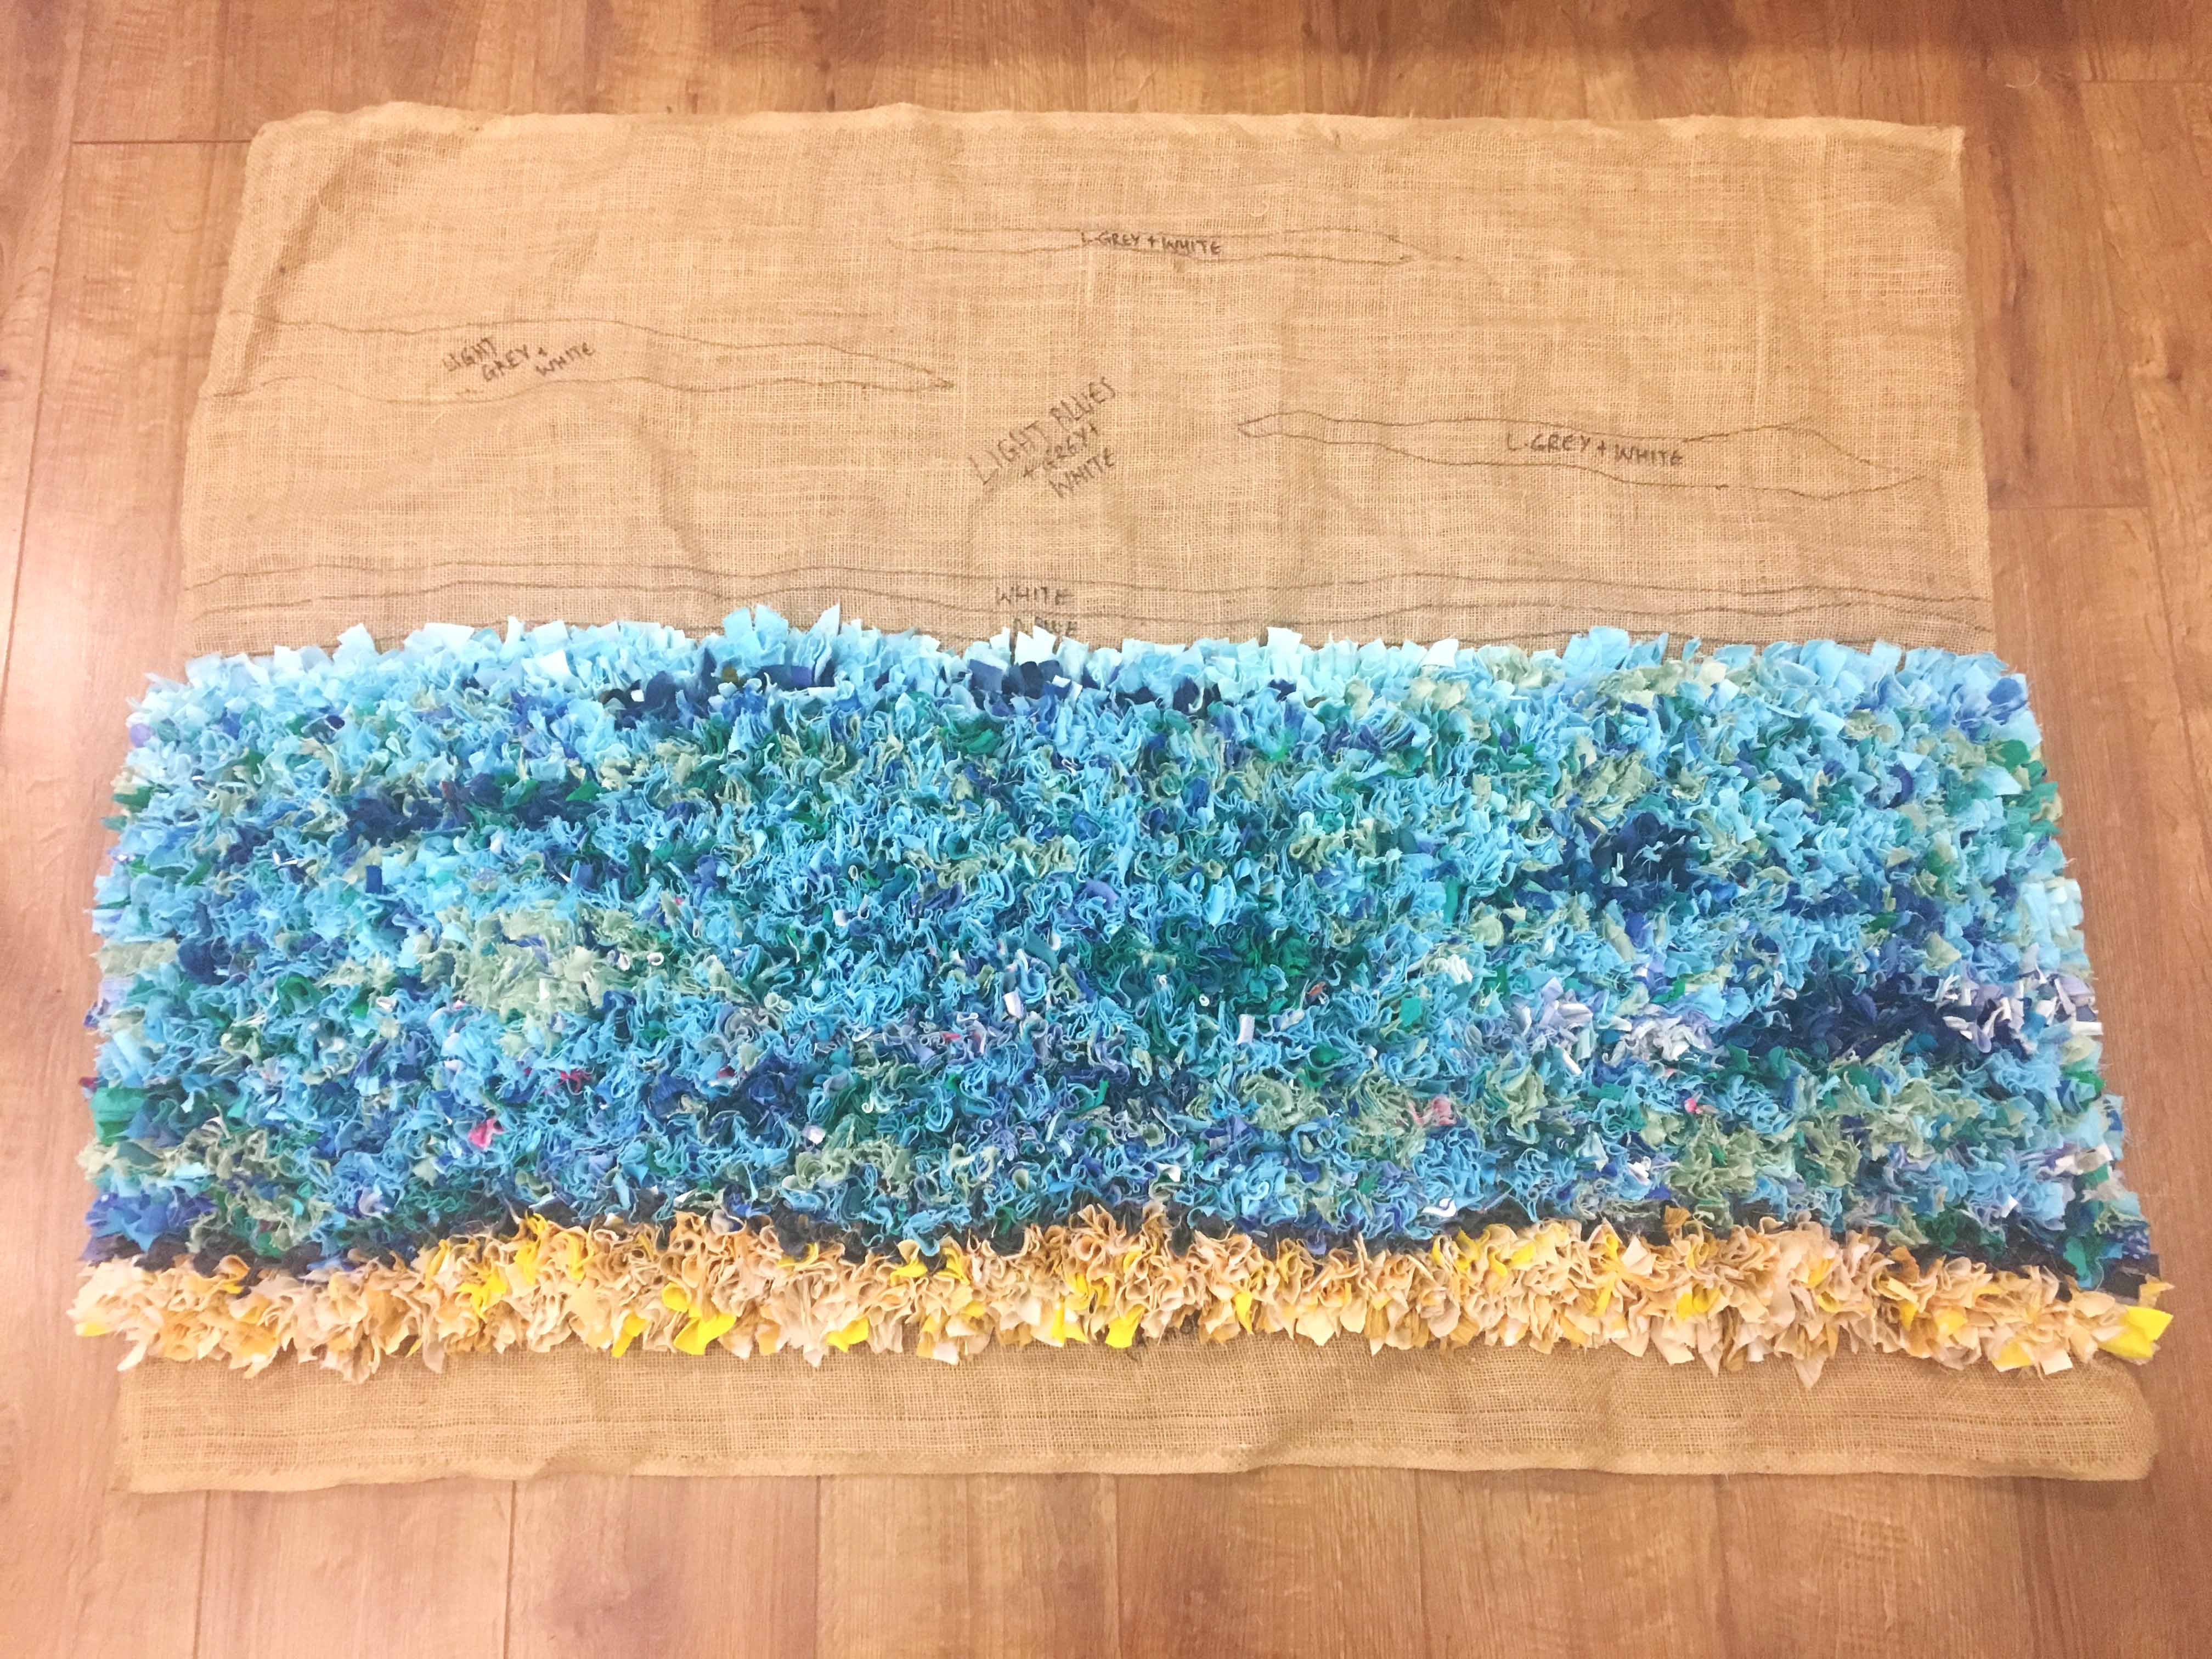
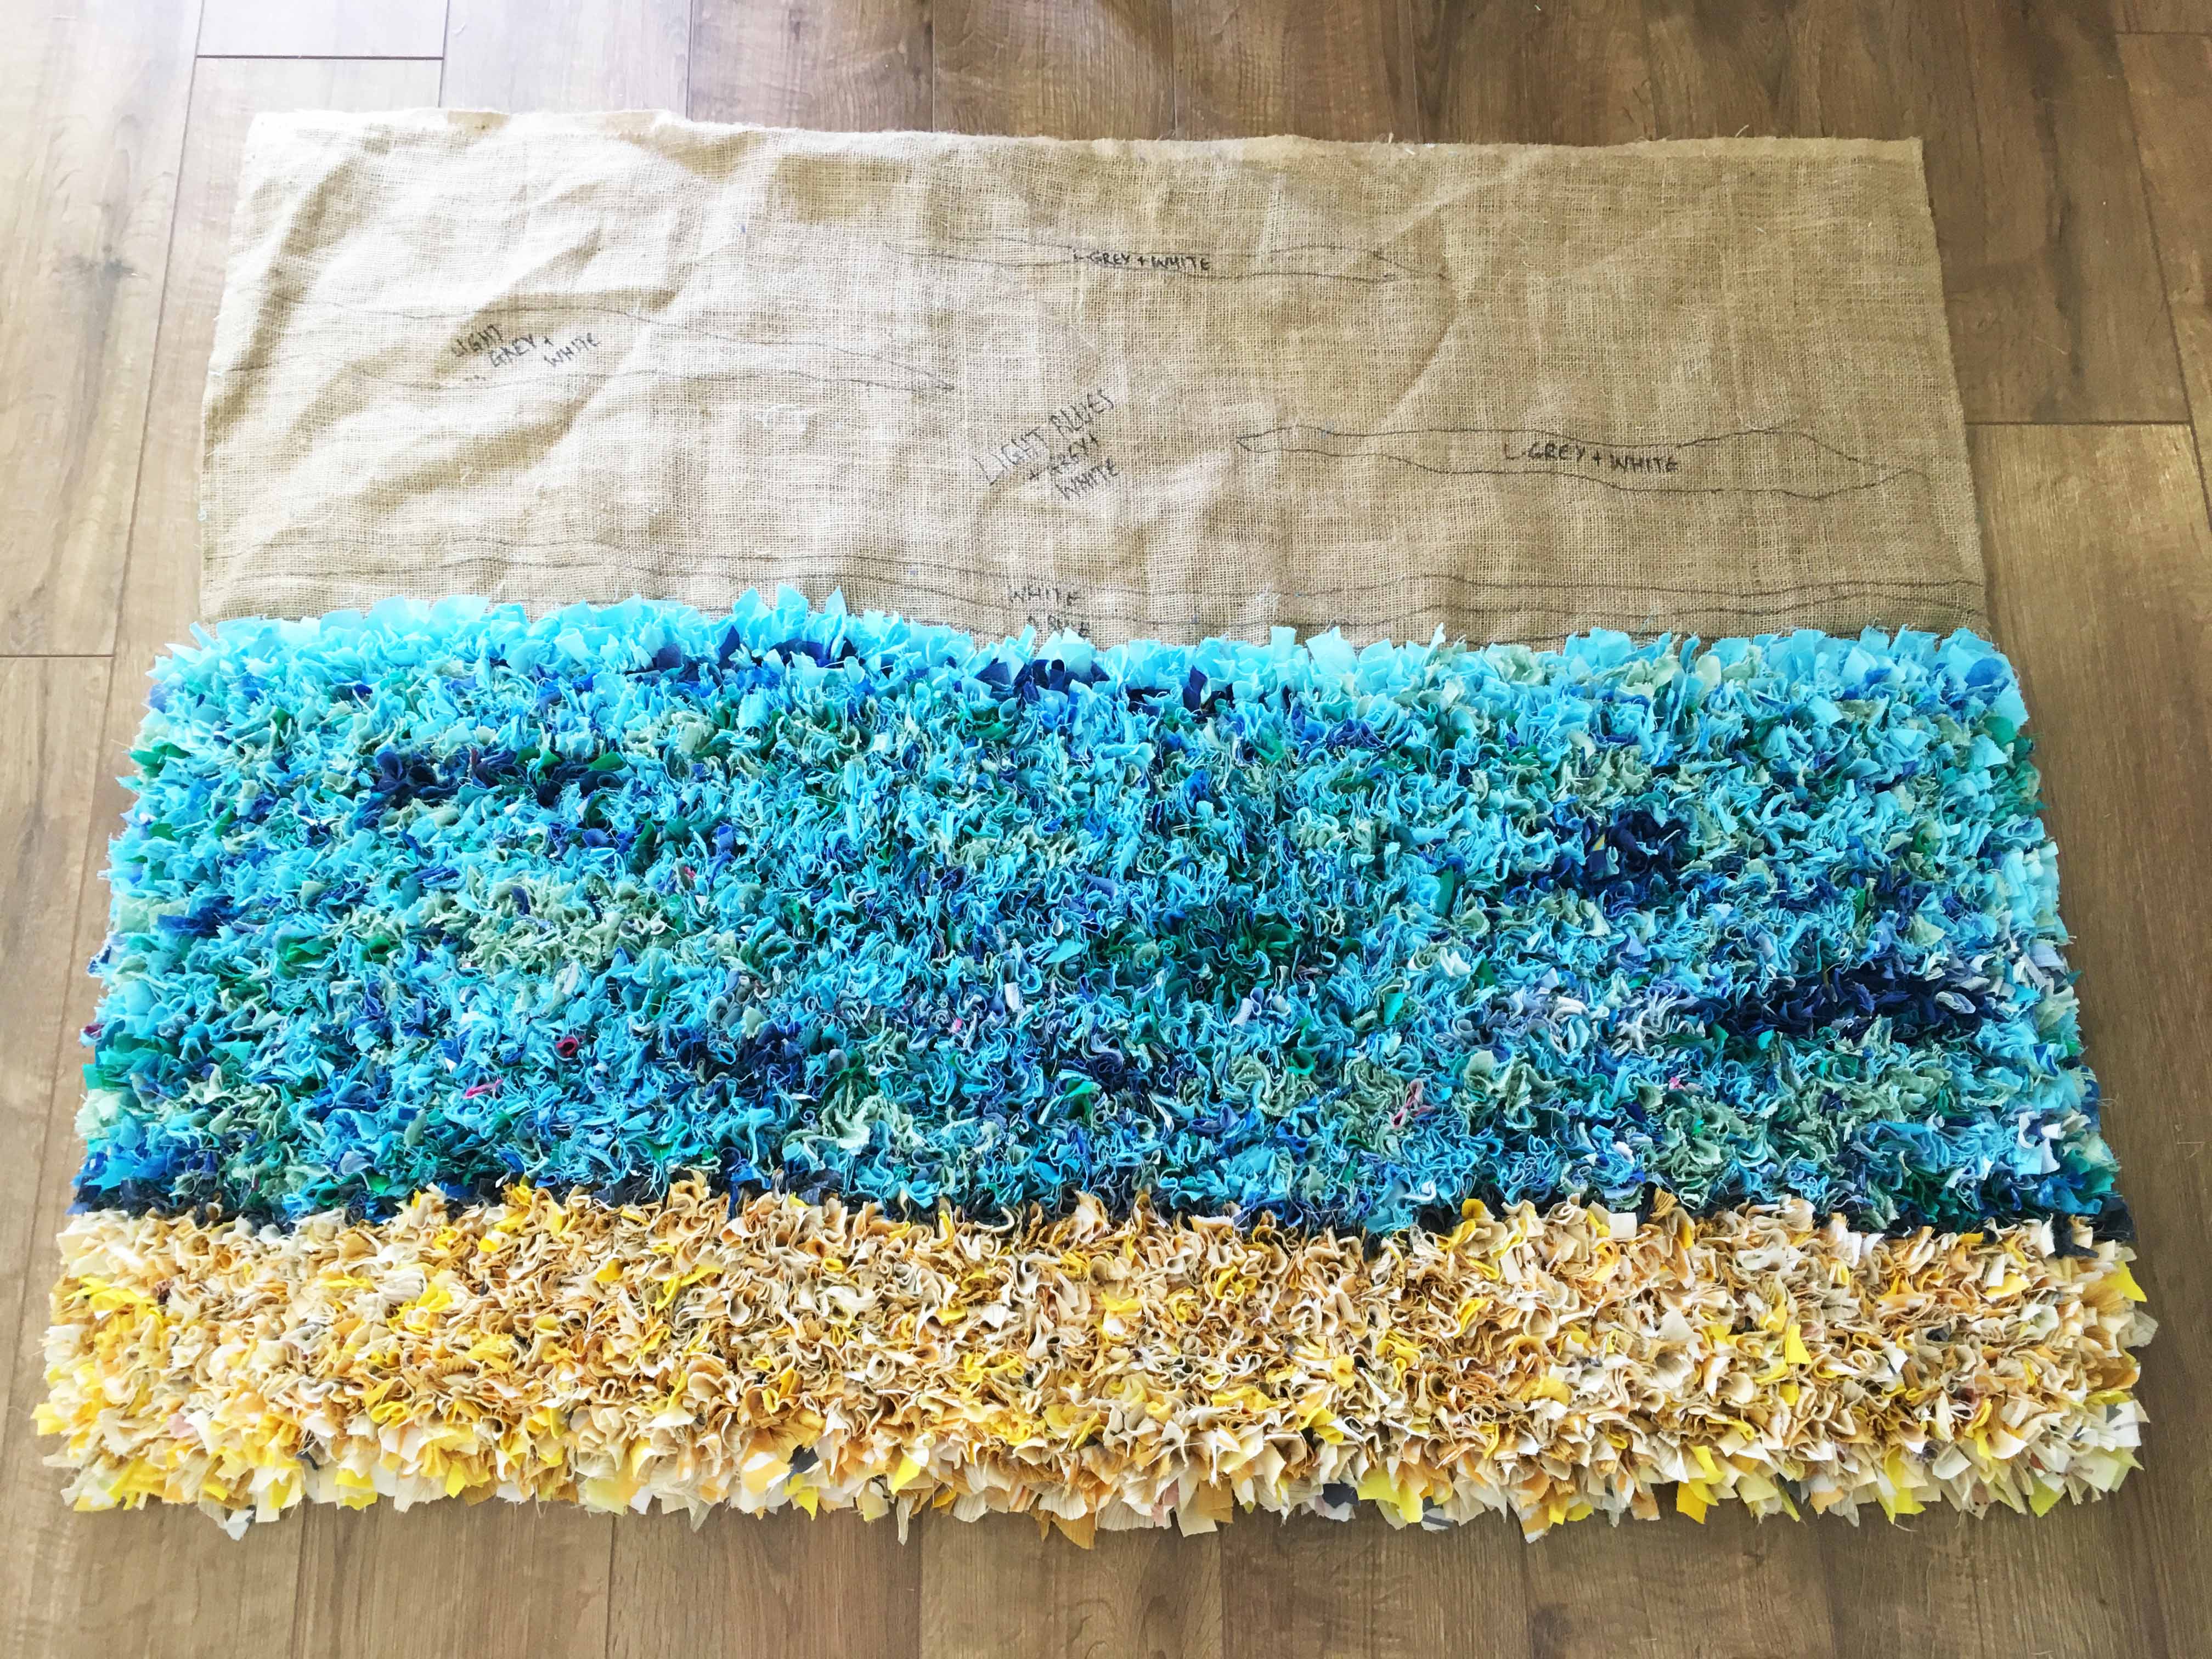
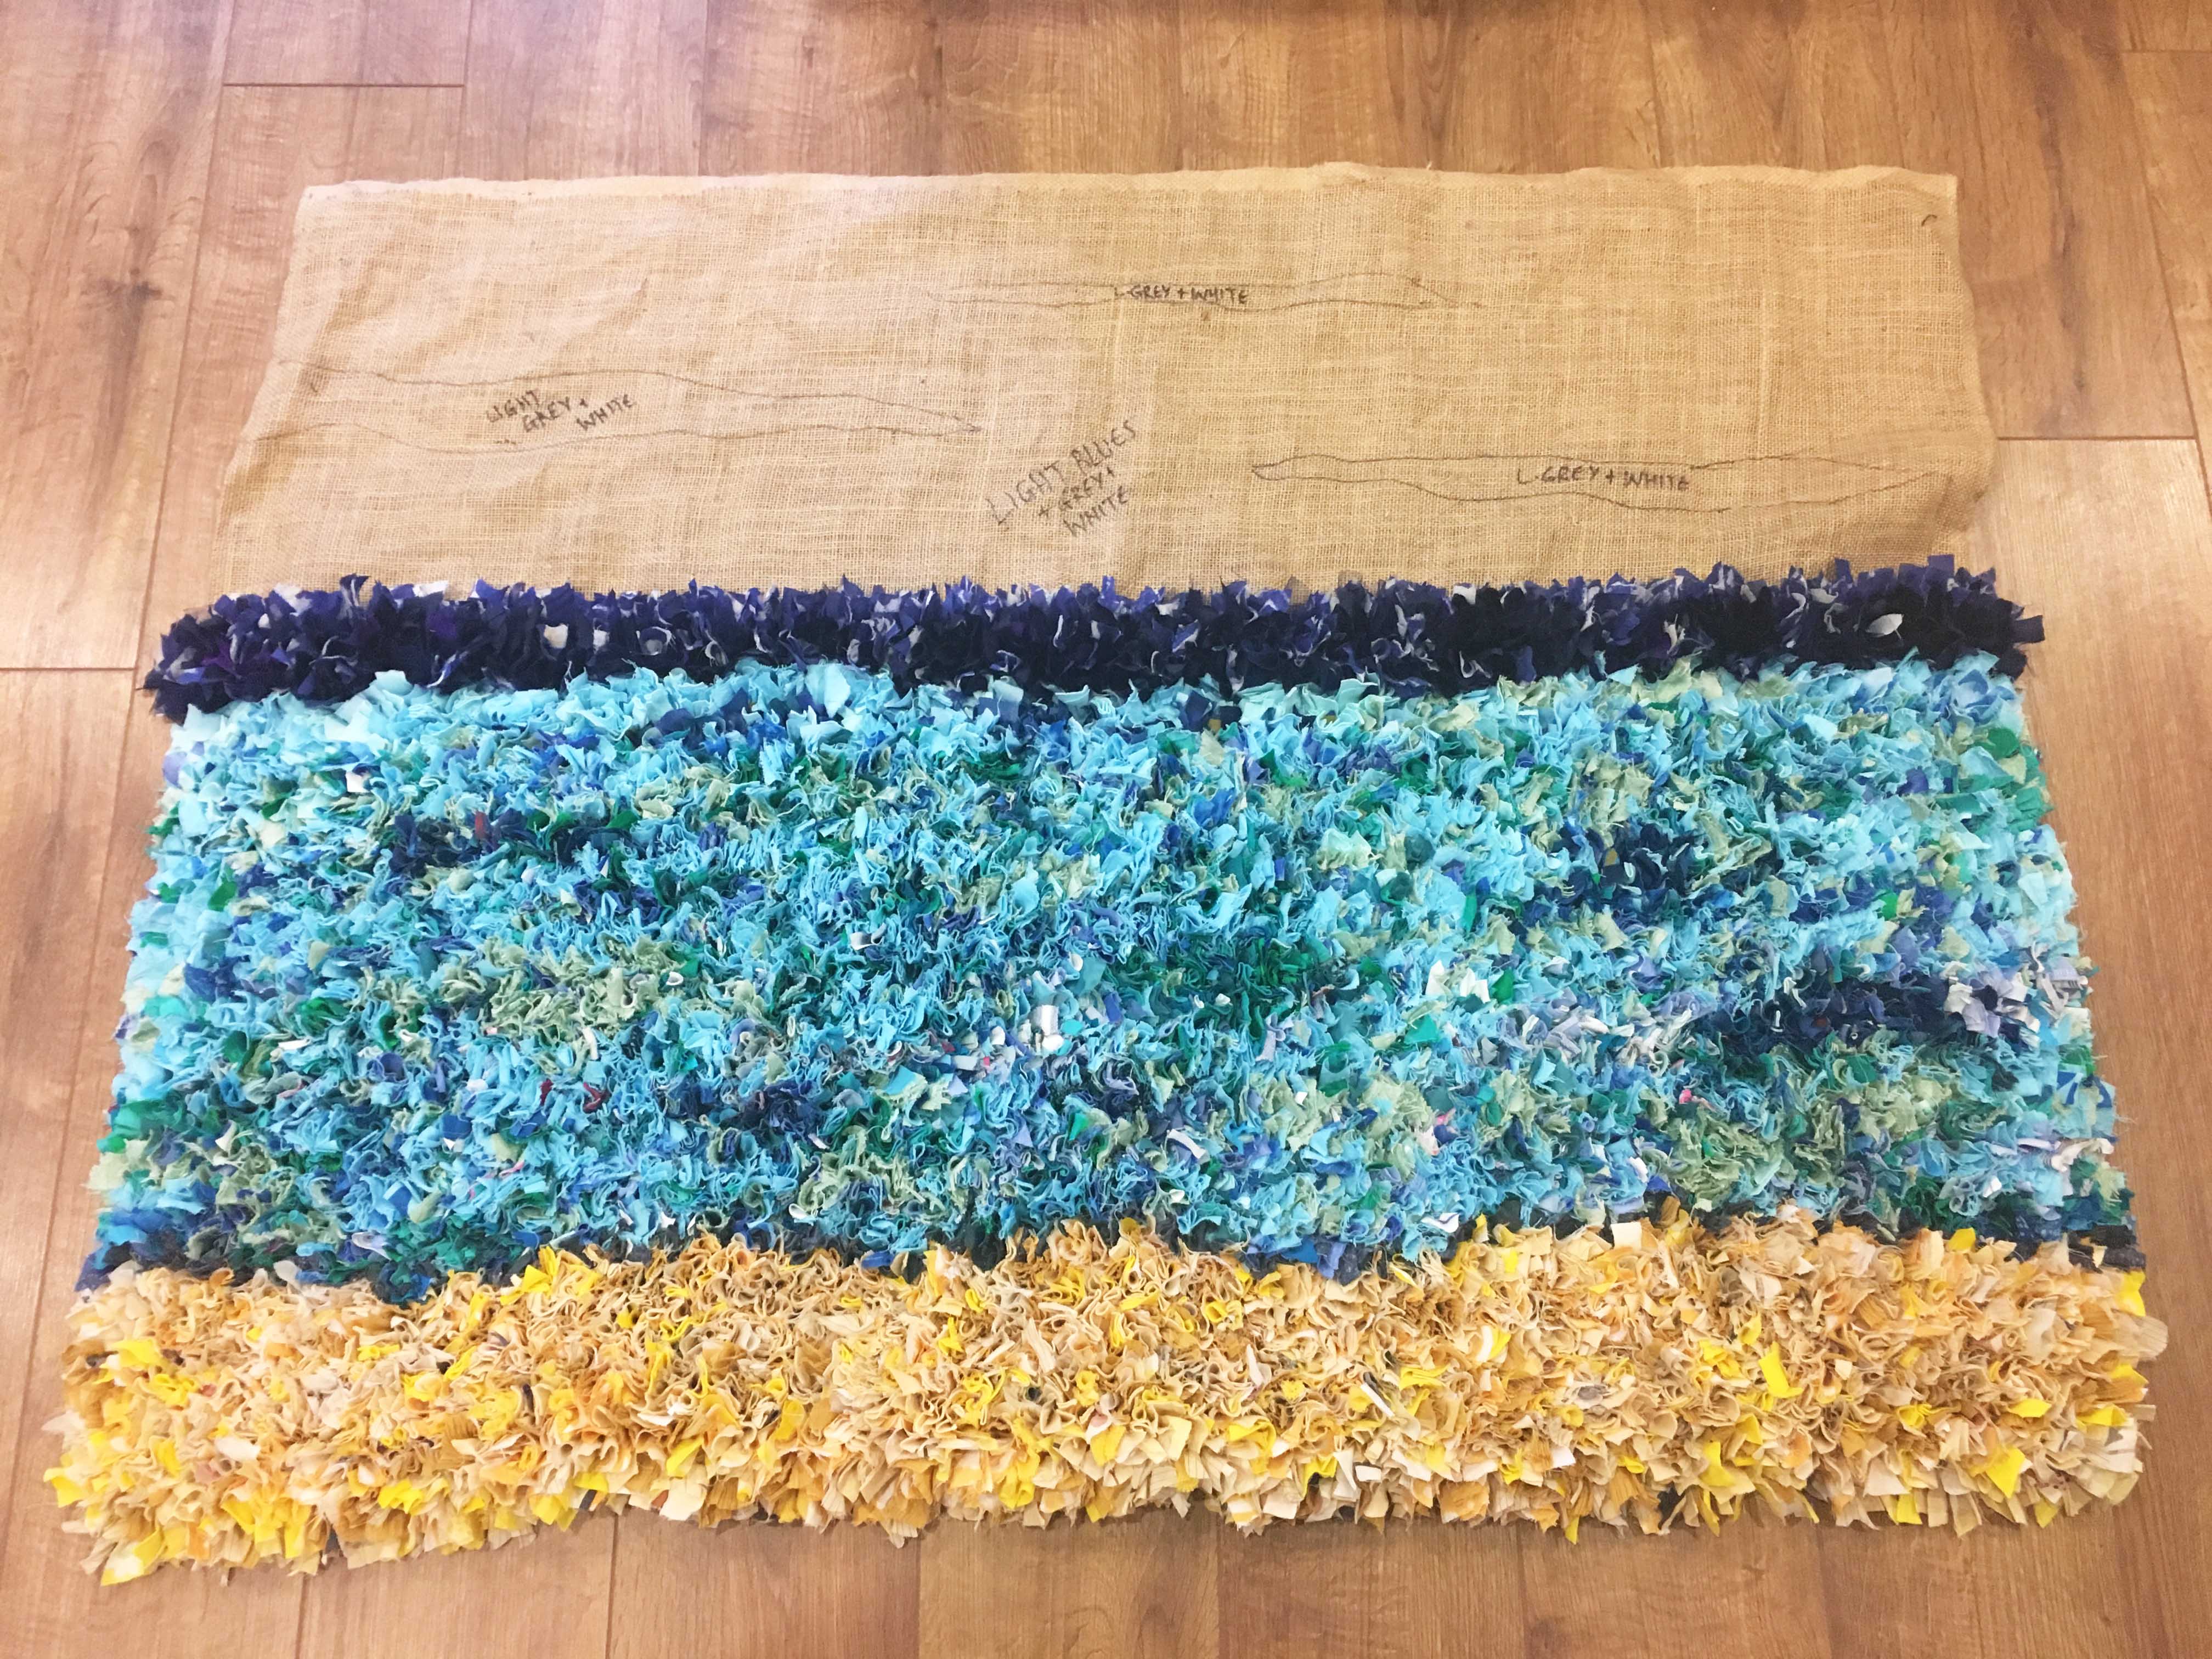
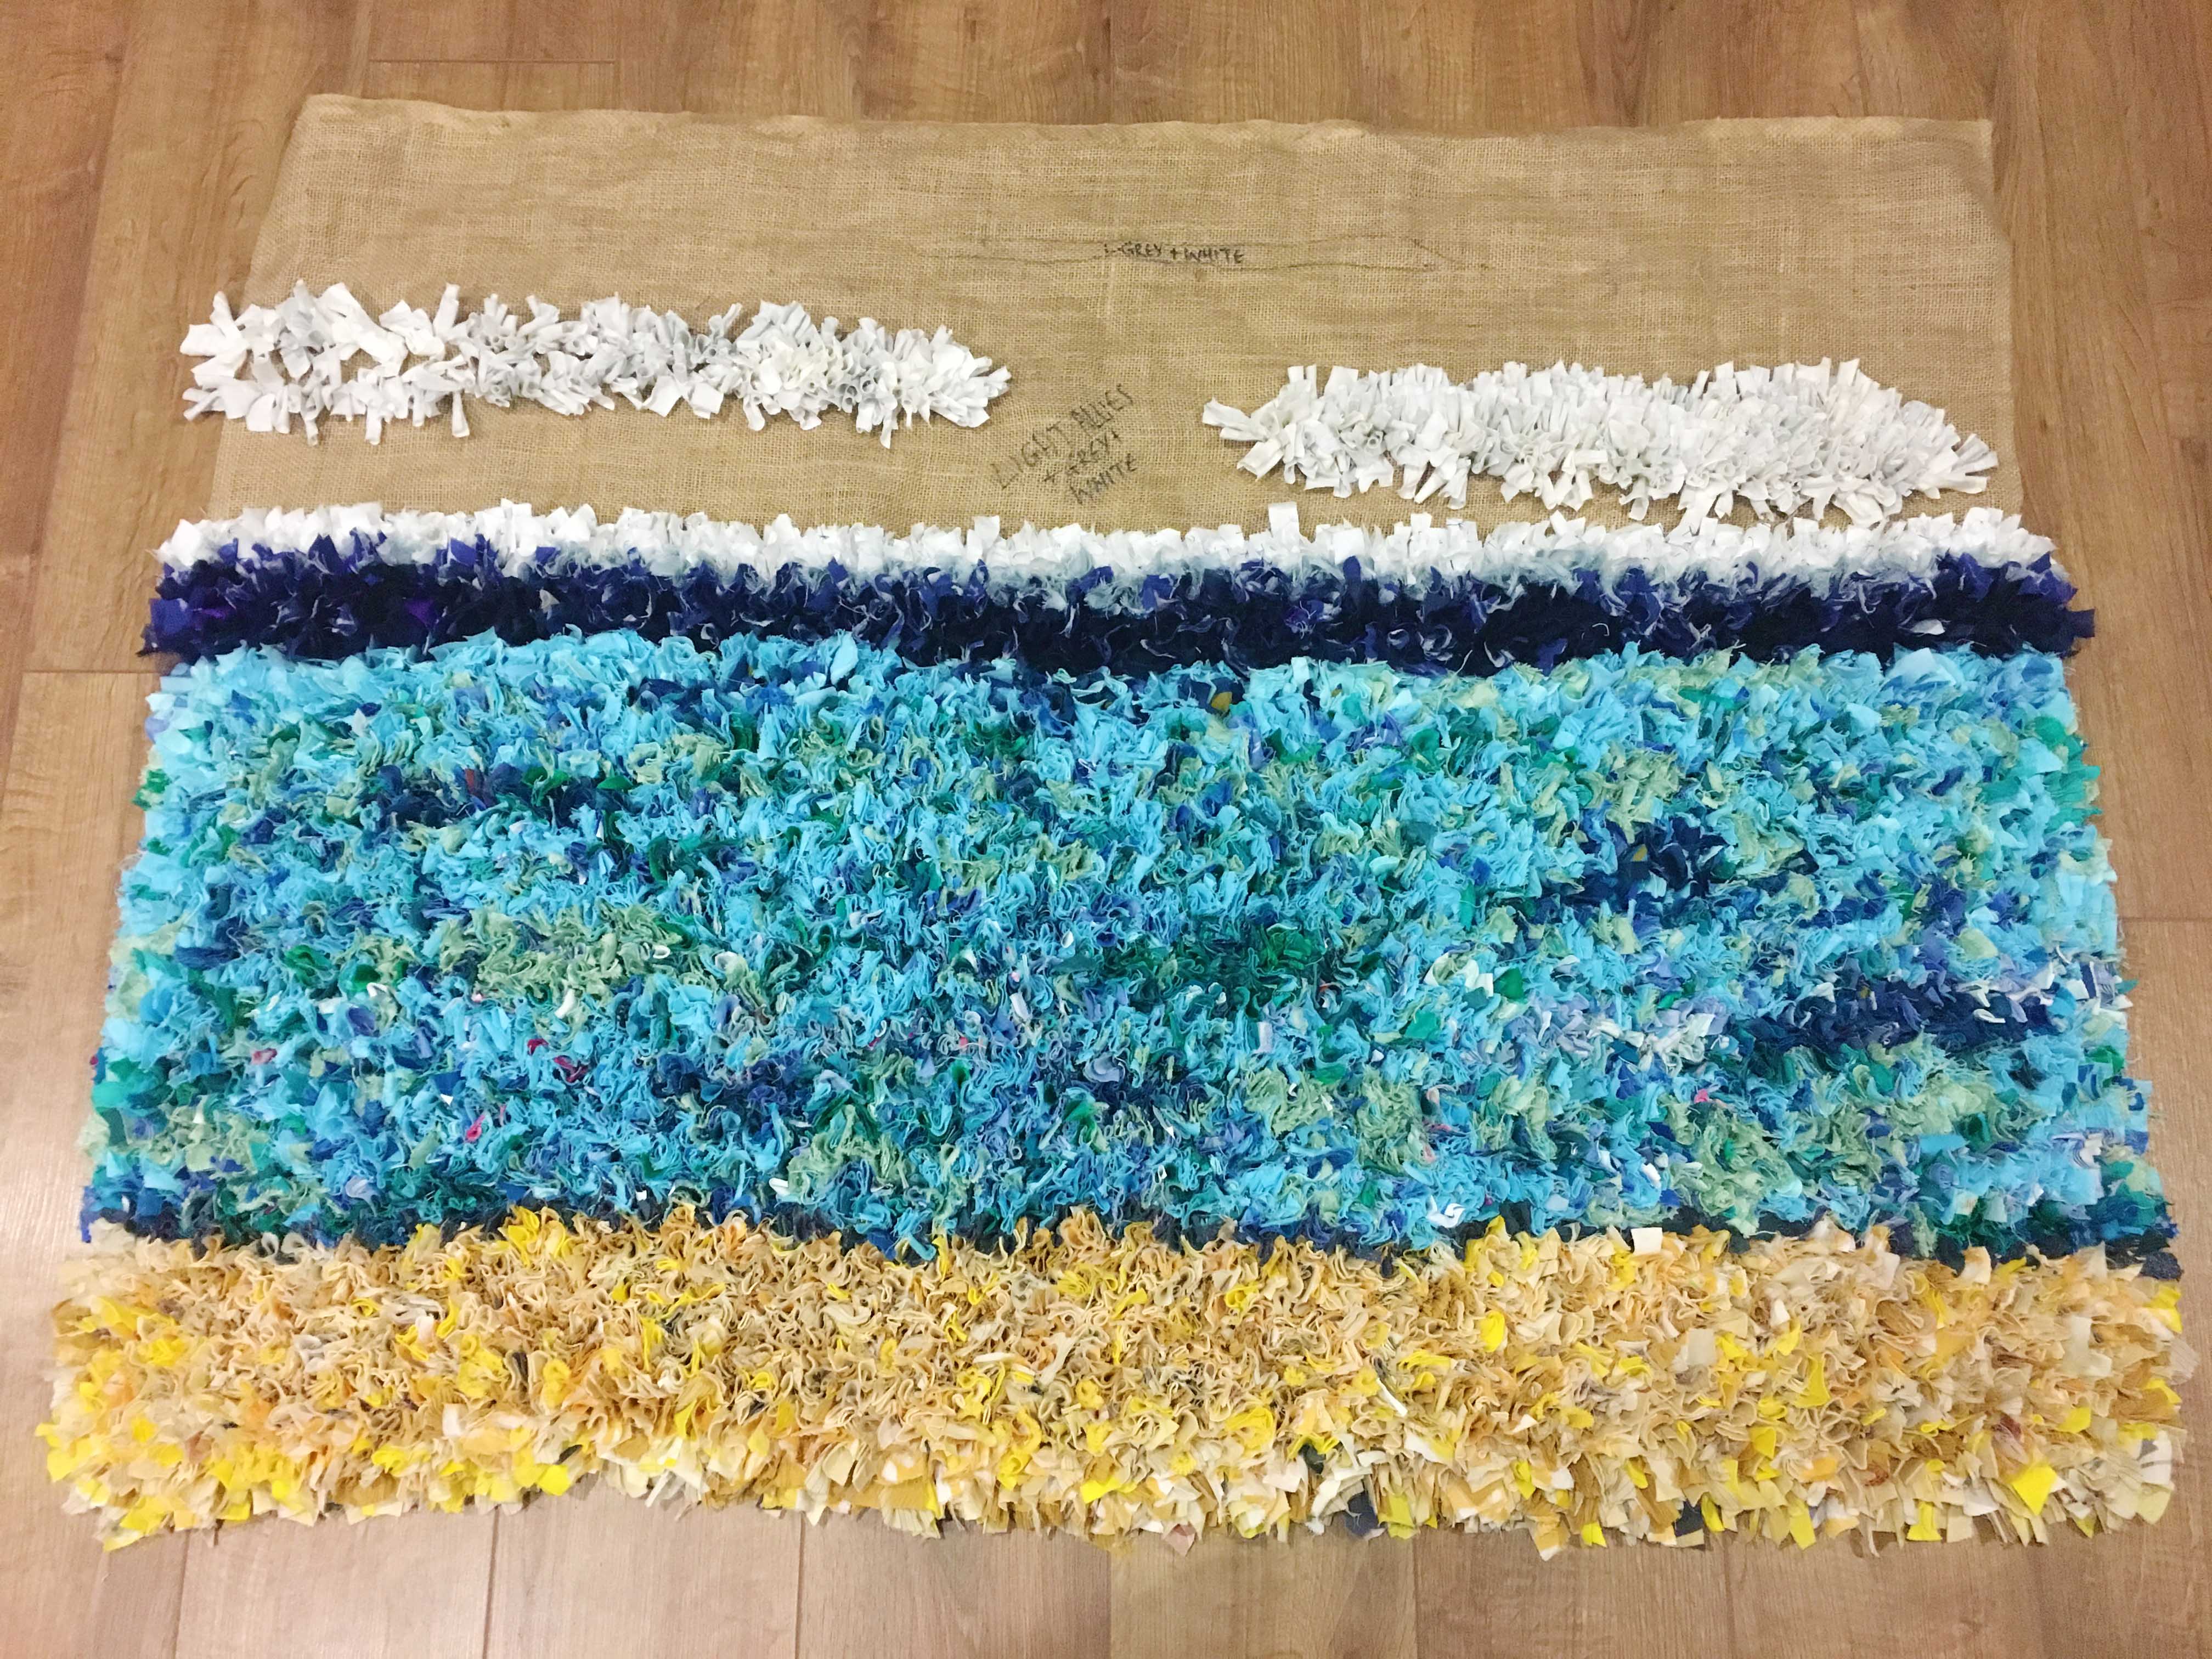
One of the great things about rag rugging is that you can sketch out your design directly onto the hessian with a marker pen. Don’t worry about measuring things too accurately as any mistakes will be covered by the rag rugging in the end anyway. Generally, the less detail you sketch on, the better. Creating large blocks or bands is generally the best approach as it allows you to be more fluid in your design (and not get caught up in the detail). I tend to divide my designs into large colour blocks and build in detail as I go along. For my first pacific island rag rug I have large sky, sea & beach blocks with a few smaller sections marked out for the clouds, horizon and surf.
Start Rag Rugging:
I often get asked “where should I start my rag rugging?”… Well, you can start anywhere on the hessian really. For large pieces like a rug, however, I generally recommend starting in one location and working your way from there rather than starting in multiple locations at once (which weighs down the rug awkwardly in lots of areas). For this rug, I decided to start with the large ocean block as it will be the most dominant part of the piece (and arguably, therefore, the most important) but I could have easily begun at the top or bottom.
So that’s a bit about “my process”. Below is where you can take a look at how my Pacific Island Rag Rug looks now and how it progresses – enjoy!
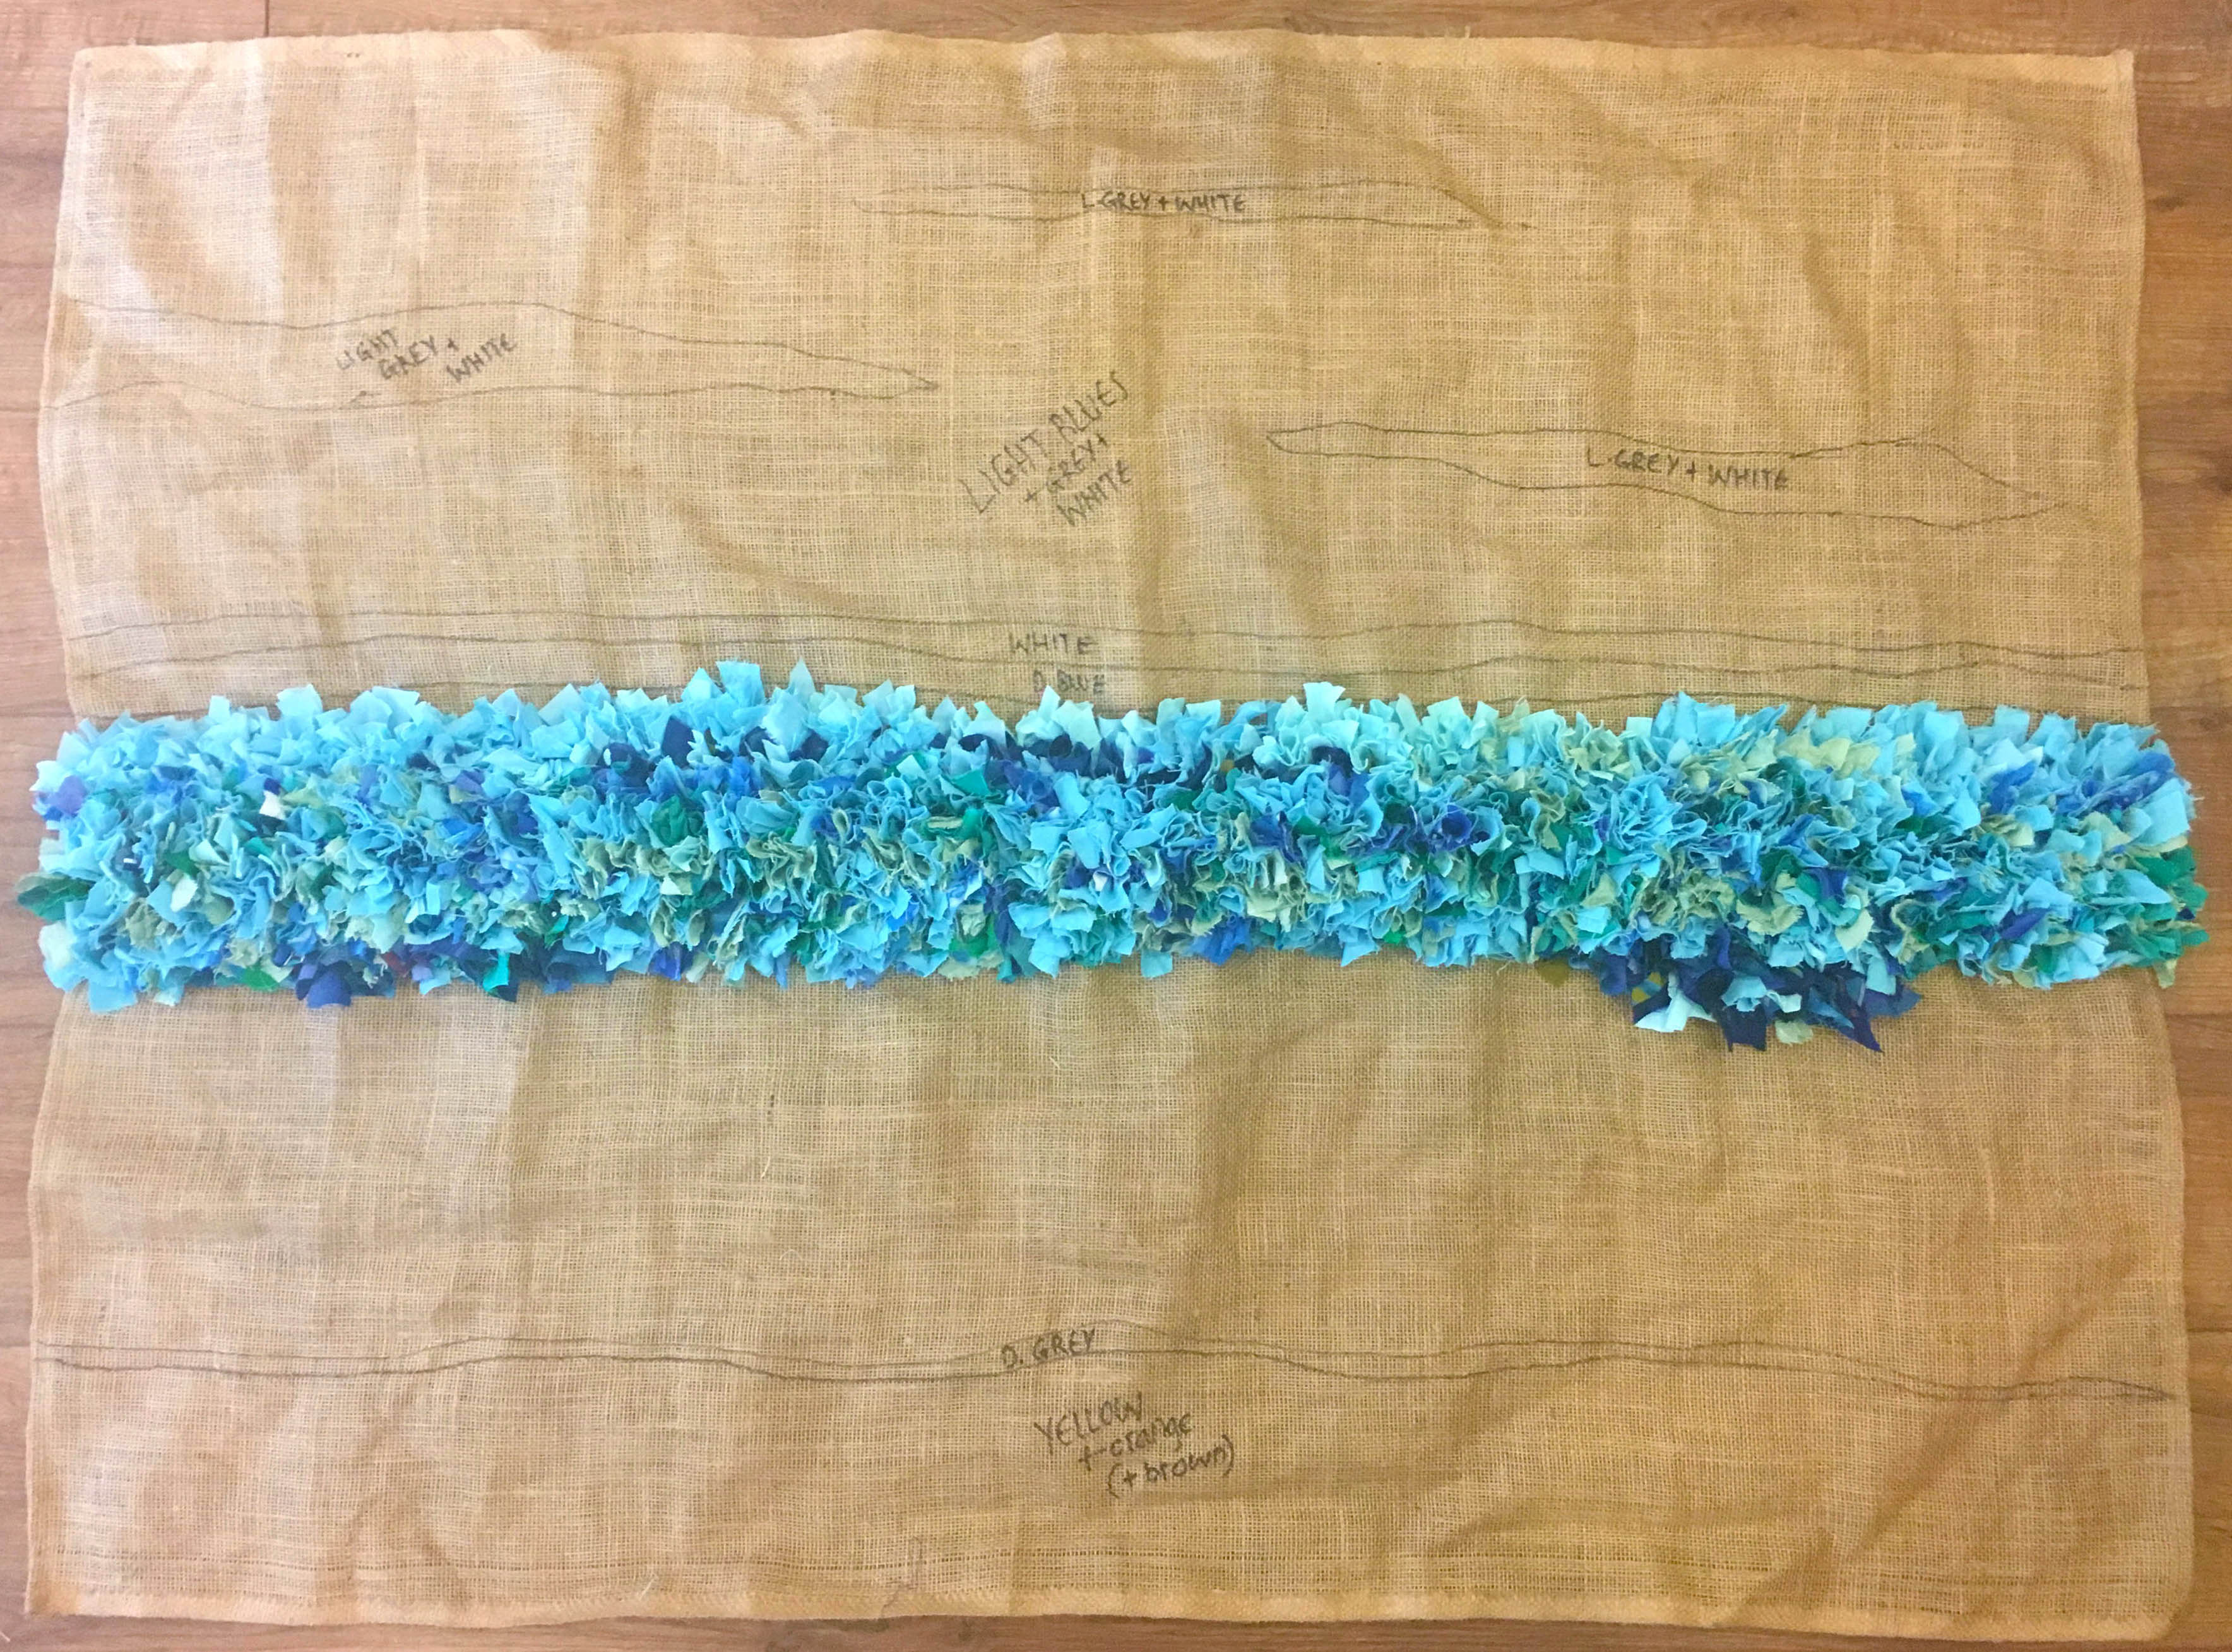
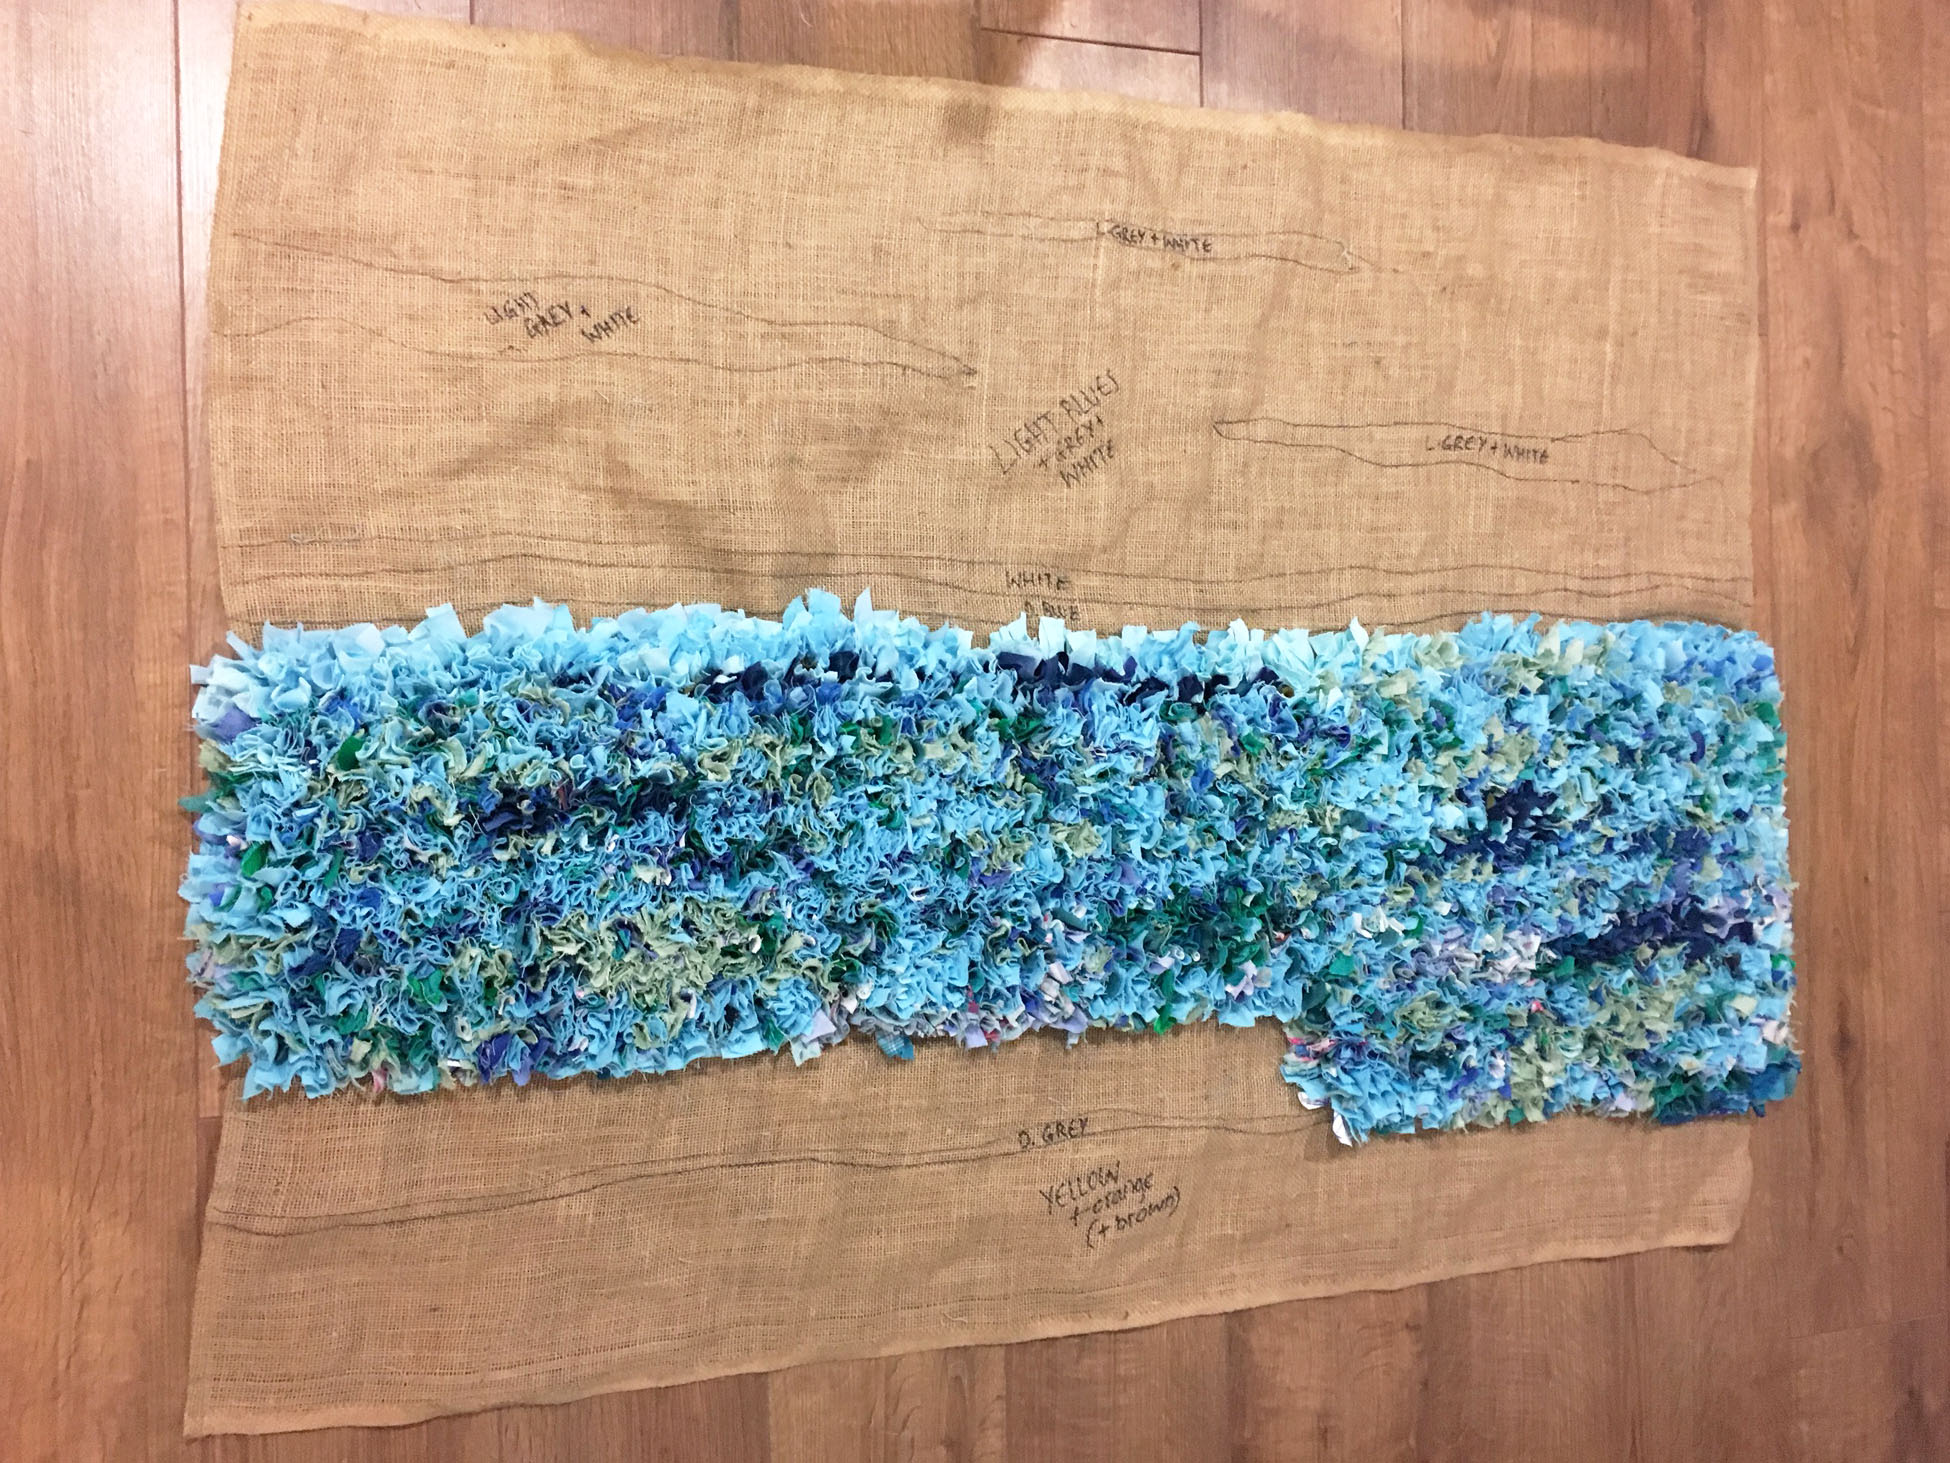
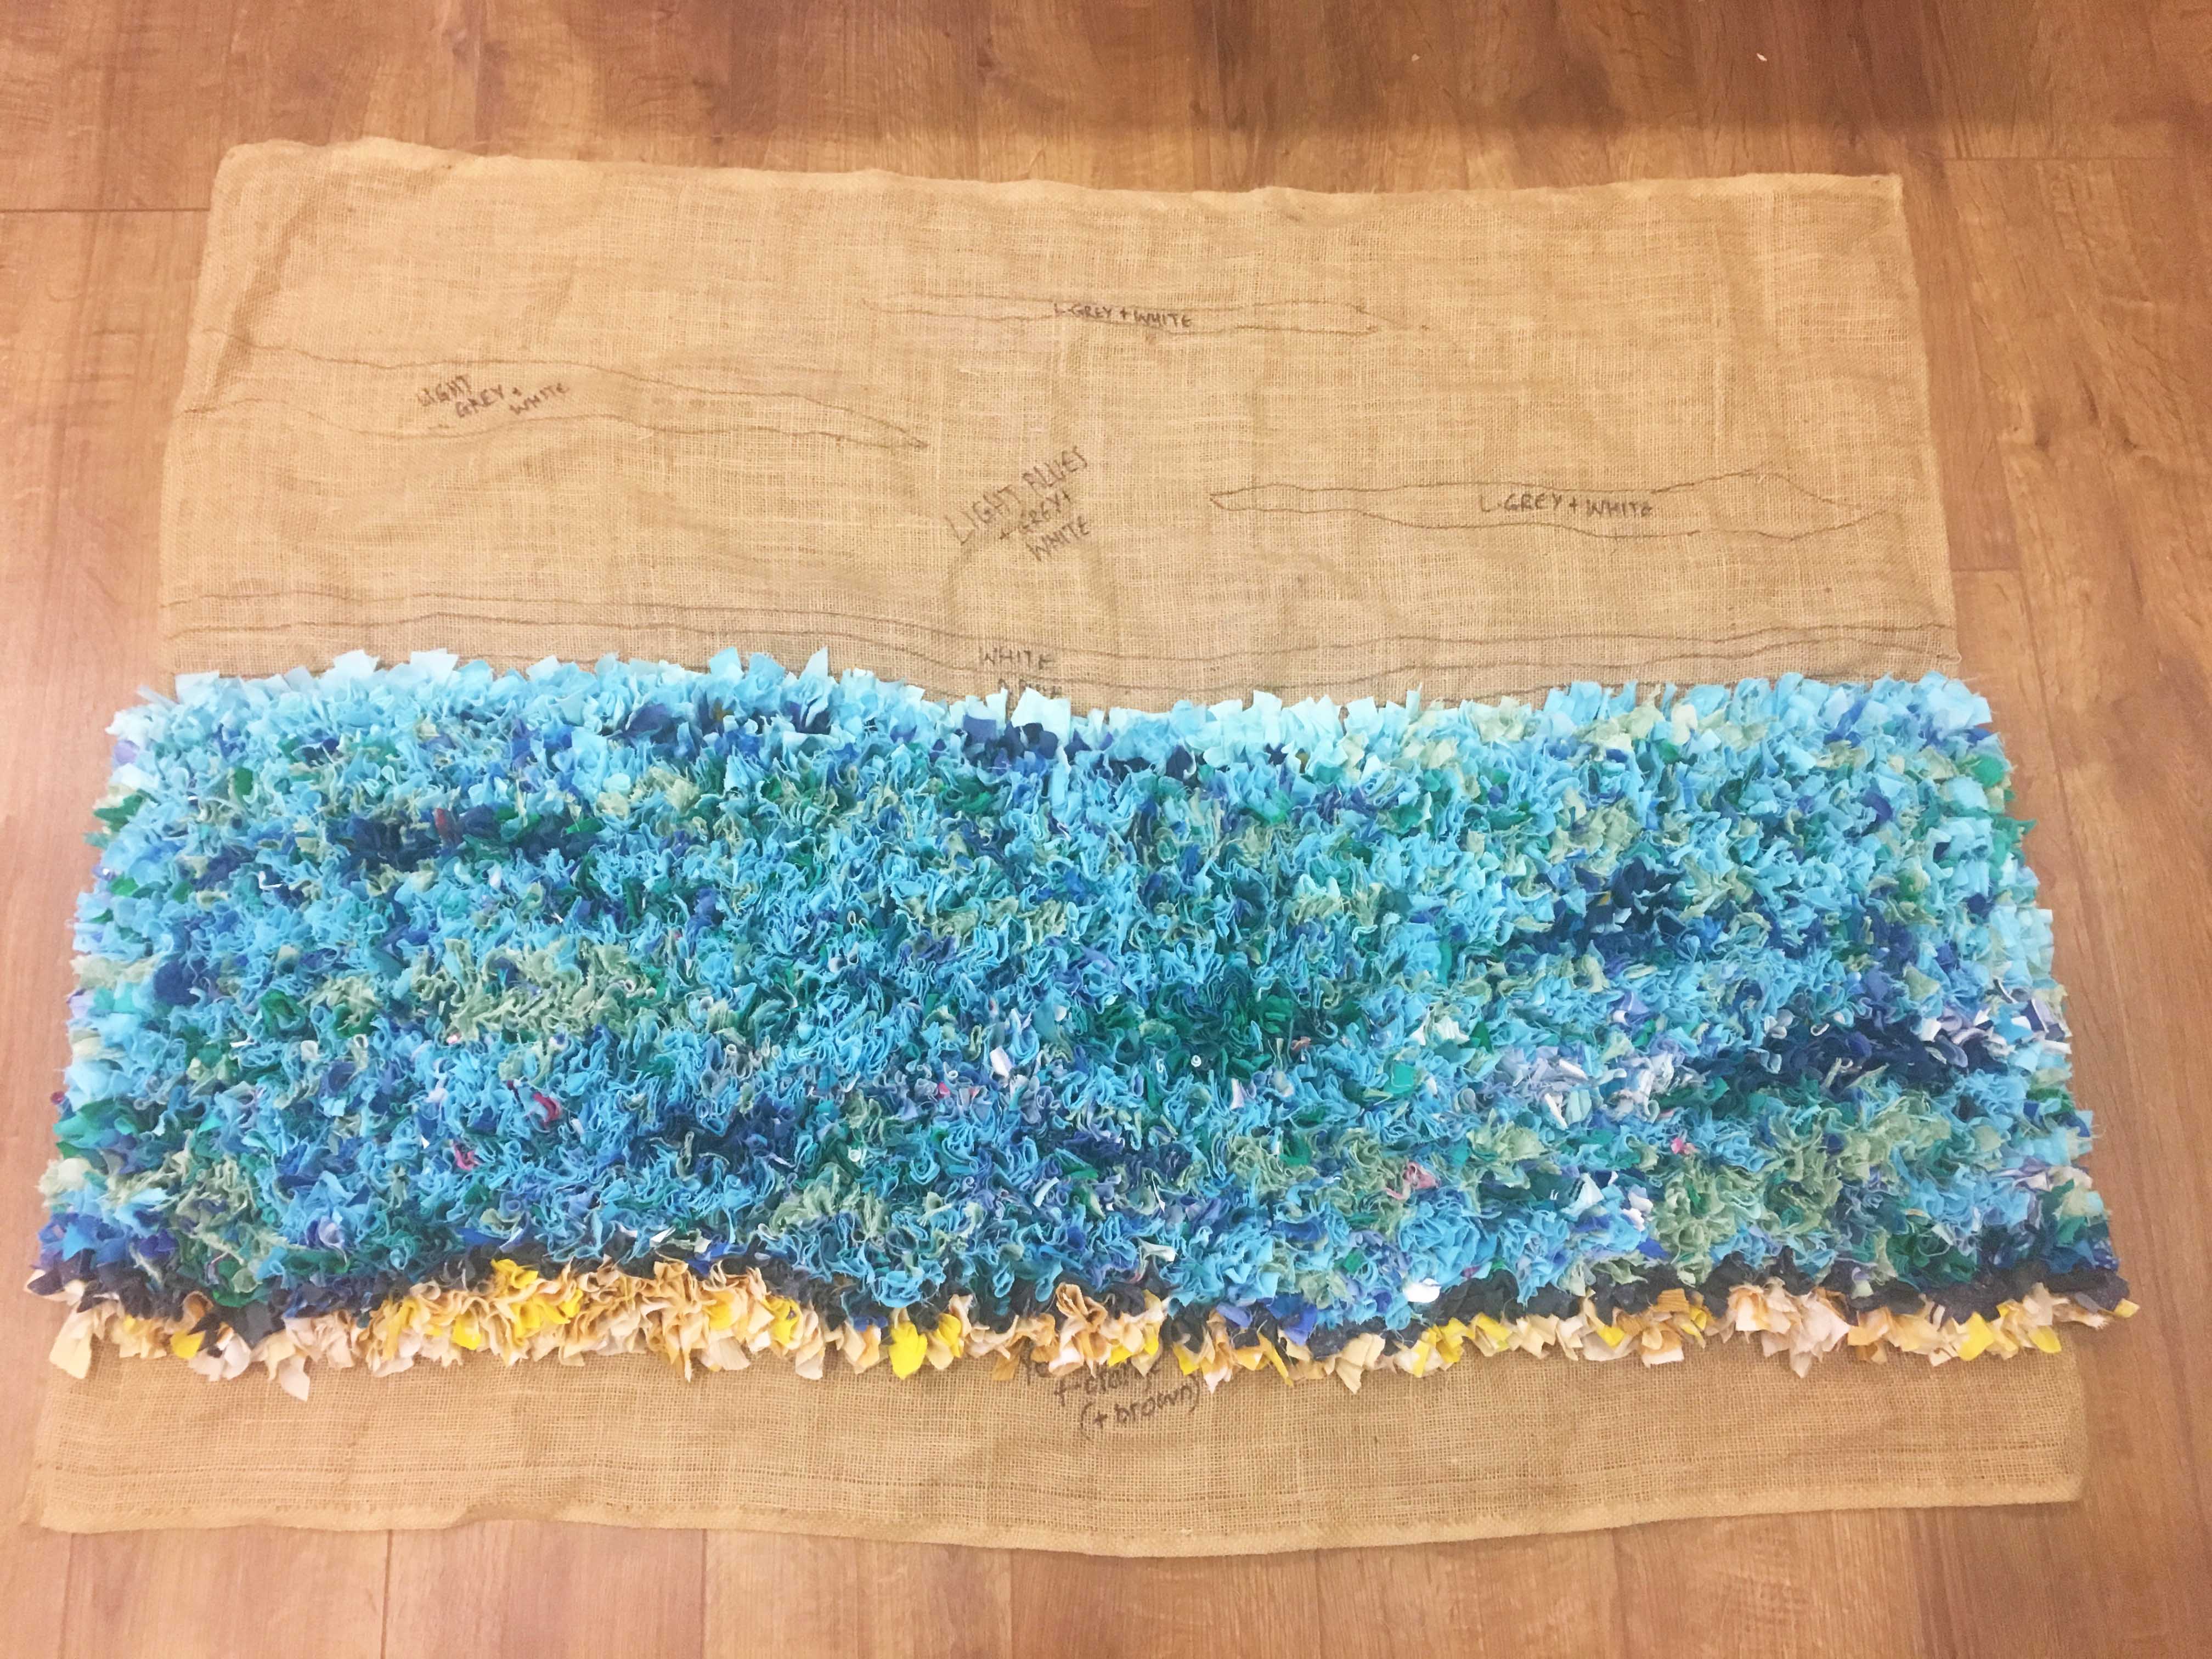
This shows the blocks that I sketched onto the hessian to plan it out.
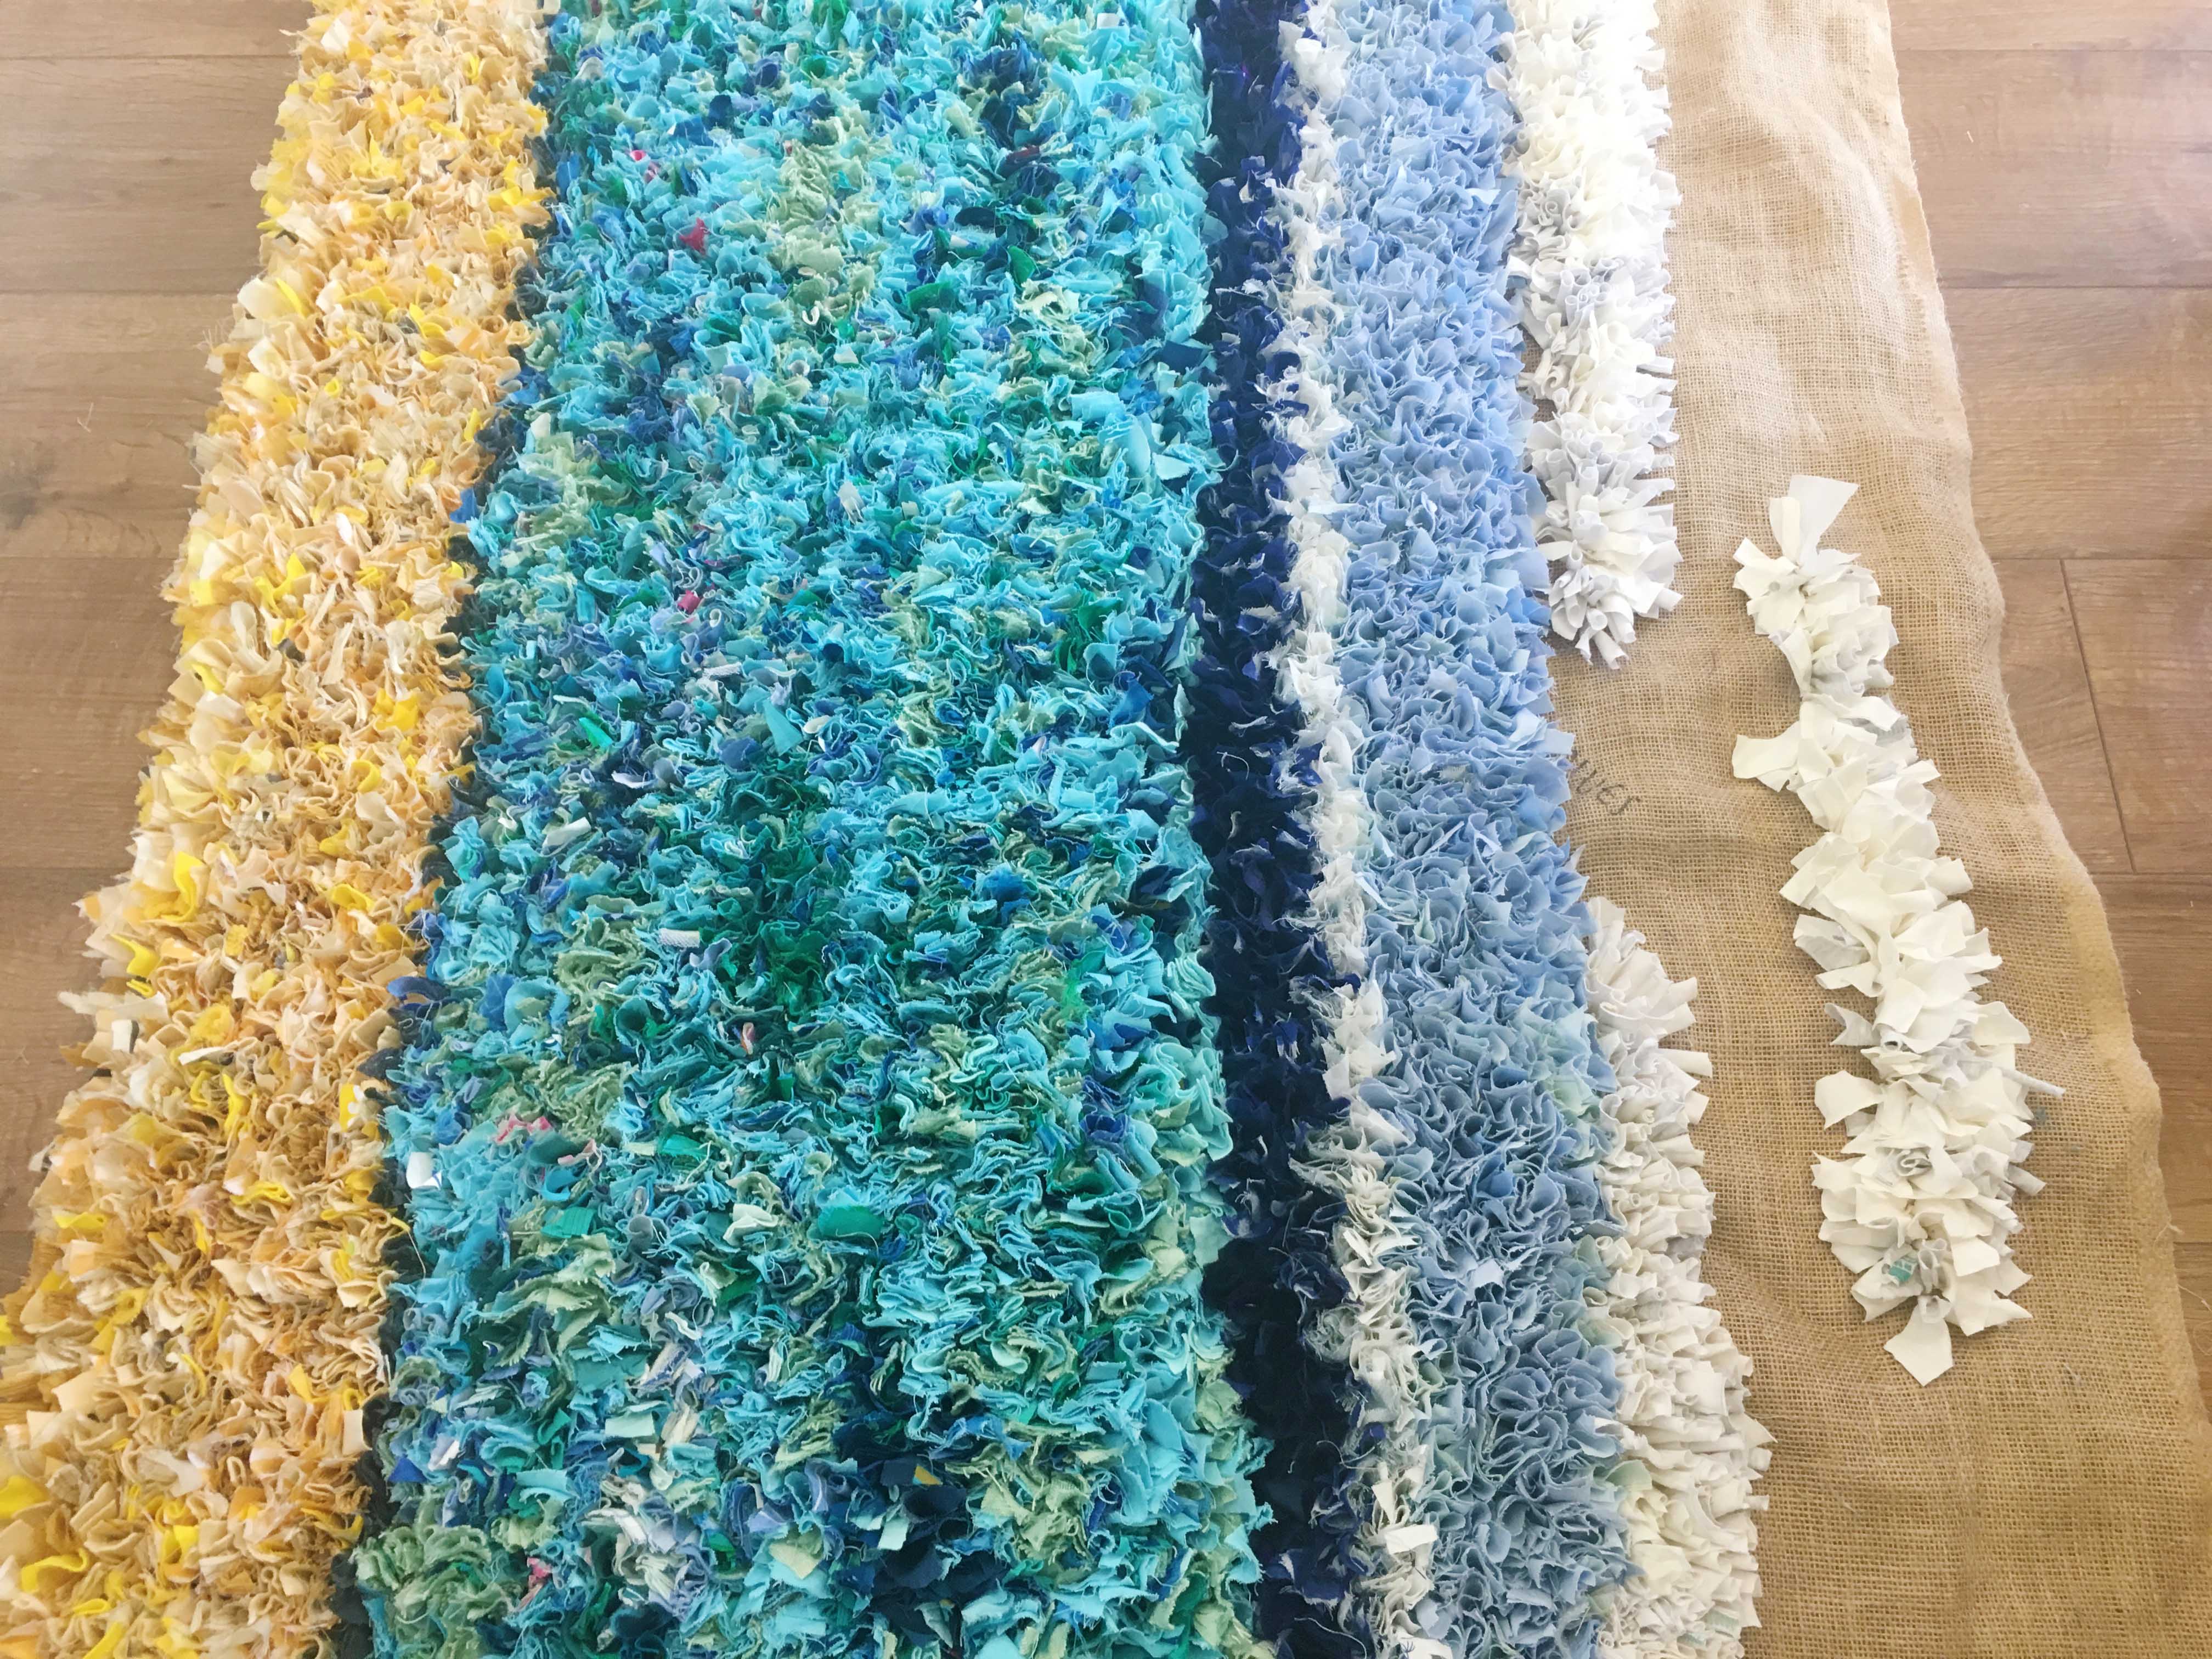
When rag rugging the sea, I chopped up 7 different shades of blue to add to the pacific island fabric offcuts I got my hands on when I was there. I have been randomly rag rugging handfuls whilst working in rows. Occasionally I will rag rug a swathe of a distinct colour (the dark blue or very light green, for example) if I want it to stand out.
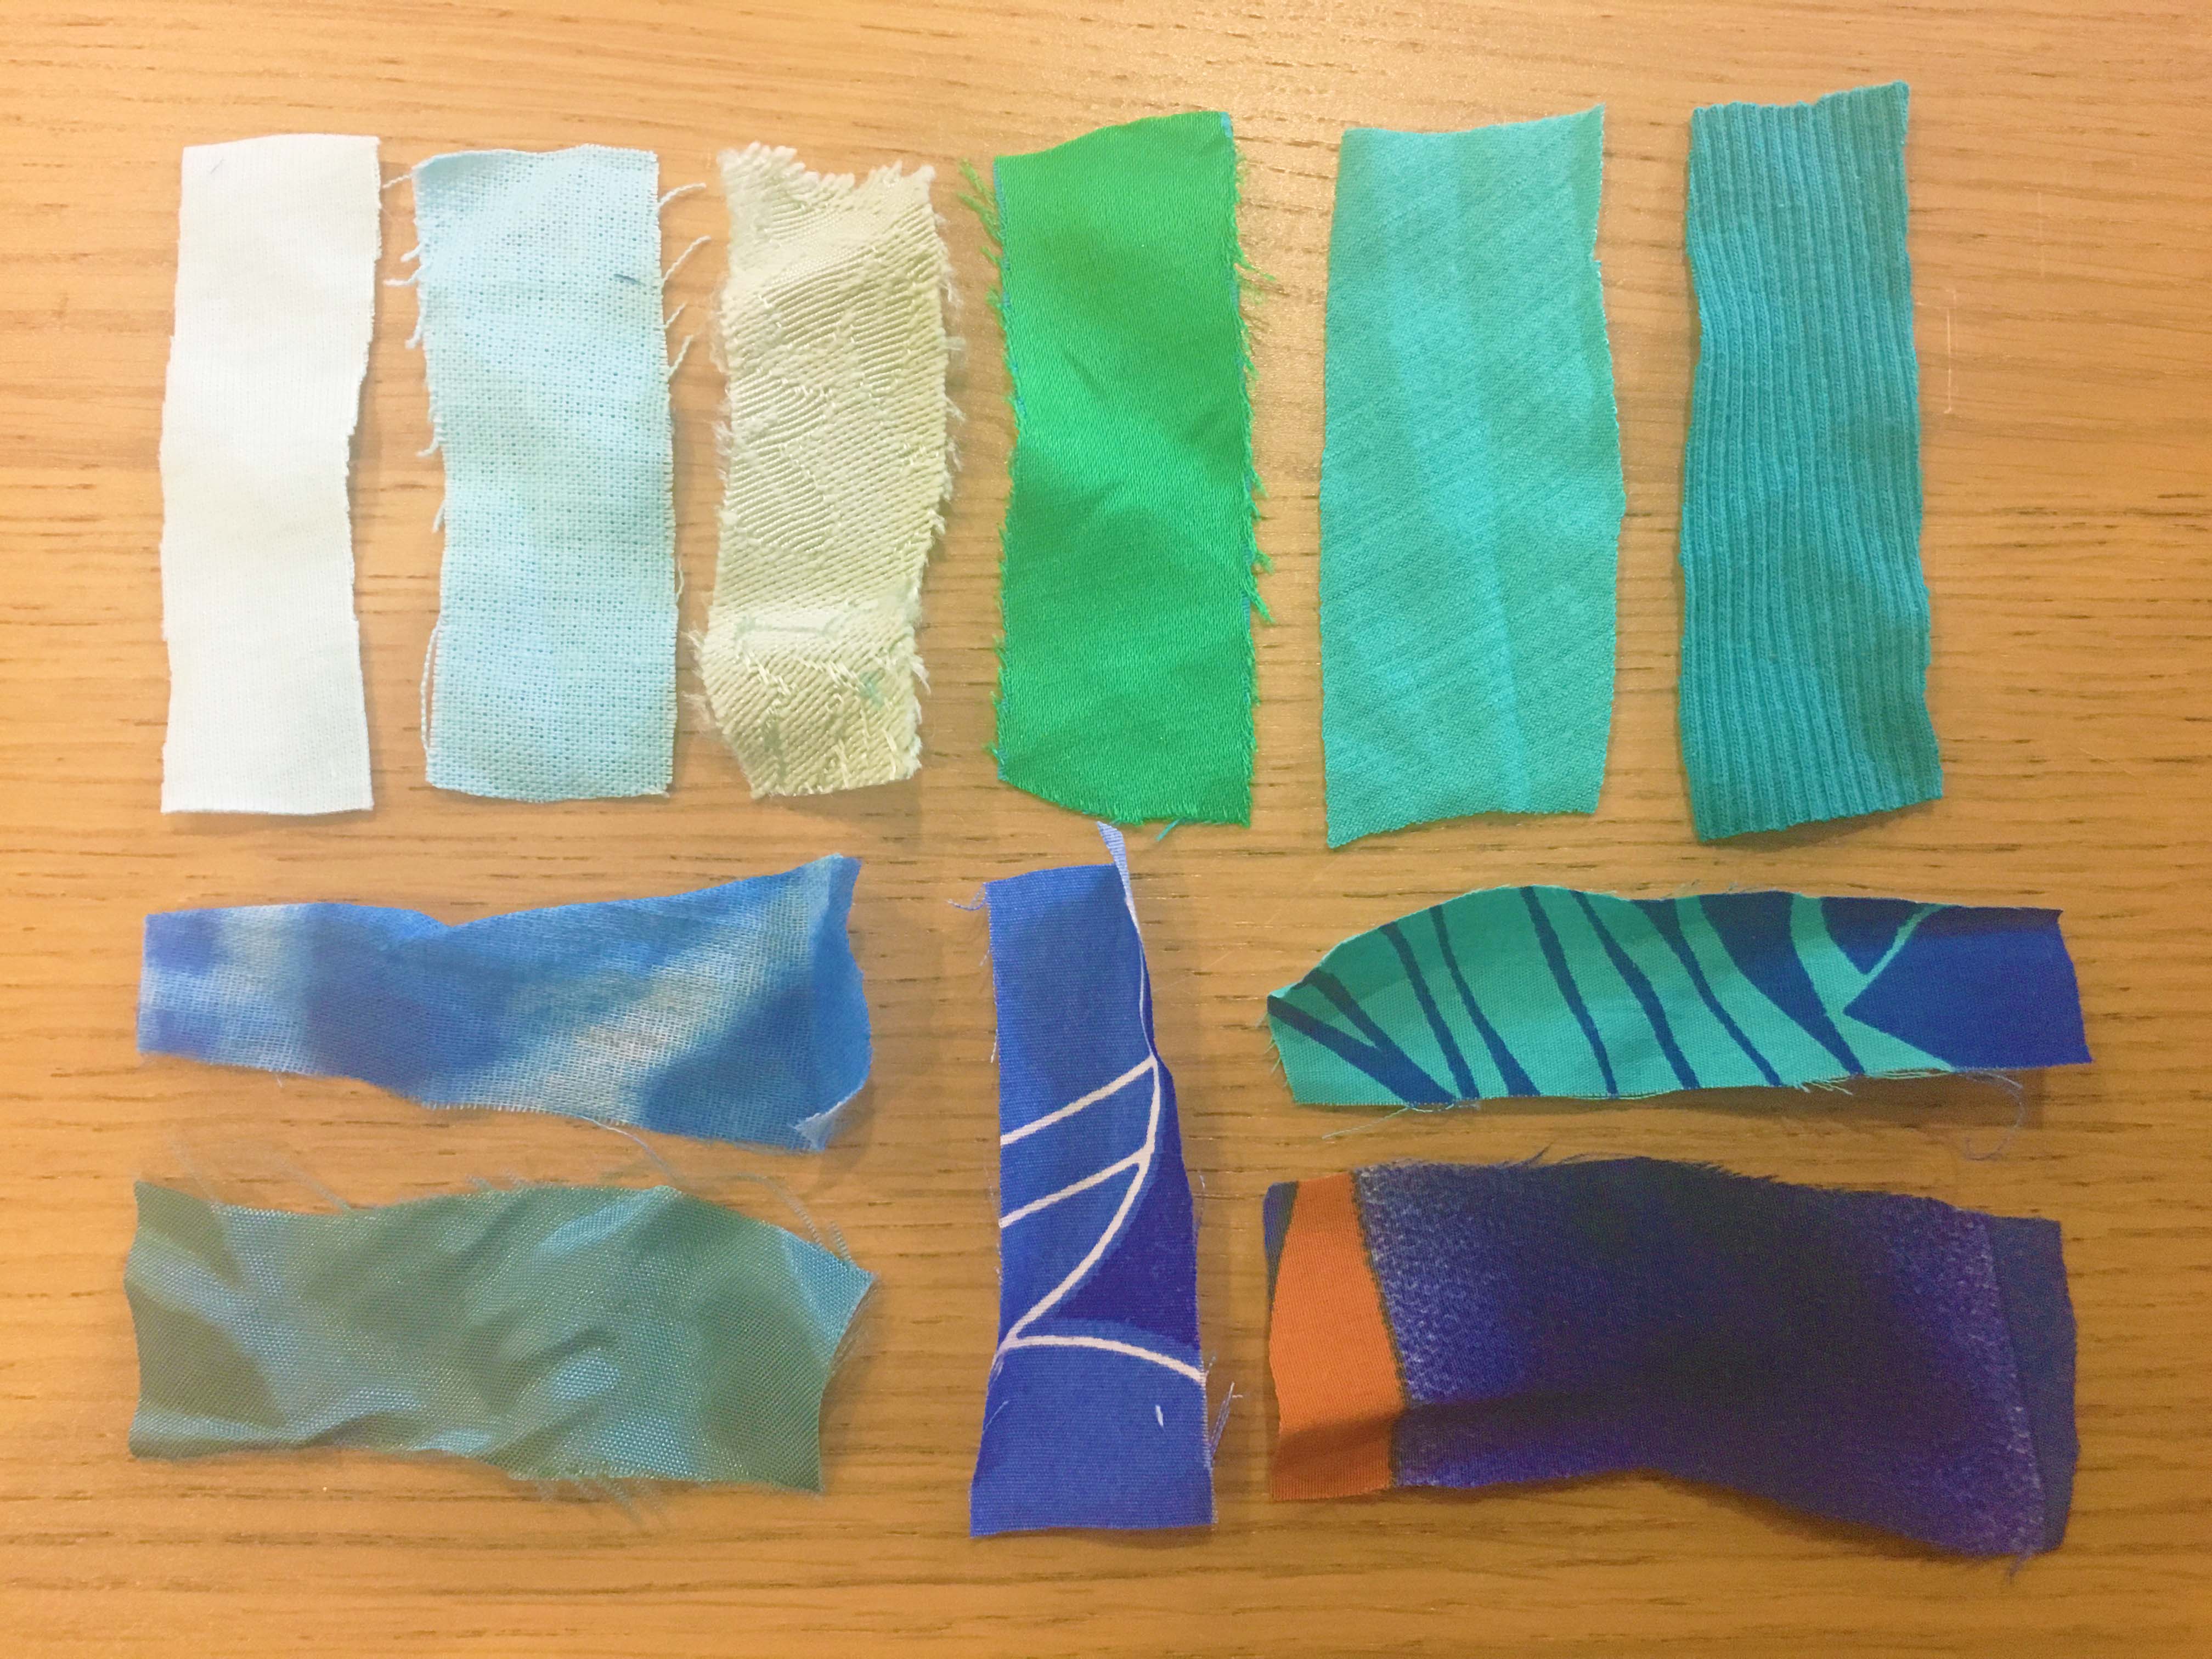
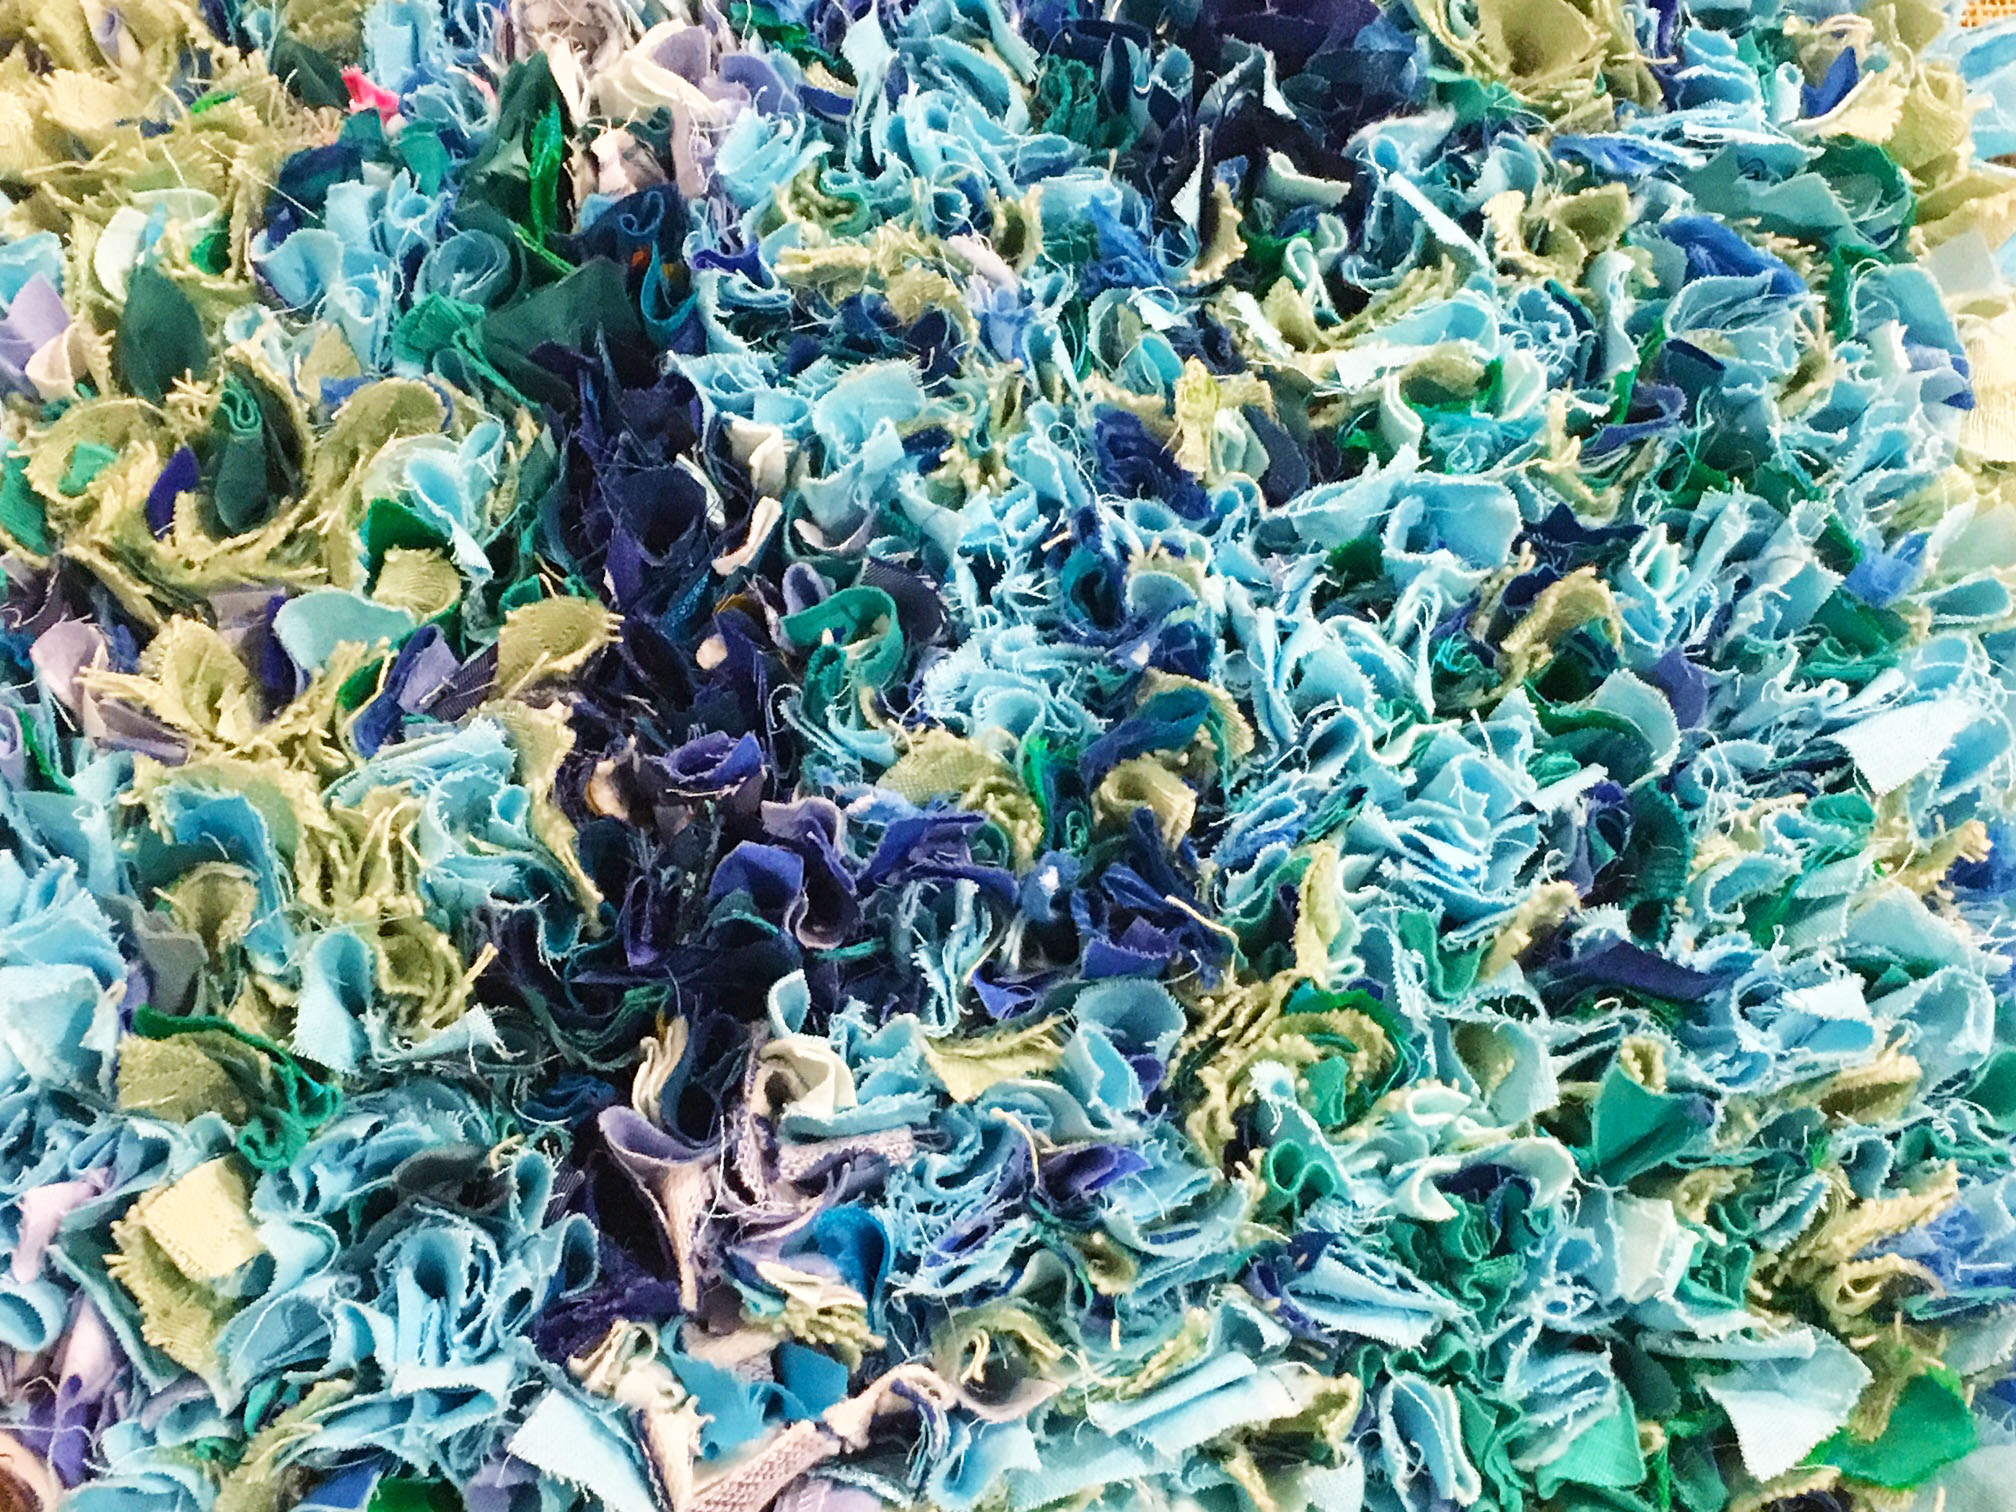
These are the colours which I’ve used so far for the sea – it’s a real mix of different shades of blue.
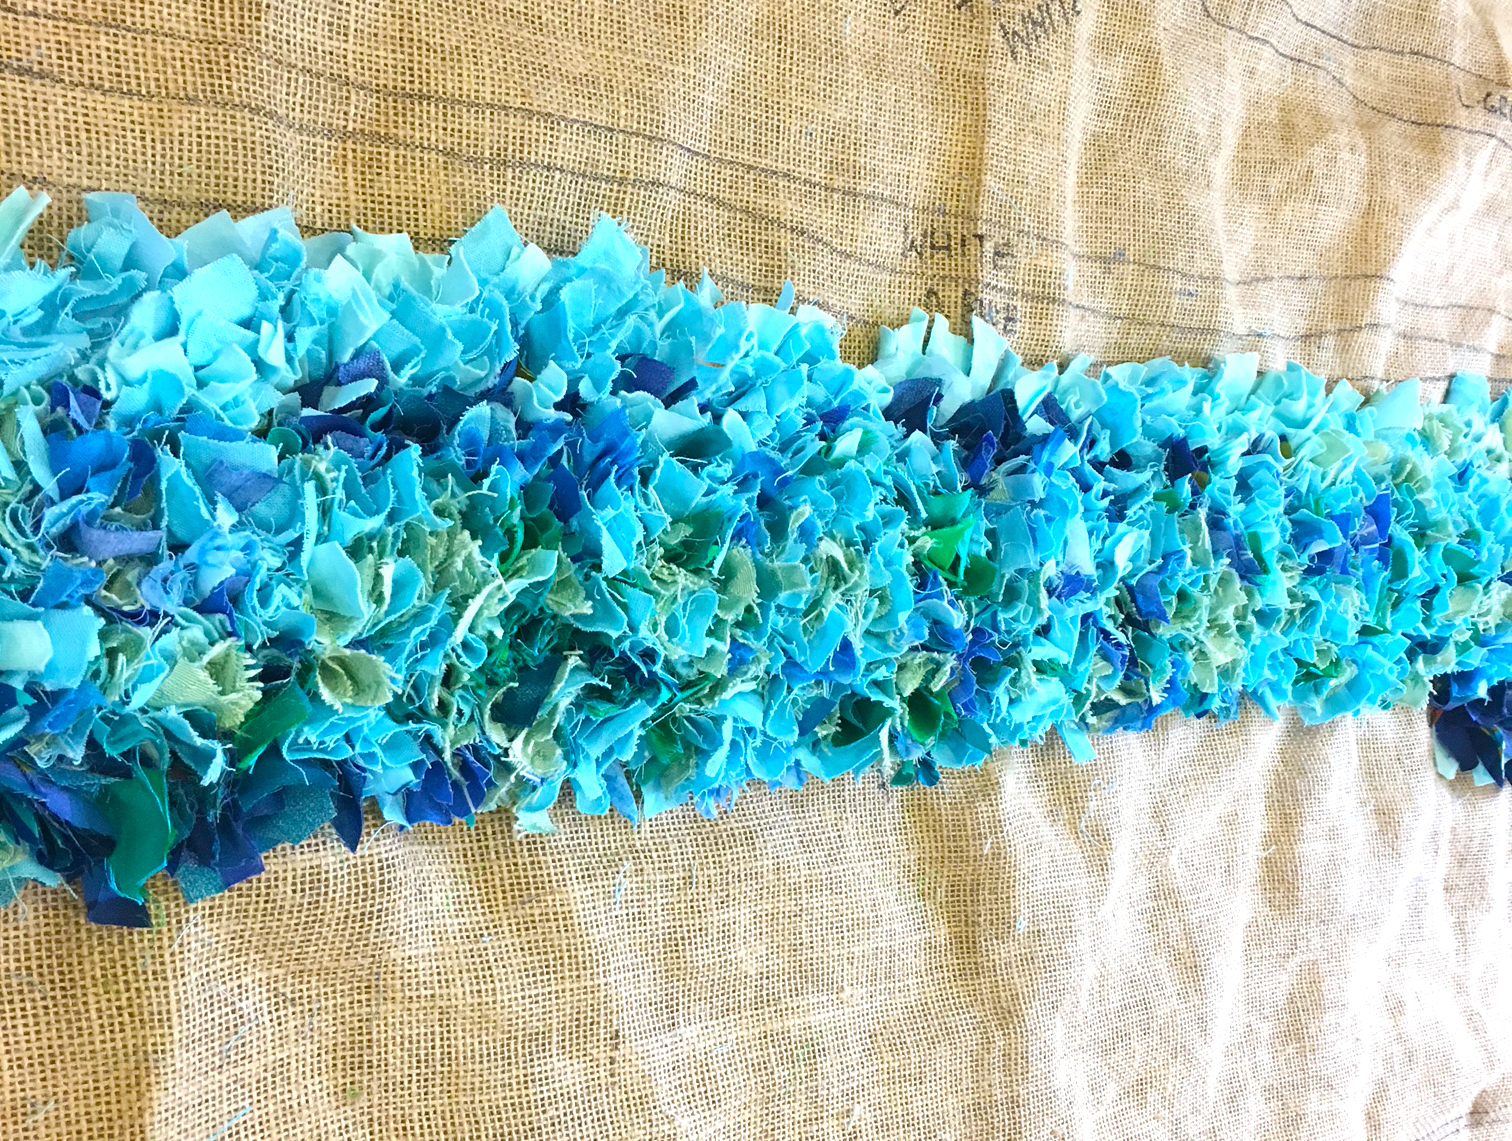
As you can see, I don’t have any problem using fabrics that fray in my rag rugs – it just adds texture.
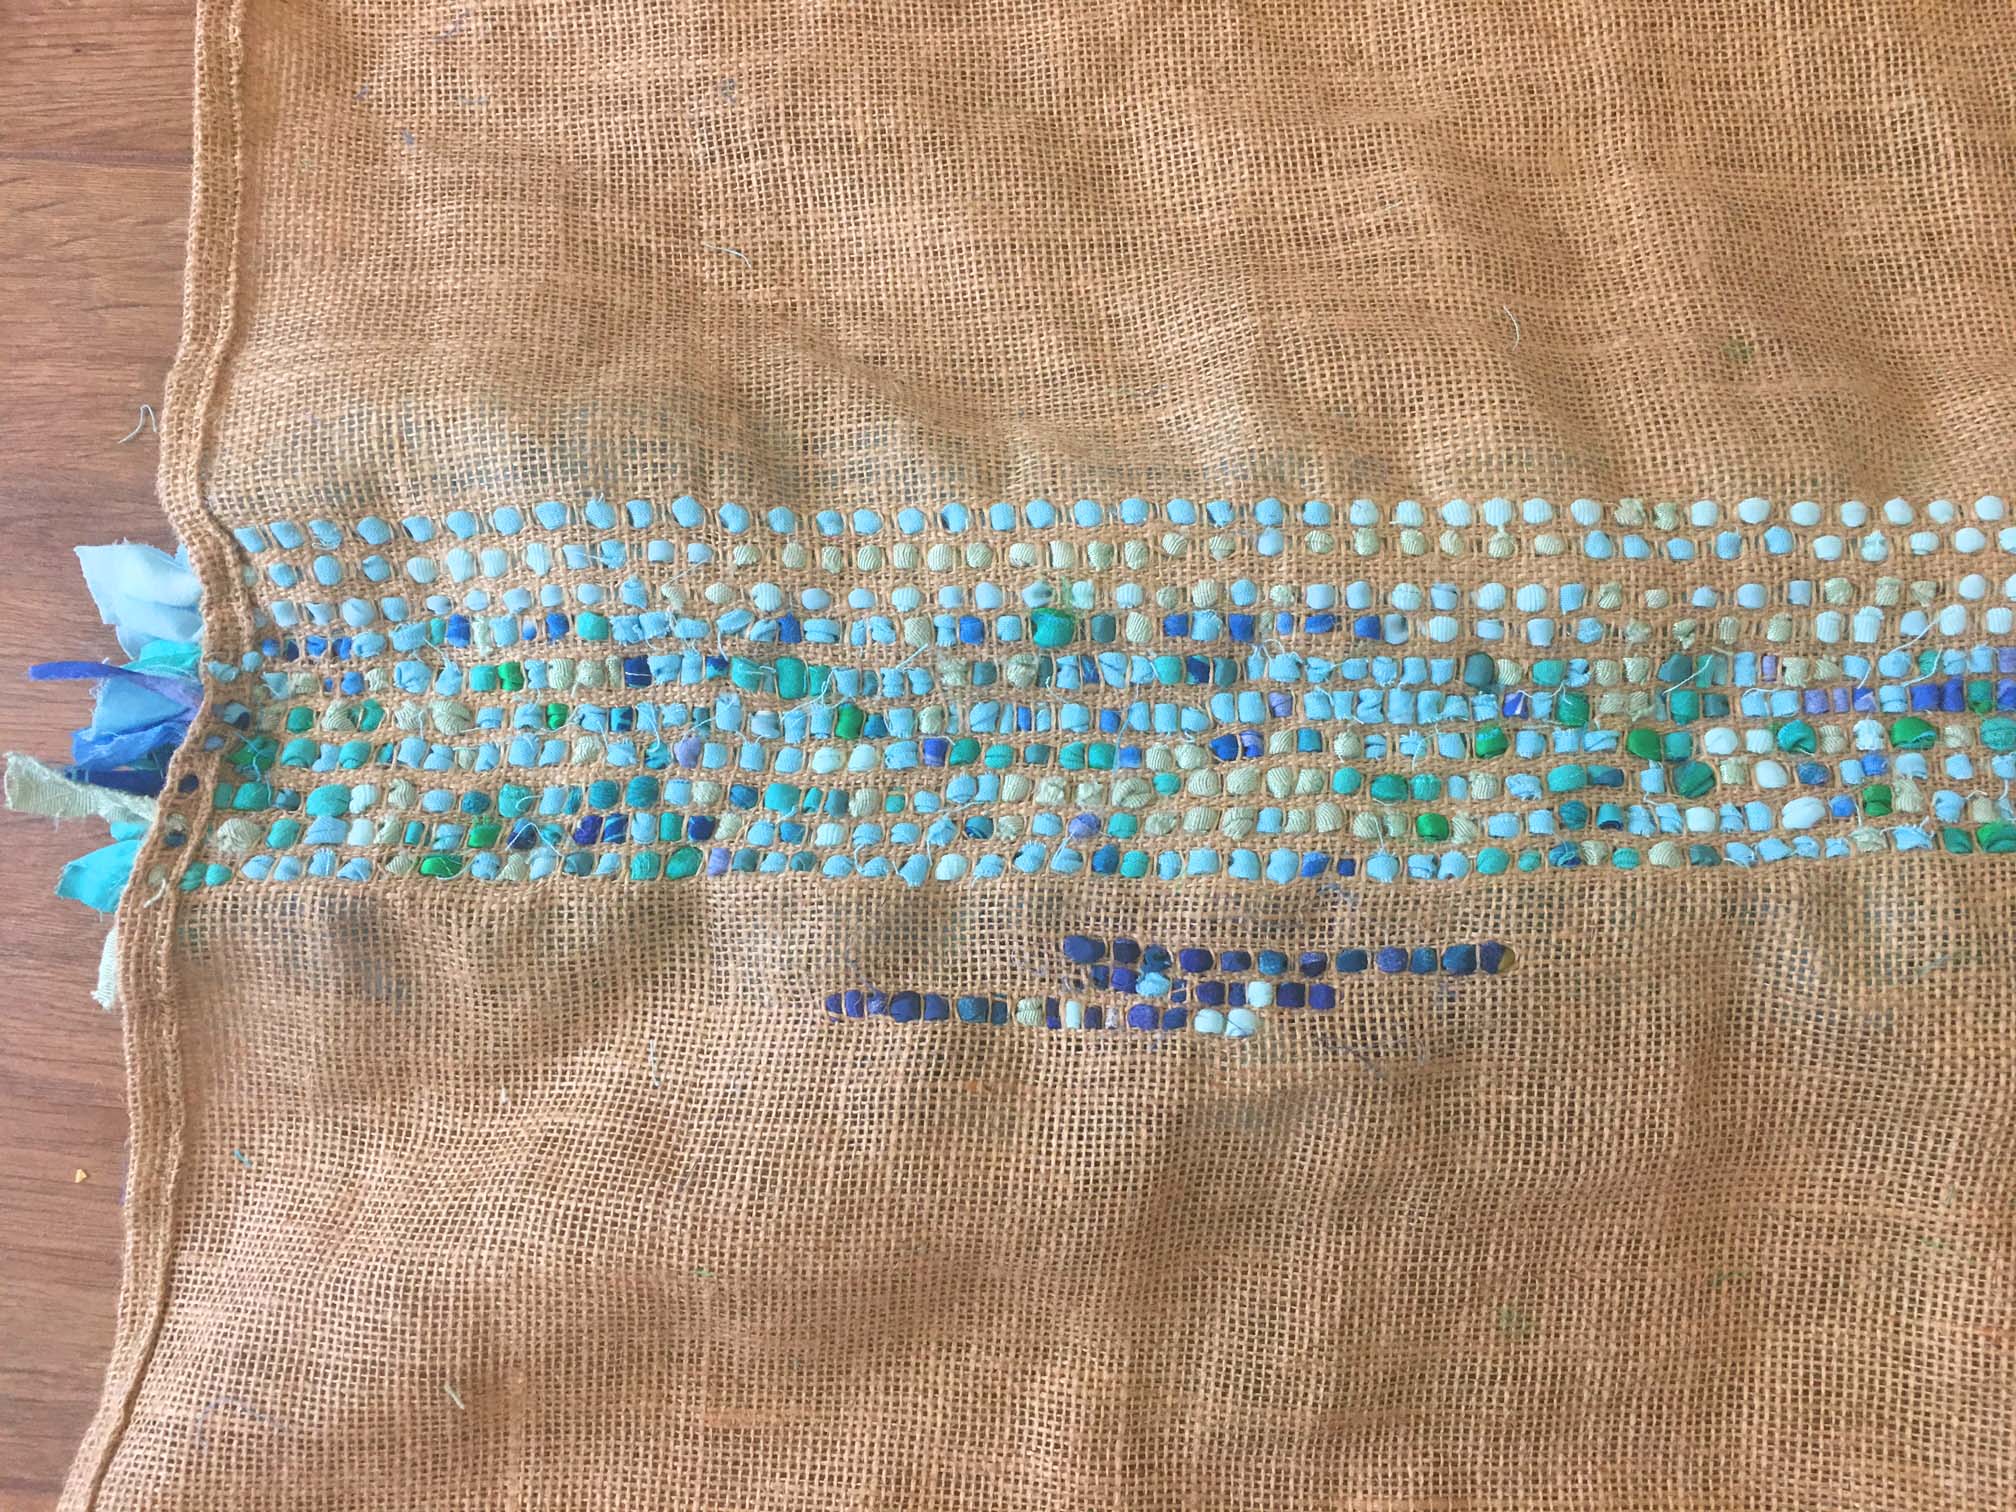
You can see on the back of the hessian where I’ve added in a swathe of dark blue before filling in. This will stand out amongst the other blues.
I’VE FINALLY FINISHED THE OCEAN – 03/05/2017
Below are a few photos to show how the rug began to take shape. Here’s what it looks like while I was finishing the ocean part:
Rather than just rag rugging in full rows, after a while I start rag rugging in chunks across the rug to make things a little less monotonous.

I made sure to include darker areas in the sea as “coral” banks.
It’s amazing how many different blue fabrics ended up in the sea.
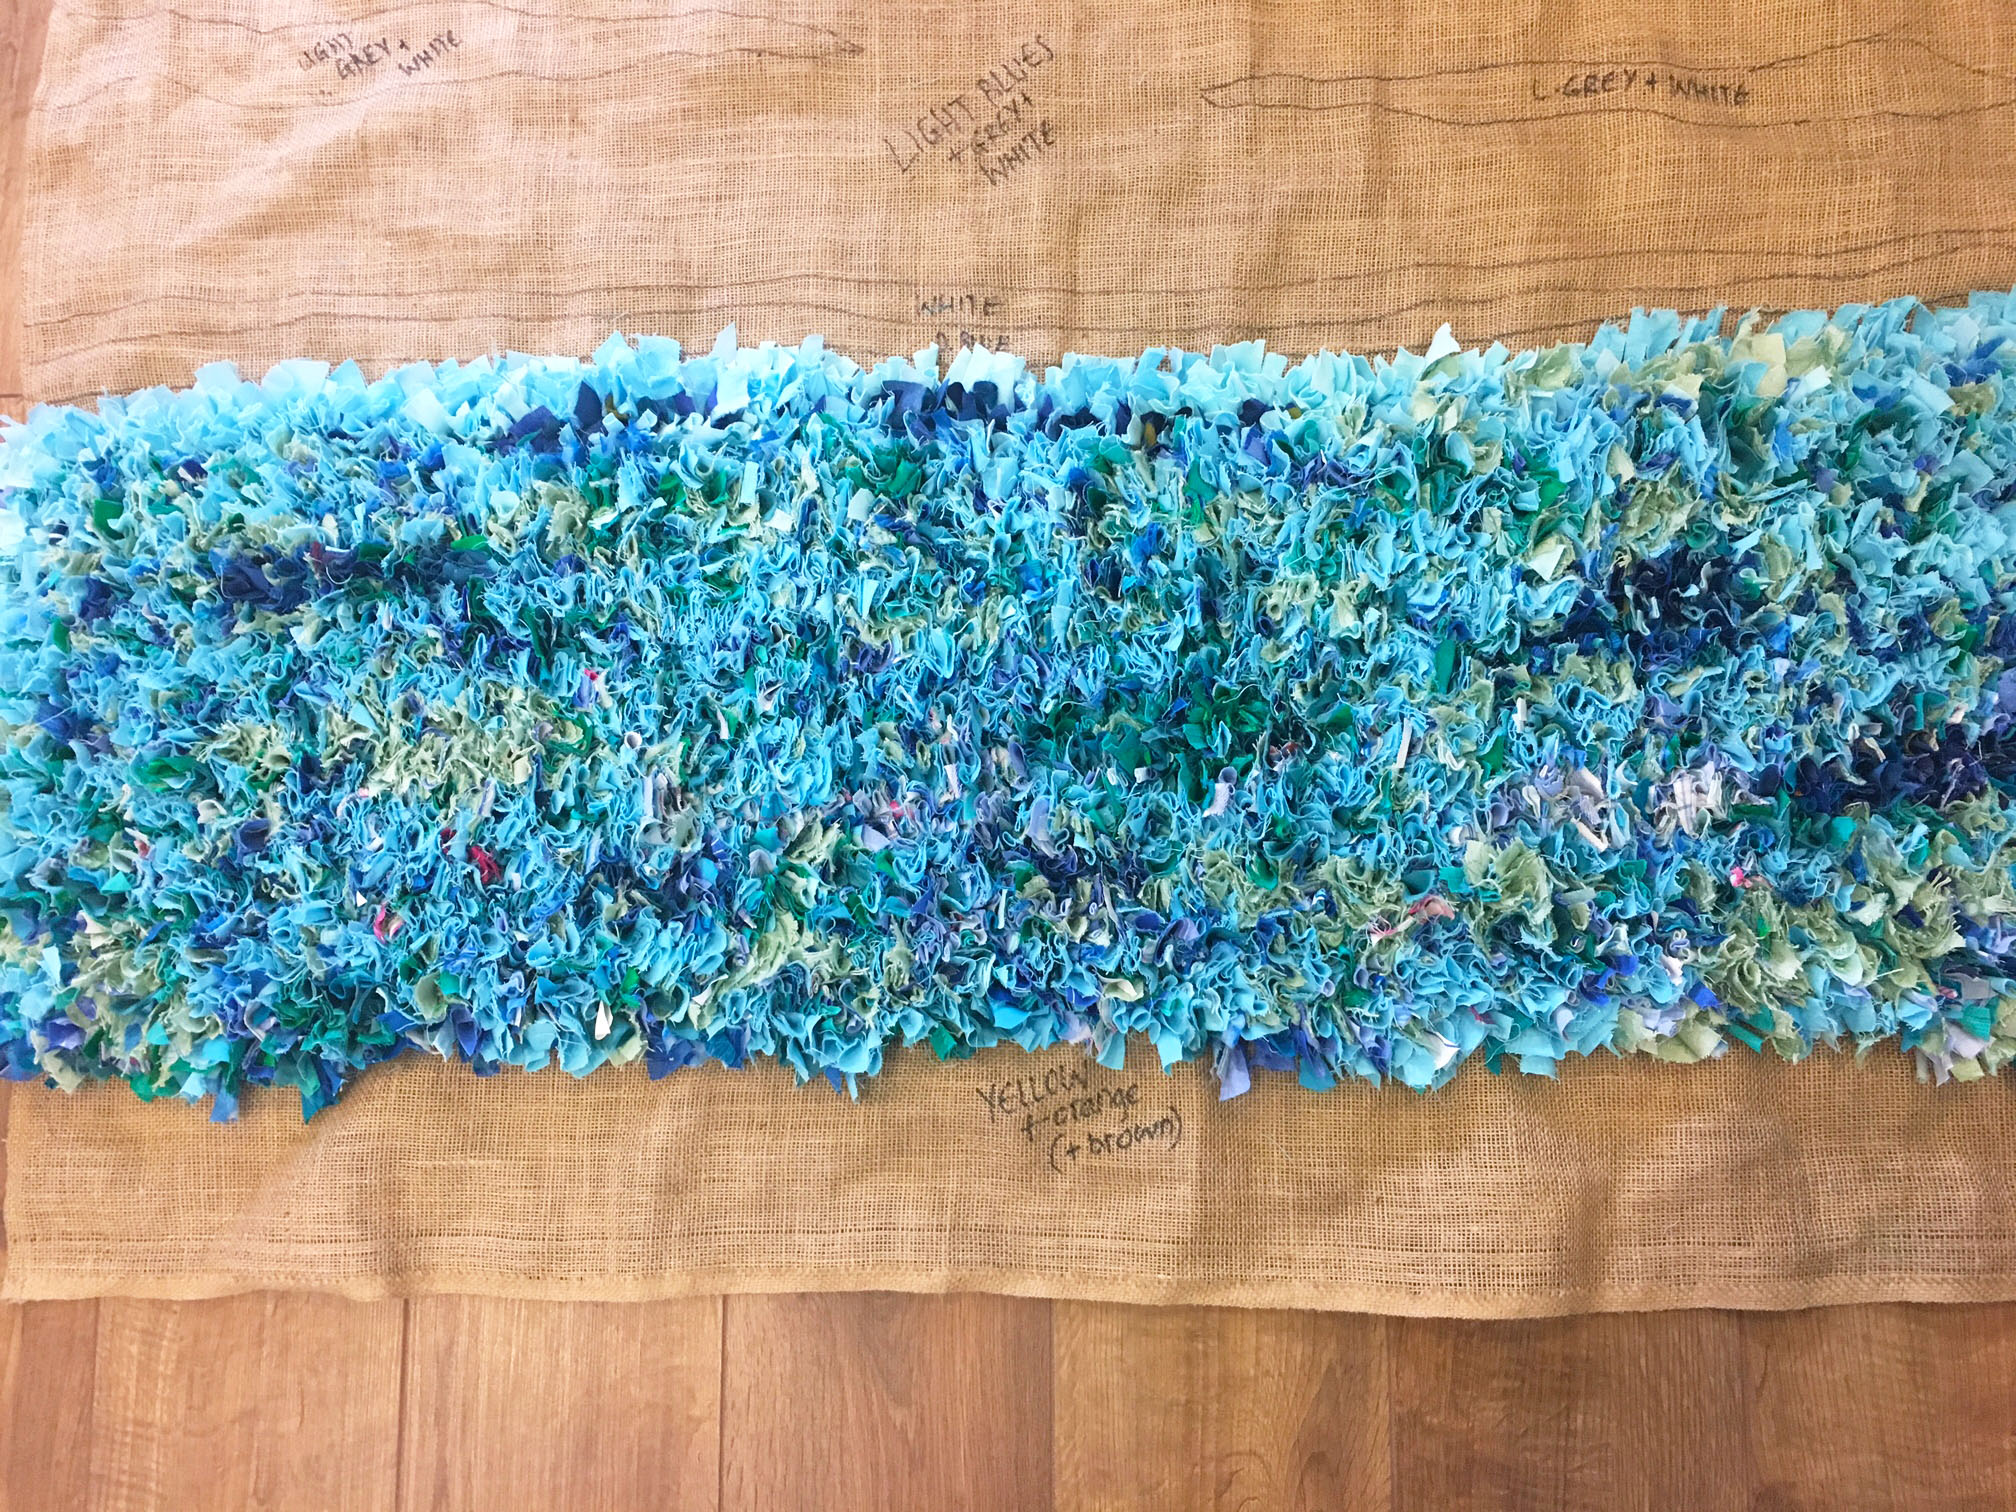
The rag rug sea was coming along quite nicely…
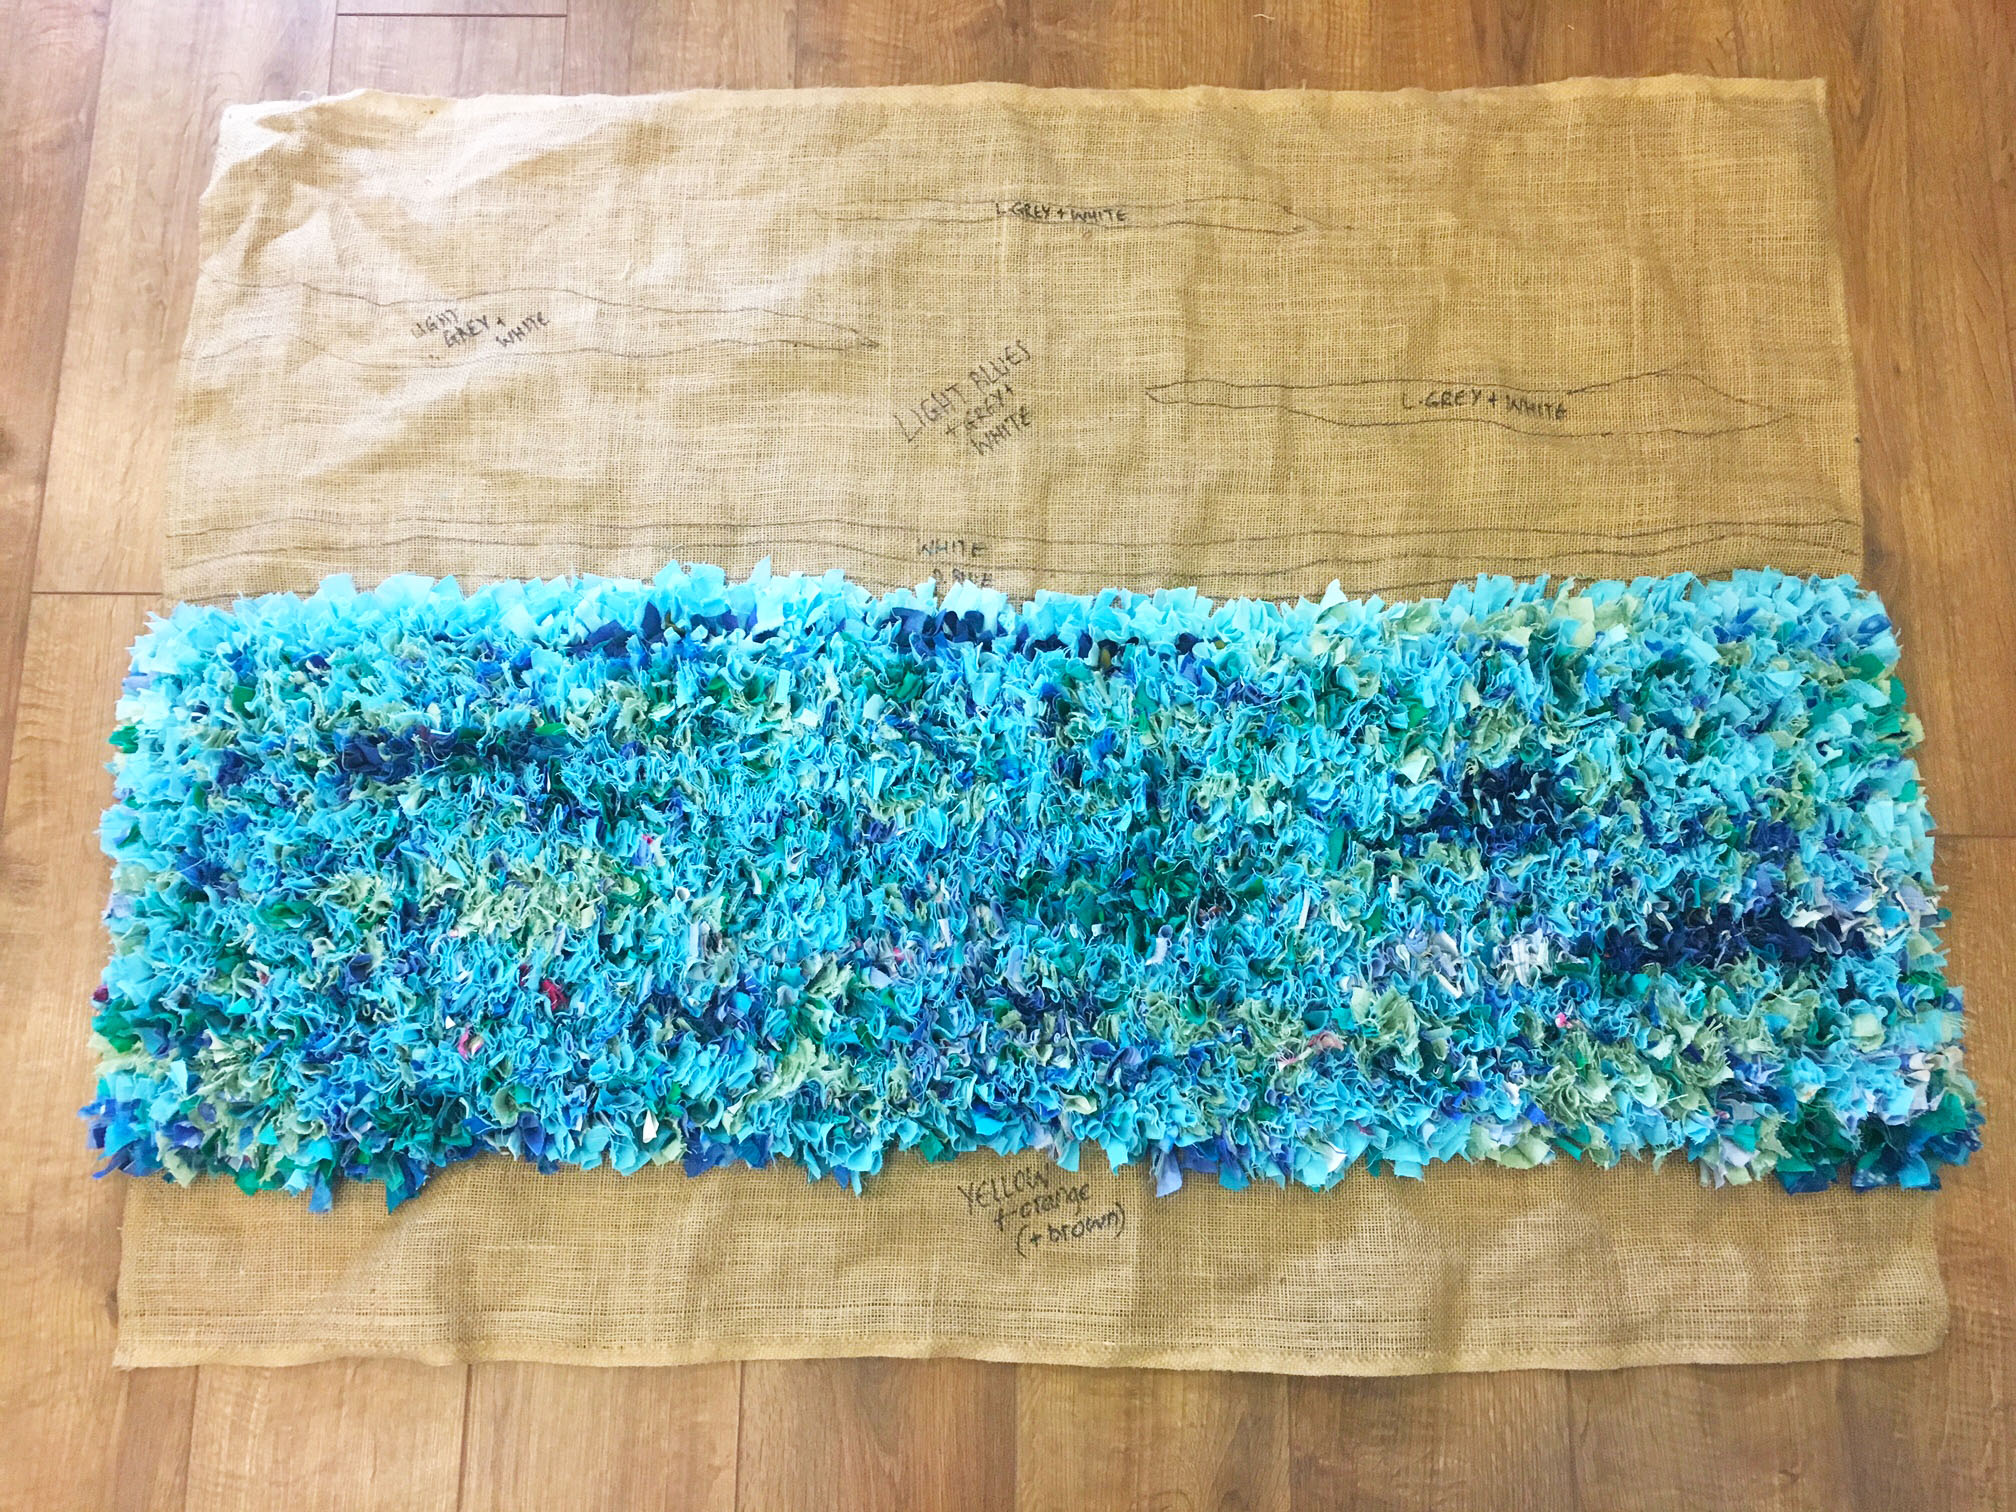
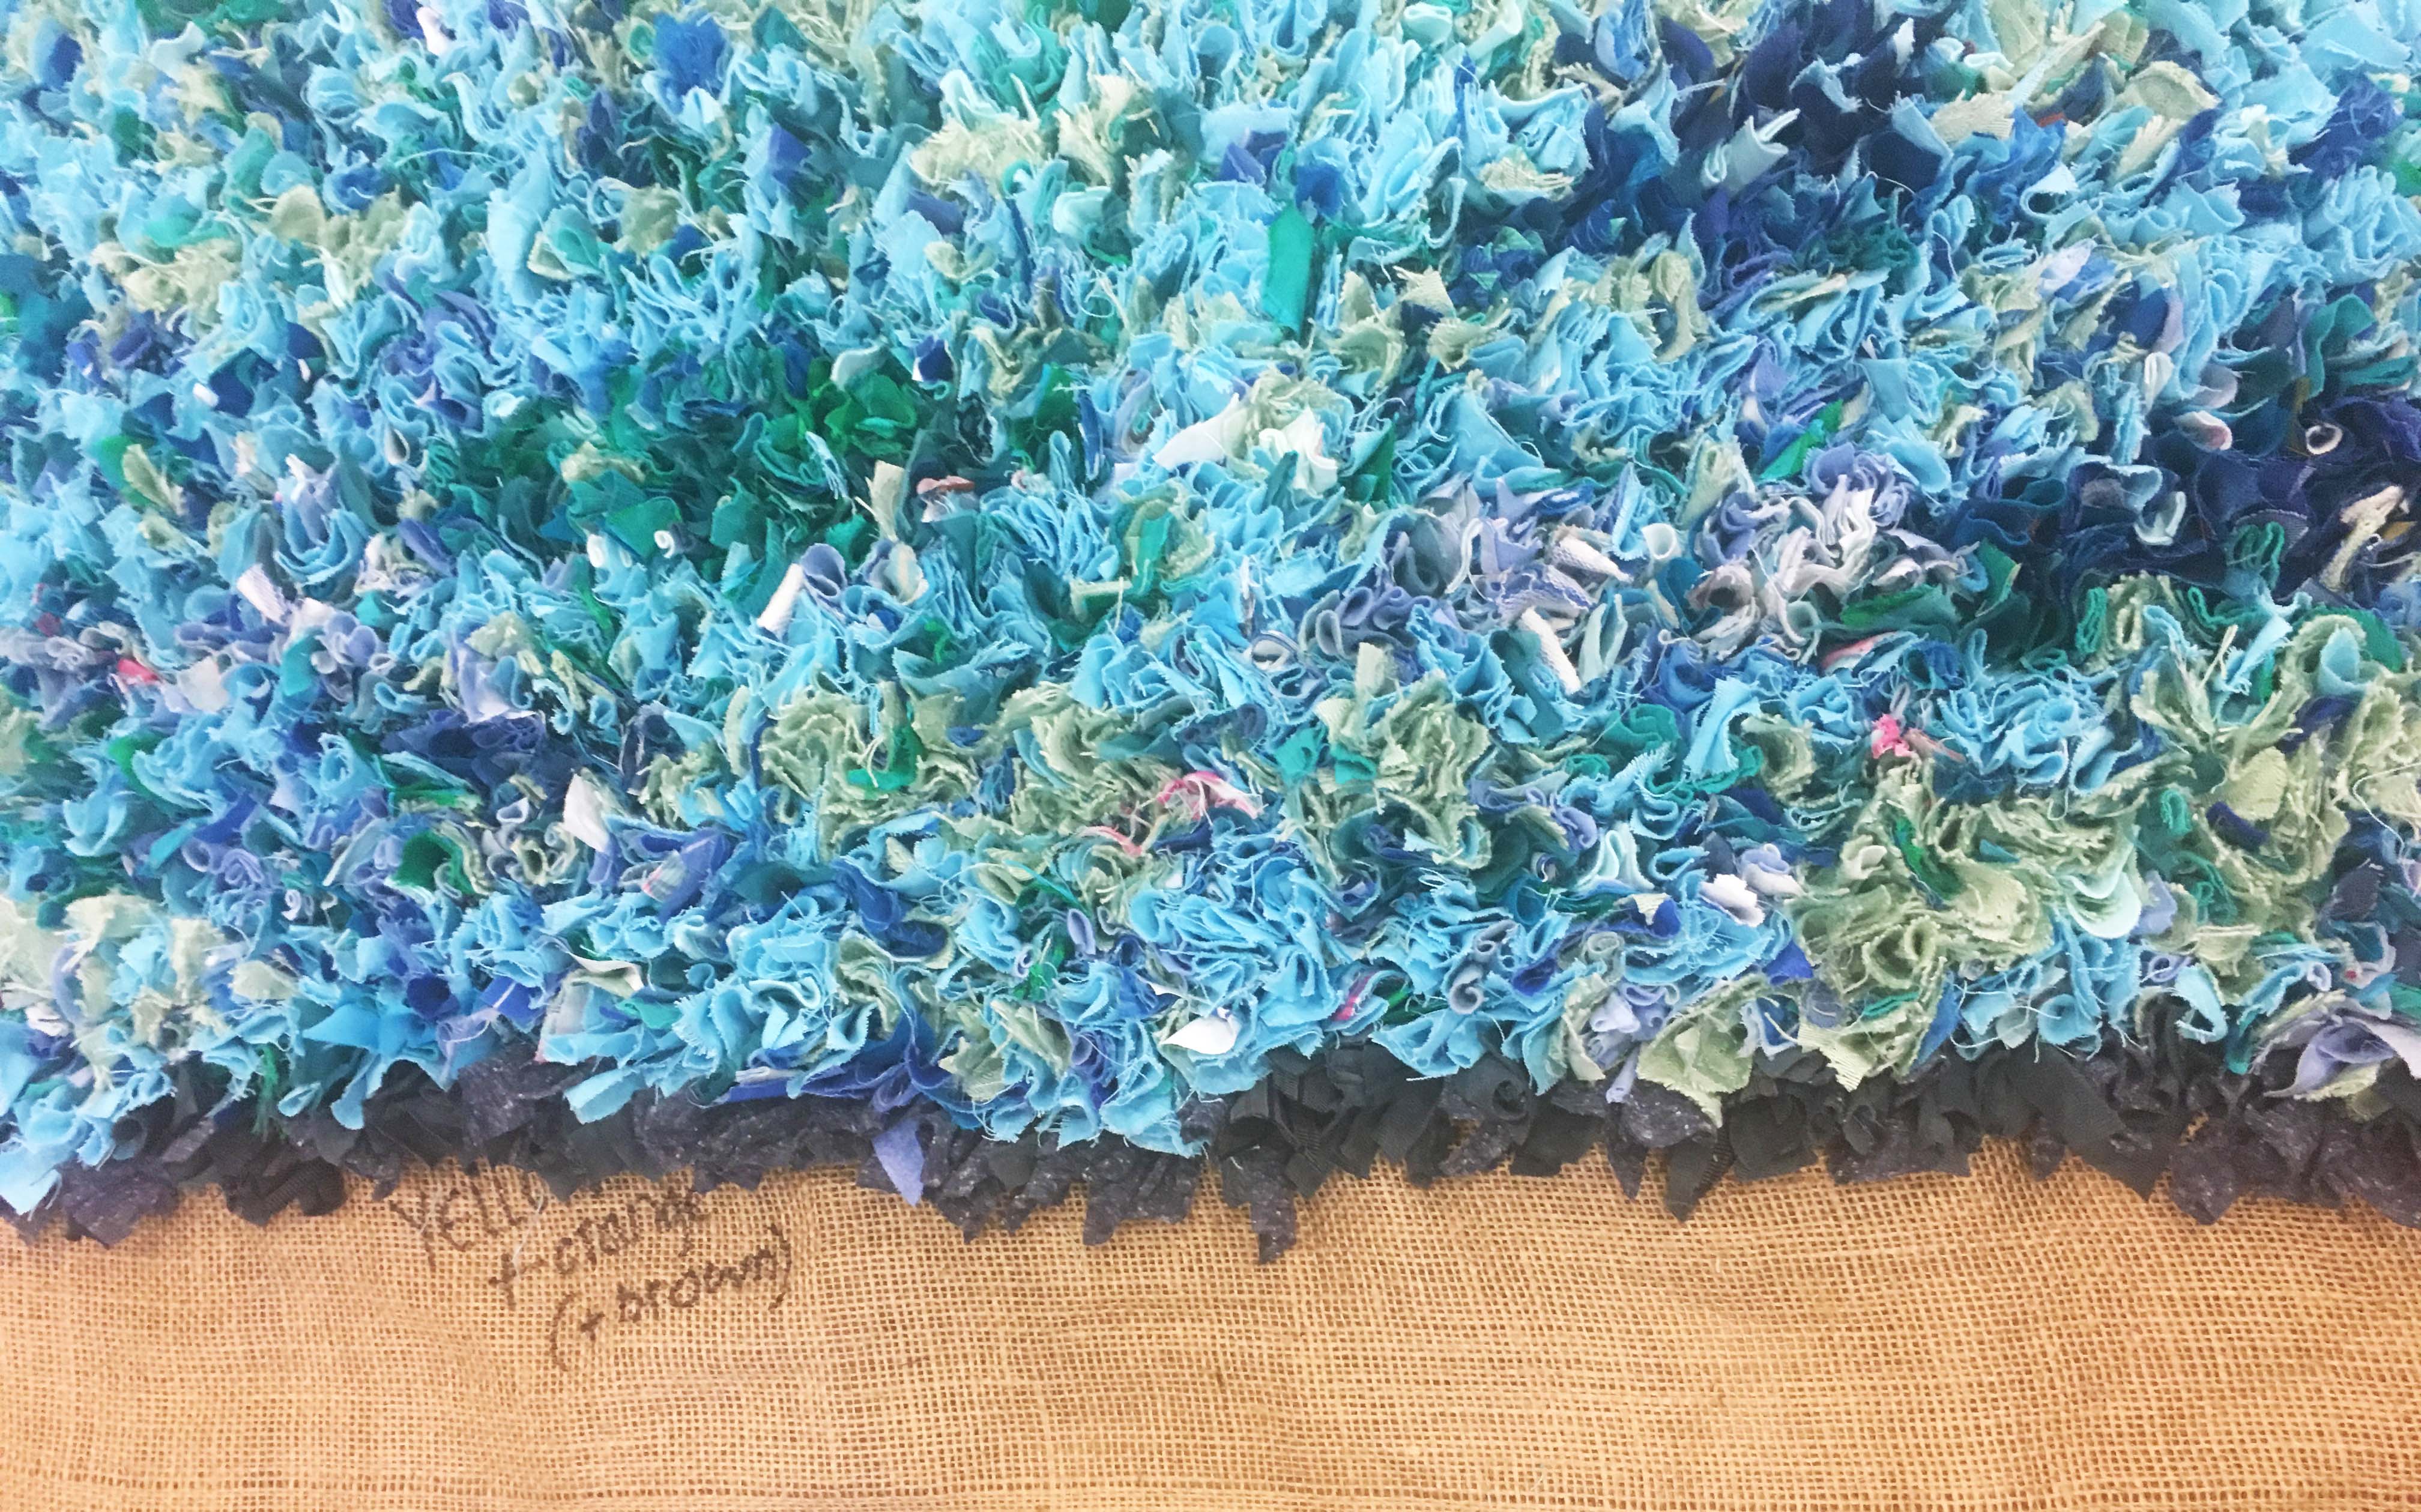
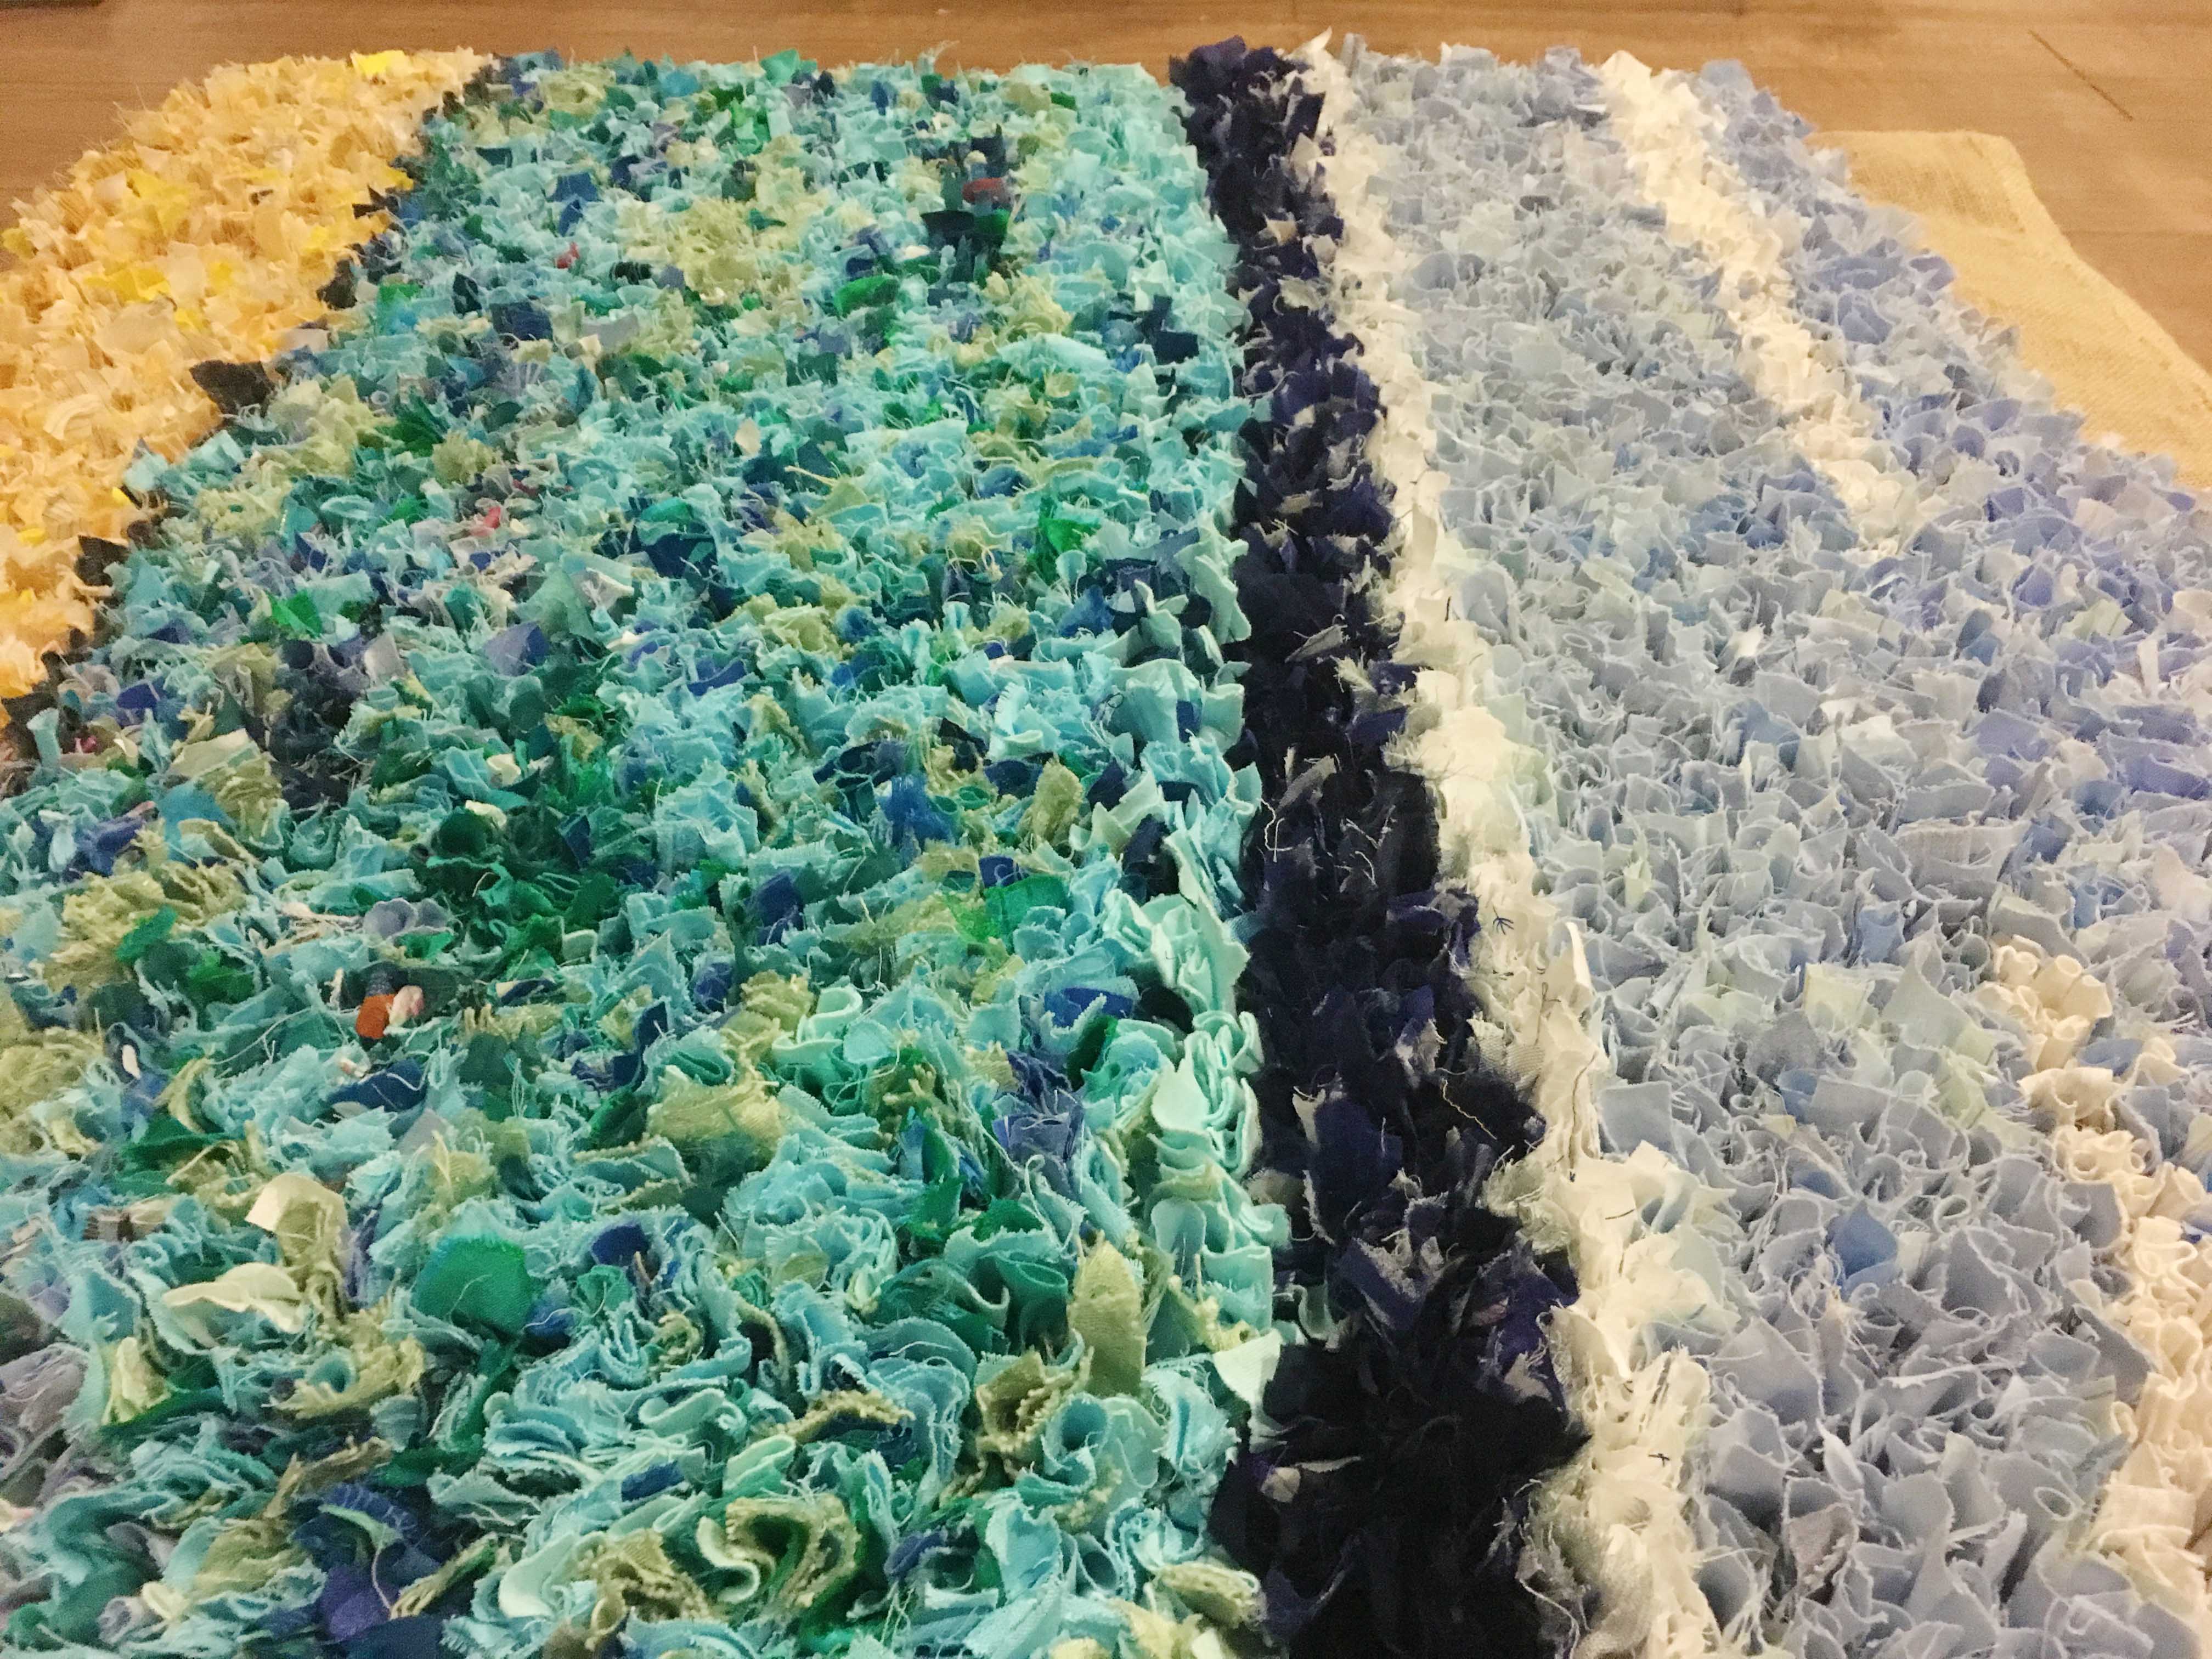
And ta da! This is what the ocean looked like when it was fully rag rugged…
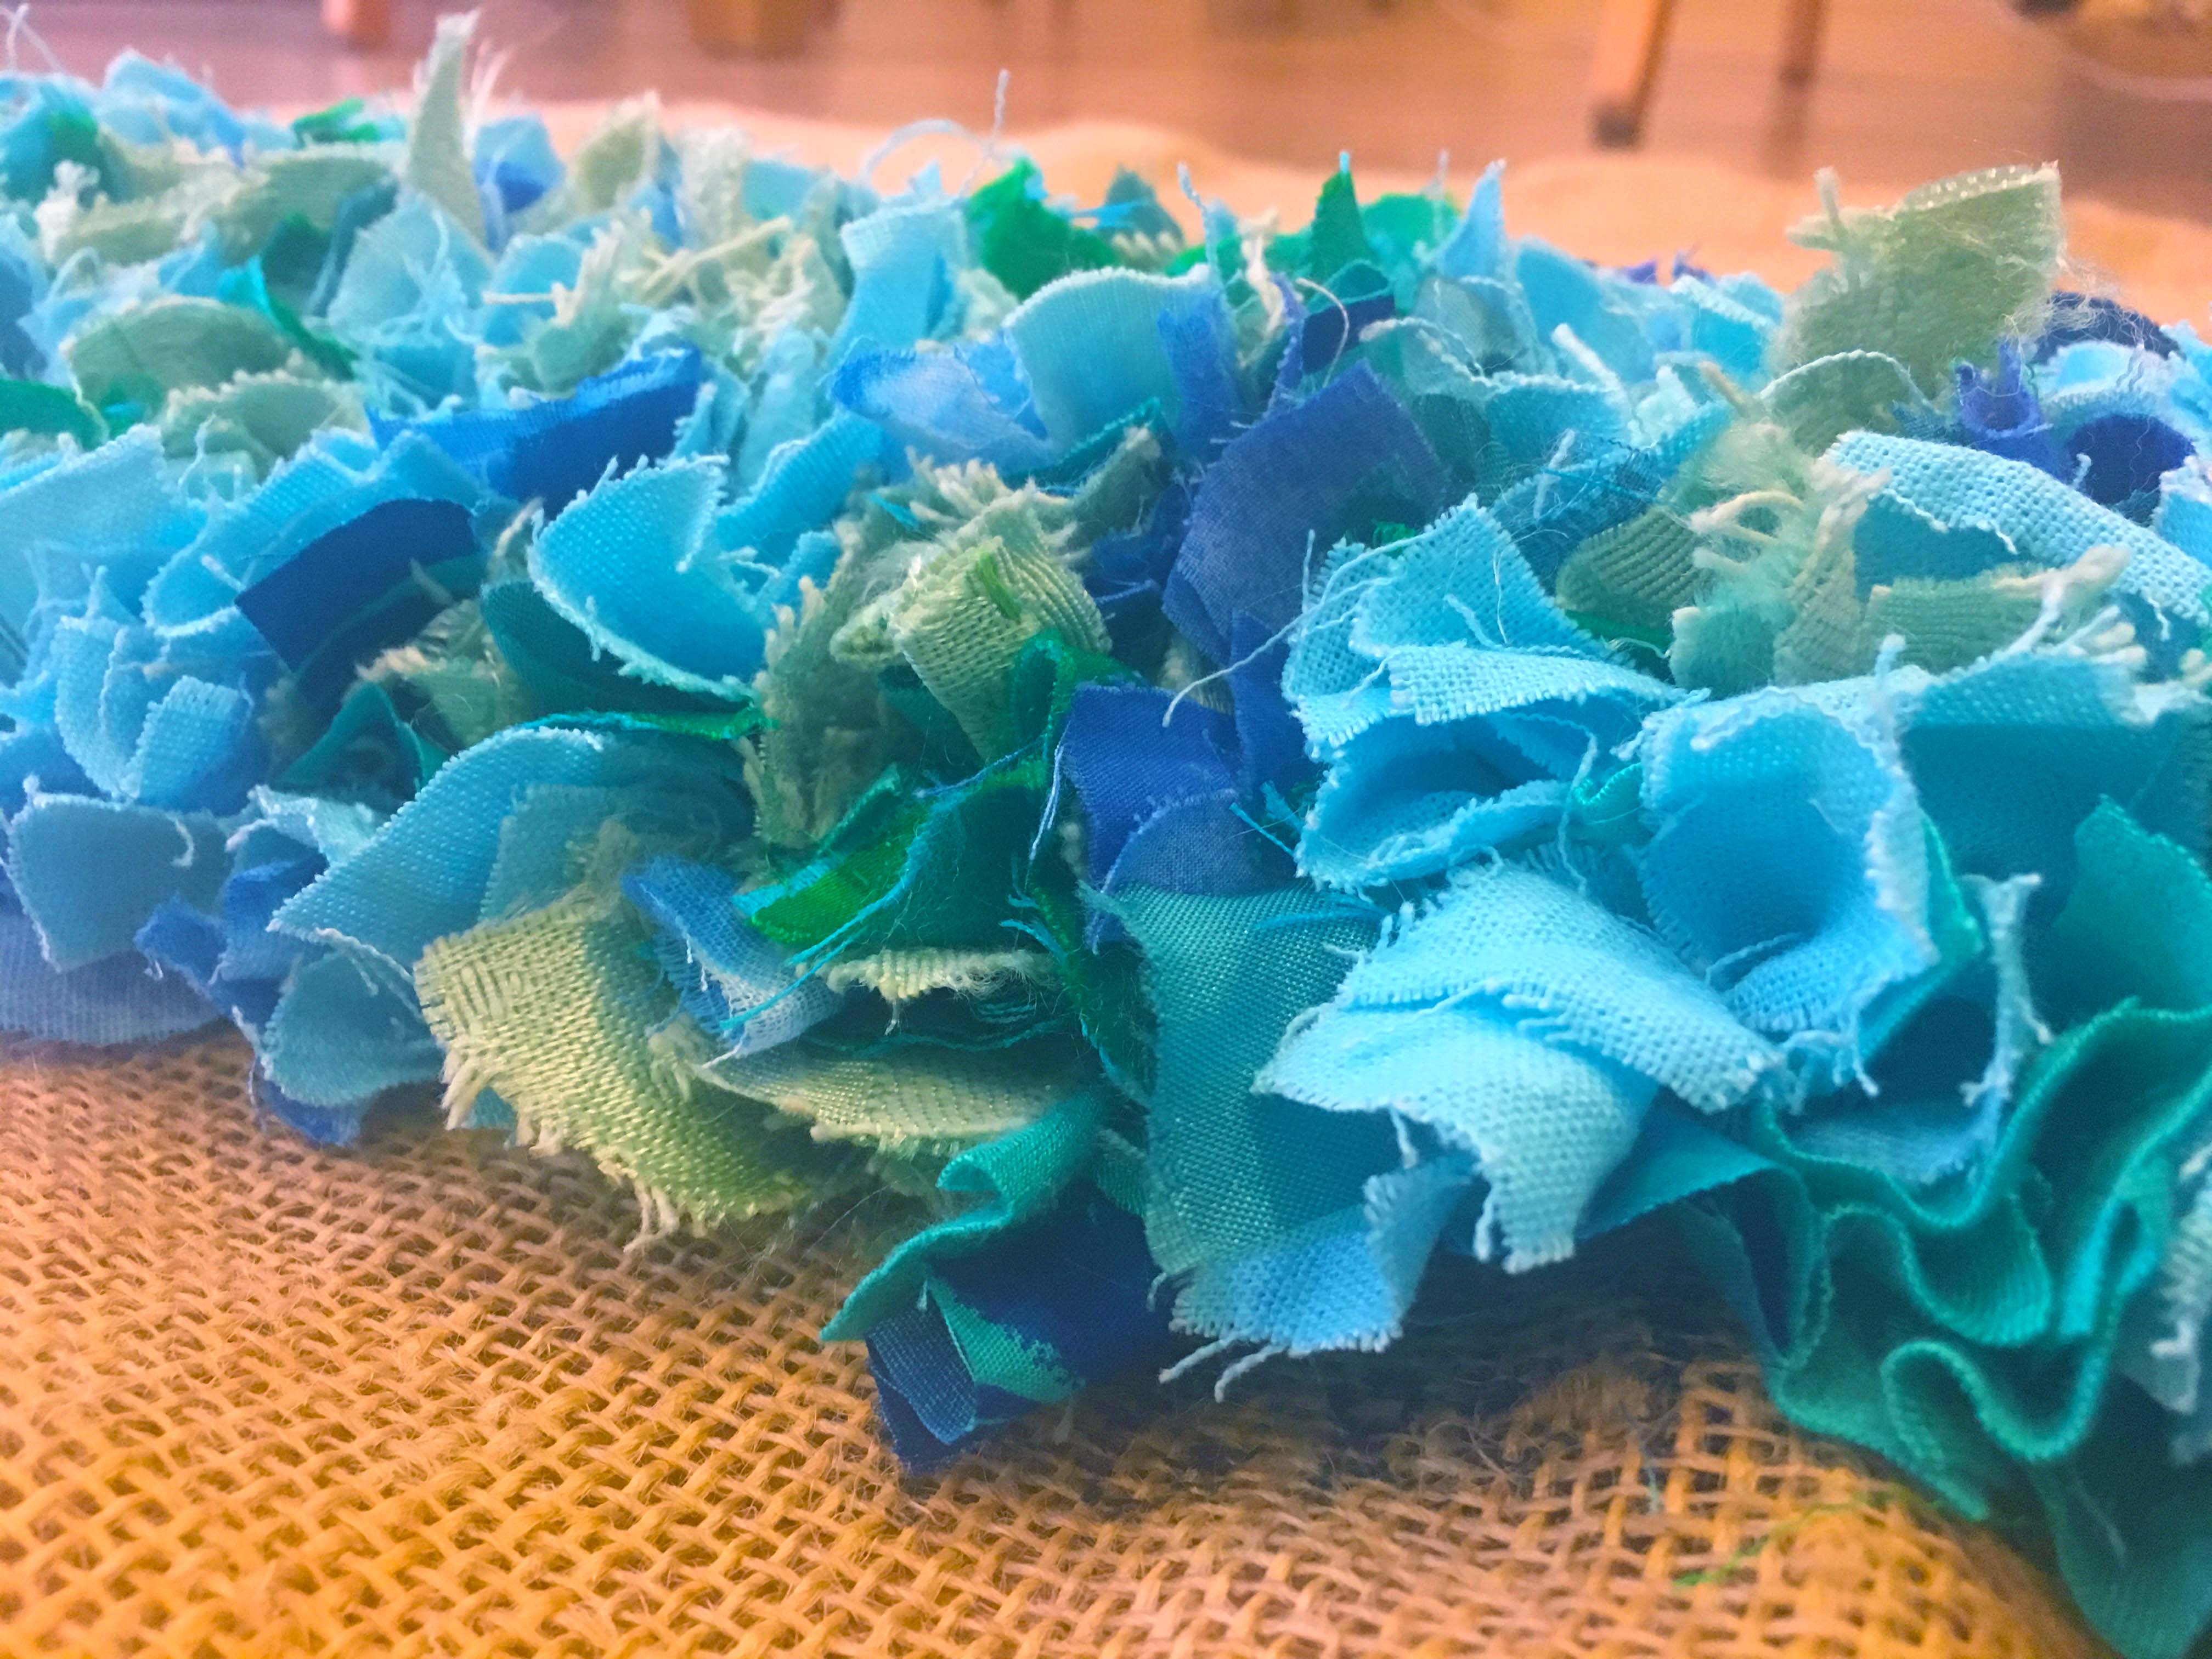
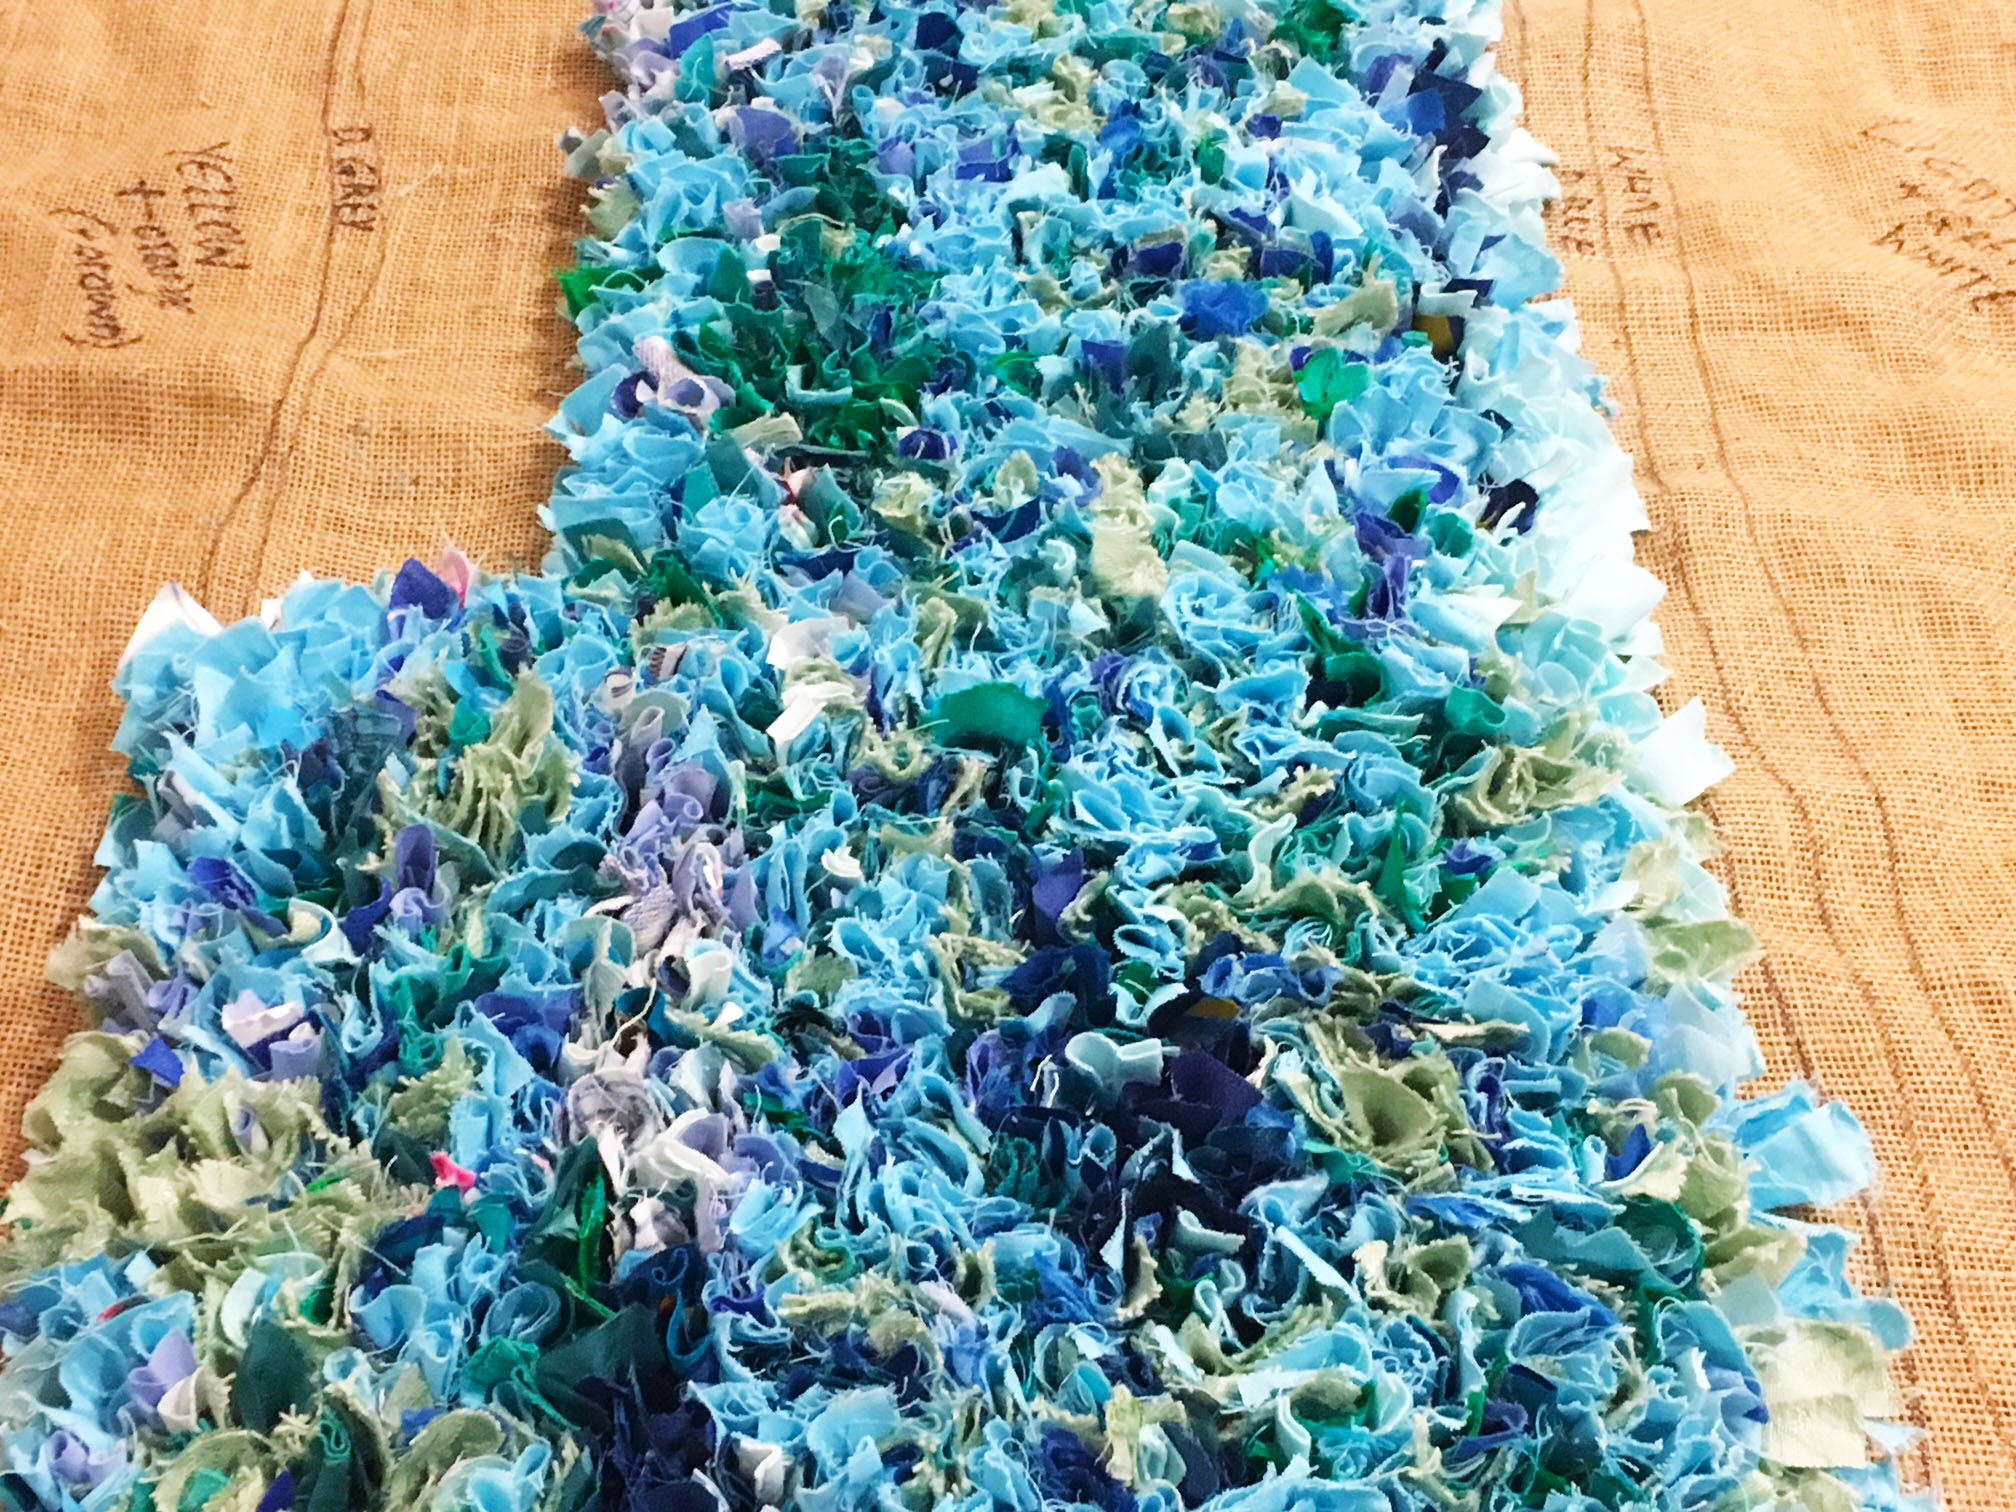
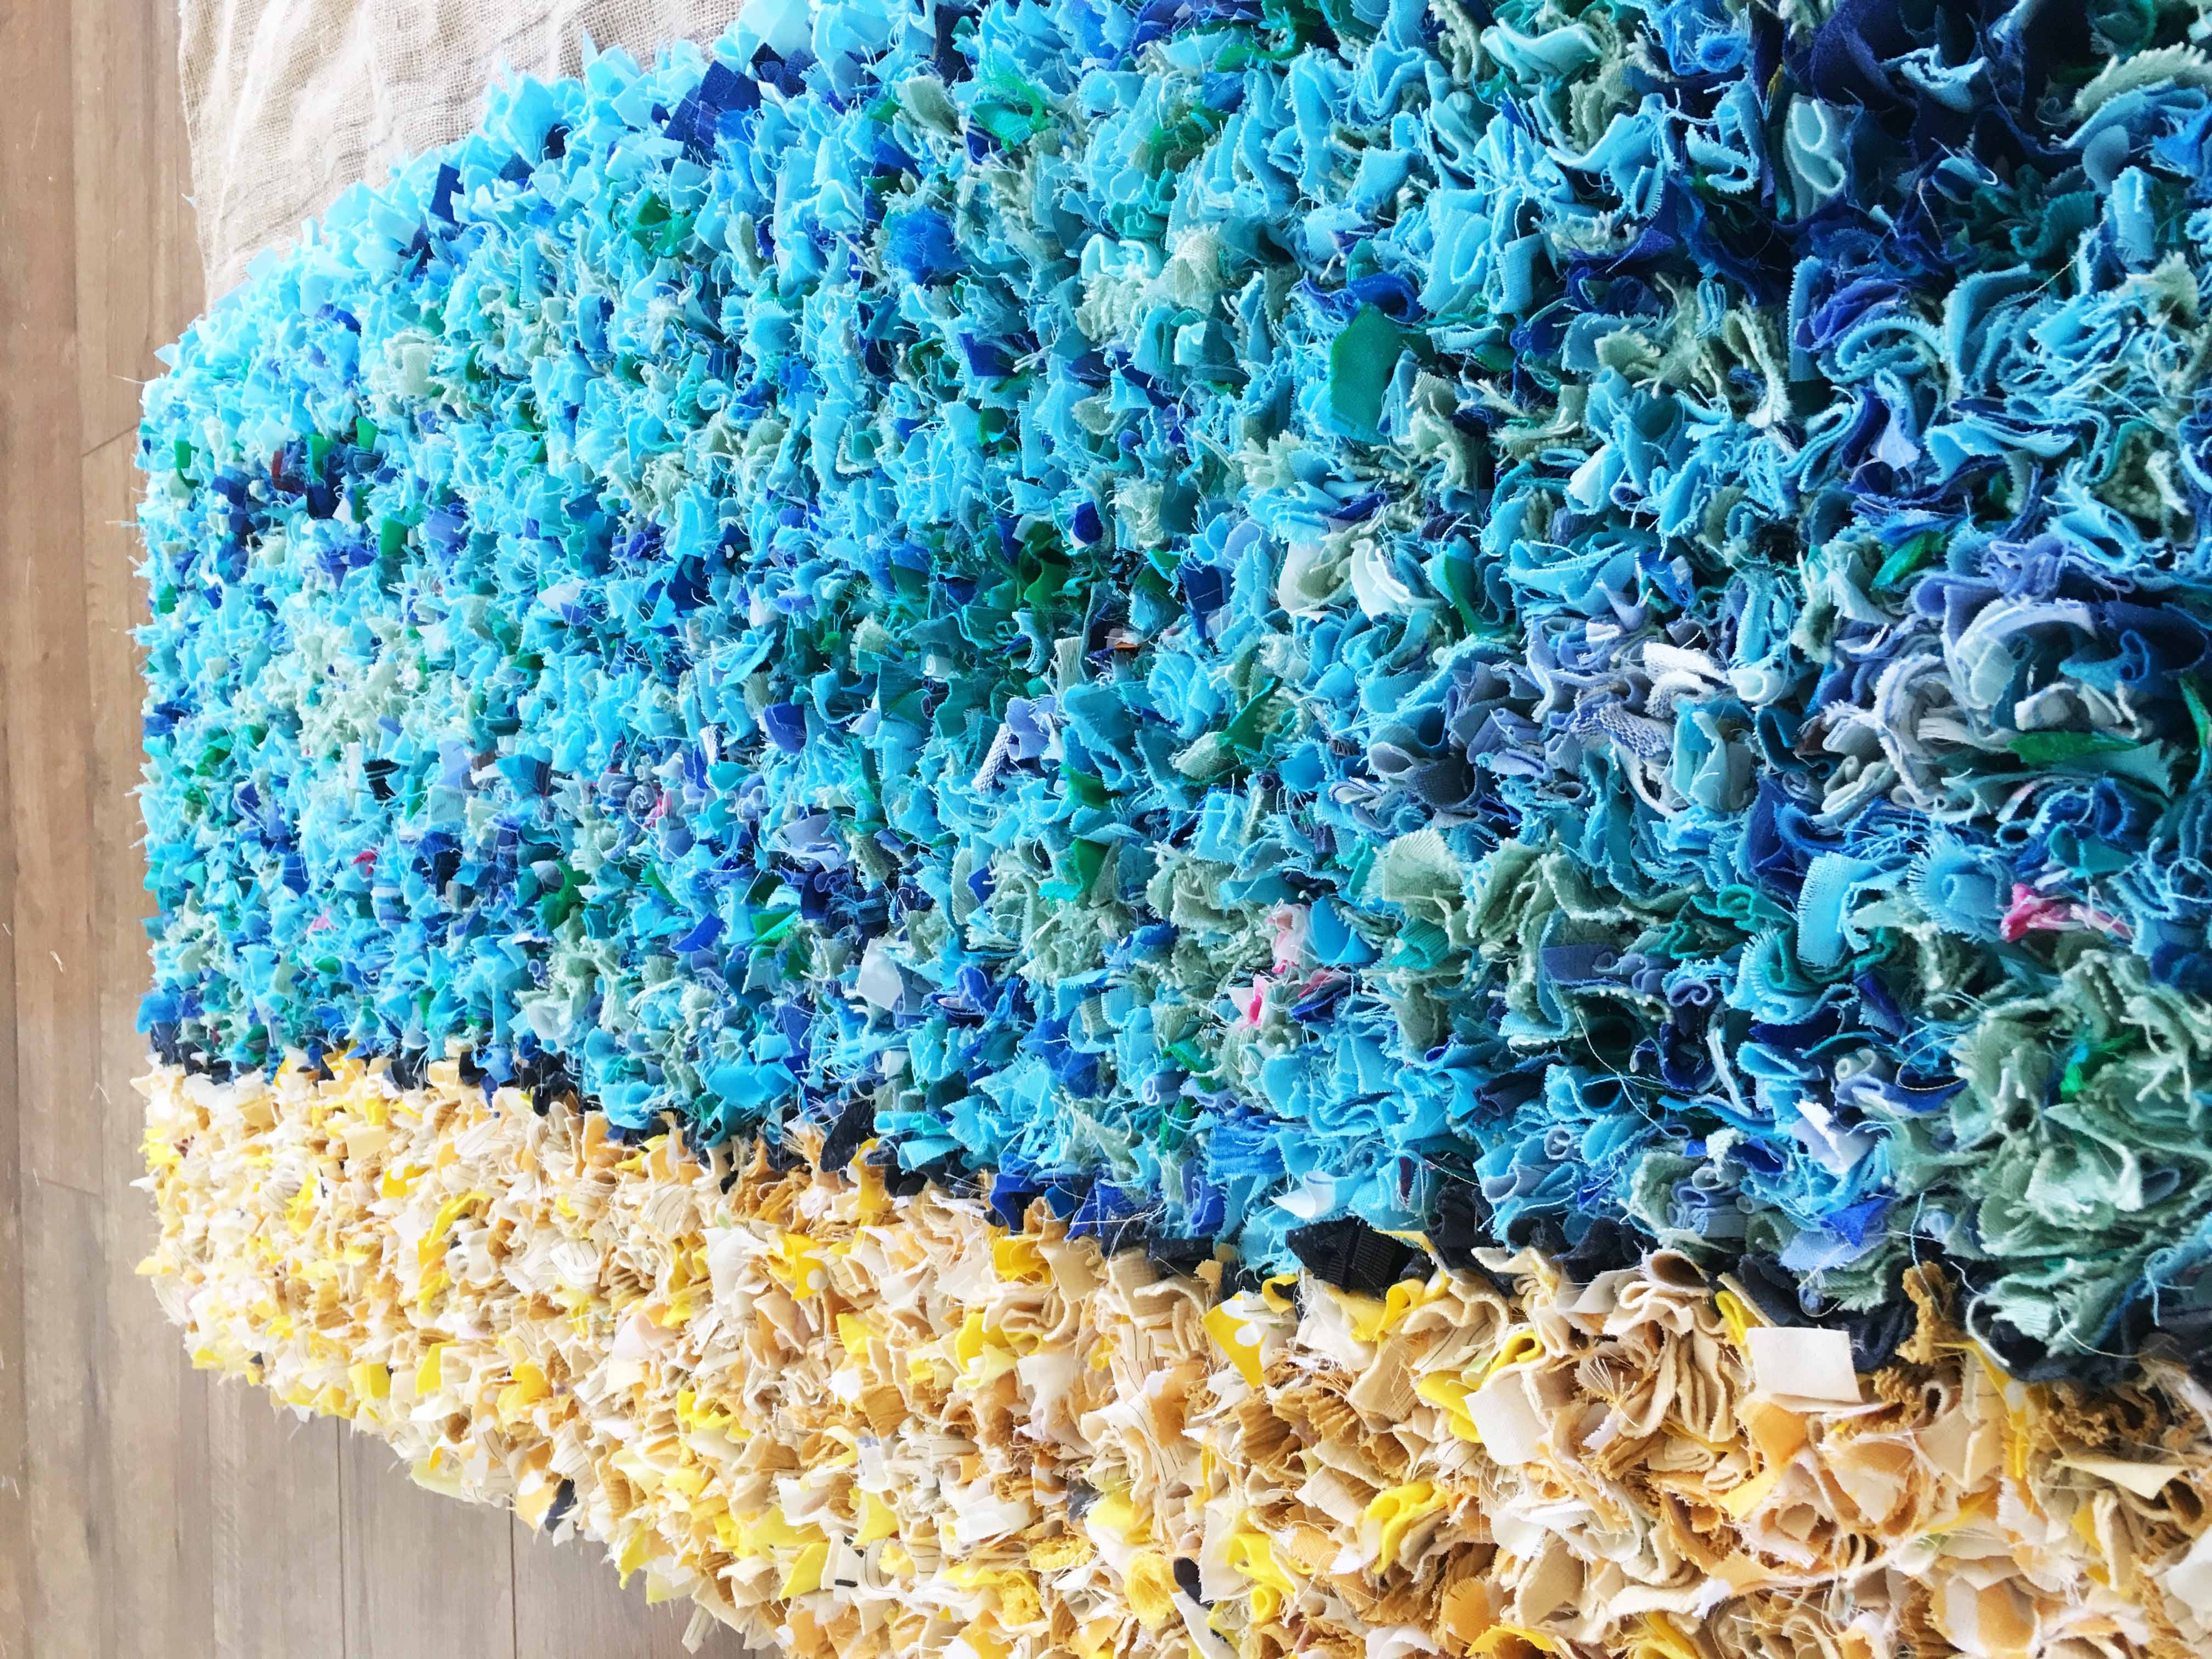
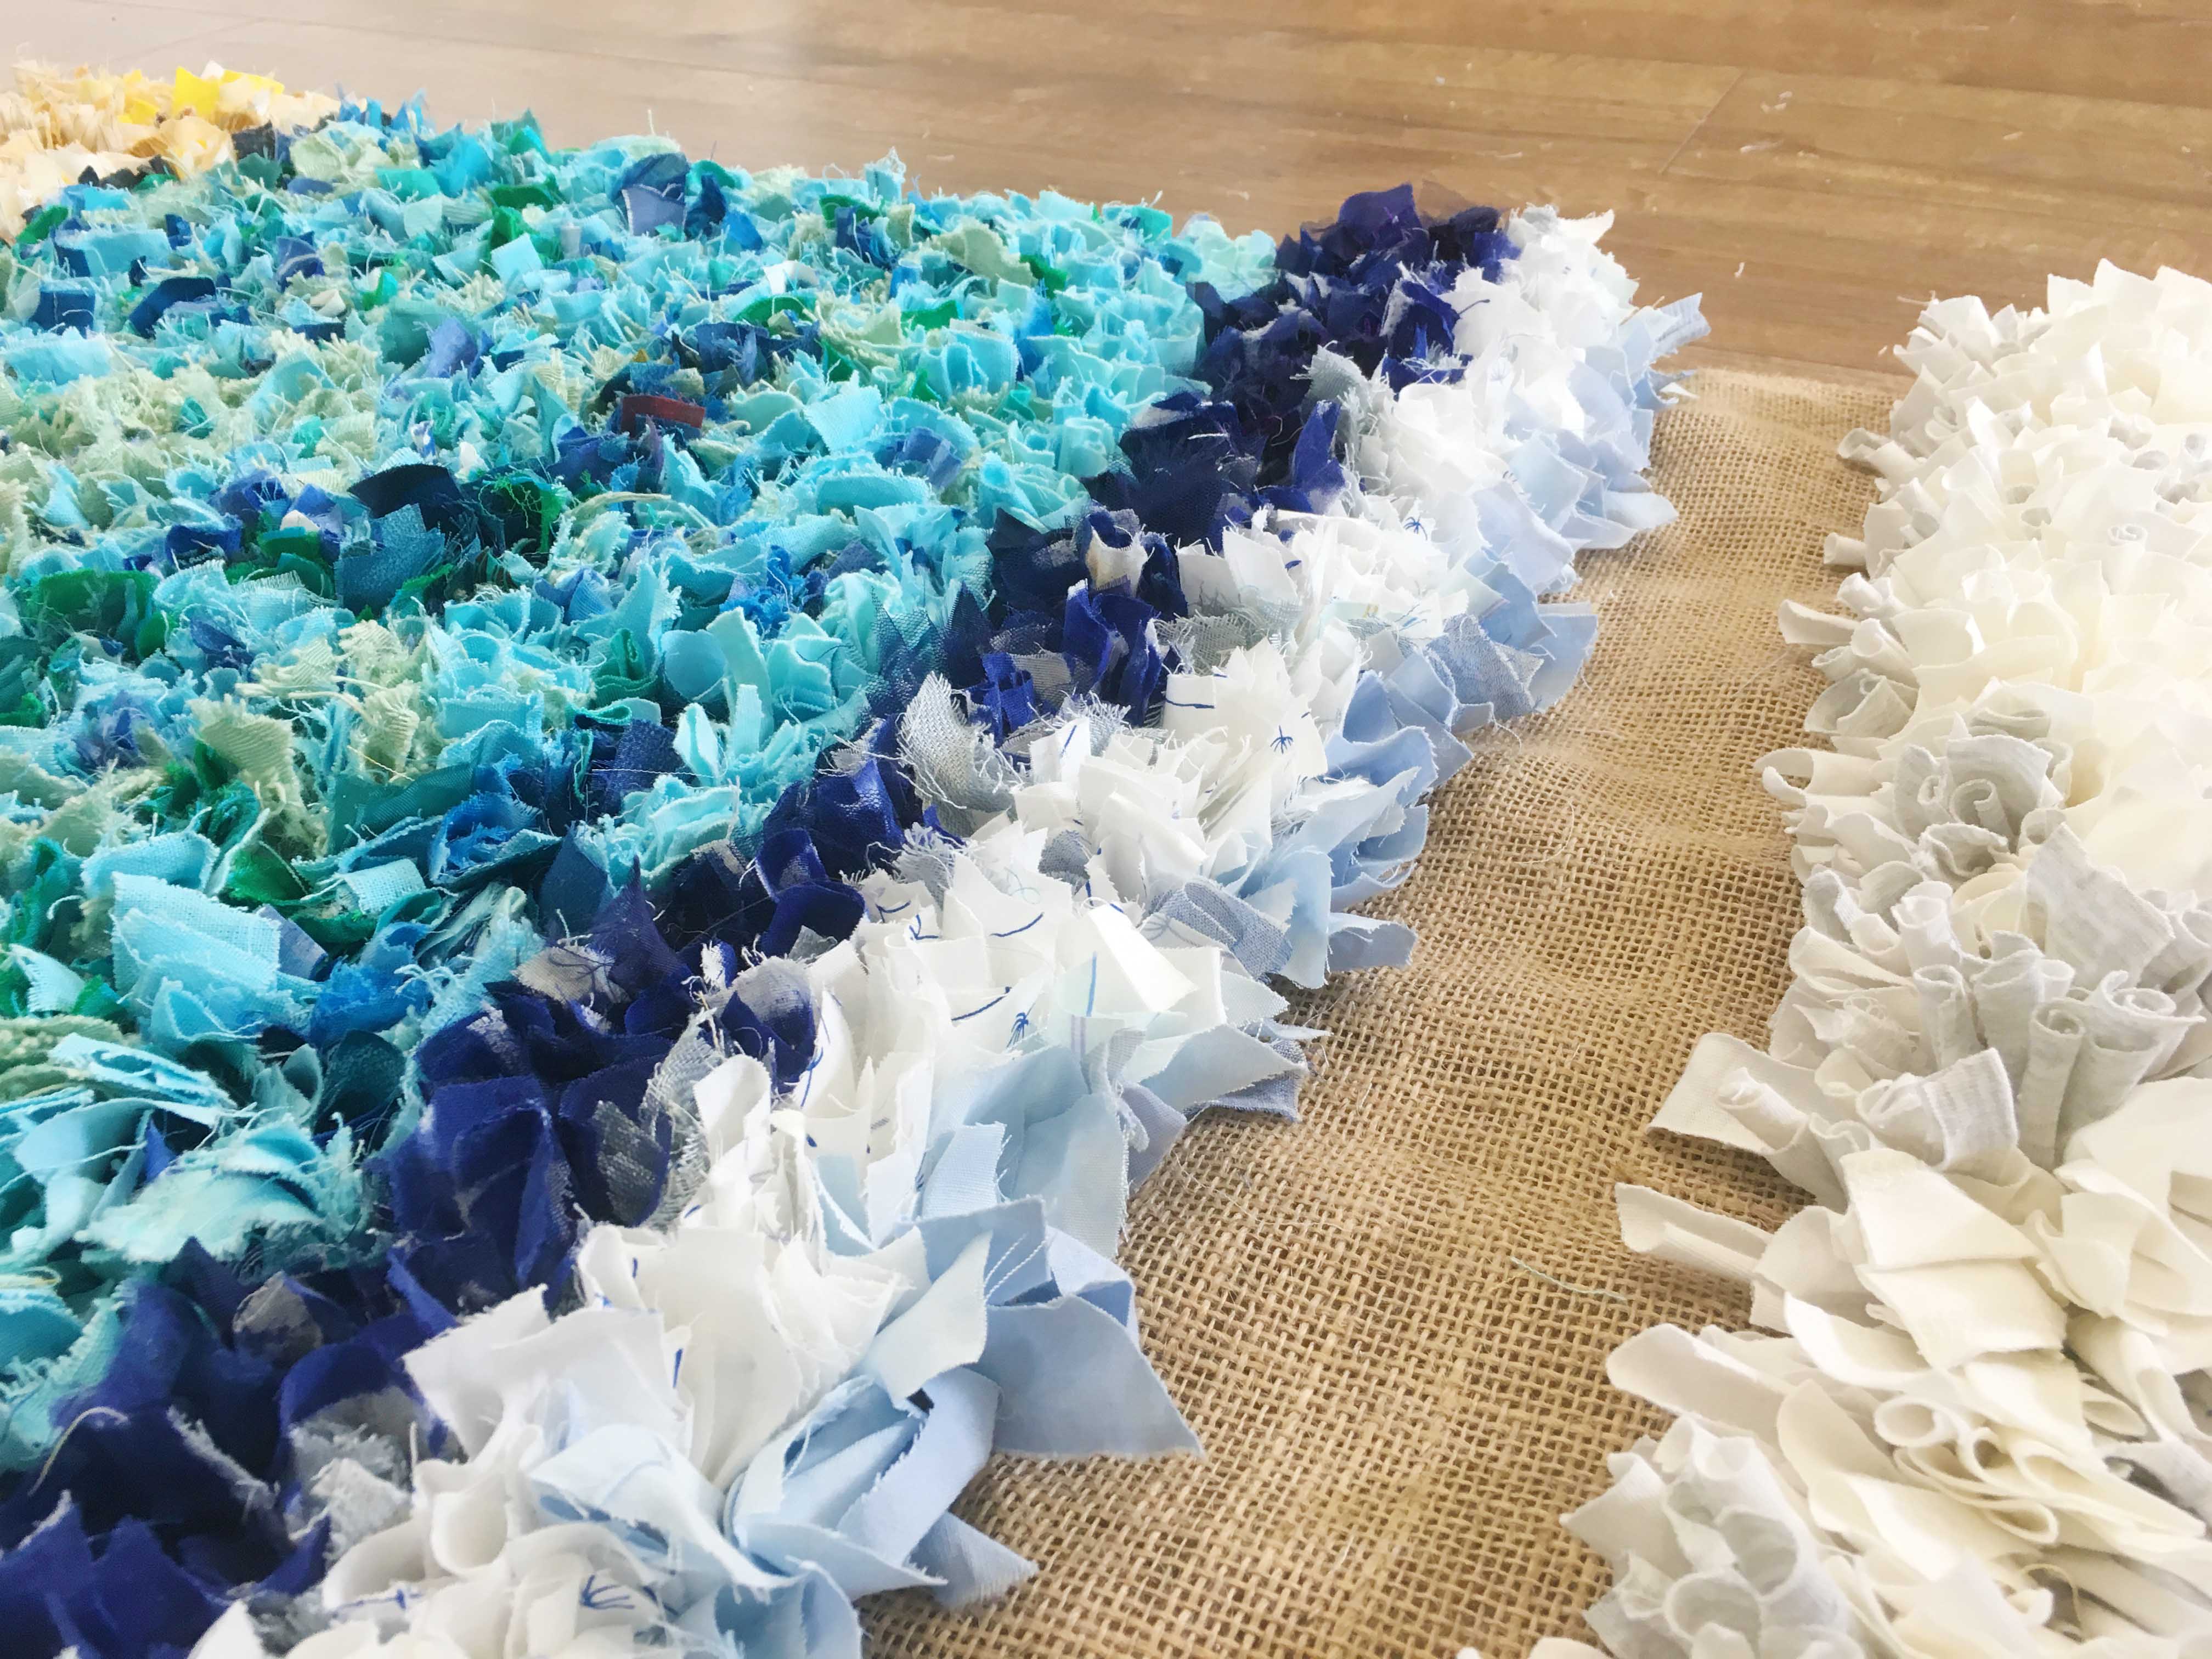
And here’s the sea a little closer up…
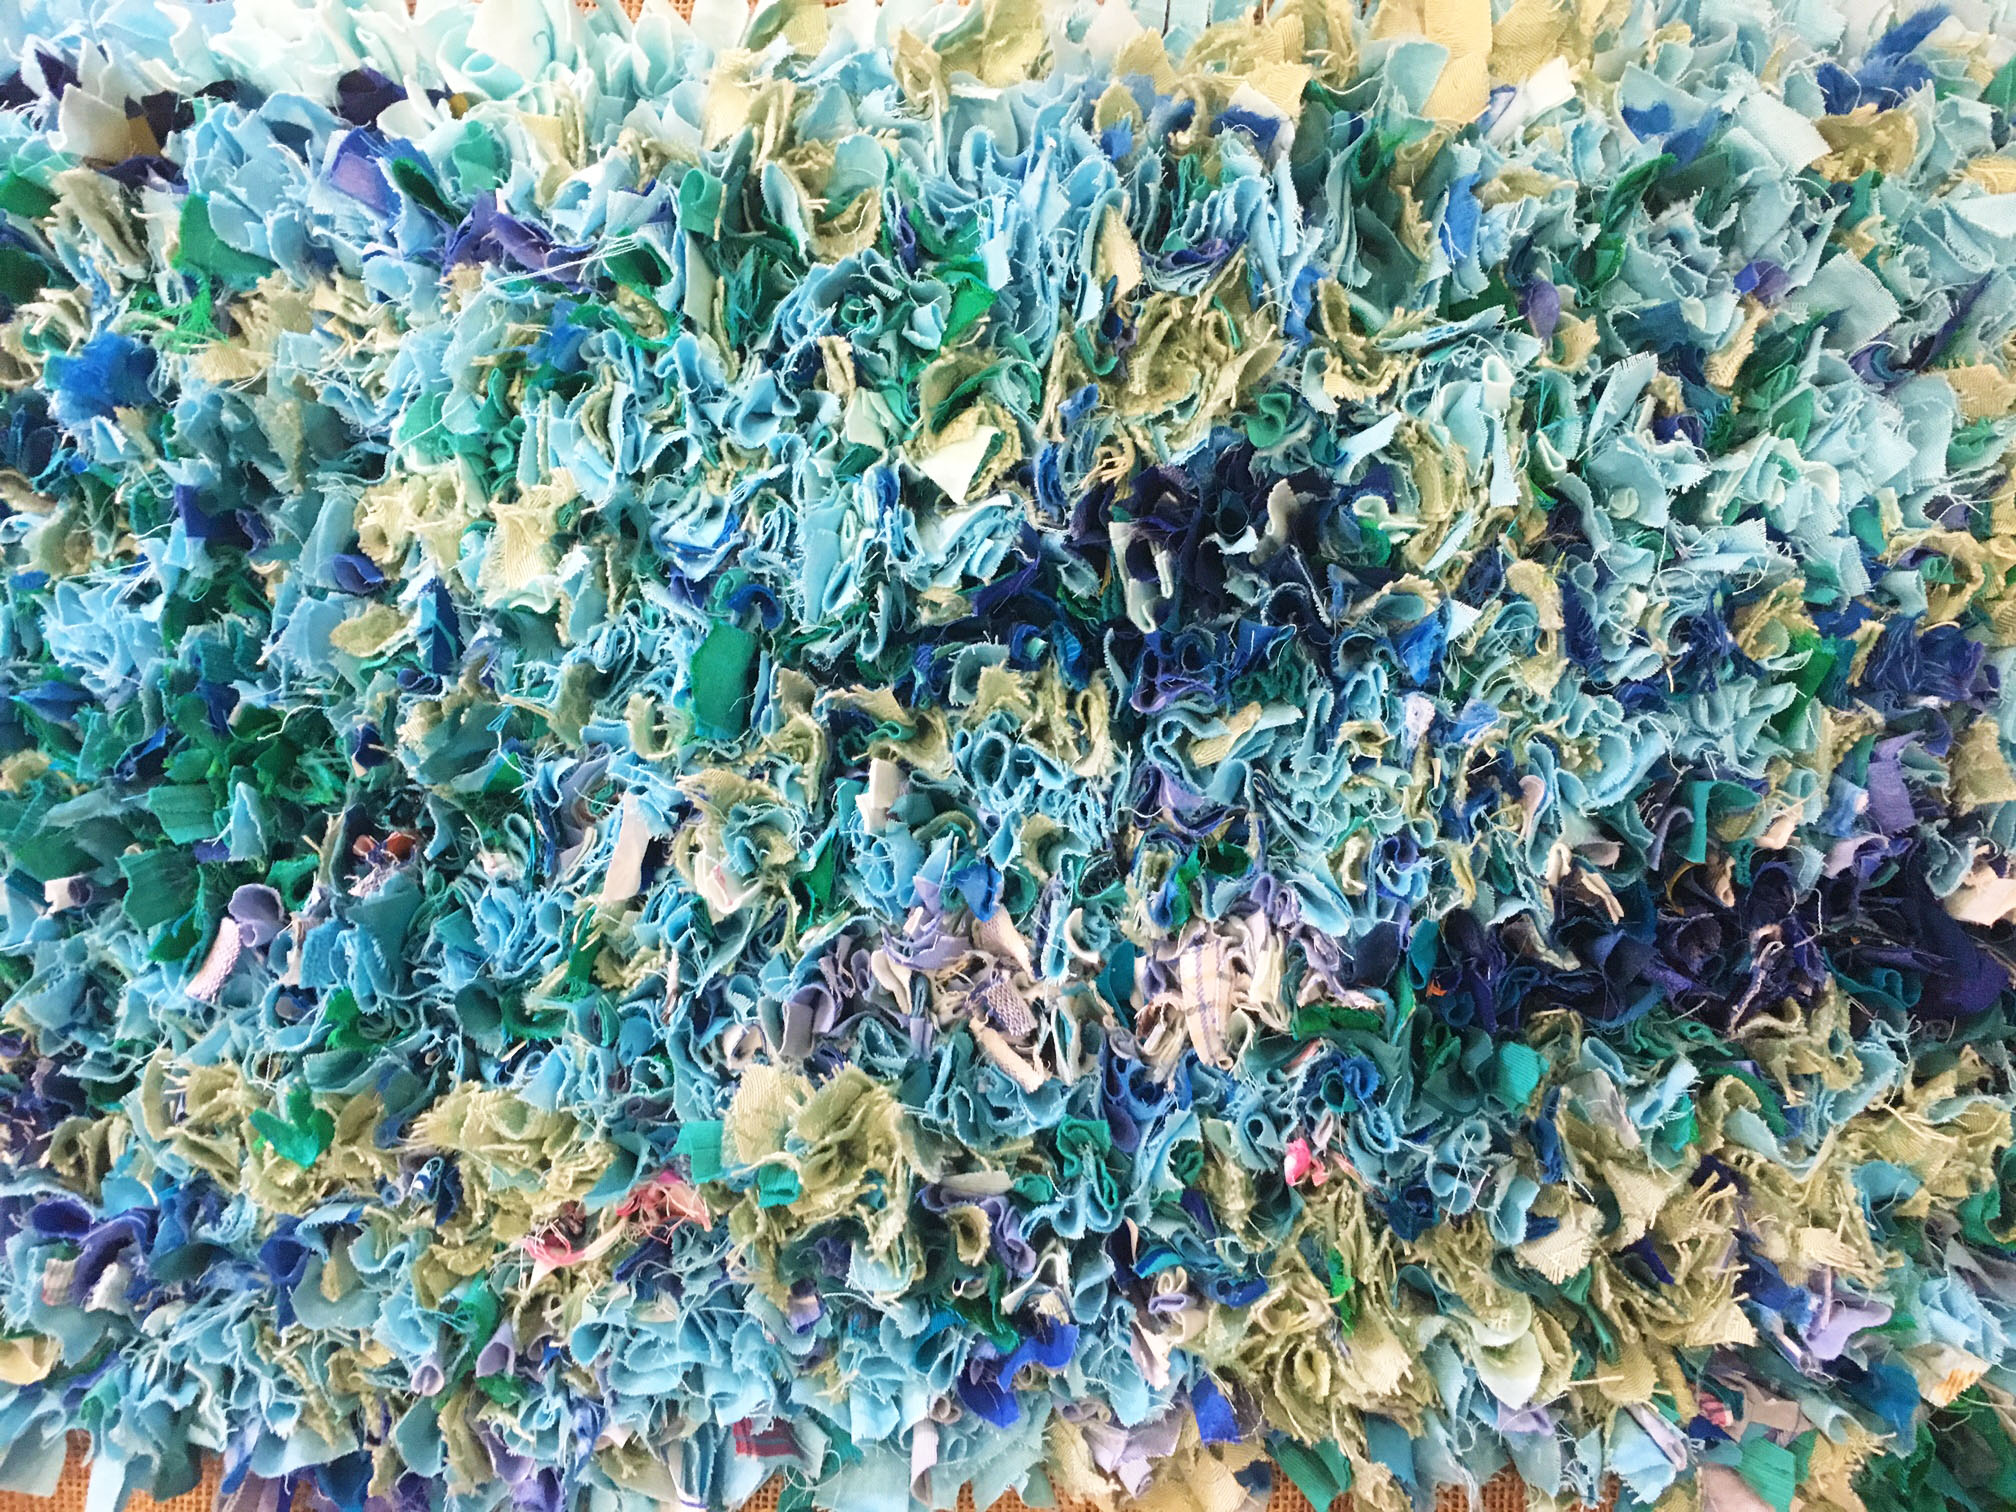
If you look nice and close, you can see that I’ve included some pink rags in the ocean to add a little interest. I like to think of them as fish swimming around.
Stay tuned to see how the beach turns out! 🙂
AND NOW THE BEACH IS DONE & DUSTED – 21/05/2017
I’ve finished the bulk of the beach but I’ll come back later to add in some detail… probably a crab or two and a few plants but for the moment, I’m thinking about my next challenge… the sky!
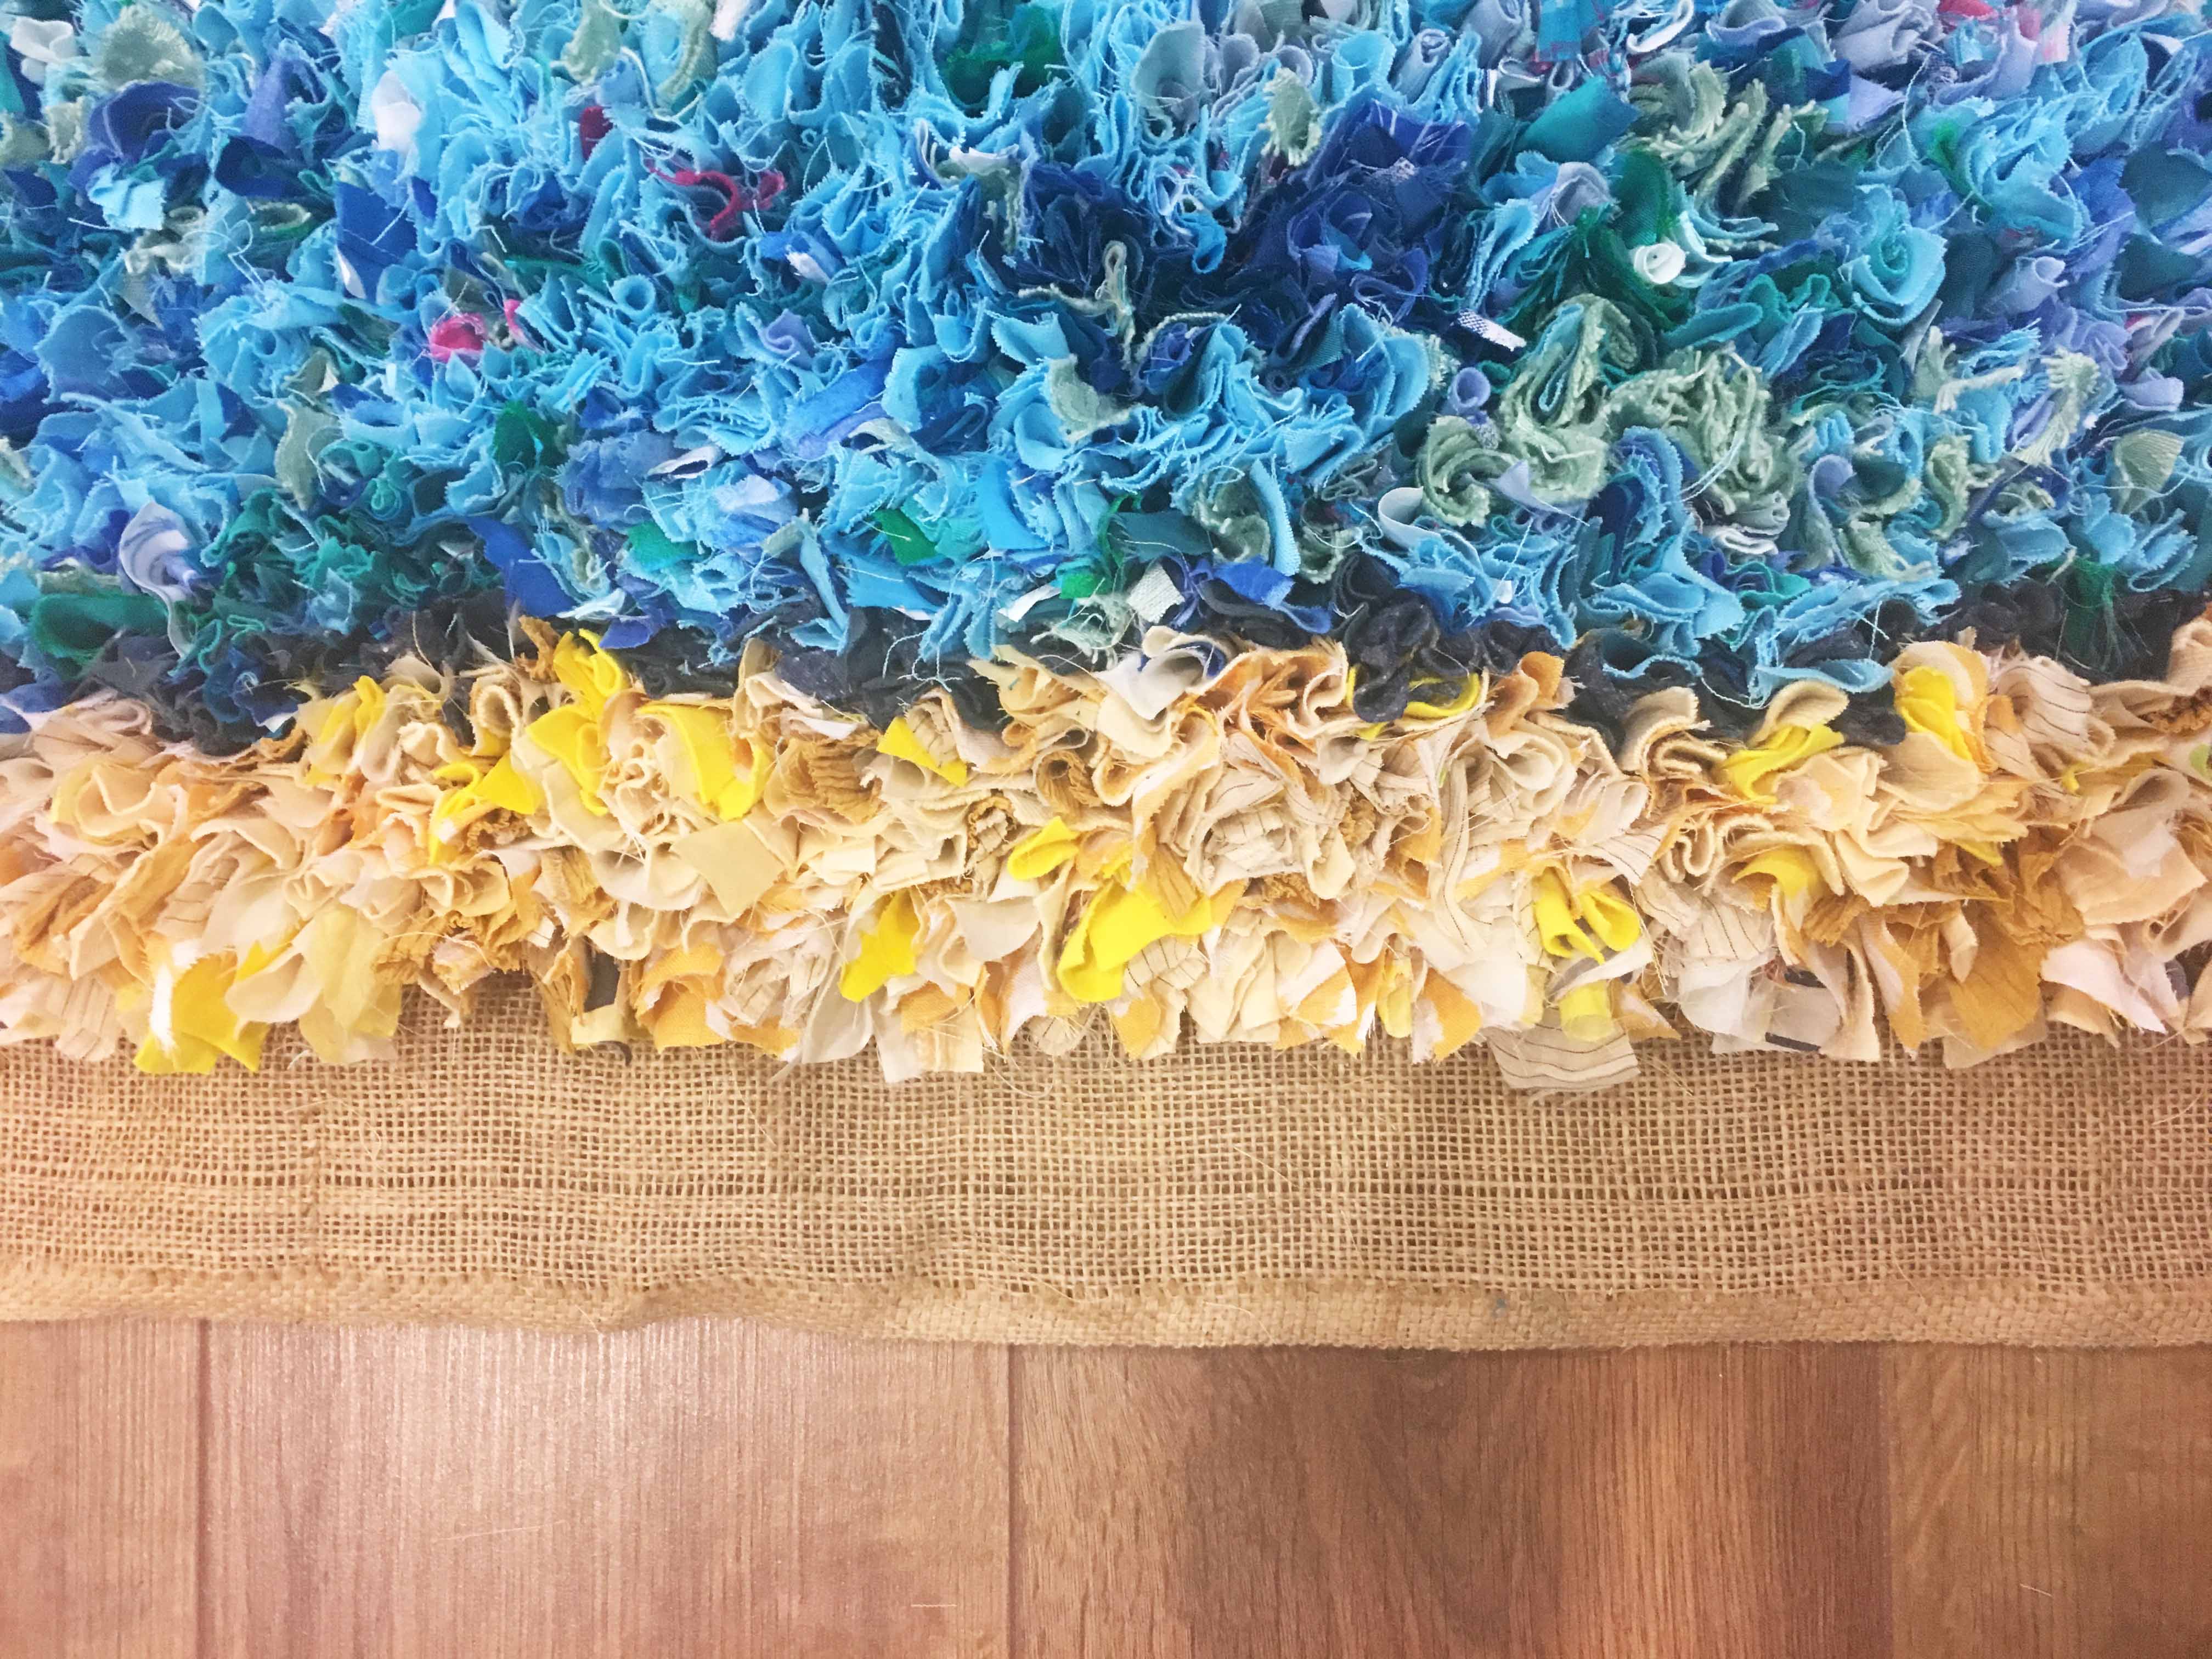
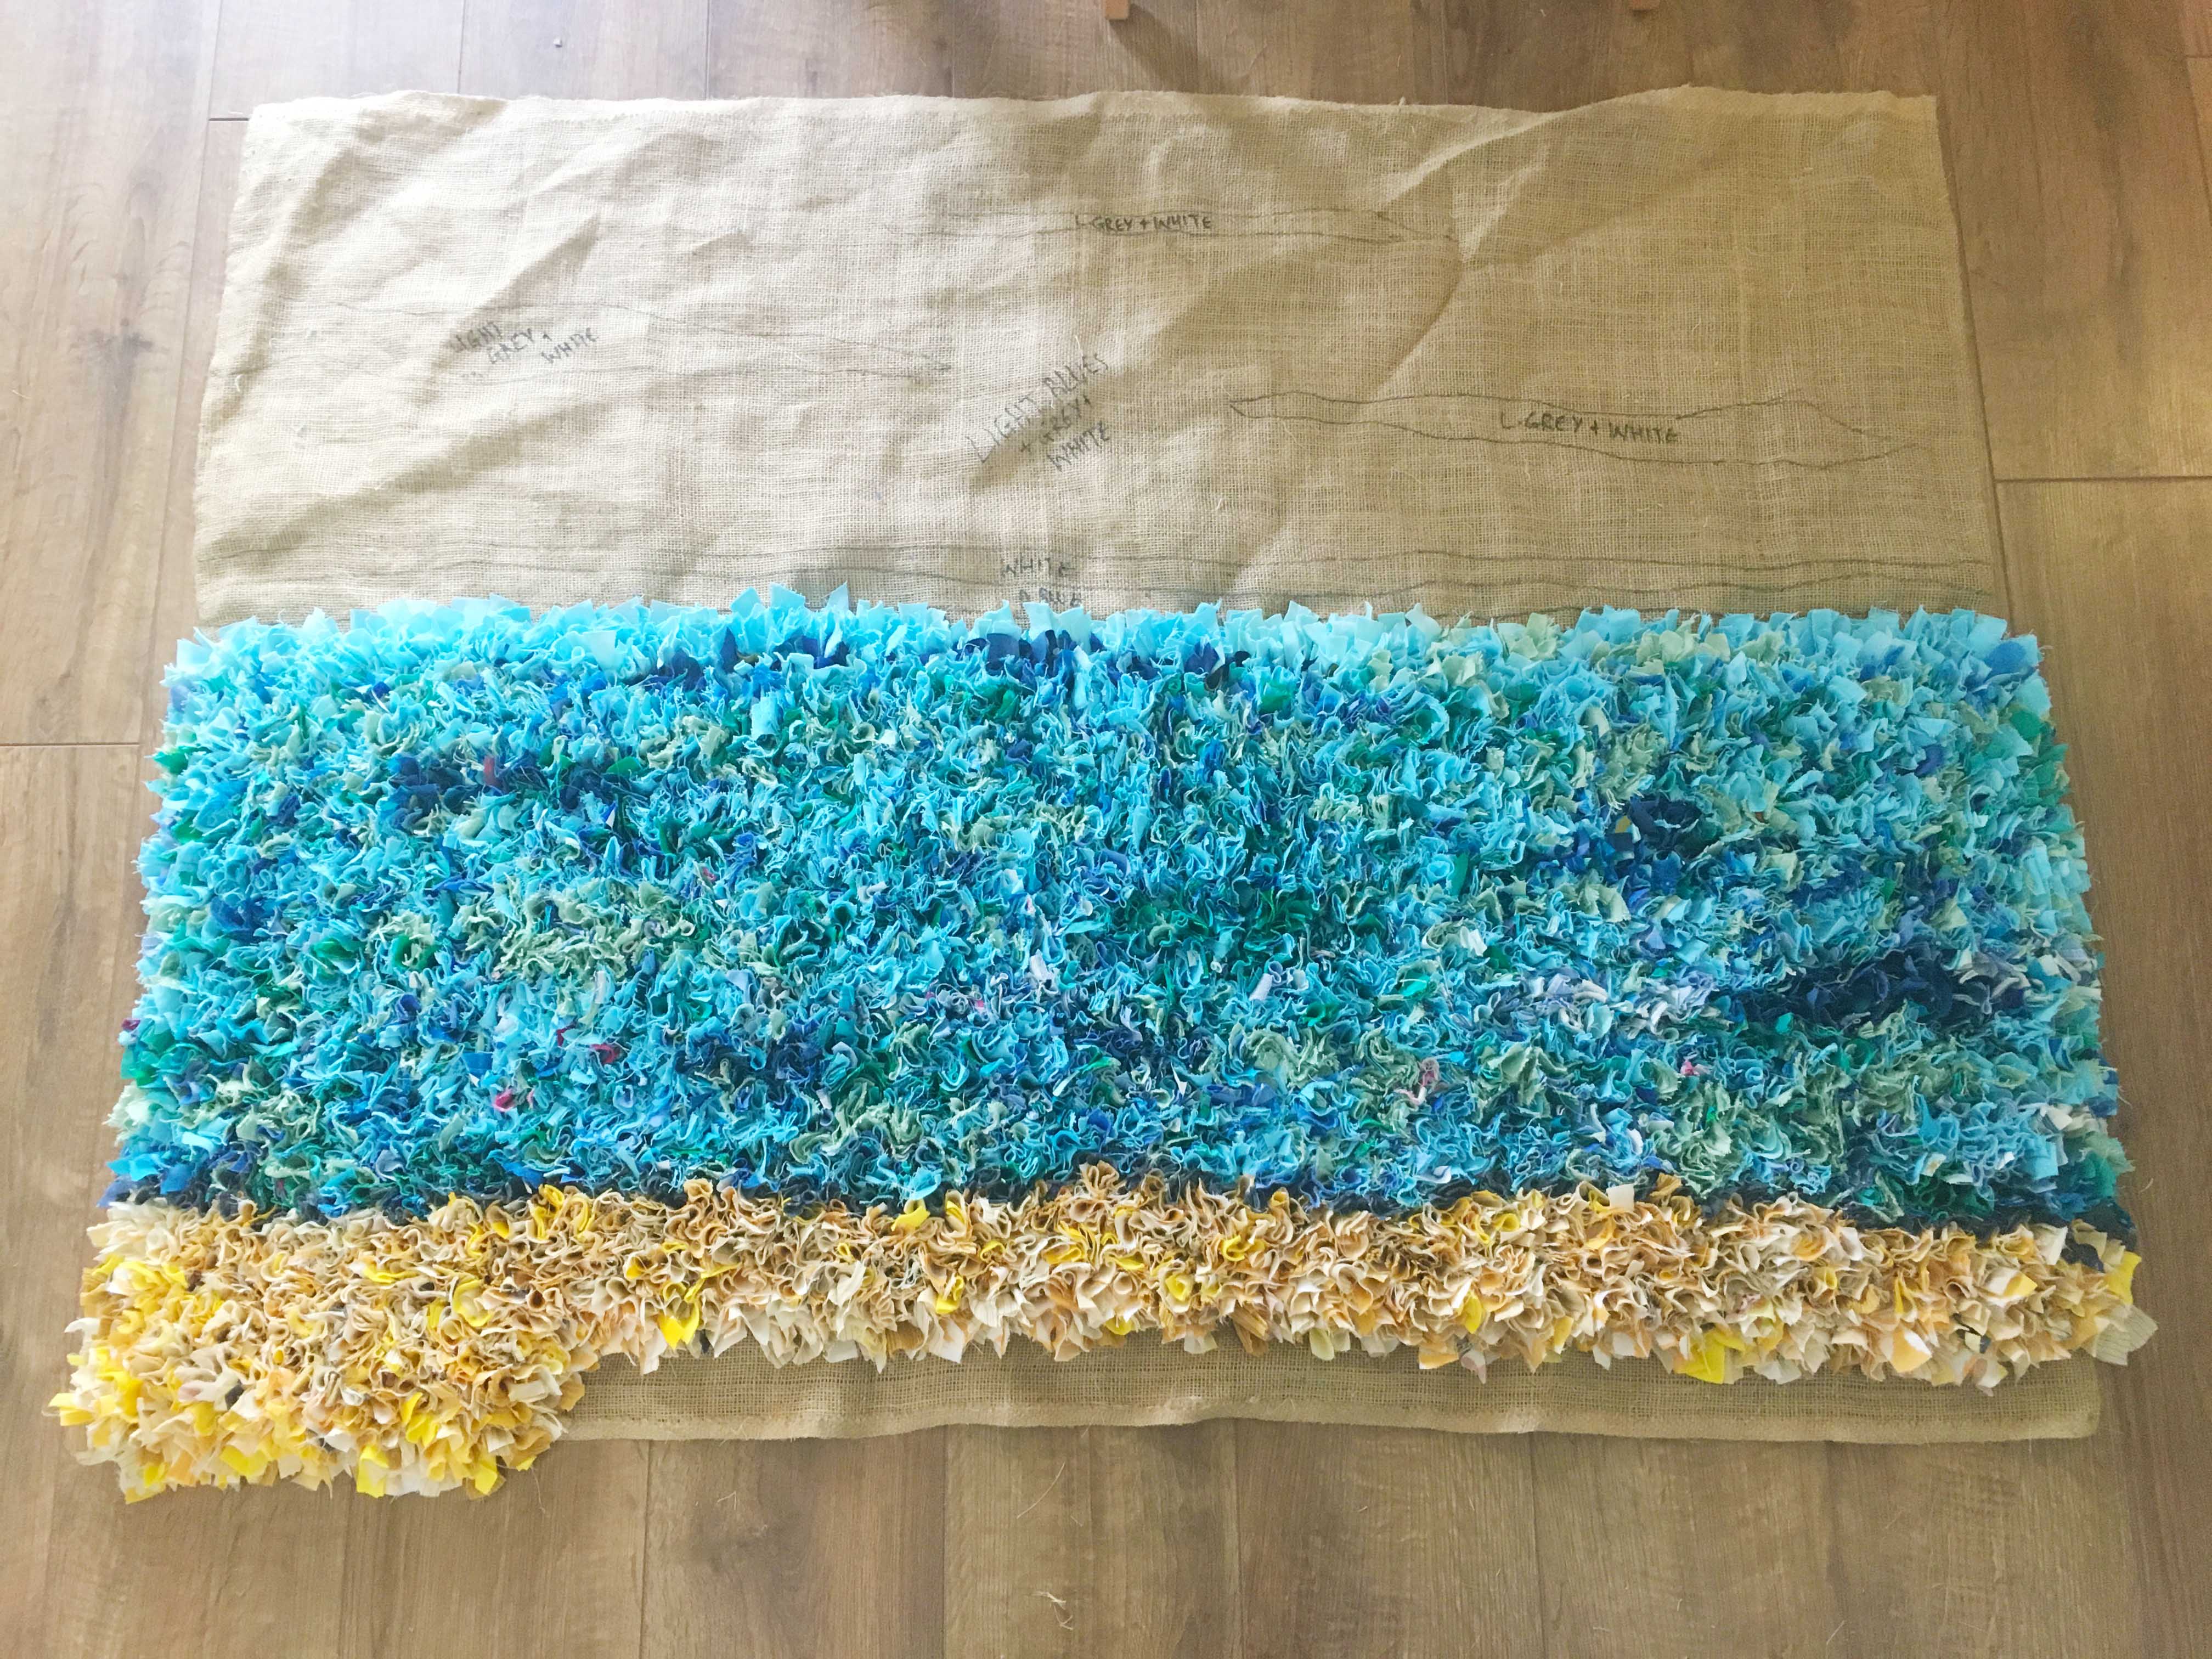
Before heading onto the beach, I added in a line of dark grey to create more definition.
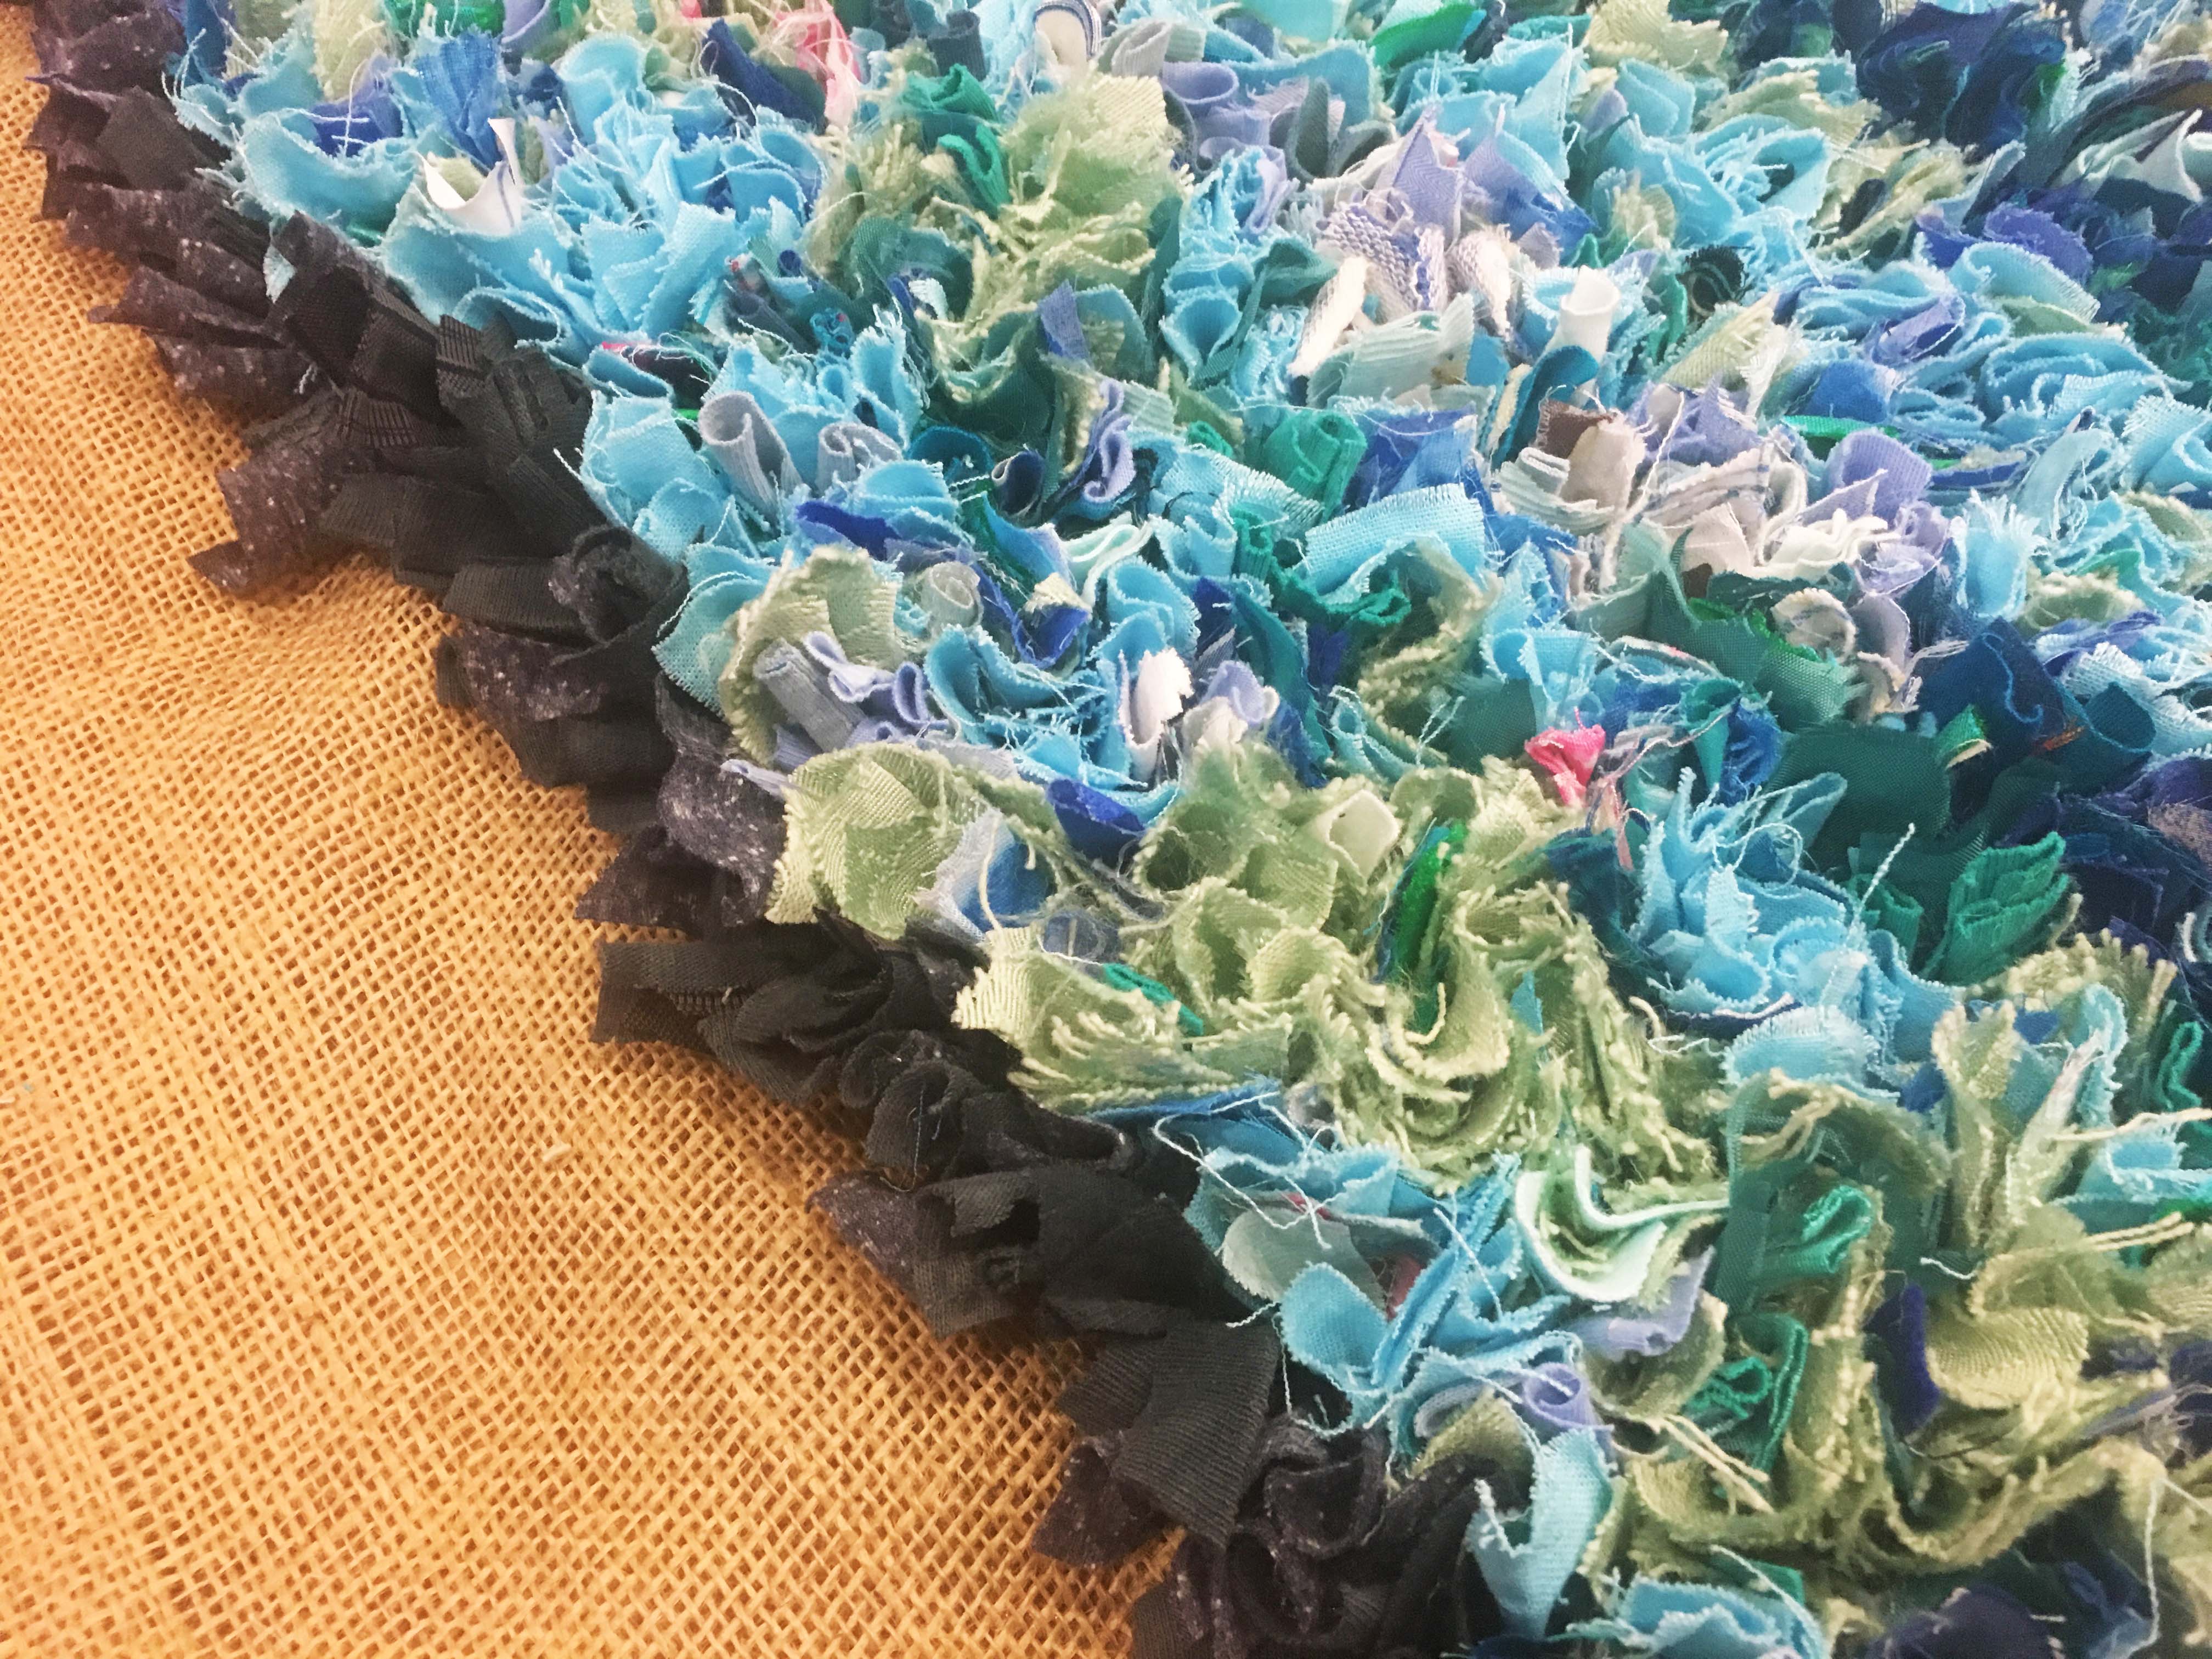
Here’s a close up of the edge of the sea. It looks pretty dark at this stage but it always becomes less stark when you add in rag rugging on the other side as just the tops will show.
And here is how the rug looked when I had a strip of the beach in place…
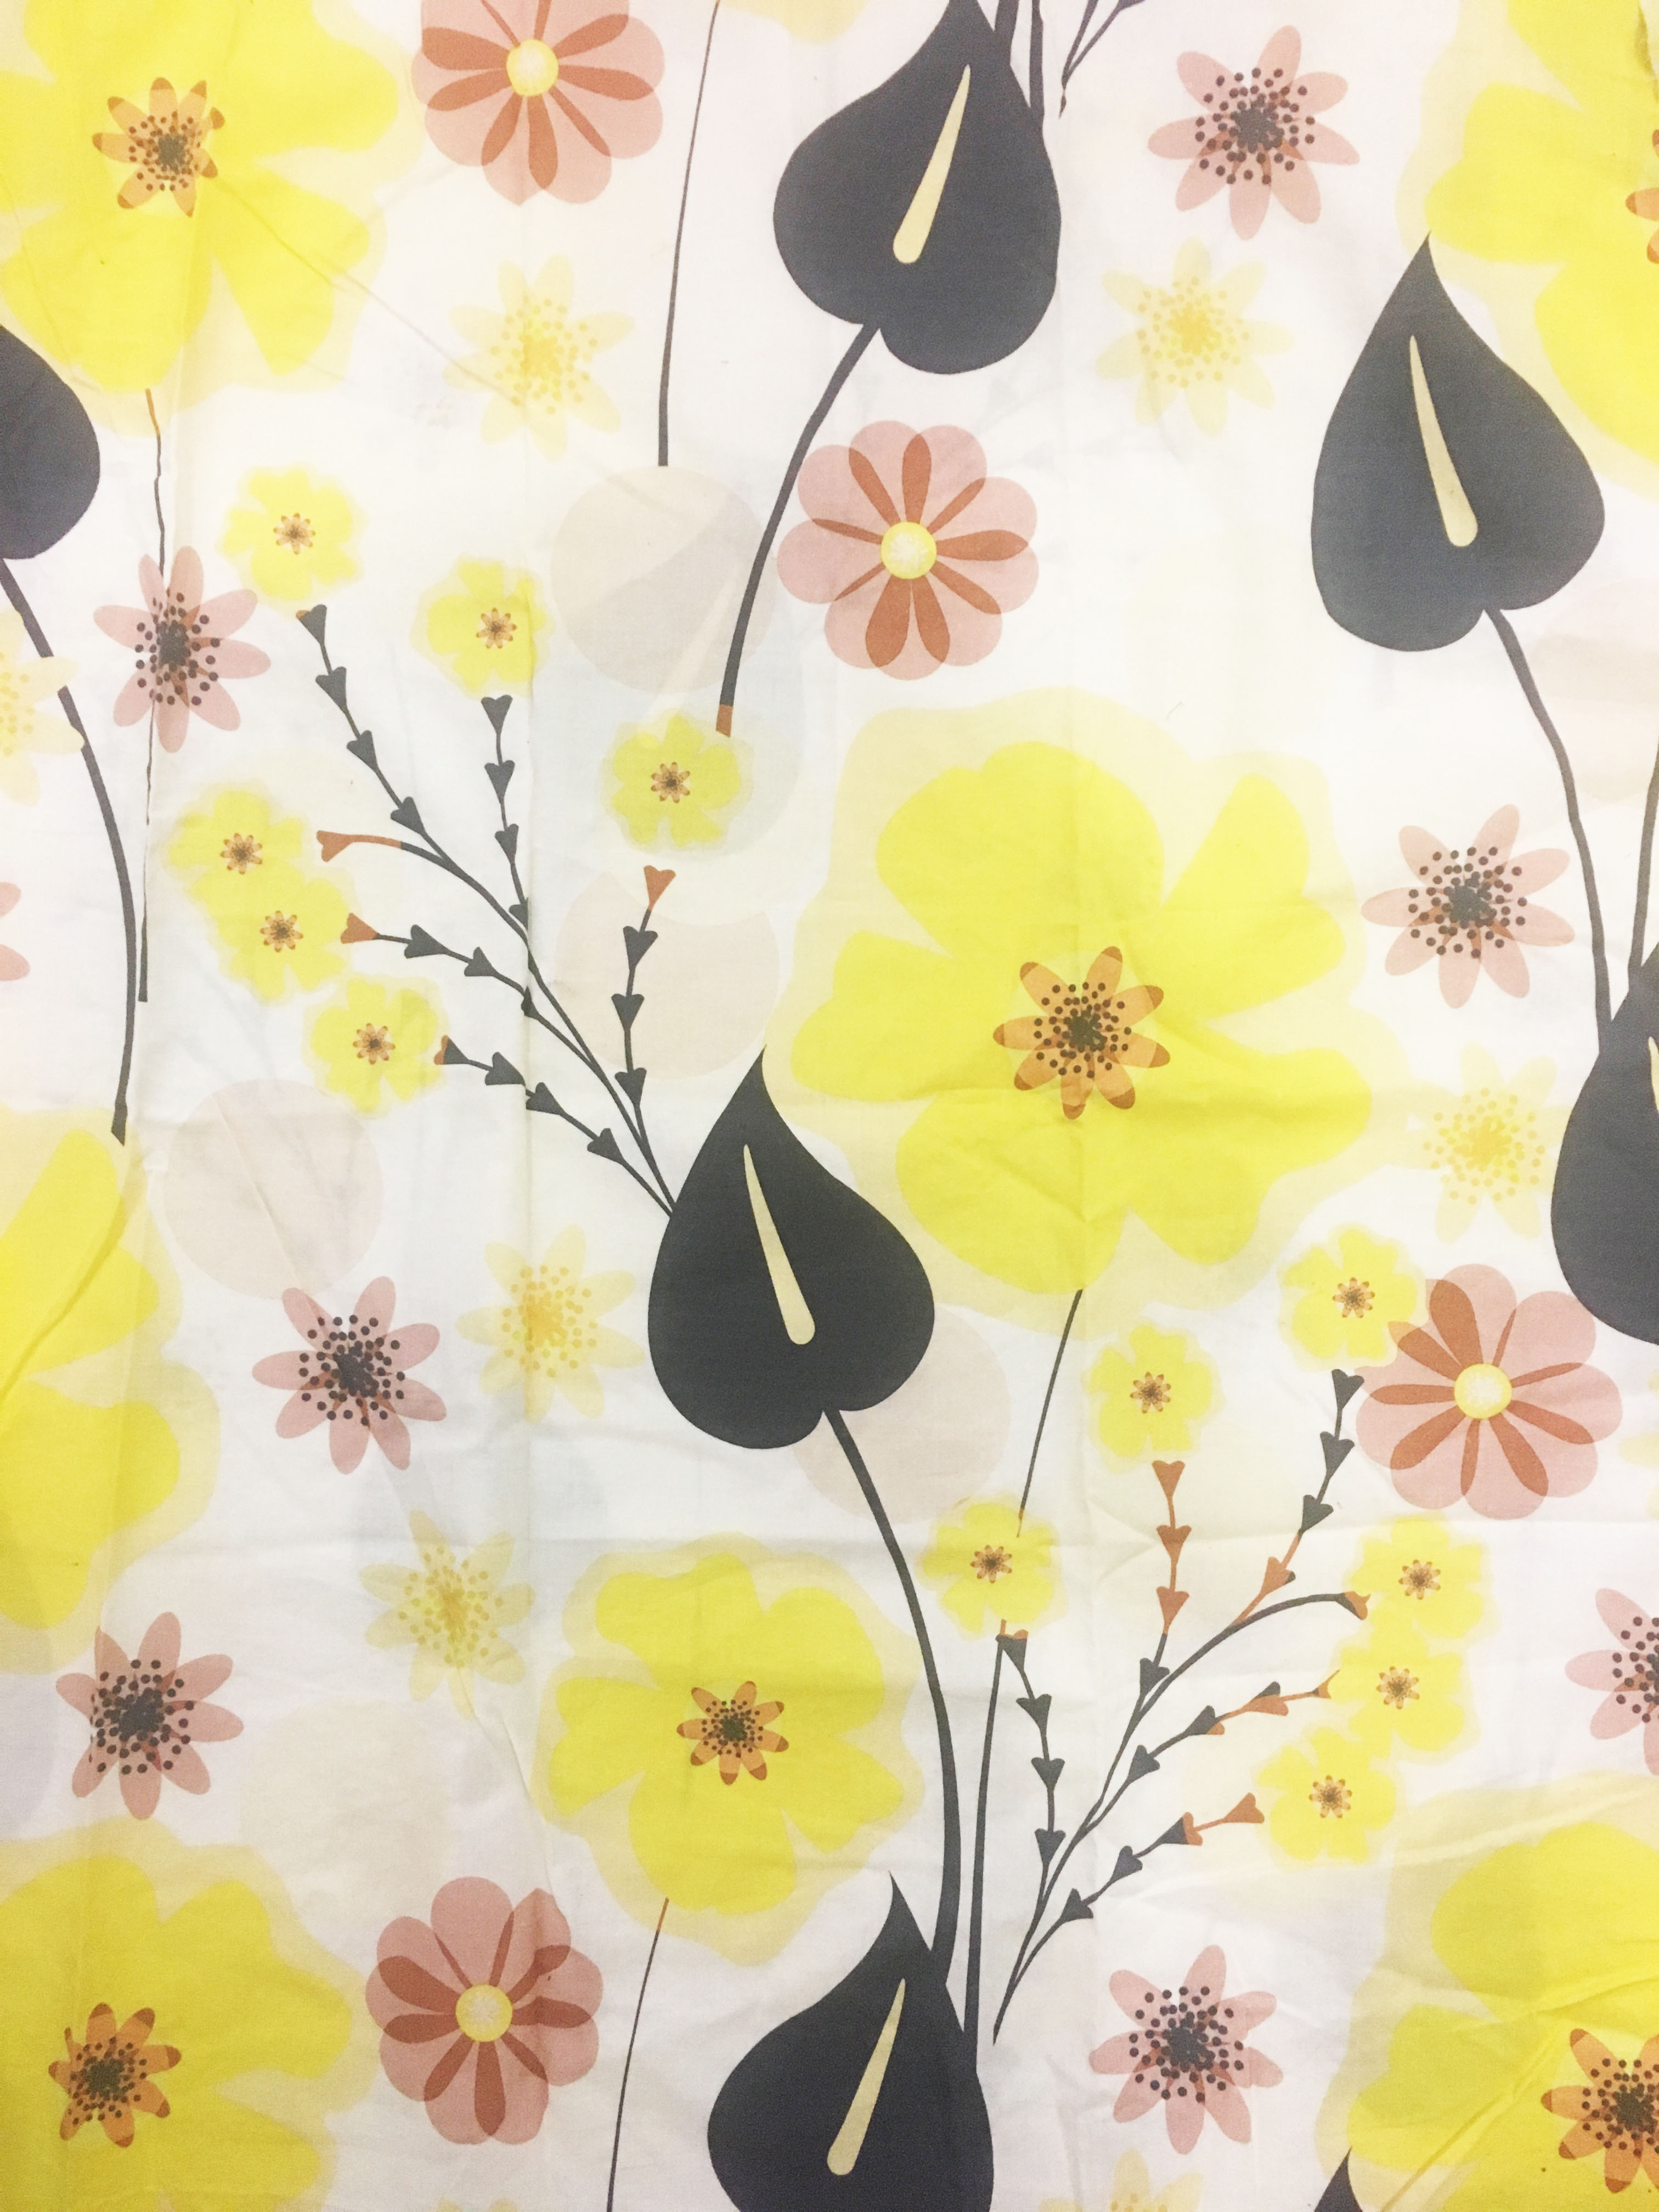
This is one of the fabrics that went into the beach. When it’s cut up you can’t tell the pattern at all – just the colours.
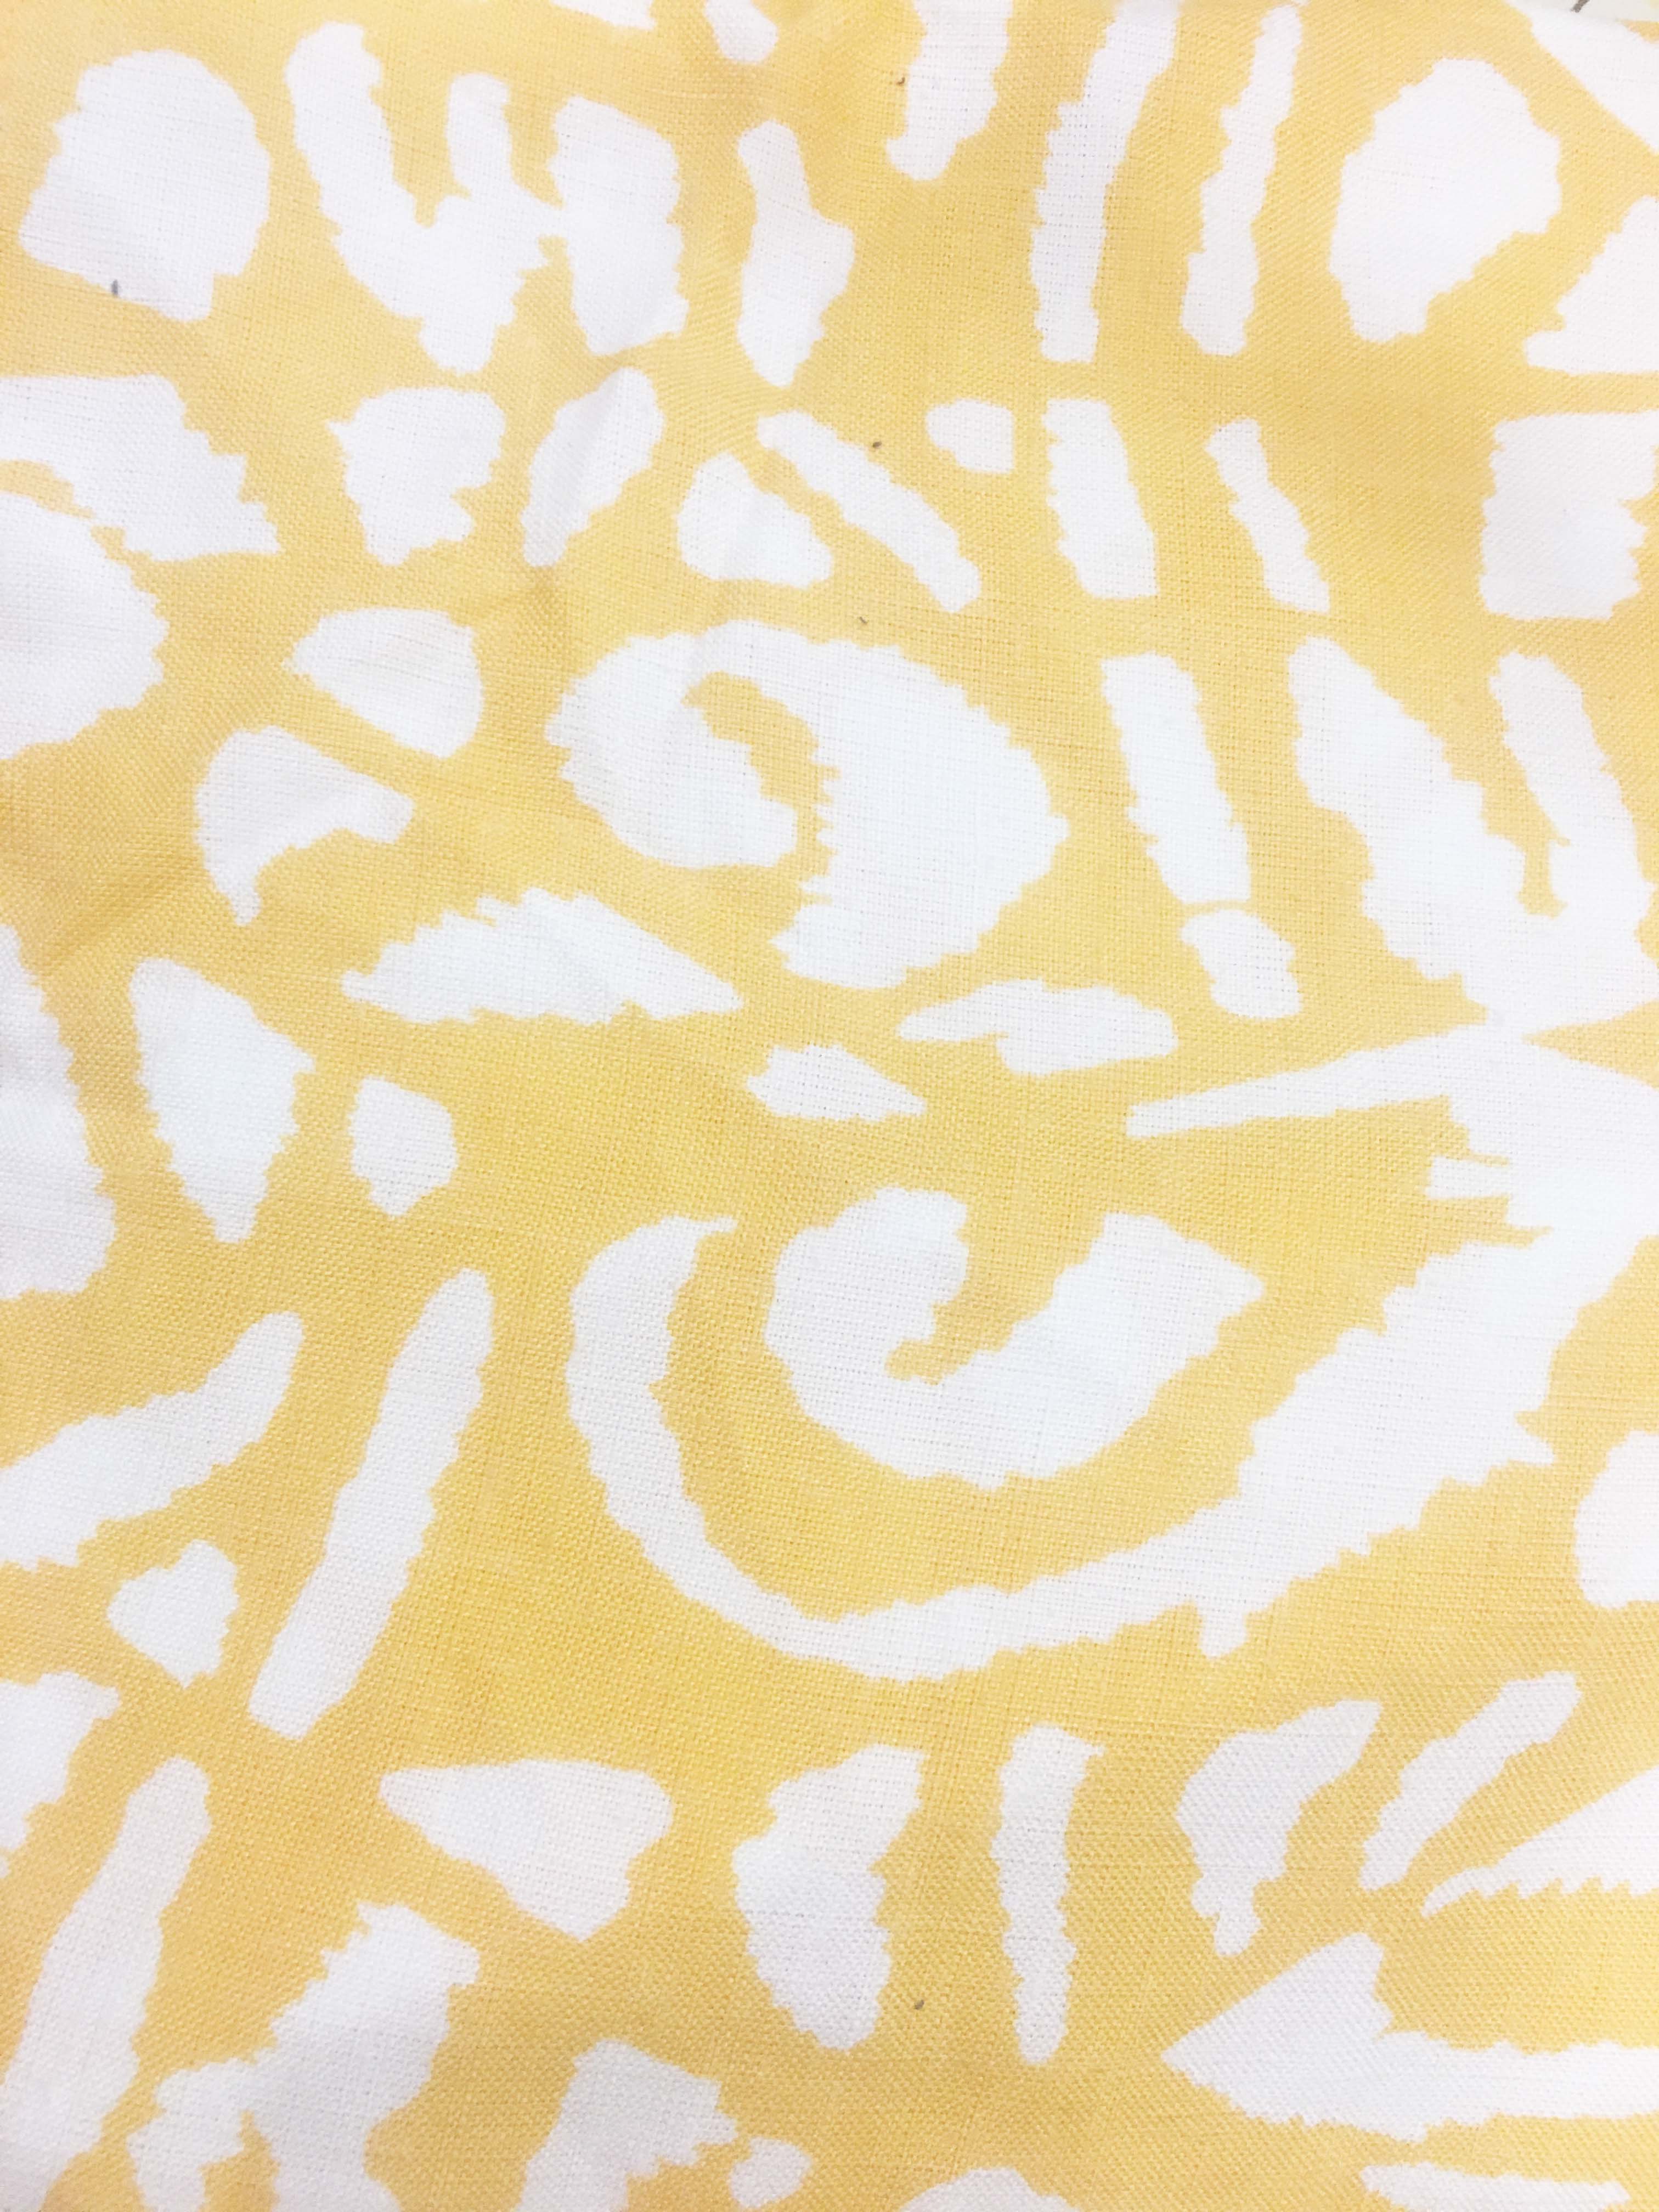
And this is another fabric that went into the Rag Rug Beach 🙂
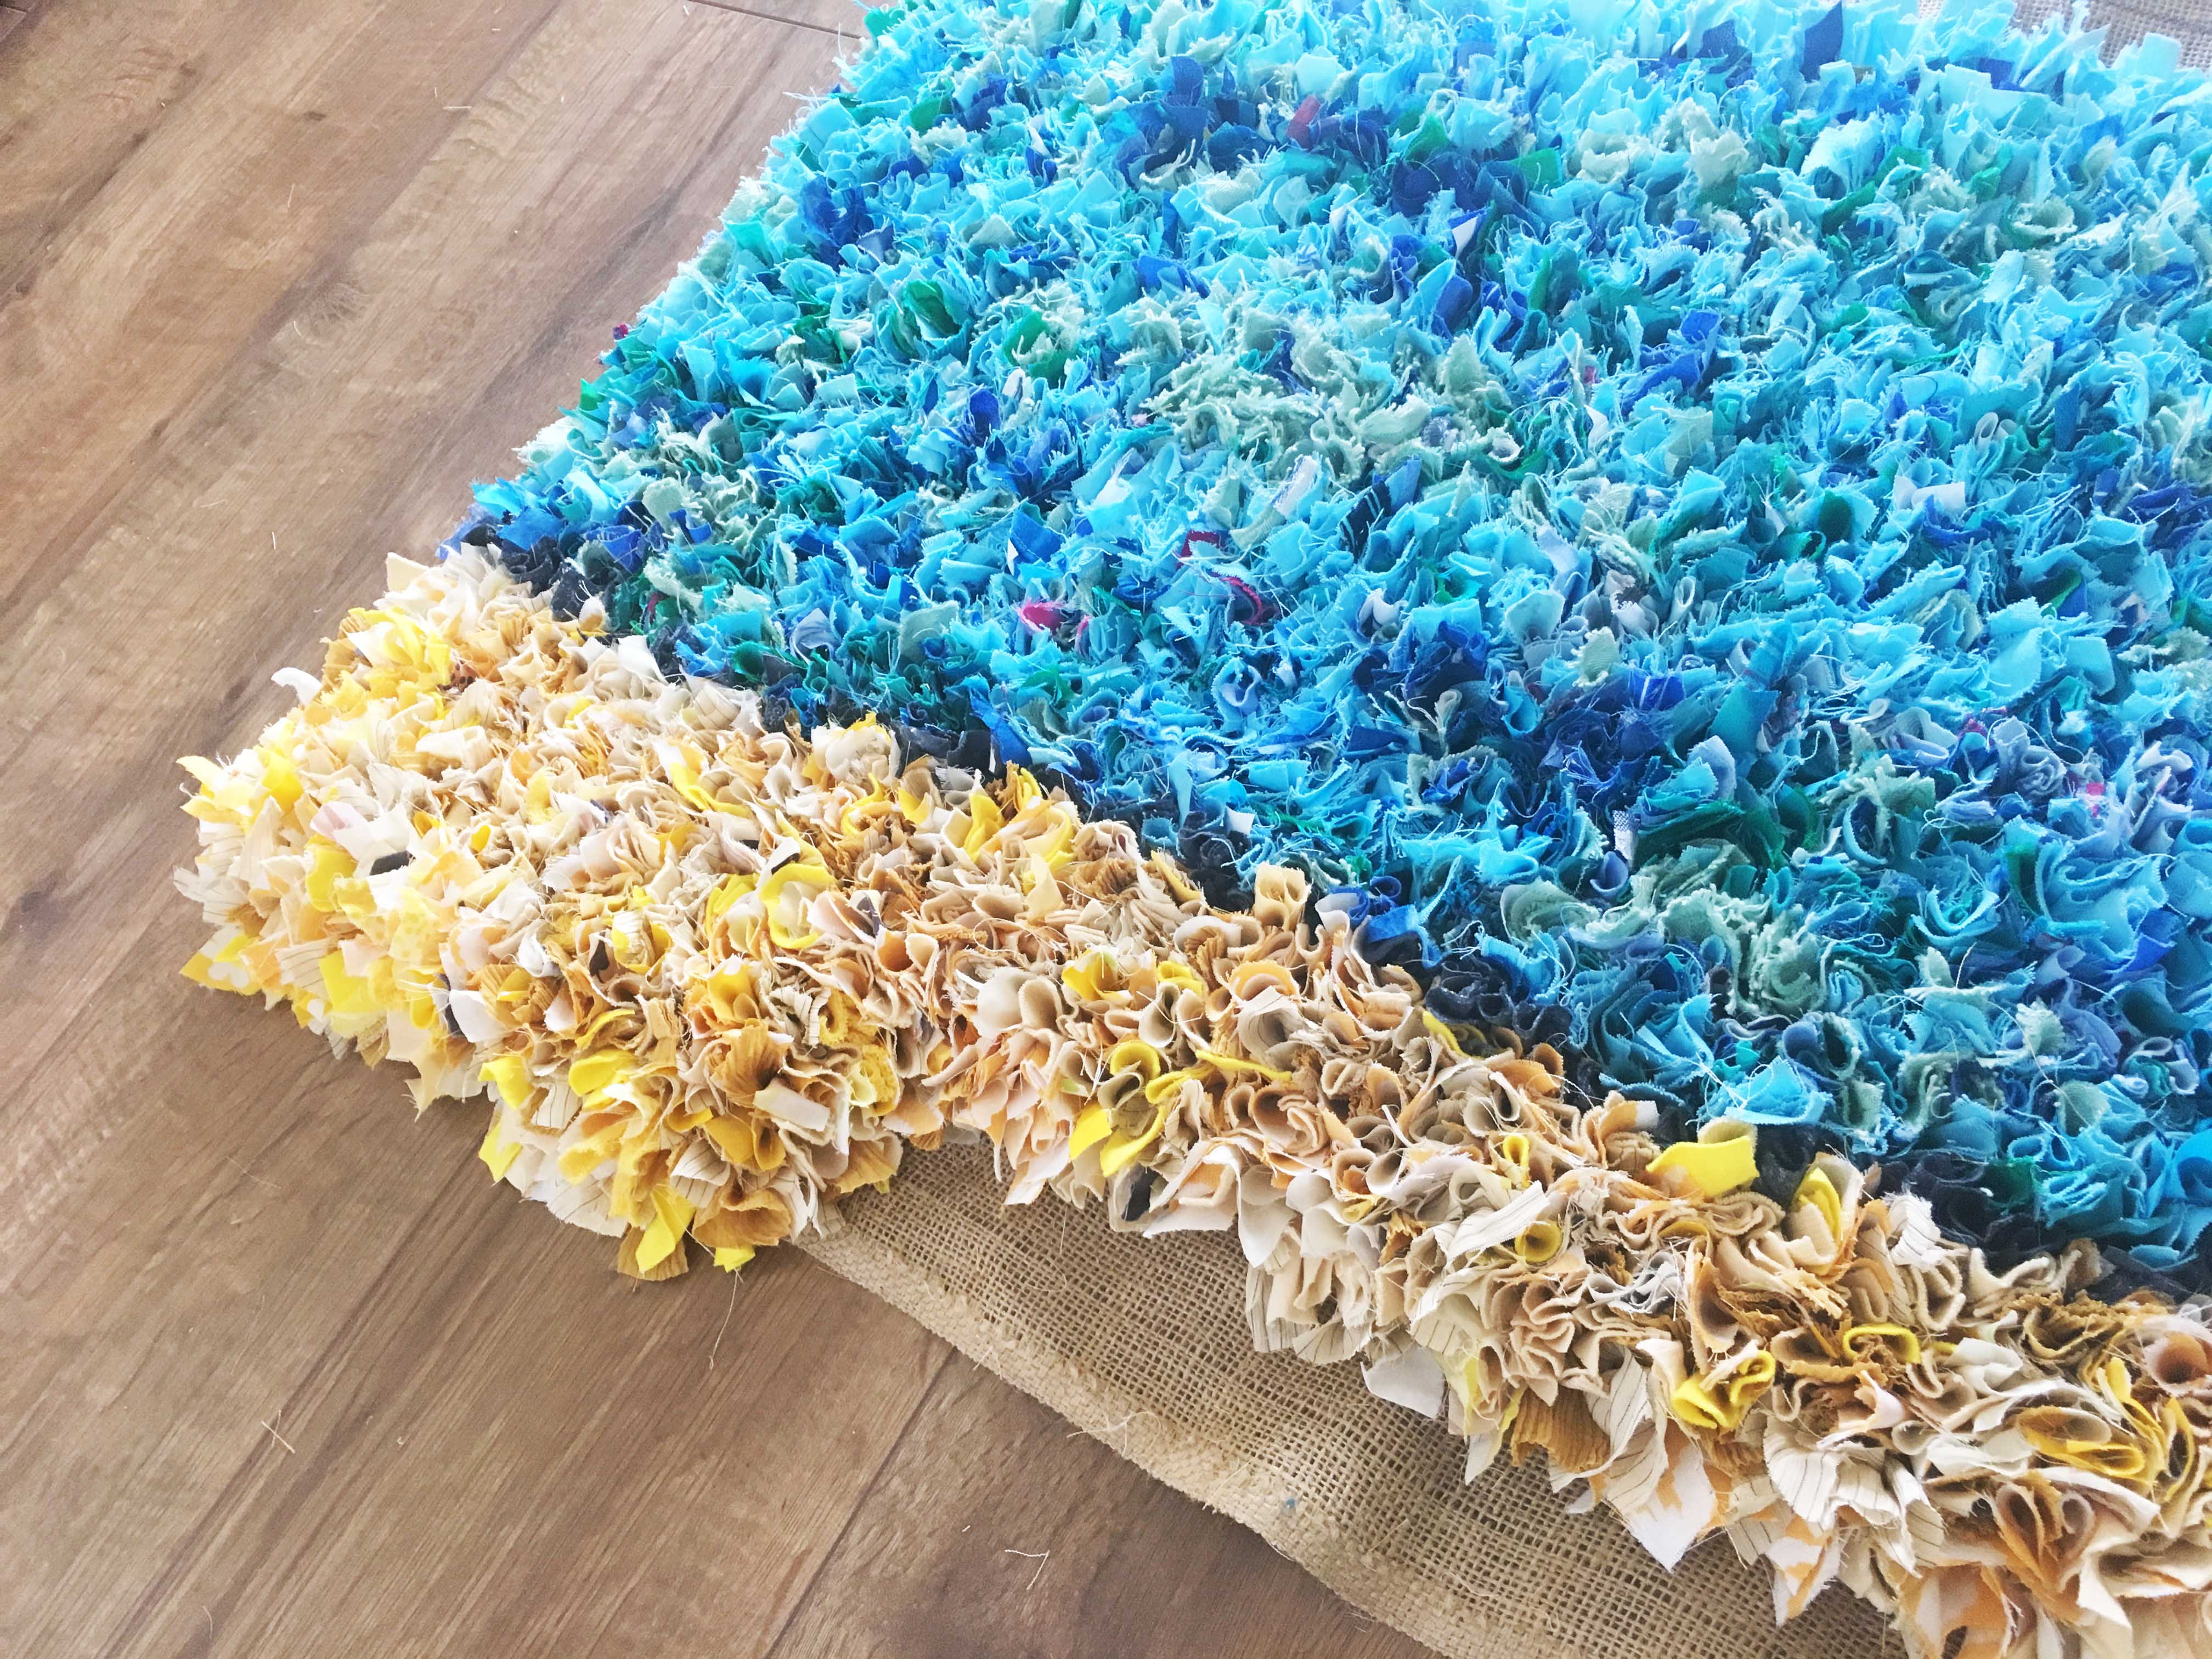
Here’s a close up so you can see some of the different colours that have gone into the rag rug beach.
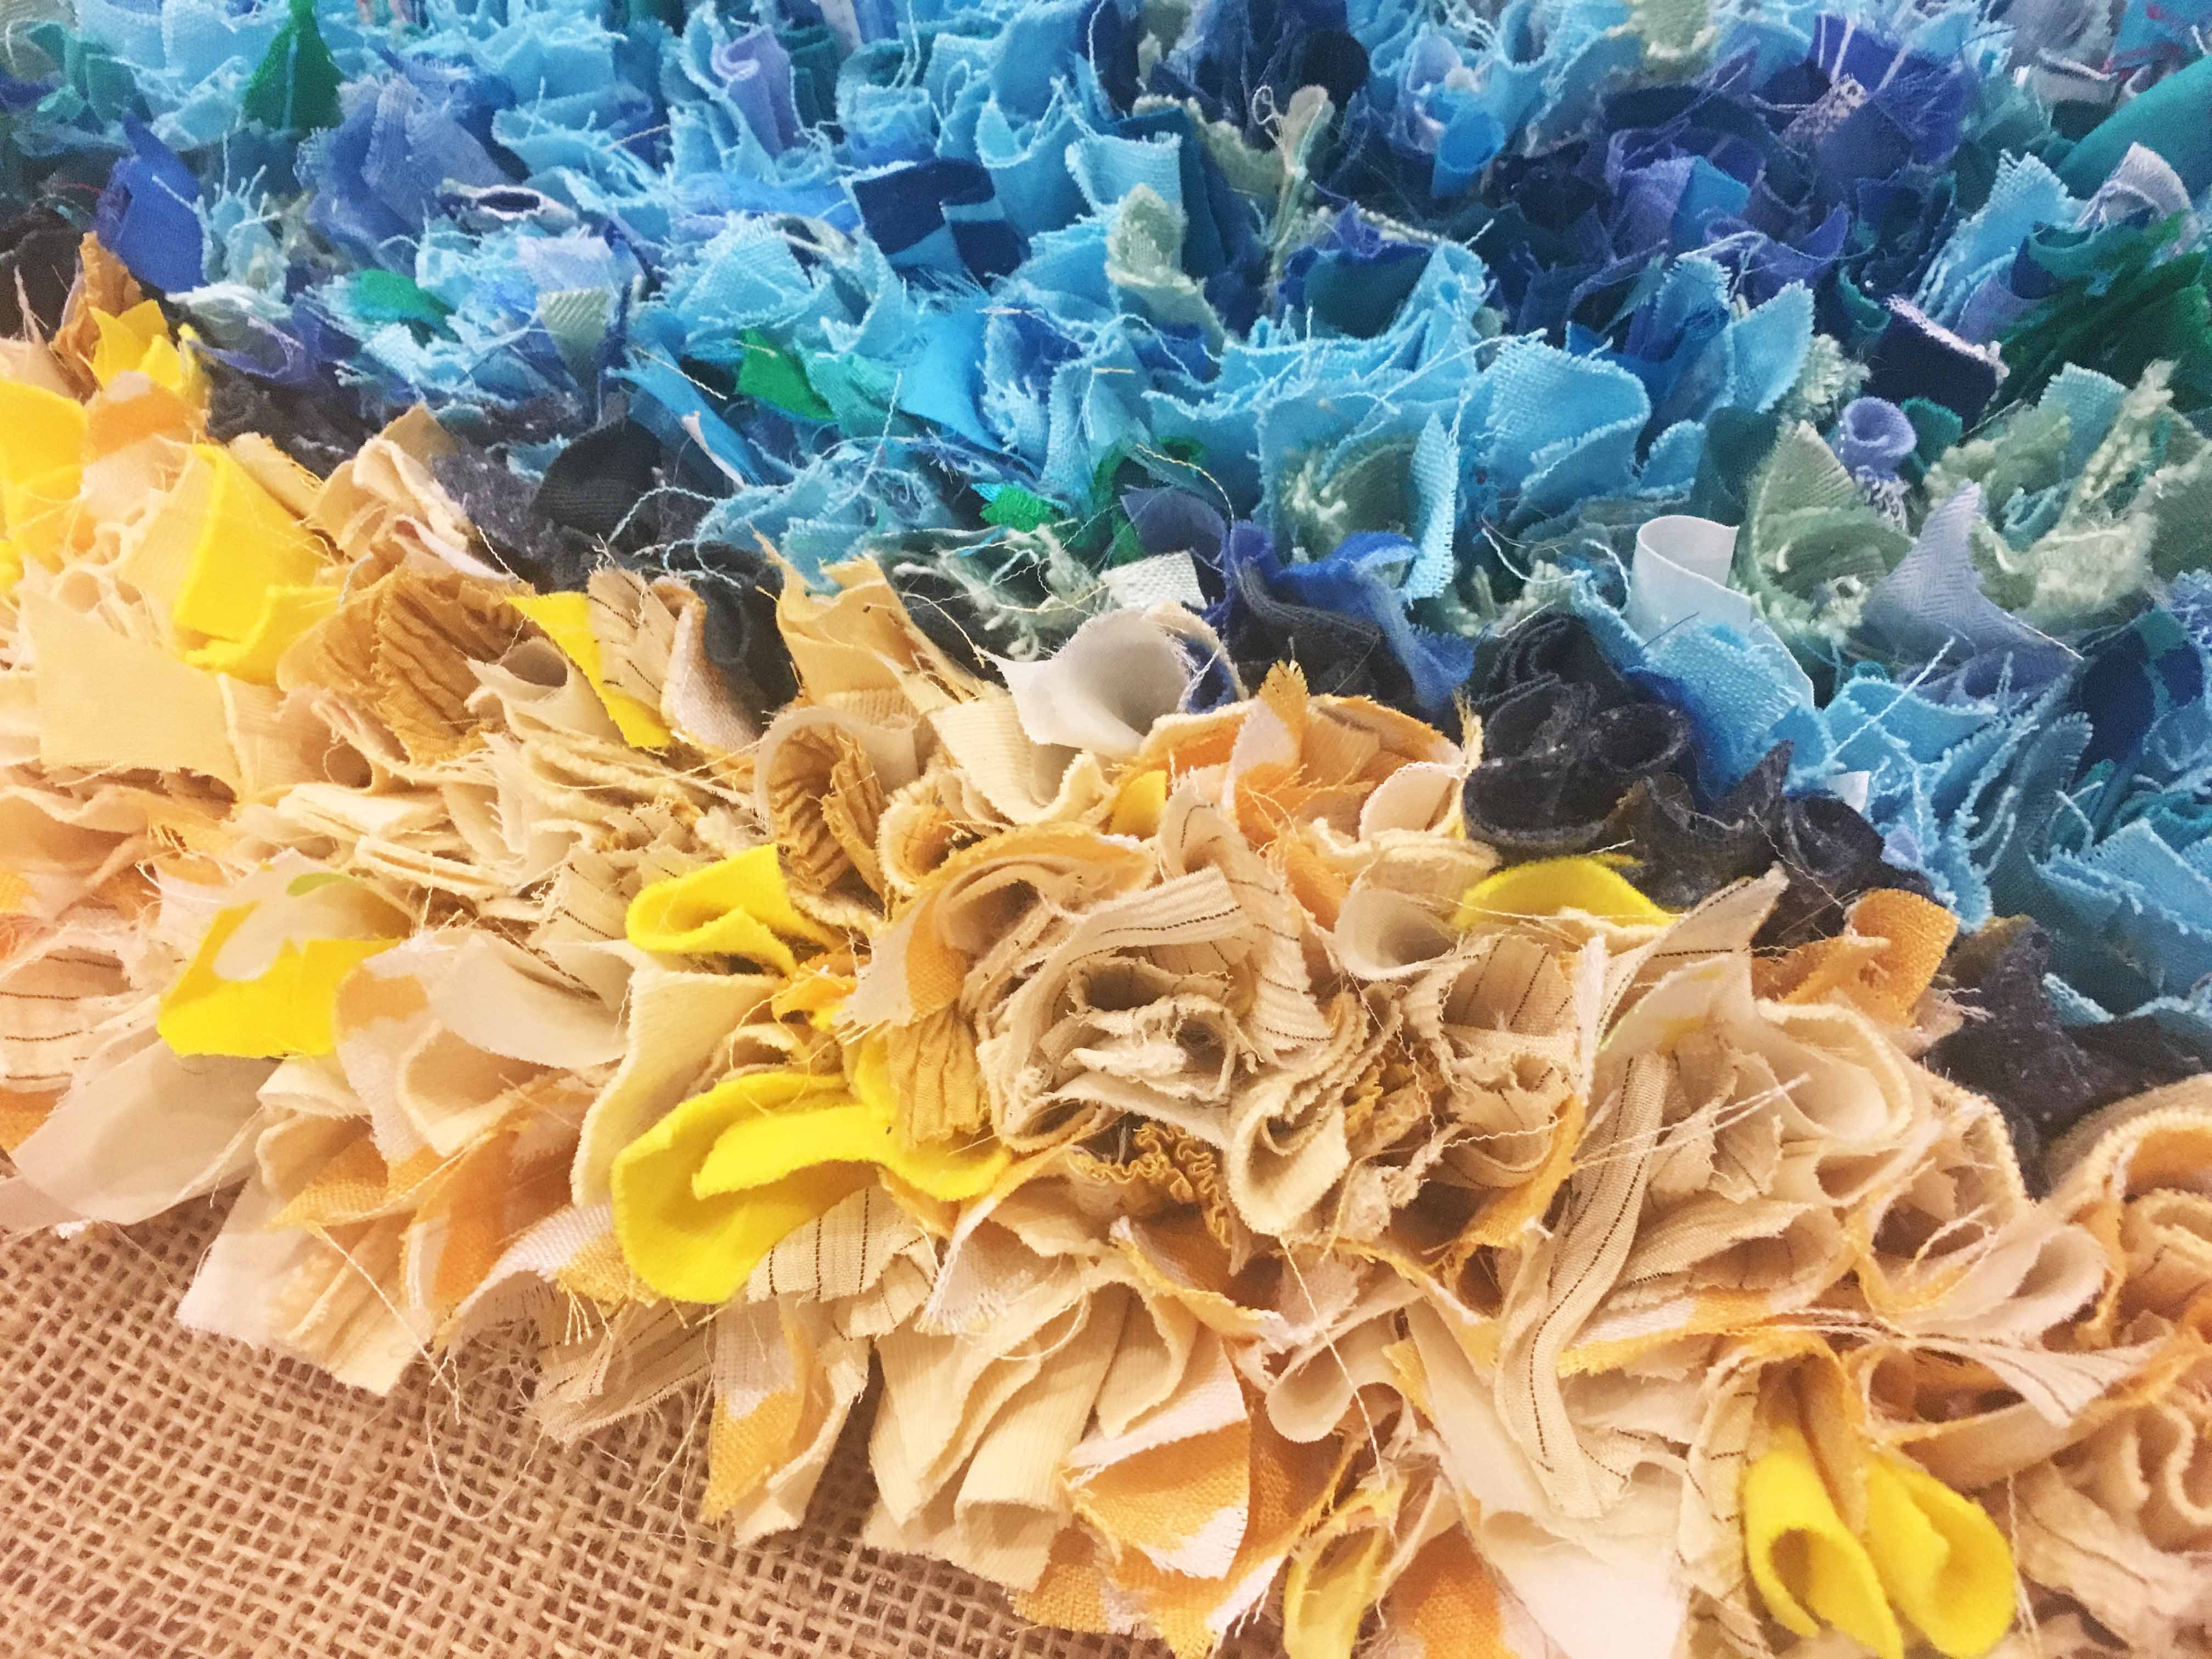
And an even closer shot… as you can tell, I love fabrics that fray!
Getting there slowly but surely!
This was when I’d finished about half of the beach. Fortunately I’d already cut up all the fabric for the second half of it.
Here I got a little bored and started rag rugging in blocks again. The lighting here looks a bit strange as it was a different time of day.
Shaggy rag rugging!!
Getting there slowly but surely…
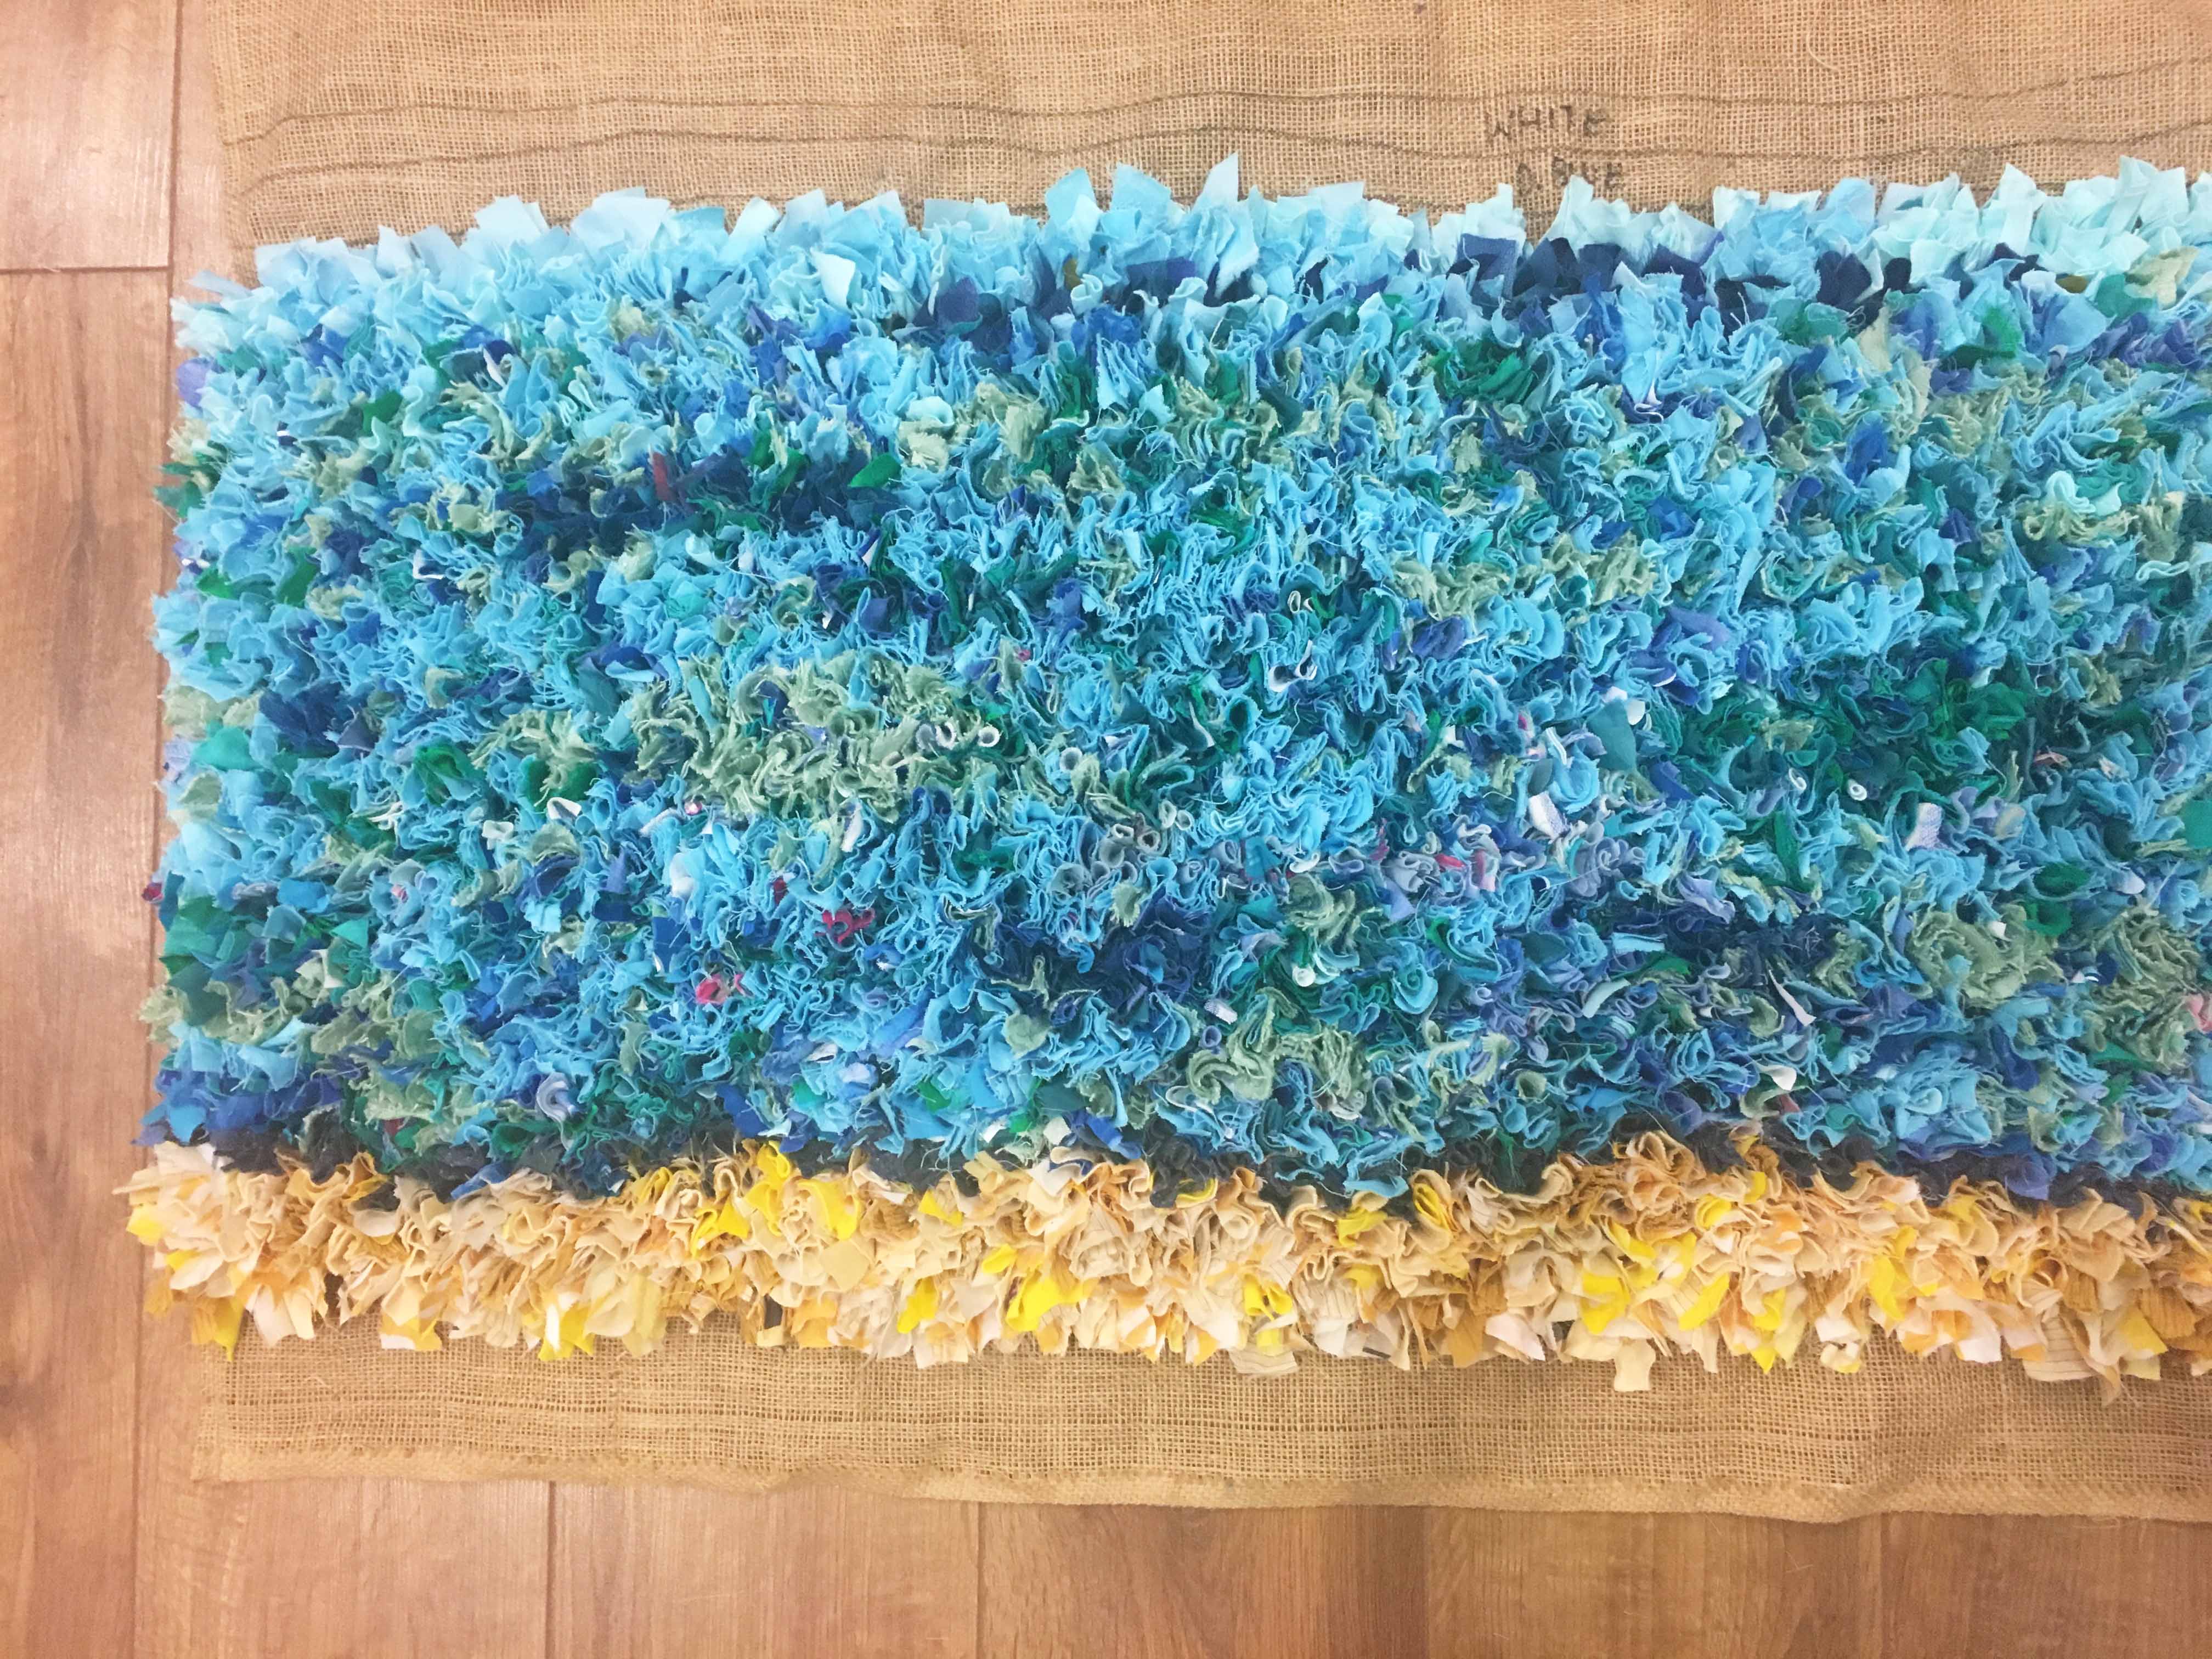
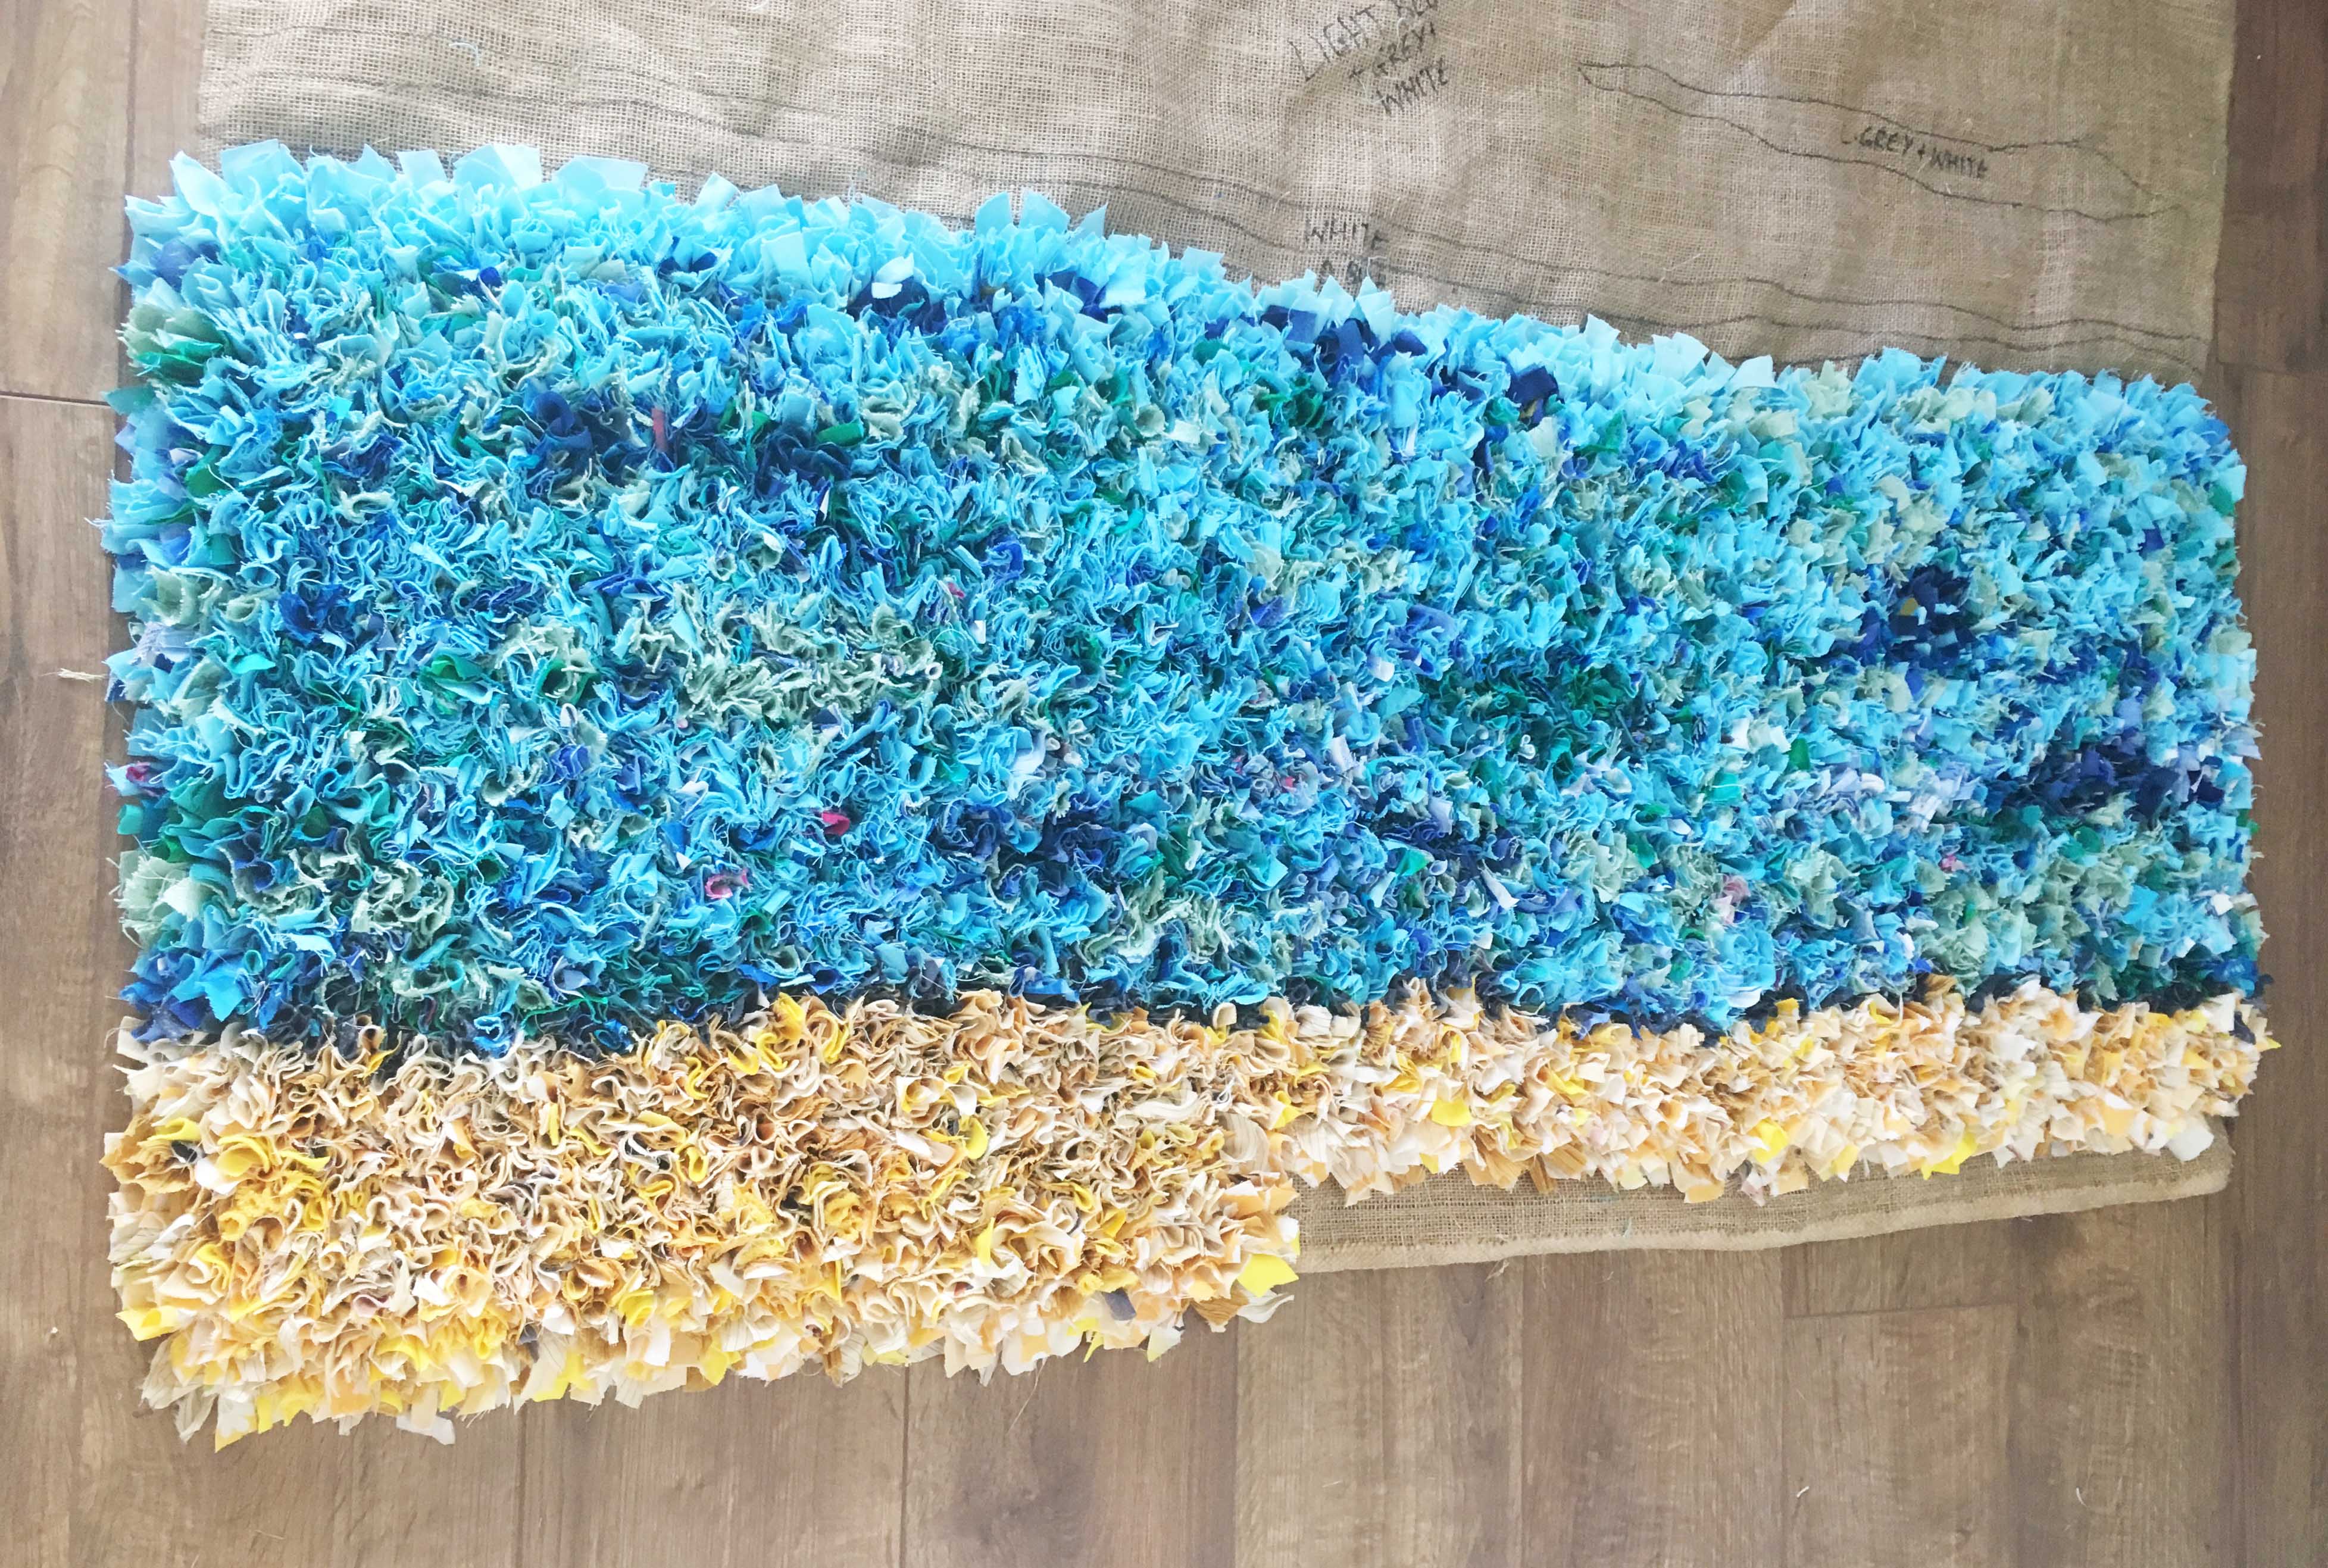
The Fully Rag Rugged Beach!!
And here you can see a little bit more.
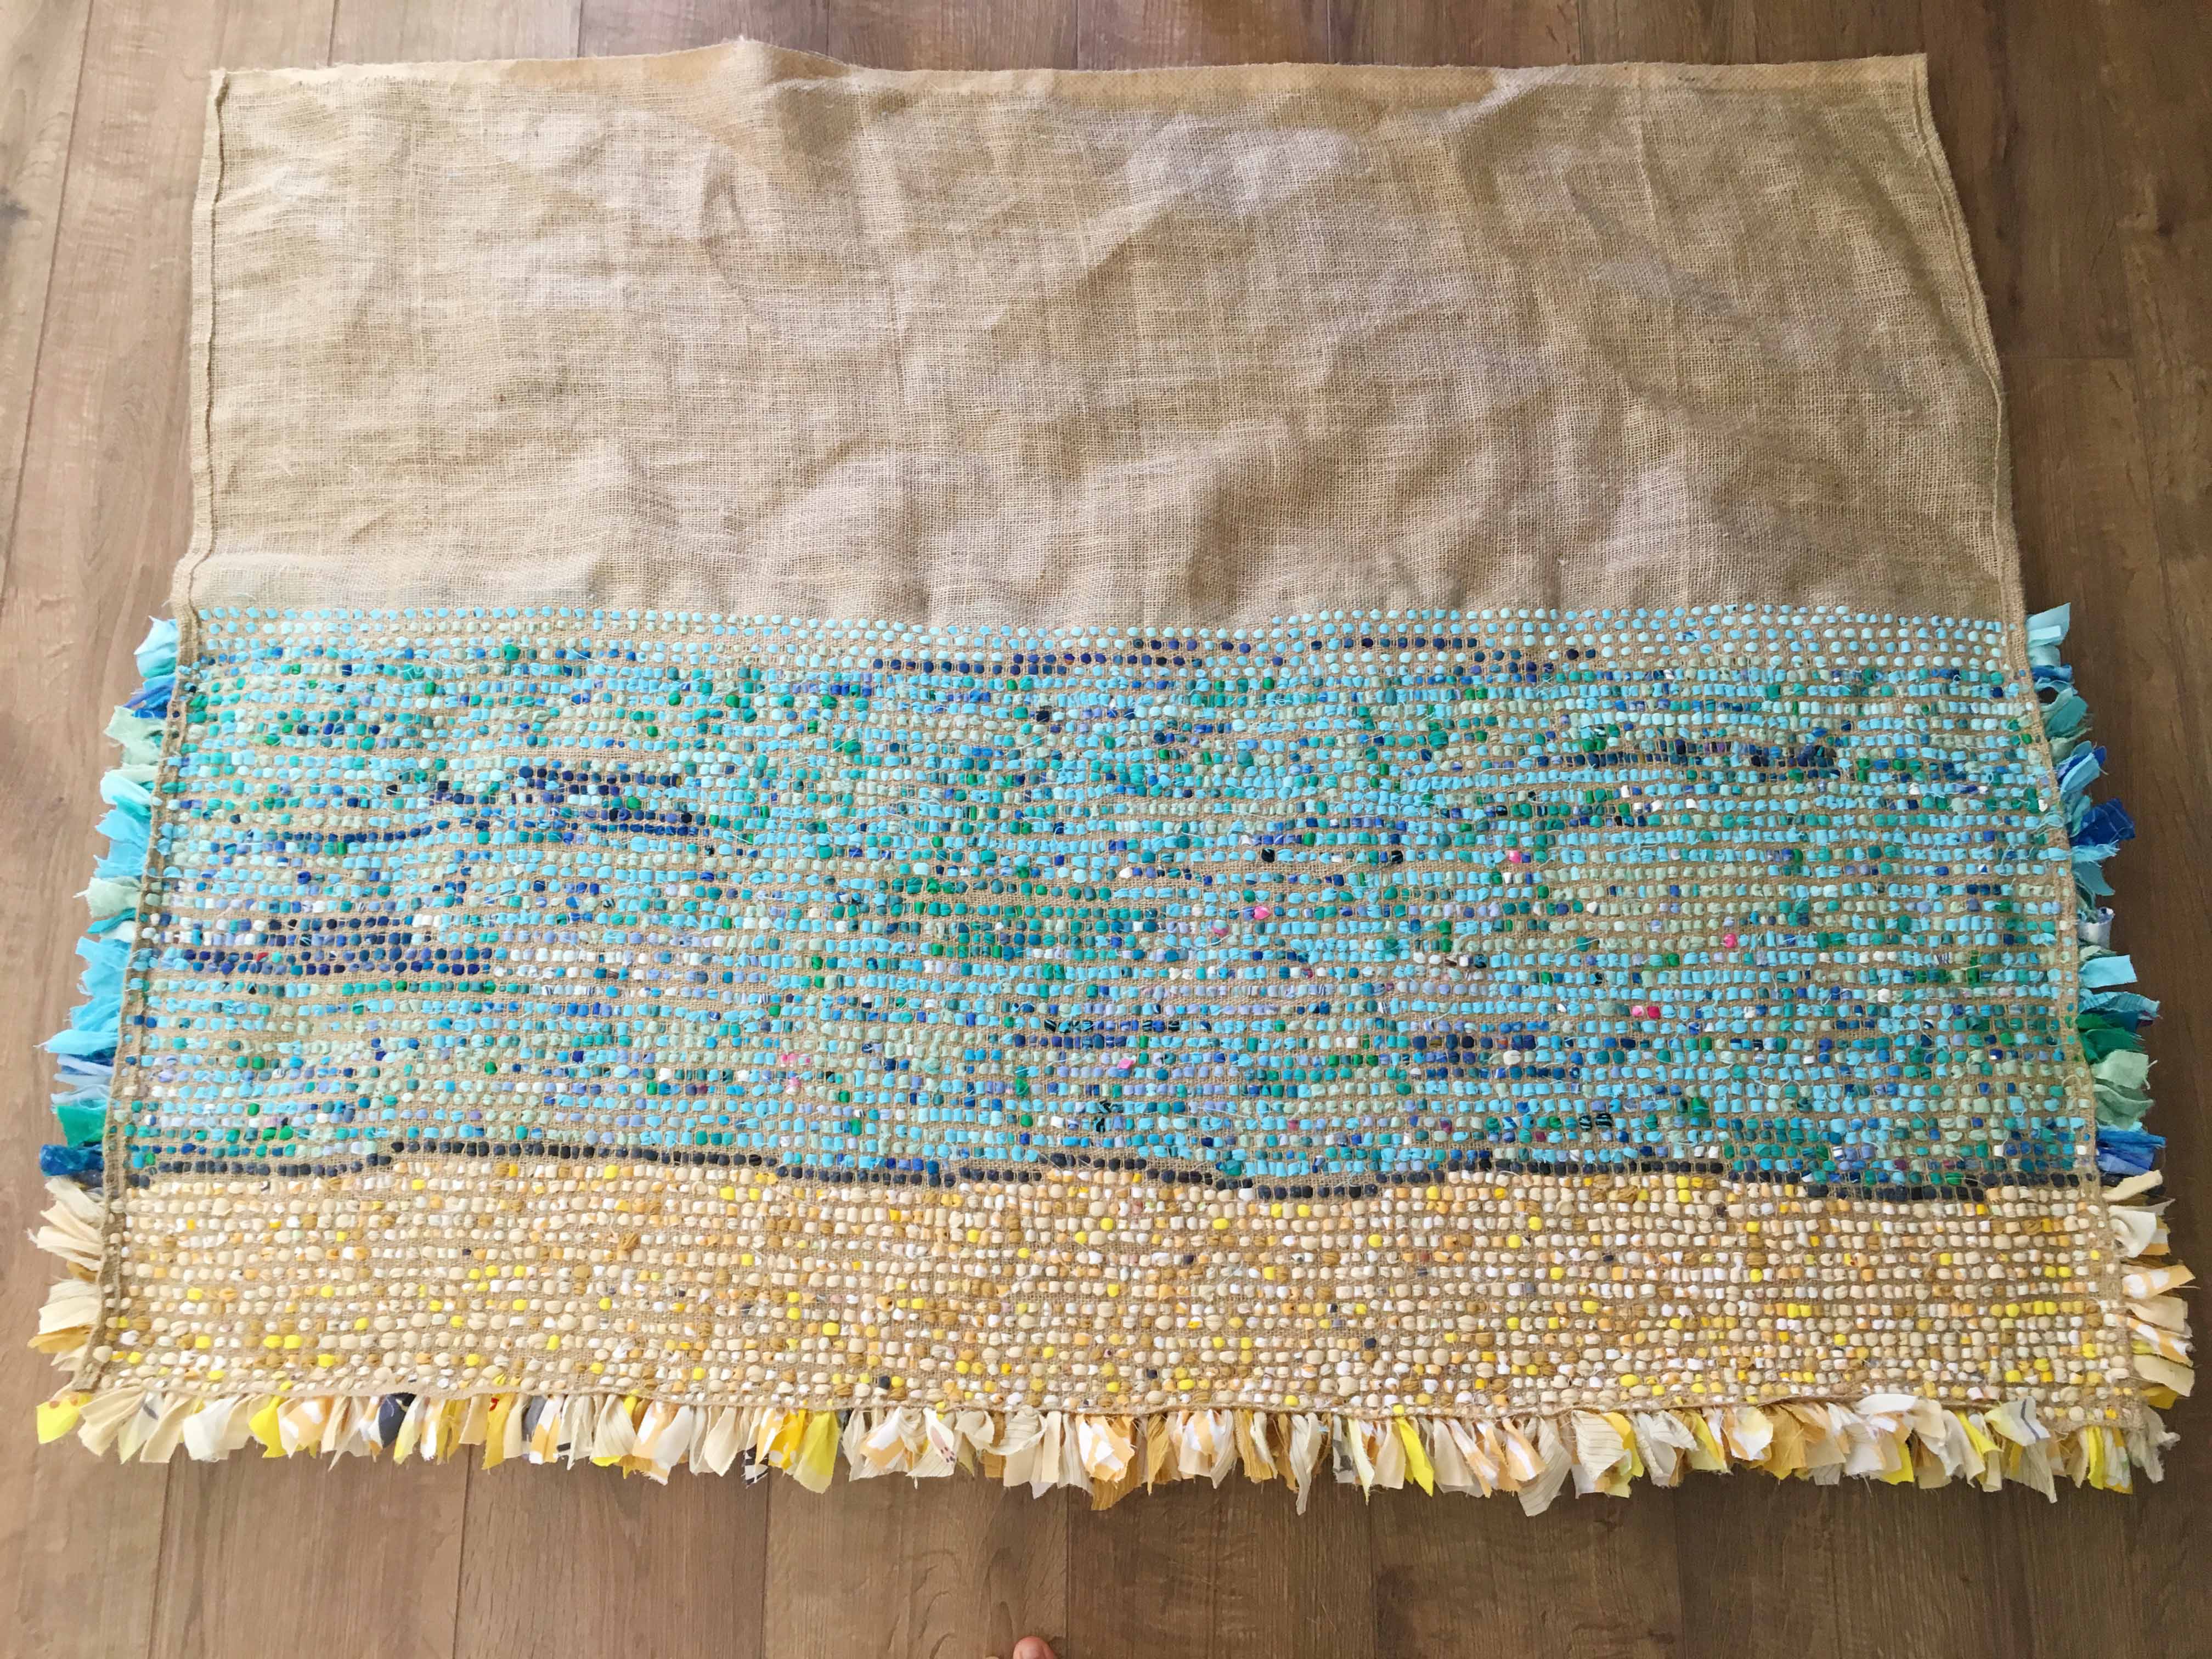
And everyone is always curious to see what the back of my rugs look like.
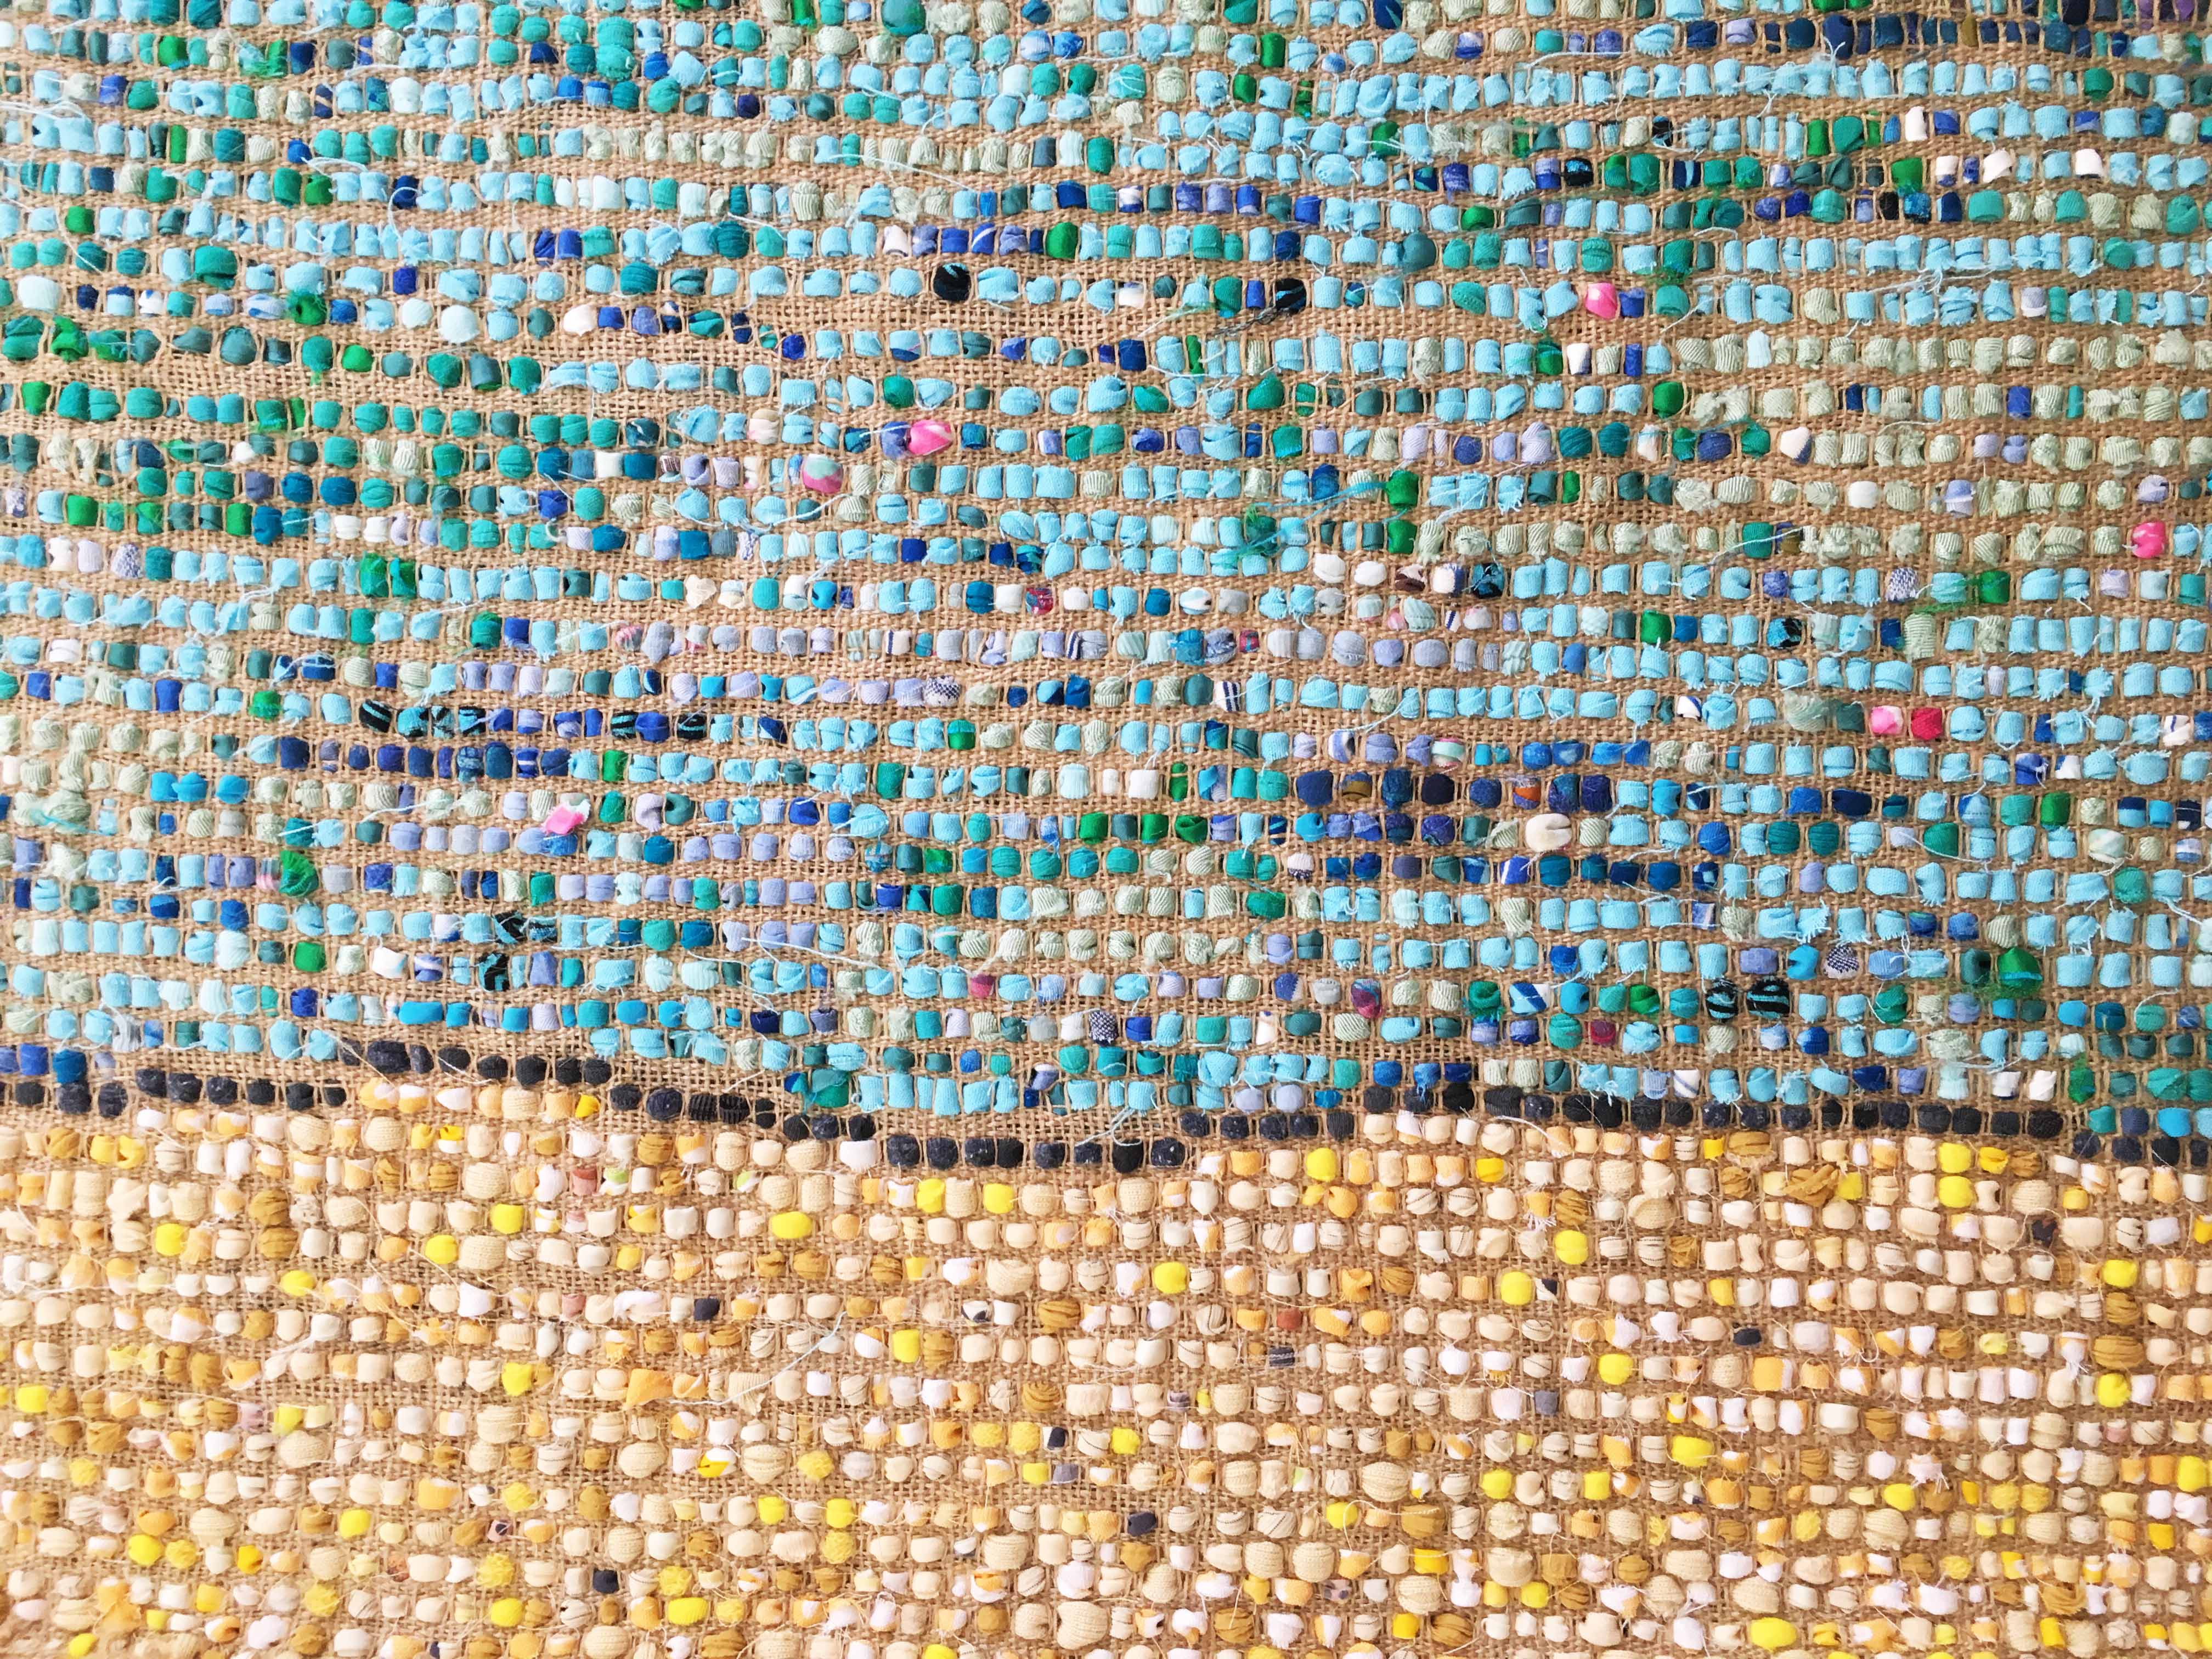
Here you can even see the back of the individual rags. I’m definitely going to add in more rogue colours further down the line.
Now onto the horizon…
The horizon looks a little stark here but it will look a lot less in your face once the rag rugging goes in above it. I’m planning to put in a white line above the navy.
THE HOME STRAIGHT – 22/06/2017
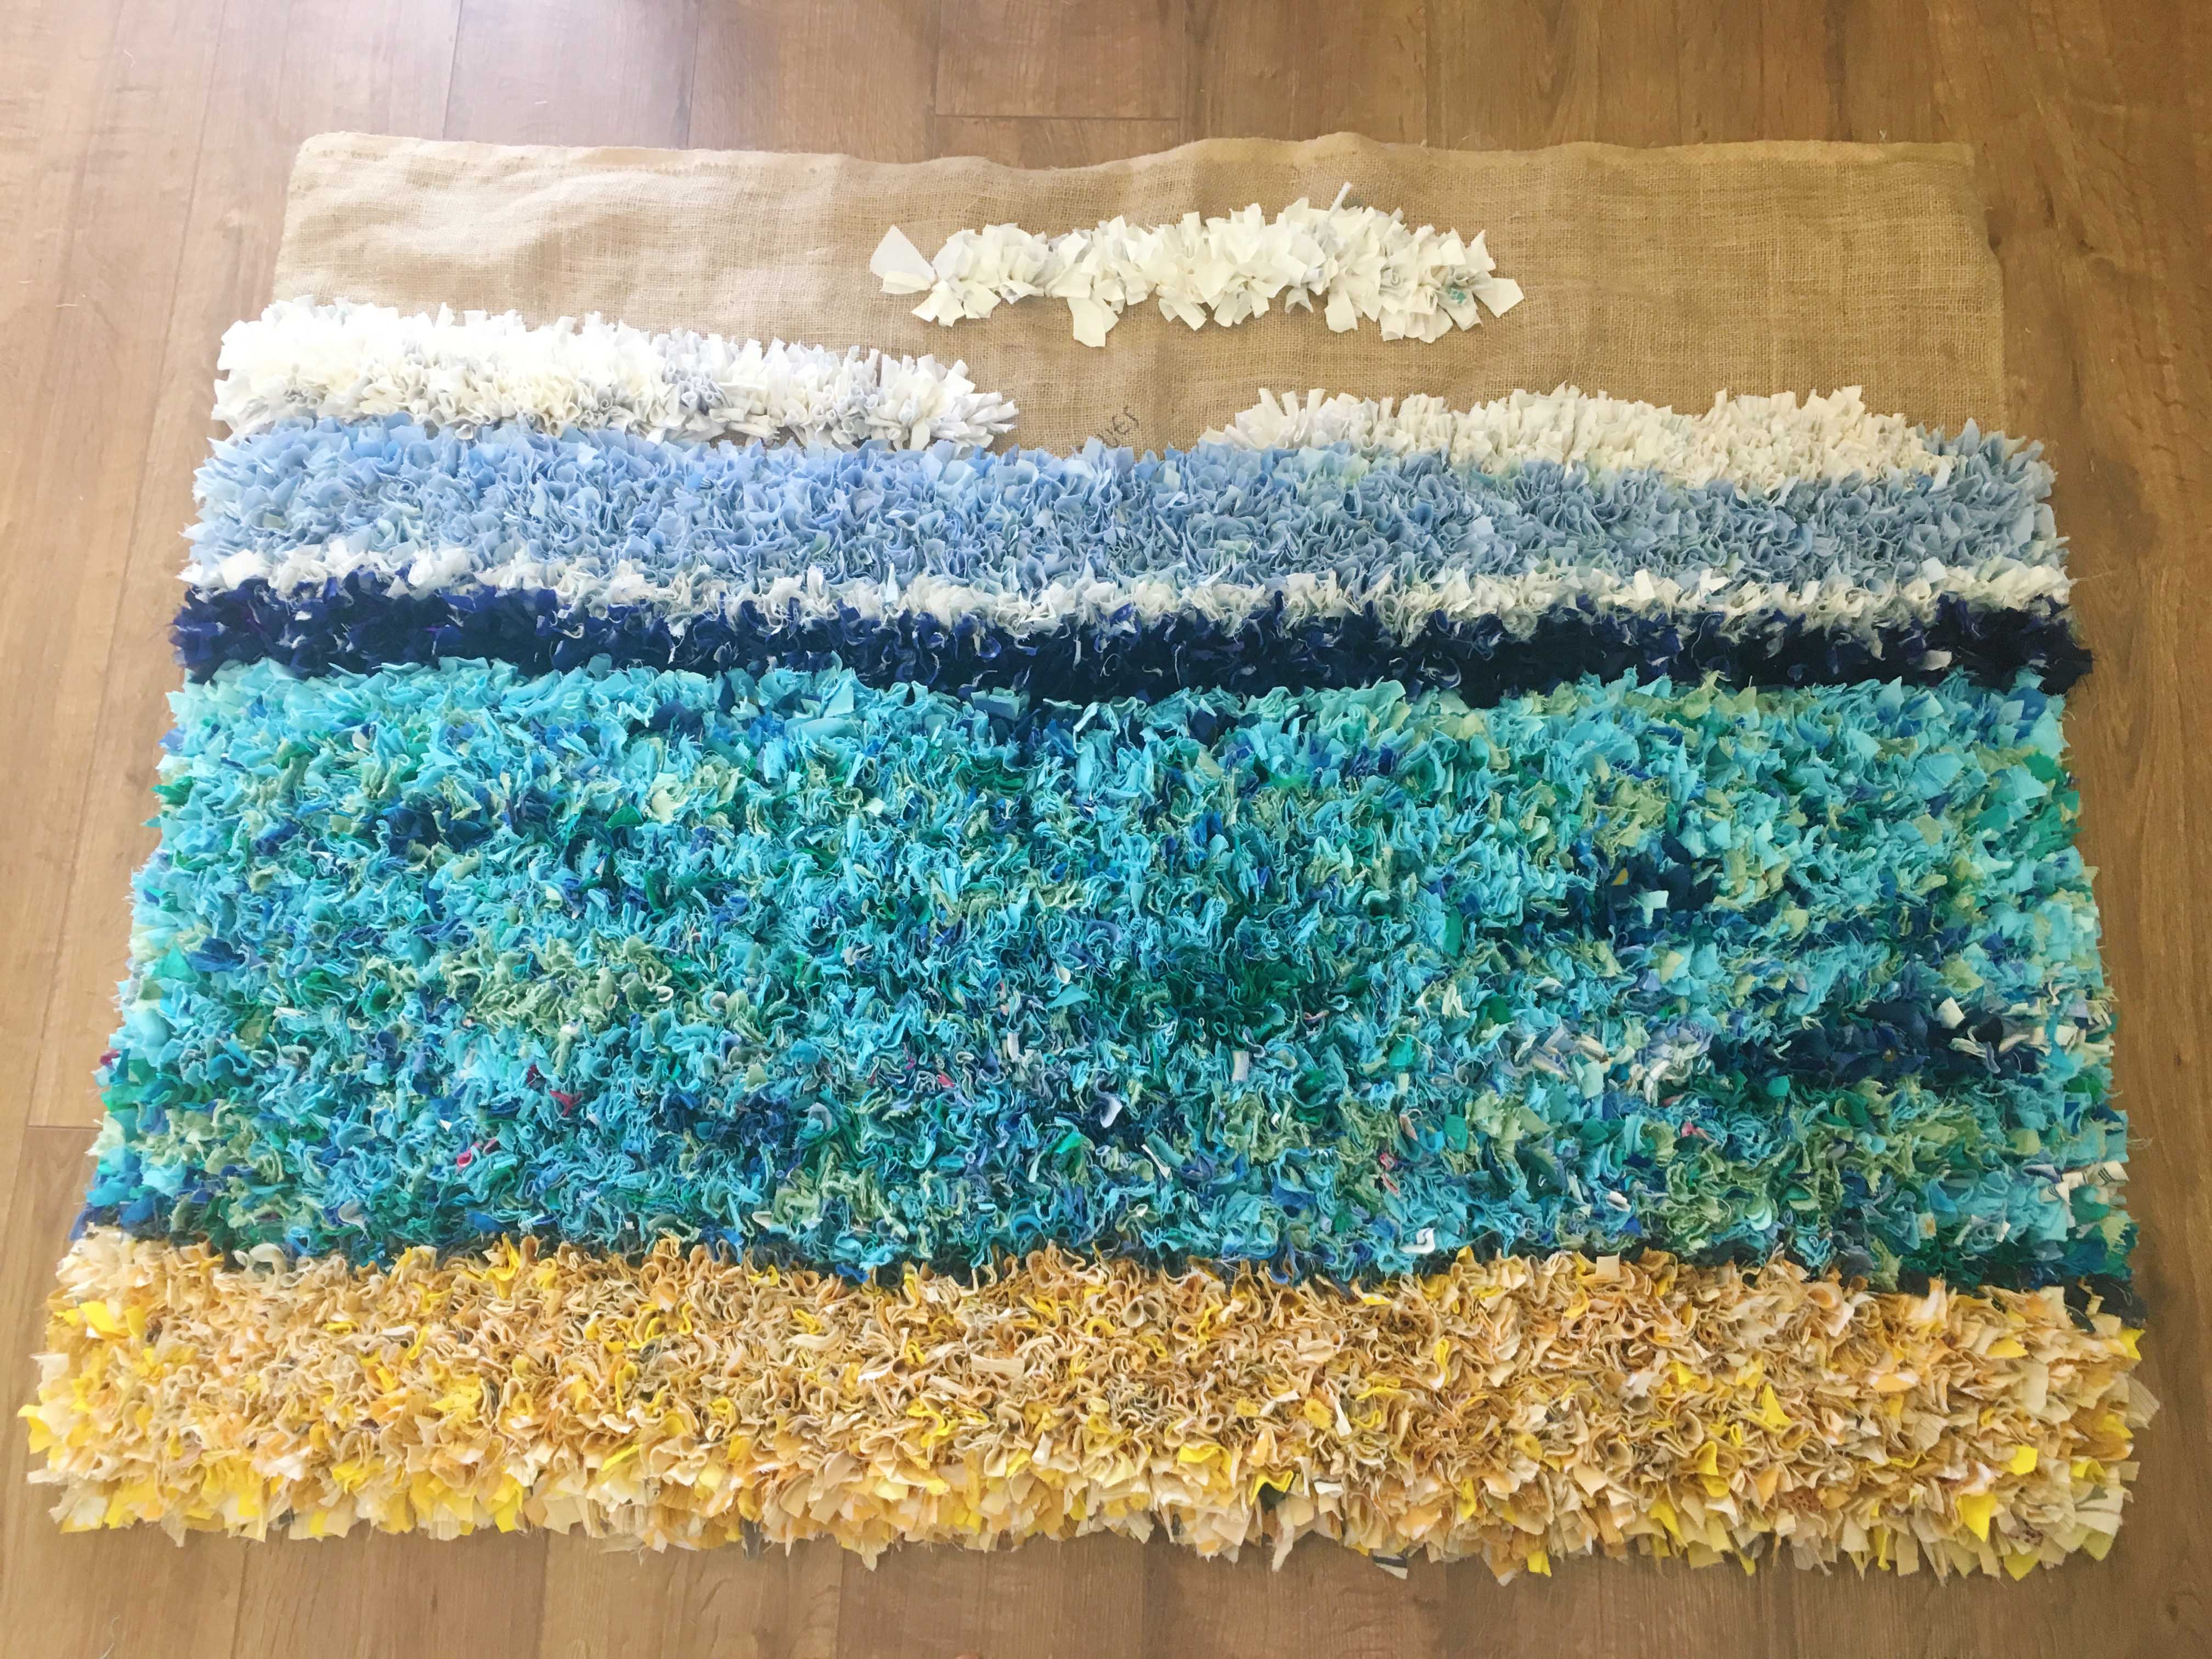
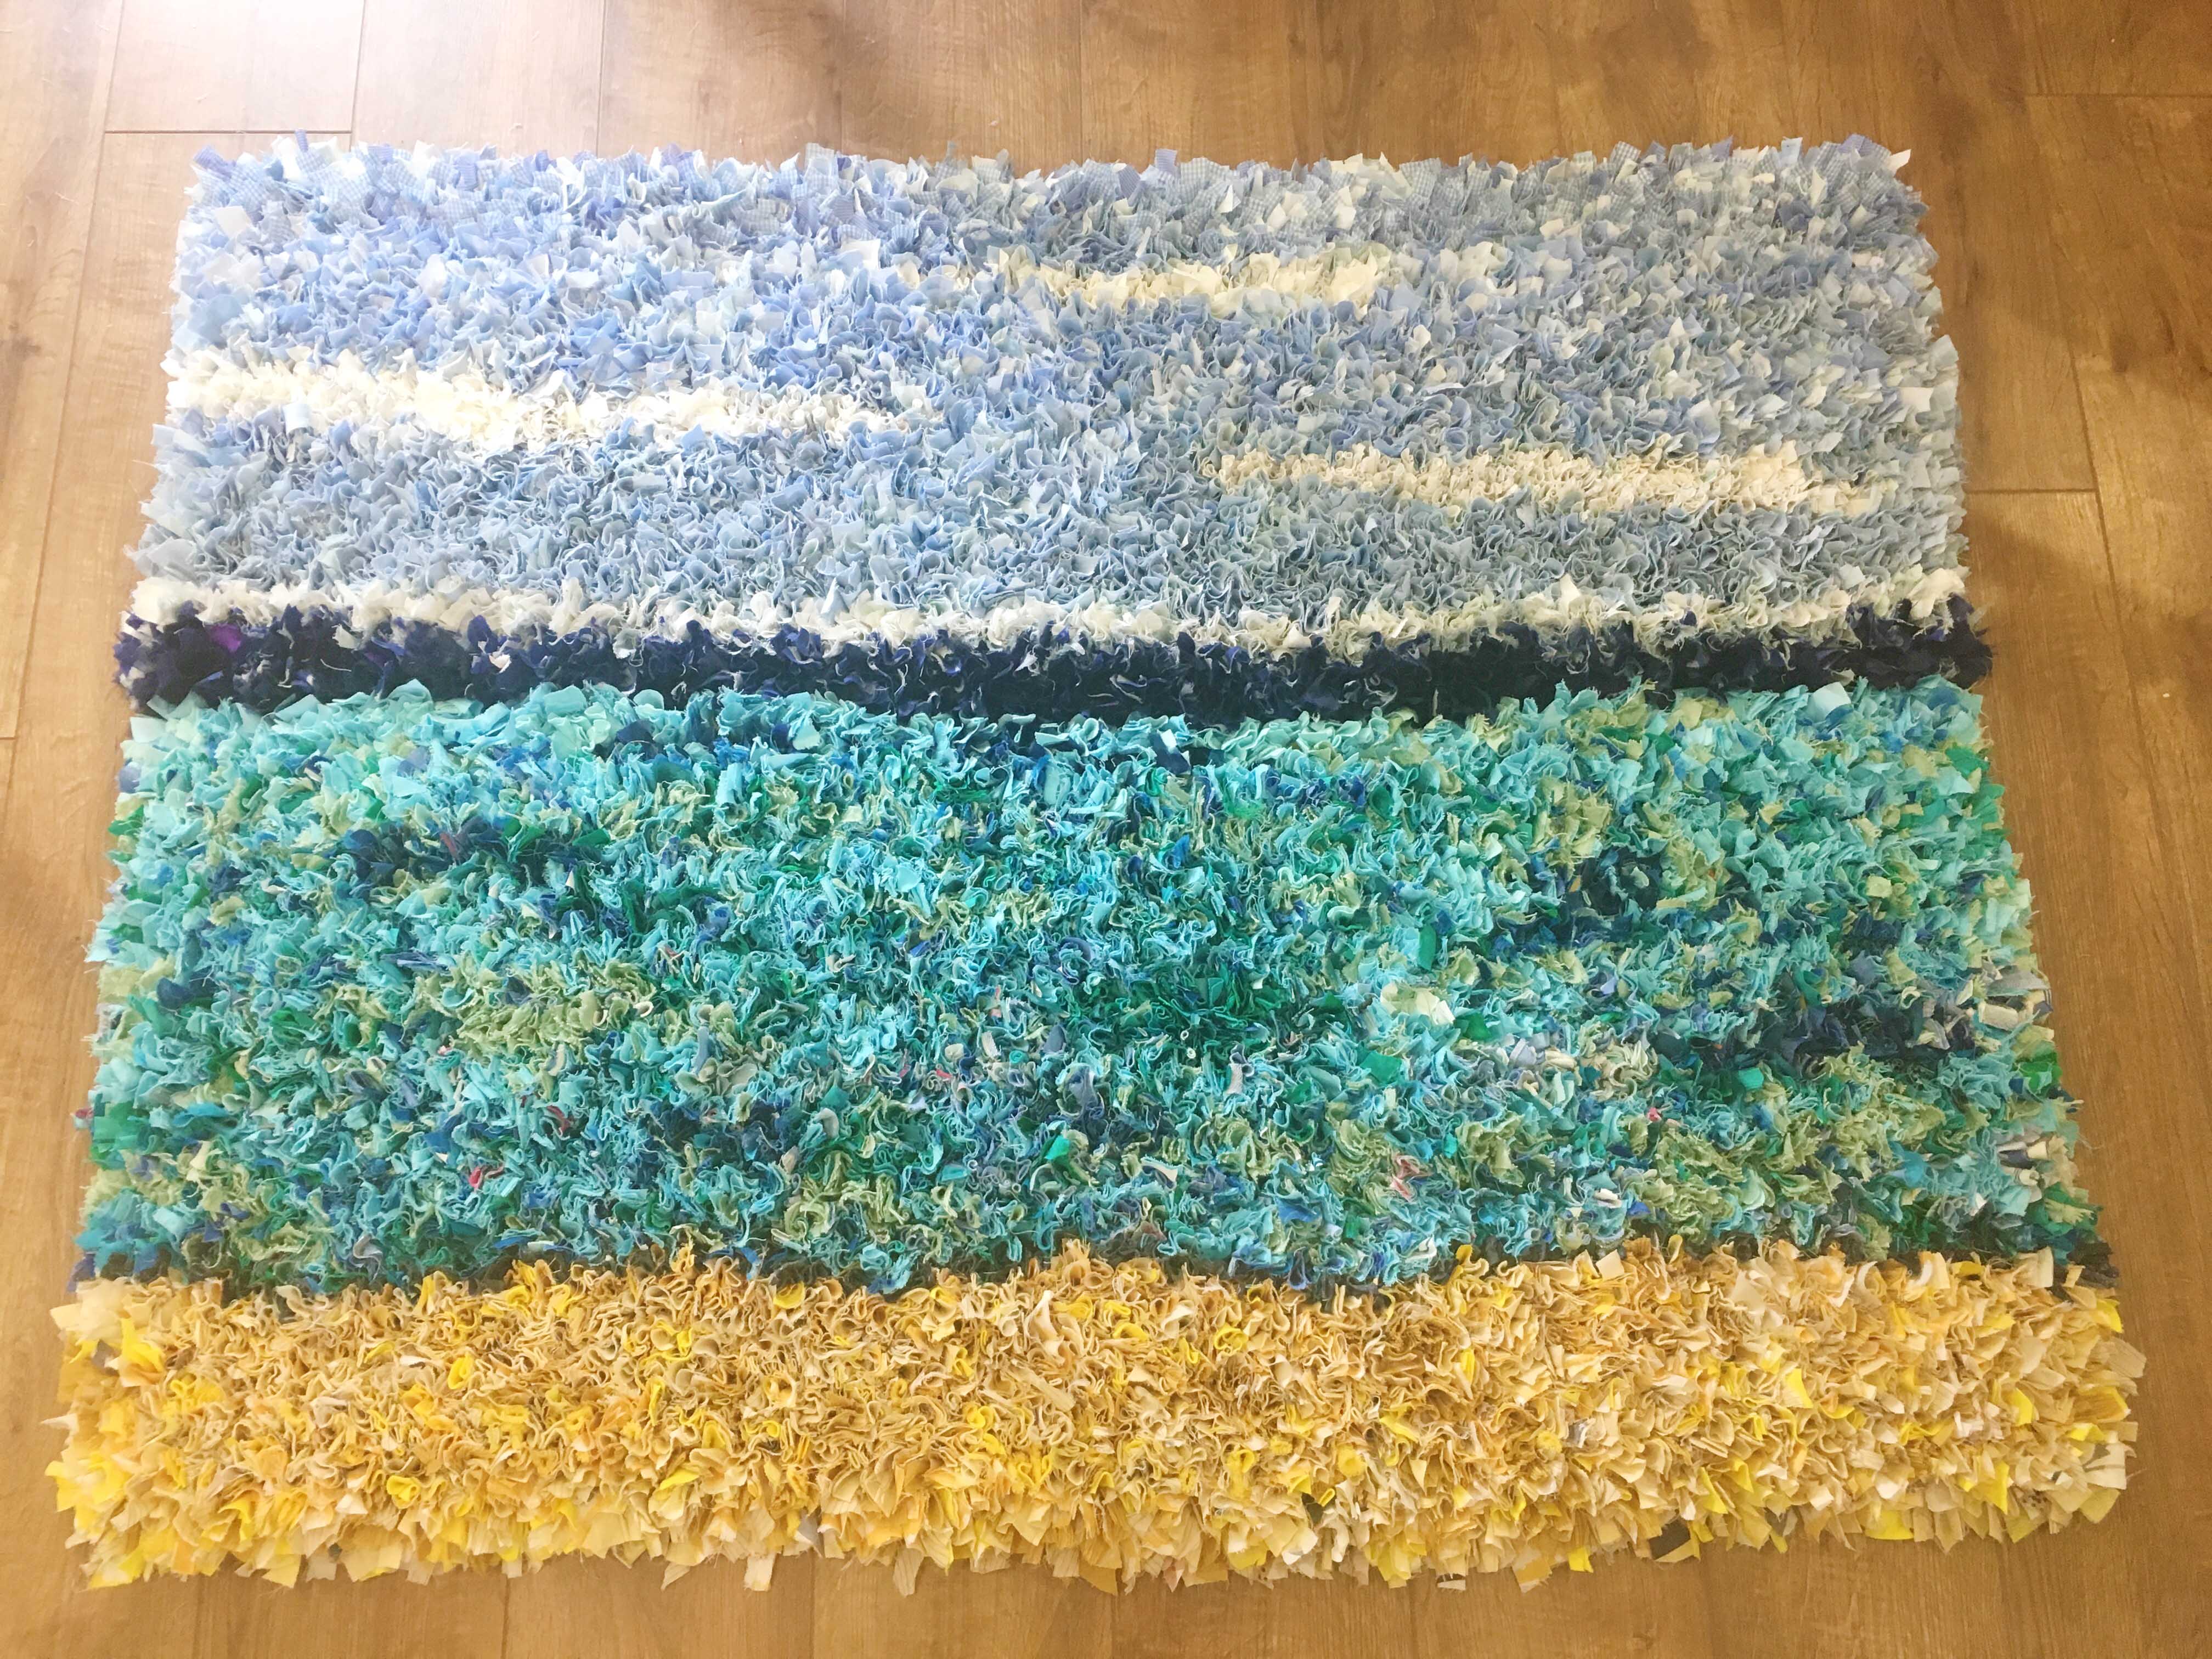
I’m done!!! My Pacific Island paradise rug is finally complete and I can’t wait for you to see it 🙂
Since I last updated you all, I rag rugged a row of white above the horizon to blend it into the sky, I put in three fluffy clouds and filled in the baby blue sky (which I have to admit was the least exciting part of the whole rug). Once I filled in the hessian, I added in a few details to lift the rug and make it that little bit more interesting. Below you can see the finished rag rug – hope you like it!
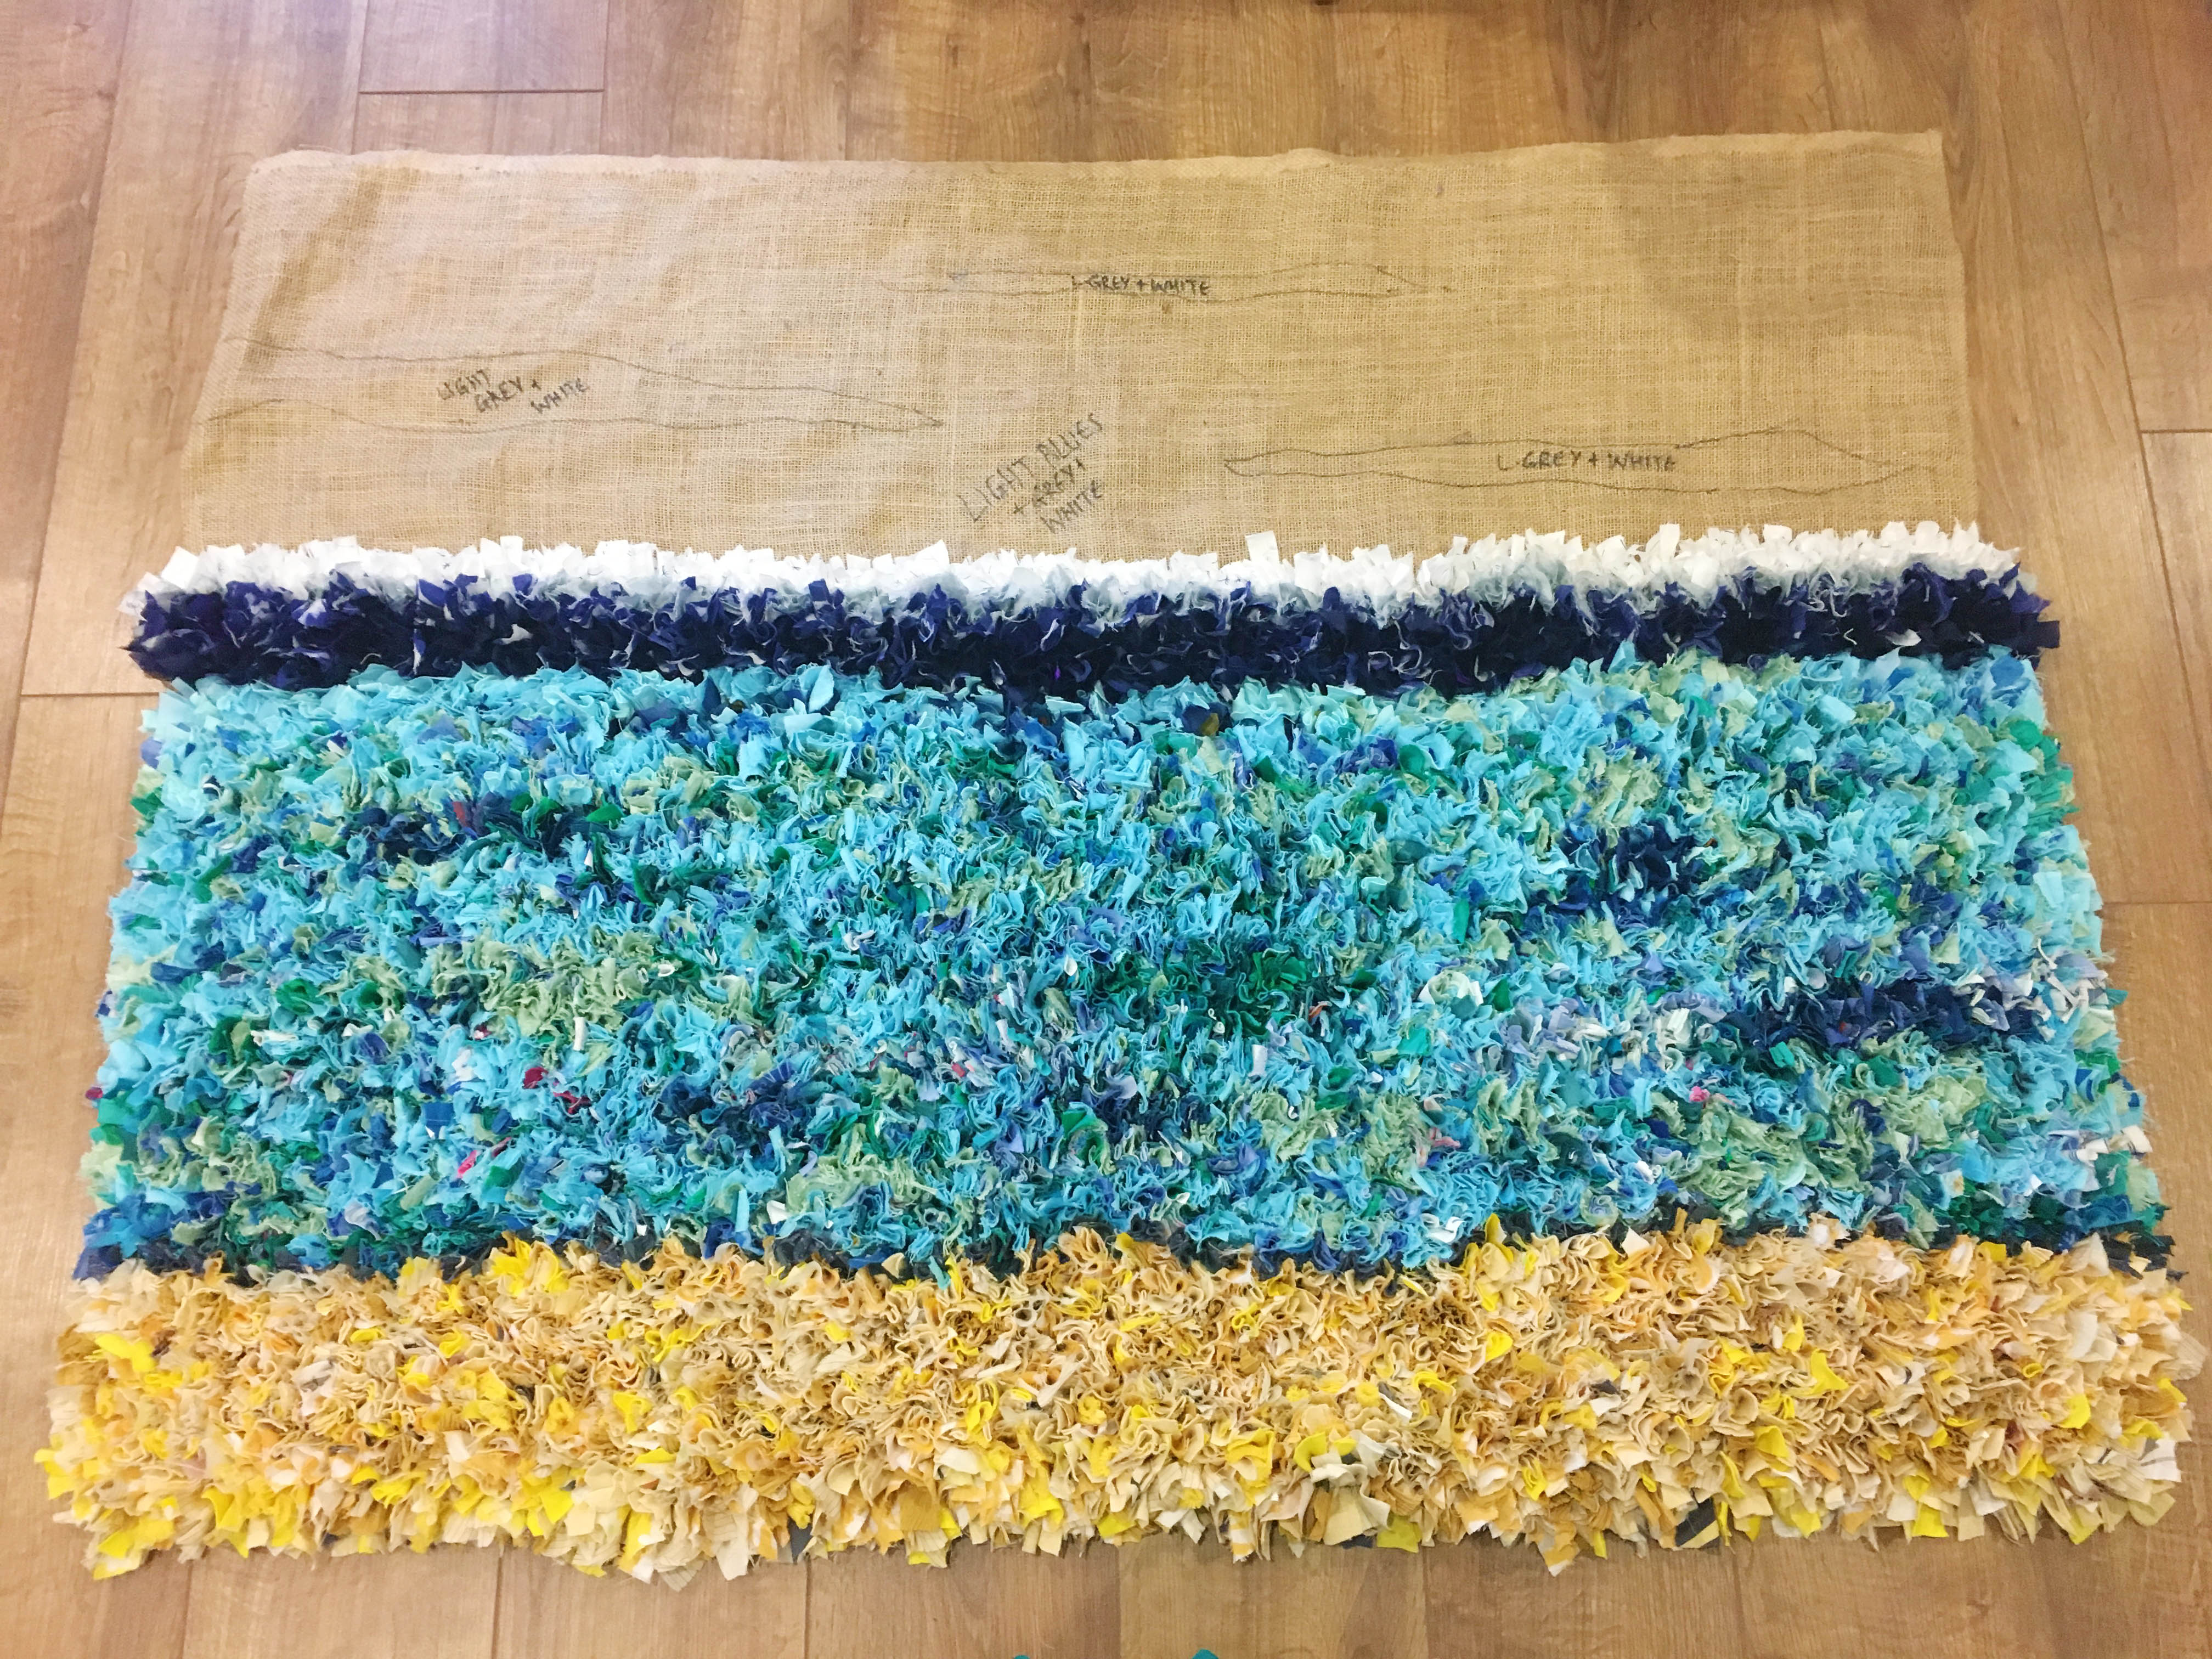
I phased the horizon into the sky with a line of white rag rugging.
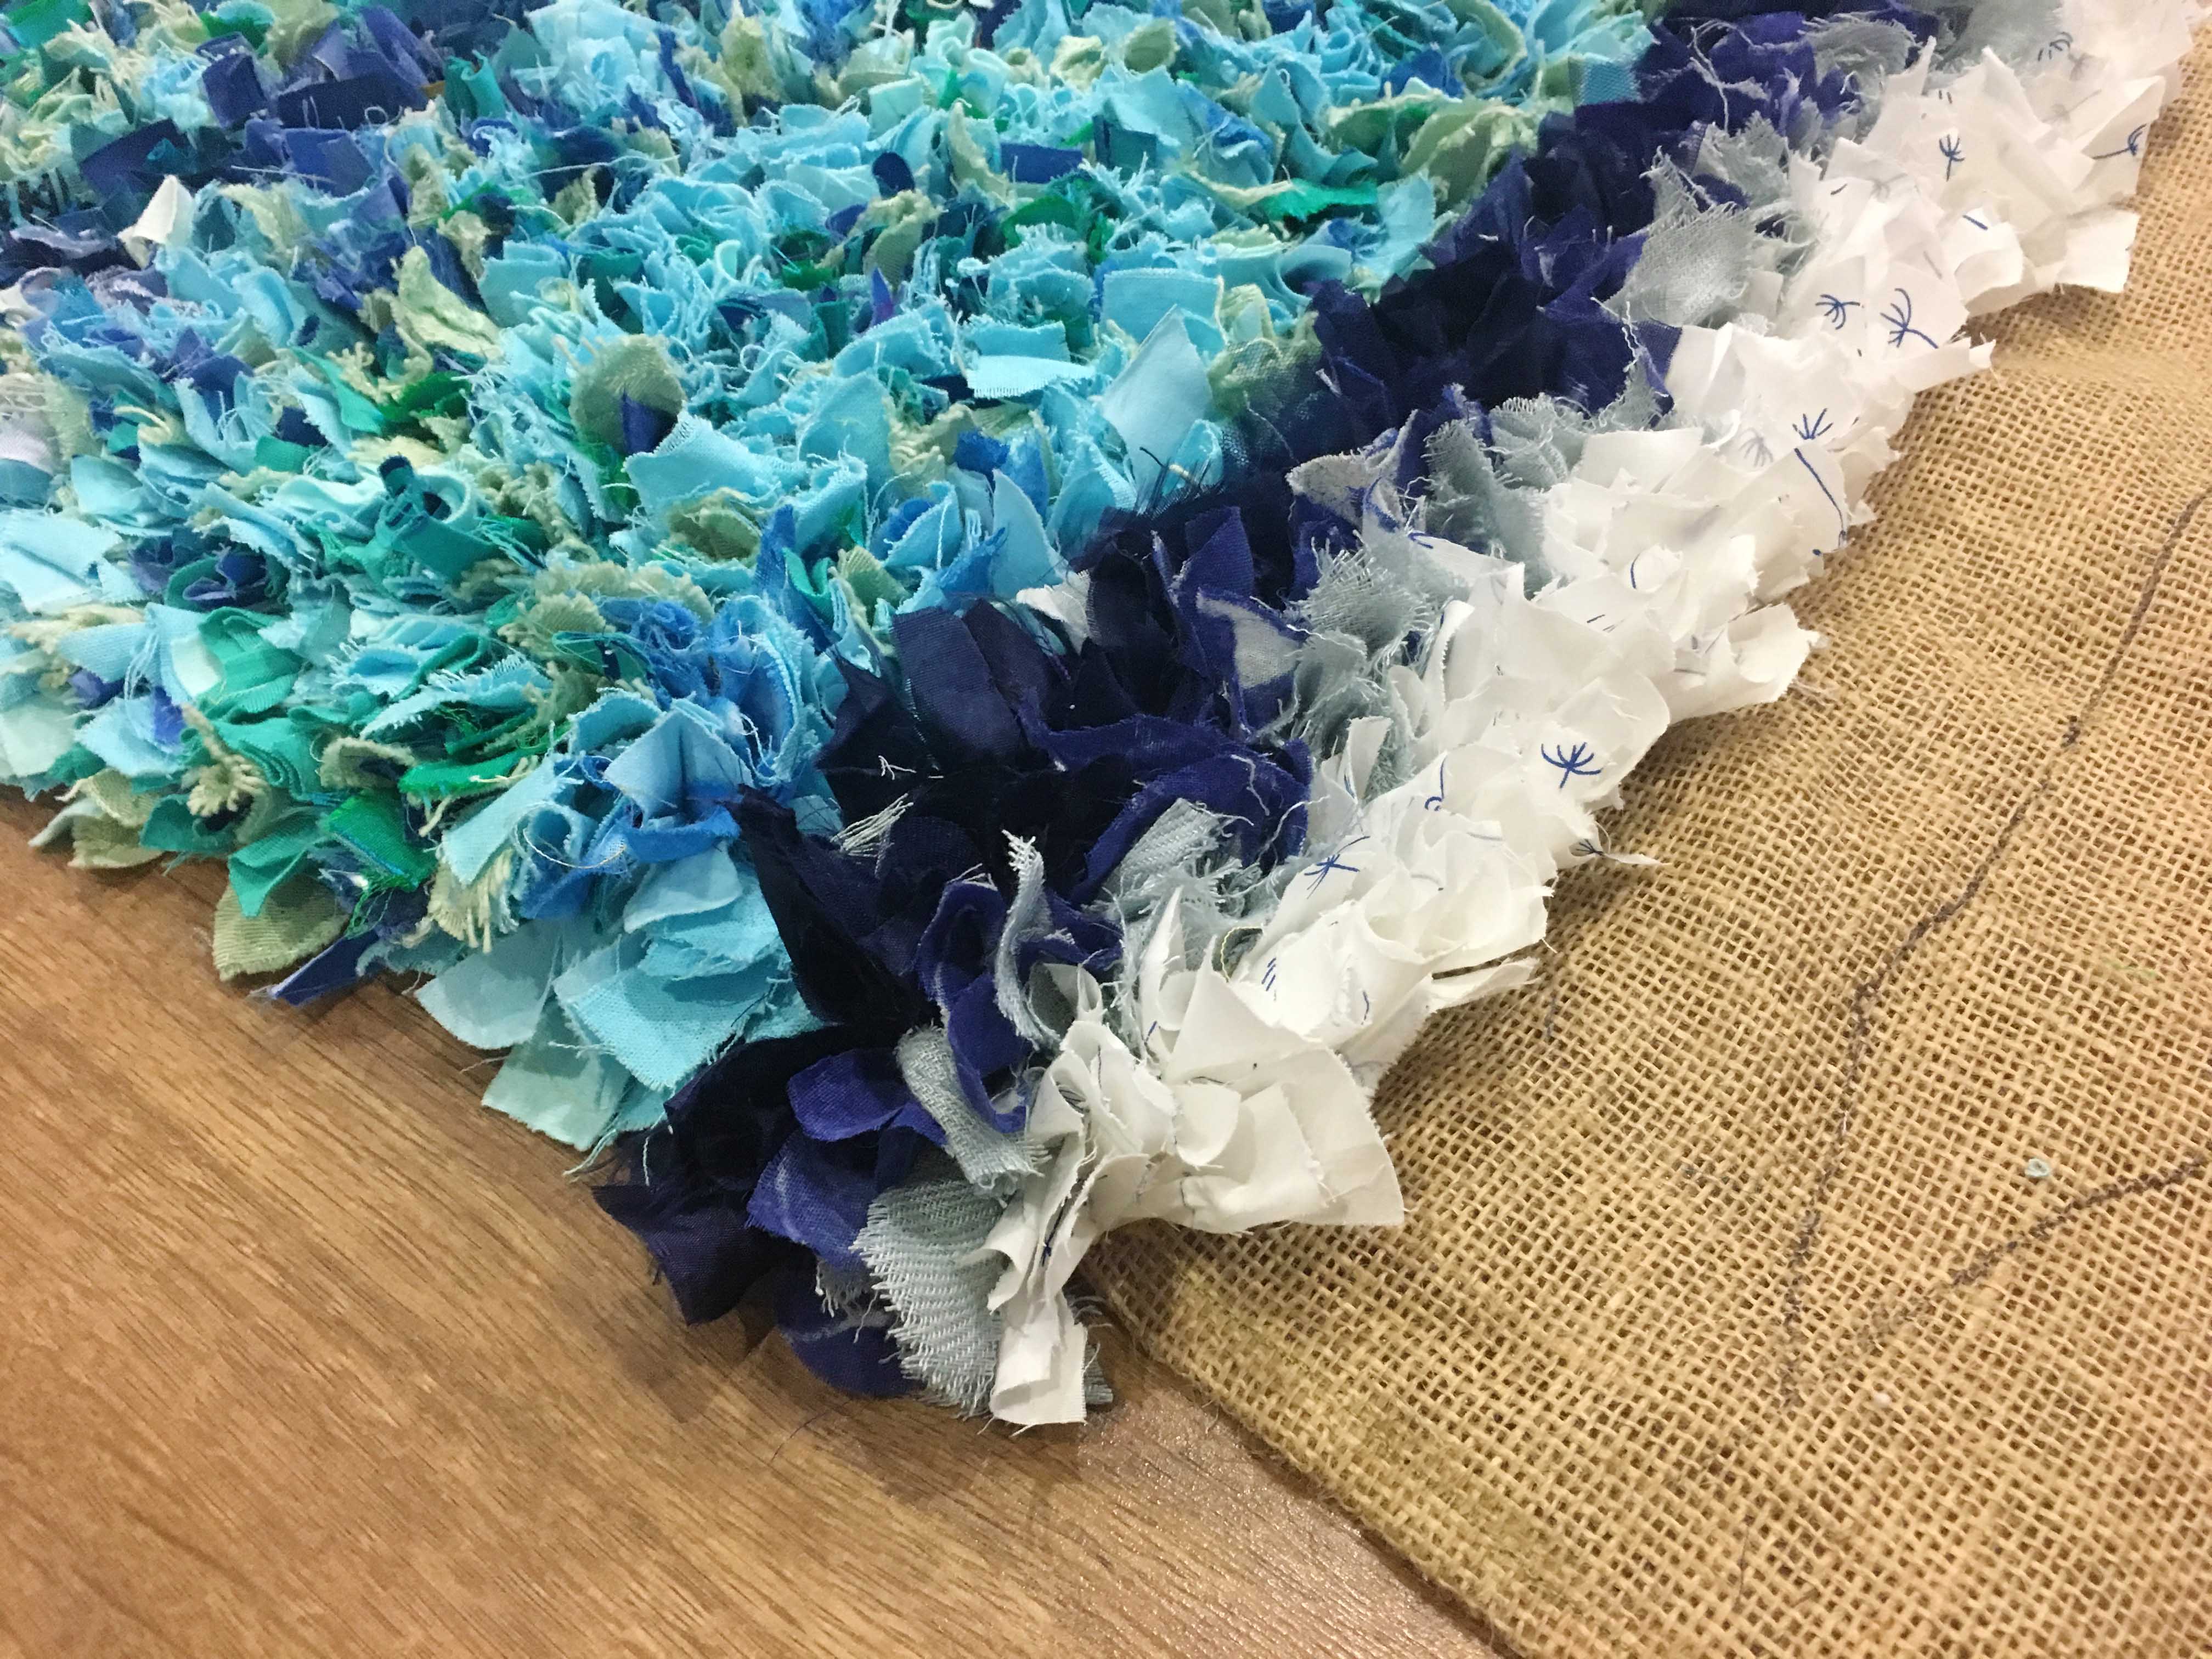
The white had a super cute small dandelion pattern on it that tied in with the ocean below and sky above.
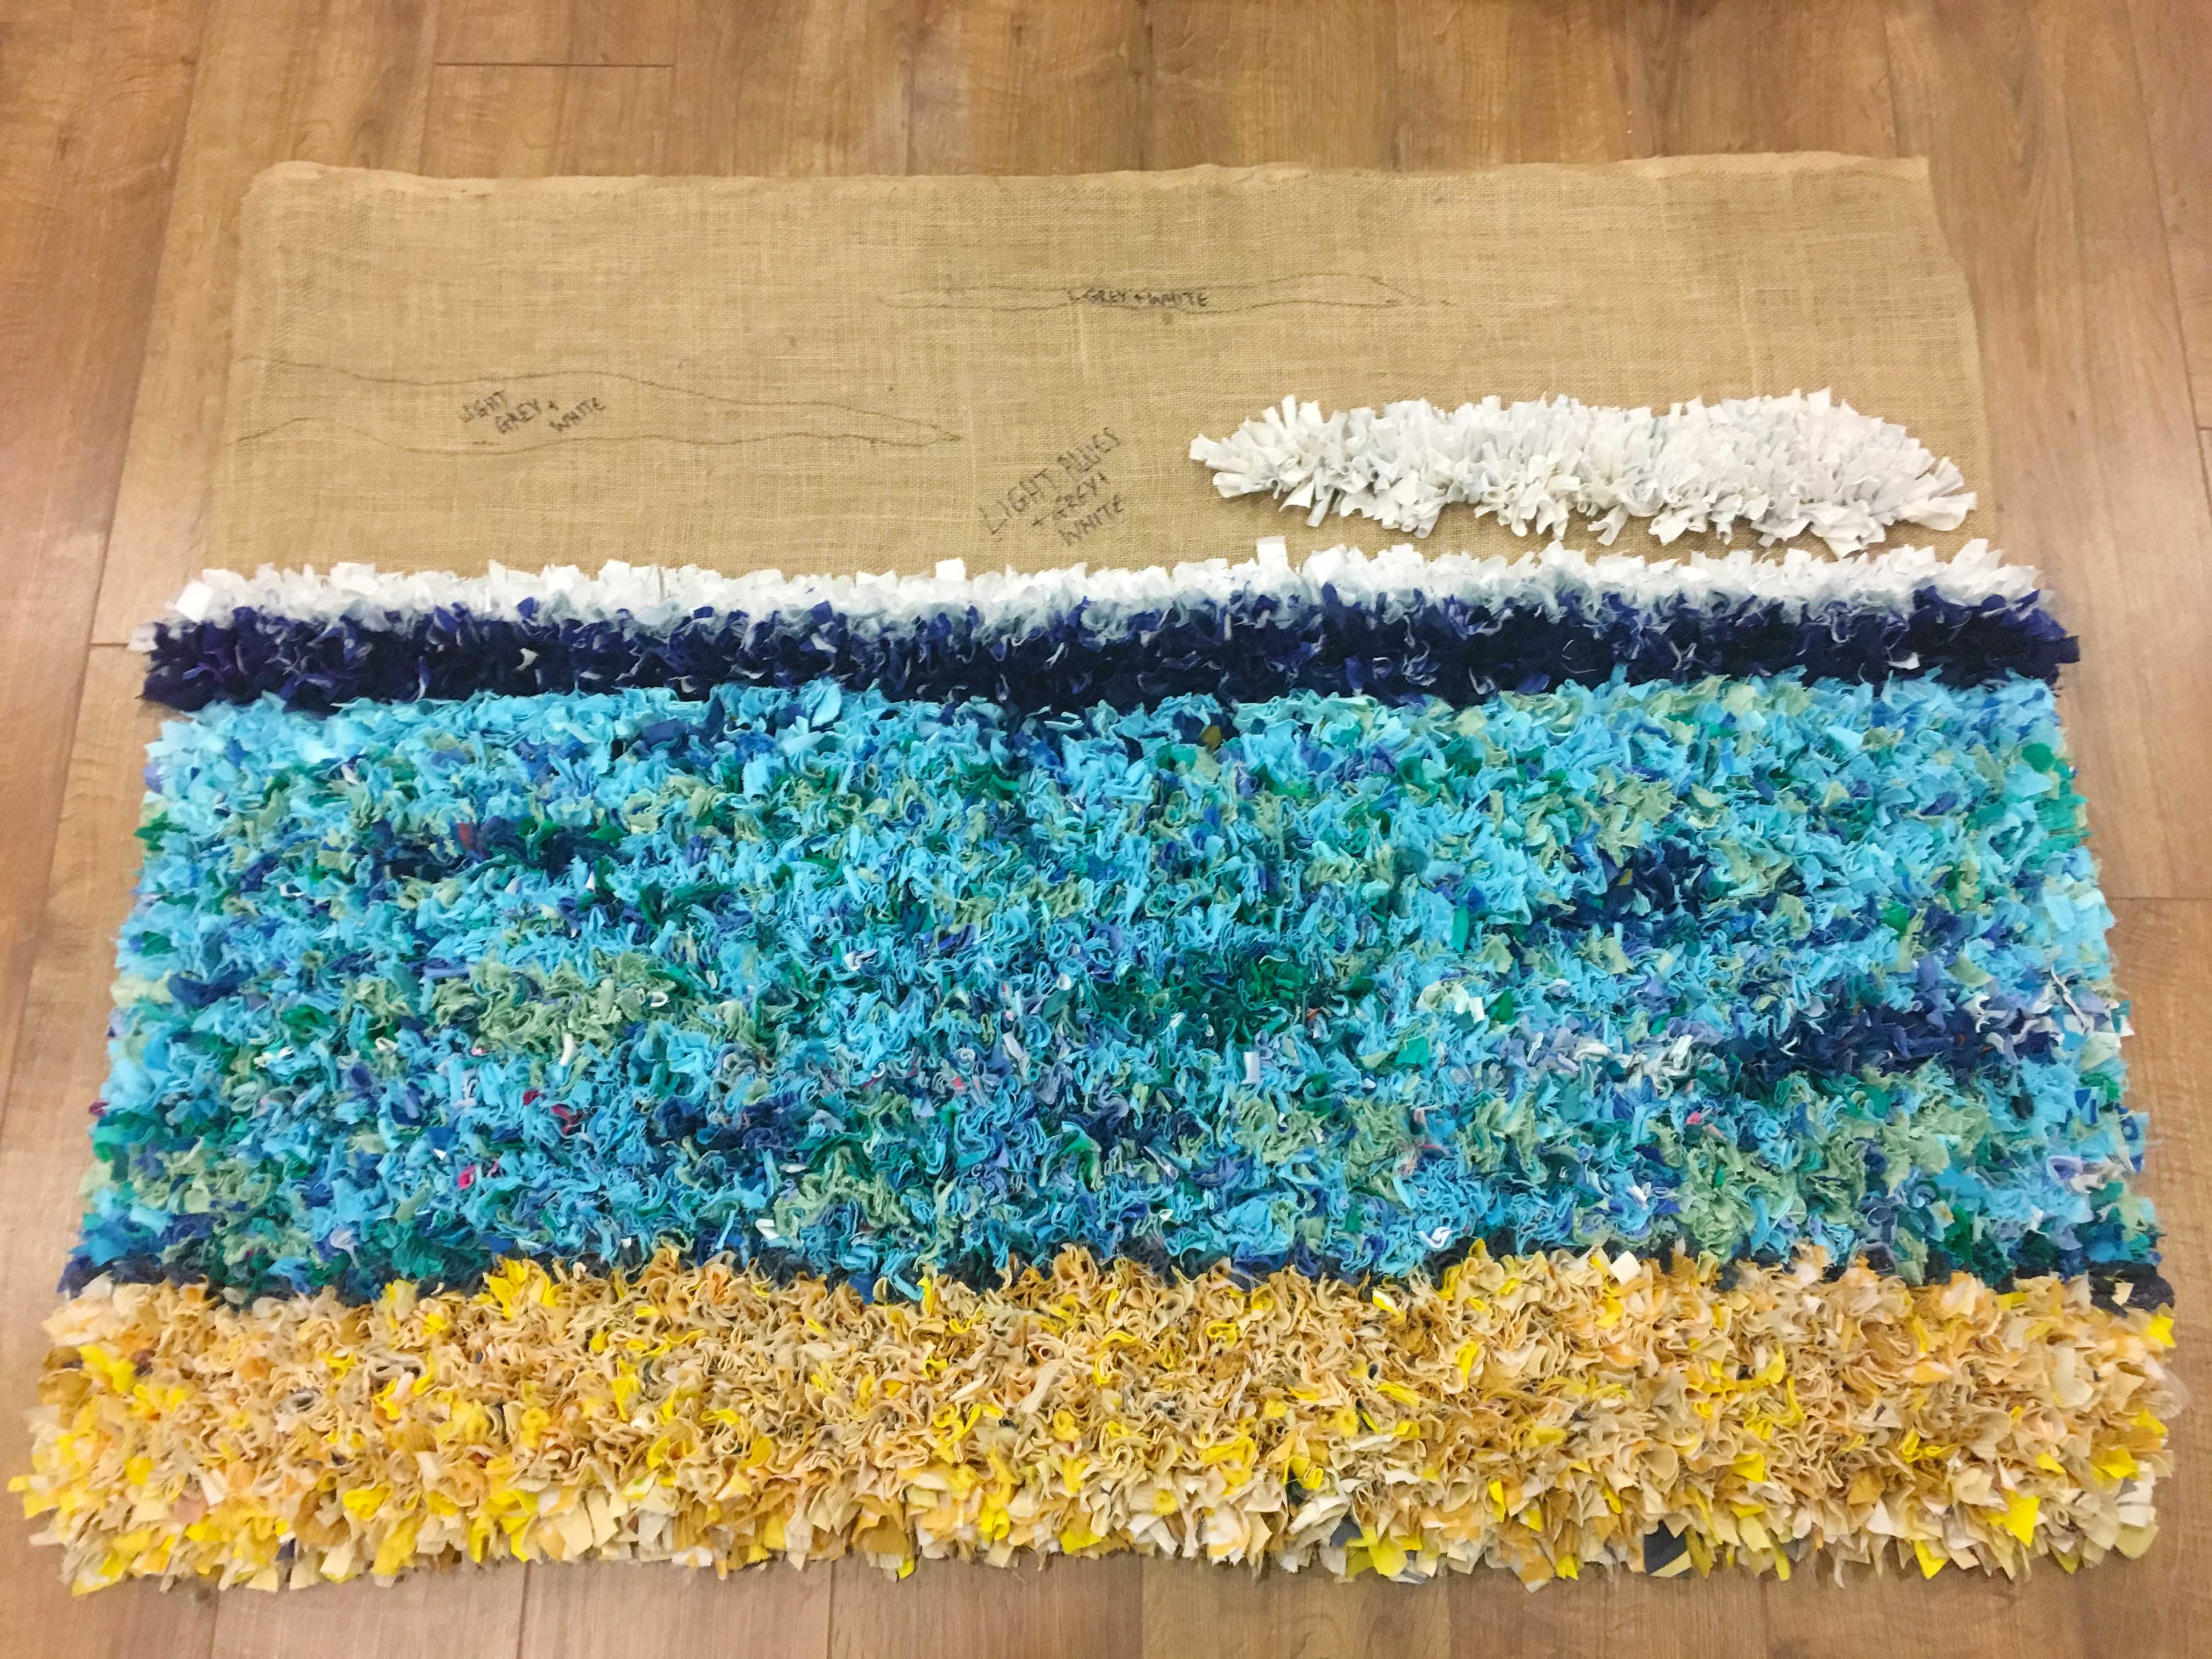
When I was putting in the rag rug clouds, I completely ignored the advice I normally give out to rag ruggers that you should rag rug from one point in the hessian. If you rag rug in lots of places then it weighs down the rag rug in lots of places which makes it much harder to fill in any gaps (plus makes it pretty unwieldy). If I did the rug again then I would definitely do the clouds as I reached them in the sky.
You can see in this photo that I actually rag rugged the outside of each cloud before filling it in.
The clouds were made up of a mixture of white and grey rags to make them less one-dimensional.
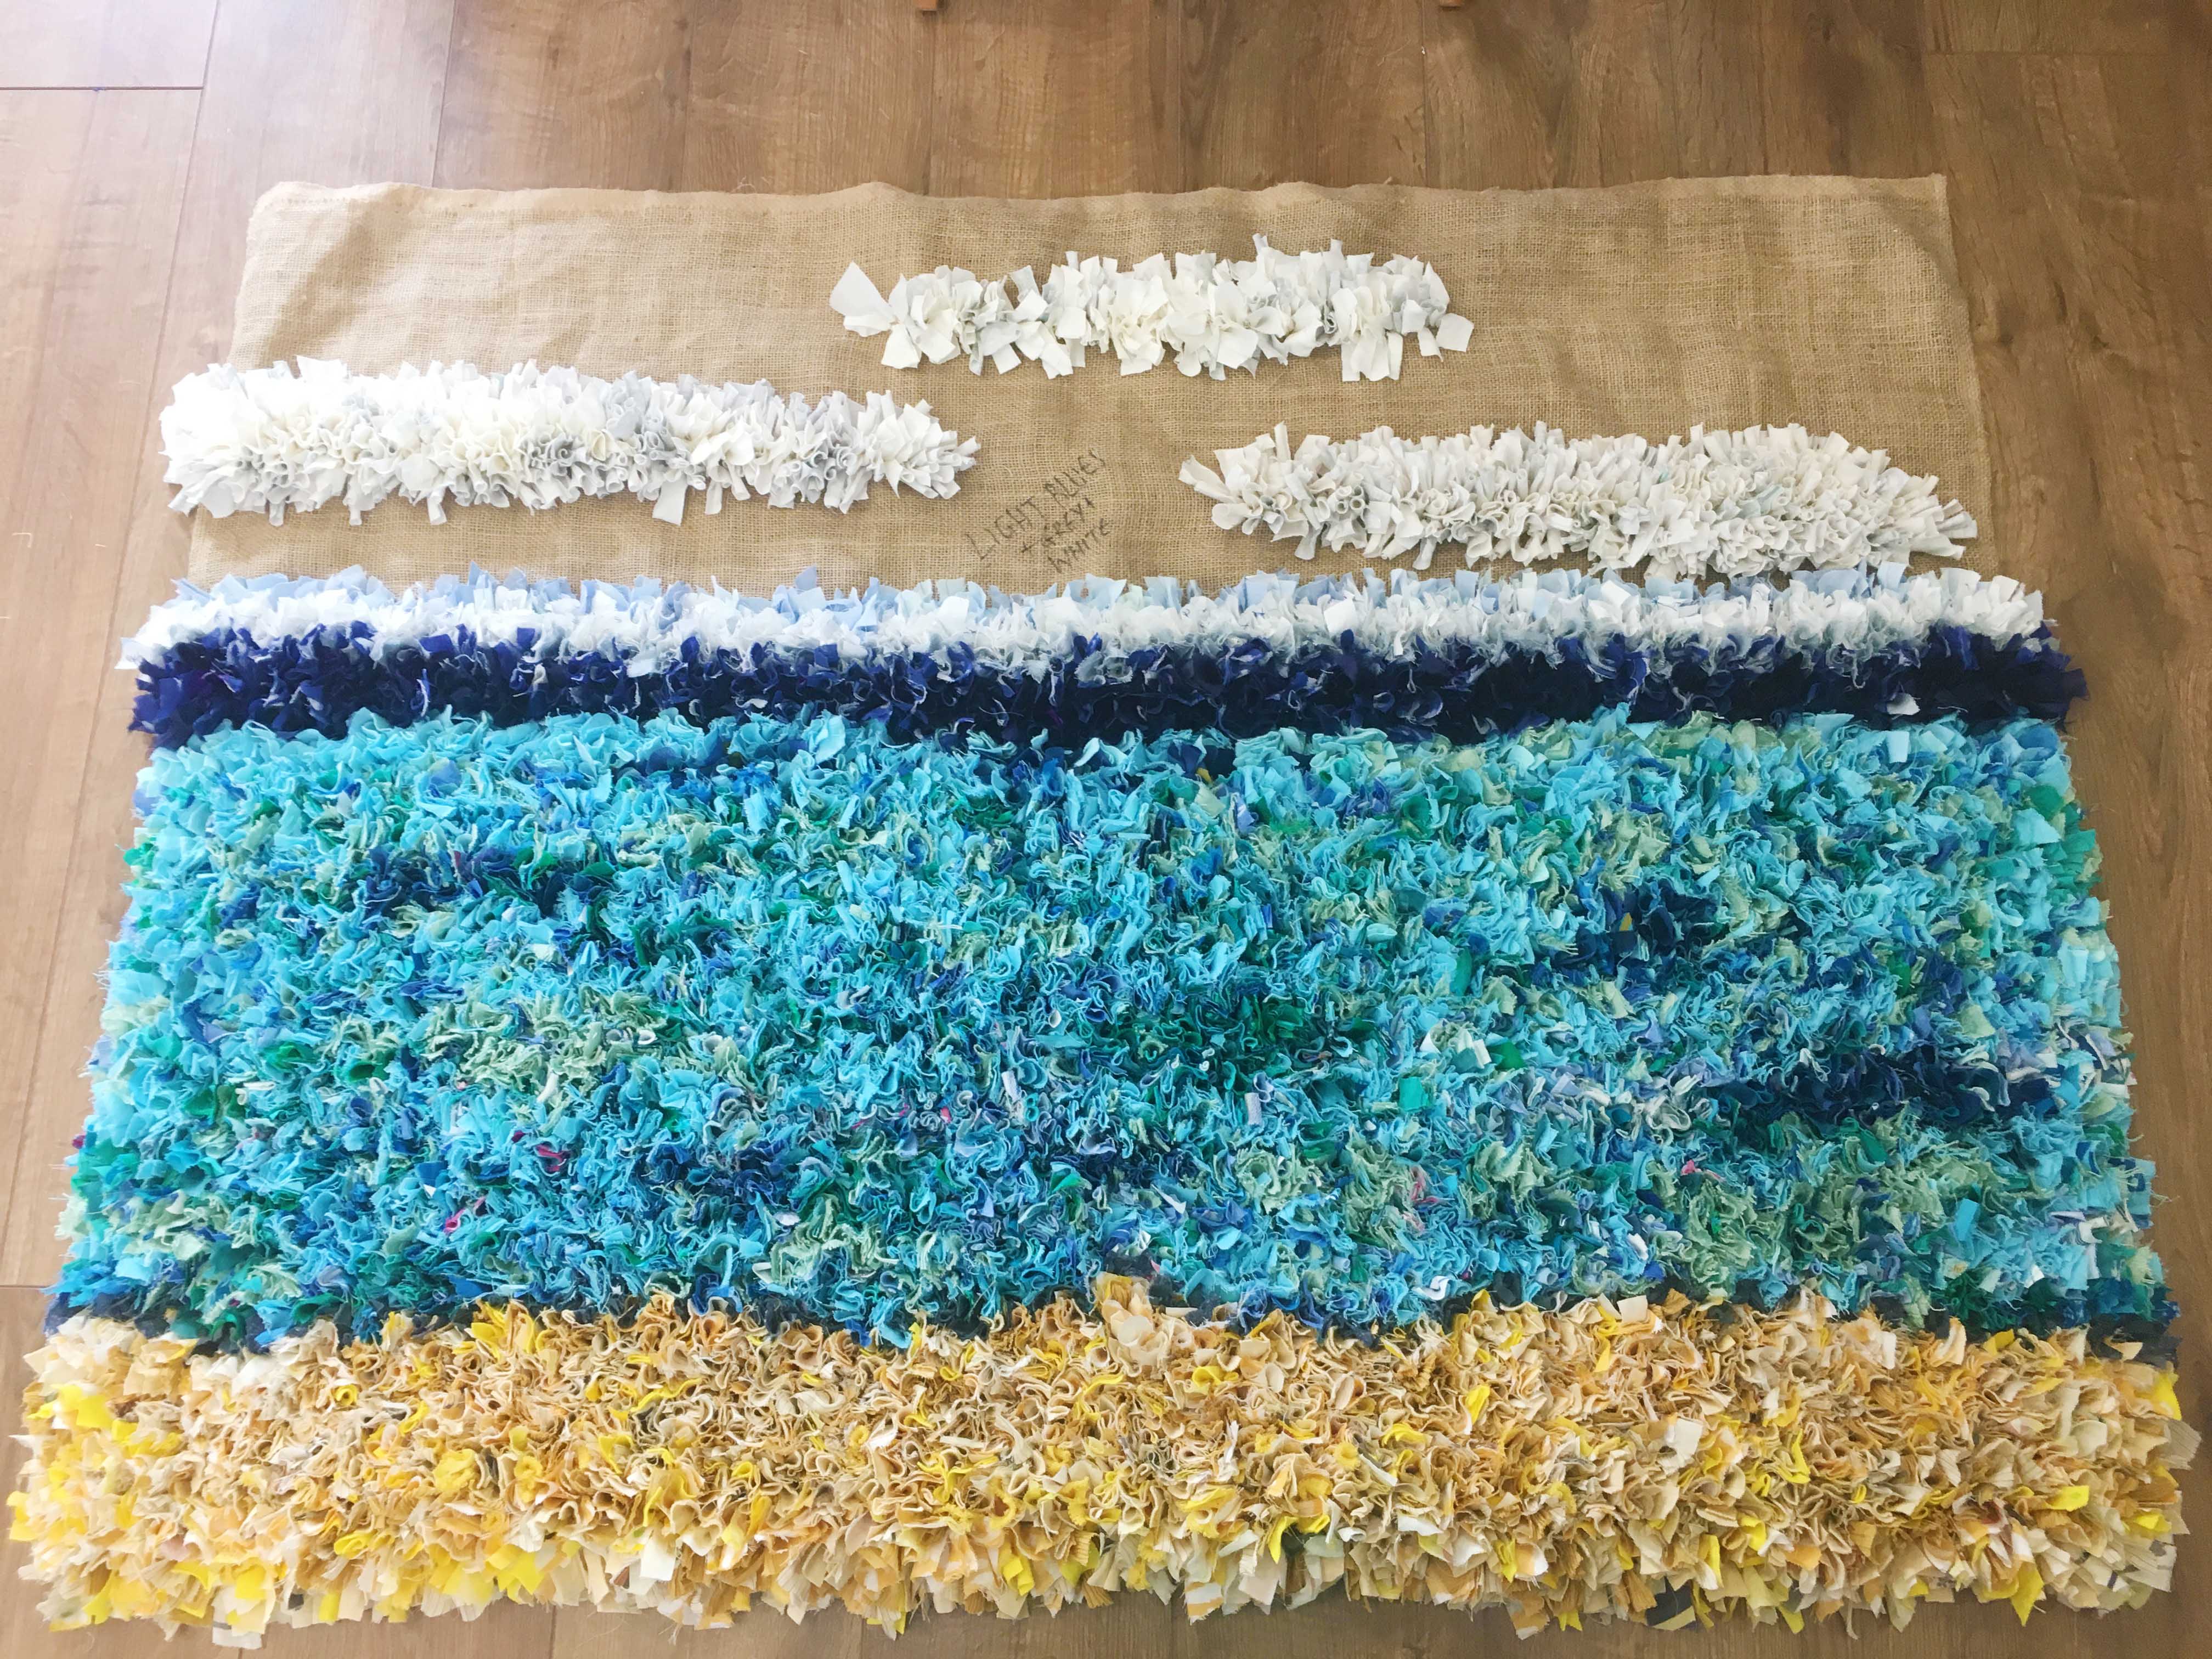
Here’s how the rug looked after I’d rag rugged all three of the clouds. They look pretty big at this stage but as soon as I put in the blue sky around, they’ll shrink a lot.
After I’d put in the first row of sky, it was just a matter of continuing on. I mainly used men’s cotton shirts (including one of Christian’s that he kindly donated) and a blue and white patterned sheet.
And here’s the sky up close and personal 🙂

So now I have a slight confession to make… here you can see from the back that I actually made this rug in a very strange order. I ran out of the exact shade of blue I wanted for the top of the ocean so I left two or three rows empty and moved onto the horizon and sky while I kept an eye out for the colour I wanted. You can see the gap that I left from the back of the rug but it doesn’t really show from the front (although I obviously filled it in later).
Even close up, it’s difficult to see the gap I left.

Here’s a close up of the rag rug sky.
And here’s what the rag rug looked like after I’d covered the hessian entirely!
Let me know what you guys think of the finished rug by commenting below – I’d love to hear what you think of it 🙂 x
I think this is absolutely beautiful. These are colours I tend to go for. I have never tried rag rugging, but definately have to have a go!
[…] personal. Since then, we’ve experimented with a few different nautical-styles, including this Pacific Island Inspired rag rug and waves. It’s a theme we come back to time and time again because it looks at home in most […]
Hello I love your rug and as I have done a fair bit of rag rugging can really appreciate effort time and inspiration necessary. My beach scene is a bit nearer home .I am still collecting the material but it is fluidly in my head and is my thoughts on Tolcarne Beach Newquay in Cornwall a place I fell in love with on holiday with mum and dad about 55 years ago!
Thank you so much for sending me you sea scene it was a great help. I would be interested in buying your next book. Kind regards Pam
[…] And here is what a rug looks like when it’s partially shaggy rag rugged… More photos of my Pacific Island rug are here. […]
[…] blog post then you’ll probably like my Pacific Island Rug Post too – you can read it here if you haven’t done so already […]
Hi Elspeth, I love the way different materials come together to make such wonderful pieces of work. Your Pacific Rug is beautiful and full of memories.
Aww, thanks so much Stephanie – I loved working on this particular rug as it transported me to the Cook Islands 🙂
How interesting to see your beautiful rug progressing in stages. What a memory it will provide too.
Thanks Liz – it’s always fun seeing the rug at different stages of completion. It’s hard to believe how it built up from a blank bit of hessian in the first place! Elspeth x
Hi
I’ve not done any rag rugging yet but hoping to soon – do the material strips used have to be a specific size please?
Thanks
Jan
Hi Jan, I’m so sorry that I didn’t see this earlier. I cut all my pieces using a rag rug gauge so that they’re nice and consistent in length, but they are roughly 7-8cm in length and 1.5cm wide (although you vary the width of the strip based on the thickness of the fabric) 🙂 Hope that helps, Elspeth x