So, it’s your first rag rug project and you’re wondering where to start… literally and creatively 🙂 In this blog post, I’ve tried to pull together some simplest rag rug design tips to get you on track to make a first project that you’ll love and cherish for years to come. Read on below for design, fabric and practical tips for many of the projects that we currently sell the kits for over on the Ragged Life website – rugs, cushions, bouquets, wreaths, basket trims and shopping bags.
And, if after reading this blog post, you’d like to learn even more about how to elevate your rag rug designs, sign up for one of our How to Design a Rag Rug live online workshops. We’ve got plenty more pearls of wisdom to share.
Right, enjoy!
Rag Rug Design Tips:
For many crafters, a rag rug is something they’ve always wanted to make. Rag rugs come in all different shapes and sizes, but aside from being time-consuming, they’re a relatively easy project to make. They don’t need assembling at the end and the creative options are endless. However, below are some of our best rag rug design tips to stop you getting in a pickle.
Design Tips:
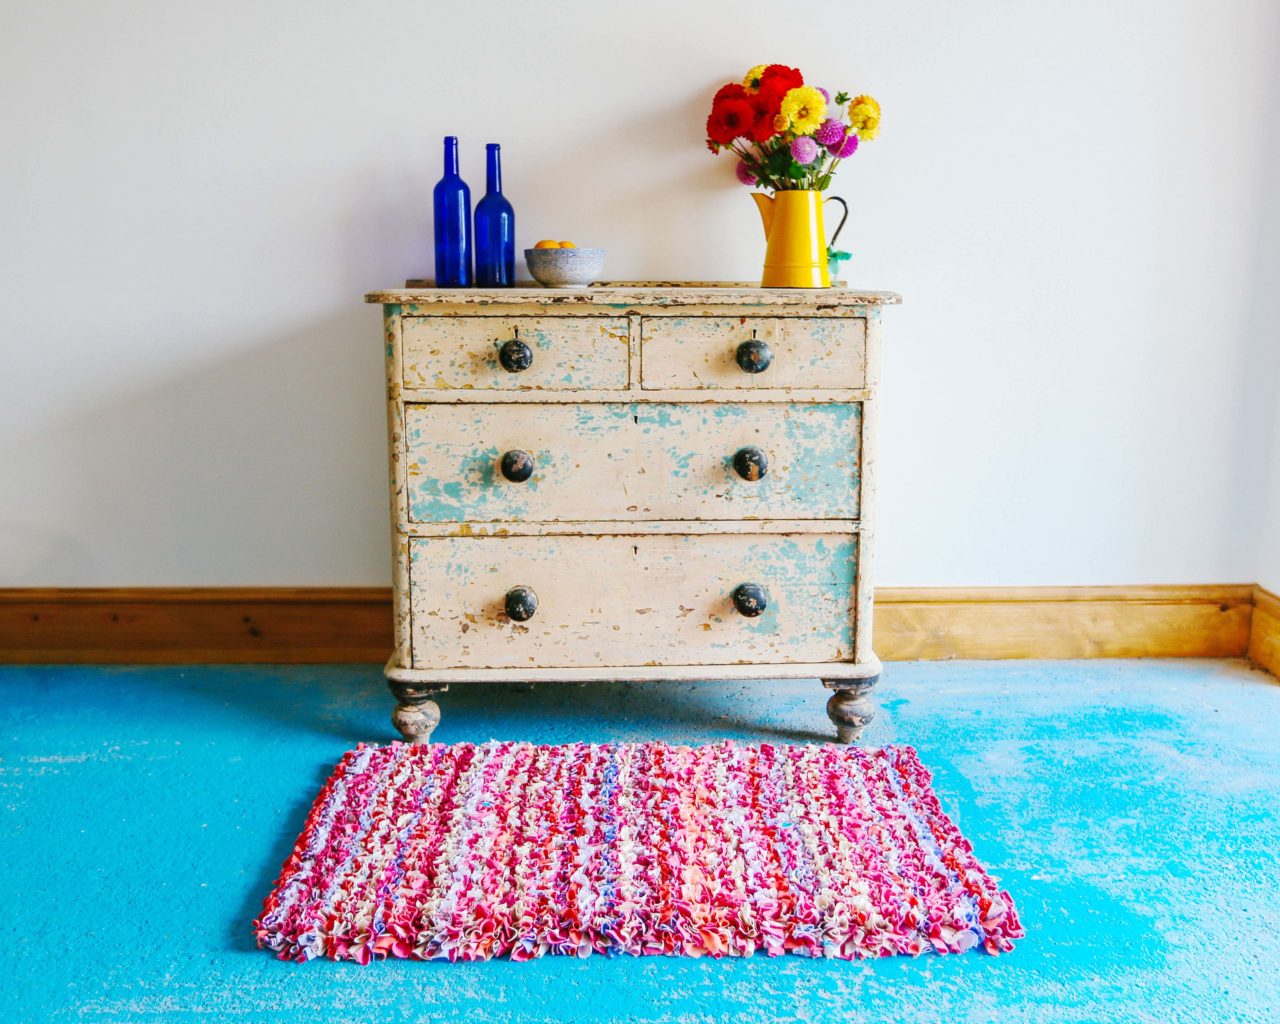
Before starting a rag rug, think about where you are going to put your masterpiece once it is done. If you have a super colourful home like me then you could put it anywhere, but if not, can you tie in with the colour scheme of the room? If it’s going to be in a high footfall area, is it sensible to use light colours that will get grubby quickly? Going to be in the bathroom? Maybe I should I use fabrics that dry quicker. Bear in mind all these aspects before getting going.
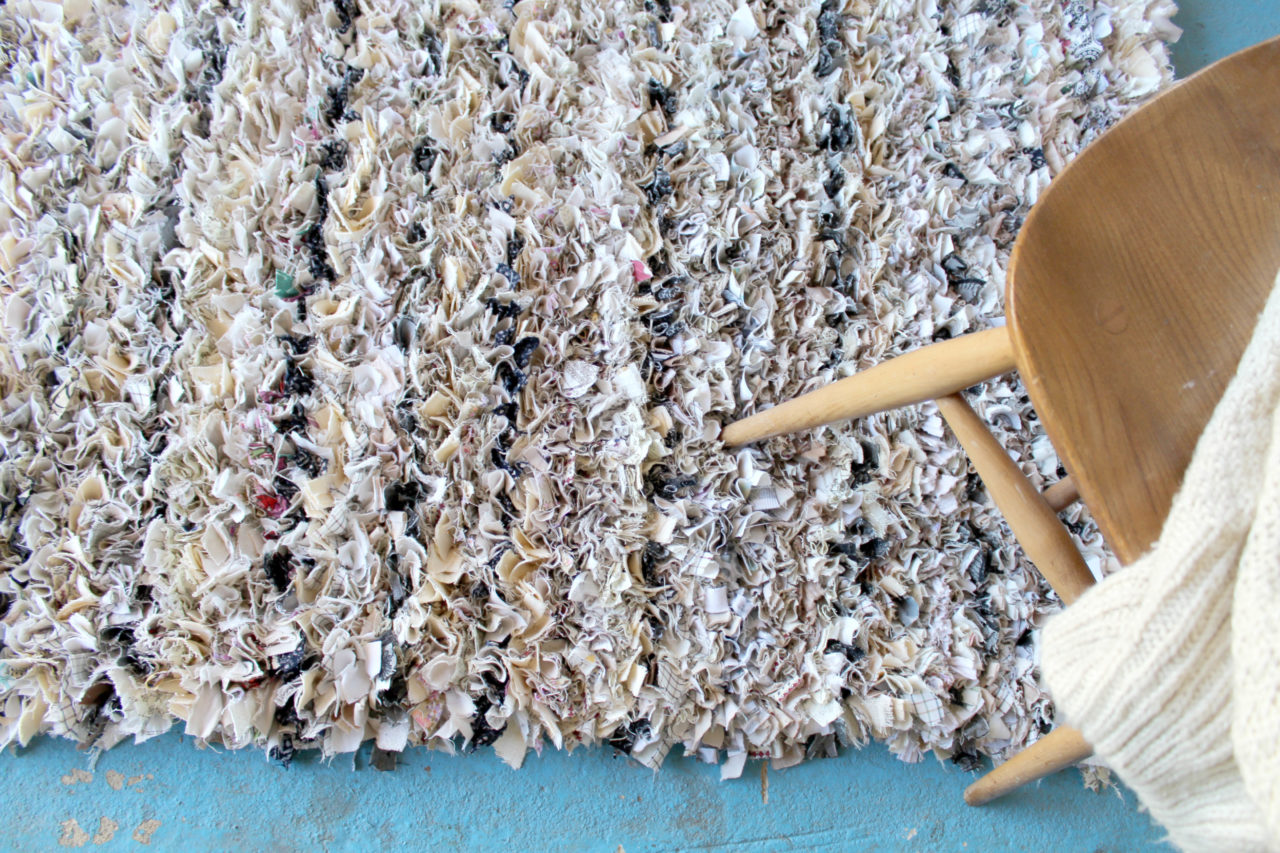
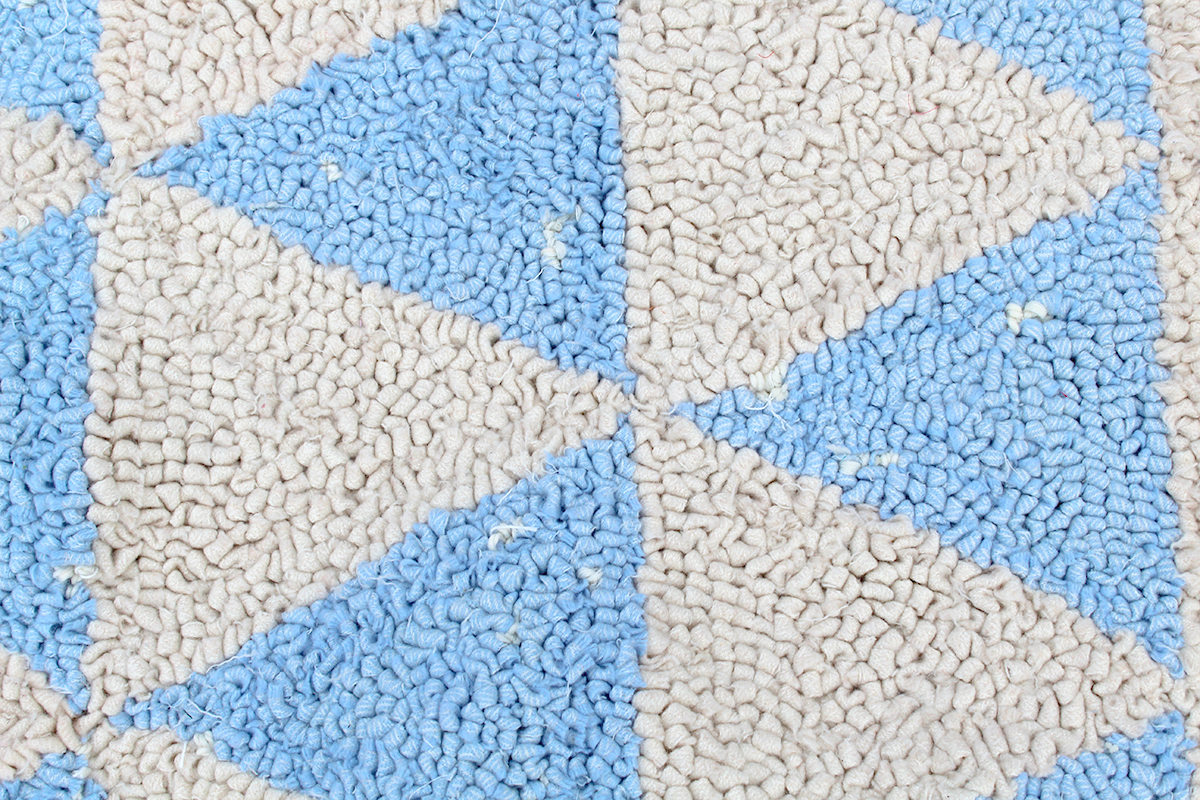
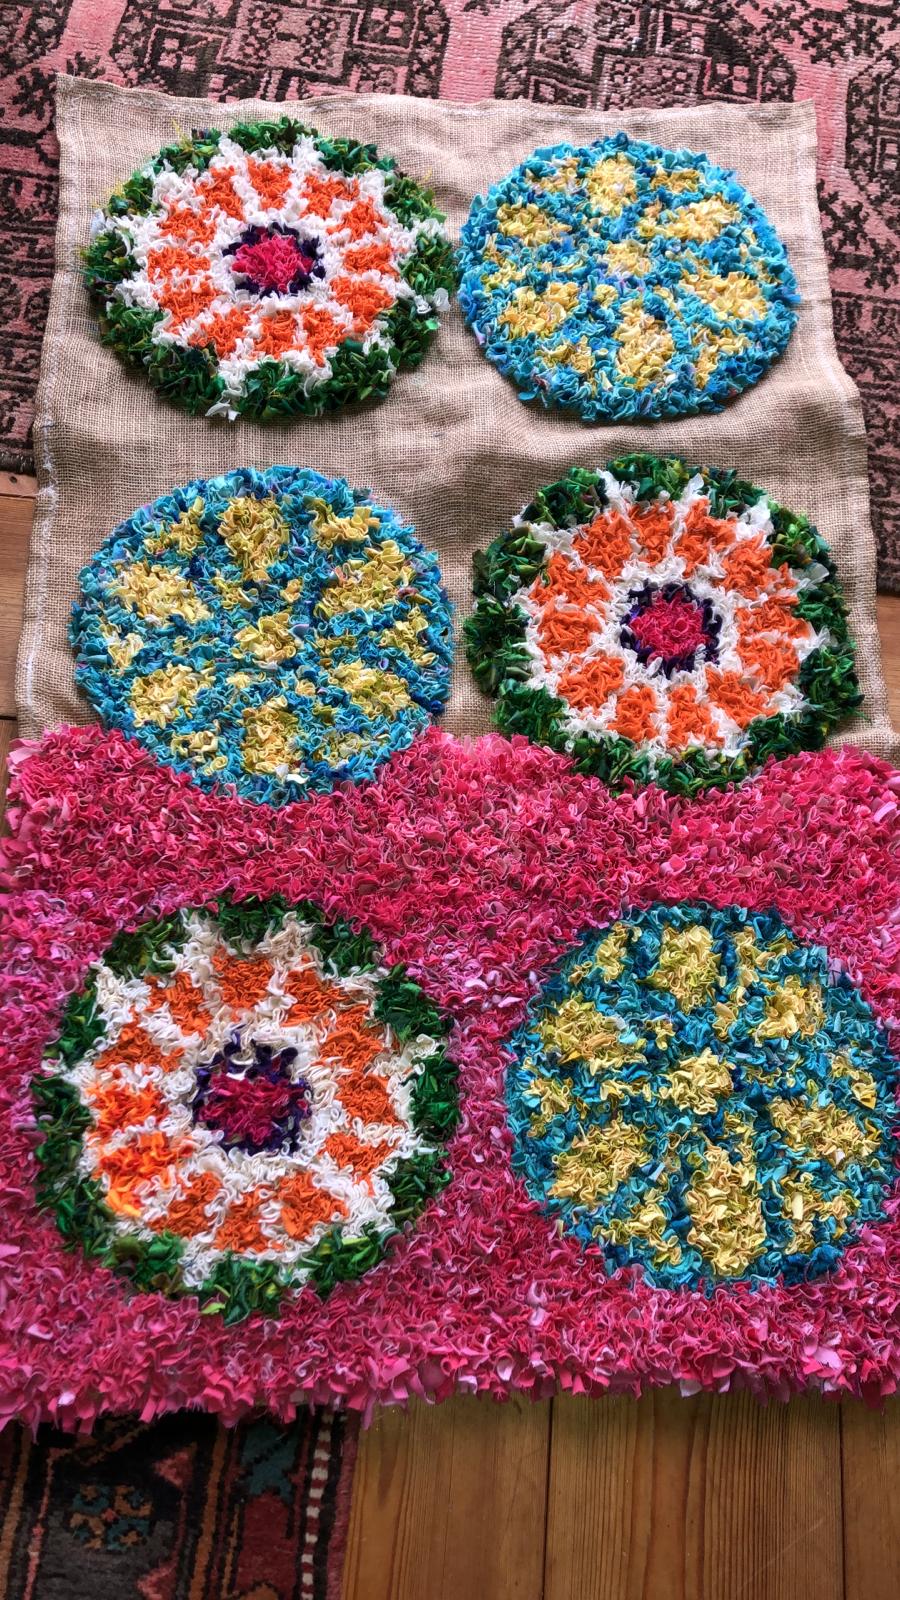
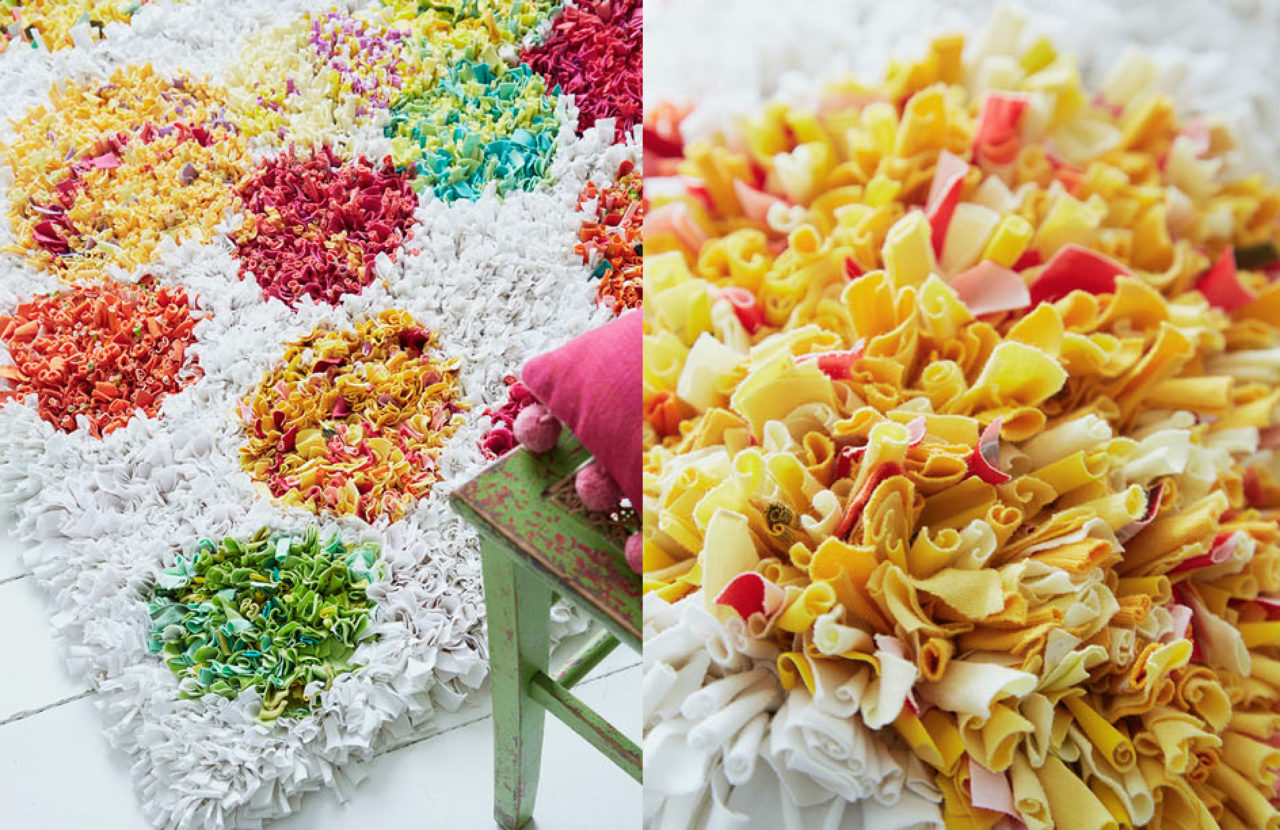
Keep your design simple for any first project. You’re far more likely to enjoy the process if you have an easy design to follow. Geometric designs work well for a rag rug beginner as they are easy to achieve and can be worked in a very logical way – e.g. from one end of the rug to the other or one colour at a time.
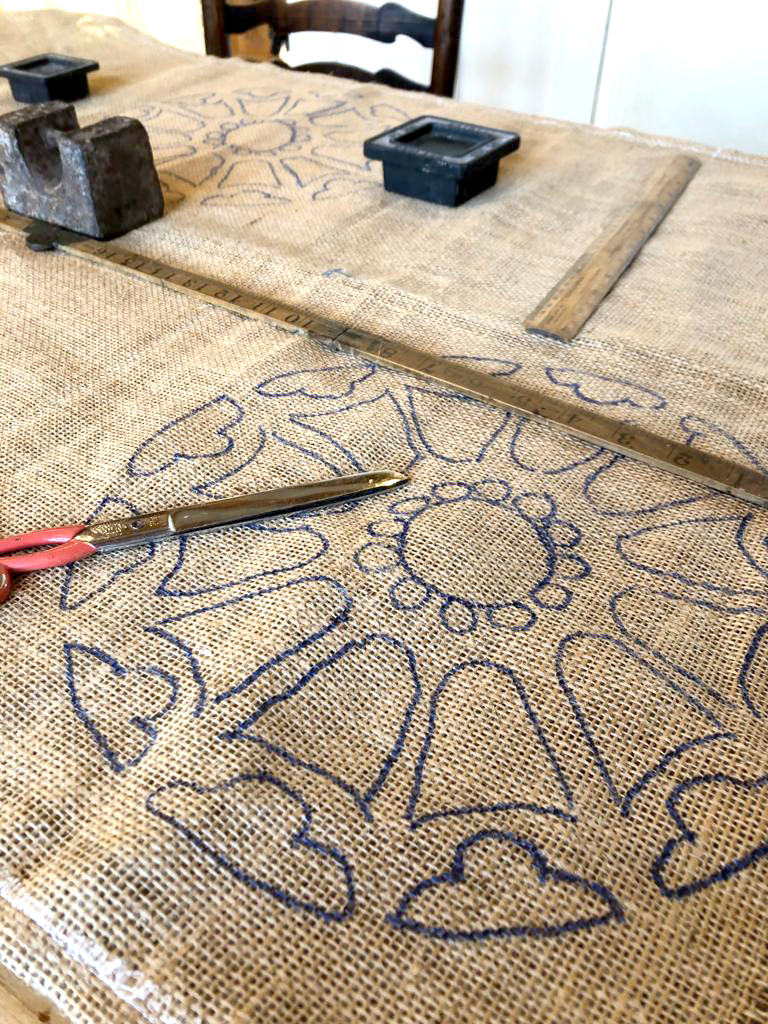
Once you’ve landed on a design, you can sketch it onto the hessian using a marker pen. It doesn’t matter how many mistakes you make as the rag rugging will eventually cover the hessian. If symmetry is important to your design, use a ruler or tape measure to mark out the main lines, but just bear in the mind that the hessian does shift when you sketch on to it.
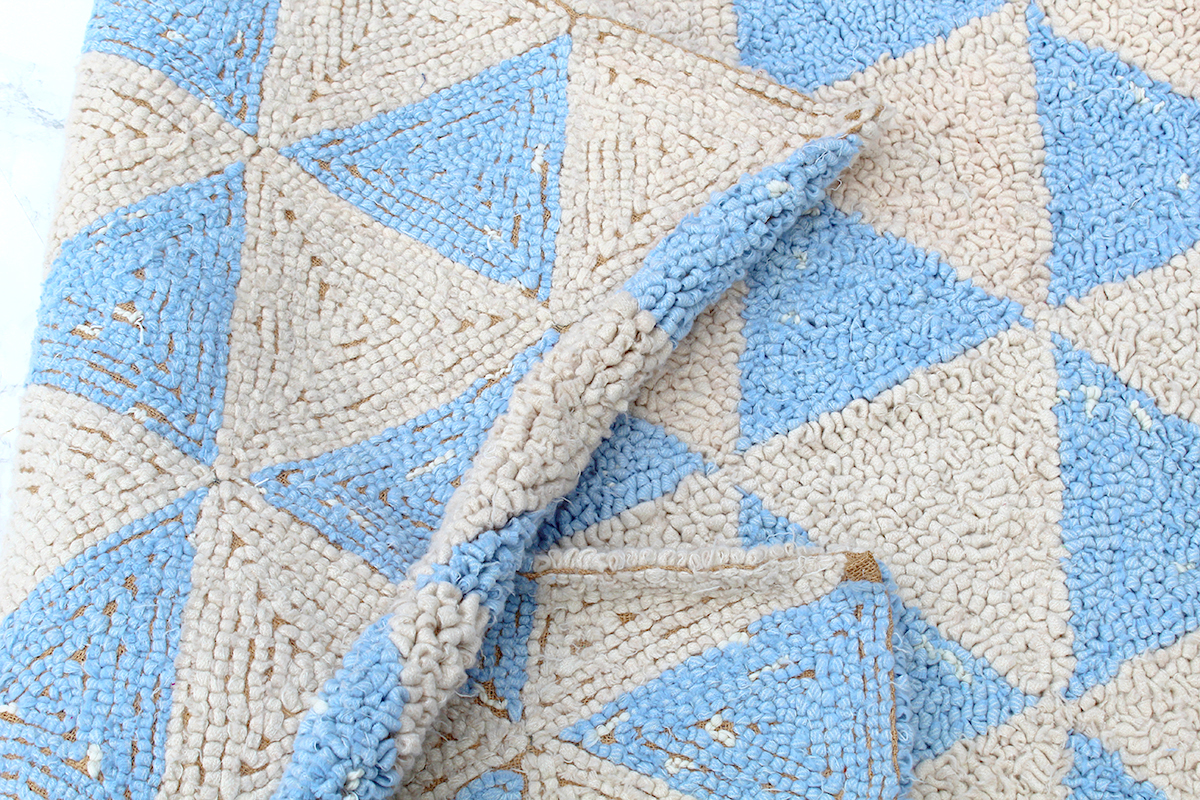
The shaggy rag rug technique will blur patterns, making it difficult to create crisp designs. Only choose the shaggy technique for more impressionist designs.
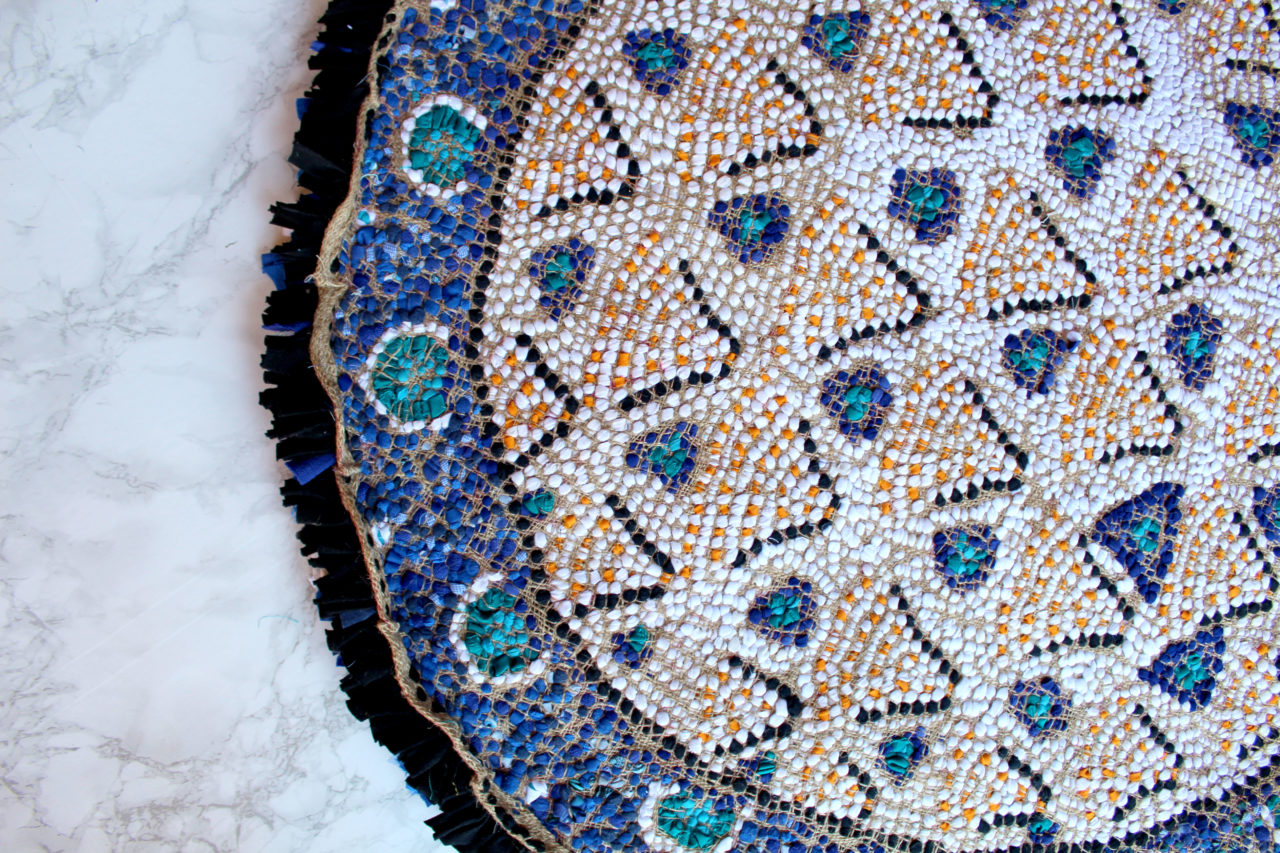
This rag rug had a very distinctive design which you can see from the back… 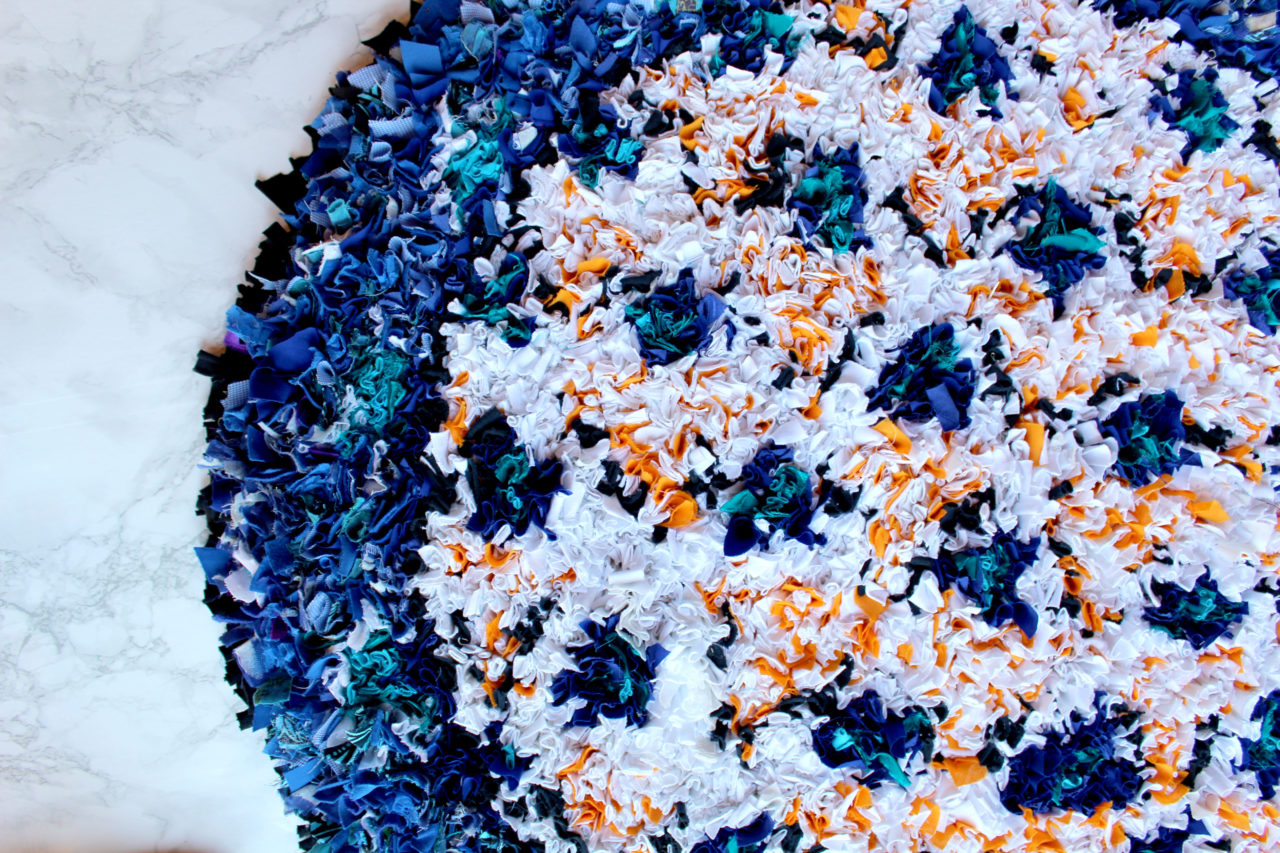
But the design completely disappeared when I shaggy rag rugged it, which was a shame…
Fabric Tips:
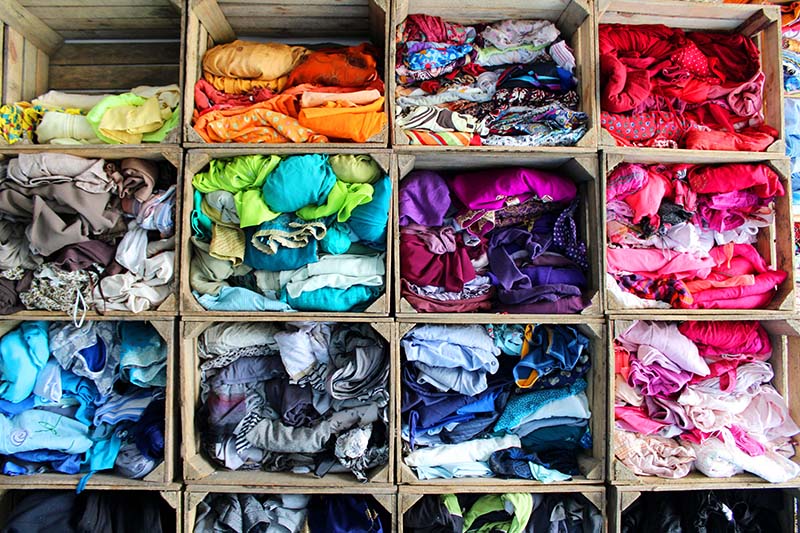
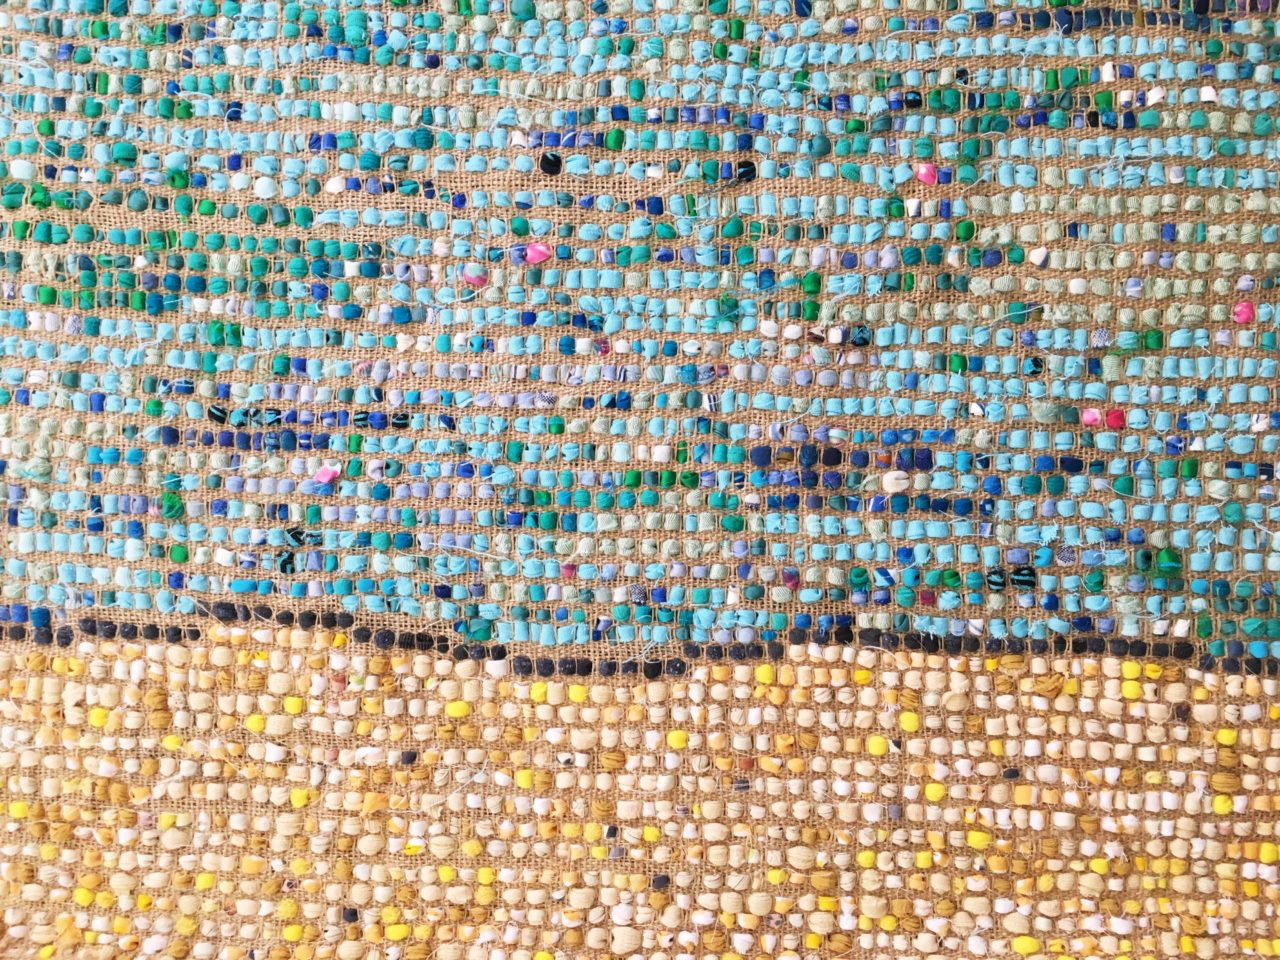
Rugs generally look best when they incorporate a variety of different fabrics, so I pick almost exclusively by colour to naturally get a mix of textures. Using just one type of fabric can look a little one-dimensional, unless it has a lot of texture, like cotton that frays a little or blanket yarn that is warm and cosy. Fabrics will look very different when you rag rug with them. For example, t-shirt material with a lot of elastic in will tube up like below…
Steer clear of materials that shed a lot. As you walk on your rug, small fibres will get disturbed, so you’ll be forever vacuuming if you use sheddy fabrics. Materials that shed a lot include, thick upholstery materials, loosely knitted or woven fabrics like cheap scarves, coarse linen and brocade. Other fabrics, like towels, shed a fine dust when you cut into them that isn’t very nice to work with. If in doubt, try a little before committing to a lot! You can use pinking shears to reduce fraying, but this is quite labour intensive and gives a very different appearance than clean cut fabric pieces. Knitted fabrics can sometimes be tightened up by boil washing them.
As a beginner, choose thinner, softer and less textured materials as they’re the easiest to work with.
If your fabric has a right side and wrong side, some of the wrong side will always show in the shaggy technique. However, you can control which side of the fabric shows for both the short shaggy and loopy techniques of rag rugging (although it can be a bit tricky as a beginner).
Practical Tips:
Your rug hessian has a hem around the edge of it. If you are using the shaggy or short shaggy technique of rag rugging, you do not need to rag rug through the hem as the pieces of fabric will fall outwards and cover the hem. However, with the loopy technique, as the loops are much shorter, the hem will not be covered by the rag rugging. You have two options. 1) Rag rug through the hem itself (this is my preferred option). 2) Don’t rag rug through the hem, but once the rug is complete, fold the hem and sew it underneath. Leave one row of empty hessian next to the hem if are going to do this second method.
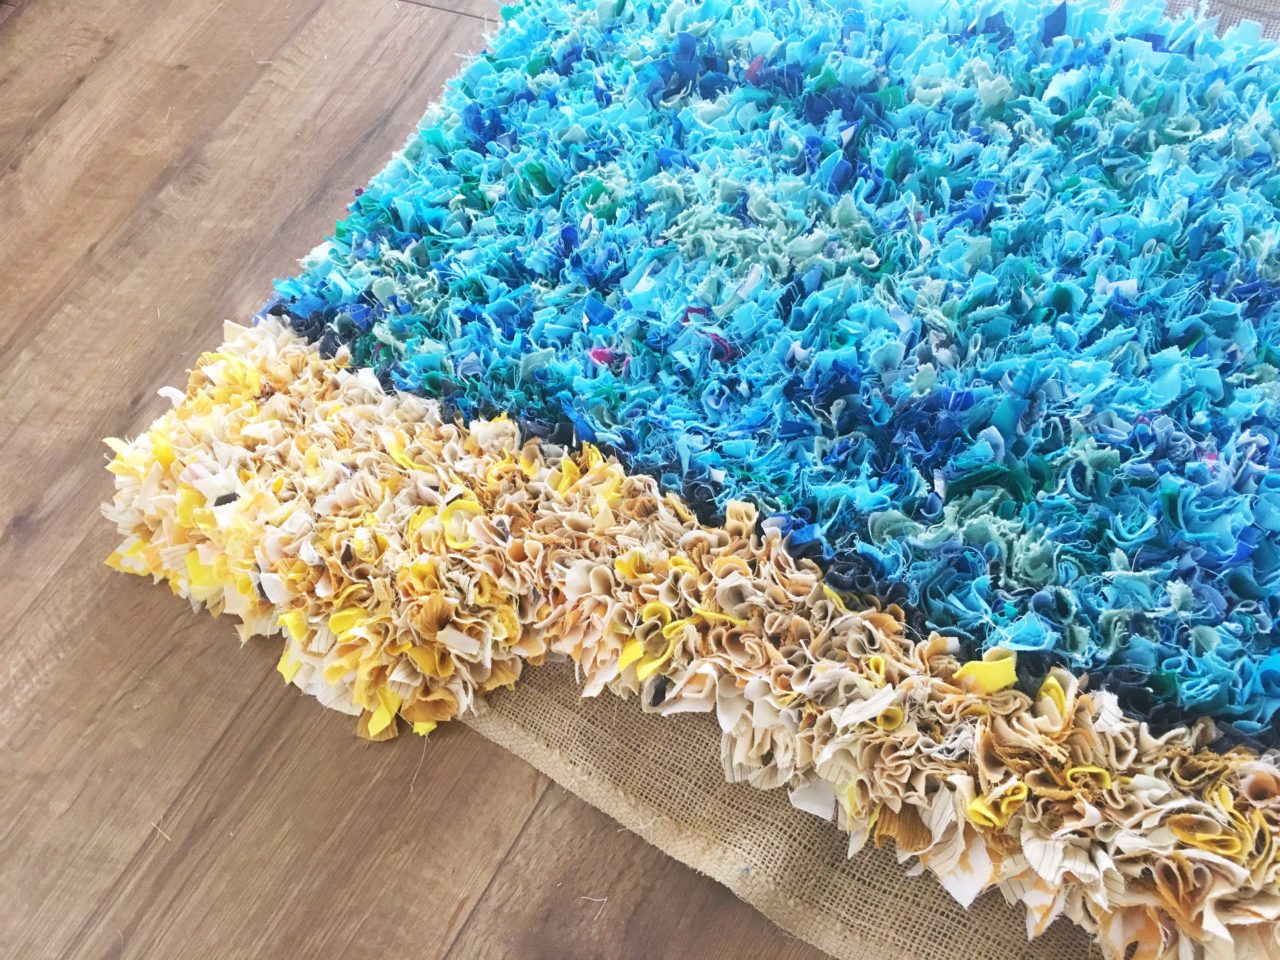
It’s harder to fill the hessian when you have fabric on both sides of where you are working. Ideally, start from one point and work from there. For example, if your design is in the centre of the rug, do that first then work outwards from there. However, striped and random rag rugs are generally best worked from one end to the other. Personally, I don’t like rag rugging a border first then filling in as it makes the rug heavy on each edge, making it harder to work.
Leaving too many gaps in the hessian makes your rug structurally unsound. Occasionally, check the back of your rag rug. If there are spaces in the hessian where the holes have not closed up, you will need to fill them with rag rugging. If your hessian begins to pucker and dip, you are rag rugging too close together. This is a common mistake that beginners make.
Buy the hemmed hessian to make a medium sized rag rug here.
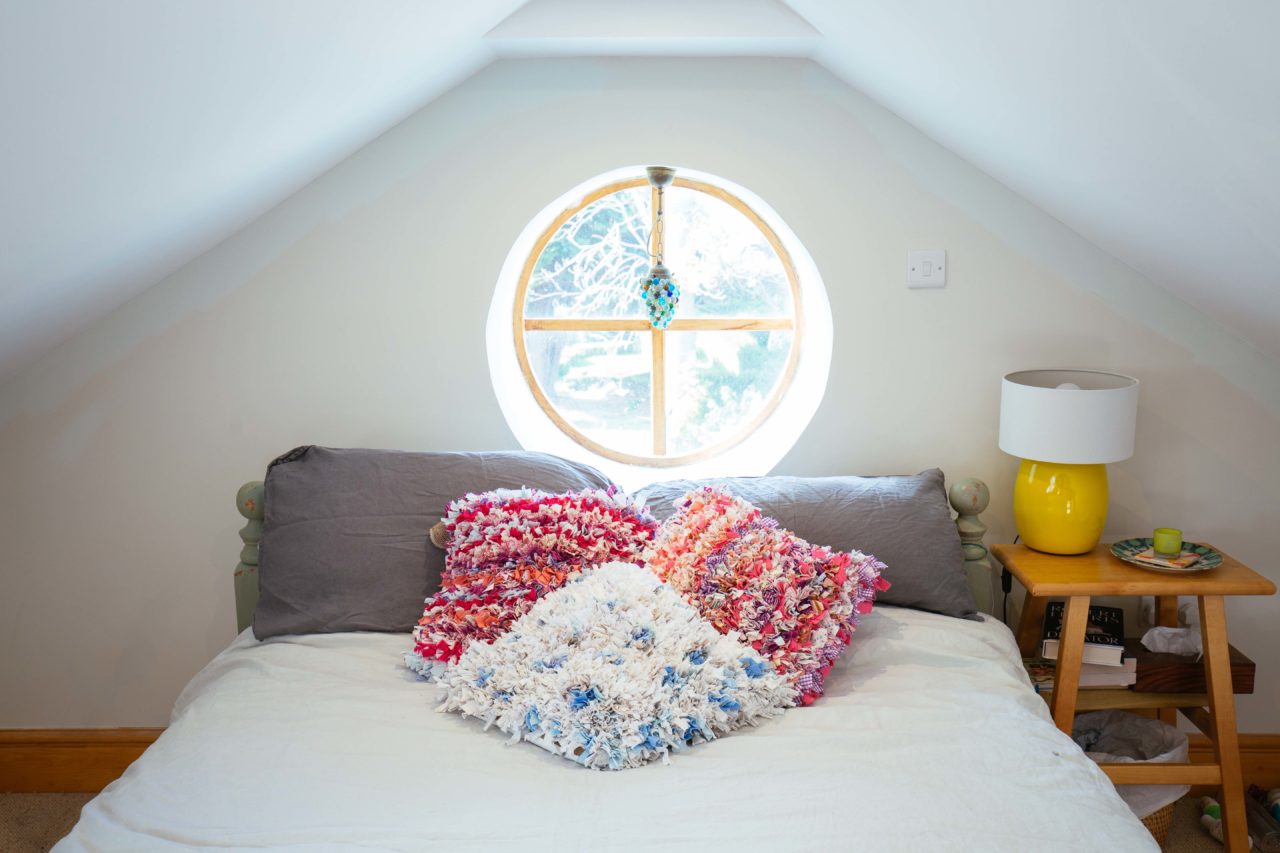
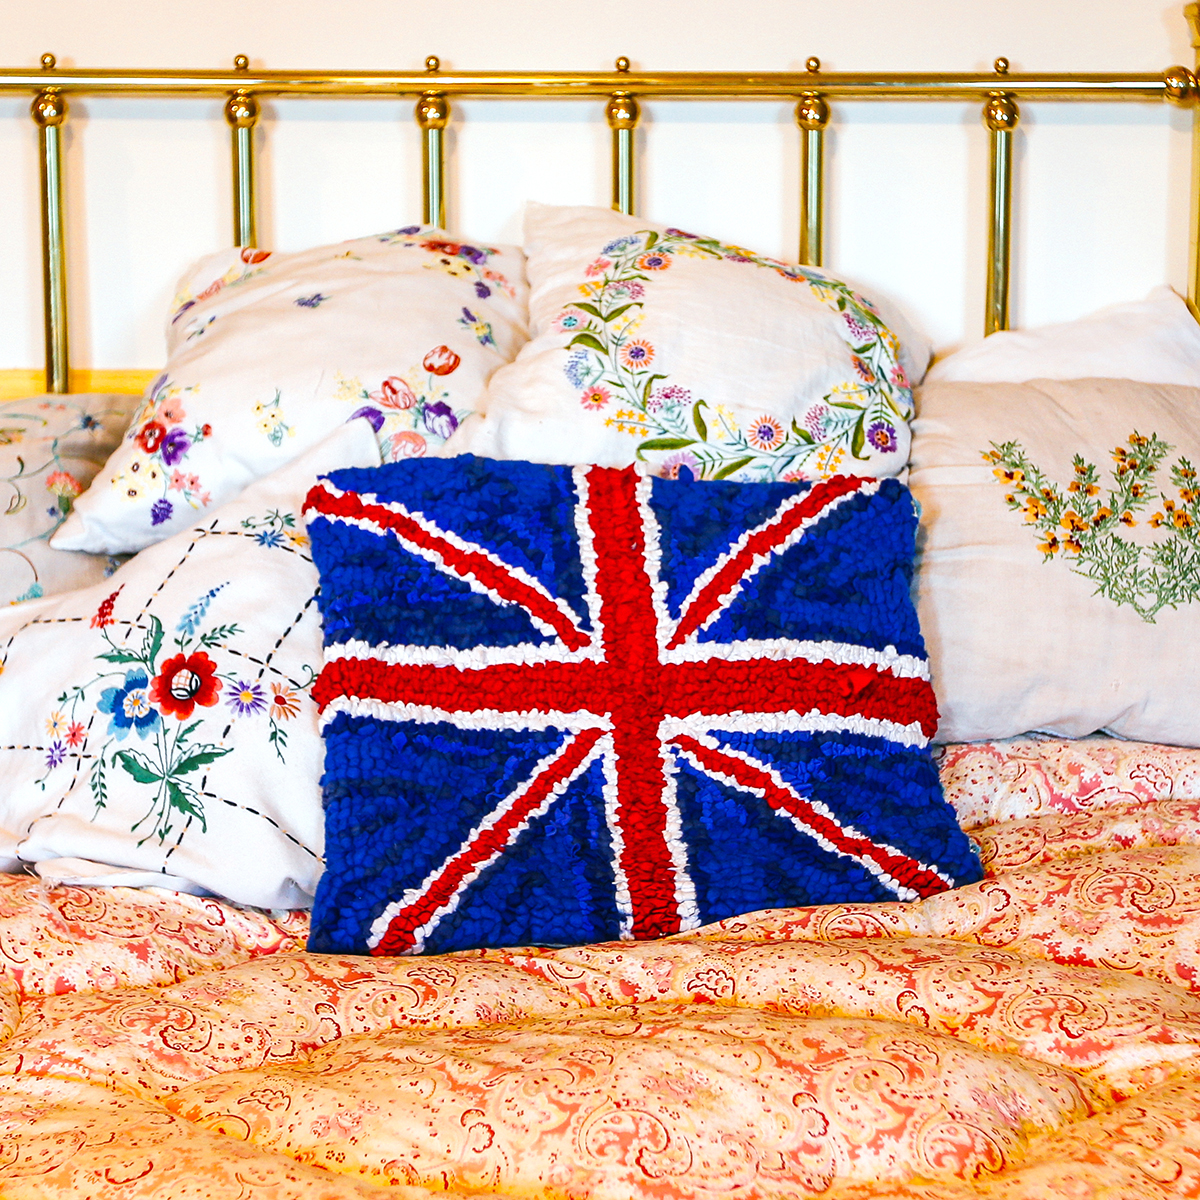
Rag Rug Cushion Design Tips:
A rag rug cushion is such a fun project to work on. It’s small enough to be relatively quick to make, but is large enough to give you lots of creative freedom. As long as you feel confident assembling the cushion at the end (which requires some basic sewing), this is a great choice.
Design Tips:
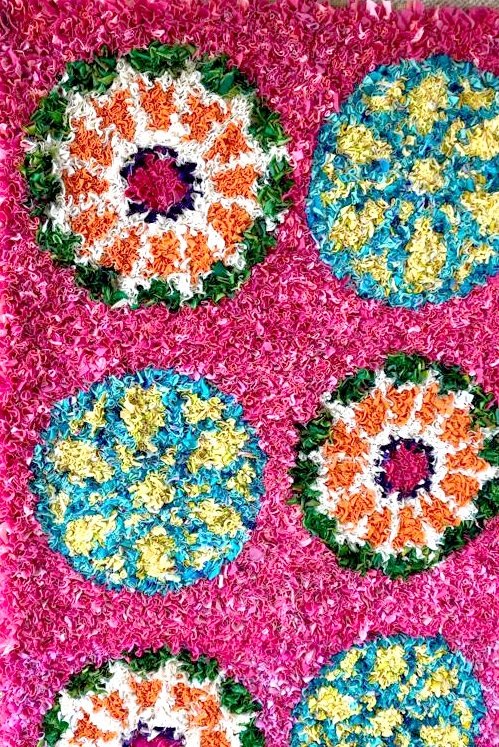
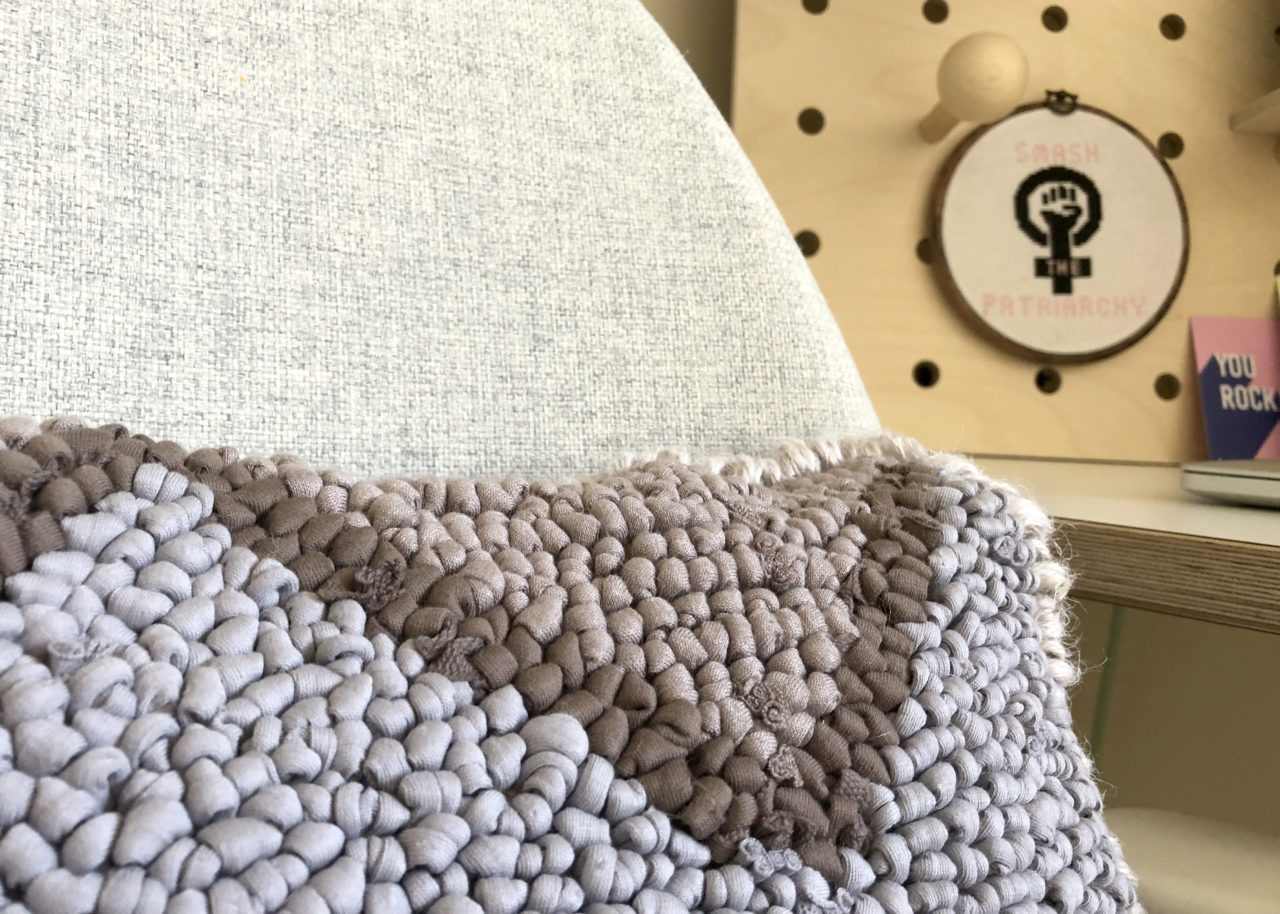
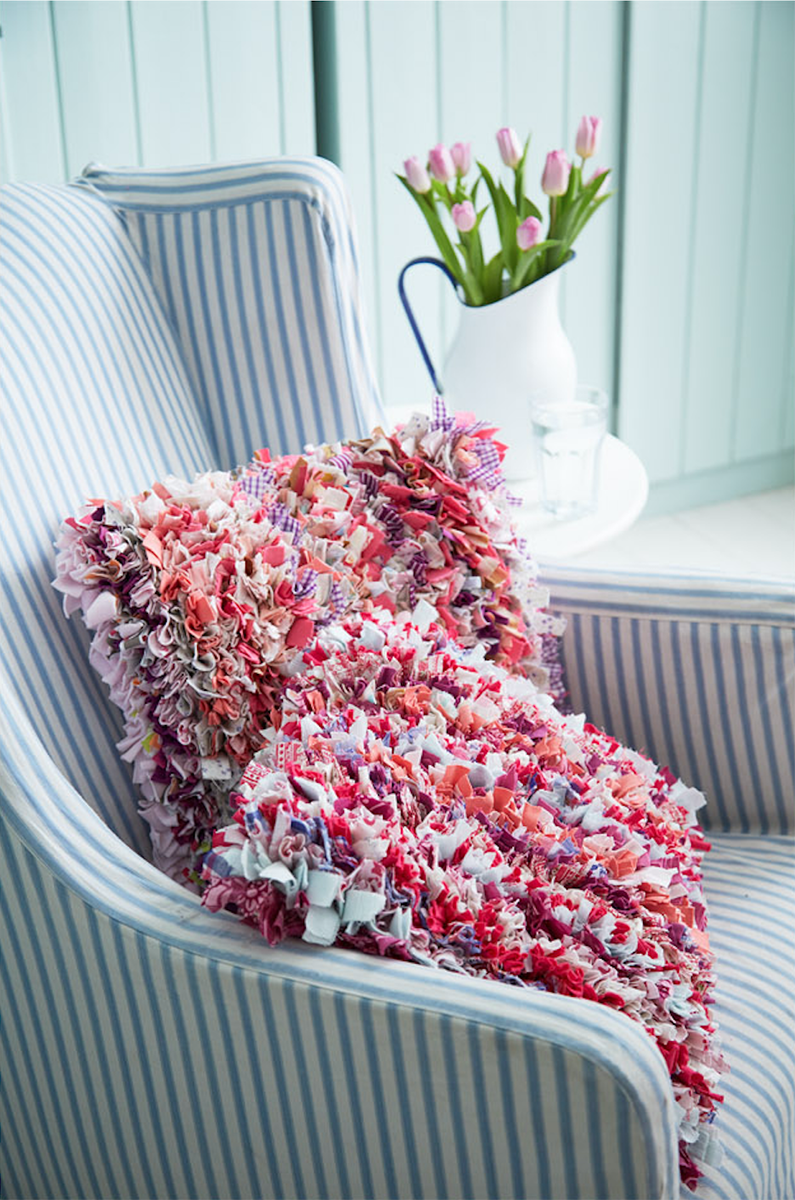
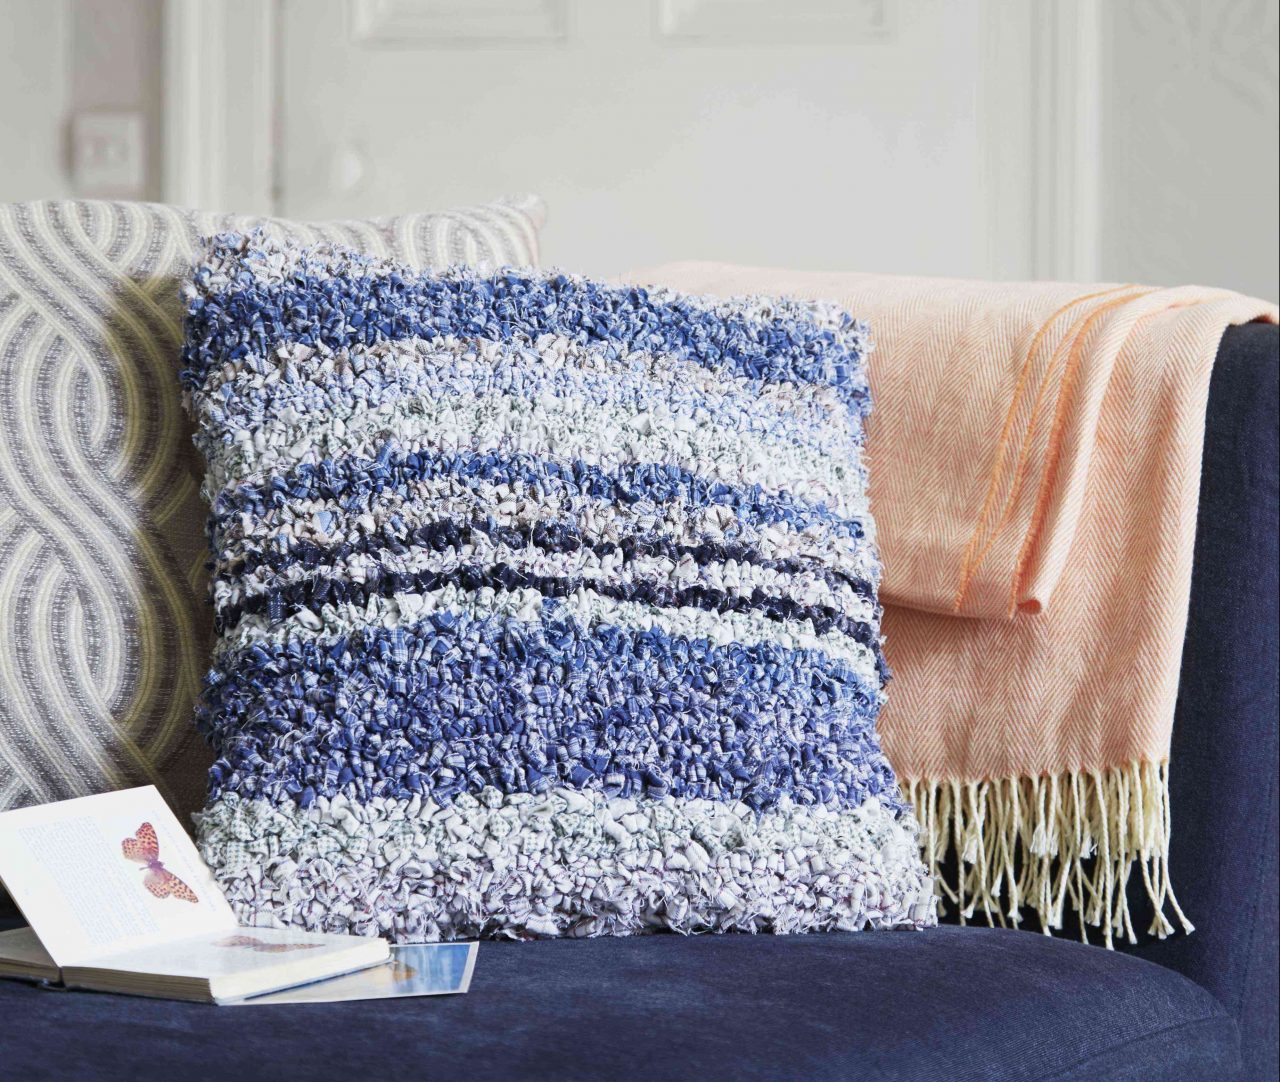
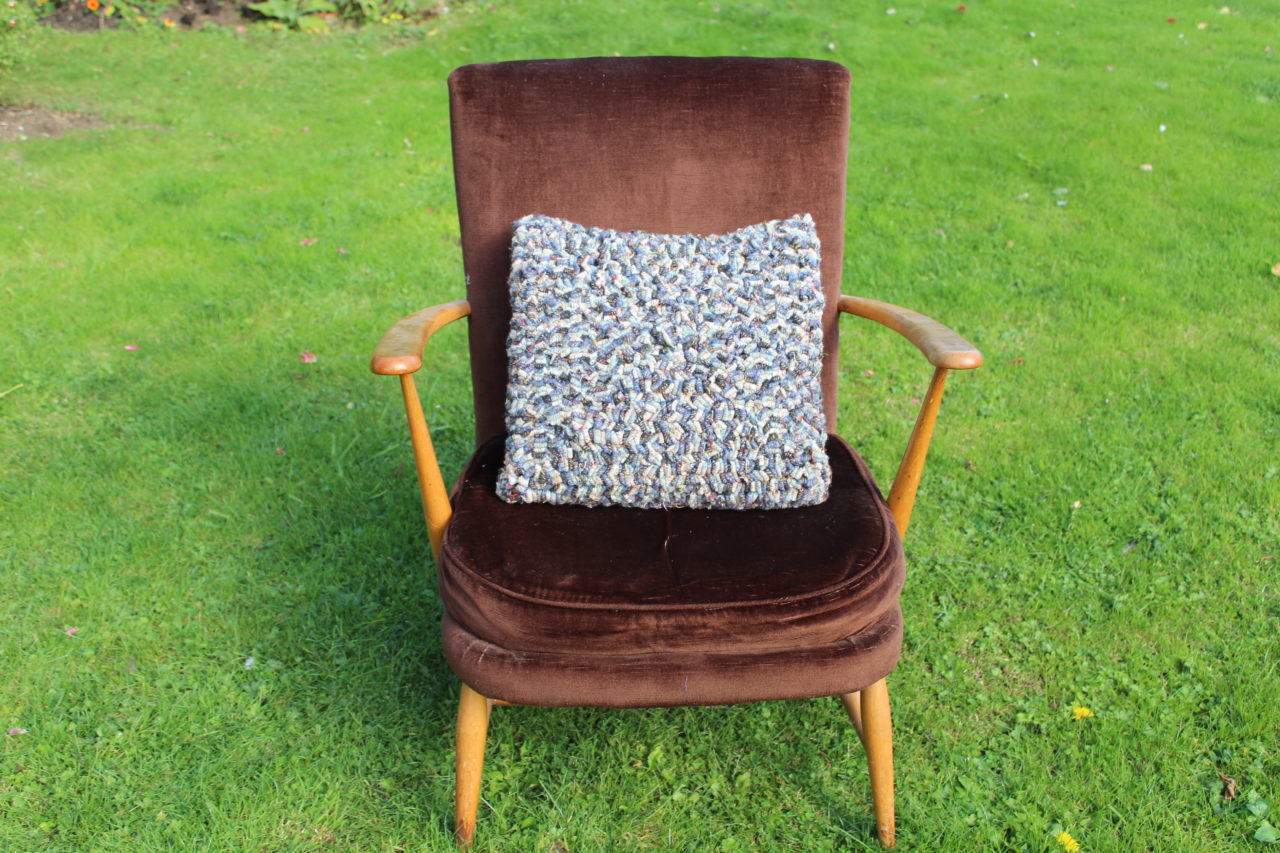
For a cushion, many of the same design tips apply as with a rug. However, your canvas is smaller, so you can’t be quite so ambitious with your designs. If you want any particular features to stand out, you have to do at least two rows of rag rugging. Single rows of rag rugging can look a little lacklustre. And if you want features to stand out even more, use block colours, or create a plain border. Plain fabrics stand out strongly in designs, particularly if you use contrasting colours either side.
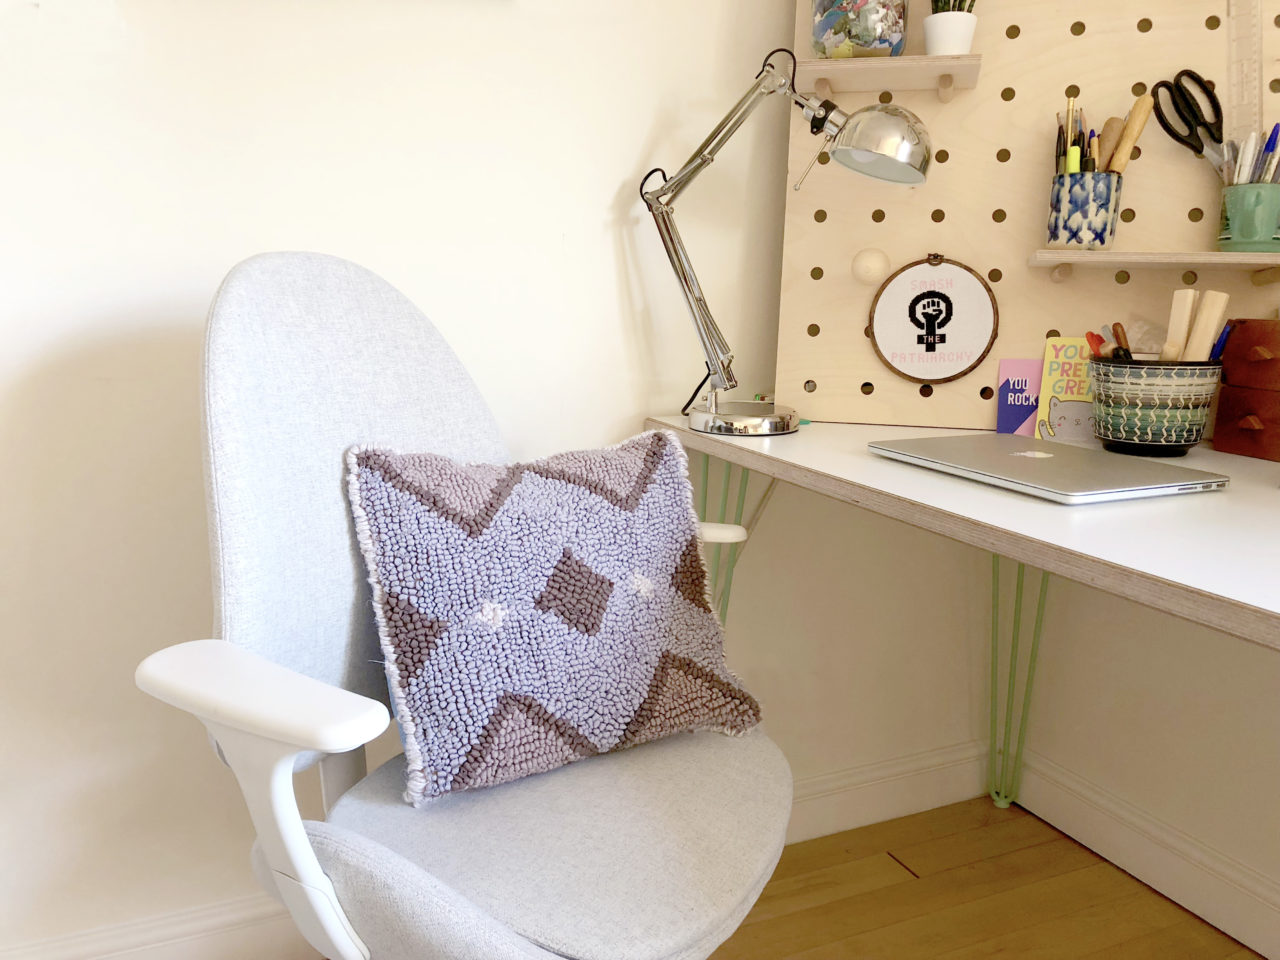
Try not to be too ambitious with your first rag rug cushion. Once you’ve got confident with the rag rug techniques and how different fabrics will react, you can tackle your Mona Lisa. Choose a simple design and colours you love and you cannot go wrong.
If you’re doing a one-colour background, it can look very nice to blend different shades of the same colour together in the background. As cushions aren’t that large, they’re a great project for using up small scraps of fabric.
Fabric Tips:
For cushions, the same rules apply as with rugs. Don’t use fabrics that shed too much, as you’ll be forever lint-rolling yourself after leaning on the cushion. Try to incorporate different textures where you can, but bear in mind, the softer your fabric is, the nicer it will be to lean on.
Depending on the 100% Wool Blanket Yarn, sometimes it helps to cut the blanket yarn down the middle lengthways to make it a bit narrower. This will make the blanket yarn easier to pull through the hessian and will make it go further. See our Blanket Yarn Blog Post for more details.
Practical Tips:
Our Ragged Life Cushion Hessian has a 40 x 40cm square marked out to fit a standard cushion pad. To complete the cushion face, you should completely fill the hessian right up to the line. This will ensure you get a nice square cushion.
As a cushion isn’t all that big, it doesn’t really matter where you start, as it doesn’t become heavy and unwieldy like a rug. However, you’re still best working it in a logical manner if you can. Sometimes, we work from the outside of the cushion inwards (like in the blanket yarn cushion below), sometimes we work it in rows from one end to the other and sometimes we start with the main design feature and work from there. Comment below to let us know what you do!
When choosing a fabric for the envelope back of your cushion, try to choose a relatively medium to heavy weight fabric as it will help to counterbalance the weight of the rag rugging on the front. It’s also nice to choose a colour that complements the front if you can.
When assembling your cushion, it’s a lot easier to get close to the rag rugging when you use a zip foot on your sewing machine. Also, if you’re finding that the rag rugging is getting in your way as you sew, you can tape the pieces back beforehand.
Buy the hemmed hessian to make a rag rug cushion here.
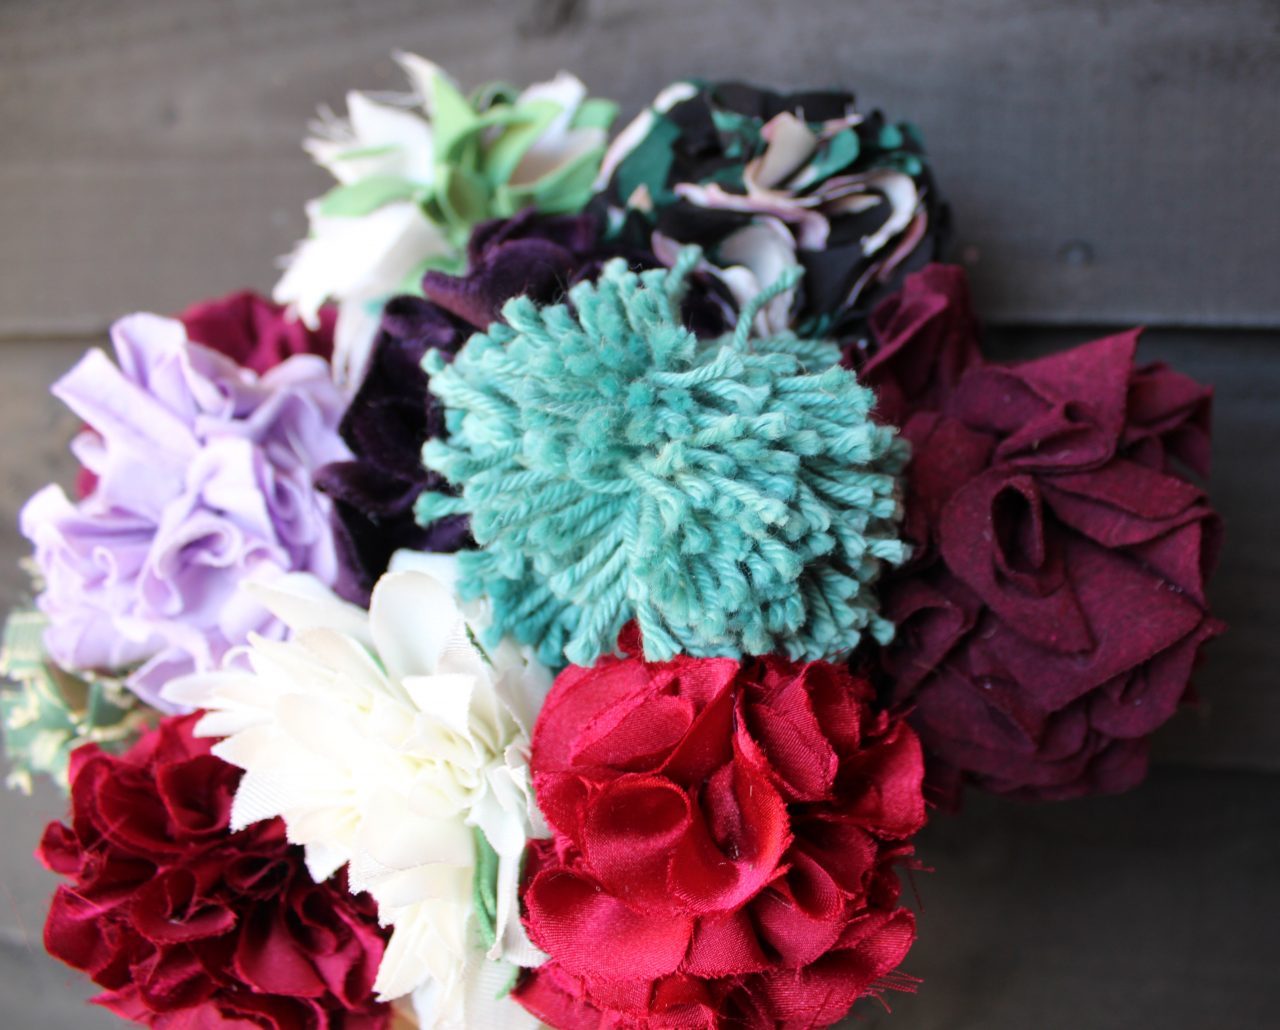
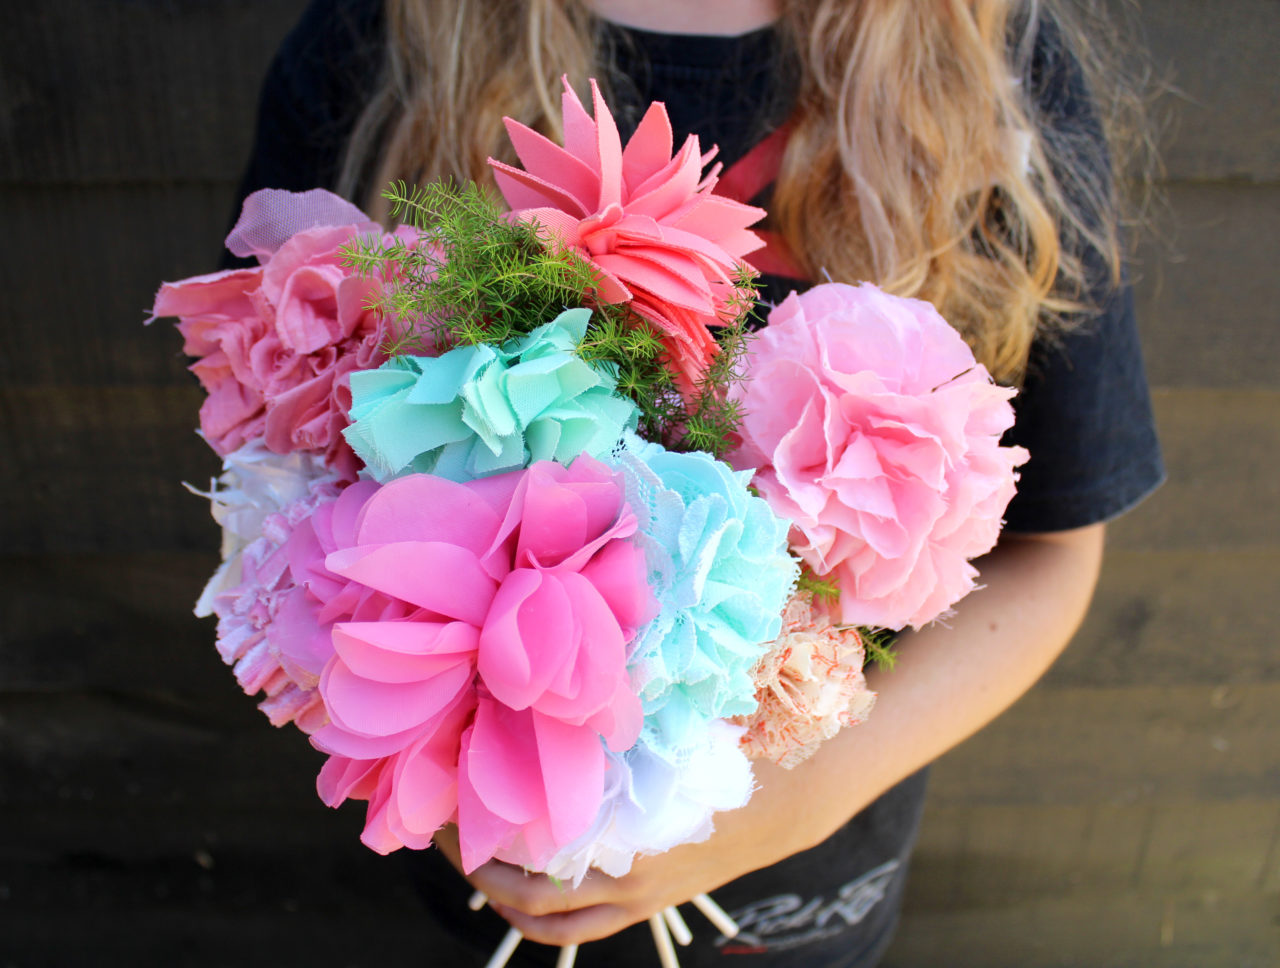
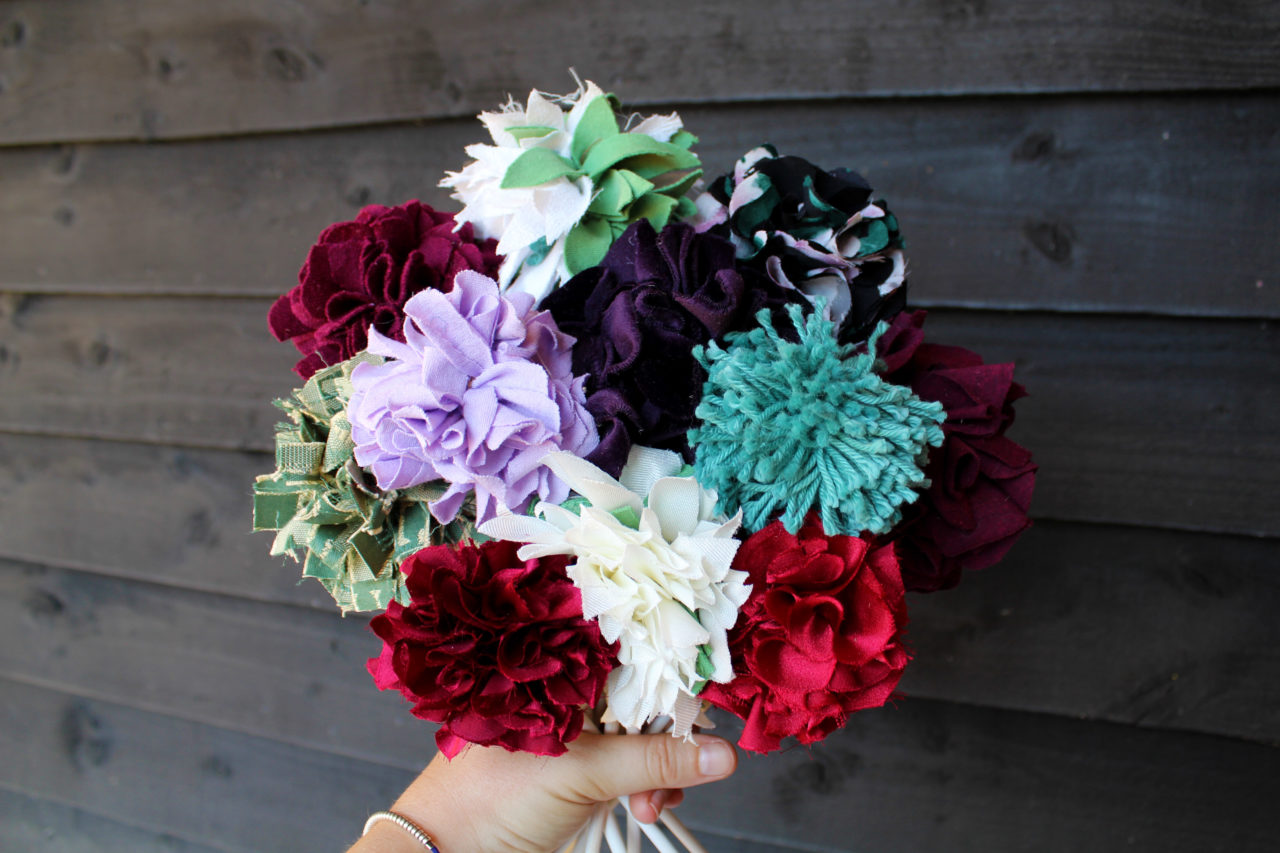
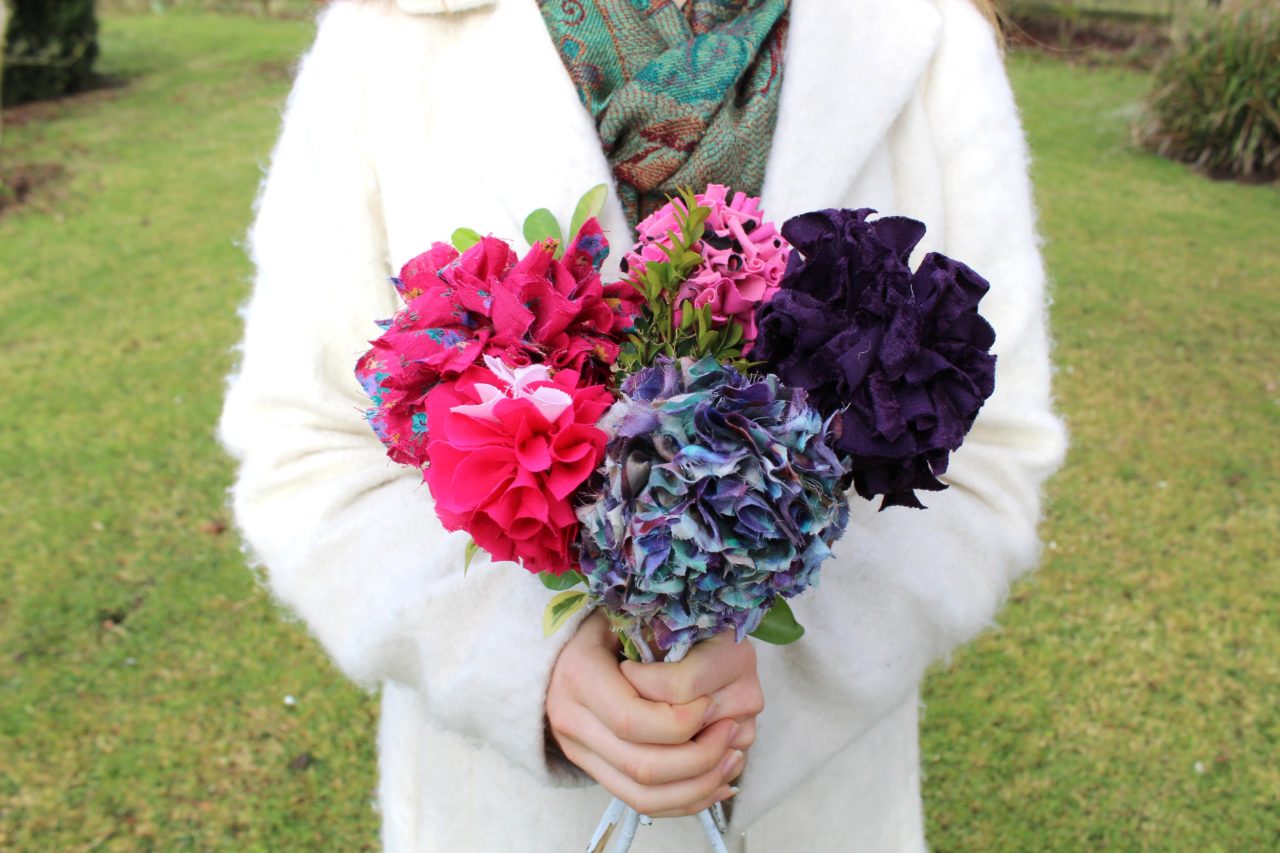
Rag Rug Bouquet Design Tips:
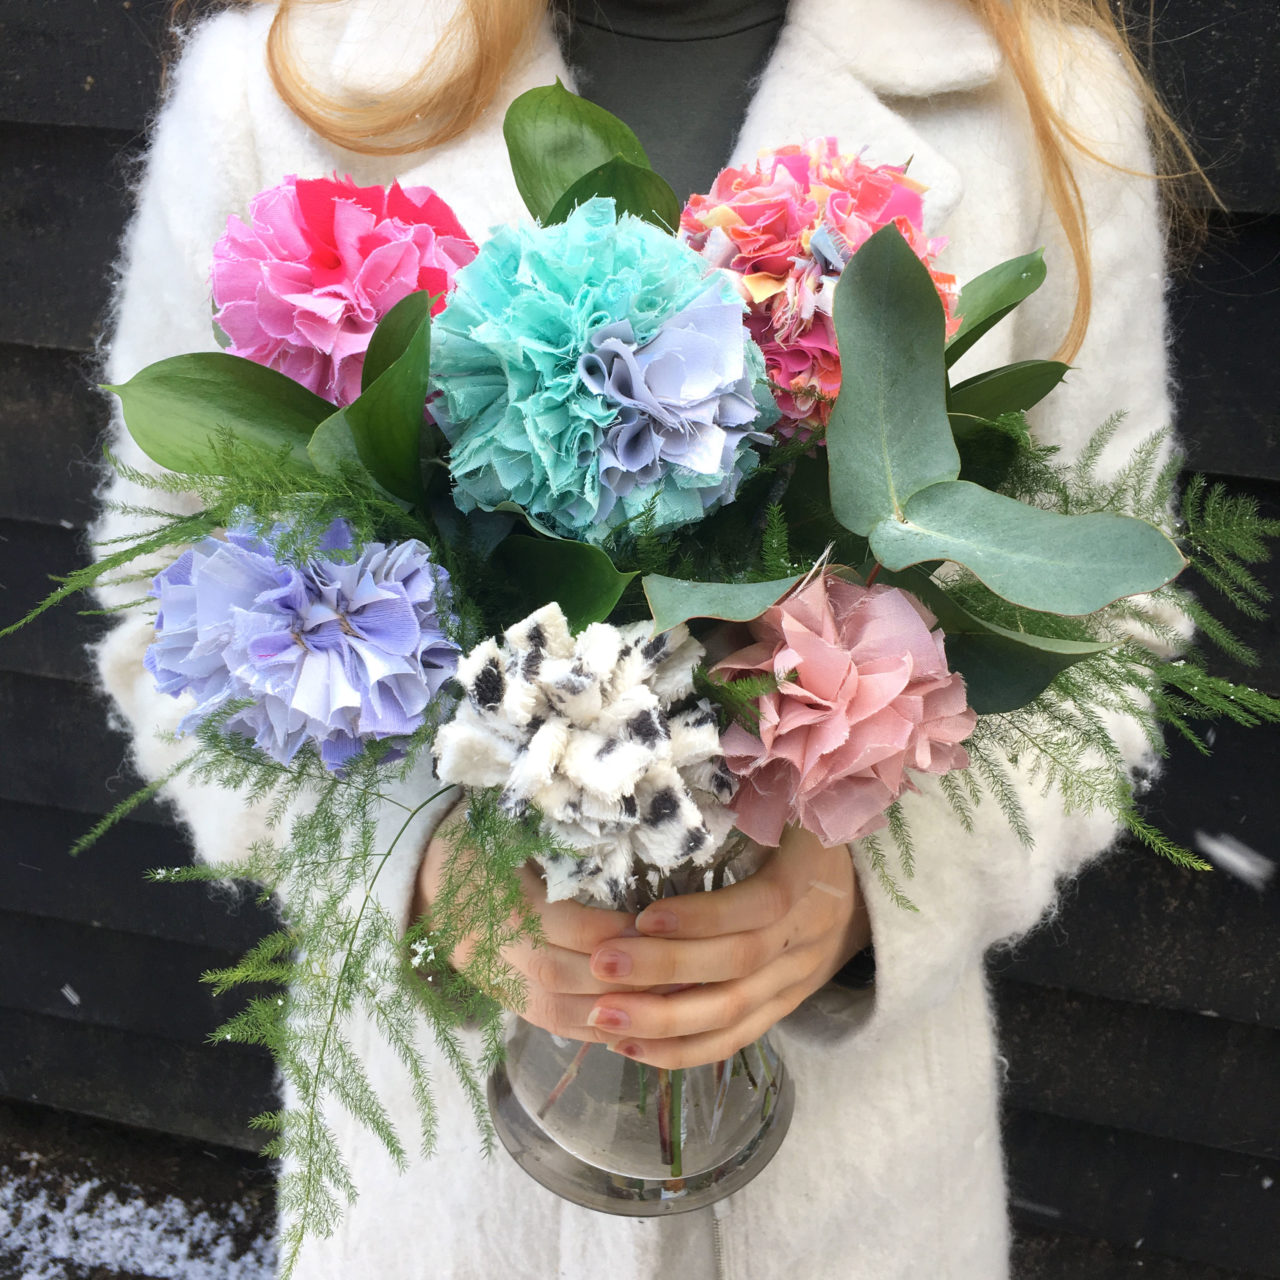
Our Ragged Life Rag Rug Bouquets have become a firm favourite since we launched them in 2017. They’re wonderful for using up odds and ends from your stash and make a beautiful gift for loved ones. Below are just a few of our tips for designs, but you can see some of the gorgeous bouquets we’ve made and students have made in our blog post here.
Design Tips:
Think about how your flowers are going to work as a set of seven before choosing your colours and fabrics. If you are struggling for inspiration, you can look up real life flower bouquets and use them as a rough colour guide.
Don’t necessarily discard a fabric because you don’t like its pattern. Much of the pattern will be lost when you cut up the garment, and some of the best flowers are made using ugly fabrics that have been cleverly cut up. If you’re unsure how a patterned fabric will look, crumple it up in your hands and that will be an approximation of how it will look when rag rugged.
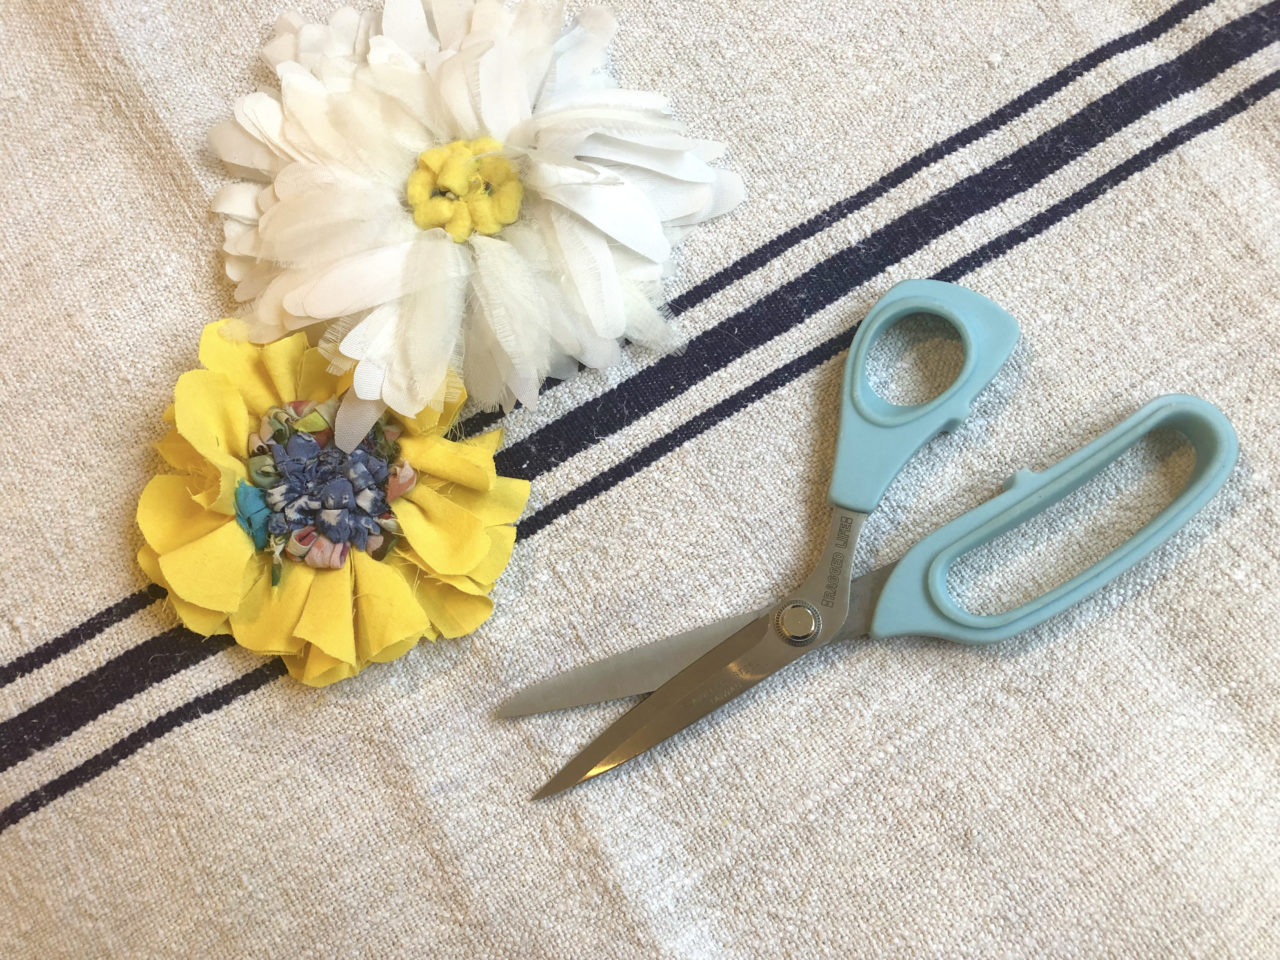
You can shape the shaggy rag rug pieces to create different styles of rag rug flower for your bouquet. The ends could be pointed, rounded or feathered, for example. The images below give you an idea how different shapes of petals look when rag rugged (these are unassembled flowers).
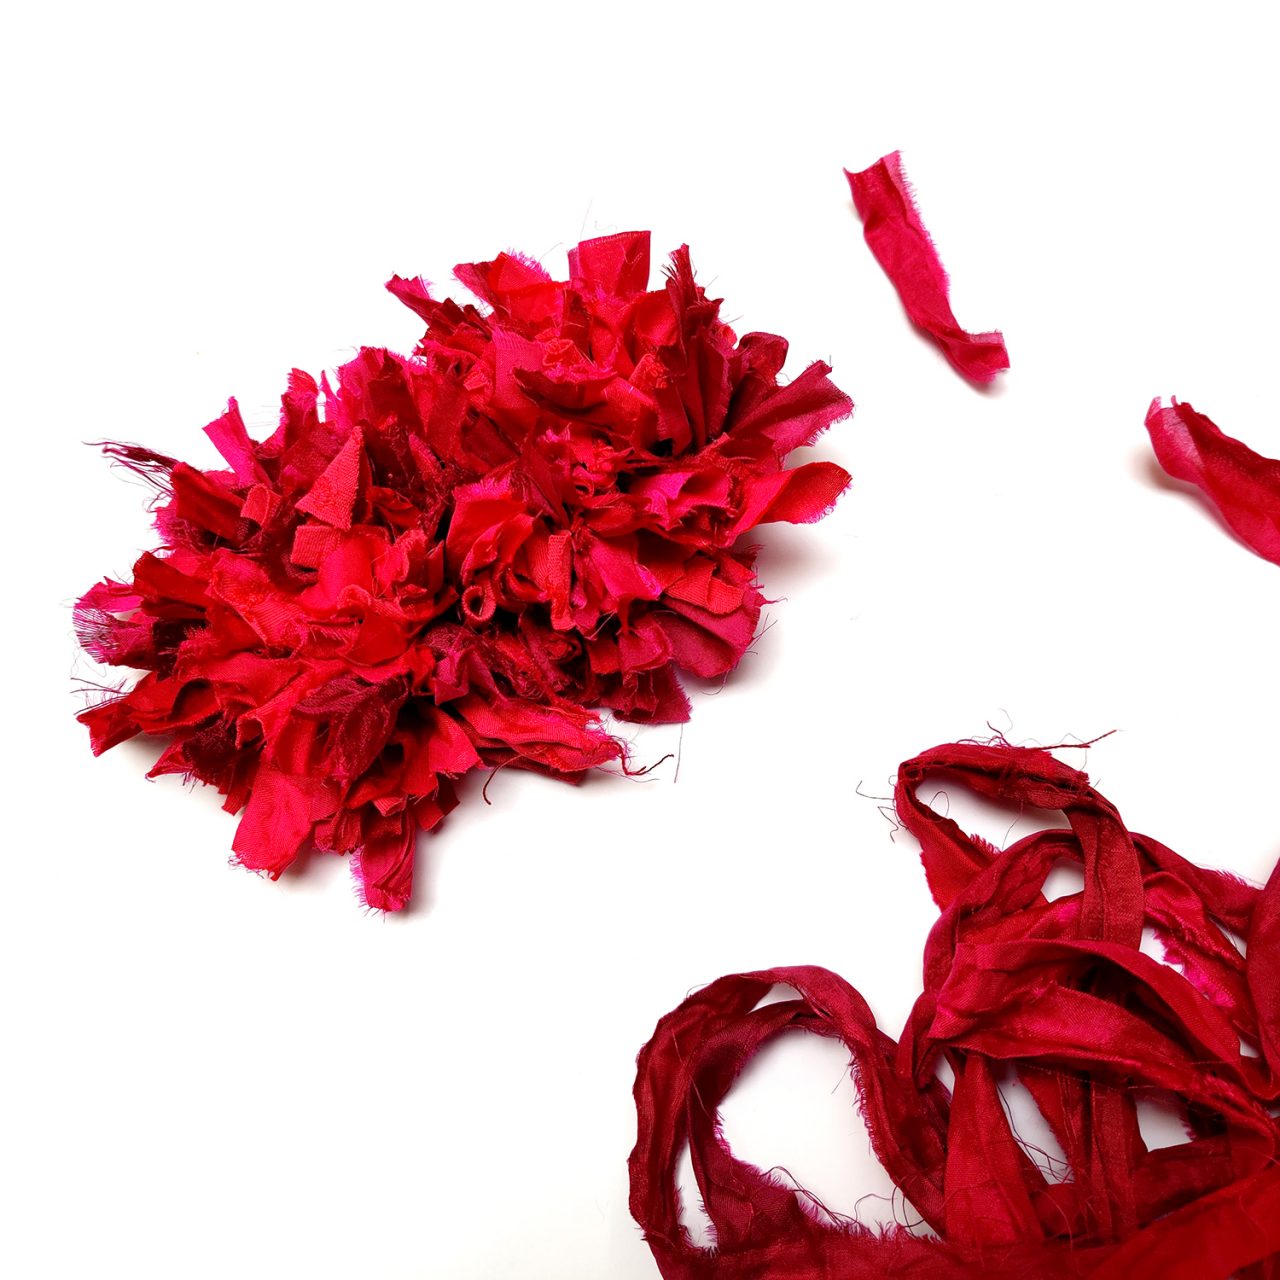

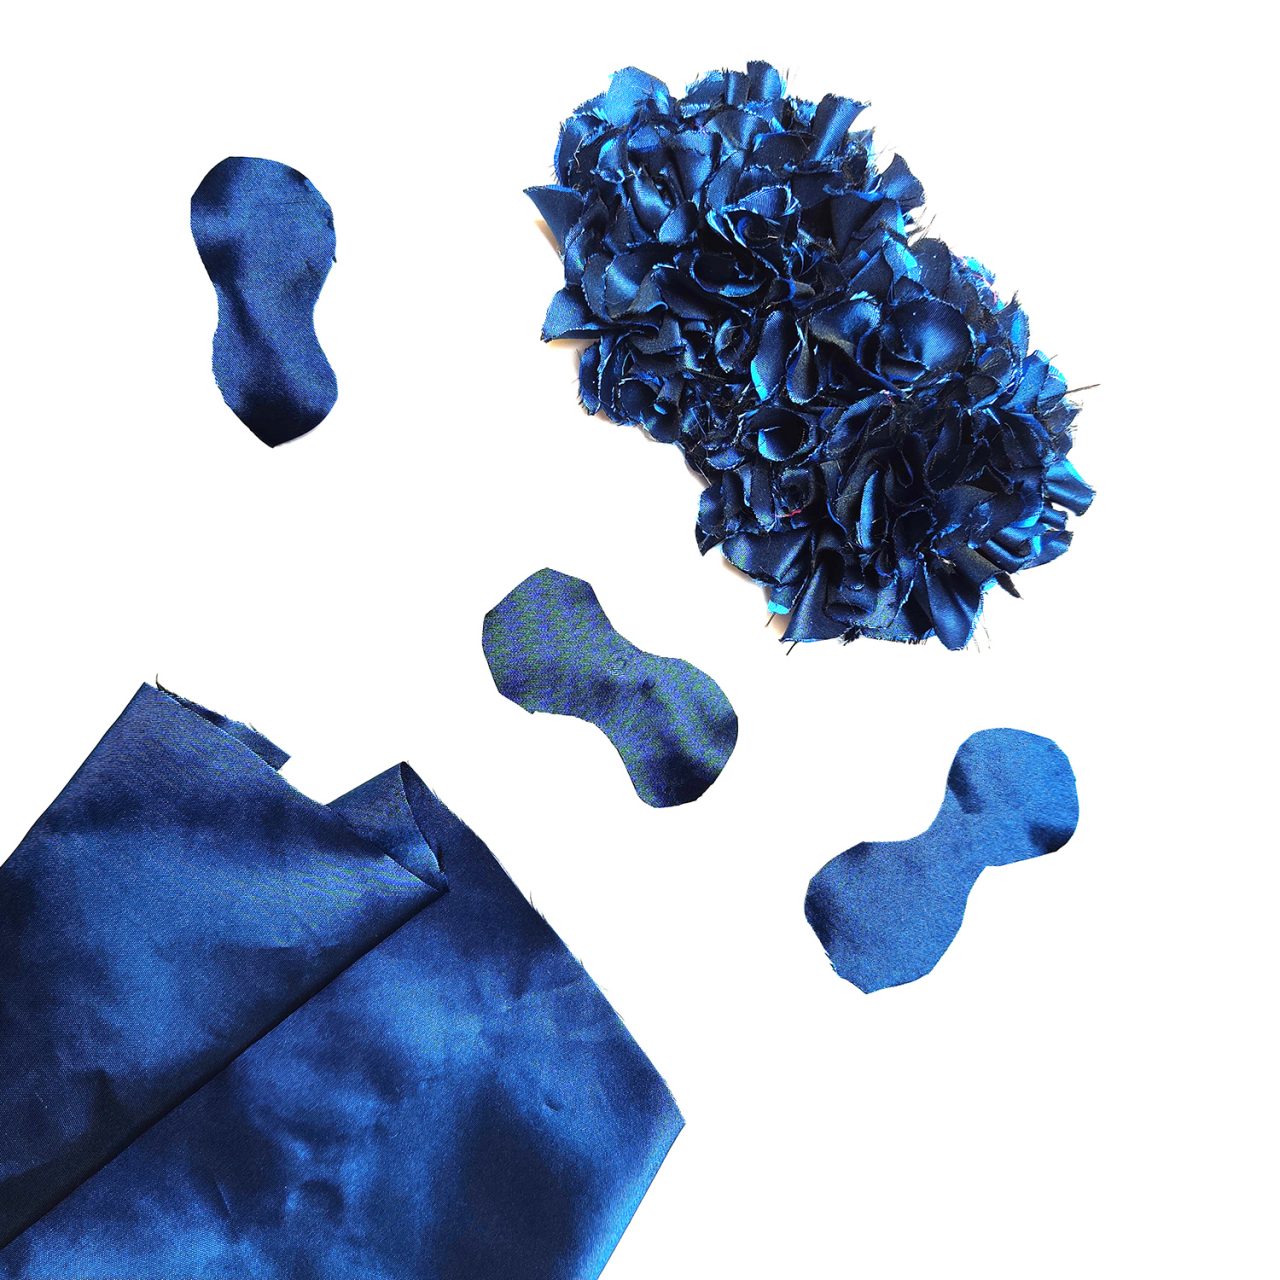
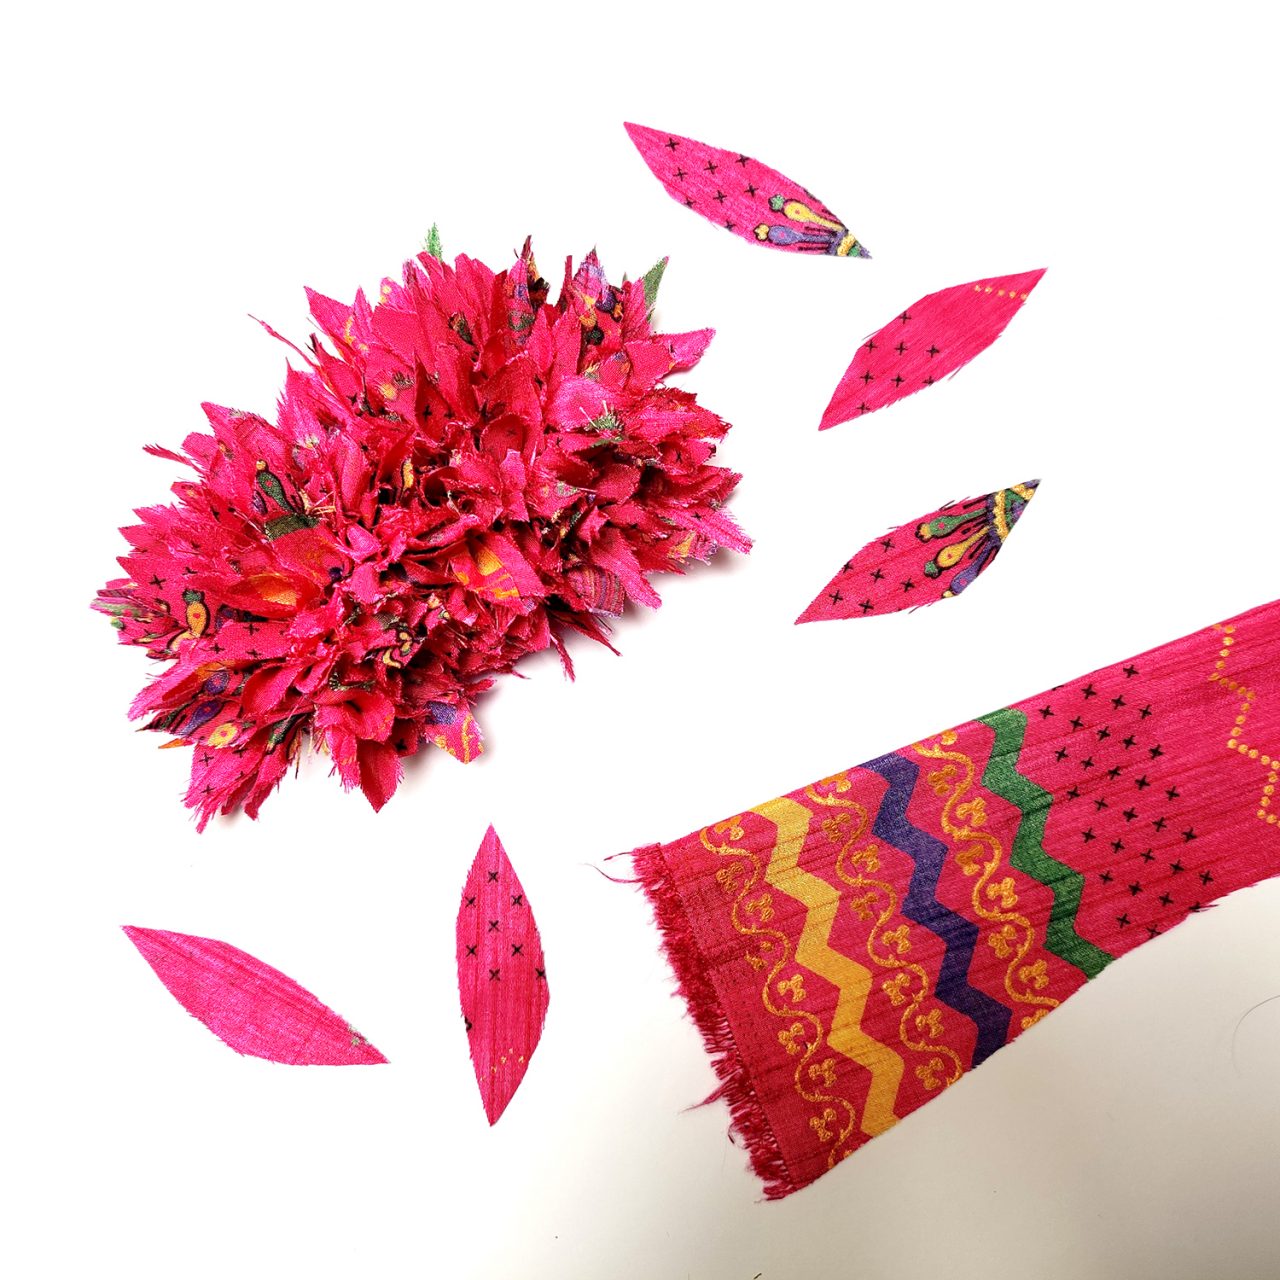
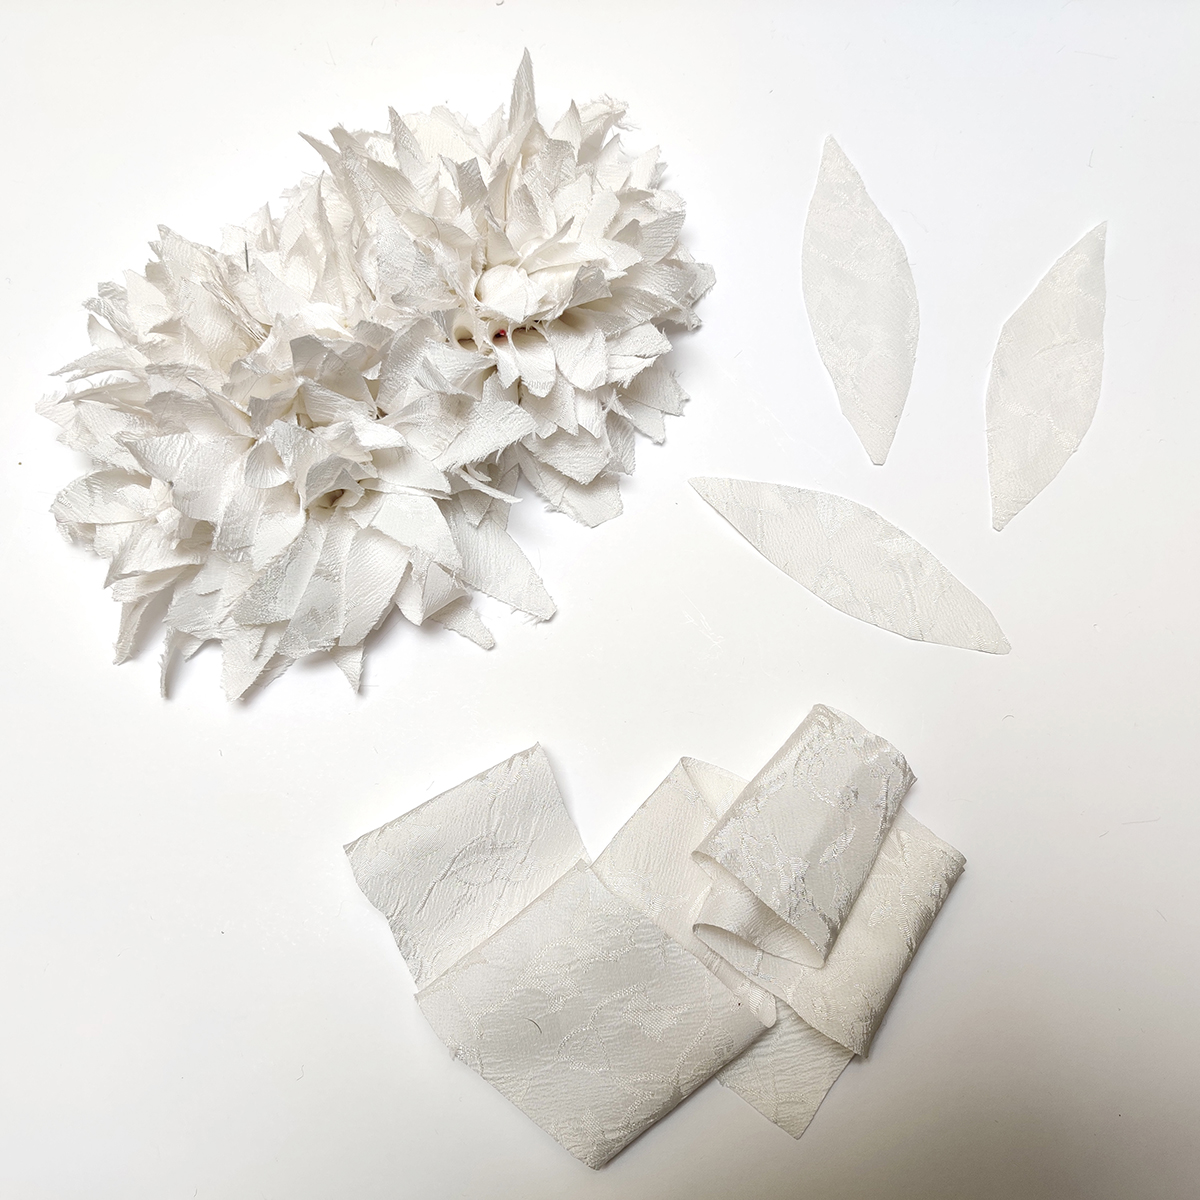
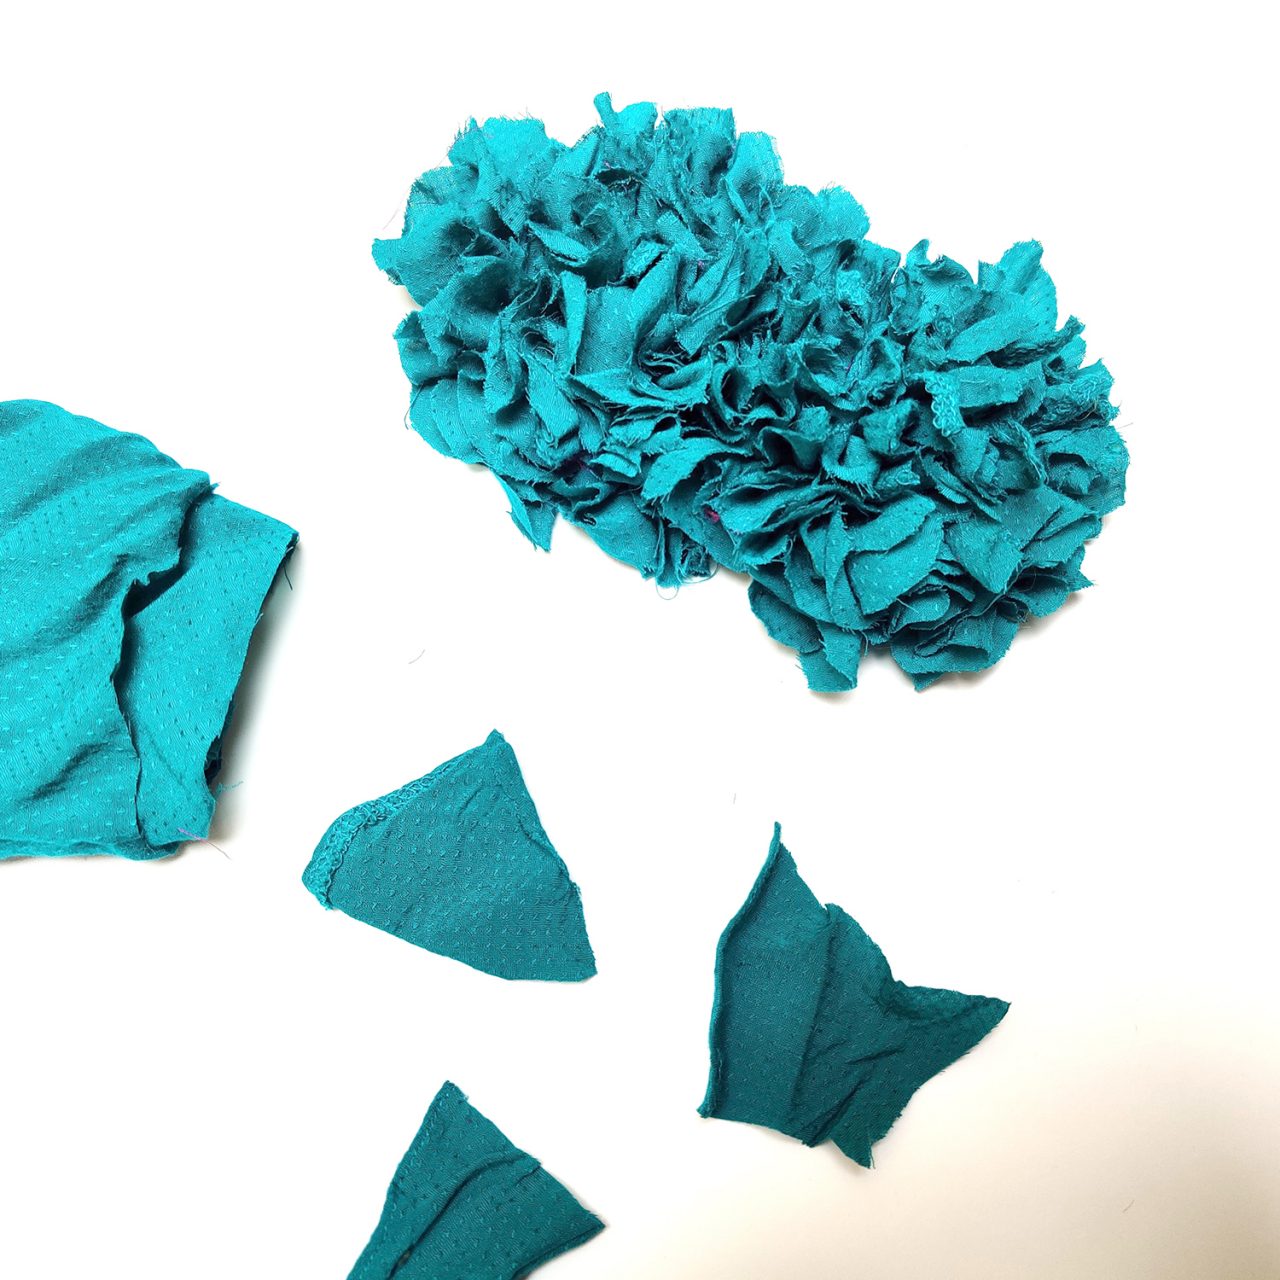
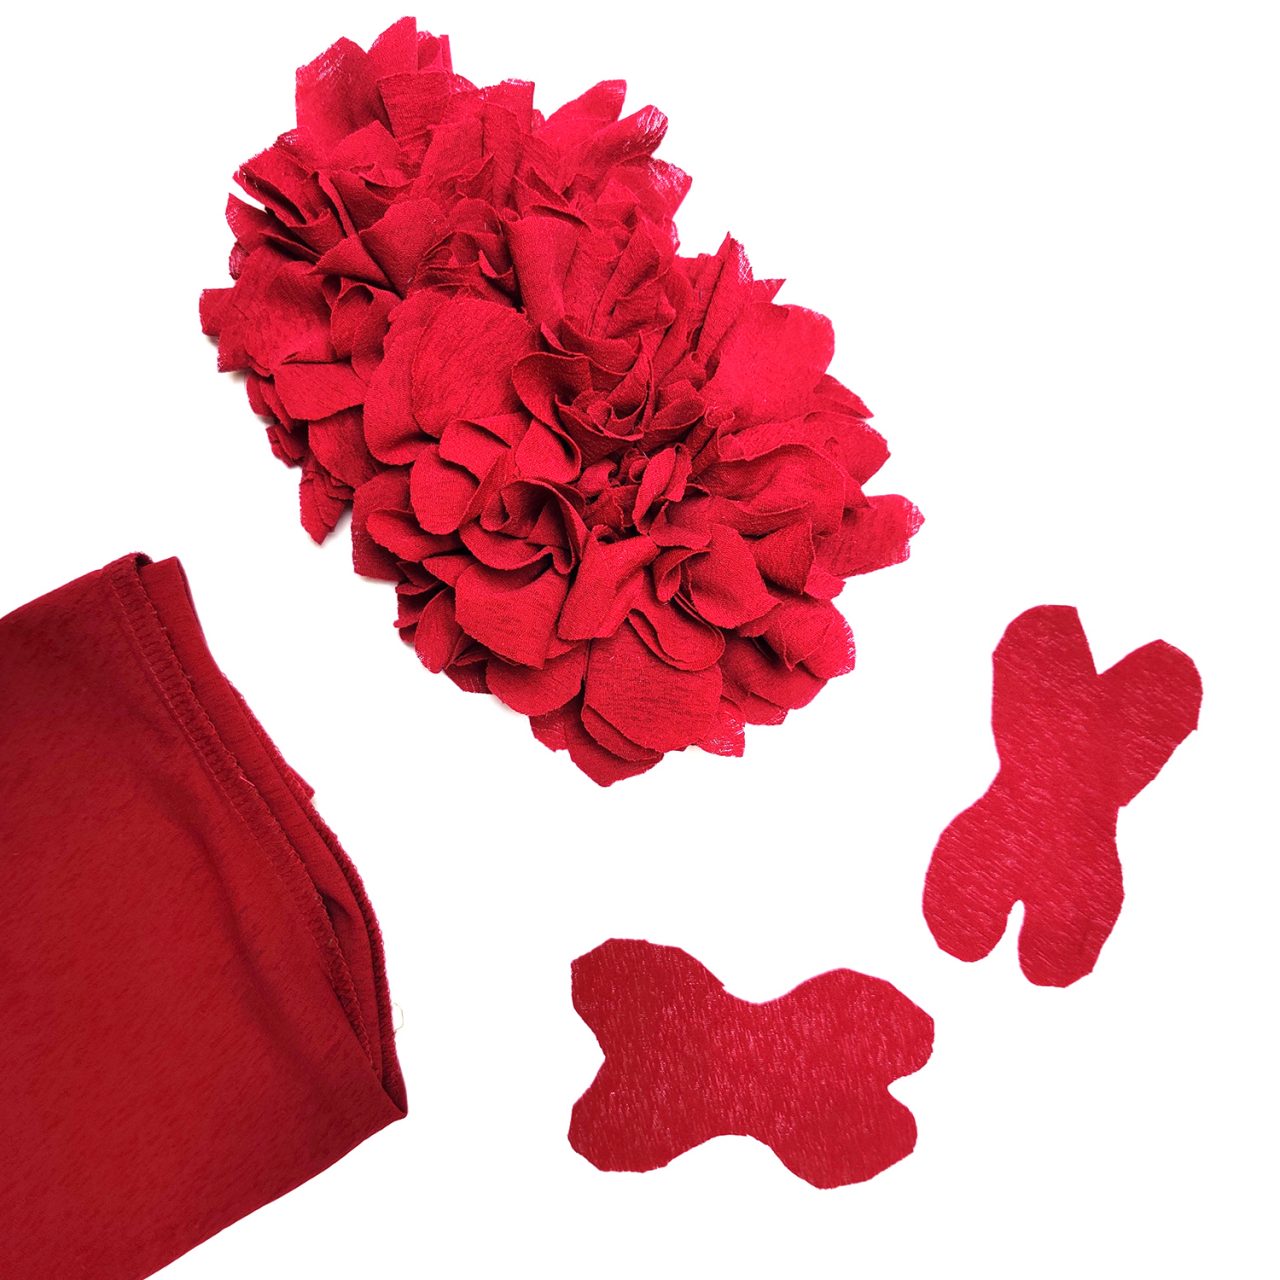
What’s more, you can also play around with the lengths and widths of your pieces. As long as the centre of the strip is at least 1.5cm wide, it will hold tight enough into the hessian. Or you can pack multiple strands of thinner fabrics into one hole, as in the tapestry thread flower below. I particularly like cutting thin fabrics into very wide strips (approx 7cm wide) as they create beautiful folds within the flowers.
Fabric Tips:
Rag rug bouquets look best when you combine a variety of different textures together (not just one).
Try to avoid extremely thin, floppy fabrics, as these will create sad, wilted flowers. If you are unsure if your fabric has enough structure, cut a piece and see how easily it stands up when you hold it vertically. If it completely flops, it probably won’t looks its best in the bouquet.
Fabrics with a bit of sheen catch the light and look great in a bouquet. Personally, I like lining fabrics and velvets for that reason.
Practical Tips:
Our Ragged Life Bouquet Hessian has been hemmed to create different size flowers to create a more varied and interesting looking bouquet. Rag rug bigger flowers in colours you’d like to stand out more and use the smaller flowers as your accents and highlights.
It doesn’t matter what order you fill your rag rug flowers in, but generally I work around the outside of the shape then fill in the centre. If you find this tricky though, you can work the flowers in rows from one end to the other.
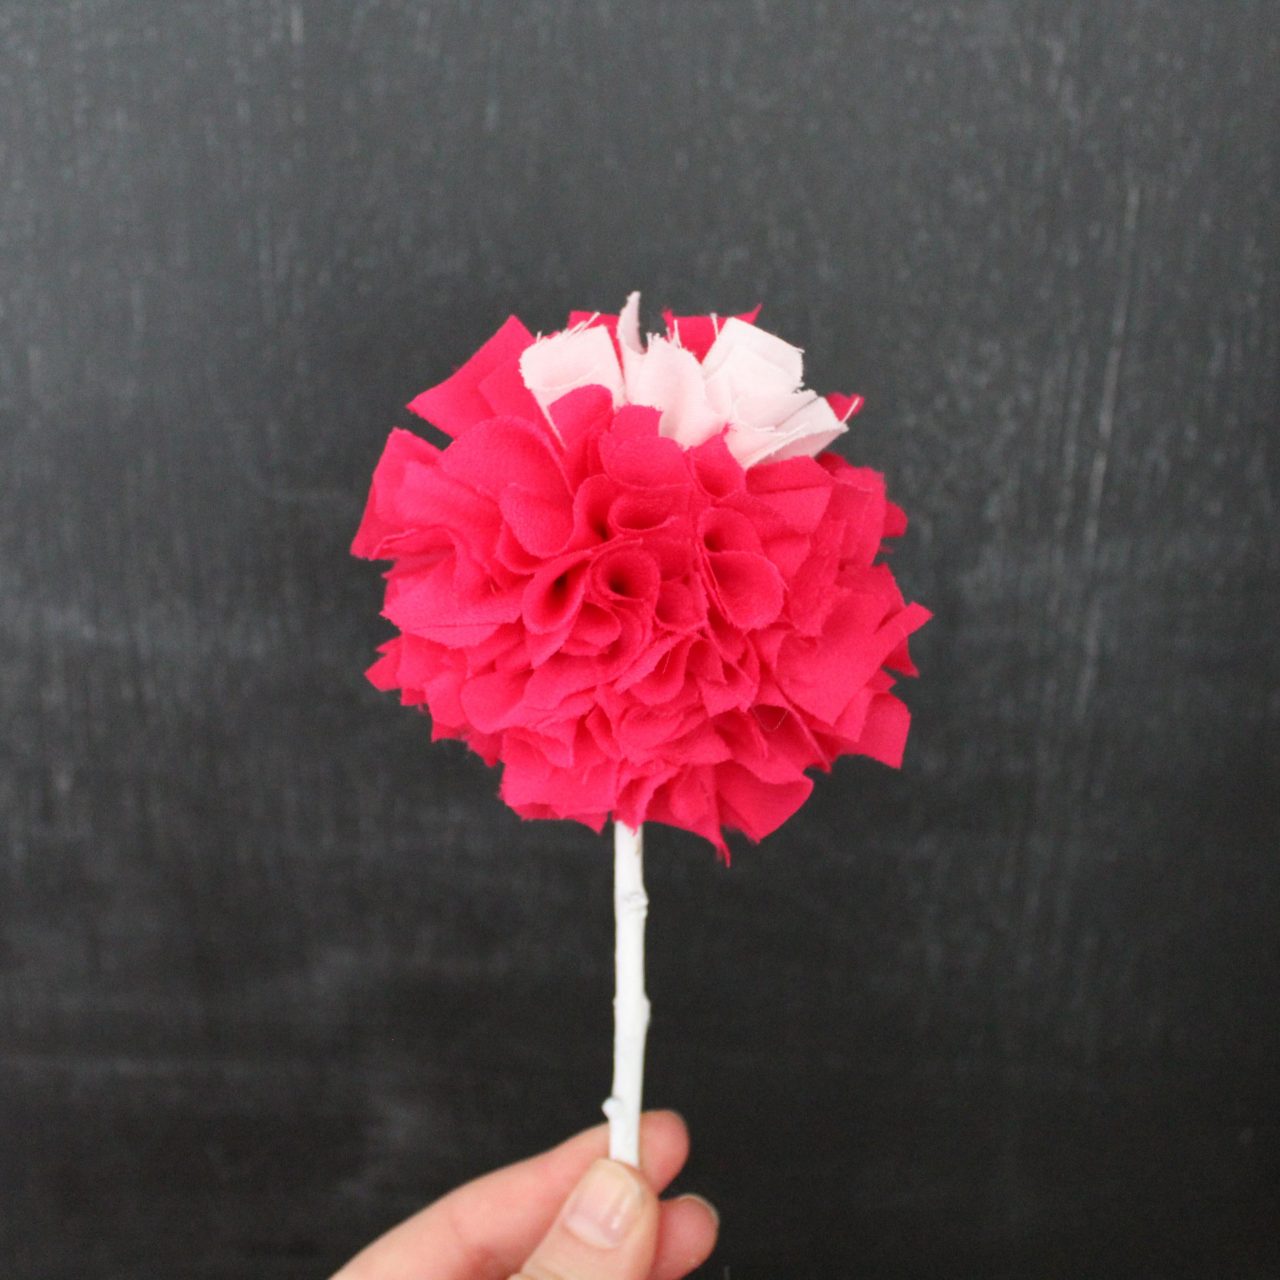
You can tweak and trim your flowers once they are assembled onto the stems, so don’t panic if they’re looking a little wild early on.
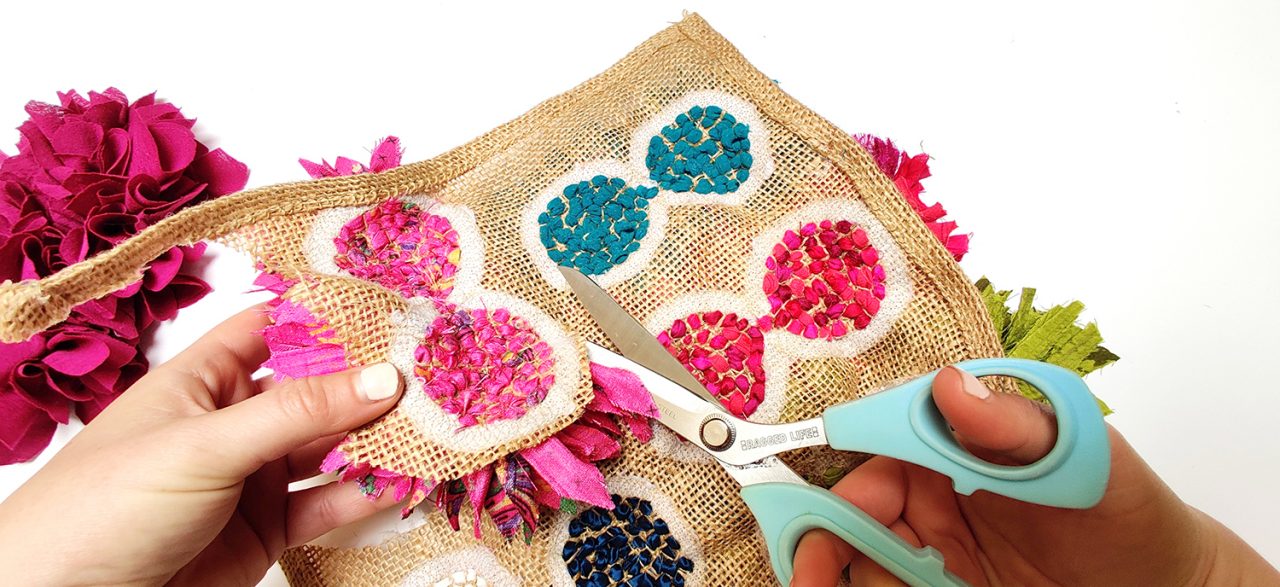
Do not cut into your hessian under you have rag rugged all seven of your flowers. This will help to keep the hessian intact as you finish. If you are trimming your flowers out from the back of the hessian, make sure not to accidentally cut your shaggy rag rug pieces as you cut.
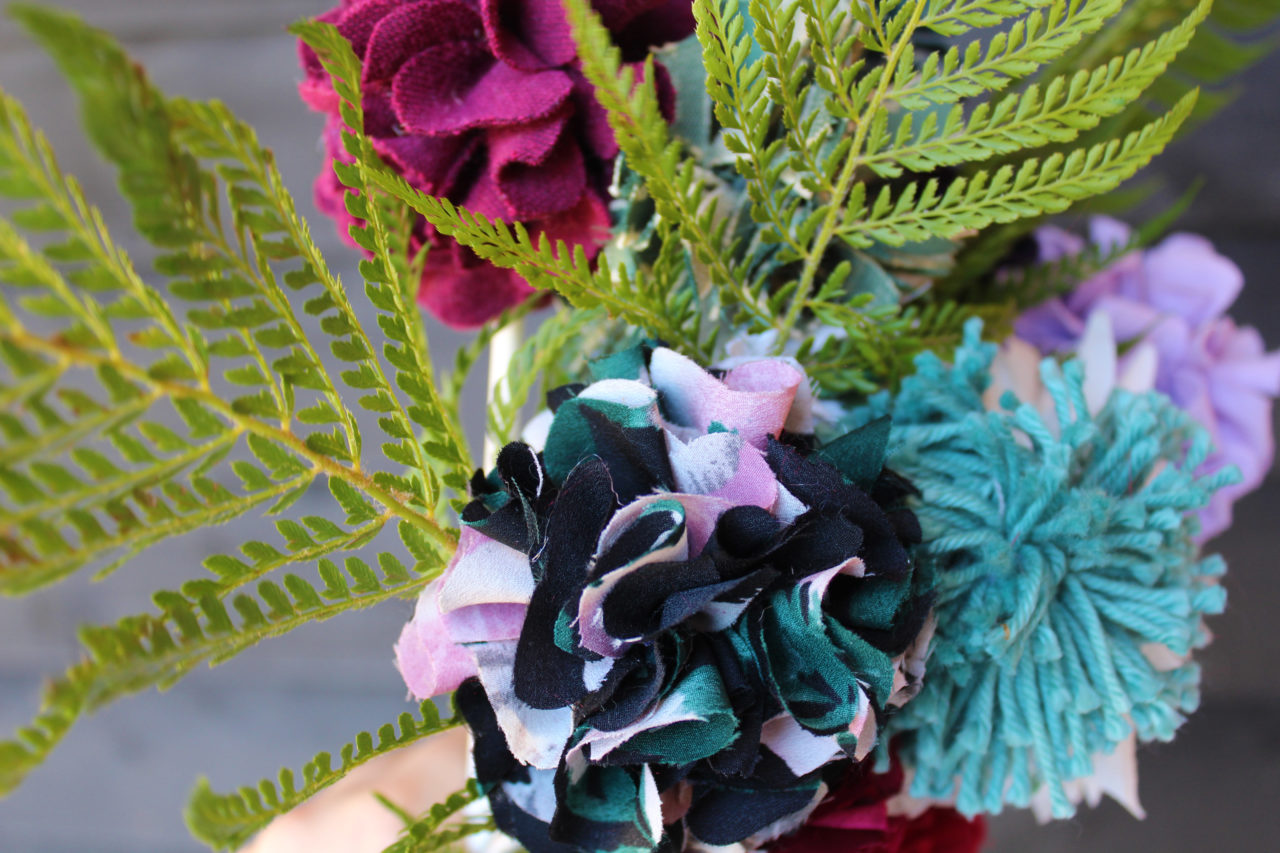
Once your flower are all assembled, place them in a vase with live foliage to make them look even more realistic. Cut your flower stems to different lengths to show off all the flowers from different angles.
Buy the hemmed hessian to make a rag rug bouquet here.
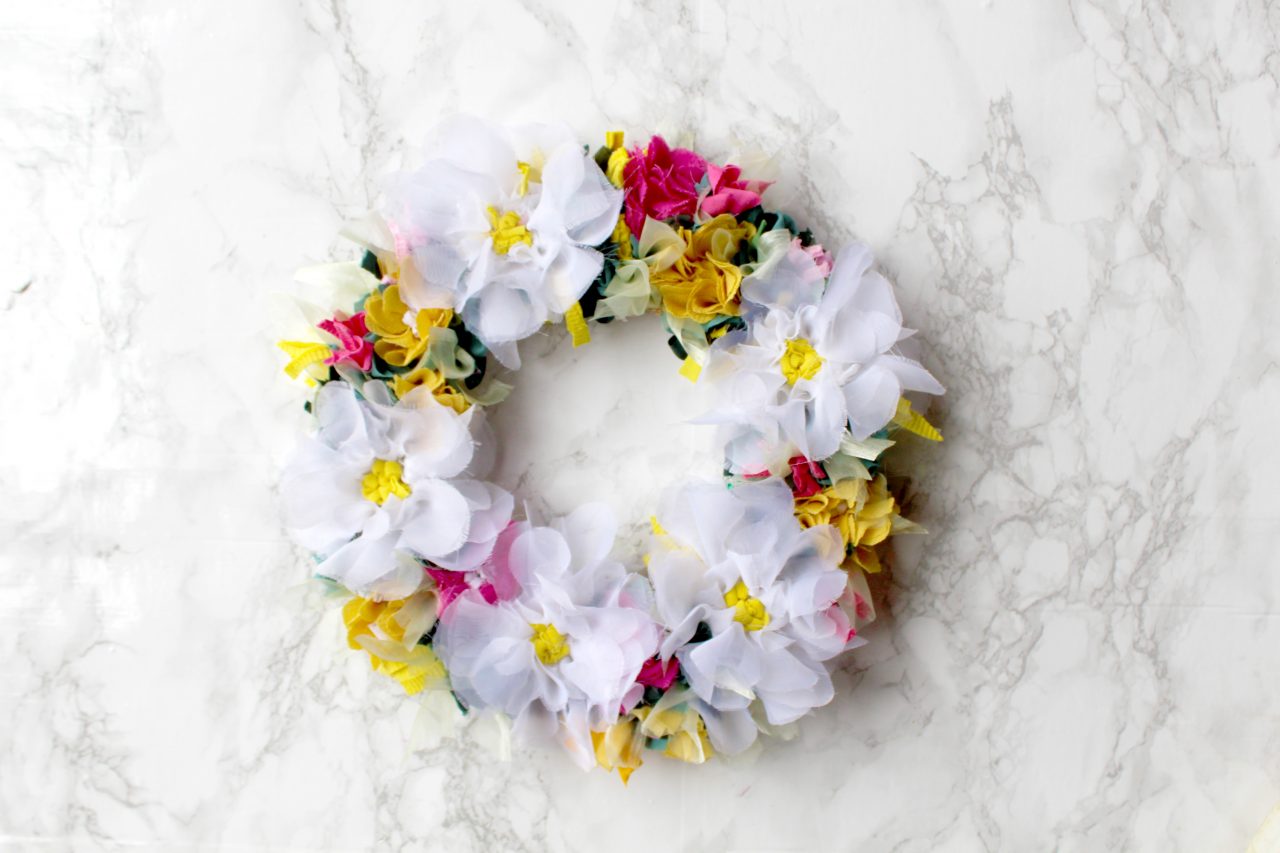
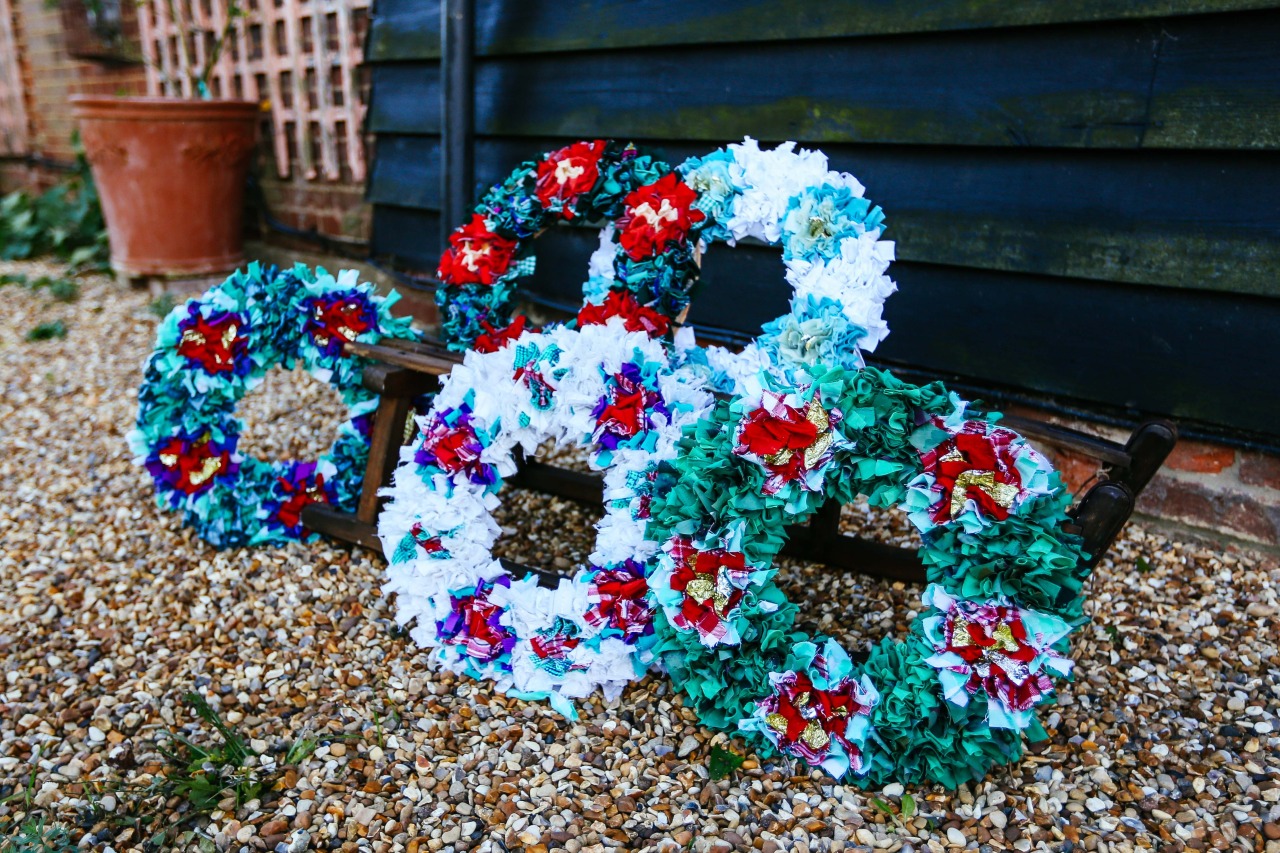
Wreath Design Tips:
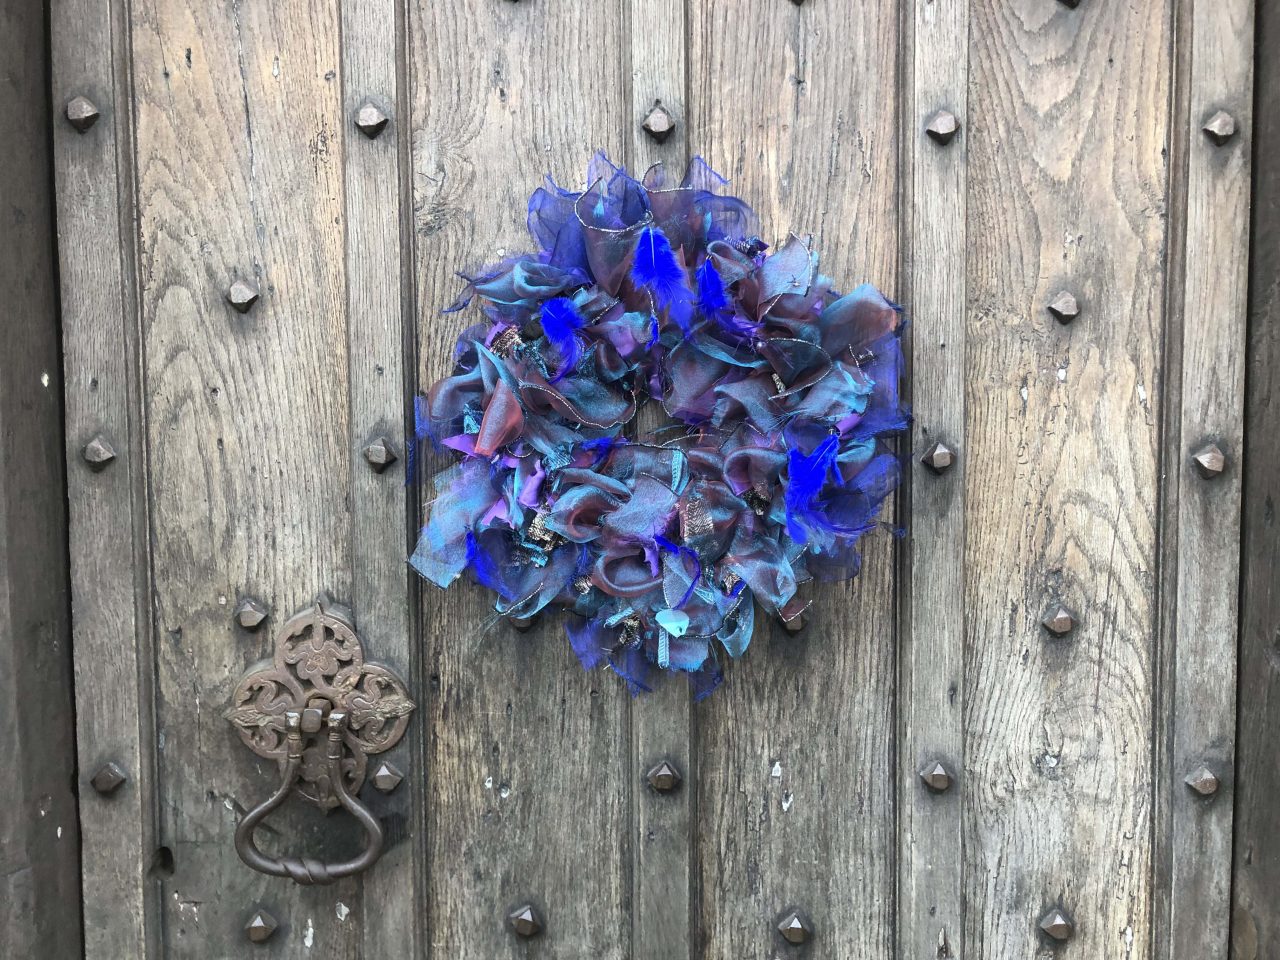
Rag rug wreaths are a great decorative addition to any home. Whether you’re making them as a jolly feature on the door at Christmas, as a nod to pastels in Spring or maybe as a harvest-style Autumn edition, they’re one of the easiest and most satisfying rag rug projects to make.
Here are some rag rug design tips to get you going…
Design Tips:
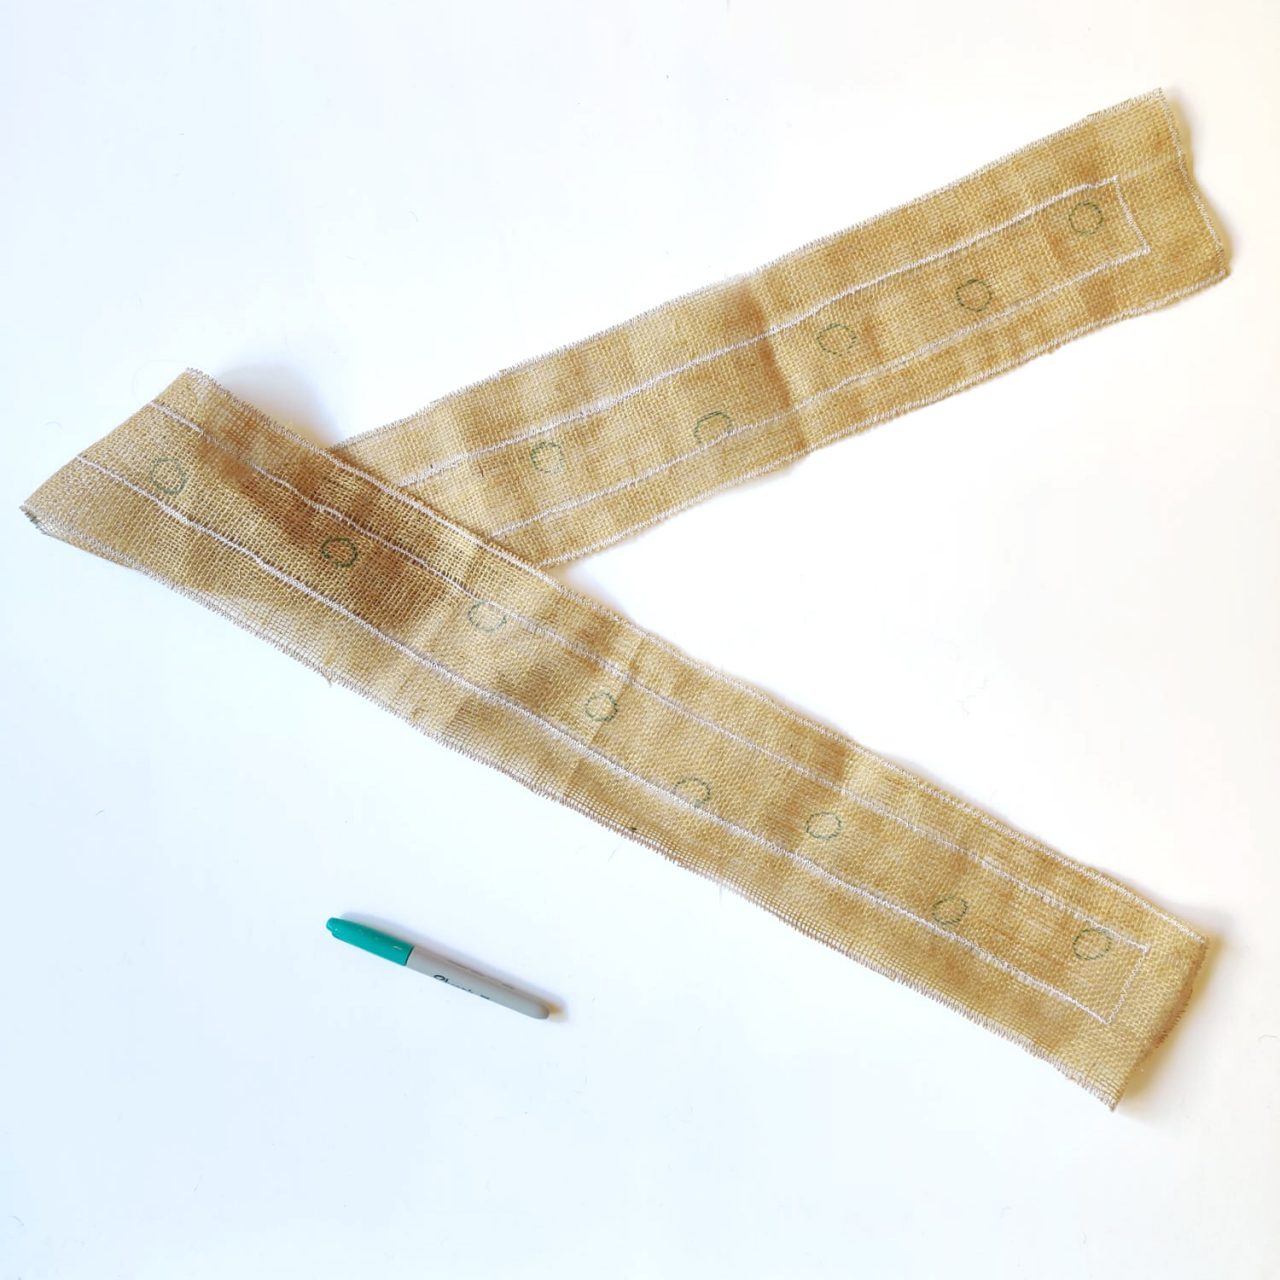
Your hemmed wreath hessian has five equidistant circles marked onto it. These are to help you space your five “flowers” if you want to make the traditional wreath design below, but you can ignore them and rag rug over the circles if they don’t fit your creative vision 🙂
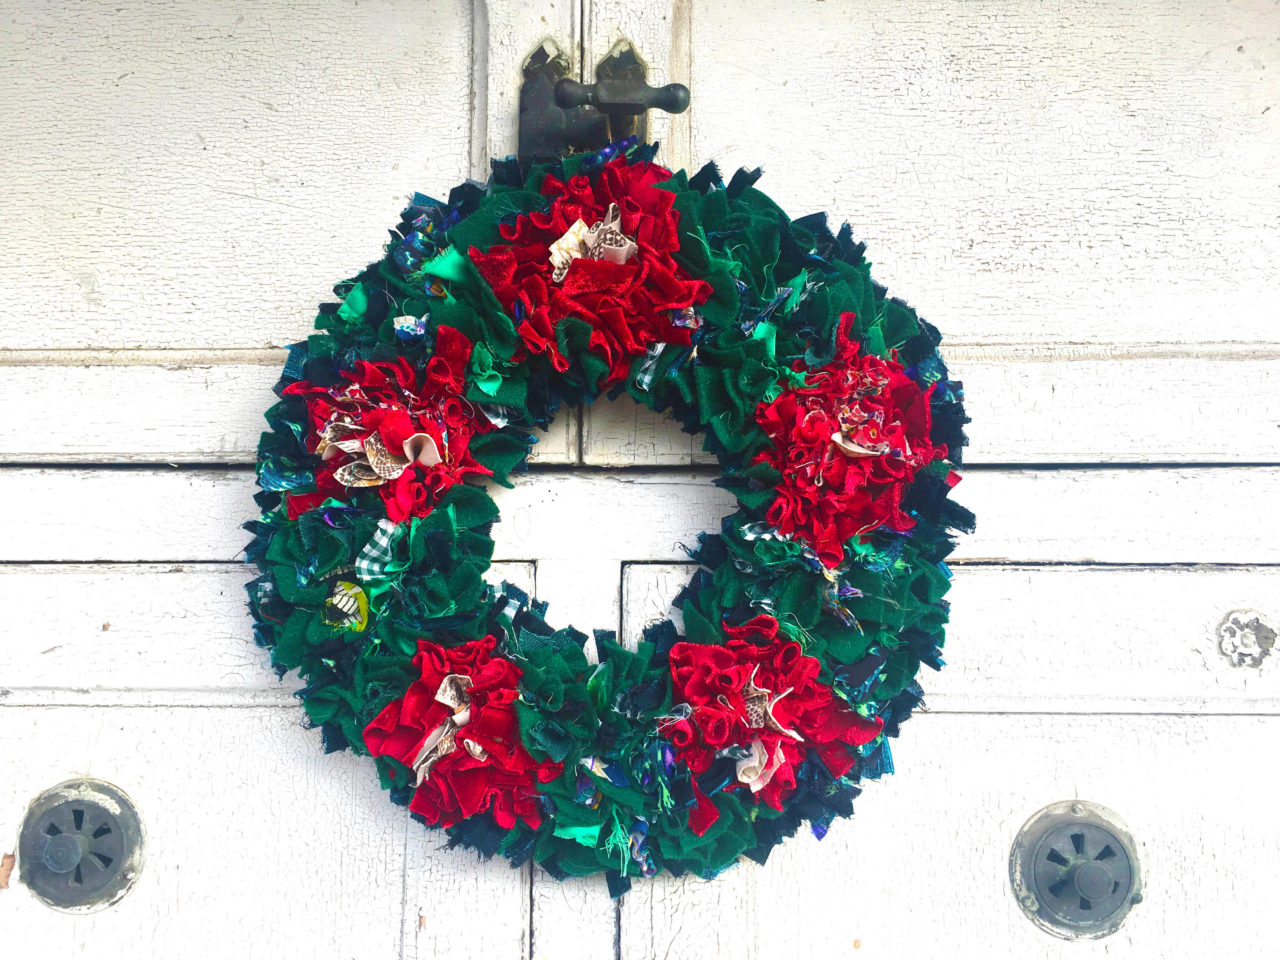
Don’t feel like you have to make a traditional Christmas wreath design. We’ve made rag rug wreaths in every colour under the sun, including one made entirely from just the seams of garments. Below is a wreath made using a children’s halloween costume, a Spring one made using floaty voile and a couple of poppy wreaths (V1 & V2).
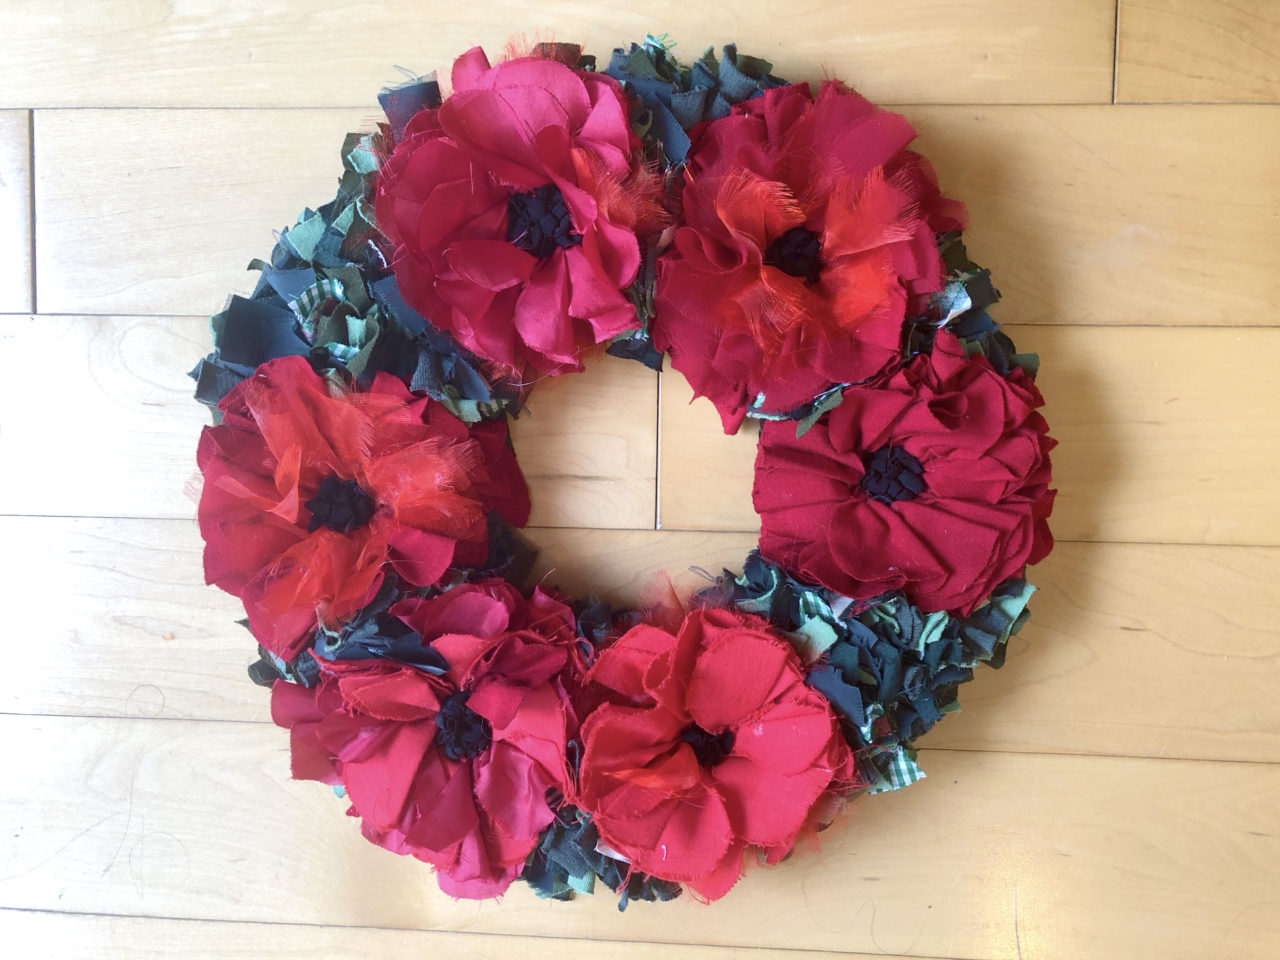
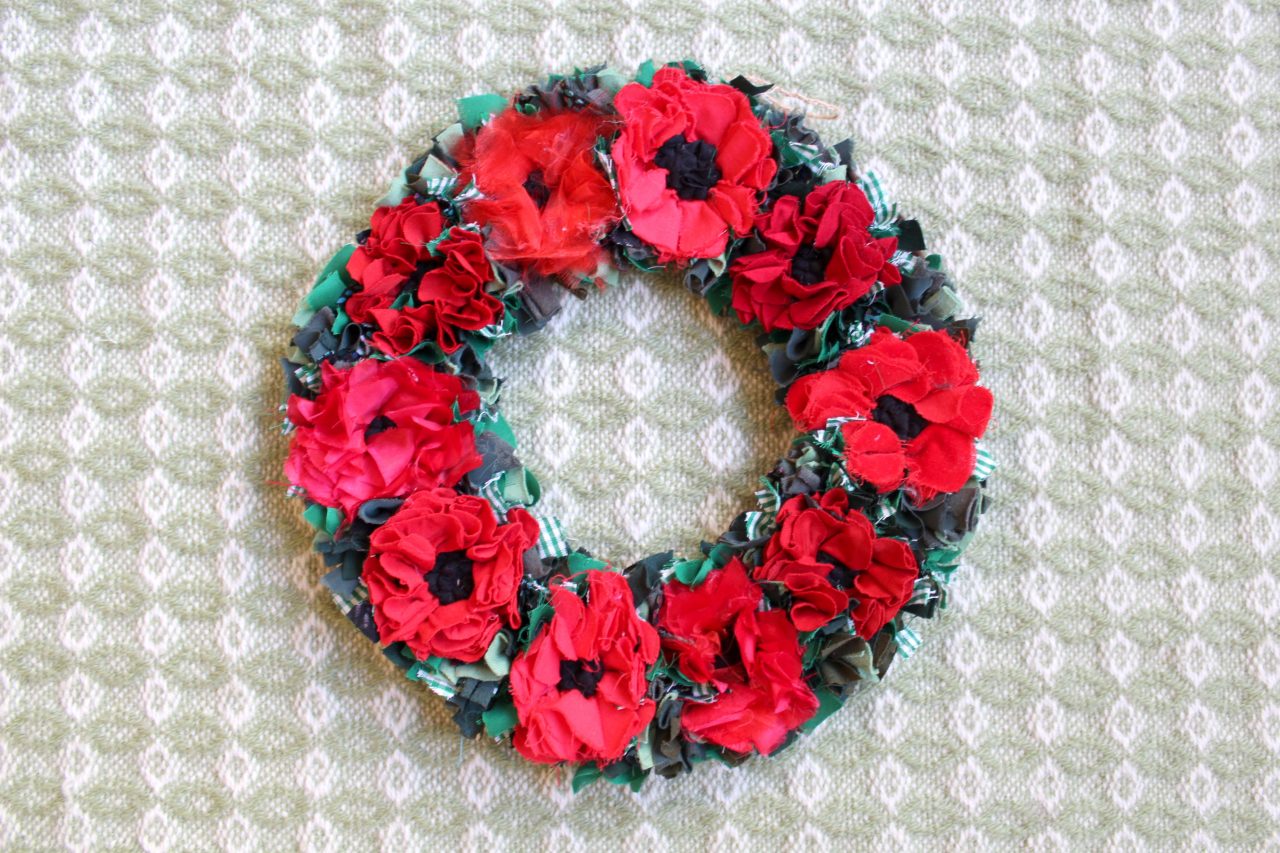
In your wreaths, you can mix the different rag rug techniques together, but the shaggy technique mimics foliage best.
Fabric Tips:
As the feel and practicality of the piece doesn’t matter so much, anything goes fabric-wise in a wreath. I’ve even used sweet wrappers and tinsel before (although the tinsel shed a lot when I cut it up). As usual, try to use a variety of different fabrics in your piece to make things looks more interesting and vibrant.
Elements will always stand out best when you use plain fabrics, so bear this in mind.
Practical Tips:
Your wreath hessian has a ring marked out, make sure you rag rug right up to the drawn line to get the best coverage around the inside and outside of the wreath.
As this project is purely decorative, you can cheat a little with your rag rugging and leave a few more gaps in the hessian. I sometimes do this around certain elements to make them stand out better – flowers, for example.
When assembling your wreath, I secure the 4 points of the wreath (North, South, East & West) to the wreath mount first, so that the wreath doesn’t shift as you assemble it.
Choose a hanging loop that complements the colours of the wreath. I’ve used plaited hessian strands, green ribbon, cut rags, bias binding and other materials, so do get inventive!
Buy the hemmed hessian to make a rag rug wreath here.
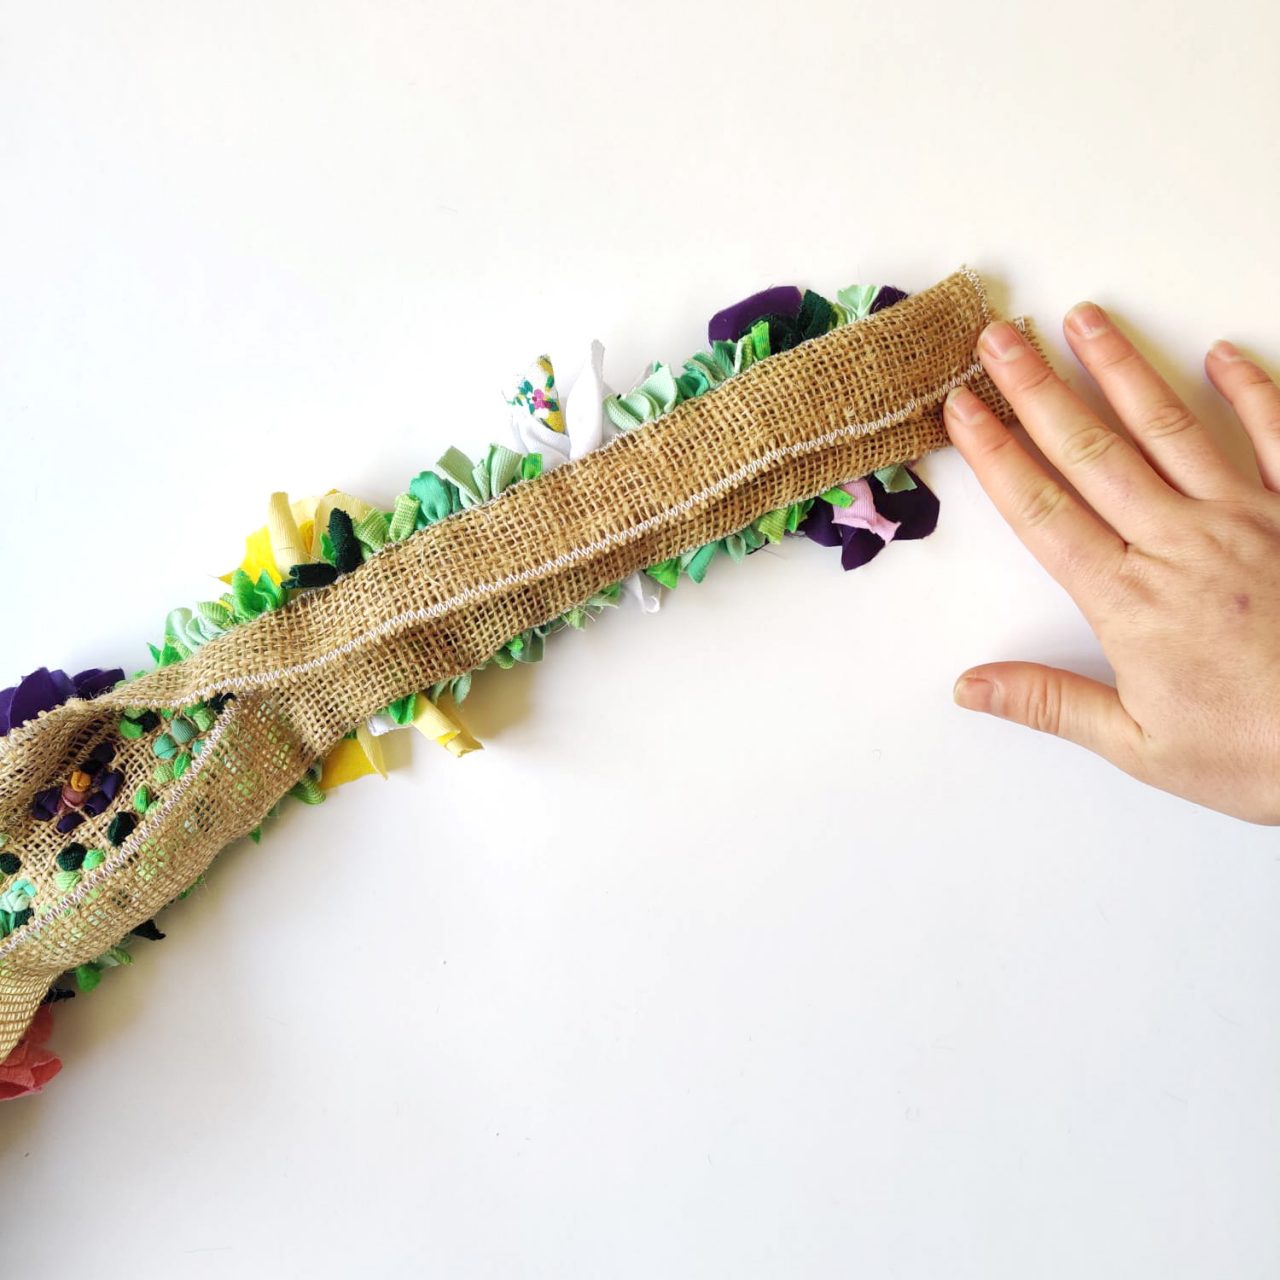
Basket Trim Design Tips:
Design Tips:
Choose a colour scheme for the trim and execute it across the full length of the trim. I find that basket trims generally look great when you repeat a pattern along the full length. This makes the trim look cohesive and great from every angle.
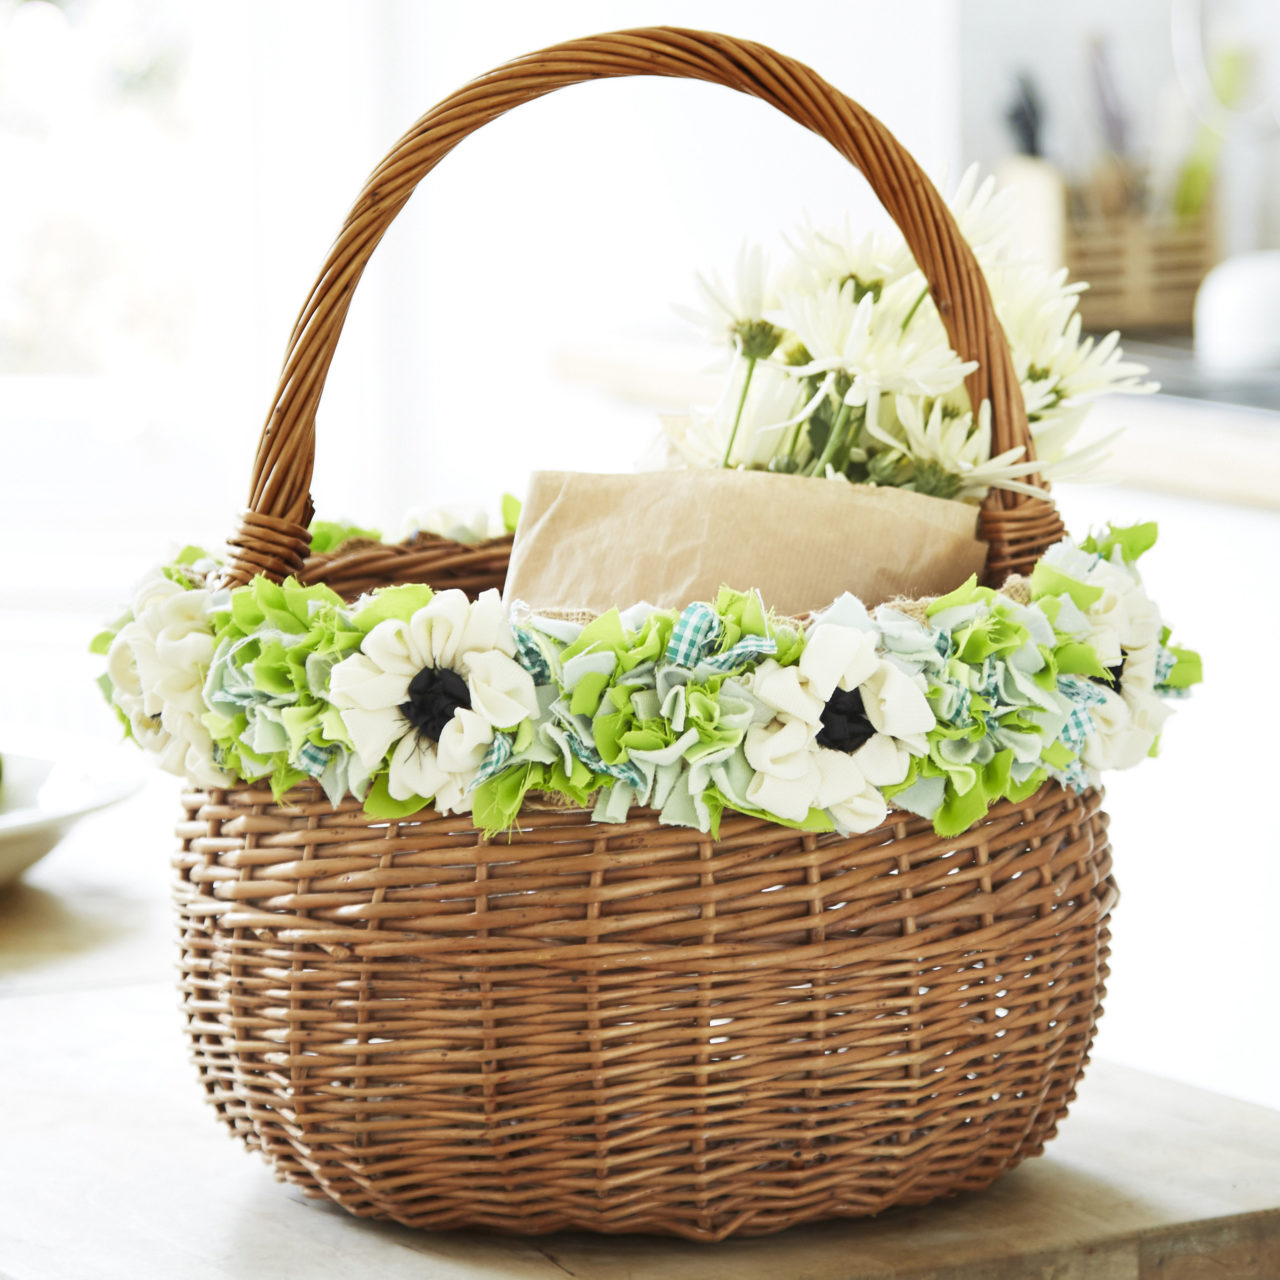
Basket trims are a great project to experiment with combining multiple rag rug techniques together in one piece. To create flowers, I use loopy rag rugging for the centres of my flowers and shaped shaggy rag rugging for the petals (see bouquet tips above for how to shape petals).
You can mark out key features onto the hessian using a marker pen before you get started. With my flower trims, I mark out the approximate location of each flower with a circle beforehand, but I’m always prepared to improvise if necessary.

If you want flowers to stand out, leave some empty hessian around the edge of each flower. This will give them space to lie flat. You can only do this with decorative projects like this, as they won’t be getting lots of wear and tear like a rug.
Fabric Tips:
Use a variety of different fabrics in your piece for good texture. As you want your basket to be practical, try not to use fabrics that shed too much (see rug design tips for more details).

Practical Tips:
Our basket trim is only 4cm deep, which seems very shallow when you first see it. However, the basket trim will appear deeper once it is rag rugged, so don’t be tempted to make it chunkier 🙂
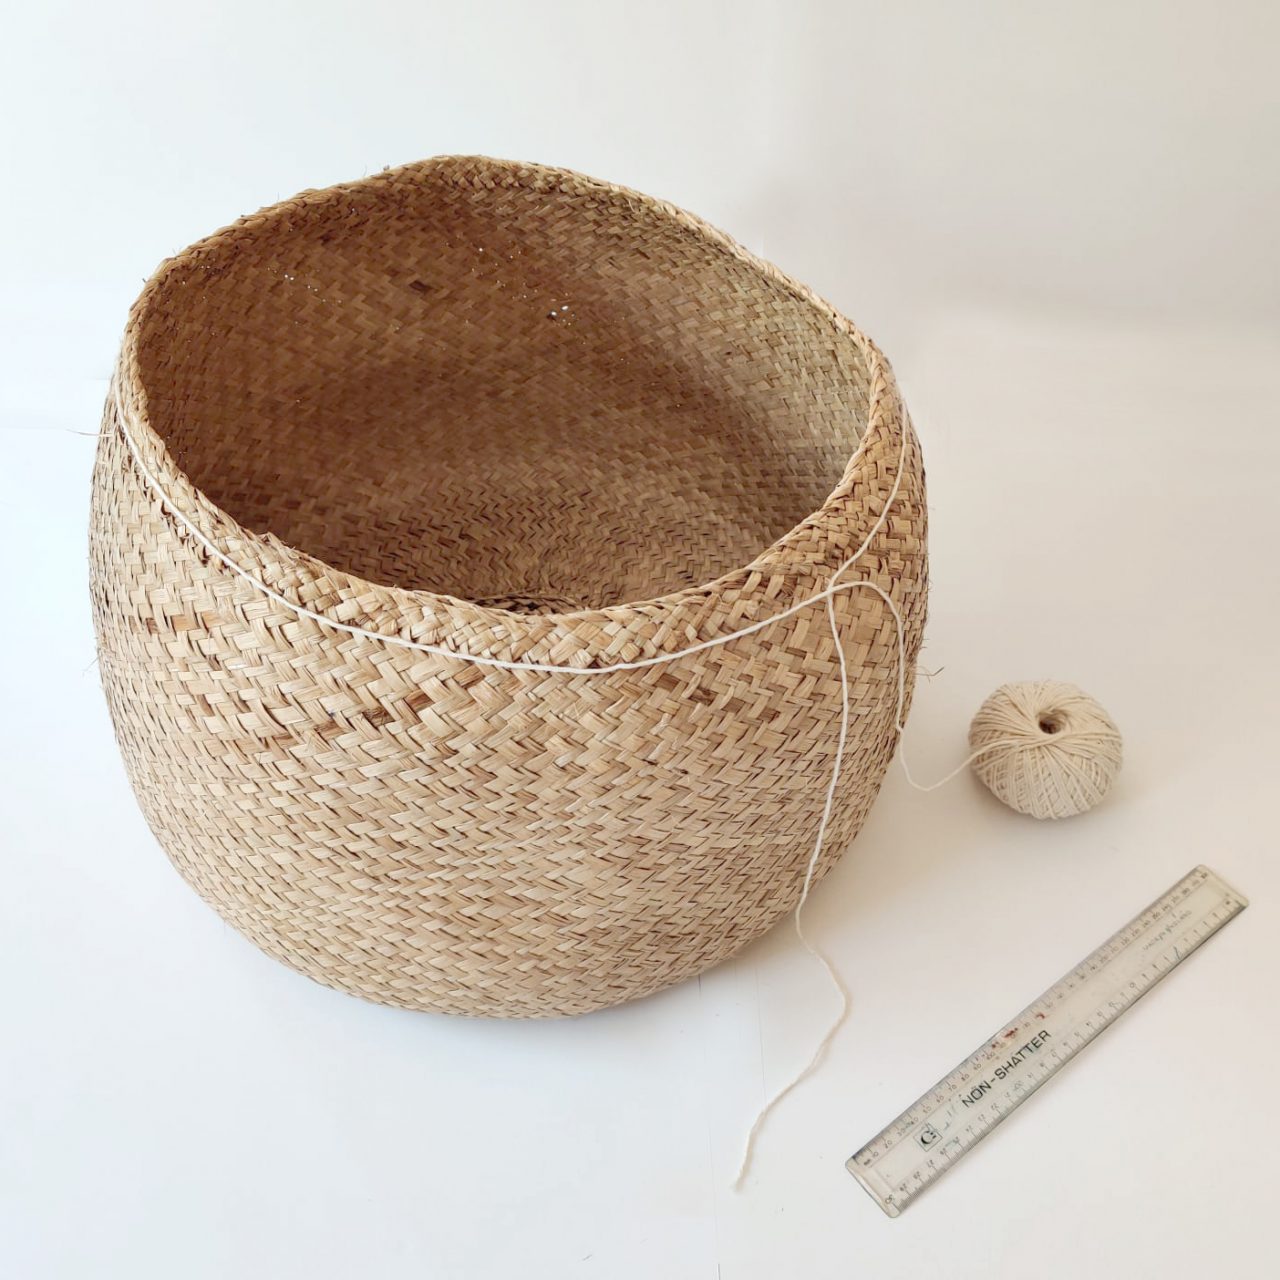
Our Ragged Life Basket Trim hessian is 200cm in length, so that it fits around most baskets. However, you’ll want to tailor the trim to fit your basket. Before you begin your rag rugging, measure the circumference of your basket and mark the length on the basket trim hessian.
I generally add a couple of extra centimetres to compensate for the added thickness of the rag rugging around the basket. When you come to assemble your basket, leave a few cm, cut the extra length off the basket trim and fold it underneath your rag rugging to hide it.
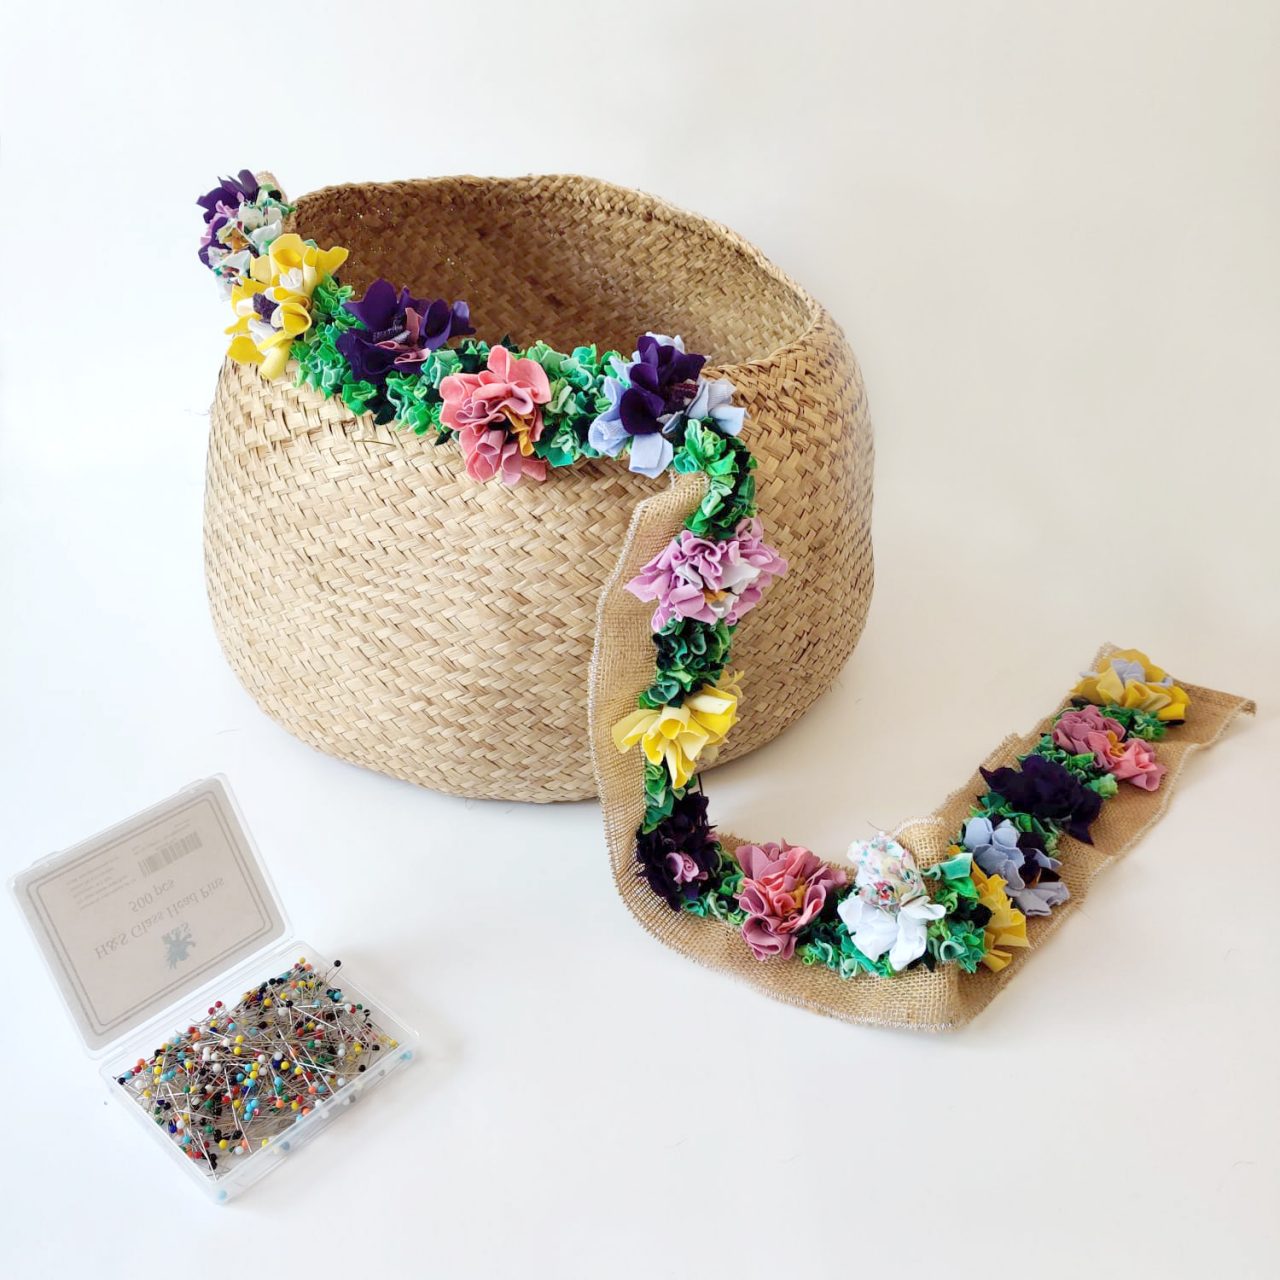
Buy the hemmed hessian to make a rag rug basket trim here.
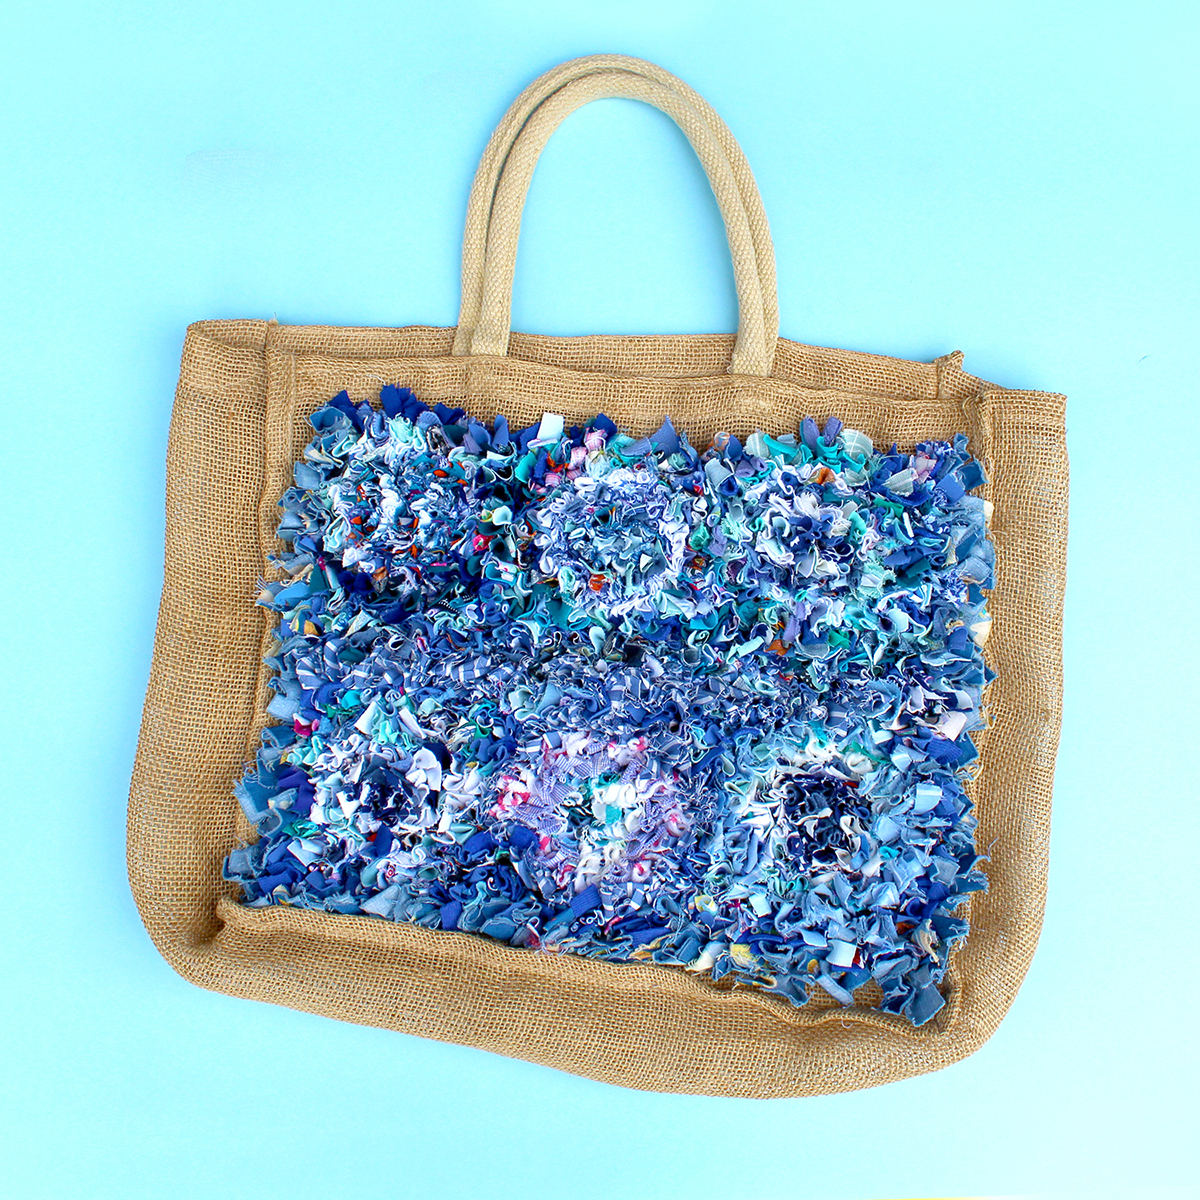
Shopping Bag Design Tips:
These hessian shopping bags are great to keep in the car, so you’re always prepared when you head to the shops 🙂 Unlike most hessian shopping bags, the inside of these bags is unlaminated, so you can easily get your rag rug tools through.
Design Tips:
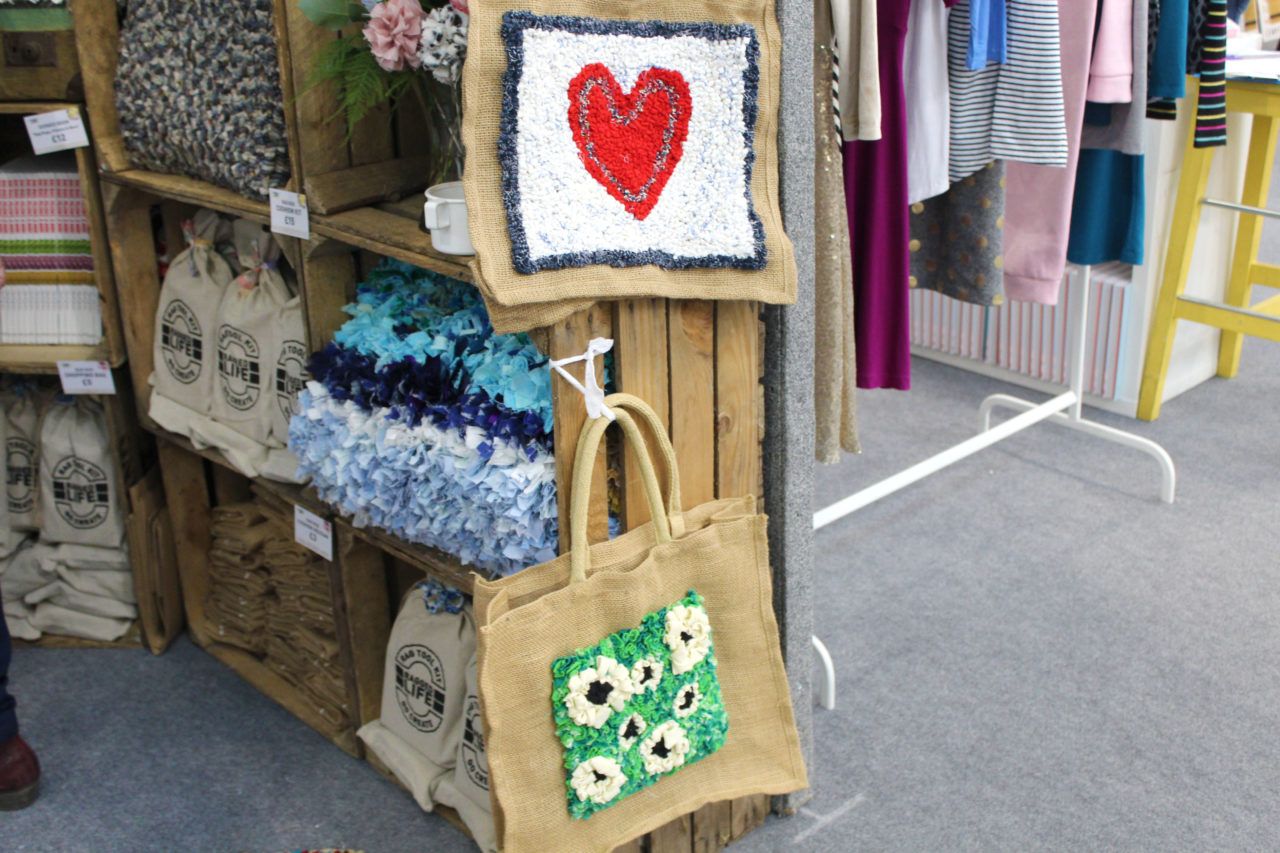
Our Ragged Life Hessian Shopping Bags look great with a focal design on the front. Sometimes, I like to rag rug a panel around my item to make the lines stand out prominently, but sometimes the design stands out well alone…
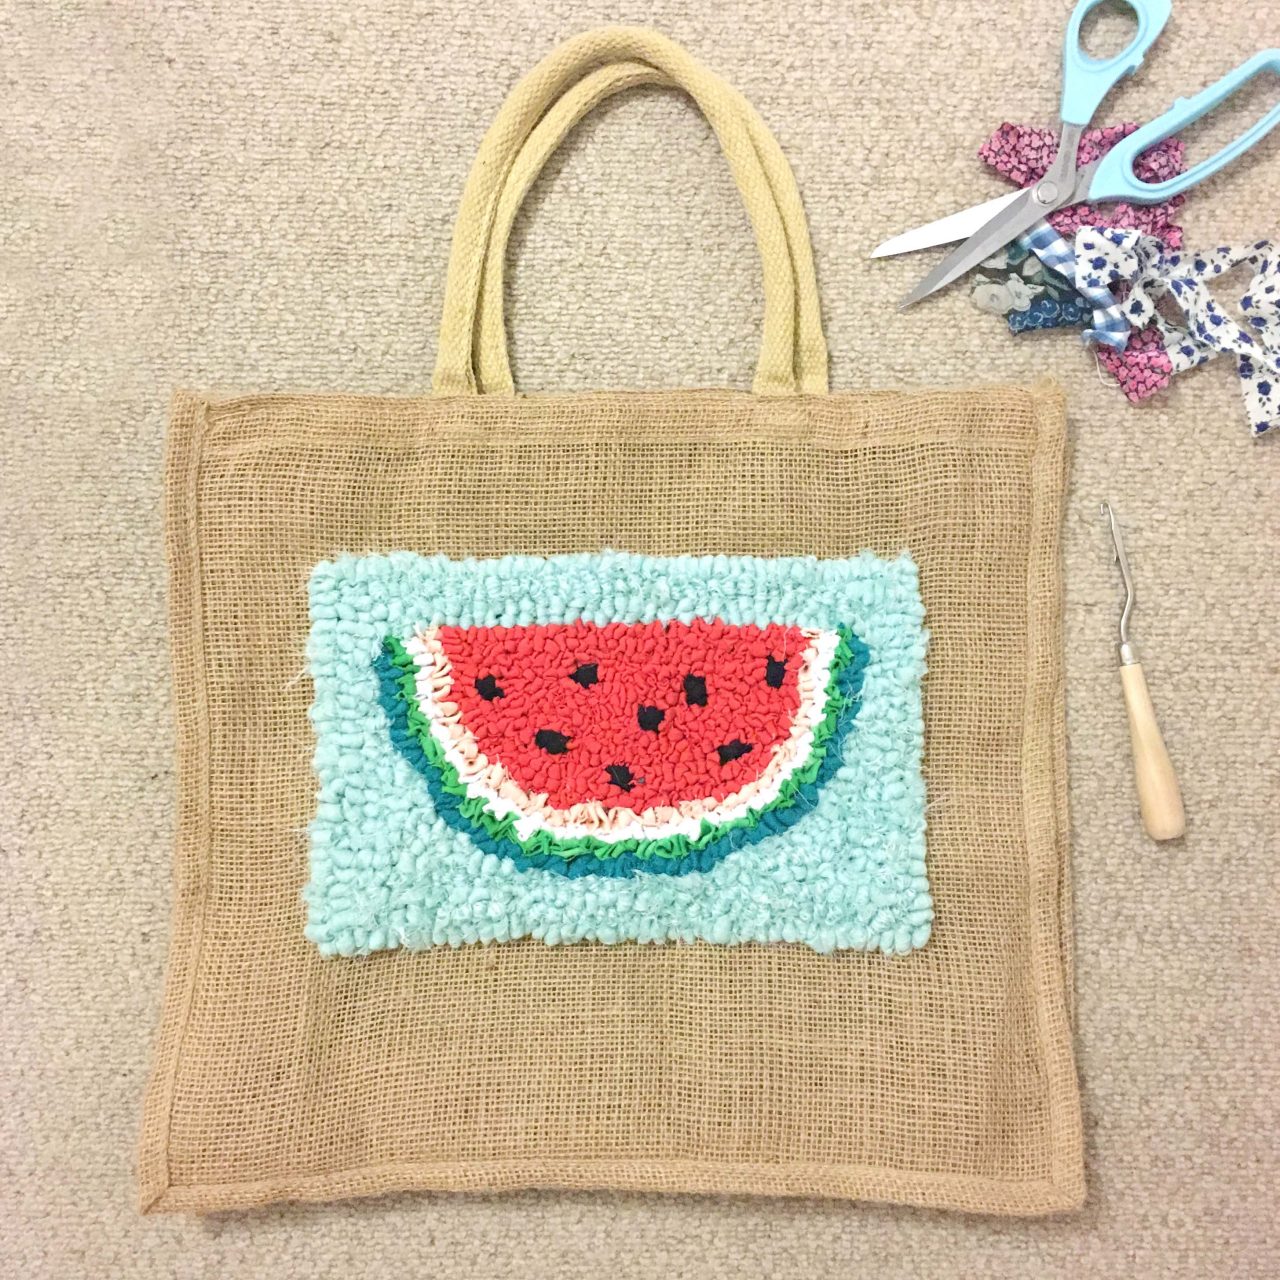

The shaggy and short shaggy techniques work best for more abstract shopping bag designs where the colours are the main focus. The loopy technique is best for pictorial designs.
Fabric Tips:
As with other project, try not to use fabrics that shed too much for your shopping bags. The fibres of fabric get stuck to your clothing which gets old pretty quickly.
Where possible, try to use lighter fabrics in your shopping bag designs, as these will add less weight to the piece. Light fabrics are things like thin cotton, chiffon, crepe, silk and thin jersey. Heavy fabrics are coarsely woven like t-shirt yarn.
Practical Tips:
You can rag rug as much or as little of the shopping bag as you would like, but bear in mind that every face of the shopping bag you fill will add more weight to the design. Any fabric you add to the shopping bag, will make it heavier. So, bear this in mind when choosing the technique you use, length you rag rug at and the amount of hessian you decide to rag rug.
Be careful not to accidentally rag rug through both the front and back panels of the hessian at the same time. This can easily be done if you are working with you shopping bag flat on the table. It’s not the end of the world if it happens though, as you can always unpick pieces of rag rugging.
Buy the hemmed hessian to make a rag rug shopping bag here.
We’re friendly – get in touch!
Thanks so much for reading. I hope you found the tips useful and inspiring. If you have any specific questions that weren’t covered in the blog post then comment below and we’ll try to add them.
As always, if you’d like to be the first to see new raggedy blog posts then why not join our Rag Rug Community on Facebook, follow us on Instagram or join our fortnightly newsletter here.
And, we’d love to see what you make, so definitely share your creations with us on social media below 🙂
Instagram: https://www.instagram.com/raggedlife/
Facebook: https://www.facebook.com/raggedliferagrugs/
Pinterest: https://www.pinterest.co.uk/raggedlife/
Twitter: https://twitter.com/raggedlife
As always, happy rag rugging!
Elspeth x
[…] more practical and design guidance check out our recent blog post here. We have answered all your burning beginner rag rug questions so be sure to head over and have a […]